Warm Chocolate Peppermint Lava Cakes Irresistible Treat

WANT TO SAVE THIS RECIPE?

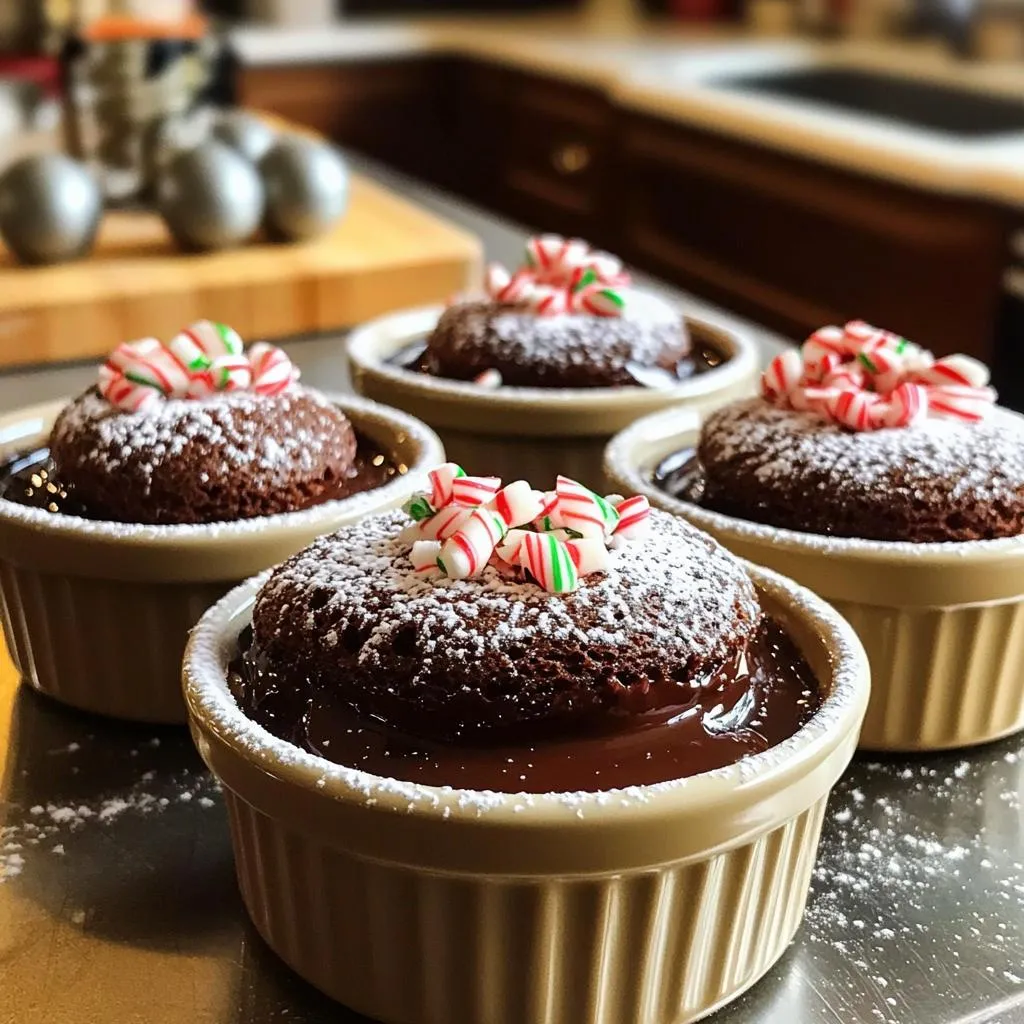
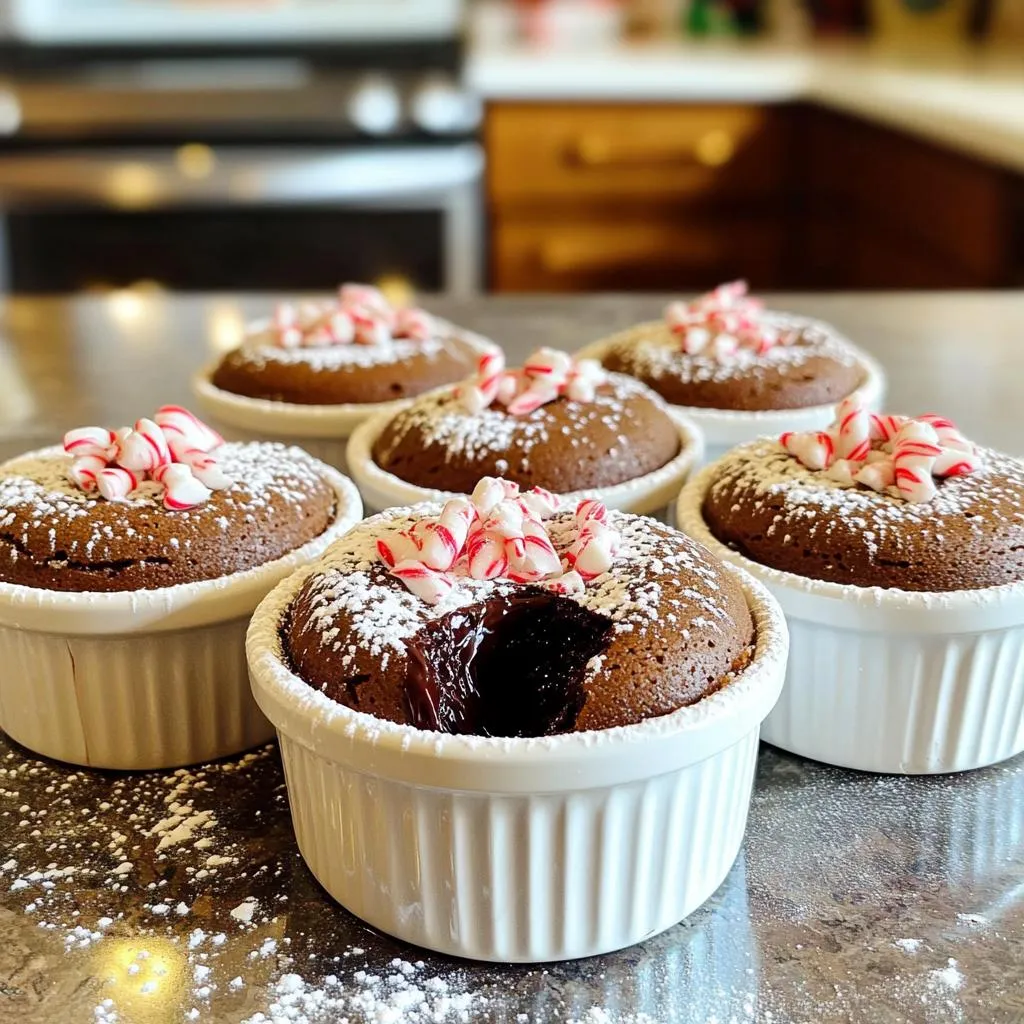
Looking for a dessert that warms your heart and soul? Try these Warm Chocolate Peppermint Lava Cakes! With a gooey center bursting with chocolate goodness, they’re a true holiday treat. This recipe is easy to follow and perfect for any occasion. Whether you plan to impress guests or treat yourself, this guide has you covered. Let’s dive into the magic of these irresistible cakes!

Ingredients

Main Ingredients List

– 1/2 cup unsalted butter

– 1 cup semisweet chocolate chips

– 2 large eggs

– 2 large egg yolks

– 1/2 cup granulated sugar

– 1/4 teaspoon salt

– 1 teaspoon vanilla extract

– 1/2 teaspoon peppermint extract

– 1/4 cup all-purpose flour

Optional Garnishes

– Powdered sugar

– Crushed candy canes

Ingredient Substitutions

You can swap unsalted butter for coconut oil. This change adds a hint of coconut flavor. For a dairy-free option, use vegan chocolate chips instead of semisweet chocolate. You can replace granulated sugar with coconut sugar for a healthier choice. If you lack peppermint extract, use almond extract for a different taste. Use gluten-free flour if you want a gluten-free version.

Step-by-Step Instructions

Preparation of Ramekins

Start by preheating your oven to 425°F (220°C). Take four ramekins and grease them with unsalted butter. Dust the insides lightly with cocoa powder. This helps the cakes release easily after baking.

Melting Chocolate and Butter

In a microwave-safe bowl, combine 1/2 cup of unsalted butter and 1 cup of semisweet chocolate chips. Heat this mixture for 30 seconds at a time, stirring after each interval. Keep heating until it melts and becomes smooth. Let it cool a bit so it mixes well later.

Combining the Egg Mixture

In another mixing bowl, crack two large eggs and add two egg yolks. Add 1/2 cup of granulated sugar and 1/4 teaspoon of salt. Whisk them together until the mixture is light and frothy. This step adds air, making your cakes fluffy.

Folding in Ingredients

Once the chocolate mix has cooled, pour it into the egg mixture. Add 1 teaspoon of vanilla extract and 1/2 teaspoon of peppermint extract. Stir gently until well mixed. Next, fold in 1/4 cup of all-purpose flour using a spatula. Mix until just combined. Don’t overmix, or the cakes will be dense.

Baking and Inversion Process

Use a ladle to fill each ramekin with batter, about 3/4 full. This allows the cakes to rise. Place them in the oven and bake for 12 to 14 minutes. The edges should be firm, but the centers should be soft. After baking, let them sit for 1 minute. Carefully invert each ramekin onto a plate to release the cakes. Enjoy the warm chocolate peppermint goodness!

Tips & Tricks

Achieving the Perfect Lava Center

To get that gooey lava center, timing is key. Bake the cakes for 12-14 minutes. The edges will look set, but the center should jiggle slightly. If you bake too long, the lava will turn into cake. Keep a close watch!

Common Mistakes to Avoid

One common mistake is overmixing the batter. This can lead to a dense cake instead of a light one. Another mistake is not greasing the ramekins properly. This can make it hard to release the cakes after baking. Always dust them with cocoa powder after greasing.

Tools and Equipment Recommendations

You’ll need a few basic tools for these cakes. Use:

– Four ramekins

– A microwave-safe bowl for melting chocolate

– A whisk for mixing the eggs

– A spatula for folding in the flour

– An oven mitt to handle hot ramekins

These tools will help you create perfect lava cakes every time!

Variations

Gluten-Free Warm Chocolate Peppermint Lava Cakes

To make gluten-free lava cakes, simply swap the all-purpose flour for a gluten-free blend. Many store-bought blends work well. Look for one that contains xanthan gum, as it helps bind the ingredients. This change keeps the texture light and fluffy. The flavor stays rich and chocolatey, making it hard to tell it’s gluten-free.

Vegan Version Options

For a vegan twist, replace the eggs with a flaxseed mixture. Mix one tablespoon of ground flaxseed with three tablespoons of water. Let it sit for five minutes until it thickens. Use dairy-free butter and chocolate chips to keep it vegan. The lava cakes will still be warm, gooey, and delicious.

Flavor Variations (e.g., mocha, raspberry)

You can easily mix up the flavor. For a mocha version, add one tablespoon of instant coffee to the chocolate mixture. This gives a rich coffee taste. For a raspberry twist, fold in a handful of fresh raspberries into the batter before baking. You can also drizzle raspberry sauce on top after baking for a fruity finish. Try different extracts too, like almond or orange, to create your own unique version.

Storage Info

How to Store Leftovers

To keep your lava cakes fresh, place them in an airtight container. Store them in the fridge for up to three days. Make sure they cool to room temperature before sealing them. This step helps prevent moisture build-up, which can ruin the texture.

Freezing Instructions

You can freeze leftover lava cakes, too! Wrap each cake tightly in plastic wrap. Then, place them in a freezer-safe bag or container. They can last up to three months in the freezer. When you’re ready to enjoy them, simply thaw them in the fridge overnight.

Reheating Tips

To reheat, preheat your oven to 350°F (175°C). Place the lava cake on a baking sheet and warm it for about 10 minutes. This method helps restore that delicious gooey center. If you’re in a hurry, you can also use the microwave. Heat for 15-20 seconds, but be careful not to overdo it. Enjoy your warm chocolate peppermint lava cake as if it just came out of the oven!

FAQs

What is the best way to serve warm chocolate lava cakes?

Serve warm chocolate lava cakes right away. They taste best fresh from the oven. Place the cake on a plate. Dust it lightly with powdered sugar. Add crushed candy canes for a festive touch. A scoop of vanilla ice cream pairs well too. The cold ice cream melts into the warm cake, creating a great mix.

Can I make the batter ahead of time?

Yes, you can make the batter ahead. Prepare it and store it in the fridge for up to 24 hours. Just remember to cover the bowl tightly. When you’re ready to bake, bring the batter to room temperature. Then, pour it into the ramekins and bake as directed.

How do I know when the lava cakes are done?

Check the edges of the cakes for firmness. They should look set and not jiggle. The centers should remain soft and slightly wobbly. A good rule is to bake them for 12-14 minutes. Keep an eye on them to avoid overbaking, which can ruin the lava effect.

Can I use different types of chocolate?

Absolutely! You can try dark chocolate for a richer flavor. Milk chocolate will make the cakes sweeter. White chocolate is also an option, but it won’t have the same lava effect. Just adjust the sugar levels if you switch to a sweeter chocolate.

How can I adjust the sweetness of the lava cakes?

To adjust sweetness, change the sugar amount. Use less sugar if you prefer less sweetness. You could also add a pinch of salt to balance the flavors. If using sweeter chocolate, cut back on sugar too. Taste the batter before baking to find your perfect balance.

You learned how to make warm chocolate lava cakes from start to finish. We covered ingredients, step-by-step instructions, and tips for success. You can create different flavors and even store leftovers. Remember to avoid common mistakes for a perfect lava center. Get ready to impress your friends and family with these treats. Enjoy baking and experimenting with this fun dessert!

- 1/2 cup unsalted butter - 1 cup semisweet chocolate chips - 2 large eggs - 2 large egg yolks - 1/2 cup granulated sugar - 1/4 teaspoon salt - 1 teaspoon vanilla extract - 1/2 teaspoon peppermint extract - 1/4 cup all-purpose flour - Powdered sugar - Crushed candy canes You can swap unsalted butter for coconut oil. This change adds a hint of coconut flavor. For a dairy-free option, use vegan chocolate chips instead of semisweet chocolate. You can replace granulated sugar with coconut sugar for a healthier choice. If you lack peppermint extract, use almond extract for a different taste. Use gluten-free flour if you want a gluten-free version. Start by preheating your oven to 425°F (220°C). Take four ramekins and grease them with unsalted butter. Dust the insides lightly with cocoa powder. This helps the cakes release easily after baking. In a microwave-safe bowl, combine 1/2 cup of unsalted butter and 1 cup of semisweet chocolate chips. Heat this mixture for 30 seconds at a time, stirring after each interval. Keep heating until it melts and becomes smooth. Let it cool a bit so it mixes well later. In another mixing bowl, crack two large eggs and add two egg yolks. Add 1/2 cup of granulated sugar and 1/4 teaspoon of salt. Whisk them together until the mixture is light and frothy. This step adds air, making your cakes fluffy. Once the chocolate mix has cooled, pour it into the egg mixture. Add 1 teaspoon of vanilla extract and 1/2 teaspoon of peppermint extract. Stir gently until well mixed. Next, fold in 1/4 cup of all-purpose flour using a spatula. Mix until just combined. Don’t overmix, or the cakes will be dense. Use a ladle to fill each ramekin with batter, about 3/4 full. This allows the cakes to rise. Place them in the oven and bake for 12 to 14 minutes. The edges should be firm, but the centers should be soft. After baking, let them sit for 1 minute. Carefully invert each ramekin onto a plate to release the cakes. Enjoy the warm chocolate peppermint goodness! To get that gooey lava center, timing is key. Bake the cakes for 12-14 minutes. The edges will look set, but the center should jiggle slightly. If you bake too long, the lava will turn into cake. Keep a close watch! One common mistake is overmixing the batter. This can lead to a dense cake instead of a light one. Another mistake is not greasing the ramekins properly. This can make it hard to release the cakes after baking. Always dust them with cocoa powder after greasing. You’ll need a few basic tools for these cakes. Use: - Four ramekins - A microwave-safe bowl for melting chocolate - A whisk for mixing the eggs - A spatula for folding in the flour - An oven mitt to handle hot ramekins These tools will help you create perfect lava cakes every time! {{image_4}} To make gluten-free lava cakes, simply swap the all-purpose flour for a gluten-free blend. Many store-bought blends work well. Look for one that contains xanthan gum, as it helps bind the ingredients. This change keeps the texture light and fluffy. The flavor stays rich and chocolatey, making it hard to tell it’s gluten-free. For a vegan twist, replace the eggs with a flaxseed mixture. Mix one tablespoon of ground flaxseed with three tablespoons of water. Let it sit for five minutes until it thickens. Use dairy-free butter and chocolate chips to keep it vegan. The lava cakes will still be warm, gooey, and delicious. You can easily mix up the flavor. For a mocha version, add one tablespoon of instant coffee to the chocolate mixture. This gives a rich coffee taste. For a raspberry twist, fold in a handful of fresh raspberries into the batter before baking. You can also drizzle raspberry sauce on top after baking for a fruity finish. Try different extracts too, like almond or orange, to create your own unique version. To keep your lava cakes fresh, place them in an airtight container. Store them in the fridge for up to three days. Make sure they cool to room temperature before sealing them. This step helps prevent moisture build-up, which can ruin the texture. You can freeze leftover lava cakes, too! Wrap each cake tightly in plastic wrap. Then, place them in a freezer-safe bag or container. They can last up to three months in the freezer. When you're ready to enjoy them, simply thaw them in the fridge overnight. To reheat, preheat your oven to 350°F (175°C). Place the lava cake on a baking sheet and warm it for about 10 minutes. This method helps restore that delicious gooey center. If you're in a hurry, you can also use the microwave. Heat for 15-20 seconds, but be careful not to overdo it. Enjoy your warm chocolate peppermint lava cake as if it just came out of the oven! Serve warm chocolate lava cakes right away. They taste best fresh from the oven. Place the cake on a plate. Dust it lightly with powdered sugar. Add crushed candy canes for a festive touch. A scoop of vanilla ice cream pairs well too. The cold ice cream melts into the warm cake, creating a great mix. Yes, you can make the batter ahead. Prepare it and store it in the fridge for up to 24 hours. Just remember to cover the bowl tightly. When you're ready to bake, bring the batter to room temperature. Then, pour it into the ramekins and bake as directed. Check the edges of the cakes for firmness. They should look set and not jiggle. The centers should remain soft and slightly wobbly. A good rule is to bake them for 12-14 minutes. Keep an eye on them to avoid overbaking, which can ruin the lava effect. Absolutely! You can try dark chocolate for a richer flavor. Milk chocolate will make the cakes sweeter. White chocolate is also an option, but it won't have the same lava effect. Just adjust the sugar levels if you switch to a sweeter chocolate. To adjust sweetness, change the sugar amount. Use less sugar if you prefer less sweetness. You could also add a pinch of salt to balance the flavors. If using sweeter chocolate, cut back on sugar too. Taste the batter before baking to find your perfect balance. You learned how to make warm chocolate lava cakes from start to finish. We covered ingredients, step-by-step instructions, and tips for success. You can create different flavors and even store leftovers. Remember to avoid common mistakes for a perfect lava center. Get ready to impress your friends and family with these treats. Enjoy baking and experimenting with this fun dessert!

Warm Chocolate Peppermint Lava Cakes

Indulge in the festive spirit with these warm chocolate peppermint lava cakes! This easy recipe combines rich chocolate, a hint of peppermint, and a gooey center that’s perfect for holiday gatherings. Ready in just 30 minutes, each cake is a delightful treat topped with powdered sugar and crushed candy canes. Click through to elevate your dessert game and impress your guests with these irresistible lava cakes!

Ingredients
  

1/2 cup unsalted butter

1 cup semisweet chocolate chips

2 large eggs

2 large egg yolks

1/2 cup granulated sugar

1/4 teaspoon salt

1 teaspoon vanilla extract

1/2 teaspoon peppermint extract

1/4 cup all-purpose flour

Optional: powdered sugar and crushed candy canes for garnish

Instructions
 

Begin by preheating your oven to 425°F (220°C). Prepare four ramekins by greasing them with butter and lightly dusting the insides with cocoa powder to ensure easy release after baking.

    In a microwave-safe mixing bowl, add the unsalted butter and semisweet chocolate chips. Heat the mixture in the microwave in 30-second intervals, stirring each time until the mixture is completely melted and smooth. Allow it to cool slightly for easier incorporation into the batter.

      In a larger mixing bowl, crack in the two large eggs and two egg yolks. Add the granulated sugar and salt, then whisk everything together vigorously until the mixture becomes light, airy, and frothy.

        Once your chocolate mixture has cooled slightly, pour it into the egg mixture. Add the vanilla extract and peppermint extract, stirring gently until all ingredients are well combined and the mixture is smooth.

          Carefully fold in the all-purpose flour. Use a spatula to mix until just incorporated, ensuring you do not overmix to maintain the airy texture of the batter.

            Using a ladle or spoon, evenly distribute the batter into the prepared ramekins, filling each one about 3/4 full to allow for rising during baking.

              Place the ramekins in the preheated oven and bake for approximately 12-14 minutes. The edges should appear firm, while the centers remain slightly soft.

                After baking, let the lava cakes rest in their ramekins for about 1 minute. Then, with care, invert each ramekin onto a serving plate, allowing the cakes to slide out easily.

                  To finish, dust each cake with a light sprinkle of powdered sugar and top with crushed candy canes for a delightful festive flair.

                    Vorbereitungszeit: 15 Minuten | Gesamtzeit: 30 Minuten | Portionen: 4

                      - Präsentationstipps: For an eye-catching presentation, serve with a scoop of vanilla ice cream on the side and an extra drizzle of melted chocolate for added indulgence!

                        WANT TO SAVE THIS RECIPE?