
S’mores Hand Pies are a fun twist on a classic treat. Imagine gooey chocolate, fluffy marshmallows, and crunchy graham crackers all wrapped in flaky pastry. They’re perfect for a quick dessert or a fun cooking project. In this post, I’ll guide you through each step to create these delicious hand pies, from gathering ingredients to the final bake. Let’s make dessert fun and easy!
Ingredients
To create S’mores Hand Pies, you need a few simple ingredients. Here’s what you will need:
– 2 cups all-purpose flour
– 1/2 teaspoon salt
– 1 teaspoon sugar
– 1 cup unsalted butter, chilled and diced
– 4-6 tablespoons ice water
– 1 cup chocolate chips (semi-sweet or milk chocolate)
– 1 cup mini marshmallows
– 1/2 cup graham cracker crumbs
– 1 egg (for egg wash)
– Optional: powdered sugar for dusting
These ingredients come together to form a delightful treat. The all-purpose flour gives the pies structure. The salt enhances the flavors, while sugar adds sweetness.
Chilled unsalted butter makes the crust flaky. Ice water helps bind the dough without warming it. Chocolate chips and mini marshmallows create the classic S’mores flavor.
Graham cracker crumbs mimic the taste of traditional S’mores. The egg wash gives the pies a lovely golden finish. If you like, dust them with powdered sugar for a sweet touch.
Now, let’s get cooking and enjoy these tasty bites!
Step-by-Step Instructions
Prepare the Dough
To make the dough, first mix the dry ingredients. In a large bowl, combine 2 cups of all-purpose flour, 1/2 teaspoon of salt, and 1 teaspoon of sugar. This blend gives your hand pies a nice flavor. Next, add 1 cup of chilled, diced unsalted butter. Use a pastry cutter or your fingers to work the butter into the dry mix. It should look like coarse crumbs. Slowly add 4 to 6 tablespoons of ice water, one tablespoon at a time. Stir until the dough holds together. Wrap the dough in plastic wrap and chill it in the fridge for at least 30 minutes. This step is key for a flaky crust.
Preheat the Oven
While the dough chills, it’s time to preheat your oven. Set the temperature to 375°F (190°C). This temperature ensures a golden, crisp finish. Prepare a baking sheet by lining it with parchment paper. This will prevent the pies from sticking and make cleanup easier.
Roll Out the Dough
After chilling, divide the dough in two. Roll out one half on a floured surface until it is about 1/8 inch thick. Use a round cutter, about 10 cm in diameter, to cut circles from the dough. Repeat this with the second half of the dough. Aim for even circles to make sure the hand pies bake evenly.
Fill the Hand Pies
Now, it’s time to fill your hand pies. On one half of each dough circle, sprinkle about 1 teaspoon of graham cracker crumbs. Next, add around 1 tablespoon of chocolate chips and a few mini marshmallows. Make sure to leave a small border around the edges. This space is important for sealing the pies.
Prepare for Baking
To seal the pies, wet the edges of the dough circles with a bit of water. Fold the other half over the filling and press the edges firmly. Use a fork to crimp the edges for a nice design and to ensure they stay closed. This step is crucial to keep the filling inside during baking.
Bake and Cool
Place the hand pies on the prepared baking sheet. Beat 1 egg in a small bowl and brush it over the tops of the pies. This egg wash gives them a beautiful golden color. Bake the pies in the preheated oven for 20 to 25 minutes, or until they turn golden brown. Once baked, let them cool for a few minutes before serving. You can dust them with powdered sugar for extra sweetness. Enjoy your delightful S’mores hand pies!
Tips & Tricks
Dough Handling Tips
– Keep your dough cold. Cold butter makes flaky crusts.
– Chill the dough for at least 30 minutes.
– Flour your surface well before rolling. This stops sticking.
– Roll the dough to 1/8 inch thick. This gives the right texture.
– Use a round cutter to make even circles.
Perfecting the Filling
– Choose chocolate chips carefully. Semi-sweet or milk chocolate works best.
– Use a 1:1 ratio of chocolate to graham cracker crumbs.
– Add mini marshmallows for that classic S’mores flavor.
– Aim for about 1 tablespoon of filling per pie. This keeps it balanced.
Making Ahead
– Prepare the dough a day early. Store it in the fridge.
– You can freeze the dough for up to three months.
– Assemble the hand pies in advance. Freeze them before baking.
– When ready, bake from frozen, adding a few extra minutes.

Variations
Flavor Additions
You can change the flavor of S’mores hand pies easily. Try different chocolates like dark or white. Each type brings a new taste. You can also add fruit or nuts. Think of bananas or strawberries for sweetness. Chopped nuts add a nice crunch. Mix and match to find your favorite combo!
Dietary Adjustments
If you need gluten-free options, swap regular flour for almond or oat flour. These flours work well in pie dough. For a vegan version, use plant-based butter and a flax egg instead of regular egg. Just mix ground flaxseed with water to create your egg substitute.
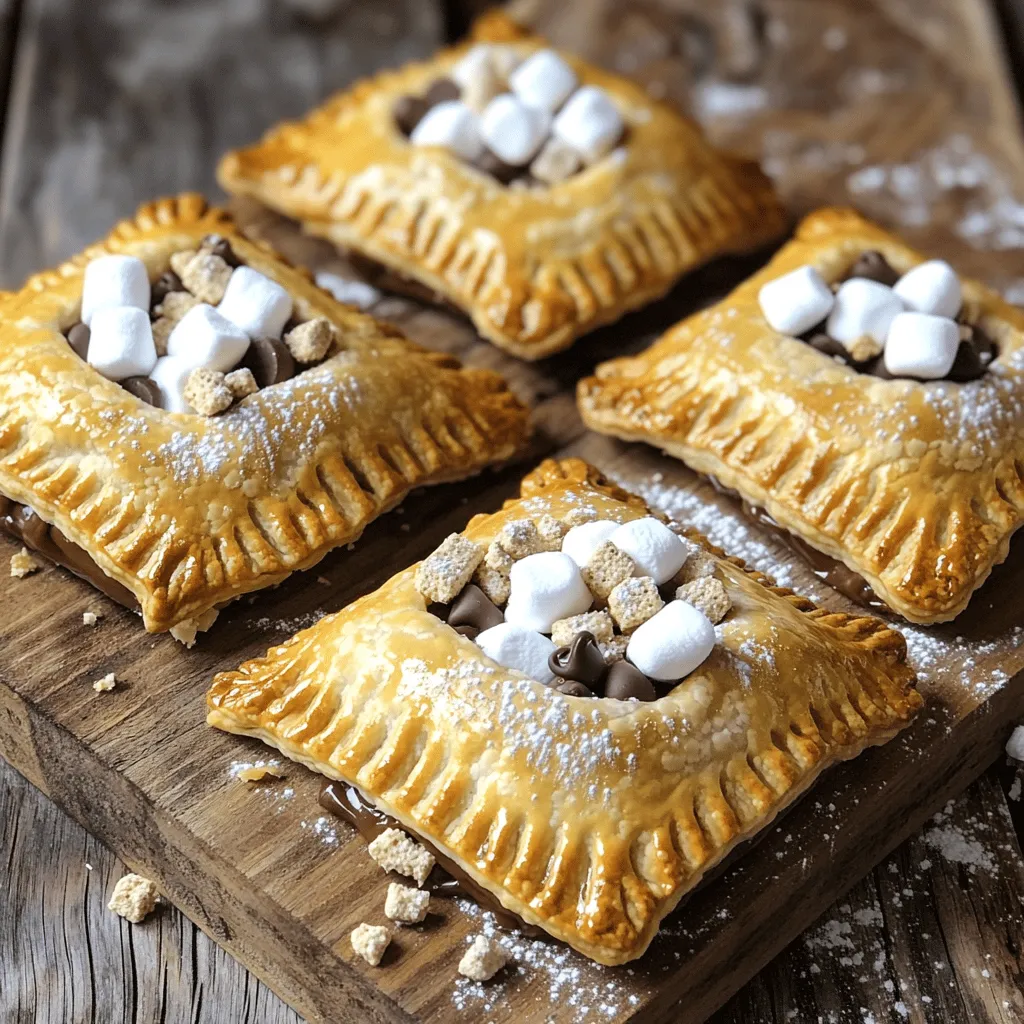
Serving Suggestions
Make your hand pies look fun when serving. Place them on a rustic wooden board. Add extra chocolate chips and mini marshmallows on top for a great look. You can also serve them with dips. A chocolate sauce or a fruity dip adds flavor and fun. Enjoy experimenting with these ideas!
Storage Info
Storing Leftovers
To keep your S’mores hand pies fresh, use simple methods. You can refrigerate or freeze them. For refrigeration, place the hand pies in an airtight container. They will stay good for 3-4 days in the fridge. If you want them to last longer, freeze them. Wrap each pie in plastic wrap, then place them in a freezer bag. This helps prevent freezer burn. For reheating, the oven works best. Preheat it to 350°F (175°C). Place the pies on a baking sheet and heat for about 10-15 minutes. This ensures they stay crisp and tasty.
Shelf Life
The shelf life of S’mores hand pies depends on how you store them. In the fridge, they last about 3-4 days. If frozen, they can remain fresh for 2-3 months. Always check for any signs of spoilage before eating. Look for an off smell or visible mold. If you see any, it’s best to throw them away. Keeping an eye on your pies ensures you enjoy them at their best.
FAQs
What are S’mores Hand Pies?
S’mores Hand Pies are mini desserts filled with chocolate, marshmallows, and graham cracker crumbs. They take inspiration from the classic campfire treat. The idea of combining these flavors dates back to the 1920s when s’mores first became popular in the U.S. They are fun to eat and easy to share.
Can I make these S’mores Hand Pies in advance?
Yes, you can prepare S’mores Hand Pies in advance. To do this, follow these steps:
– Prepare the dough and chill it as directed.
– Shape the pies and seal them tightly.
– Place them on a baking sheet and freeze them.
– When you are ready to bake, let them thaw in the fridge overnight.
This way, you can enjoy fresh hand pies without all the work at once.
What can I substitute for graham cracker crumbs?
If you don’t have graham cracker crumbs, here are some options:
– Crushed digestive biscuits provide a similar flavor.
– Vanilla wafers add a sweet twist.
– Oatmeal cookies can give a unique texture.
All these options can work well with the chocolate and marshmallows.
How can I enhance the chocolate flavor?
To boost the chocolate flavor in S’mores Hand Pies, consider these ideas:
– Use dark chocolate chips for a richer taste.
– Mix in peanut butter chips for a creamy layer.
– Add a sprinkle of cocoa powder to the filling for more depth.
These changes can elevate your hand pies to a new level.
Are S’mores Hand Pies suitable for parties?
Absolutely! S’mores Hand Pies are perfect for parties. Here are some ideas for serving:
– Arrange them on a rustic wooden board for a charming display.
– Garnish with extra chocolate chips and mini marshmallows on top.
– Offer dipping sauces, like chocolate or caramel, for added fun.
They make a delightful treat that everyone will enjoy!
This blog post detailed how to make S’mores Hand Pies from scratch. We covered ingredients, step-by-step instructions, and helpful tips for success. I shared variations, storage tips, and answered common questions.
Now, you can create delicious treats for any occasion. Whether you enjoy classic flavors or want to try something new, these hand pies are sure to please. Enjoy baking and sharing your tasty creations!


