S’mores Hand Pies Irresistible Easy Dessert Recipe

WANT TO SAVE THIS RECIPE?

Do you love s’mores? Who doesn’t? Now, imagine enjoying that tasty treat in a hand pie! Today, I’m sharing my irresistible and easy S’mores Hand Pies recipe. You’ll learn how to create a fun dessert that’s perfect for any occasion. From fresh ingredients to simple steps, I’ll guide you every bit of the way. Get ready for a delightful twist on a classic favorite!

Ingredients

List of Ingredients for S’mores Hand Pies

To make your S’mores Hand Pies, gather these simple ingredients:

– 1 cup all-purpose flour

– 1/4 cup granulated sugar

– 1/2 teaspoon salt

– 1/4 cup unsalted butter, cold and cubed

– 3 tablespoons cold water

– 1/4 cup mini marshmallows

– 1/4 cup chocolate chips

– 2 tablespoons graham cracker crumbs

– 1 egg (for egg wash)

– Additional granulated sugar for sprinkling

These ingredients come together to create a tasty treat that everyone will love.

Ingredient Substitutions

You can easily swap some ingredients if needed. Here are a few ideas:

– Use whole wheat flour instead of all-purpose for a nuttier taste.

– Coconut oil can replace unsalted butter for a dairy-free option.

– Dark chocolate chips offer a richer flavor than regular chocolate chips.

– If you don’t have mini marshmallows, try using a thin slice of regular marshmallow instead.

These substitutions keep the fun while adding unique flavors!

Importance of Fresh Ingredients

Using fresh ingredients makes a big difference in taste. Fresh butter helps create a flaky crust. It also adds richness to your filling. Mini marshmallows should be soft and fluffy for that gooey texture. Chocolate chips should be smooth and melty.

When you choose quality ingredients, you ensure your hand pies taste their best. Always check your pantry for freshness before baking. This way, your S’mores Hand Pies will be a hit!

Step-by-Step Instructions

Preparing the Dough

Start by sifting the flour, sugar, and salt in a medium bowl. This helps mix the dry items well. Next, add your cold, cubed butter. Use a pastry cutter or your fingers to blend it. You want it to look like coarse crumbs. Then, slowly pour in the cold water. Mix until the dough comes together. Wrap the dough in plastic wrap and chill in the fridge for at least 30 minutes. This step helps the dough relax.

Preheating the Oven

While the dough chills, it’s time to preheat your oven. Set it to 375°F (190°C). A hot oven makes sure your hand pies bake evenly and get that nice golden color.

Rolling Out the Dough

Once your dough is chilled, it’s time to roll it out. Flour your work surface lightly. Place the dough on it and use a rolling pin to flatten it. Aim for about 1/8 inch thick. Use a cookie cutter or a glass to cut out circles. Each circle should be about 4 inches in diameter. You’ll need about 16 circles total.

Filling and Sealing the Pies

Take half of the dough circles and lay them on a parchment-lined baking sheet. In the center of each circle, sprinkle a teaspoon of graham cracker crumbs. Follow this with mini marshmallows and chocolate chips. Be generous! Place another dough circle on top of each filled base. Press the edges gently to seal. Use a fork to crimp the edges. This helps keep the yummy filling inside.

Applying Egg Wash and Baking

In a small bowl, beat the egg until smooth. With a pastry brush, coat the tops of the hand pies with the egg wash. For a sweet finish, sprinkle some granulated sugar on top. Now, pop the baking sheet into the oven. Bake for 15-20 minutes until they turn golden brown. Watch them closely to avoid burning!

Cooling and Serving the Pies

After baking, let the hand pies cool on the baking sheet for a few minutes. Then, transfer them to a wire rack. They are best enjoyed warm for that gooey filling. If you like, serve them at room temperature as a tasty treat!

Tips & Tricks

Common Mistakes to Avoid

When making S’mores hand pies, avoid overworking the dough. This can make your crust tough. Also, don’t skip chilling the dough. Chilling helps it stay flaky. Make sure to seal the edges well. If they are not sealed, the gooey filling may leak out. Lastly, watch the baking time. Over-baking can lead to dry pies.

How to Achieve a Perfect Crust

To get a perfect crust, use cold ingredients. This includes butter and water. Cold butter creates those nice flaky layers. When rolling out the dough, keep it about 1/8 inch thick. If it’s too thick, the pies won’t bake evenly. Use enough flour on your work surface to prevent sticking, but don’t overdo it.

Recommended Tools and Equipment

You will need a few simple tools for this recipe. A mixing bowl is key for the dough. A pastry cutter or your fingertips will help blend the ingredients. A rolling pin is essential for rolling out the dough. Use a cookie cutter or glass to cut out the circles. A parchment-lined baking sheet will make cleanup easy.

Making Ahead of Time

You can prepare the dough a day in advance. Just wrap it tightly in plastic wrap. Keep it in the fridge until you’re ready to bake. You can also fill and seal the pies ahead of time. Just store them in the fridge until you are ready to bake. This way, you can enjoy fresh hand pies in no time!

Variations

Alternative Fillings for Hand Pies

You can switch up the filling in your hand pies. Try peanut butter and chocolate for a nutty taste. Or, use caramel and nuts for a sweet and crunchy twist. You can even add fruit, like sliced bananas or strawberries, for a fresh flavor.

Gluten-Free and Vegan Options

If you need gluten-free hand pies, use a gluten-free flour blend. Make sure it has a binding agent. For vegan pies, swap the butter for coconut oil or vegan butter. Use plant-based milk for the egg wash or skip it altogether. The pies will still taste great!

Seasonal Variations (e.g., Pumpkin Spice, Berry)

Seasonal flavors are fun! In fall, add pumpkin puree and pumpkin spice for a cozy treat. In summer, try fresh berries mixed with a bit of sugar. This adds a nice fruity touch. You can make different variations to match the seasons with ease!

Storage Info

How to Properly Store Leftover Hand Pies

To keep your S’mores hand pies fresh, store them in an airtight container. Make sure they cool completely before sealing. Place a layer of parchment paper between layers to avoid sticking. This method helps keep the crust crisp while preventing sogginess. Stored this way, they will last up to three days at room temperature.

Freezing Instructions

You can freeze S’mores hand pies if you have leftovers. First, let them cool completely. Wrap each pie tightly in plastic wrap. Then, place them in a freezer bag or airtight container. This keeps them safe from freezer burn. They can stay frozen for up to three months. When ready to eat, just thaw them in the fridge overnight.

Reheating Tips for Best Results

To enjoy your hand pies again, preheat your oven to 350°F (175°C). Place the hand pies on a baking sheet. Heat them for about 10-15 minutes until warm. This method revives the flaky crust and gooey filling. You can also use a microwave, but the crust may get soft. If using a microwave, heat for 30-45 seconds. Enjoy them warm for the best flavor!

FAQs

How long do S’mores Hand Pies last?

S’mores hand pies can last for about 3 days when stored properly. Keep them in an airtight container at room temperature. If you want to keep them longer, you can freeze them. They last up to 3 months in the freezer.

Can I make these hand pies without an egg wash?

Yes, you can skip the egg wash. If you want a nice shine, brush the tops with milk or cream instead. It still gives a lovely finish without the egg.

What’s the best way to serve S’mores Hand Pies?

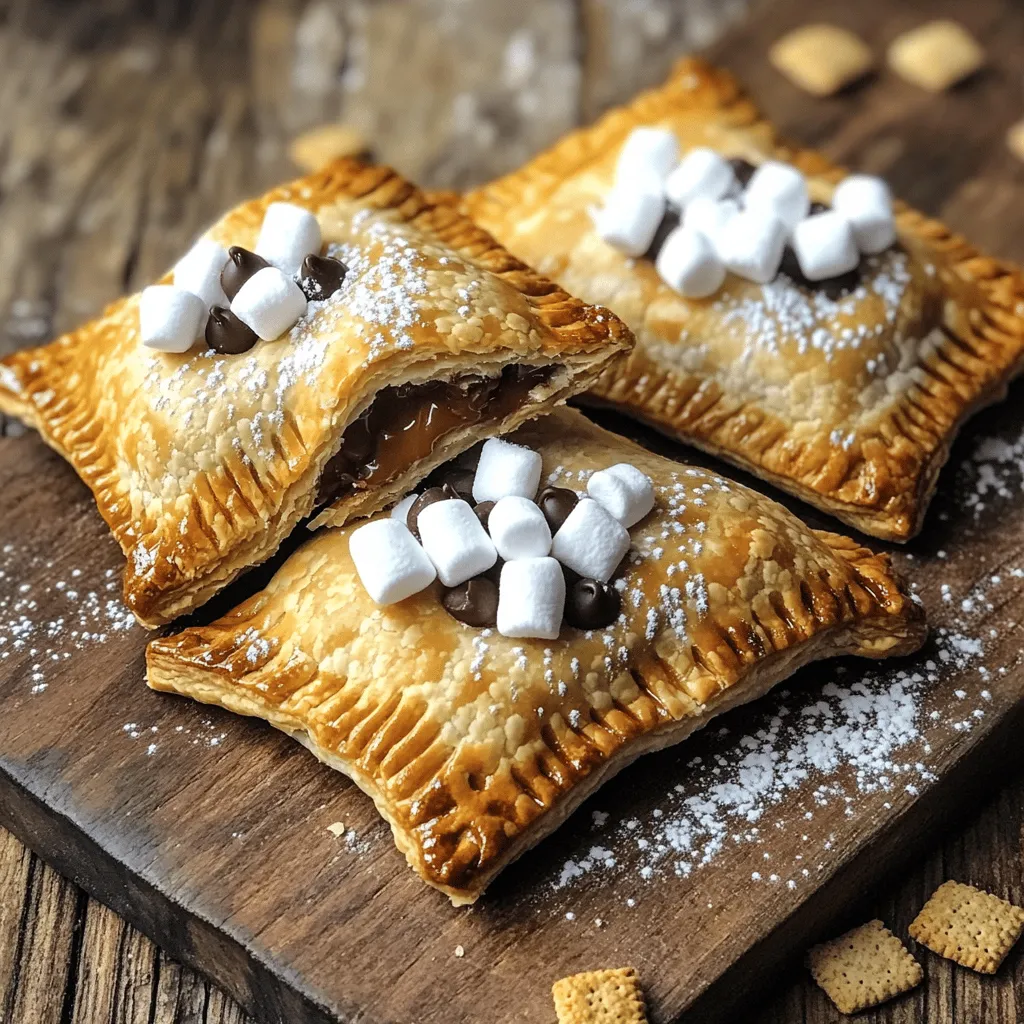
Serve these hand pies warm for the best taste. You can arrange them on a wooden board. Lightly dust with powdered sugar for a fun look. Pair with a bowl of warm chocolate sauce for dipping.

Where can I buy pre-made S’mores Hand Pies?

You can find pre-made S’mores hand pies at some grocery stores. Check the frozen dessert section or your local bakery. They may also be available at specialty dessert shops.

Can I customize the flavors in S’mores Hand Pies?

Absolutely! You can add different fillings. Use peanut butter cups, caramel, or fruit. You can also switch the chocolate for white chocolate or dark chocolate to mix it up.

S’mores hand pies are an easy treat to make. We covered key ingredients and substitutions, plus the importance of freshness. Each step in the process, from dough to baking, ensures tasty results. I shared tips to avoid common mistakes and how to make your crust perfect. Don’t forget the fun variations and storage tips to keep them fresh.

Enjoy making these hand pies and impress your friends with delicious flavors!

To make your S'mores Hand Pies, gather these simple ingredients: - 1 cup all-purpose flour - 1/4 cup granulated sugar - 1/2 teaspoon salt - 1/4 cup unsalted butter, cold and cubed - 3 tablespoons cold water - 1/4 cup mini marshmallows - 1/4 cup chocolate chips - 2 tablespoons graham cracker crumbs - 1 egg (for egg wash) - Additional granulated sugar for sprinkling These ingredients come together to create a tasty treat that everyone will love. You can easily swap some ingredients if needed. Here are a few ideas: - Use whole wheat flour instead of all-purpose for a nuttier taste. - Coconut oil can replace unsalted butter for a dairy-free option. - Dark chocolate chips offer a richer flavor than regular chocolate chips. - If you don't have mini marshmallows, try using a thin slice of regular marshmallow instead. These substitutions keep the fun while adding unique flavors! Using fresh ingredients makes a big difference in taste. Fresh butter helps create a flaky crust. It also adds richness to your filling. Mini marshmallows should be soft and fluffy for that gooey texture. Chocolate chips should be smooth and melty. When you choose quality ingredients, you ensure your hand pies taste their best. Always check your pantry for freshness before baking. This way, your S'mores Hand Pies will be a hit! Start by sifting the flour, sugar, and salt in a medium bowl. This helps mix the dry items well. Next, add your cold, cubed butter. Use a pastry cutter or your fingers to blend it. You want it to look like coarse crumbs. Then, slowly pour in the cold water. Mix until the dough comes together. Wrap the dough in plastic wrap and chill in the fridge for at least 30 minutes. This step helps the dough relax. While the dough chills, it’s time to preheat your oven. Set it to 375°F (190°C). A hot oven makes sure your hand pies bake evenly and get that nice golden color. Once your dough is chilled, it’s time to roll it out. Flour your work surface lightly. Place the dough on it and use a rolling pin to flatten it. Aim for about 1/8 inch thick. Use a cookie cutter or a glass to cut out circles. Each circle should be about 4 inches in diameter. You’ll need about 16 circles total. Take half of the dough circles and lay them on a parchment-lined baking sheet. In the center of each circle, sprinkle a teaspoon of graham cracker crumbs. Follow this with mini marshmallows and chocolate chips. Be generous! Place another dough circle on top of each filled base. Press the edges gently to seal. Use a fork to crimp the edges. This helps keep the yummy filling inside. In a small bowl, beat the egg until smooth. With a pastry brush, coat the tops of the hand pies with the egg wash. For a sweet finish, sprinkle some granulated sugar on top. Now, pop the baking sheet into the oven. Bake for 15-20 minutes until they turn golden brown. Watch them closely to avoid burning! After baking, let the hand pies cool on the baking sheet for a few minutes. Then, transfer them to a wire rack. They are best enjoyed warm for that gooey filling. If you like, serve them at room temperature as a tasty treat! When making S'mores hand pies, avoid overworking the dough. This can make your crust tough. Also, don't skip chilling the dough. Chilling helps it stay flaky. Make sure to seal the edges well. If they are not sealed, the gooey filling may leak out. Lastly, watch the baking time. Over-baking can lead to dry pies. To get a perfect crust, use cold ingredients. This includes butter and water. Cold butter creates those nice flaky layers. When rolling out the dough, keep it about 1/8 inch thick. If it’s too thick, the pies won't bake evenly. Use enough flour on your work surface to prevent sticking, but don't overdo it. You will need a few simple tools for this recipe. A mixing bowl is key for the dough. A pastry cutter or your fingertips will help blend the ingredients. A rolling pin is essential for rolling out the dough. Use a cookie cutter or glass to cut out the circles. A parchment-lined baking sheet will make cleanup easy. You can prepare the dough a day in advance. Just wrap it tightly in plastic wrap. Keep it in the fridge until you're ready to bake. You can also fill and seal the pies ahead of time. Just store them in the fridge until you are ready to bake. This way, you can enjoy fresh hand pies in no time! {{image_4}} You can switch up the filling in your hand pies. Try peanut butter and chocolate for a nutty taste. Or, use caramel and nuts for a sweet and crunchy twist. You can even add fruit, like sliced bananas or strawberries, for a fresh flavor. If you need gluten-free hand pies, use a gluten-free flour blend. Make sure it has a binding agent. For vegan pies, swap the butter for coconut oil or vegan butter. Use plant-based milk for the egg wash or skip it altogether. The pies will still taste great! Seasonal flavors are fun! In fall, add pumpkin puree and pumpkin spice for a cozy treat. In summer, try fresh berries mixed with a bit of sugar. This adds a nice fruity touch. You can make different variations to match the seasons with ease! To keep your S'mores hand pies fresh, store them in an airtight container. Make sure they cool completely before sealing. Place a layer of parchment paper between layers to avoid sticking. This method helps keep the crust crisp while preventing sogginess. Stored this way, they will last up to three days at room temperature. You can freeze S'mores hand pies if you have leftovers. First, let them cool completely. Wrap each pie tightly in plastic wrap. Then, place them in a freezer bag or airtight container. This keeps them safe from freezer burn. They can stay frozen for up to three months. When ready to eat, just thaw them in the fridge overnight. To enjoy your hand pies again, preheat your oven to 350°F (175°C). Place the hand pies on a baking sheet. Heat them for about 10-15 minutes until warm. This method revives the flaky crust and gooey filling. You can also use a microwave, but the crust may get soft. If using a microwave, heat for 30-45 seconds. Enjoy them warm for the best flavor! S'mores hand pies can last for about 3 days when stored properly. Keep them in an airtight container at room temperature. If you want to keep them longer, you can freeze them. They last up to 3 months in the freezer. Yes, you can skip the egg wash. If you want a nice shine, brush the tops with milk or cream instead. It still gives a lovely finish without the egg. Serve these hand pies warm for the best taste. You can arrange them on a wooden board. Lightly dust with powdered sugar for a fun look. Pair with a bowl of warm chocolate sauce for dipping. You can find pre-made S'mores hand pies at some grocery stores. Check the frozen dessert section or your local bakery. They may also be available at specialty dessert shops. Absolutely! You can add different fillings. Use peanut butter cups, caramel, or fruit. You can also switch the chocolate for white chocolate or dark chocolate to mix it up. S'mores hand pies are an easy treat to make. We covered key ingredients and substitutions, plus the importance of freshness. Each step in the process, from dough to baking, ensures tasty results. I shared tips to avoid common mistakes and how to make your crust perfect. Don't forget the fun variations and storage tips to keep them fresh. Enjoy making these hand pies and impress your friends with delicious flavors!
S'mores Hand Pies

Indulge your sweet tooth with these delightful S'mores Hand Pies! This easy recipe combines rich chocolate, gooey marshmallows, and crunchy graham crackers all tucked inside a flaky pastry. Perfect for snacks or dessert, they're sure to impress family and friends. Ready in just an hour, these hand pies are not only delicious but also fun to make! Click through to explore the full recipe and bring this tasty treat to life!

Ingredients
  

1 cup all-purpose flour

1/4 cup granulated sugar

1/2 teaspoon salt

1/4 cup unsalted butter, cold and cubed

3 tablespoons cold water

1/4 cup mini marshmallows

1/4 cup chocolate chips

2 tablespoons graham cracker crumbs

1 egg (for egg wash)

Additional granulated sugar for sprinkling

Instructions
 

Prepare the Dough: In a medium mixing bowl, sift together the all-purpose flour, granulated sugar, and salt. Add the cold, cubed unsalted butter into the bowl. Using a pastry cutter or your fingertips, blend until the mixture resembles coarse crumbs with pea-sized butter pieces. Gradually pour in the cold water, mixing gently until the dough starts to come together. Once formed, wrap the dough tightly in plastic wrap and refrigerate for a minimum of 30 minutes to relax the gluten.

    Preheat the Oven: As the dough chills, preheat your oven to 375°F (190°C) to ensure it's hot and ready for baking.

      Roll Out the Dough: Lightly flour your work surface and place the chilled dough on it. Using a rolling pin, roll out the dough evenly to about 1/8 inch thick. Cut out circles using a cookie cutter or a glass, aiming for approximately 4 inches in diameter.

        Fill the Pies: Take half of the dough circles and place them on a parchment-lined baking sheet. In the center of each circle, sprinkle a teaspoon of graham cracker crumbs, followed by a generous handful of mini marshmallows and chocolate chips.

          Seal the Pies: Place another dough circle on top of each filled base. Press gently around the edges to secure the filling, then use a fork to crimp the edges firmly together, ensuring no filling escapes during baking.

            Egg Wash: In a small bowl, beat the egg until smooth. Using a pastry brush, lightly coat the tops of the hand pies with the egg wash. For an extra touch of sweetness and sparkle, sprinkle a light dusting of granulated sugar over the tops.

              Bake: Transfer the baking sheet to the preheated oven and bake the hand pies for 15-20 minutes, or until they turn beautifully golden brown. Keep an eye on them to prevent over-baking!

                Cool and Serve: Allow the hand pies to cool on the baking sheet for a few minutes, then transfer them to a wire rack. Enjoy them warm for the gooey filling or at room temperature for a delightful treat!

                  Prep Time, Total Time, Servings: 30 mins | 1 hr | 8 servings

                    - Presentation Tips: Arrange the hand pies on a rustic wooden board, lightly dust them with powdered sugar for a whimsical touch, and serve with a warm bowl of chocolate sauce for an indulgent dipping experience. Perfect for sharing or enjoying as a special treat!

                      WANT TO SAVE THIS RECIPE?