No-Churn Birthday Cake Ice Cream Easy and Fun Treat

WANT TO SAVE THIS RECIPE?

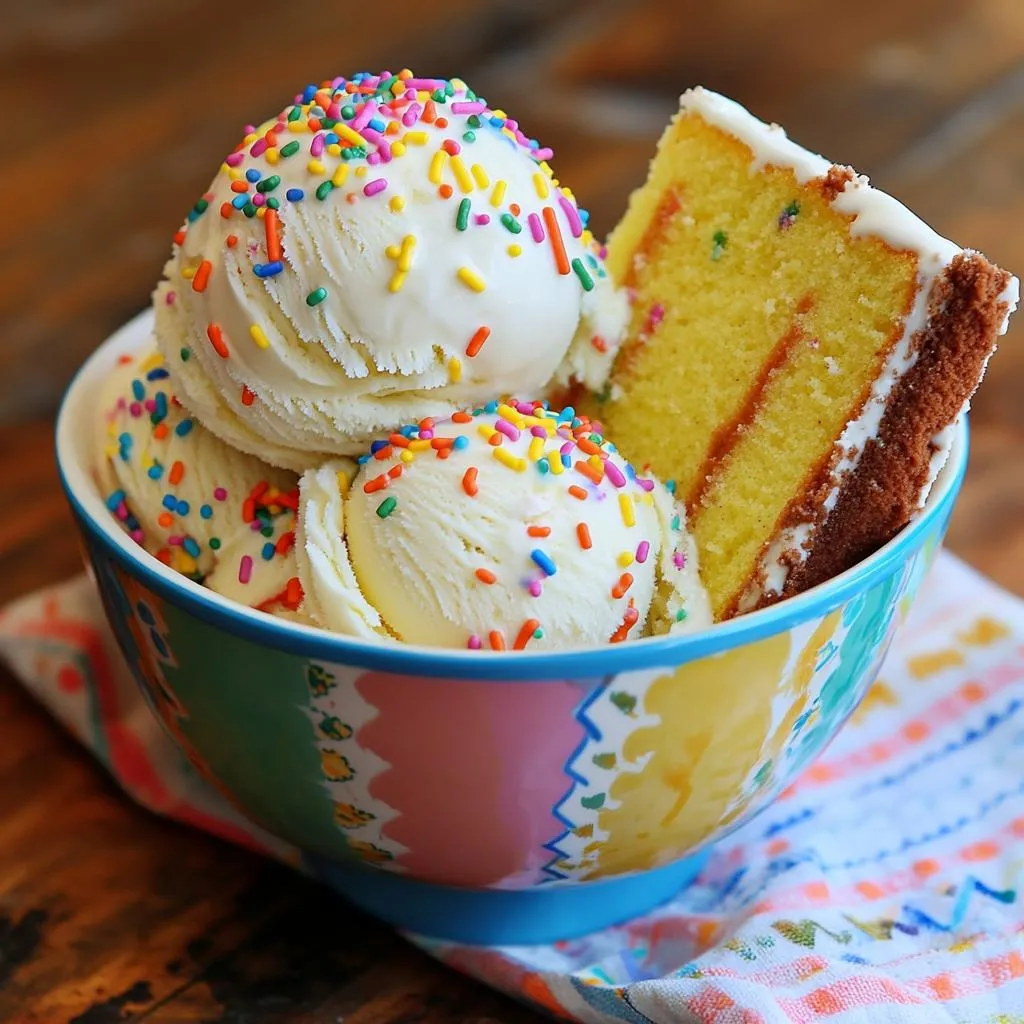
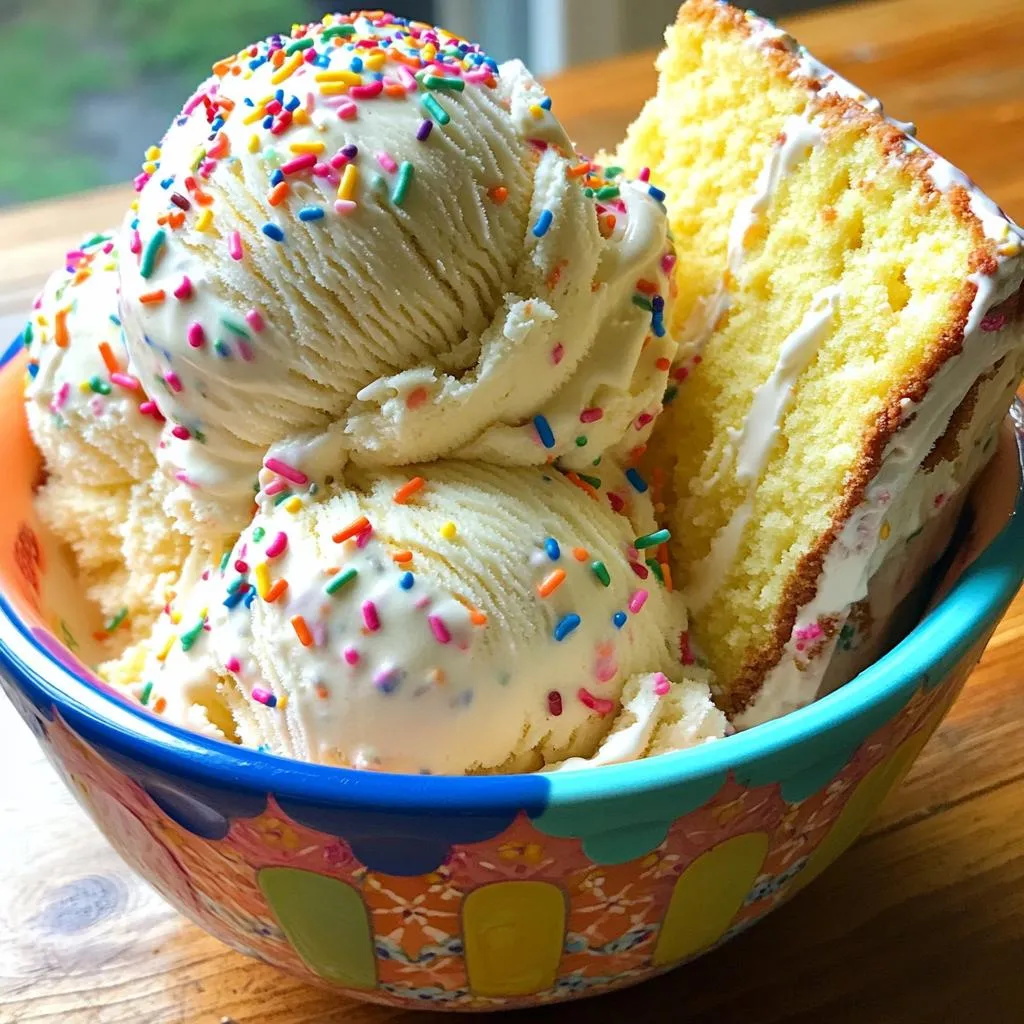
Looking to celebrate with a sweet twist? My No-Churn Birthday Cake Ice Cream is an easy and fun treat for any party. You’ll whip up this delicious dessert with just three main ingredients! Add in colorful sprinkles or leftover birthday cake for extra joy. Perfect for kids and adults alike, this homemade ice cream will make any celebration even sweeter. Ready to scoop up some fun? Let’s get started!

Ingredients

Main Ingredients

– 2 cups heavy whipping cream

– 1 can (14 oz) sweetened condensed milk

– 1 teaspoon vanilla extract

Optional Add-Ins

– 1 cup crumbled birthday cake (store-bought or homemade)

– 1/2 cup rainbow sprinkles

– A pinch of salt

Step-by-Step Instructions

Whipping the Cream

In a mixing bowl, pour in the heavy whipping cream. I like to use a sturdy bowl to prevent spills. Whip on medium-high speed until stiff peaks form. This takes about 3 to 5 minutes. The cream should hold its shape firmly when you lift the mixer.

Preparing the Base

Take a separate bowl and combine the sweetened condensed milk, vanilla extract, and a pinch of salt. Mix these ingredients until they blend smoothly and look creamy. This step adds a sweet base to our ice cream.

Combining Mixtures

Now, gently fold the whipped cream into the condensed milk mixture. Do this in three separate additions. This keeps the whipped cream airy. After that, add in the crumbled birthday cake and rainbow sprinkles. Use a spatula to fold them in evenly. Be careful not to overmix.

Freezing

Next, transfer the mixture into an 8×8 inch dish or a loaf pan. Spread the top evenly. Cover it tightly with plastic wrap. Place it in the freezer for at least 6 hours. This lets the ice cream set and become solid.

When you’re ready to serve, scoop generous portions into bowls or cones. If you like, sprinkle some extra rainbow sprinkles on top for fun!

Tips & Tricks

Achieving the Perfect Consistency

To make this ice cream, start by whipping the cream. The key is to reach stiff peaks. This means the cream holds its shape well. You will whip it for about 3-5 minutes. Use an electric mixer for best results.

When you fold the whipped cream into the condensed milk, do it gently. You want to keep the air in the cream. Use a spatula to fold in three parts. This method helps maintain that light and fluffy texture. Overmixing will make it too flat and dense.

Presentation Tips

Presentation matters! Serve the ice cream in colorful bowls or cones. Bright colors make it fun and festive. You can also add extra rainbow sprinkles on top. A slice of birthday cake on the side adds a nice touch. This makes each scoop feel like a party!

Storage Info

Freezing Instructions

To store your no-churn birthday cake ice cream, use a tight container. I prefer using glass or plastic containers with lids. This helps keep ice crystals from forming, which can ruin the smooth texture. Make sure to press plastic wrap directly on the ice cream’s surface before sealing the lid.

For the best taste and texture, freeze the ice cream for at least six hours. But, if you can wait, letting it freeze overnight is even better. This waiting time helps all the flavors blend perfectly.

Re-freezing Tips

If you have leftover ice cream, you can re-freeze it. Just make sure to scoop out only what you need. Avoid leaving the container open for too long. This can lead to texture changes and ice crystals forming.

Look for signs of freezer burn or icy layers on the top. If you see these, it might affect the taste. Ideally, eat the ice cream within two weeks for the best flavor and texture.

FAQs

Can I use regular milk instead of heavy cream?

No, you cannot use regular milk. Heavy cream has more fat. This fat gives the ice cream its rich and creamy texture. Using regular milk will make the ice cream thin and icy. If you want creamy ice cream, stick with heavy cream.

How do I make this recipe dairy-free?

To make this ice cream dairy-free, use coconut cream instead of heavy cream. You can also use dairy-free sweetened condensed milk. Both options will give you a creamy base. Vanilla extract remains the same, adding flavor. With these swaps, you’ll enjoy a tasty treat without dairy.

Can I make this ice cream in advance and how long will it last?

Yes, you can make this ice cream ahead of time. It lasts about 2-3 weeks in the freezer. Store it in an airtight container. This helps keep the texture smooth. For the best taste, eat it within a week. The longer it sits, the harder it can become.

What can I do with leftover birthday cake?

Leftover birthday cake can become a fun topping. Crumble it and sprinkle it on ice cream. You can also layer it in a parfait. Just add whipped cream and fruit. Another idea is to make cake pops. Mix the cake with frosting, roll it into balls, and dip them in chocolate. Enjoy being creative with your leftover cake!

This blog post covered a simple and fun homemade ice cream recipe. You learned about the key ingredients, step-by-step instructions, and helpful tips. Adding birthday cake and sprinkles makes this treat special. Remember, you can mix different flavors and customize toppings for your taste. Now, with proper storage, you can enjoy this ice cream for weeks. Try making it today; it’s a sweet treat that everyone will love!

- 2 cups heavy whipping cream - 1 can (14 oz) sweetened condensed milk - 1 teaspoon vanilla extract - 1 cup crumbled birthday cake (store-bought or homemade) - 1/2 cup rainbow sprinkles - A pinch of salt In a mixing bowl, pour in the heavy whipping cream. I like to use a sturdy bowl to prevent spills. Whip on medium-high speed until stiff peaks form. This takes about 3 to 5 minutes. The cream should hold its shape firmly when you lift the mixer. Take a separate bowl and combine the sweetened condensed milk, vanilla extract, and a pinch of salt. Mix these ingredients until they blend smoothly and look creamy. This step adds a sweet base to our ice cream. Now, gently fold the whipped cream into the condensed milk mixture. Do this in three separate additions. This keeps the whipped cream airy. After that, add in the crumbled birthday cake and rainbow sprinkles. Use a spatula to fold them in evenly. Be careful not to overmix. Next, transfer the mixture into an 8x8 inch dish or a loaf pan. Spread the top evenly. Cover it tightly with plastic wrap. Place it in the freezer for at least 6 hours. This lets the ice cream set and become solid. When you’re ready to serve, scoop generous portions into bowls or cones. If you like, sprinkle some extra rainbow sprinkles on top for fun! To make this ice cream, start by whipping the cream. The key is to reach stiff peaks. This means the cream holds its shape well. You will whip it for about 3-5 minutes. Use an electric mixer for best results. When you fold the whipped cream into the condensed milk, do it gently. You want to keep the air in the cream. Use a spatula to fold in three parts. This method helps maintain that light and fluffy texture. Overmixing will make it too flat and dense. Presentation matters! Serve the ice cream in colorful bowls or cones. Bright colors make it fun and festive. You can also add extra rainbow sprinkles on top. A slice of birthday cake on the side adds a nice touch. This makes each scoop feel like a party! To store your no-churn birthday cake ice cream, use a tight container. I prefer using glass or plastic containers with lids. This helps keep ice crystals from forming, which can ruin the smooth texture. Make sure to press plastic wrap directly on the ice cream's surface before sealing the lid. For the best taste and texture, freeze the ice cream for at least six hours. But, if you can wait, letting it freeze overnight is even better. This waiting time helps all the flavors blend perfectly. If you have leftover ice cream, you can re-freeze it. Just make sure to scoop out only what you need. Avoid leaving the container open for too long. This can lead to texture changes and ice crystals forming. Look for signs of freezer burn or icy layers on the top. If you see these, it might affect the taste. Ideally, eat the ice cream within two weeks for the best flavor and texture. {{image_4}} No, you cannot use regular milk. Heavy cream has more fat. This fat gives the ice cream its rich and creamy texture. Using regular milk will make the ice cream thin and icy. If you want creamy ice cream, stick with heavy cream. To make this ice cream dairy-free, use coconut cream instead of heavy cream. You can also use dairy-free sweetened condensed milk. Both options will give you a creamy base. Vanilla extract remains the same, adding flavor. With these swaps, you’ll enjoy a tasty treat without dairy. Yes, you can make this ice cream ahead of time. It lasts about 2-3 weeks in the freezer. Store it in an airtight container. This helps keep the texture smooth. For the best taste, eat it within a week. The longer it sits, the harder it can become. Leftover birthday cake can become a fun topping. Crumble it and sprinkle it on ice cream. You can also layer it in a parfait. Just add whipped cream and fruit. Another idea is to make cake pops. Mix the cake with frosting, roll it into balls, and dip them in chocolate. Enjoy being creative with your leftover cake! This blog post covered a simple and fun homemade ice cream recipe. You learned about the key ingredients, step-by-step instructions, and helpful tips. Adding birthday cake and sprinkles makes this treat special. Remember, you can mix different flavors and customize toppings for your taste. Now, with proper storage, you can enjoy this ice cream for weeks. Try making it today; it's a sweet treat that everyone will love!

No-Churn Birthday Cake Ice Cream

Indulge in a deliciously festive treat with this no-churn birthday cake ice cream recipe! Perfect for celebrations or satisfying sweet cravings, this creamy dessert combines whipped cream, sweetened condensed milk, and crumbled cake with a sprinkle of joy. With just 15 minutes of prep time, you can create this delightful ice cream that’s ready to freeze and enjoy later. Click through for the full recipe and bring a scoop of happiness to your next gathering!

Ingredients
  

2 cups heavy whipping cream

1 can (14 oz) sweetened condensed milk

1 teaspoon vanilla extract

1 cup crumbled birthday cake (can be store-bought or homemade)

1/2 cup rainbow sprinkles

A pinch of salt

Instructions
 

In a spacious mixing bowl, pour in the heavy whipping cream. Using an electric mixer, whip the cream on medium-high speed until stiff peaks form, which should take about 3-5 minutes. The peaks should hold their shape firmly when the mixer is lifted.

    In a separate medium bowl, combine the sweetened condensed milk, vanilla extract, and a pinch of salt. Stir thoroughly until all ingredients are fully blended and smooth.

      Carefully incorporate the whipped cream into the condensed milk mixture. Do this in three separate additions, gently folding the whipped cream in to preserve its airiness and prevent deflation.

        Once the two mixtures are combined, add in the crumbled birthday cake and rainbow sprinkles. Use a spatula to gently fold these ingredients in, ensuring they are evenly distributed without overmixing.

          Pour the combined mixture into an 8x8 inch square dish or a loaf pan. Spread the top evenly with a spatula to create a smooth surface.

            Cover the dish tightly with plastic wrap and place it in the freezer. Freeze for at least 6 hours, or until completely solid.

              When you’re ready to serve, scoop generous portions of the ice cream into bowls or cones. If desired, finish with a sprinkle of extra rainbow sprinkles on top for a festive touch.

                Prep Time: 15 minutes | Total Time: 6 hours 15 minutes | Servings: 8

                  - Presentation Tips: For a vibrant presentation, scoop the ice cream into colorful bowls or cones. Consider garnishing with extra rainbow sprinkles and a slice of birthday cake on the side to amplify the celebratory spirit of the dish!

                    WANT TO SAVE THIS RECIPE?