No-Bake Pumpkin Cheesecake Energy Balls Delightful Treat

WANT TO SAVE THIS RECIPE?

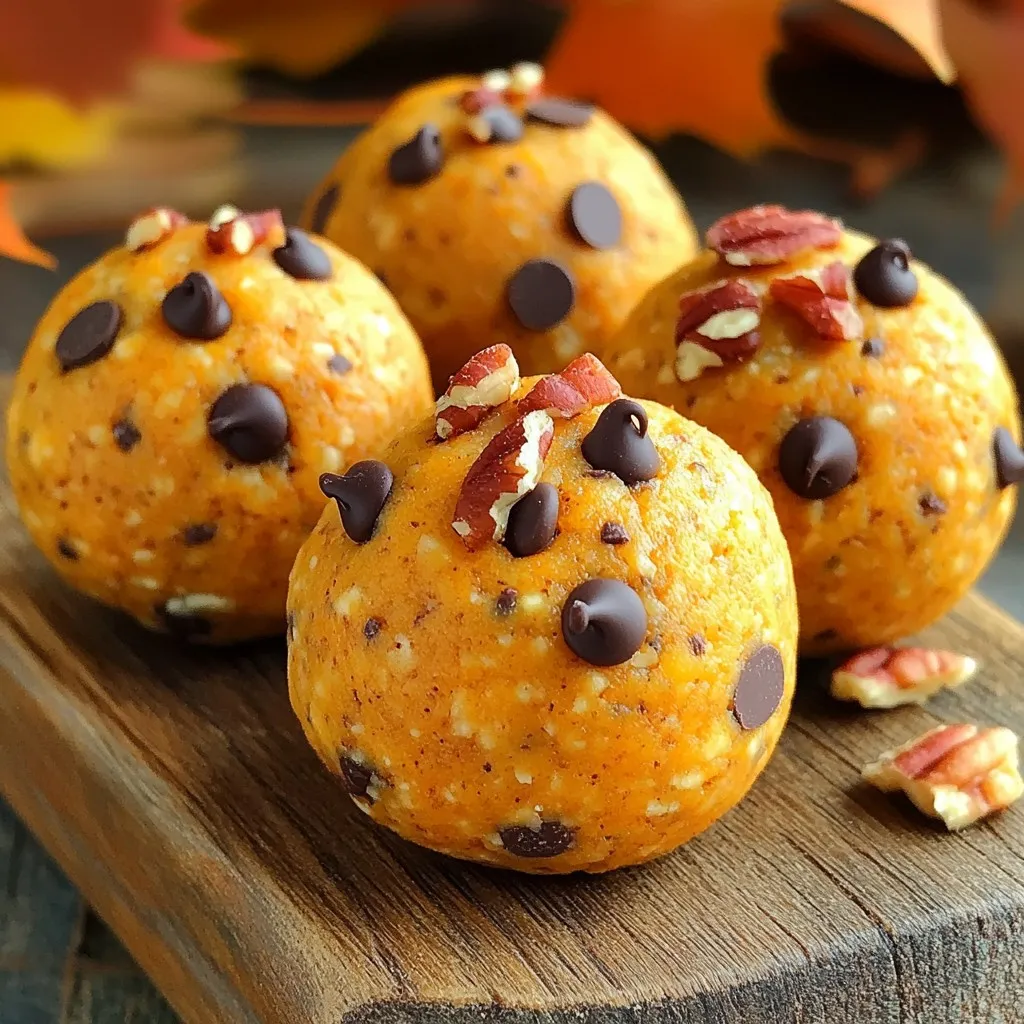
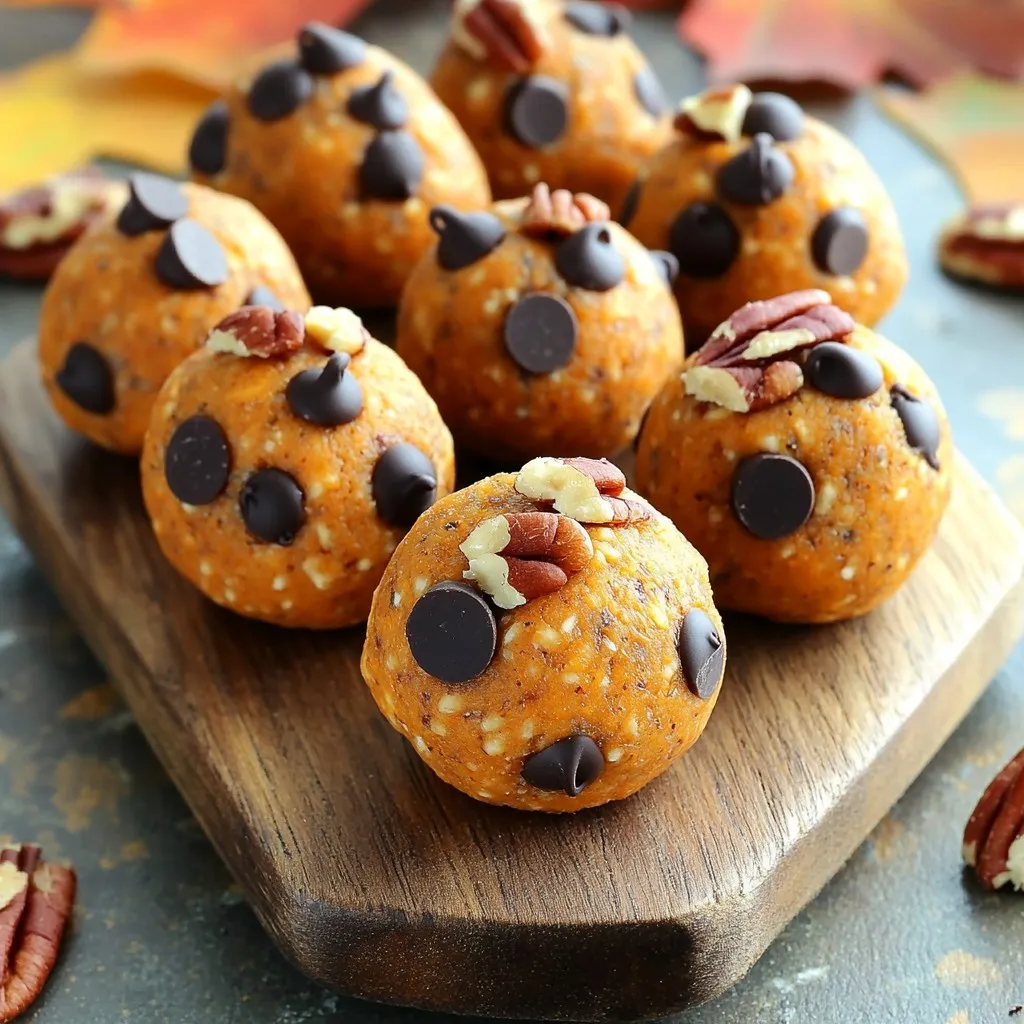
Looking for a quick and tasty treat? These No-Bake Pumpkin Cheesecake Energy Balls are just the thing. Packed with flavor and nutrients, they make a perfect snack. I’ll guide you through easy steps for making them, plus tips for flavor and storage. No baking means less mess and more fun! Let’s dive in and create this delightful treat that you and your family will love.

Ingredients

Complete List of Ingredients

To make No-Bake Pumpkin Cheesecake Energy Balls, you need these simple ingredients:

– 1 cup rolled oats

– 1/2 cup pumpkin puree

– 1/4 cup cream cheese, softened

– 1/4 cup pure maple syrup

– 1/2 teaspoon vanilla extract

– 1/2 teaspoon ground cinnamon

– 1/4 teaspoon ground nutmeg

– 1/4 cup chopped pecans (optional)

– 1/4 cup mini chocolate chips (optional)

These ingredients blend together to create a tasty treat that’s easy to make.

Substitutions for Common Ingredients

You can swap some ingredients if you need to:

Rolled oats: Use quick oats for a smoother texture.

Pumpkin puree: Substitute with sweet potato or butternut squash puree.

Cream cheese: Greek yogurt works well for a lighter option.

Maple syrup: Honey or agave syrup can replace maple syrup.

Chopped pecans: Try walnuts or almonds for a different crunch.

Mini chocolate chips: Use dried fruit or seeds for a healthier mix.

These swaps keep the energy balls delicious while catering to your taste or needs.

Nutritional Information

Each energy ball offers a balanced mix of nutrients:

Calories: About 80 per ball

Protein: 2 grams

Carbohydrates: 10 grams

Fat: 4 grams

Fiber: 1.5 grams

Sugar: 2 grams

These energy balls are not only tasty but also provide some good energy for your day. Enjoy them as a snack or a sweet treat!

Step-by-Step Instructions

Detailed Preparation Steps

To make these no-bake pumpkin cheesecake energy balls, start by gathering all your ingredients. You need rolled oats, pumpkin puree, cream cheese, maple syrup, and vanilla extract. First, take a large mixing bowl. Add the rolled oats, pumpkin puree, softened cream cheese, maple syrup, and vanilla extract. Use a spatula or fork to mix until everything blends well.

Next, add ground cinnamon and nutmeg. These spices give a warm, cozy flavor. Stir well to mix them in evenly. If you want a bit of crunch, fold in chopped pecans. For a sweet touch, add mini chocolate chips. Mix until all ingredients are evenly combined.

Tips for Mixing and Shaping

When shaping the energy balls, keep your hands clean and slightly damp. This helps prevent sticking. Use about one tablespoon of the mixture for each ball. Roll it in your palms until you get a nice round shape. Try to make the balls uniform in size. This ensures they chill evenly. Line a baking sheet with parchment paper. Place the shaped balls on it, leaving space between each one.

Chilling and Serving Instructions

Now it’s time to chill your energy balls. Place the baking sheet in the refrigerator for at least 30 minutes. Chilling firms them up, making them easier to eat. Once chilled, move the energy balls to an airtight container. Store them in the fridge. They stay fresh for up to one week.

For serving, arrange the energy balls in a decorative bowl. You can add a small dish of maple syrup for dipping. This makes a fun and tasty snack for any occasion!

Tips & Tricks

How to Make Perfect Energy Balls

To make the best No-Bake Pumpkin Cheesecake Energy Balls, start with fresh ingredients. Use rolled oats for a chewy base. Ensure the cream cheese is soft for easy mixing. Combine all wet ingredients first to avoid lumps. Adjust the sweetness by adding more maple syrup if needed. When shaping the balls, keep them uniform for even chilling.

Common Mistakes to Avoid

Many people skip chilling the energy balls. This step is key for firm texture. Another mistake is not mixing spices well. Uneven spice distribution can lead to bland bites. Be careful when adding optional ingredients like nuts or chocolate chips. Too much can change the texture and flavor balance.

Enhancements for Extra Flavor

Want to take your energy balls up a notch? Try adding a scoop of protein powder. This boosts nutrition and keeps you full. You can also mix in different spices, like ginger or allspice, for a unique twist. For a crunchy texture, use nuts like walnuts or almonds. Drizzle some melted dark chocolate on top for a sweet finish.

Variations

Flavor Variations

You can change the flavor of your energy balls easily. Try using different nuts like almonds or walnuts. Each nut adds its unique taste and crunch. You can also swap spices. Instead of cinnamon, use ginger for a spicy kick. Or mix in some pumpkin pie spice for an extra fall flavor. Adding dried fruit, like cranberries or raisins, gives a sweet twist. Don’t forget about the chocolate! Dark chocolate chips or white chocolate can make them even more fun.

Dietary Adjustments

Making these energy balls fit your diet is simple. For a gluten-free option, use certified gluten-free oats. This keeps your snack safe and tasty. If you want a vegan version, replace cream cheese with a plant-based cream cheese. Maple syrup is already vegan, so you’re good to go. You can also use nut butters like almond or peanut instead of cream cheese for a new texture and flavor. Just be sure to check for allergies.

Seasonal Adaptations

You can change these energy balls with the seasons. In fall, add apple spice or cranberries. In winter, try peppermint extract for a festive touch. For summer, add coconut flakes and a splash of lime juice. You can also use fresh fruit like strawberries or blueberries when they are in season. Each season brings new flavors to explore, making your energy balls exciting all year round!

Storage Info

Best Storage Practices

To keep your No-Bake Pumpkin Cheesecake Energy Balls fresh, store them in an airtight container. Place a piece of parchment paper between layers if stacking. This keeps them from sticking together. Always keep them in the refrigerator for best results.

How to Freeze Energy Balls

You can freeze these energy balls for later use. First, place them on a baking sheet in a single layer. Freeze them for about two hours until firm. Once frozen, transfer them to a freezer bag or container. Label it with the date and use within three months for the best flavor.

Shelf Life and Freshness Tips

These energy balls stay fresh for up to one week in the fridge. If you want to enjoy them longer, freezing is the way to go. Always check for any signs of spoilage before eating. If they smell off or look different, it’s best to toss them. Enjoy your tasty snack while it lasts!

FAQs

Can I use different nut butters?

Yes, you can use different nut butters. Almond butter, sunflower seed butter, or cashew butter all work well. Each option gives a unique taste. Choose one that you love. Make sure it has a smooth texture for the best results.

How long do these energy balls last?

These energy balls last up to one week in the fridge. Store them in an airtight container. They will stay fresh and tasty. If you want to keep them longer, freeze them for up to three months. Just remember to let them thaw before eating.

Are they suitable for kids?

Yes, they are great for kids! They are healthy and fun to eat. The flavors of pumpkin and spices will delight young taste buds. Plus, they are easy to grab for snacks or lunch boxes. Just check for any nut allergies before serving.

This article covered how to make energy balls from scratch. You learned about the ingredients, easy steps for prep, and tips to avoid mistakes. We discussed flavor variations and suitable storage methods. Remember, making these snacks is fun and easy. You can adapt them to your taste and diet. Enjoy experimenting with new flavors and sharing them with others. Trust me, your energy balls will be a hit! Now it’s your turn to get started and make some tasty treats!

To make No-Bake Pumpkin Cheesecake Energy Balls, you need these simple ingredients: - 1 cup rolled oats - 1/2 cup pumpkin puree - 1/4 cup cream cheese, softened - 1/4 cup pure maple syrup - 1/2 teaspoon vanilla extract - 1/2 teaspoon ground cinnamon - 1/4 teaspoon ground nutmeg - 1/4 cup chopped pecans (optional) - 1/4 cup mini chocolate chips (optional) These ingredients blend together to create a tasty treat that’s easy to make. You can swap some ingredients if you need to: - Rolled oats: Use quick oats for a smoother texture. - Pumpkin puree: Substitute with sweet potato or butternut squash puree. - Cream cheese: Greek yogurt works well for a lighter option. - Maple syrup: Honey or agave syrup can replace maple syrup. - Chopped pecans: Try walnuts or almonds for a different crunch. - Mini chocolate chips: Use dried fruit or seeds for a healthier mix. These swaps keep the energy balls delicious while catering to your taste or needs. Each energy ball offers a balanced mix of nutrients: - Calories: About 80 per ball - Protein: 2 grams - Carbohydrates: 10 grams - Fat: 4 grams - Fiber: 1.5 grams - Sugar: 2 grams These energy balls are not only tasty but also provide some good energy for your day. Enjoy them as a snack or a sweet treat! To make these no-bake pumpkin cheesecake energy balls, start by gathering all your ingredients. You need rolled oats, pumpkin puree, cream cheese, maple syrup, and vanilla extract. First, take a large mixing bowl. Add the rolled oats, pumpkin puree, softened cream cheese, maple syrup, and vanilla extract. Use a spatula or fork to mix until everything blends well. Next, add ground cinnamon and nutmeg. These spices give a warm, cozy flavor. Stir well to mix them in evenly. If you want a bit of crunch, fold in chopped pecans. For a sweet touch, add mini chocolate chips. Mix until all ingredients are evenly combined. When shaping the energy balls, keep your hands clean and slightly damp. This helps prevent sticking. Use about one tablespoon of the mixture for each ball. Roll it in your palms until you get a nice round shape. Try to make the balls uniform in size. This ensures they chill evenly. Line a baking sheet with parchment paper. Place the shaped balls on it, leaving space between each one. Now it’s time to chill your energy balls. Place the baking sheet in the refrigerator for at least 30 minutes. Chilling firms them up, making them easier to eat. Once chilled, move the energy balls to an airtight container. Store them in the fridge. They stay fresh for up to one week. For serving, arrange the energy balls in a decorative bowl. You can add a small dish of maple syrup for dipping. This makes a fun and tasty snack for any occasion! To make the best No-Bake Pumpkin Cheesecake Energy Balls, start with fresh ingredients. Use rolled oats for a chewy base. Ensure the cream cheese is soft for easy mixing. Combine all wet ingredients first to avoid lumps. Adjust the sweetness by adding more maple syrup if needed. When shaping the balls, keep them uniform for even chilling. Many people skip chilling the energy balls. This step is key for firm texture. Another mistake is not mixing spices well. Uneven spice distribution can lead to bland bites. Be careful when adding optional ingredients like nuts or chocolate chips. Too much can change the texture and flavor balance. Want to take your energy balls up a notch? Try adding a scoop of protein powder. This boosts nutrition and keeps you full. You can also mix in different spices, like ginger or allspice, for a unique twist. For a crunchy texture, use nuts like walnuts or almonds. Drizzle some melted dark chocolate on top for a sweet finish. {{image_4}} You can change the flavor of your energy balls easily. Try using different nuts like almonds or walnuts. Each nut adds its unique taste and crunch. You can also swap spices. Instead of cinnamon, use ginger for a spicy kick. Or mix in some pumpkin pie spice for an extra fall flavor. Adding dried fruit, like cranberries or raisins, gives a sweet twist. Don’t forget about the chocolate! Dark chocolate chips or white chocolate can make them even more fun. Making these energy balls fit your diet is simple. For a gluten-free option, use certified gluten-free oats. This keeps your snack safe and tasty. If you want a vegan version, replace cream cheese with a plant-based cream cheese. Maple syrup is already vegan, so you’re good to go. You can also use nut butters like almond or peanut instead of cream cheese for a new texture and flavor. Just be sure to check for allergies. You can change these energy balls with the seasons. In fall, add apple spice or cranberries. In winter, try peppermint extract for a festive touch. For summer, add coconut flakes and a splash of lime juice. You can also use fresh fruit like strawberries or blueberries when they are in season. Each season brings new flavors to explore, making your energy balls exciting all year round! To keep your No-Bake Pumpkin Cheesecake Energy Balls fresh, store them in an airtight container. Place a piece of parchment paper between layers if stacking. This keeps them from sticking together. Always keep them in the refrigerator for best results. You can freeze these energy balls for later use. First, place them on a baking sheet in a single layer. Freeze them for about two hours until firm. Once frozen, transfer them to a freezer bag or container. Label it with the date and use within three months for the best flavor. These energy balls stay fresh for up to one week in the fridge. If you want to enjoy them longer, freezing is the way to go. Always check for any signs of spoilage before eating. If they smell off or look different, it’s best to toss them. Enjoy your tasty snack while it lasts! Yes, you can use different nut butters. Almond butter, sunflower seed butter, or cashew butter all work well. Each option gives a unique taste. Choose one that you love. Make sure it has a smooth texture for the best results. These energy balls last up to one week in the fridge. Store them in an airtight container. They will stay fresh and tasty. If you want to keep them longer, freeze them for up to three months. Just remember to let them thaw before eating. Yes, they are great for kids! They are healthy and fun to eat. The flavors of pumpkin and spices will delight young taste buds. Plus, they are easy to grab for snacks or lunch boxes. Just check for any nut allergies before serving. This article covered how to make energy balls from scratch. You learned about the ingredients, easy steps for prep, and tips to avoid mistakes. We discussed flavor variations and suitable storage methods. Remember, making these snacks is fun and easy. You can adapt them to your taste and diet. Enjoy experimenting with new flavors and sharing them with others. Trust me, your energy balls will be a hit! Now it’s your turn to get started and make some tasty treats!

No-Bake Pumpkin Cheesecake Energy Balls

Indulge in the fall flavors of No-Bake Pumpkin Cheesecake Energy Balls! These easy-to-make treats combine oats, pumpkin puree, and cream cheese for a delightful snack that’s both nutritious and delicious. Perfect for a quick energy boost, these bites are packed with warm spices and optional chocolate chips for a touch of sweetness. Click through to discover the full recipe and prepare these tasty energy balls today!

Ingredients
  

1 cup rolled oats

1/2 cup pumpkin puree

1/4 cup cream cheese, softened to room temperature

1/4 cup pure maple syrup

1/2 teaspoon vanilla extract

1/2 teaspoon ground cinnamon

1/4 teaspoon ground nutmeg

1/4 cup chopped pecans (optional for crunch)

1/4 cup mini chocolate chips (optional for indulgence)

Instructions
 

In a spacious mixing bowl, combine the rolled oats, pumpkin puree, softened cream cheese, maple syrup, and vanilla extract. Use a spatula or fork to mix until the ingredients are completely blended together.

    Add the ground cinnamon and nutmeg to the mixture. Stir well to ensure these warm spices are evenly distributed throughout the mixture.

      If you choose to add extra flavor and texture, gently fold in the chopped pecans and mini chocolate chips until they are evenly incorporated into the mixture.

        With clean hands, scoop out approximately 1 tablespoon of the mixture and shape it into a ball. Continue this process until the entire mixture has been formed into uniform energy balls.

          Arrange the energy balls on a baking sheet lined with parchment paper, ensuring they are spaced apart slightly to allow for easy handling.

            Place the baking sheet in the refrigerator and chill the energy balls for at least 30 minutes. Chilling helps them firm up and makes them easier to enjoy.

              After the chilling time is complete, transfer the energy balls to an airtight container and store in the refrigerator. They will keep fresh for up to one week—if they last that long!

                Prep Time: 15 minutes | Total Time: 45 minutes | Servings: 12-15

                  - Presentation Tips: Serve these delightful energy balls in a decorative bowl and accompany them with a small dish of maple syrup for dipping, if desired. They make a nutritious and enticing snack for any gathering!

                    WANT TO SAVE THIS RECIPE?