
Get ready to enjoy a seasonal treat that’s easy to make and even easier to eat! My No-Bake Pumpkin Cheesecake Cups are a delicious delight that brings together creamy pumpkin goodness with a crunchy graham cracker crust, all without turning on the oven. Perfect for gatherings or cozy nights in, these cups are sure to impress. Join me as I share the simple steps to whip up this tasty dessert!
Ingredients
Main Ingredients for No-Bake Pumpkin Cheesecake Cups
– 1 cup cream cheese, softened to room temperature
– 1 cup canned pumpkin puree (make sure it’s pure pumpkin, not pumpkin pie filling)
– 1/2 cup powdered sugar
– 1 teaspoon vanilla extract
– 1 teaspoon pumpkin pie spice
– 1 cup heavy whipping cream
For this recipe, cream cheese creates the rich base. The pumpkin puree adds flavor and color. Powdered sugar sweetens the mix. Vanilla extract enhances the taste. Pumpkin pie spice brings warmth, while heavy whipping cream makes it light and fluffy.
Ingredients for the Crust
– 1 cup graham cracker crumbs (about 8 full sheets)
– 1/4 cup unsalted butter, melted
The graham cracker crumbs give a nice crunch. Melted butter binds the crumbs together, creating a tasty crust.
Optional Garnishes
– Ground cinnamon
– Chopped pecans
– Whipped cream
These garnishes add a special touch. Ground cinnamon gives warmth. Chopped pecans add crunch, while whipped cream makes it even more decadent. Feel free to mix and match!
Step-by-Step Instructions
Mixing the Pumpkin Cheesecake Cream
1. Prepare the cream mixture: Start by taking a large bowl. Add the softened cream cheese. Use an electric mixer to beat it until smooth. Make sure there are no lumps left. This step is key for a creamy texture.
2. Incorporate flavorings: Next, add the canned pumpkin puree. Mix in the powdered sugar, vanilla extract, and pumpkin pie spice. Blend everything together until fully smooth. You want the flavors to blend well.
Making the Crust
1. Combine graham cracker crumbs and melted butter: In another bowl, add the graham cracker crumbs. Pour in the melted butter. Stir until the crumbs look like wet sand. This will form the base of your cups.
2. Prepare cups for assembly: Grab small cups or dessert bowls. This is where you will layer your cheesecake. Make sure they are clean and ready for the graham cracker crust.
Assembling the Cheesecake Cups
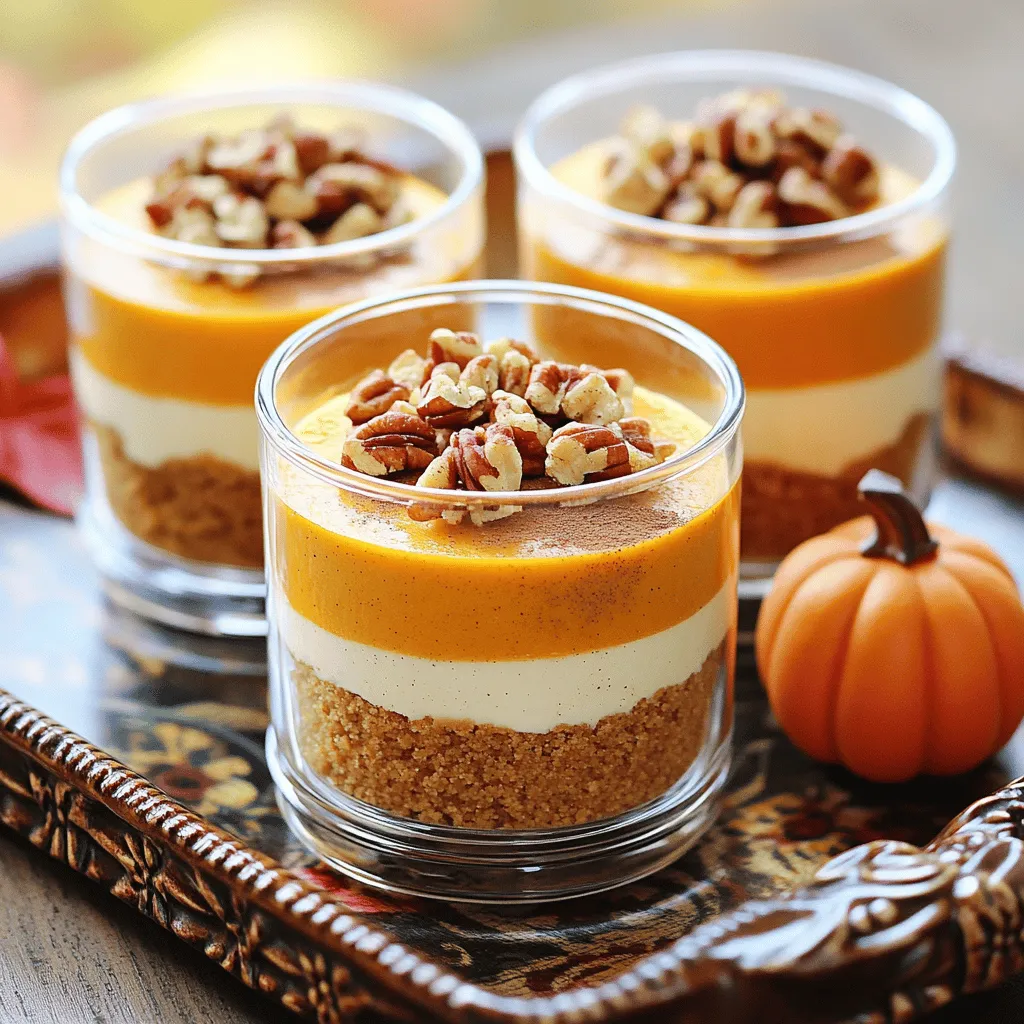
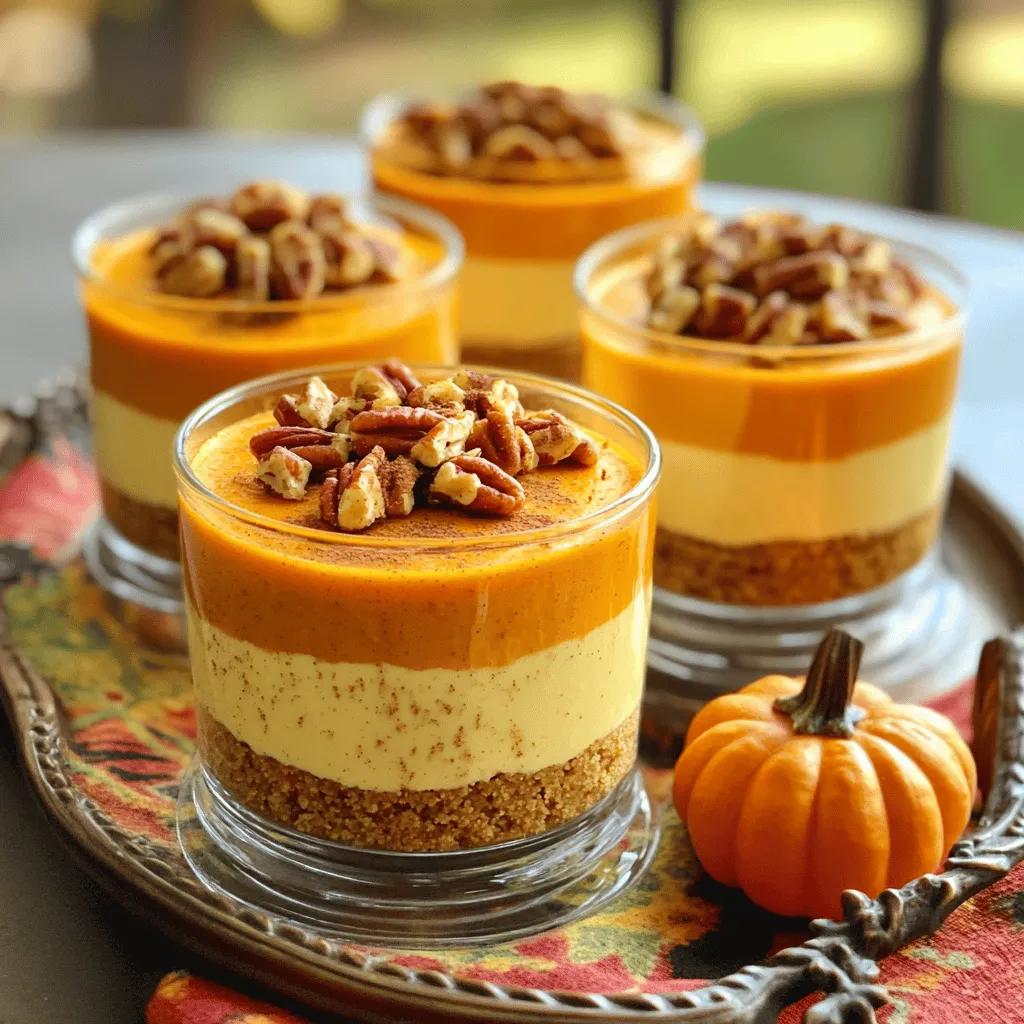
1. Layer graham cracker crust and pumpkin filling: Start with the graham cracker mixture. Place a layer in the bottom of each cup. Use the back of a spoon to press it down gently. This creates a solid base.
2. Finish layering and refrigerate: Now, spoon a layer of the pumpkin cheesecake mixture on top. Spread it evenly without disturbing the crust. Repeat this process until the cups are full. End with a layer of pumpkin filling. Cover each cup with plastic wrap and refrigerate for at least two hours to set.
Tips & Tricks
Perfecting the Cheesecake Texture
How to whip cream to stiff peaks
To get the best texture, start with cold heavy cream. Pour it into a mixing bowl. Use a hand mixer on medium speed. Whip until soft peaks form, then increase to high speed. Keep whipping until stiff peaks form. This may take about 3 to 5 minutes. Stiff peaks will hold their shape when you lift the beaters.
Importance of folding vs. stirring
When you mix the whipped cream with the pumpkin mixture, use a spatula to fold. Folding is gentle and keeps air in the cream. This makes your cheesecake light. Stirring, on the other hand, can deflate the whipped cream. This will make your dessert dense and heavy. So, always fold for the best results.
Serving Suggestions
Presentation tips for the dessert cups
For a lovely look, use clear dessert cups. This shows off the layers of crust and filling. You can also drizzle some caramel or chocolate sauce on top. A light dusting of ground cinnamon adds a nice touch.
Seasonal decor to enhance the dish
Add small pumpkins or gourds near the cups to bring the fall spirit. A few autumn leaves can add color and charm. You can even use festive napkins for a cozy feel. These little touches make your dessert more inviting.
Common Mistakes to Avoid
Using pumpkin pie filling instead of pure pumpkin
Always use pure pumpkin puree. Pumpkin pie filling has spices and sugar already mixed in. This will change the taste and texture of your cheesecake. Stick to pure pumpkin for the best flavor.
Overmixing the filling
When you combine the whipped cream and pumpkin mixture, be careful. Overmixing can ruin the texture. It can make the filling heavy instead of light and fluffy. Just fold until combined, and stop. This simple step keeps your cheesecake dreamy and airy.
Variations
Flavor Add-ins
You can make your pumpkin cheesecake cups more fun with add-ins. Try adding chocolate chips or crushed candy. These will give a nice crunch and sweet surprise. For a spicy twist, use nutmeg or allspice. Both will enhance the autumn feel of your dessert. You can mix these in with the pumpkin filling for a tasty treat.
Alternative Bases
If you want to change the crust, there are many options. You can use Oreo crumbs for a rich flavor. They will make the dessert taste even more special. Nuts are another great choice for a gluten-free crust. Experimenting with different cookies can also bring new flavors. Each option adds a unique touch to your dessert cups.
Dietary Modifications
For those who follow a vegan diet, you can adjust the recipe. Use cashew cream instead of cream cheese for a creamy base. Coconut whipped cream can replace heavy cream. This keeps the texture light and fluffy. If you’re looking for lower sugar options, consider using natural sweeteners. These swaps will make the dessert healthier without losing taste.
Storage Info
Storing Leftovers
To keep your leftover cheesecake cups fresh, store them in the fridge. Use an airtight container or cover each cup with plastic wrap. This helps prevent them from drying out or absorbing other food odors. The cheesecake cups will stay tasty for up to 3 days in the fridge.
Freezing Directions
If you want to enjoy these treats later, you can freeze them. First, let the cups chill in the fridge for 2 hours. Then, wrap each cup tightly in plastic wrap and place them in a freezer-safe bag. They can stay fresh for up to 2 months in the freezer.
To thaw, move the cups to the fridge for about 4 hours before serving. This allows them to come back to the right texture without getting watery.
Reheating Tips
These cheesecake cups are best enjoyed cold, but you can warm the crust if you like. Place the cups in a microwave for just 10-15 seconds. This warms the crust without melting the filling.
Most people prefer these cups chilled or at room temperature. If you serve them cold, the flavors pop more. For room temperature, wait about 20 minutes after taking them from the fridge before serving. Enjoy your delicious dessert!
FAQs
How long does it take to make No-Bake Pumpkin Cheesecake Cups?
The prep time for these cups is 20 minutes. The total time, including chilling, is 2 hours and 20 minutes. You need to chill them for at least 2 hours. This helps the flavors mix well and the texture set.
Can I make these cheesecake cups in advance?
Yes, you can make these cups ahead of time. They stay fresh in the fridge for up to 3 days. Just cover them well with plastic wrap or a lid. This keeps them from drying out in the fridge. Making them a day early can save you time.
What can I use instead of graham cracker crumbs?
If you can’t find graham crackers, try using crushed cookies like Oreos. You can also use crushed nuts for a gluten-free option. Almond flour mixed with butter works well too. Just choose what fits your taste and diet.
In this blog post, we explored how to make No-Bake Pumpkin Cheesecake Cups. We covered key ingredients, such as cream cheese and pumpkin puree, and went through each step of the process. I shared tips for perfecting texture and common mistakes to avoid. You can mix in different flavors, use alternative bases, or modify for special diets. Finally, I provided storage tips to ensure your cups stay fresh. Enjoy making this simple and delicious dessert anytime!


