
Craving a sweet treat that’s simple to make? These No Bake Chocolate Peanut Butter Bars are the answer! With just a few easy steps, you can whip up a delicious dessert that’s perfect for any occasion. Whether you want to customize flavors or stick to the classic, I’ll guide you through every part of the process. Let’s dive into this easy recipe and satisfy your sweet tooth!
Why I Love This Recipe
- Easy to Make: This recipe requires no baking, making it a quick and simple treat to whip up at any time.
- Healthier Indulgence: Made with wholesome ingredients like almond flour and natural peanut butter, these bars are a guilt-free dessert option.
- Customizable: You can easily swap in different nut butters or sweeteners to suit your taste preferences.
- Perfect for Meal Prep: These bars store well in the fridge, making them a convenient snack for busy days.
Ingredients
Essential Ingredients for No Bake Chocolate Peanut Butter Bars
To make these tasty bars, you will need a few key ingredients. Here is the list:
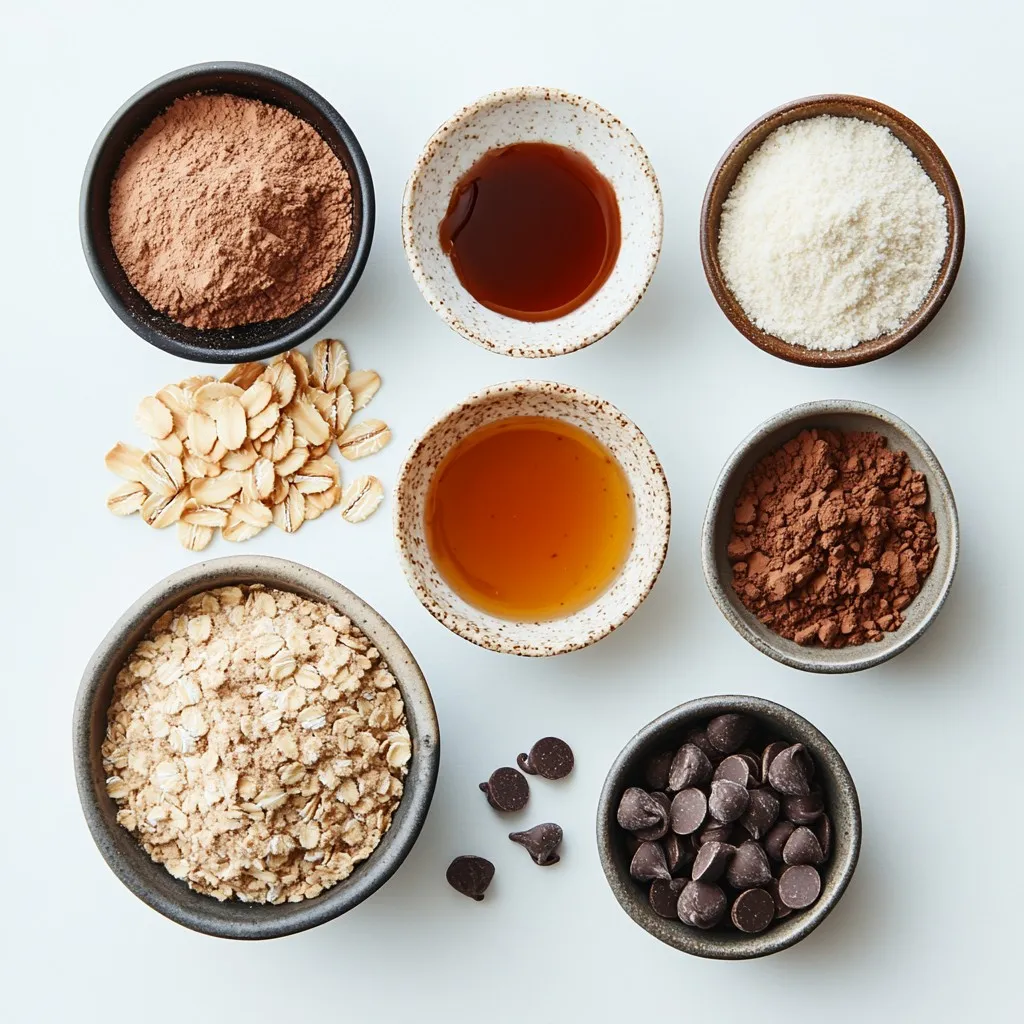
– 1 cup almond flour
– 1 cup rolled oats
– 1/2 cup natural peanut butter
– 1/4 cup honey or maple syrup
– 1/4 cup cocoa powder
– 1/4 teaspoon salt
– 1/2 cup dark chocolate chips
– 2 tablespoons coconut oil
These ingredients come together to create a delicious, no-bake treat. The almond flour gives a nice texture, while the oats add a wholesome feel. The peanut butter and honey provide sweetness and creaminess.
Optional Ingredients for Customization
You can add your favorite flavors or textures to these bars. Here are some great options:
– Chopped nuts (like walnuts or almonds)
– Dried fruit (such as cranberries or raisins)
– A pinch of cinnamon for warmth
– Vanilla extract for extra flavor
Feel free to mix and match these optional ingredients. Customizing your bars makes them special and unique.
Substitutions for Dietary Preferences
If you have specific dietary needs, you can still enjoy these bars. Here are some easy swaps:
– Use sunflower seed butter instead of peanut butter for nut-free bars.
– Swap almond flour with oat flour for a gluten-free option.
– Use agave syrup instead of honey for a vegan option.
These substitutions keep the recipe friendly for different diets while maintaining its great taste.
Step-by-Step Instructions
Preparation of the Dry Ingredients
To start, gather your dry ingredients. You will need almond flour, rolled oats, cocoa powder, and salt. In a large mixing bowl, add one cup of almond flour. Next, add one cup of rolled oats. Then, pour in a quarter cup of cocoa powder and a quarter teaspoon of salt. Mix these together well. It is important to blend them evenly. This will help the bars taste great and hold together later.
Combining Wet Ingredients
Now, let’s move to the wet ingredients. In a separate bowl, add half a cup of natural peanut butter. Pour in a quarter cup of honey or maple syrup. Use a spoon to blend them until smooth. If the mixture feels too thick, you can warm it in the microwave for 10-15 seconds. Just be careful not to overheat. Once combined, pour this mixture into your bowl with the dry ingredients. Mix until everything is sticky and holds together.
Assembling the Bars and Melting the Chocolate
Next, prepare your baking dish. Line an 8×8 inch dish with parchment paper. Make sure the paper hangs over the sides for easy removal. Transfer the sticky mix into the dish. Press it down firmly with a spatula or your fingers. This creates a solid base.
Now, let’s melt the chocolate. In a small bowl, add half a cup of dark chocolate chips and two tablespoons of coconut oil. Heat them in the microwave in 30-second intervals. Stir between heats until the mixture is smooth and glossy. Pour the melted chocolate over the pressed base. Use a spatula to spread it evenly.
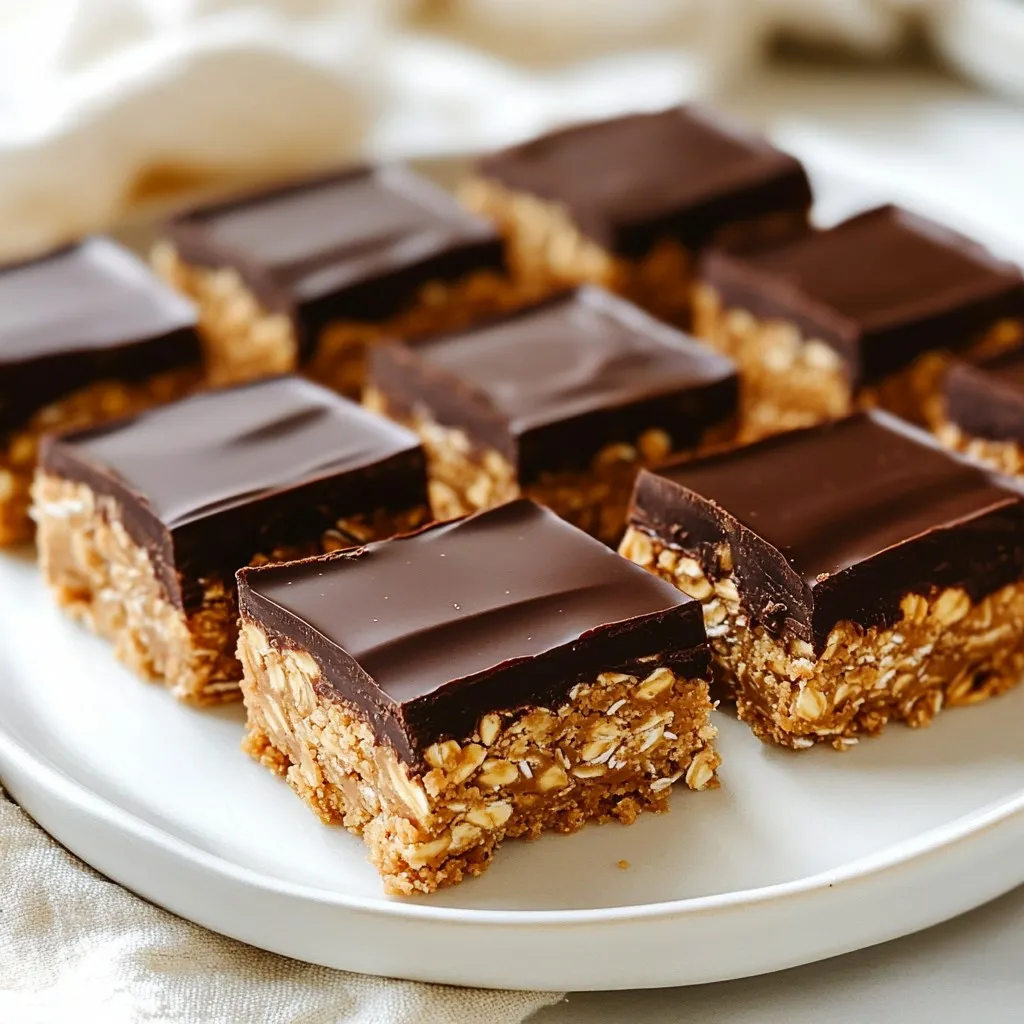
Finally, place the dish in the fridge for 1-2 hours. This helps the bars set properly. Once they are firm, lift them out using the parchment paper. Cut the bars into squares or rectangles. Enjoy your no-bake chocolate peanut butter bars!
Tips & Tricks
How to Ensure the Bars Hold Together
To make sure your bars hold well, follow these simple steps:
– Use the right ratio of ingredients: The balance of almond flour, oats, and peanut butter is key. Too much dry or wet does not help.
– Mix well: When combining the wet and dry ingredients, make sure they are mixed fully. The mixture should be sticky.
– Press firmly: When you place the mixture in the baking dish, press down hard. This helps the bars stay together.
Recommended Tools and Equipment
Having the right tools makes this process easier:
– Large mixing bowl: For combining your dry and wet ingredients.
– Spatula: Great for mixing and pressing down the mixture.
– 8×8 inch baking dish: Perfect size for this recipe.
– Parchment paper: For easy removal of the bars later.
– Microwave-safe bowl: Needed for melting chocolate and coconut oil.
Best Practices for Melting Chocolate
Melting chocolate can be tricky, but these tips help:
– Use short intervals: Heat chocolate in the microwave for 30 seconds at a time. Stir after each interval. This prevents burning.
– Add coconut oil: Mixing in coconut oil helps the chocolate become glossy and smooth.
– Let it cool slightly: After melting, let it cool a bit before spreading it on the bars. This helps keep the base from melting.
Pro Tips
- Use Room Temperature Ingredients: Allow the peanut butter and honey to come to room temperature before mixing. This helps create a smoother, more homogenous mixture.
- Chill for Easier Cutting: If you find the bars difficult to cut, return them to the refrigerator for an additional 30 minutes. This will firm them up even more for clean cuts.
- Customize Your Toppings: Feel free to add toppings such as chopped nuts, shredded coconut, or sea salt on top of the chocolate layer for added texture and flavor.
- Store Properly: To keep the bars fresh, store them in an airtight container in the refrigerator. They can last up to a week, or freeze for longer storage.
Variations
Adding Flavor Variations (e.g., vanilla, sea salt)
You can easily add flavor to your bars. Try mixing in a teaspoon of vanilla extract. It gives a sweet, warm taste. You can also sprinkle a little sea salt on top. This adds a nice contrast to the chocolate and peanut butter. Experiment with spices like cinnamon or nutmeg for unique flavors. Each variation makes your treat special.
Nut-Free Options (using sunflower seed butter)
If you want to make these bars nut-free, use sunflower seed butter instead of peanut butter. This swap gives a similar creamy texture and taste. It works great for those with nut allergies. Just make sure to choose a sunflower seed butter that is creamy and smooth. Your bars will still be delicious and safe for everyone to enjoy.
Gluten-Free Modifications (alternative flours)
To make these bars gluten-free, just swap almond flour for another gluten-free flour. Options include coconut flour or oat flour. Each flour gives a different taste and texture. If you use coconut flour, remember to adjust the amount. Coconut flour absorbs more moisture. You can also check your oats to ensure they are gluten-free. This way, everyone can enjoy the tasty treats without worry.
Storage Info
How to Store No Bake Chocolate Peanut Butter Bars
To keep your bars fresh, store them in an airtight container. If you have leftovers, this is the best way to keep them tasty. Place parchment paper between layers to prevent sticking. Store them in the fridge for about a week. This helps keep the chocolate firm and the bars from getting too soft.
Freezing Instructions for Long-Term Storage
Freezing is a great option if you want to save these bars longer. Cut them into squares first, then wrap each piece tightly in plastic wrap. Place the wrapped bars in a freezer-friendly bag or container. They can stay in the freezer for up to three months. When you want to enjoy them, just thaw them in the fridge overnight.
Shelf Life and Best Before Recommendations
These bars are best when eaten fresh but can last a week in the fridge. If you freeze them, they maintain their taste and texture for months. Always check for any changes in smell or texture before eating. This ensures you enjoy them at their best.
FAQs
Can I use other nut butters for this recipe?
Yes, you can use other nut butters. Almond butter, cashew butter, or sunflower seed butter work well. Each nut butter brings its own taste. Almond butter adds a light flavor. Cashew butter gives a creamier texture. Sunflower seed butter is great for nut-free diets.
How long do these bars take to set?
These bars take about 1 to 2 hours to set. The time can change based on your fridge temperature. You want the bars to feel firm when you touch them. If you are in a hurry, you can freeze them for about 30 minutes. Just remember to check often so they do not freeze too hard.
Can I make these bars vegan-friendly?
Yes, you can easily make these bars vegan. Use maple syrup instead of honey. Also, choose dark chocolate that is dairy-free. Make sure to check the labels for any hidden animal products. Enjoy a delicious treat that fits a vegan diet!
You learned how to make no bake chocolate peanut butter bars. We covered essential and optional ingredients, plus substitutions for diets. The step-by-step guide made it easy to prepare, combine, and assemble your bars. I shared tips to help them hold together and melt chocolate well. You can explore fun flavor variations and find storage tips for freshness.
Try the recipe and enjoy your tasty treat


