
Get ready for a sweet treat with my No-Bake Chocolate Hazelnut Cheesecake Bars! This easy recipe combines rich hazelnut cookies, creamy cheesecake filling, and swirls of decadent chocolate. You won’t need an oven for this delightful dessert. Perfect for any occasion, these bars are sure to impress friends and family. Let’s dive into the simple steps and ingredients you need to create this chocolatey masterpiece!
Ingredients
Main Ingredients
– 1 ½ cups hazelnut cookies, finely crushed
– ¼ cup unsalted butter, melted
– 1 cup cream cheese, softened to room temperature
– ½ cup powdered sugar
– 1 cup hazelnut spread (such as Nutella)
– 1 teaspoon pure vanilla extract
– 1 cup heavy cream, whipped to soft peaks
– ½ cup dark chocolate chips, melted
– Chopped hazelnuts, for garnish
Equipment Needed
– Mixing bowls
– Electric mixer
– 8×8-inch square pan
– Spatula
– Plastic wrap
To make these no-bake chocolate hazelnut cheesecake bars, you need a few key ingredients. The hazelnut cookies give the crust a rich, nutty base. Melted unsalted butter binds the cookie crumbs together, making a sturdy layer. Cream cheese forms the cheese filling, while powdered sugar adds sweetness. Hazelnut spread is the star flavor, and vanilla extract enhances it.
For the creaminess, we use heavy cream. Whipped to soft peaks, it keeps the filling light. Dark chocolate chips add a touch of decadence, while chopped hazelnuts provide a crunchy garnish.
You also need basic kitchen tools. Mixing bowls are a must for combining ingredients. An electric mixer helps to make the cream cheese filling smooth. An 8×8-inch square pan forms the bars. A spatula is key for spreading the filling evenly, and plastic wrap keeps everything fresh while it chills.
With these ingredients and tools, you’re ready to create a dessert that impresses everyone!
Step-by-Step Instructions
Preparing the Crust
To make the crust, first, take 1 ½ cups of hazelnut cookies and crush them finely. In a bowl, mix the crushed cookies with ¼ cup of melted unsalted butter. Stir well until all the crumbs are moist. Next, press this mixture firmly into the bottom of an 8×8-inch square pan. Make sure you create an even layer. Put the pan in the refrigerator while you prepare the filling.
Making the Cheesecake Filling
Now, let’s focus on the filling. In a large bowl, beat 1 cup of softened cream cheese with ½ cup of powdered sugar. Use an electric mixer on medium speed. Keep mixing until the mixture is smooth and creamy. Then, add 1 cup of hazelnut spread and 1 teaspoon of pure vanilla extract. Mix again until everything is well combined and no lumps remain.
Incorporating Whipped Cream
Next, we will add some fluffiness. Take 1 cup of heavy cream that has been whipped to soft peaks. Gently fold this whipped cream into the cream cheese mixture. Be careful not to deflate the whipped cream. This step is key for a light and airy filling.
Assembling the Cheesecake Bars
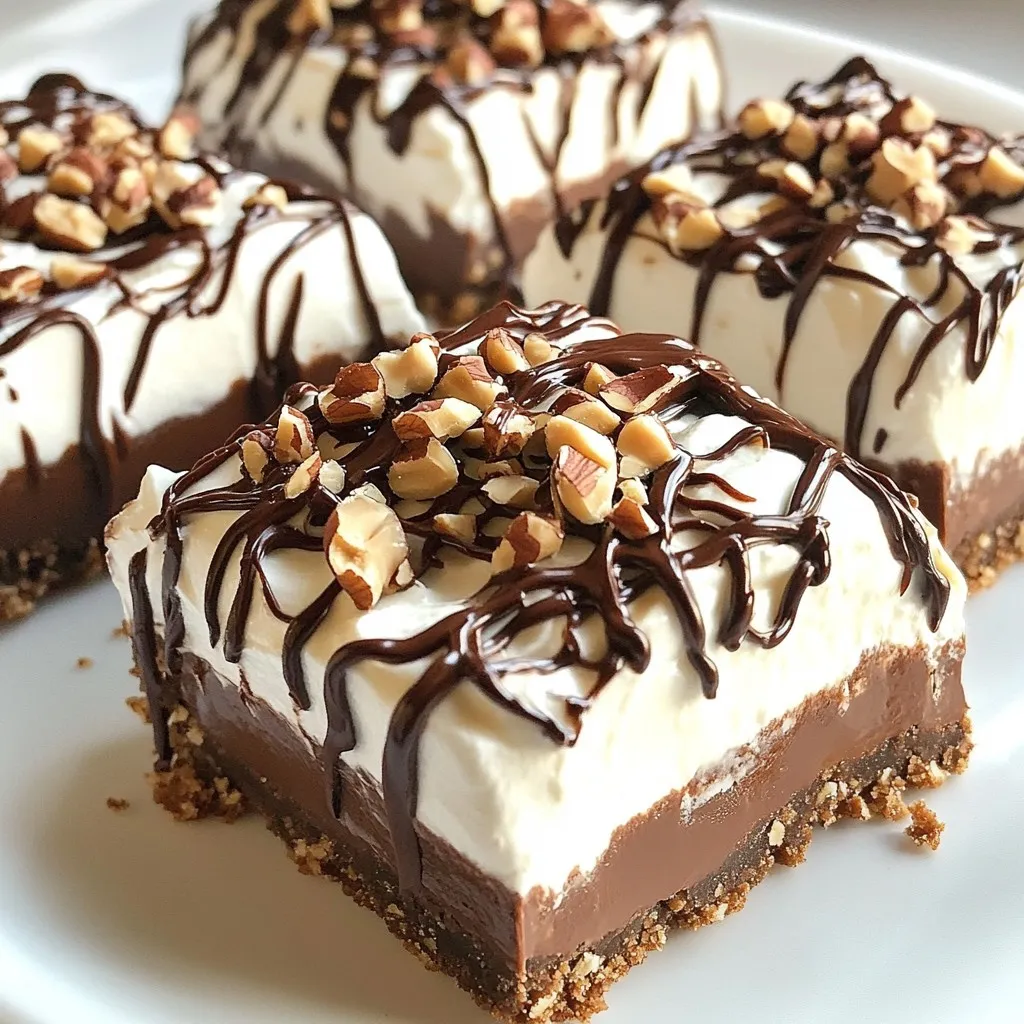
It’s time to bring everything together. Carefully pour the cheesecake filling over the chilled cookie crust. Use a spatula to smooth it out evenly. Then, drizzle ½ cup of melted dark chocolate over the top. With a knife or a toothpick, create swirls for a marbled effect. This adds a beautiful touch to your bars.
Chilling Process
Cover the pan with plastic wrap. Place it in the refrigerator and let it chill for at least 4 hours. This time allows the cheesecake to firm up completely.
Serving Suggestions
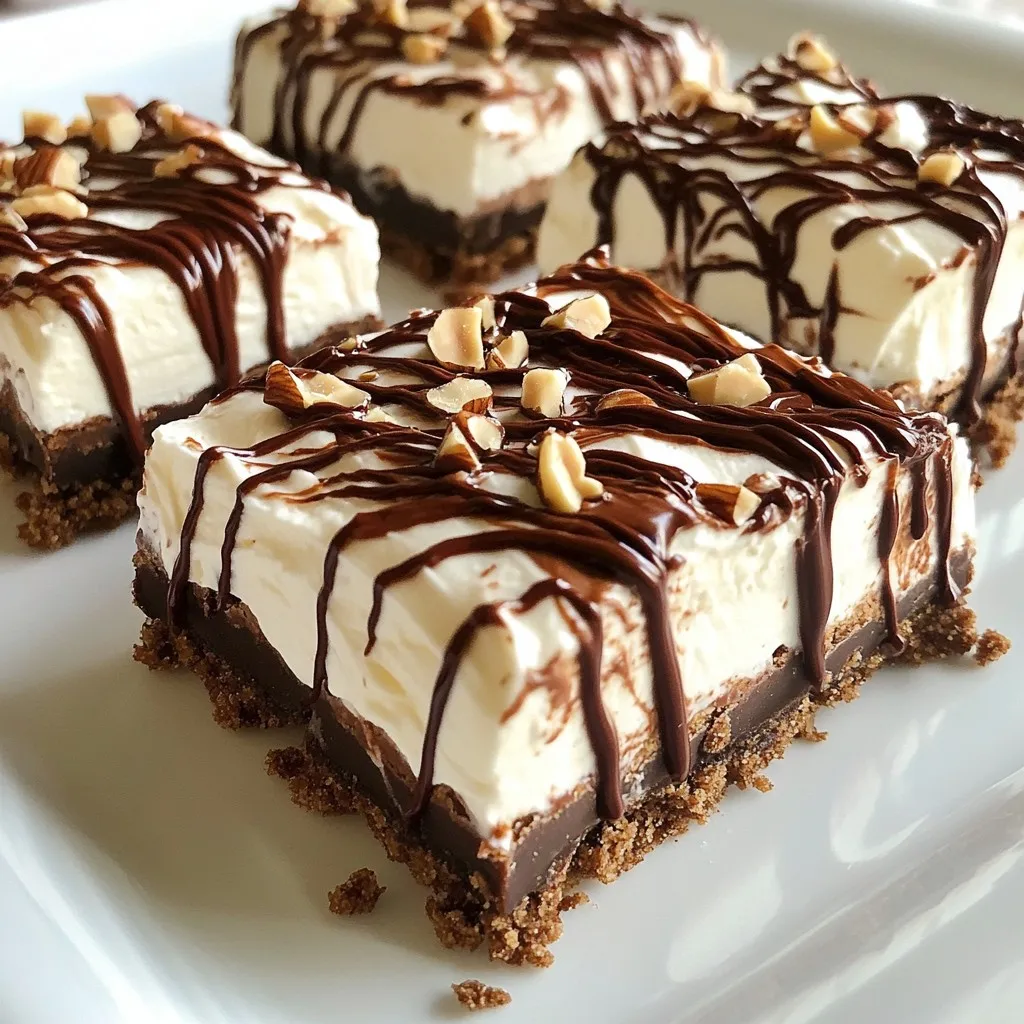
Once the cheesecake is firm, lift it from the pan using the overhanging parchment paper. Cut it into 9 equal bars. Before serving, sprinkle generously with chopped hazelnuts. This adds a nice crunch and makes your dessert look even more appealing.
Tips & Tricks
Achieving the Perfect Texture
To get the best texture in your cheesecake bars, start with softened cream cheese. Soft cream cheese mixes easily, leading to a smooth filling. If it is cold, you will end up with lumps. Leave it out for at least 30 minutes before mixing.
When you fold the whipped cream into the cream cheese mixture, do it gently. Use a spatula and scoop from the bottom. This keeps the mixture light and airy. If you mix too hard, your filling may turn out dense.
Enhancing Flavor
You can boost the flavor of your cheesecake bars in many ways. Try adding a splash of almond extract for an extra nutty taste. For a chocolate twist, use dark chocolate, milk chocolate, or even white chocolate chips. Each type will change the flavor profile, so choose what you love best.
For toppings, consider fresh berries or a sprinkle of sea salt. These will add a nice contrast to the rich cheesecake. You can also try using flavored hazelnut spreads if you want to explore different taste combinations.
Presentation Ideas
A beautiful presentation makes your dessert shine. Serve your cheesecake bars on a decorative platter. Arrange them neatly and add a drizzle of extra melted chocolate on top. This creates a lovely effect that will impress your guests.
For added flair, sprinkle chopped hazelnuts on top. This not only looks great but adds a nice crunch. Use a knife or toothpick to swirl the chocolate into fun patterns. This little detail will elevate the look of your bars!
Variations
Substitutions
You can easily make this recipe fit your needs. Here are some great swaps:
– Gluten-free options for cookies: Use gluten-free hazelnut cookies. Look for brands that offer this option. You can also use almond flour or gluten-free graham crackers as a base.
– Dairy-free alternatives for the cream cheese: Try using dairy-free cream cheese made from nuts or soy. It provides a similar texture and creamy taste.
Flavor Variations
Want to change the flavor? Here are some ideas:
– Adding fruit purees for a different taste: Blend strawberries or raspberries into a puree. Swirl it into the cheesecake filling for a fruity twist.
– Mixing in spices like cinnamon or coffee: Add a teaspoon of cinnamon or instant coffee to the cheesecake mix. This gives a warm, cozy flavor that pairs well with chocolate.
Serving Size Options
Adjusting the recipe for your needs is simple:
– Adjusting ingredients for larger or smaller batches: If you want more bars, double the ingredients. For fewer bars, cut everything in half. Just remember to keep the same ratios for the best result.
Storage Info
Short-Term Storage
To keep your cheesecake bars fresh, store them in the fridge. Place the bars in an airtight container. This will help prevent them from drying out. The bars will stay good for up to five days. Make sure to seal the container well.
Freezing Instructions
Yes, you can freeze cheesecake bars! They freeze well and stay tasty. Cut the bars into pieces before freezing. Wrap each piece in plastic wrap, then place them in a freezer-safe bag. This extra layer helps keep them fresh for up to three months.
Thawing Tips
To thaw cheesecake bars, place them in the fridge overnight. This method keeps the texture nice and creamy. If you’re in a hurry, you can leave them at room temperature for about an hour. Avoid using a microwave, as it can make the bars too soft or melt them.
FAQs
Can I use regular cream instead of heavy cream?
You can use regular cream, but the texture will change. Heavy cream has more fat. This fat gives the cheesecake a rich and creamy feel. Regular cream has less fat, so it may not whip as well. For the best result, heavy cream is the way to go.
How long does it take for the cheesecake to set?
The cheesecake usually needs about 4 hours to set in the fridge. If you want it firmer, you can leave it longer. Just make sure to cover it well with plastic wrap. This keeps it fresh and prevents it from absorbing other smells in the fridge.
Can I add other toppings?
Yes, you can add many toppings to make it your own! Here are some ideas:
– Chopped nuts like almonds or pecans
– Fresh fruits like strawberries or raspberries
– Drizzles of caramel or chocolate sauce
These toppings can add flavor and make your bars look even more delicious.
Is this recipe suitable for special diets?
You can make this recipe fit special diets. To go vegan, use dairy-free cream cheese and a plant-based cream. For gluten-free, choose gluten-free hazelnut cookies. Just check the labels to ensure they fit your diet needs.
What can I do if my cheesecake filling is too runny?
If your filling is too runny, try these tips:
– Make sure the cream cheese is very soft. Cold cream cheese won’t mix well.
– Mix the filling just until combined. Overmixing can cause it to lose air.
– If it’s still runny, chill it longer. The filling will firm up as it cools.
These hazelnut cheesecake bars are a treat that anyone can enjoy. We covered all the steps: making the crust, filling, and assembling your dessert. Plus, I shared tips for texture, flavor, and presentation.
I hope these ideas inspire you to try them. Whether you use classic ingredients or explore fun variations, you’ll create a dessert that delights everyone. Enjoy making these bars and share them with friends and family. You’ll impress all who taste them!


