
Craving something sweet yet easy to make? Dive into the rich world of my No-Bake Chocolate Espresso Cheesecake Delight. This treat combines the bold flavors of chocolate and espresso for a dessert that packs a punch. Plus, you won’t need an oven! In this guide, I’ll share all the ingredients, step-by-step instructions, tips, and variations to make your cheesecake perfect. Ready to impress your friends and satisfy your sweet tooth? Let’s get started!
Ingredients
List of Ingredients for No-Bake Chocolate Espresso Cheesecake
– 1 1/2 cups chocolate cookie crumbs
– 5 tablespoons unsalted butter, melted
– 16 oz cream cheese, softened to room temperature
– 1 cup powdered sugar
– 1/2 cup sour cream
– 1/2 cup heavy whipping cream
– 1 tablespoon instant espresso powder
– 1 teaspoon vanilla extract
– 8 oz dark chocolate, melted and cooled slightly
– Optional: chocolate shavings and espresso beans for garnish
Measurement Units for Each Ingredient
– Chocolate cookie crumbs: 1 1/2 cups
– Unsalted butter: 5 tablespoons
– Cream cheese: 16 oz
– Powdered sugar: 1 cup
– Sour cream: 1/2 cup
– Heavy whipping cream: 1/2 cup
– Instant espresso powder: 1 tablespoon
– Vanilla extract: 1 teaspoon
– Dark chocolate: 8 oz
Optional Garnishes for Serving
You can add a beautiful touch with:
– Chocolate shavings
– Espresso beans
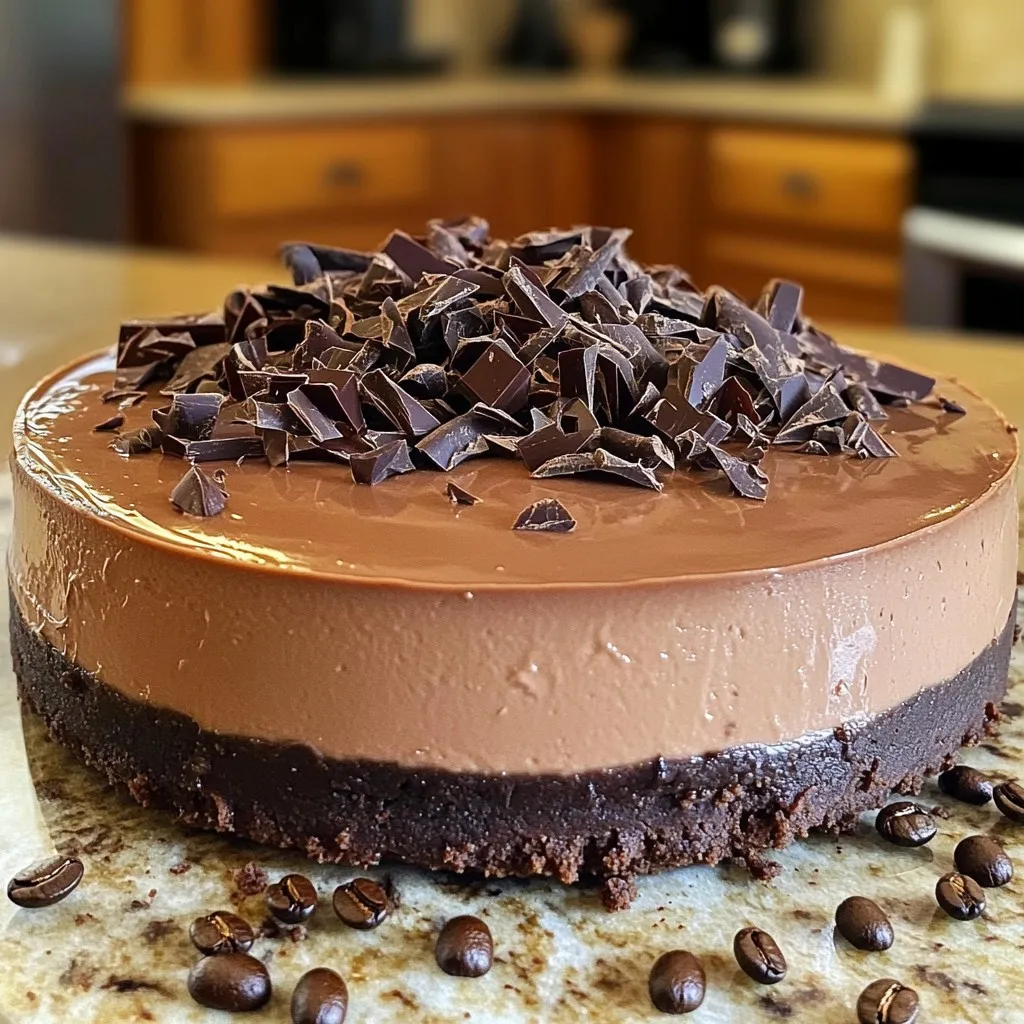
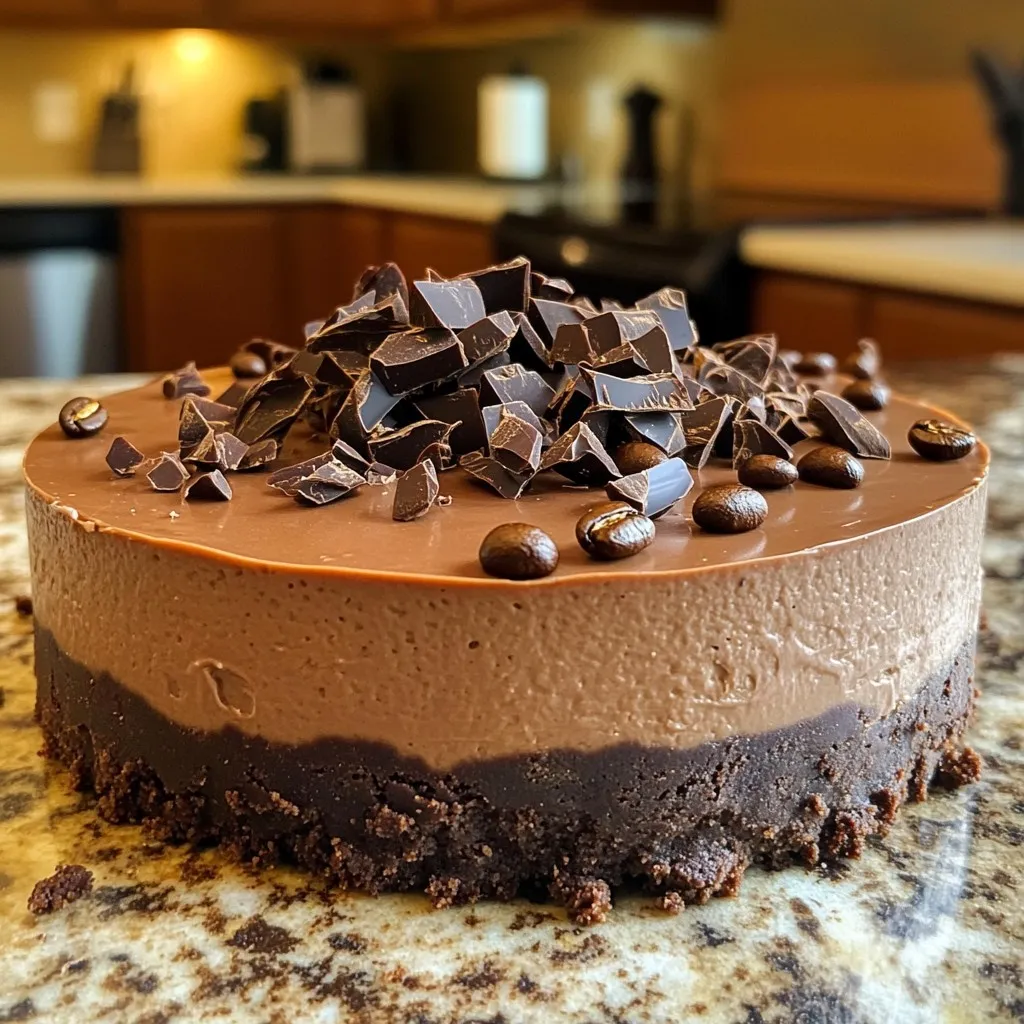
These ingredients create a creamy, rich cheesecake with a bold espresso flavor. The crust is made from chocolate cookie crumbs mixed with melted butter. This gives a tasty base that pairs well with the filling. The cream cheese adds creaminess, while the sour cream balances with a slight tang. The dark chocolate and espresso powder make this dessert truly special. You can enjoy it plain or with some lovely garnishes for a nice finish.
Step-by-Step Instructions
Preparing the Crust
To start, you need to make the crust. In a medium bowl, mix 1 ½ cups of chocolate cookie crumbs with 5 tablespoons of melted butter. Stir this well. You want every crumb to be coated in butter. This creates a moist mix. Next, grab a 9-inch springform pan. Pour the crumb mixture into the pan. Use the back of a measuring cup or your fingers to press it down. You should have a nice, even layer. Now, place the crust in the fridge to chill while you make the filling.
Making the Filling
For the filling, take a large bowl and add 16 ounces of softened cream cheese. Use an electric mixer to beat it on medium speed. Aim for a creamy texture. This should take about 2-3 minutes. Then, slowly sprinkle in 1 cup of powdered sugar. Mix on low speed. You want no lumps! Next, add in ½ cup of sour cream. Blend it until smooth.
Now, in a small bowl, dissolve 1 tablespoon of instant espresso powder in hot water. Pour this into the cream cheese mix, along with 1 teaspoon of vanilla extract. Mix until just combined. Then, gradually fold in 8 ounces of melted dark chocolate. Use a spatula to blend until the color is uniform.
In another bowl, whip ½ cup of heavy cream until stiff peaks form. This takes about 3-5 minutes. Be careful not to over-whip! Gently fold the whipped cream into the chocolate espresso filling in three parts. Make sure to incorporate it well until you see no streaks.
Assembling the Cheesecake
Now it’s time to assemble! Pour the rich filling over the chilled crust. Use a spatula to smooth the top evenly. Cover the springform pan tightly with plastic wrap. Put it in the fridge for at least 4 hours. This helps the cheesecake set well. Once set, carefully remove the sides of the springform pan. For a touch of flair, you can garnish with chocolate shavings and espresso beans before serving. Enjoy your no-bake chocolate espresso cheesecake!
Tips & Tricks
Tips for Achieving the Perfect Cheesecake Texture
To create a smooth and creamy cheesecake, start with room-temperature cream cheese. Cold cream cheese can lead to lumps. Beat the cream cheese until it is silky before adding other ingredients. When folding in whipped cream, do it gently to keep the air in. This helps create a light texture. Chill the cheesecake for at least four hours. This time allows it to set properly.
Common Mistakes to Avoid
One common mistake is not chilling the crust enough. A warm crust can make the filling too soft. Another error is overmixing the filling. This can add too much air and change the texture. Avoid adding hot melted chocolate directly to the cream cheese. Let it cool slightly to prevent melting the filling. Lastly, don’t skip the espresso powder. It adds depth and richness to the flavor.
Recommended Tools & Equipment
You will need a 9-inch springform pan for this cheesecake. A medium mixing bowl is great for the crust. Use a large mixing bowl for the filling. An electric mixer helps achieve a smooth texture quickly. A spatula is handy for folding ingredients together. Finally, keep plastic wrap on hand to cover the cheesecake while it chills.
Variations
Flavor Combinations to Try
You can switch things up with fun flavors. Try adding orange zest for a citrusy kick. A pinch of cinnamon can give your cheesecake a warm spice. You might also mix in some mint extract for a fresh taste. Each twist makes the cheesecake unique and delightful.
Dietary Adjustments (Gluten-Free, Vegan)
To make this cheesecake gluten-free, use gluten-free chocolate cookies for the crust. For a vegan option, swap cream cheese for a plant-based cheese. Use coconut cream instead of heavy cream. Replace powdered sugar with a vegan sweetener. These adjustments keep the taste great while fitting diet needs.
Using Different Toppings
Toppings can change the look and taste of your cheesecake. Try fresh berries for a fruity touch. Shaved chocolate makes it look fancy and adds richness. You can also use crushed nuts for crunch. Drizzle with caramel or chocolate sauce for added sweetness.
Storage Info
Best Practices for Refrigeration
To keep your no-bake chocolate espresso cheesecake fresh, store it in the fridge. First, cover the cheesecake tightly with plastic wrap. This keeps moisture in and odors out. Place it on a flat surface to avoid any shifts. It’s best to eat the cheesecake within a few days for the best taste.
Freezing Instructions for Leftovers
If you have leftovers, you can freeze the cheesecake. Slice it into individual pieces for easy serving later. Wrap each slice in plastic wrap and then place them in a freezer-safe container. This way, you will protect it from freezer burn. When you’re ready to eat, thaw it in the fridge overnight for the best texture.
Shelf Life of No-Bake Cheesecake
The shelf life of your no-bake cheesecake is around 5 to 7 days in the fridge. However, if properly frozen, it can last up to 2 months. Just remember, the sooner you enjoy it, the better the flavor and texture.
FAQs
Can I use a different type of chocolate?
Yes, you can use milk chocolate or semi-sweet chocolate. Each type gives a different taste. Milk chocolate makes it sweeter, while semi-sweet brings a nice balance. You can also try white chocolate for a unique twist. Just keep in mind that the flavor will change.
How long does the cheesecake need to chill?
The cheesecake needs to chill for at least four hours. This time helps it set properly. If you can, chill it overnight. This extra time makes it even better. A well-chilled cheesecake is creamy and firm.
What can I substitute for sour cream?
You can use Greek yogurt or cream cheese instead of sour cream. Greek yogurt gives a similar tangy flavor. Cream cheese will make the filling richer and thicker. Both options work well in this recipe.
How to tell when the cheesecake is set?
To check if the cheesecake is set, gently touch the top. It should feel firm, not jiggly. If it still wobbles, give it more chilling time. Once set, you can easily cut and serve it.
This guide covered all aspects of making a no-bake chocolate espresso cheesecake. You learned about key ingredients, simple steps, and helpful tips to create the perfect dessert. I shared fun variations to suit different tastes. Remember to store your cheesecake properly to keep it fresh. With practice, you’ll make a delicious cheesecake every time. Enjoy impressing family and friends with your baking skills!


