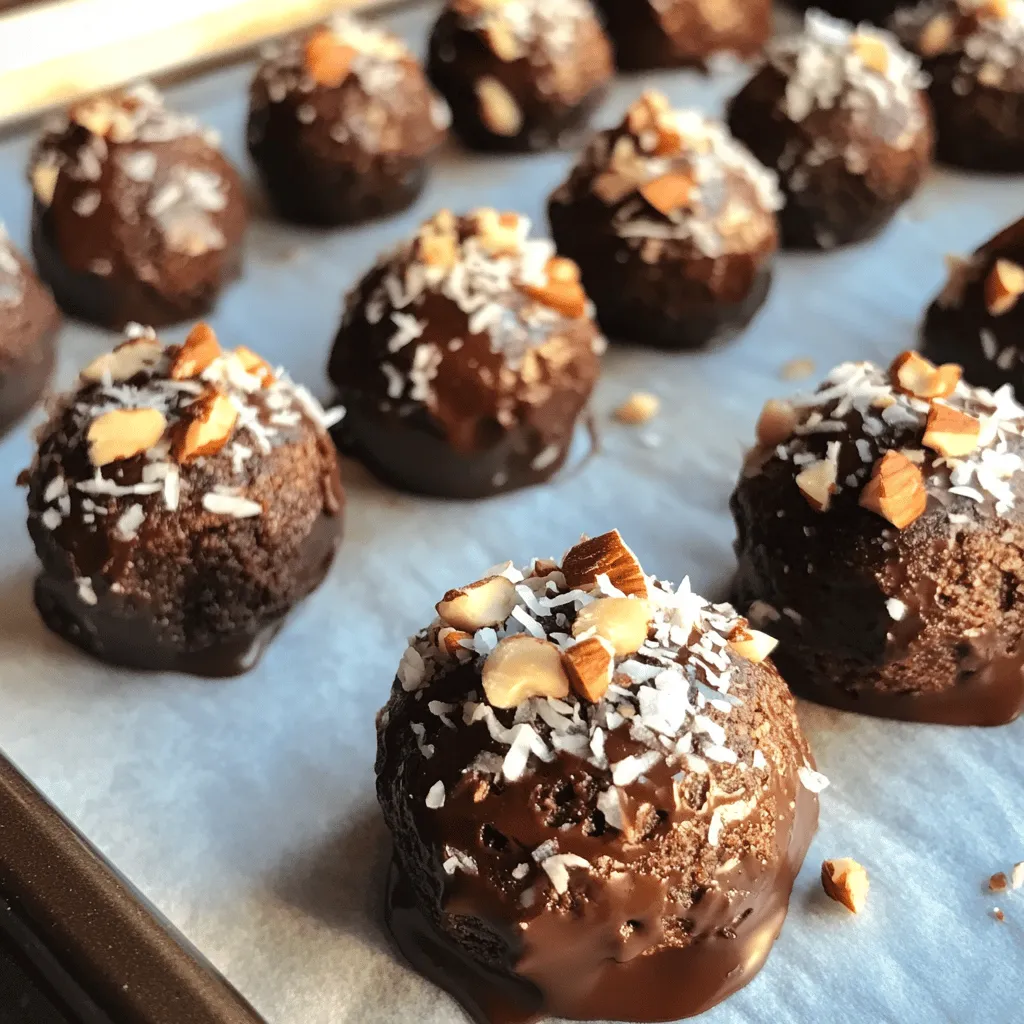
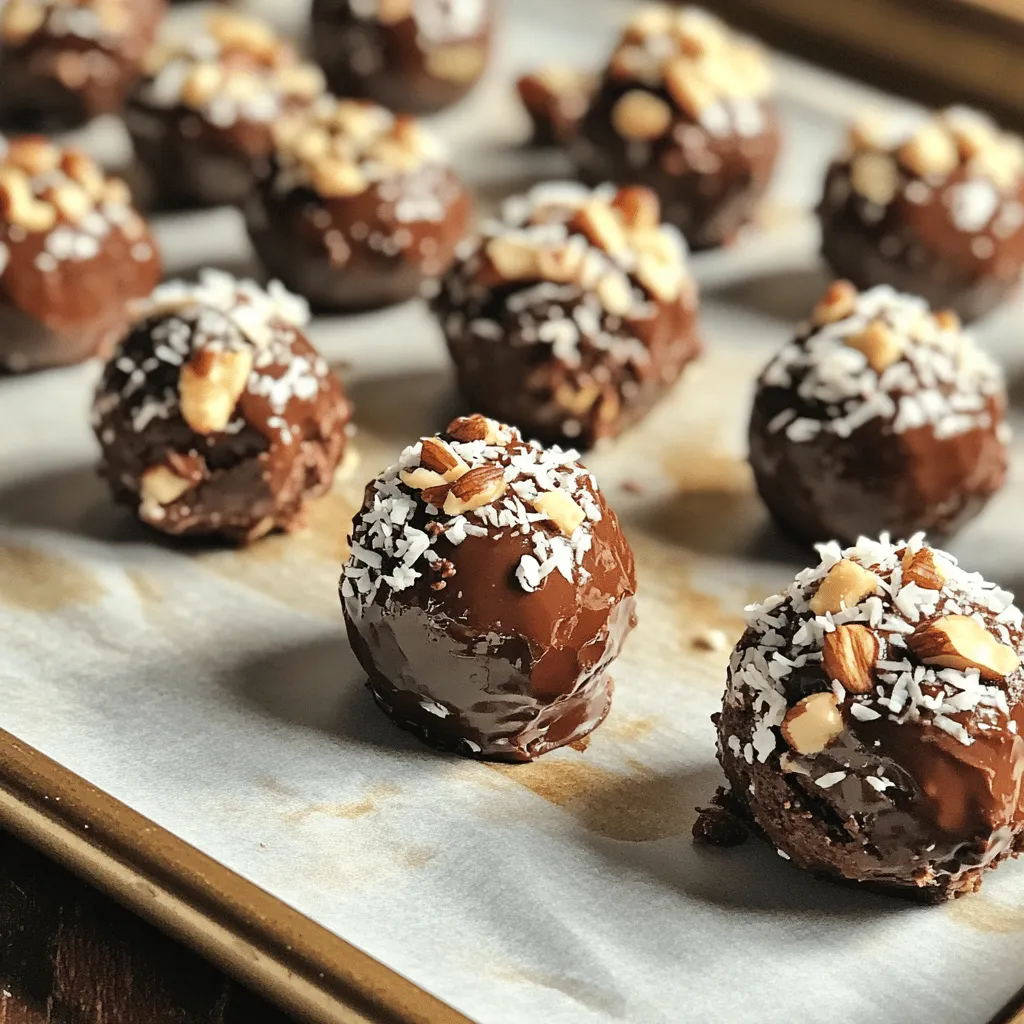
Looking for a quick and tasty dessert? You’ve found it! These No Bake Brownie Bites are easy to make and fun to eat. Whether you’re a busy parent or just want a sweet treat, this recipe fits the bill. With simple ingredients and no oven required, you’ll impress friends and family in no time. Let’s dive into the joy of making these delicious bites together!
Ingredients
List of Ingredients
To make the best no-bake brownie bites, gather these items:
– 1 cup raw walnuts
– 1 cup pitted Medjool dates
– 1/2 cup unsweetened cocoa powder
– 1/4 cup almond butter
– 1 teaspoon vanilla extract
– 1/4 teaspoon sea salt
– 1/2 cup chocolate chips (use dairy-free if preferred)
– Optional toppings: shredded coconut, chopped nuts, or colorful sprinkles
Ingredient Substitutions
You can swap ingredients based on your needs. If you have nut allergies, use sunflower seed butter instead of almond butter. You can also use any nuts you like in place of walnuts. For sweeteners, maple syrup or agave can replace Medjool dates. These swaps help you enjoy the recipe while accommodating different diets.
Importance of Fresh Ingredients
Using fresh ingredients makes a big difference. Fresh walnuts have a rich taste and crunchy texture. Medjool dates should be soft and sticky, adding just the right sweetness. High-quality cocoa powder gives a deep chocolate flavor. Fresh ingredients ensure your brownie bites taste amazing. Always check the dates on your items to get the best results.
Step-by-Step Instructions
Preparation Process Overview
To make these no-bake brownie bites, start with easy steps. First, gather your ingredients. You will need walnuts, Medjool dates, cocoa powder, almond butter, vanilla, sea salt, and chocolate chips. This recipe is quick and fun, taking just 15 minutes of prep time.
Detailed Instructions for Mixing
1. Place the raw walnuts and pitted Medjool dates into a food processor.
2. Pulse the mixture for 1-2 minutes. You want it crumbly but sticky.
3. Add the cocoa powder, almond butter, vanilla, and sea salt to the bowl.
4. Process these ingredients until they blend into a smooth mix.
5. Pause to scrape down the sides; this ensures all ingredients mix well.
6. With the processor running, gently fold in the chocolate chips. This adds delicious pockets of chocolate.
Rolling and Coating the Brownie Bites
1. Take small amounts of the mix and roll them into balls, about 1 inch wide.
2. Aim for a smooth outer layer as you shape each bite.
3. If you want extra flair, roll your bites in toppings like shredded coconut or chopped nuts.
4. Arrange the bites on a baking sheet lined with parchment paper.
5. Refrigerate for 30 minutes to firm them up for perfect bites.
These steps make it easy to create a tasty dessert that everyone will love!
Tips & Tricks
Perfecting the Texture
To get the right texture in your brownie bites, pulse the walnuts and dates well. You want them to be crumbly but still hold together when pressed. This should take about 1-2 minutes in the food processor. If the mix feels too dry, add a touch more almond butter. If it’s too wet, add a bit more cocoa powder. Achieving this balance is key for a great bite.
Common Mistakes to Avoid
One common mistake is not processing the mixture long enough. Make sure to blend until smooth. Also, don’t skip the step of scraping down the sides of the bowl. This ensures all ingredients mix well. Lastly, avoid rolling the bites too large. Aim for about 1 inch in diameter for the best texture and flavor.
Enhancing Flavor Profiles
You can boost the flavor of your brownie bites in several ways. Try adding a pinch of cinnamon or a splash of espresso powder to deepen the chocolate taste. You can also mix in different toppings, like chopped nuts or colorful sprinkles, to add texture. Don’t forget to use high-quality chocolate chips. They make a big difference in flavor.

Variations
Healthy Ingredient Swaps
You can easily make these brownie bites healthier. Swap raw walnuts for raw almonds. They still give a nice crunch. Use cashew butter instead of almond butter. This adds a creamier texture. If you want to cut sugar, replace Medjool dates with mashed bananas. This keeps the sweetness while adding some nutrients.
Flavor Additions
You can spice things up with some added flavors. A pinch of cinnamon gives a warm touch. Add a dash of sea salt for a nice contrast. You can also use almond or peppermint extract instead of vanilla. This will change the taste and make it unique. For a richer chocolate flavor, try adding a tablespoon of espresso powder. It enhances the cocoa without making it taste like coffee.
Themed Versions
Get creative by making themed brownie bites for holidays. For Halloween, roll them in orange and black sprinkles. For Christmas, dust them with powdered sugar for a snowy effect. You can shape them into hearts for Valentine’s Day. For summer, mix in some crushed freeze-dried strawberries for a fruity twist. Each theme can make your dessert even more fun and festive!
Storage Info
Best Storage Practices
To store your no-bake brownie bites, first let them cool in the fridge. Use an airtight container to keep them fresh. You can layer the bites with parchment paper to prevent sticking. Keeping them in the fridge helps maintain their texture and taste.
How to Freeze Brownie Bites
If you want to save some for later, freezing is a great option. Place the brownie bites on a baking sheet. Freeze them for about 1 hour until they are firm. Then, transfer them to an airtight container or freezer bag. This way, they’ll last several months without losing flavor.
Shelf Life and Freshness Tips
These brownie bites can last in the fridge for about a week. To enjoy them at their best, try to eat them within the first few days. If you notice any changes in texture or smell, it’s best to throw them away. Always trust your senses to judge freshness.
FAQs
Can I make these brownie bites vegan?
Yes, you can make these brownie bites vegan. The recipe already uses plant-based ingredients. Just choose dairy-free chocolate chips. This keeps the bites vegan-friendly while still being delicious.
What can I substitute for almond butter?
You can use other nut butters. Peanut butter works well too. If you want a nut-free option, try sunflower seed butter. Each choice gives a unique flavor.
How long do no-bake brownie bites last in the fridge?
These brownie bites can last up to one week in the fridge. Just store them in an airtight container. This keeps them fresh and tasty for longer.
Can I add extra toppings?
Absolutely! You can add toppings like shredded coconut or colorful sprinkles. Chopped nuts also add a nice crunch. Get creative with your favorite toppings!
Are these brownie bites gluten-free?
Yes, these brownie bites are gluten-free. They do not contain any flour. All ingredients used are naturally gluten-free, making them safe for those who avoid gluten.
Can I use different nuts?
Yes! While walnuts are great, you can use cashews or pecans. Each nut brings its own flavor and texture to the brownie bites. Experiment to find your favorite.
Do I need a food processor?
A food processor makes mixing easy. It helps blend the ingredients quickly. If you don’t have one, you can mash everything by hand, but it will take longer.
Can I make these brownie bites ahead of time?
Yes, you can prepare them a day or two in advance. Just keep them in the fridge until you’re ready to serve. This saves time for parties or gatherings.
How can I make these brownie bites sweeter?
If you want sweeter bites, add more dates. You can also drizzle a little maple syrup into the mix. Just remember to adjust the texture as needed.
In this post, we explored how to make delicious brownie bites. We discussed key ingredients, their substitutes, and the importance of freshness. You learned a step-by-step guide for mixing and rolling. We shared tips to avoid mistakes and enhance flavors. Additionally, we covered healthy swaps and themed variations. Finally, we offered storage tips to keep your treats fresh. Remember, great brownies start with good ingredients and care. Happy baking!


