No-Bake Biscoff Pumpkin Cheesecake Bites Delightful Treat

WANT TO SAVE THIS RECIPE?

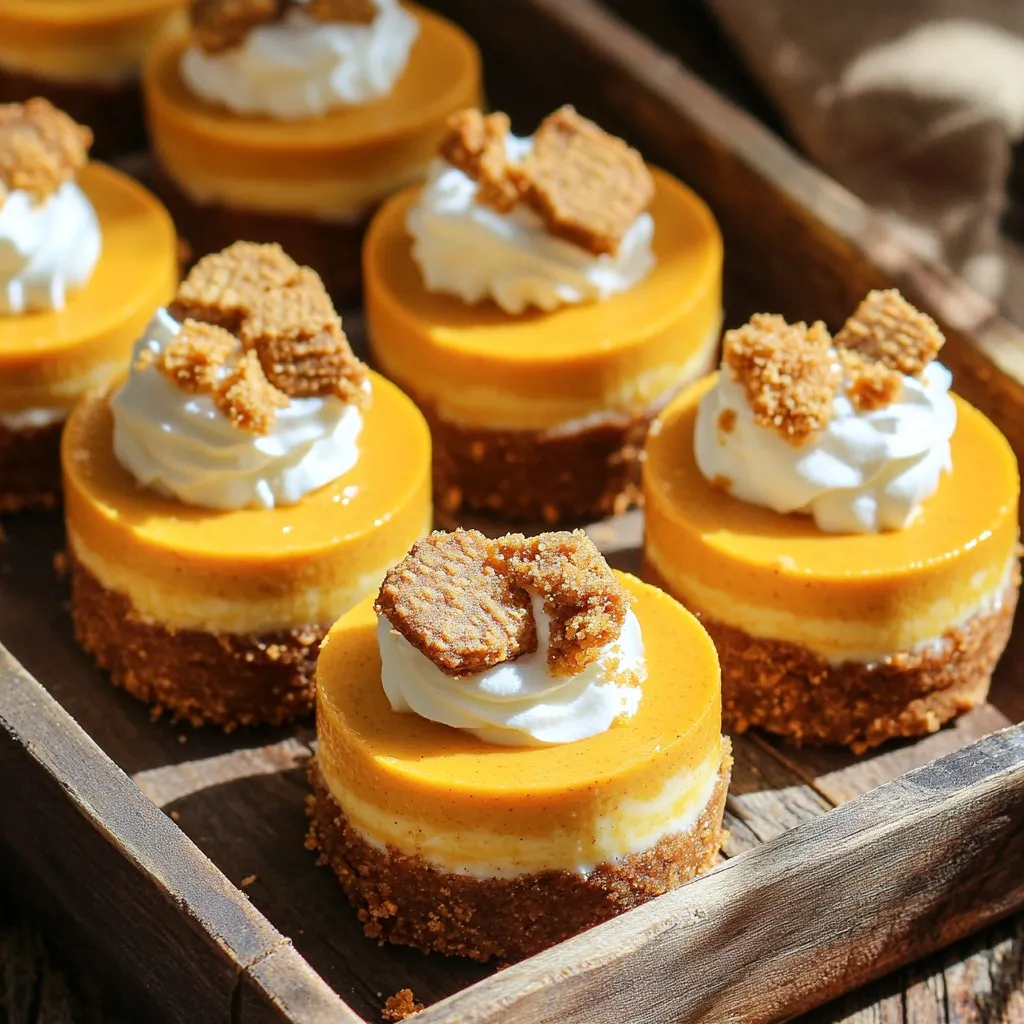
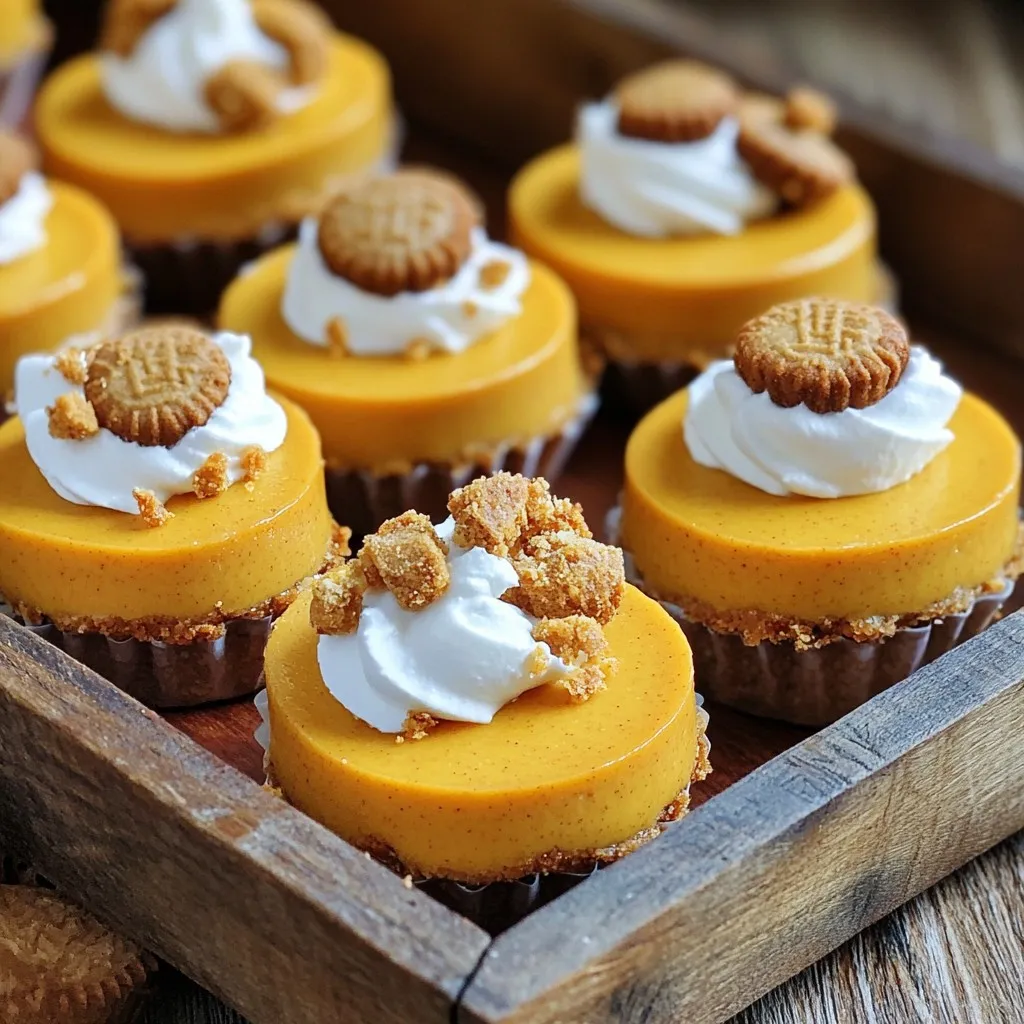
Get ready to indulge in a sweet and easy treat! My No-Bake Biscoff Pumpkin Cheesecake Bites bring together the warmth of pumpkin and the spice of Biscoff cookies, perfect for any fall gathering. With simple ingredients and quick steps, you can impress friends and family. Whether you enjoy a rich dessert or need a fun snack, these bites are a must-try. Let’s get started on this delightful recipe!

Ingredients

Essential Ingredients for No-Bake Biscoff Pumpkin Cheesecake Bites

To make these bites, gather these key ingredients:

– 1 cup Biscoff cookies, finely crushed

– 1/2 cup unsalted butter, melted

– 1 cup cream cheese, softened to room temperature

– 1 cup pumpkin puree (canned or homemade)

– 1/2 cup powdered sugar

– 1 teaspoon vanilla extract

– 1 teaspoon pumpkin pie spice

– A pinch of salt

Each ingredient plays an important role in the flavor and texture. The Biscoff cookies give a sweet, spiced base. Cream cheese and pumpkin provide creaminess and richness. The spices add warmth and depth.

Optional Ingredients for Garnish

For a little extra flair, consider these garnishes:

– Additional Biscoff cookies, crumbled

– Whipped cream

Crumbling extra Biscoff cookies adds a crunchy texture. Whipped cream makes the bites even creamier. These add-ons enhance the visual appeal and taste.

Ingredient Substitutions

If you need substitutions, here are some ideas:

– Use graham crackers instead of Biscoff cookies for the crust.

– Swap cream cheese with Greek yogurt for a lighter option.

– Replace powdered sugar with honey or maple syrup for natural sweetness.

These substitutions can change the flavor slightly but will still create a tasty treat. Feel free to experiment based on your preferences or dietary needs.

Step-by-Step Instructions

Preparing the Crust

To make the crust, start with 1 cup of Biscoff cookies. Crush them finely in a bowl. Next, melt 1/2 cup of unsalted butter. Mix the melted butter with the cookie crumbs until they are fully coated. This mix will hold together well. Use clean hands or a spoon to press the mix into mini muffin tins or silicone molds. Make sure the layer is even and firm. After pressing, chill them in the fridge. This helps the crust set while you make the filling.

Creating the Pumpkin Cheesecake Filling

Now it’s time for the filling. In a large bowl, add 1 cup of softened cream cheese. Use an electric mixer to beat it until it is smooth. Gradually add in 1 cup of pumpkin puree, 1/2 cup of powdered sugar, 1 teaspoon of vanilla extract, and 1 teaspoon of pumpkin pie spice. Don’t forget a pinch of salt! Mix everything together until it is light and fluffy. This filling should taste like fall!

Filling the Molds and Setting

Take your chilled crusts from the fridge. Carefully spoon the pumpkin cream cheese filling into each mold. Use a spatula to smooth the tops. Make sure each bite is filled to the top. Once filled, place the molds back in the fridge. Let them chill for about 2-3 hours. This helps them set and become firm. When they are ready, gently pop them out of the molds. If you used silicone molds, they should come out easily. Enjoy your delightful treats!

Tips & Tricks

Best Practices for Mixing and Chilling

When mixing your ingredients, always start with room-temperature cream cheese. This helps it blend smoothly. Use an electric mixer for the best results. Mix until the filling is light and fluffy. Once mixed, fill your molds right away to keep the mixture fresh. After filling, chill the molds for at least 2-3 hours. This step is key to setting the bites nicely.

How to Achieve the Perfect Texture

For a creamy texture, ensure you blend the filling well. The pumpkin puree and cream cheese should be fully combined. Use a spatula to pack the mixture into the molds. This helps prevent air pockets, which can make the bites uneven. If the bites seem too soft after chilling, they may need more time in the fridge.

Serving Suggestions

Serve these bites on a colorful platter for a festive look. Crumble extra Biscoff cookies on top for added crunch. You can also add a dollop of whipped cream for extra creaminess. If you’re feeling creative, sprinkle some pumpkin pie spice around the platter. This makes for a stunning presentation that will impress your guests.

Variations

Flavored Variations

You can mix up the flavor of these bites easily. Try adding melted chocolate or maple syrup. To make chocolate Biscoff pumpkin cheesecake bites, stir in 1/4 cup of melted chocolate into the filling. For maple flavor, add 2 tablespoons of maple syrup instead of powdered sugar. Both options bring a sweet twist to the classic taste.

Dietary Modifications

If you need gluten-free options, swap Biscoff cookies for gluten-free cookies. Many brands offer gluten-free varieties that taste great. Use gluten-free flour if needed in your crust. This way, everyone can enjoy these cheesecake bites without worry.

Different Serving Styles

You can serve these bites in fun ways. Try layering the filling in clear cups for a parfait style. Just alternate layers of crust and cream cheese filling. You can also make a larger cheesecake in a pie dish. Adjust the chilling time and serve slices. Both styles add visual flair and make for a great presentation.

Storage Info

How to Store No-Bake Pumpkin Cheesecake Bites

To keep your no-bake pumpkin cheesecake bites fresh, place them in an airtight container. Make sure to layer parchment paper between bites to avoid sticking. Store them in the fridge. They stay tasty and ready for a quick treat.

Freezing Instructions for Longer Storage

If you want to save some bites for later, freezing works great. Simply place the bites in a freezer-safe container. You can also wrap them in plastic wrap for extra protection. They can stay frozen for up to three months. When you’re ready to enjoy, let them thaw in the fridge overnight.

Shelf Life and Best Practices

These cheesecake bites last about five days in the fridge. To keep them fresh, avoid leaving them out at room temperature for too long. I always recommend enjoying them chilled for the best taste and texture.

FAQs

Can I use homemade pumpkin puree instead of canned?

Yes, you can use homemade pumpkin puree. Just make sure it is smooth. If it’s too watery, it may make the filling runny. Drain any excess liquid before mixing it with the other ingredients. Homemade puree brings a fresh flavor that many love.

How can I make these cheesecake bites ahead of time?

You can prepare these cheesecake bites up to two days ahead. Just store them in the fridge after you fill the molds. This allows the flavors to meld and the bites to set properly. Keep them covered to stay fresh. They make a great treat ready for any gathering!

What can I substitute for cream cheese in this recipe?

If you want a dairy-free option, use a vegan cream cheese. Silken tofu blended until smooth is another choice. Both will give you a creamy texture. Just taste and adjust the sweetness if needed.

You learned the key ingredients for a tasty no-bake Biscoff pumpkin cheesecake. I shared tips for making the crust and filling, plus ways to serve it. Technical details on storage and variations keep your bites fresh and fun.

You can easily adapt the recipe to fit your tastes or needs. Enjoy making this dessert your own! It’s simple, fun, and perfect for any occasion.

To make these bites, gather these key ingredients: - 1 cup Biscoff cookies, finely crushed - 1/2 cup unsalted butter, melted - 1 cup cream cheese, softened to room temperature - 1 cup pumpkin puree (canned or homemade) - 1/2 cup powdered sugar - 1 teaspoon vanilla extract - 1 teaspoon pumpkin pie spice - A pinch of salt Each ingredient plays an important role in the flavor and texture. The Biscoff cookies give a sweet, spiced base. Cream cheese and pumpkin provide creaminess and richness. The spices add warmth and depth. For a little extra flair, consider these garnishes: - Additional Biscoff cookies, crumbled - Whipped cream Crumbling extra Biscoff cookies adds a crunchy texture. Whipped cream makes the bites even creamier. These add-ons enhance the visual appeal and taste. If you need substitutions, here are some ideas: - Use graham crackers instead of Biscoff cookies for the crust. - Swap cream cheese with Greek yogurt for a lighter option. - Replace powdered sugar with honey or maple syrup for natural sweetness. These substitutions can change the flavor slightly but will still create a tasty treat. Feel free to experiment based on your preferences or dietary needs. To make the crust, start with 1 cup of Biscoff cookies. Crush them finely in a bowl. Next, melt 1/2 cup of unsalted butter. Mix the melted butter with the cookie crumbs until they are fully coated. This mix will hold together well. Use clean hands or a spoon to press the mix into mini muffin tins or silicone molds. Make sure the layer is even and firm. After pressing, chill them in the fridge. This helps the crust set while you make the filling. Now it’s time for the filling. In a large bowl, add 1 cup of softened cream cheese. Use an electric mixer to beat it until it is smooth. Gradually add in 1 cup of pumpkin puree, 1/2 cup of powdered sugar, 1 teaspoon of vanilla extract, and 1 teaspoon of pumpkin pie spice. Don’t forget a pinch of salt! Mix everything together until it is light and fluffy. This filling should taste like fall! Take your chilled crusts from the fridge. Carefully spoon the pumpkin cream cheese filling into each mold. Use a spatula to smooth the tops. Make sure each bite is filled to the top. Once filled, place the molds back in the fridge. Let them chill for about 2-3 hours. This helps them set and become firm. When they are ready, gently pop them out of the molds. If you used silicone molds, they should come out easily. Enjoy your delightful treats! When mixing your ingredients, always start with room-temperature cream cheese. This helps it blend smoothly. Use an electric mixer for the best results. Mix until the filling is light and fluffy. Once mixed, fill your molds right away to keep the mixture fresh. After filling, chill the molds for at least 2-3 hours. This step is key to setting the bites nicely. For a creamy texture, ensure you blend the filling well. The pumpkin puree and cream cheese should be fully combined. Use a spatula to pack the mixture into the molds. This helps prevent air pockets, which can make the bites uneven. If the bites seem too soft after chilling, they may need more time in the fridge. Serve these bites on a colorful platter for a festive look. Crumble extra Biscoff cookies on top for added crunch. You can also add a dollop of whipped cream for extra creaminess. If you're feeling creative, sprinkle some pumpkin pie spice around the platter. This makes for a stunning presentation that will impress your guests. {{image_4}} You can mix up the flavor of these bites easily. Try adding melted chocolate or maple syrup. To make chocolate Biscoff pumpkin cheesecake bites, stir in 1/4 cup of melted chocolate into the filling. For maple flavor, add 2 tablespoons of maple syrup instead of powdered sugar. Both options bring a sweet twist to the classic taste. If you need gluten-free options, swap Biscoff cookies for gluten-free cookies. Many brands offer gluten-free varieties that taste great. Use gluten-free flour if needed in your crust. This way, everyone can enjoy these cheesecake bites without worry. You can serve these bites in fun ways. Try layering the filling in clear cups for a parfait style. Just alternate layers of crust and cream cheese filling. You can also make a larger cheesecake in a pie dish. Adjust the chilling time and serve slices. Both styles add visual flair and make for a great presentation. To keep your no-bake pumpkin cheesecake bites fresh, place them in an airtight container. Make sure to layer parchment paper between bites to avoid sticking. Store them in the fridge. They stay tasty and ready for a quick treat. If you want to save some bites for later, freezing works great. Simply place the bites in a freezer-safe container. You can also wrap them in plastic wrap for extra protection. They can stay frozen for up to three months. When you're ready to enjoy, let them thaw in the fridge overnight. These cheesecake bites last about five days in the fridge. To keep them fresh, avoid leaving them out at room temperature for too long. I always recommend enjoying them chilled for the best taste and texture. Yes, you can use homemade pumpkin puree. Just make sure it is smooth. If it's too watery, it may make the filling runny. Drain any excess liquid before mixing it with the other ingredients. Homemade puree brings a fresh flavor that many love. You can prepare these cheesecake bites up to two days ahead. Just store them in the fridge after you fill the molds. This allows the flavors to meld and the bites to set properly. Keep them covered to stay fresh. They make a great treat ready for any gathering! If you want a dairy-free option, use a vegan cream cheese. Silken tofu blended until smooth is another choice. Both will give you a creamy texture. Just taste and adjust the sweetness if needed. You learned the key ingredients for a tasty no-bake Biscoff pumpkin cheesecake. I shared tips for making the crust and filling, plus ways to serve it. Technical details on storage and variations keep your bites fresh and fun. You can easily adapt the recipe to fit your tastes or needs. Enjoy making this dessert your own! It's simple, fun, and perfect for any occasion.

No-Bake Biscoff Pumpkin Cheesecake Bites

Indulge in the sweet and spicy flavors of fall with these No-Bake Biscoff Pumpkin Cheesecake Bites! This easy recipe combines creamy pumpkin filling with a crunchy Biscoff cookie crust, perfect for any autumn gathering or cozy night in. Get ready to impress your friends and family with this delightful treat. Click through to explore the full recipe and make these delicious bites today!

Ingredients
  

1 cup Biscoff cookies, finely crushed

1/2 cup unsalted butter, melted

1 cup cream cheese, softened to room temperature

1 cup pumpkin puree (canned or homemade)

1/2 cup powdered sugar

1 teaspoon vanilla extract

1 teaspoon pumpkin pie spice

A pinch of salt

Additional Biscoff cookies for garnish

Instructions
 

Prepare the crust: In a medium mixing bowl, thoroughly combine the crushed Biscoff cookies with the melted butter. Ensure all the cookie crumbs are fully coated in butter for a cohesive crust.

    Form the base: Using clean hands or the back of a spoon, firmly press the cookie mixture into the bottom of mini muffin tins or silicone molds to form a solid crust layer. Once pressed, place the molds in the refrigerator to chill and set while you work on the filling.

      Make the filling: In a large mixing bowl, using an electric mixer, beat the softened cream cheese until smooth and creamy. Gradually add in the pumpkin puree, powdered sugar, vanilla extract, pumpkin pie spice, and a pinch of salt. Continue mixing until all ingredients are well combined, light, and fluffy.

        Fill the molds: Take the chilled crust from the refrigerator and evenly distribute the pumpkin cream cheese mixture into each mold. Use a spatula to smooth the tops for an attractive finish, ensuring each bite is filled to the brim.

          Chill to set: Carefully transfer the filled molds back to the refrigerator. Allow them to chill for a minimum of 2-3 hours, or until the cheesecake bites are firm to the touch and have set properly.

            Serve: Once fully chilled and set, gently pop the cheesecake bites out of the molds; if using silicone molds, they should come out easily.

              Garnish: For a delightful finishing touch, crumble extra Biscoff cookies on top of each cheesecake bite. Optionally, serve with a dollop of whipped cream for extra creaminess and elegance.

                Prep Time: 15 minutes | Total Time: 3 hours 15 minutes | Servings: 12 bites

                  - Presentation Tips: Arrange the cheesecake bites on a decorative platter. For an extra festive touch, sprinkle a little extra pumpkin pie spice around them on the platter and add a few whole Biscoff cookies for garnish.

                    WANT TO SAVE THIS RECIPE?