
Do you crave a sweet treat that’s easy to make and absolutely delicious? Look no further! This No-Bake Biscoff Cheesecake combines creamy goodness with the unique flavor of Biscoff biscuits. Whether you’re a kitchen pro or a beginner, this simple recipe will wow your friends and family. Let’s dive into the ingredients and tools you need to create this heavenly dessert in no time!
Why I Love This Recipe
- Decadent Flavor: This cheesecake combines the rich, caramel-like taste of Biscoff with the creaminess of cheesecake, creating an indulgent dessert experience.
- No-Bake Convenience: With no baking required, this recipe is perfect for hot days or when you want a quick yet impressive dessert.
- Easy Preparation: The simple steps make it accessible for all skill levels, ensuring everyone can enjoy this delicious treat.
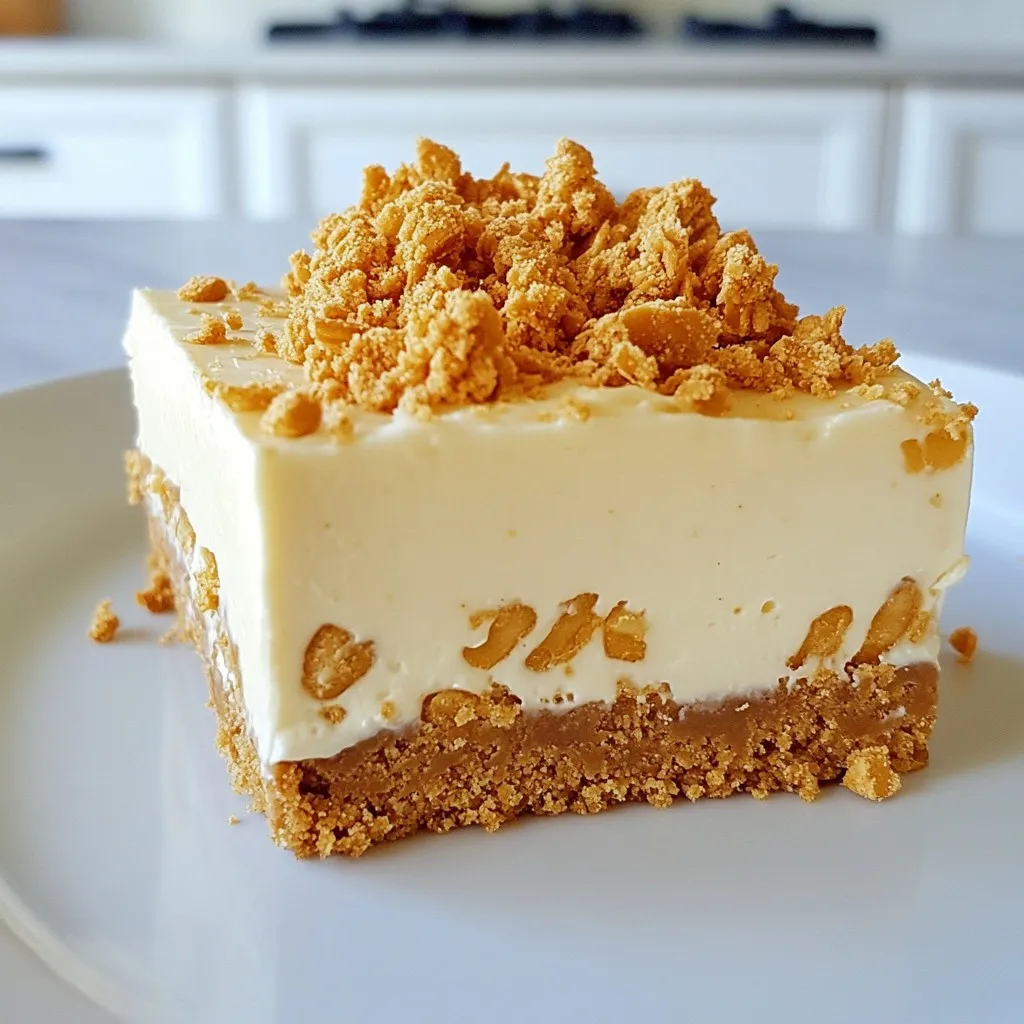
- Beautiful Presentation: Garnished with crushed Biscoff biscuits, this cheesecake is not only delicious but also visually appealing, making it a showstopper at any gathering.
Ingredients
Main Ingredients
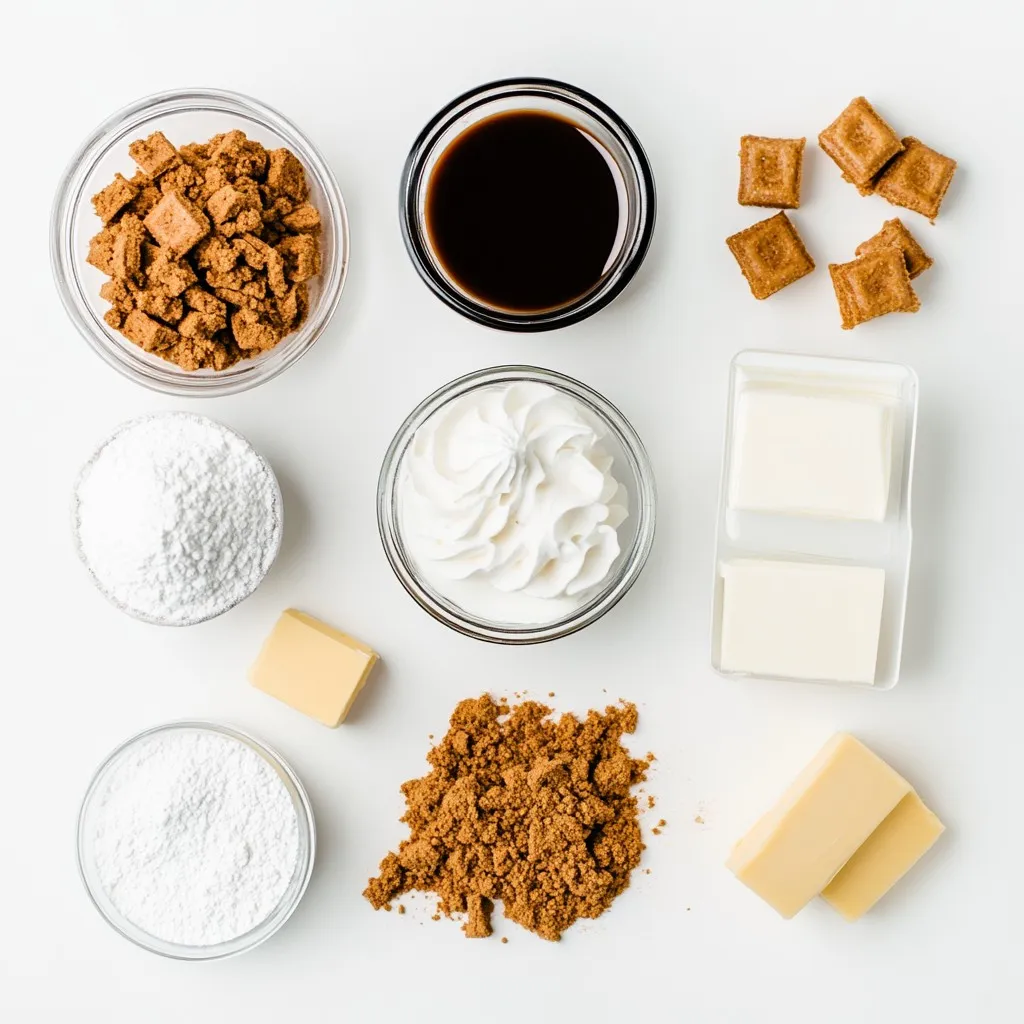
– 250g Biscoff biscuits, finely crushed
– 100g unsalted butter, melted and cooled
– 500g cream cheese, brought to room temperature
– 200ml heavy whipping cream, chilled
– 100g powdered sugar
– 120g Biscoff spread
– 1 teaspoon pure vanilla extract
Optional Ingredients
– Extra Biscoff biscuits for garnish
– Biscoff spread
Kitchen Tools Needed
– Springform pan
– Electric mixer
– Mixing bowls
When making this no-bake Biscoff cheesecake, I start with the key ingredients. The Biscoff biscuits create a sweet, crunchy base that I simply love. I crush them finely to help form a solid crust. Then, I melt unsalted butter and mix it with the crushed biscuits. This combination gives the crust a rich flavor.
Next, I focus on the filling. Cream cheese is a must for that creamy, smooth texture. I let it warm up to room temperature first. This helps it blend easily. I also whip chilled heavy cream for lightness. The whipped cream adds airiness to the filling. Don’t forget the powdered sugar and Biscoff spread! They bring sweetness and that signature cookie flavor.
Optional ingredients can add a fun touch. I sometimes crush extra Biscoff biscuits for garnish. A drizzle of Biscoff spread on top makes it look pretty and taste even better.
For kitchen tools, I grab a springform pan for easy removal. An electric mixer helps me beat everything smoothly. Mixing bowls are essential for keeping things organized. With these ingredients and tools ready, you are on your way to making a delicious cheesecake!
Step-by-Step Instructions
Preparing the Crust
– First, take 250g of Biscoff biscuits and crush them finely.
– In a bowl, mix the crushed biscuits with 100g of melted butter.
– Stir until it looks like wet sand.
– Press this mixture into the bottom of a 9-inch springform pan.
– Chill the crust in the fridge for 10-15 minutes while you get ready for the filling.
Making the Cheesecake Filling
– In a large bowl, beat 500g of cream cheese with an electric mixer.
– Mix on medium speed until smooth, about 2-3 minutes.
– Gradually add 100g of powdered sugar, 120g of Biscoff spread, and 1 teaspoon of vanilla extract.
– Blend well until everything is creamy and smooth.
Folding in the Whipped Cream
– In a clean bowl, whip 200ml of heavy whipping cream until stiff peaks form.
– This should take about 3-4 minutes.
– Carefully fold the whipped cream into the cream cheese mixture in three parts.
– Use a spatula to combine gently. Don’t deflate the whipped cream; keep it airy.
Assembling the Cheesecake
– Pour the creamy cheesecake filling over the chilled crust.
– Spread it evenly with a spatula for a smooth top.
– Cover the cheesecake with plastic wrap or foil.
– Refrigerate for at least 4 hours or overnight for the best set.
Tips & Tricks
Cream Cheese Preparation
Make sure your cream cheese is at room temperature. Cold cream cheese is hard to mix. It can cause lumps in your cheesecake. To soften it, leave it out for about 30 minutes. You can also cut it into small pieces. This helps it warm up faster.
Whipping Cream Technique
For perfect stiff peaks, use chilled heavy cream. Cold cream whips better than warm cream. Start mixing at low speed, then increase to medium. Whip for about 3 to 4 minutes. Stop once you see stiff peaks form. Be careful not to over-whip. Over-whipped cream can turn grainy.
Setting the Cheesecake
Chilling time is key for a firm cheesecake. After you pour the filling onto the crust, cover it well. Use plastic wrap or foil so it doesn’t absorb smells. Chill for at least 4 hours. For the best texture, let it set overnight. This makes the cheesecake slice cleanly and taste great.
Pro Tips
- Chill Your Ingredients: Ensure your cream cheese and heavy cream are at room temperature and chilled respectively for a smoother filling and better texture.
- Don’t Rush the Whipping: Whip the heavy cream until stiff peaks form, which will give your cheesecake a light and airy texture. Be careful not to overwhip, as it can become grainy.
- Use a Springform Pan: A springform pan allows for easy removal of the cheesecake without damaging its structure, ensuring a beautiful presentation.
- Let It Set Overnight: For the best flavor and texture, refrigerate the cheesecake overnight. This allows the flavors to meld and the cheesecake to firm up perfectly.
Variations
Chocolate Biscoff Cheesecake
You can add chocolate layers to your cheesecake for a rich twist. Melt some dark or milk chocolate. Once it cools, swirl it into the cream cheese mixture. You can also pour a layer of melted chocolate on top before chilling. This adds a great flavor and looks fancy!
Fruit Topped Biscoff Cheesecake
Fresh fruits can brighten up your cheesecake. I love using berries like strawberries, blueberries, or raspberries. Simply slice the fruits and arrange them on top after chilling. You can even make a fruit sauce to drizzle over each slice. This adds a fresh taste and makes it colorful!
Mini Biscoff Cheesecakes
Making mini cheesecakes is fun and easy! Use muffin tins lined with cupcake liners. Press the crushed Biscoff mixture into each cup, just like the large cheesecake. Fill each with the cream cheese mixture. Chill them until set, then serve as cute individual treats. They are perfect for parties or snacks!
Storage Info
Refrigeration Guidelines
To keep your no-bake Biscoff cheesecake fresh, store it in the fridge. Use an airtight container or cover it well with plastic wrap. This way, it stays moist and delicious. The cool temperature helps maintain its creamy texture.
Freezing Instructions
If you want to save some for later, you can freeze the cheesecake. First, let it chill fully in the fridge. Then, carefully slice it into pieces. Wrap each slice in plastic wrap, then place them in a freezer bag. This helps prevent freezer burn. You can freeze it for up to three months.
Best By Recommendations
For the best taste and texture, enjoy your cheesecake within five days if stored in the fridge. If frozen, eat it within three months for the best flavor. Always check for any changes in smell or texture before serving.
FAQs
Can I use other types of cookies for the crust?
Yes, you can use other cookies. Some great options include:
– Graham crackers
– Oreos
– Digestive biscuits
– Vanilla wafers
These alternatives can add different flavors. Choose what you like best!
Is it necessary to chill overnight?
Chilling overnight is not required, but it helps. Here’s why:
– It allows the cheesecake to set fully.
– The flavors meld together better.
– The texture becomes creamier and firmer.
If you chill for at least 4 hours, you can still enjoy it, but overnight is best!
Can I make this cheesecake vegan?
Yes, you can make a vegan version. Here are some tips:
– Use vegan cream cheese instead of regular cream cheese.
– Substitute heavy cream with coconut cream.
– Use maple syrup or coconut sugar in place of powdered sugar.
These swaps keep the flavor while making it plant-based!
How long does it take to set the cheesecake?
The cheesecake needs at least 4 hours to set. For the best results:
– Chilling overnight is ideal.
– The longer it chills, the better the texture.
Plan for some wait time, but it will be worth it!
This cheesecake recipe uses Biscoff biscuits, cream cheese, and heavy cream for a rich treat. You learned how to make the crust, filling, and assembly, plus important tips for success. Variations let you customize your dessert, and storage info helps keep it fresh. I hope you feel ready to create this delicious cheesecake. Enjoy every bit


