
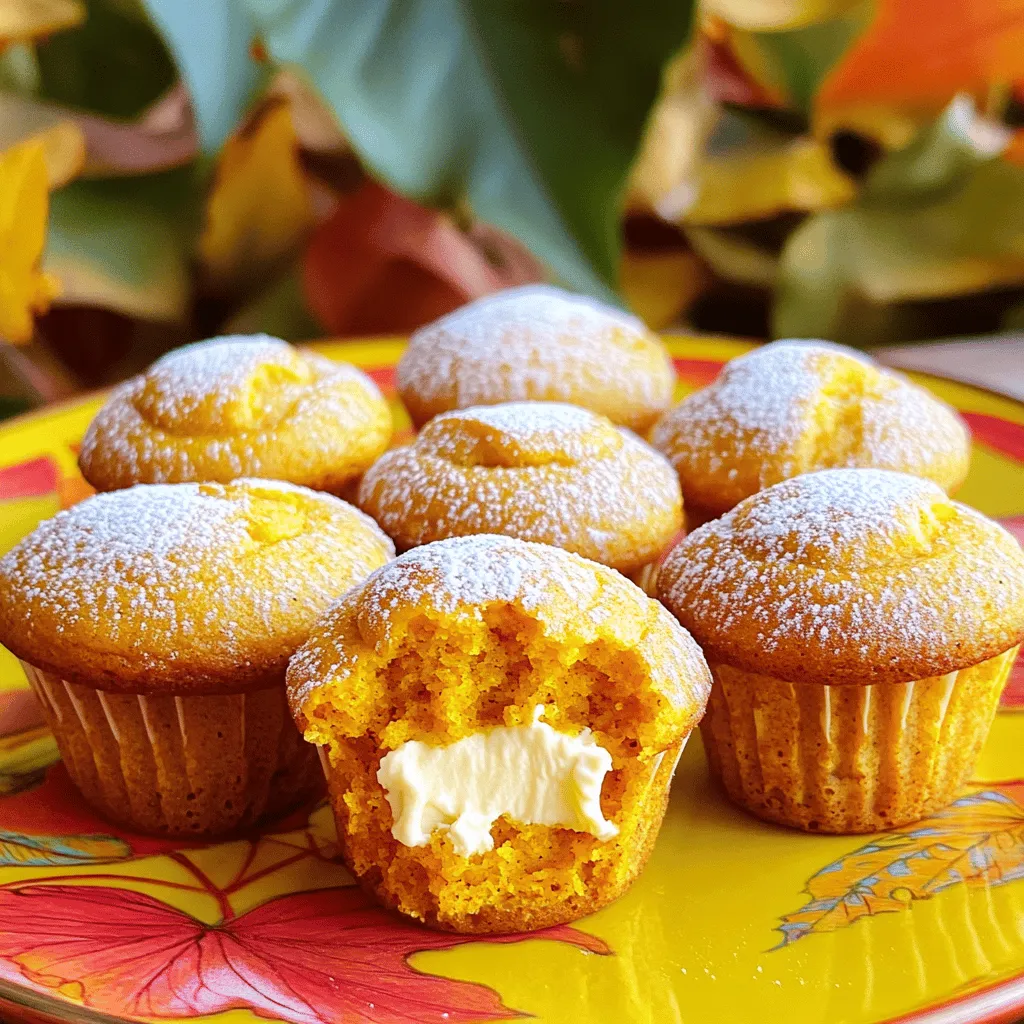
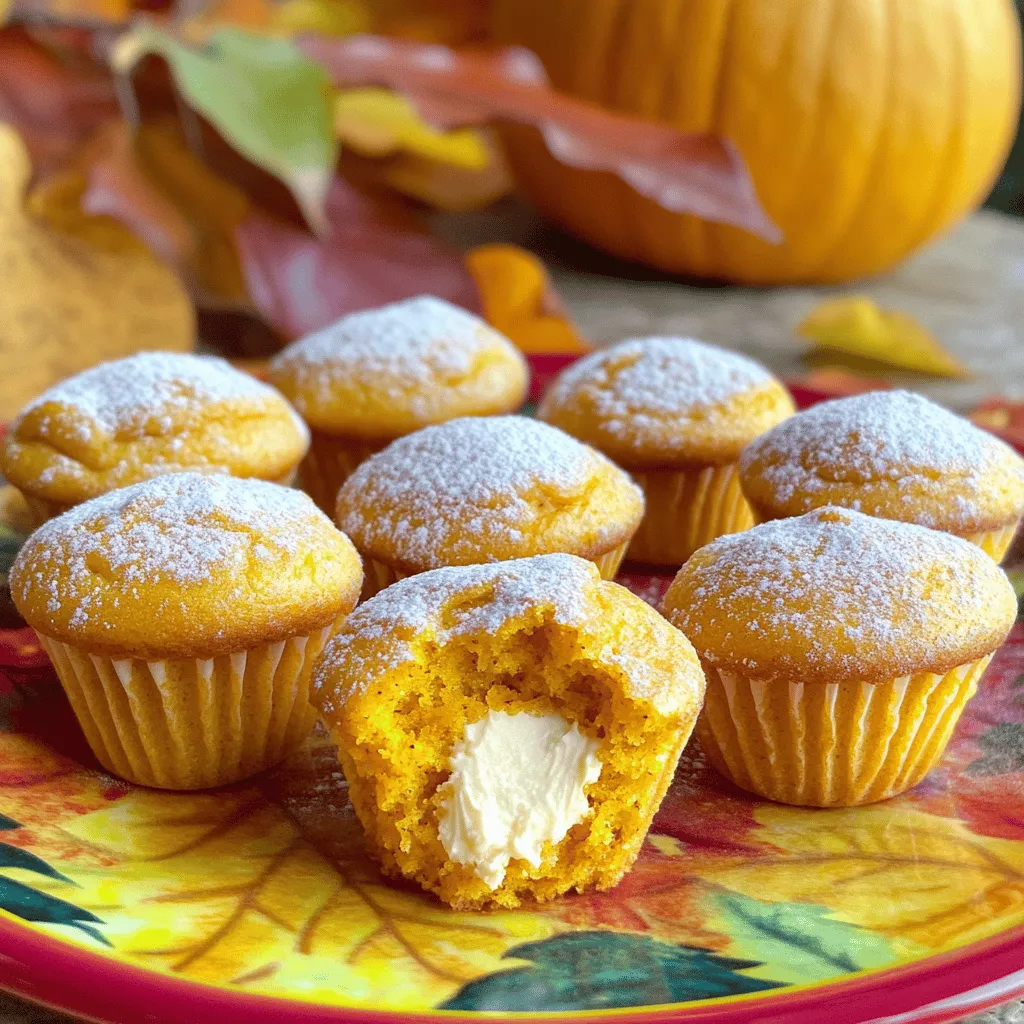
Fall is here, and what better way to celebrate than with mini pumpkin cream cheese muffins? These tasty bites are perfect for snacks, breakfast, or cozy gatherings. I’ll guide you through simple steps, share ingredient tips, and offer fun variations to make these goodies your own. Get ready to fill your kitchen with the warm scent of pumpkin spice and cream cheese bliss! Let’s dive in!
Ingredients
List of Ingredients
To make mini pumpkin cream cheese muffins, gather these simple ingredients:
– 1 cup pumpkin puree
– 1 cup all-purpose flour
– 1/2 cup brown sugar
– 1/4 cup granulated sugar
– 1/2 cup vegetable oil
– 2 large eggs
– 1 teaspoon baking soda
– 1/2 teaspoon baking powder
– 1 teaspoon pumpkin pie spice
– 1/2 teaspoon ground cinnamon
– 1/4 teaspoon salt
– 4 oz cream cheese, softened
– 1 tablespoon pure maple syrup
– 1 teaspoon vanilla extract
Recommended Brands for Best Results
For the best taste and texture, I recommend these brands:
– Pumpkin Puree: Libby’s is a great choice for rich flavor.
– Flour: King Arthur Flour offers consistent quality.
– Sugar: Domino is a trusted brand for both brown and granulated sugar.
– Cream Cheese: Philadelphia cream cheese has a smooth texture that works well in recipes.
– Maple Syrup: Use pure maple syrup from Grade A for the best sweetness.
Substitutions and Allergens
If you have dietary needs, consider these substitutions:
– Flour: Use almond or gluten-free flour for a gluten-free option.
– Sugar: Coconut sugar or honey can replace brown and granulated sugar.
– Eggs: Replace eggs with flaxseed meal mixed with water for a vegan option.
– Dairy: Use dairy-free cream cheese for a non-dairy version.
Always check for allergens like nuts or gluten when preparing these muffins. Enjoy baking!
Step-by-Step Instructions
Preparing the Oven and Muffin Tin
First, set your oven to 350°F (175°C). This is the perfect temperature for baking. Next, grab a mini muffin tin. You can use paper liners to line each cup or grease them lightly with oil. This stops the muffins from sticking.
Mixing Wet Ingredients
In a large bowl, combine the pumpkin puree, vegetable oil, brown sugar, granulated sugar, eggs, and vanilla extract. Use a whisk to mix them well. You want the mixture to be smooth. This step gives the muffins their rich flavor and moist texture.
Combining Dry Ingredients
In another bowl, sift the all-purpose flour, baking soda, baking powder, pumpkin pie spice, ground cinnamon, and salt. Sifting helps mix the ingredients and keeps the muffins light. Make sure there are no lumps in the dry mix.
Blending Wet and Dry Mixtures
Now, add the dry ingredients to the wet mix. Use a spatula to gently fold the two mixtures together. Be careful not to overmix. If you do, your muffins may turn out dense. You want a light and fluffy texture.
Preparing the Cream Cheese Filling
In a small bowl, blend the softened cream cheese with the maple syrup and a pinch of ground cinnamon. Mix until it is creamy and smooth. This filling adds a delicious surprise inside each muffin.
Assembling the Muffins
Spoon the pumpkin batter into each muffin cup until they are about halfway full. Then, add a small dollop of the cream cheese mixture in the center of each cup. Finally, top them off with more pumpkin batter to cover the filling completely.
Baking the Muffins
Place the muffin tin in the oven and bake for 12-15 minutes. To check for doneness, insert a toothpick into the center of a muffin. If it comes out clean, the muffins are ready.
Cooling Process
Once they are baked, let the muffins cool in the tin for about 5 minutes. This helps them firm up. Then, transfer them to a wire rack to cool completely. This step is important to keep them from getting soggy.
Tips & Tricks
Common Mistakes to Avoid
When baking mini pumpkin cream cheese muffins, avoid overmixing the batter. This can make your muffins dense. Mix just until you see no dry flour. Another mistake is skipping the cooling step. Letting them cool helps the flavors develop. Lastly, don’t overfill the muffin cups. Filling them halfway allows room for the muffins to rise properly.
Best Practices for Perfect Muffins
Use fresh pumpkin puree for the best taste. If you’re unsure, check for a bright orange color. For a fluffy texture, sift your dry ingredients before mixing. This helps incorporate air and ensures even rising. Also, always preheat your oven. This step ensures even cooking and a nice, golden crust.
Decorating Suggestions
To make your muffins look extra special, dust them with powdered sugar after cooling. A light sprinkle adds charm. Consider adding a small dollop of whipped cream on the side for a treat. You can also top the muffins with chopped nuts or a drizzle of caramel. These little touches make your muffins stand out!
Variations
Add-ins for Extra Flavor
To make your mini pumpkin cream cheese muffins even better, you can add fun mix-ins! Try adding:
– 1/2 cup chopped walnuts or pecans
– 1/2 cup chocolate chips
– 1/2 cup dried cranberries or raisins
– 1/4 cup shredded coconut
These add-ins give your muffins a new twist. For example, chocolate chips add sweetness, while nuts bring crunch. Mix any of these into your batter before baking.
Gluten-Free or Vegan Alternatives
If you need gluten-free muffins, swap the all-purpose flour for a gluten-free blend. Look for one that already has baking powder and baking soda. For a vegan version, use these changes:
– Replace eggs with 1/4 cup unsweetened applesauce per egg.
– Use plant-based cream cheese for the filling.
– Substitute vegetable oil with coconut oil or any neutral oil.
These swaps keep your muffins tasty and enjoyable for everyone.
Seasonal Variations
Adapting your muffins for the season can be fun! In fall, add a pinch of nutmeg or allspice. In winter, try peppermint extract for a holiday twist. In spring, mix in some lemon zest for brightness. In summer, add fresh berries for a fruity touch. Changing the spices and flavors keeps your muffins exciting all year round!
Storage Info
How to Store Leftover Muffins
After you bake your mini pumpkin cream cheese muffins, let them cool completely. Place the muffins in an airtight container. Store them at room temperature for up to three days. If you want to keep them fresh longer, consider refrigerating them. Just remember to let them warm up before eating!
Freezing Instructions
To freeze your muffins, follow these steps:
– Wrap each muffin tightly in plastic wrap.
– Place the wrapped muffins in a freezer bag or container.
– Label the bag with the date.
These muffins can stay fresh in the freezer for up to three months.
Reheating Tips
To enjoy your muffins again, you can reheat them easily:
– For the microwave, place a muffin on a plate. Heat for 15-20 seconds.
– For the oven, preheat to 350°F (175°C). Bake for 5-10 minutes.
This way, your muffins will taste fresh and yummy!
FAQs
Can I make these muffins ahead of time?
Yes, you can make these muffins ahead of time. They keep well for a few days. Store them in an airtight container at room temperature. You can also freeze them for longer storage.
How long do mini muffins last?
Mini muffins last about 3 to 5 days at room temperature. If stored in the fridge, they can last up to a week. Always check for any signs of spoilage before eating.
What’s the best way to thaw frozen muffins?
To thaw frozen muffins, place them in the fridge overnight. For a quicker method, microwave them for a few seconds. You can also leave them at room temperature for a couple of hours.
Can I use fresh pumpkin instead of puree?
Yes, you can use fresh pumpkin. First, cook it until soft and then puree it. Make sure it is not too watery, as this can change the muffin texture.
Can I double the recipe for a larger batch?
Absolutely, you can double the recipe. Just make sure to mix the wet and dry ingredients in larger bowls. Adjust baking time if needed when using larger pans.
This blog post covered how to make delicious muffins using simple steps. We explored the key ingredients, recommended brands, and potential substitutes. You learned step-by-step instructions, tips to avoid common mistakes, and fun ways to personalize your muffins. We also discussed storage options to keep them fresh.
When you try these muffins, enjoy the process and get creative in the kitchen. Happy baking!


