Mini Cheesecakes Delightful Treat for Any Occasion

WANT TO SAVE THIS RECIPE?

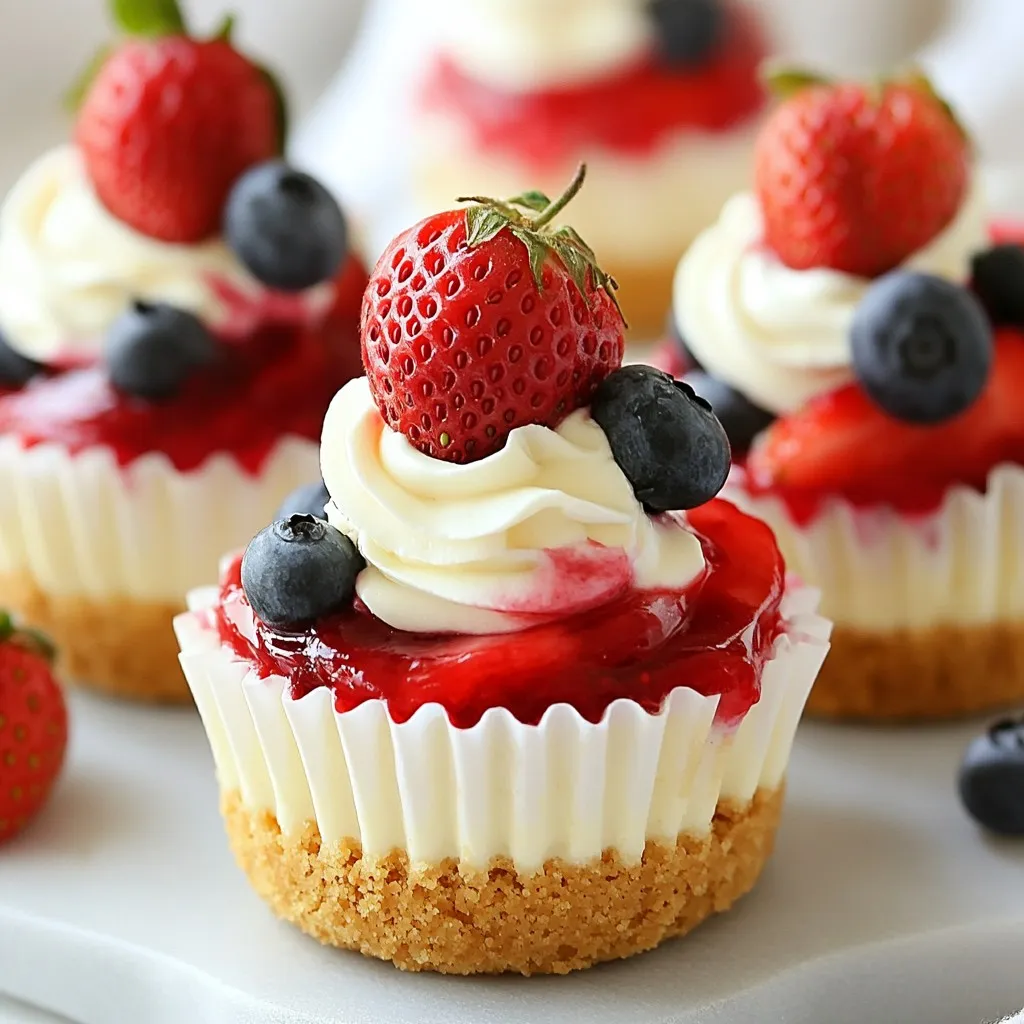
Looking for a sweet treat that impresses without a lot of fuss? Mini cheesecakes are your answer! These delightful bites are perfect for any occasion, whether you’re celebrating a birthday or enjoying a cozy night in. With a simple list of ingredients and easy steps, you can whip up these creamy desserts that everyone will love. Let’s dive in and create your new favorite dessert!

Why I Love This Recipe

  1. Perfectly Portion-Controlled: These mini cheesecakes are the ideal size for satisfying your sweet tooth without overindulging.
  2. Beautiful Presentation: The berry swirl creates a stunning visual that makes these desserts perfect for any occasion.
  3. Customizable Flavors: You can easily swap out the berries for your favorite fruits, making this recipe versatile for every season.
  4. Make-Ahead Delight: These cheesecakes can be made in advance, allowing you to enjoy stress-free entertaining.

Ingredients

Main Ingredients for Mini Cheesecakes

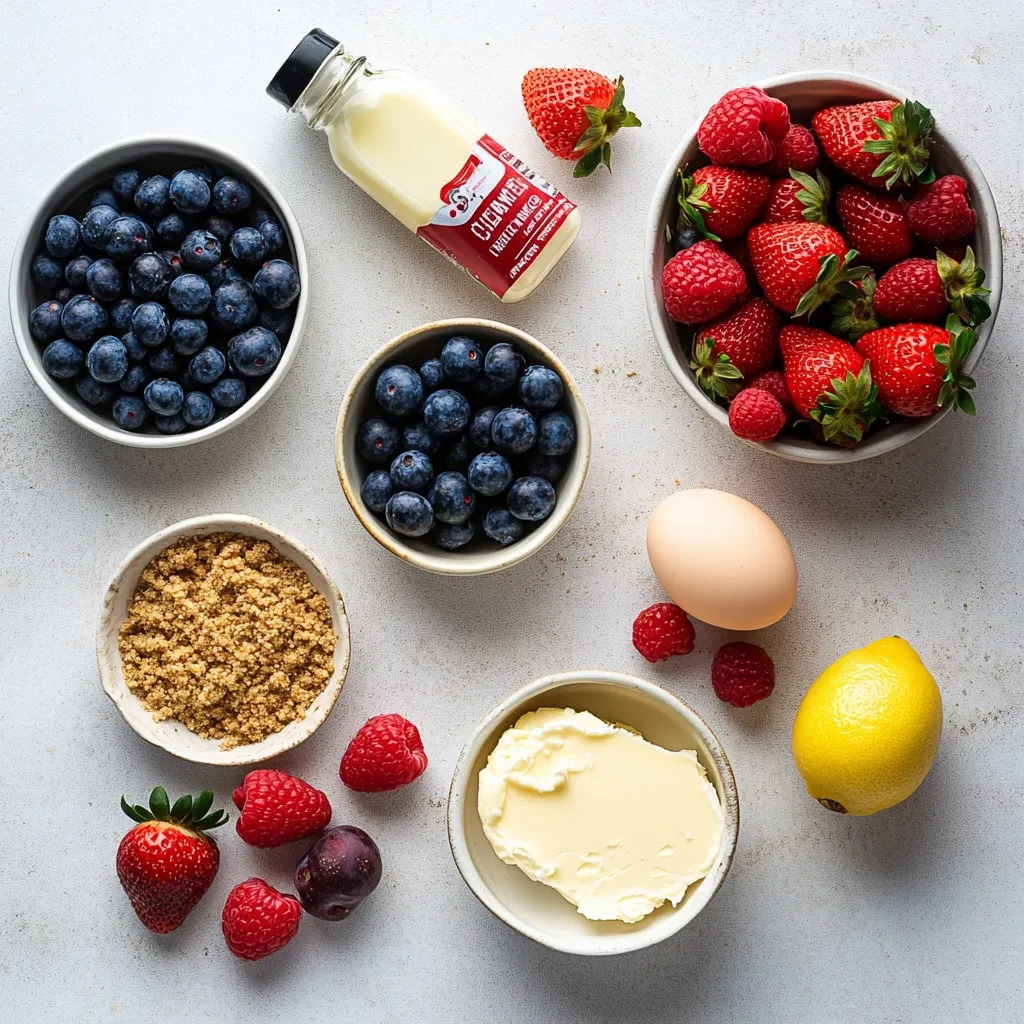
– 1 cup graham cracker crumbs

– 16 oz cream cheese, softened to room temperature

– 1 cup mixed fresh berries

For mini cheesecakes, the main ingredients create a creamy and rich dessert. I love using graham cracker crumbs for the crust. They give a nice sweet crunch. The cream cheese is the star of the show. It makes the filling smooth and rich. I add mixed fresh berries for a pop of flavor and color. Strawberries, blueberries, and raspberries work best. They add freshness and a hint of tartness.

Additional Ingredients for Berry Swirl

– 1/2 cup unsalted butter, melted

– 1 tablespoon fresh lemon juice

– 1 tablespoon cornstarch

The berry swirl adds a fun twist to your mini cheesecakes. I melt unsalted butter to mix with the graham cracker crumbs. This helps the crust hold together. The fresh lemon juice brightens up the berry flavor. It makes the taste more lively. Cornstarch thickens the berry mixture. This creates a lovely swirl that blends with the cream cheese.

Optional Toppings

– Whipped cream

– Additional fresh berries for garnish

Toppings make your mini cheesecakes look even more inviting. I often serve mine with whipped cream. It adds a light and airy feel. Fresh berries on top not only look pretty, but they also add extra flavor. You can mix and match these toppings for fun and tasty results.

Step-by-Step Instructions

Preparing the Crust

1. Preheat your oven to 325°F (160°C). Line a muffin tin with paper liners. This helps with easy removal later.

2. In a medium bowl, mix 1 cup of graham cracker crumbs and 1/4 cup of sugar. Pour in 1/2 cup of melted butter. Stir until the crumbs look like wet sand.

3. Take about one tablespoon of this mixture and press it down into each muffin cup. Use the back of a spoon to flatten it. Bake for 10 minutes. Let the crust cool completely.

Making the Cheesecake Filling

1. In a new bowl, beat 16 oz of softened cream cheese with a mixer. Make it smooth and creamy.

2. Gradually add 1 cup of sugar and 1 teaspoon of pure vanilla extract. Mix until it’s all combined.

3. Add 2 large eggs one at a time. Mix on low speed just until each egg is mixed in. Be careful not to overmix; this helps avoid cracks in your cheesecakes.

Creating the Berry Swirl

1. In a small saucepan, combine 1 cup of mixed fresh berries and 1 tablespoon of fresh lemon juice. Cook over medium heat. Stir gently until the berries soften, about 5 minutes.

2. Once the berries bubble, add 1 tablespoon of cornstarch. Stir until the mixture thickens. Remove it from heat and let it cool slightly.

3. Carefully pour the cream cheese mixture over the cooled crusts in the muffin tin. Fill each cup about two-thirds full.

4. Drop spoonfuls of the berry mixture on top of the cream cheese. Use a toothpick to swirl the berry mixture into the cream cheese for a beautiful marbled look.

5. Bake for 18-20 minutes. The centers should be set but still a bit jiggly. Let the cheesecakes cool to room temperature in the tin. Then, move them to the fridge to chill for at least 4 hours or overnight.

Tips & Tricks

Avoiding Cracks in Cheesecakes

To keep your mini cheesecakes crack-free, mix at low speed once you add the eggs. Overmixing can bring in too much air. Air makes cracks appear as the cheesecake bakes. After baking, cool the cheesecakes slowly at room temperature. Rapid temperature changes can also cause cracks.

Best Practices for Achieving Creamy Texture

For a smooth and creamy texture, use room temperature cream cheese. Cold cream cheese can lead to lumps. Beat it well until smooth before adding other ingredients. Chill your cheesecakes adequately before serving. A good chill helps the texture firm up nicely.

Presentation Tips

Serve your mini cheesecakes with a generous dollop of whipped cream and fresh berries. This adds color and a fresh taste. Use a decorative platter for serving. A beautiful display makes these treats even more inviting for guests.

Pro Tips

  1. Chill for Best Flavor: Allow the mini cheesecakes to chill overnight in the refrigerator. This not only enhances their flavor but also helps achieve the perfect creamy texture.
  2. Mix Berries Wisely: Use a variety of berries to create a colorful and flavorful swirl. Strawberries, blueberries, and raspberries complement each other beautifully.
  3. Avoid Overmixing: When combining the eggs with the cream cheese mixture, mix on low speed to prevent incorporating too much air, which can lead to cracks in your cheesecakes.
  4. Perfect Portioning: Use a cookie scoop to evenly distribute the cream cheese mixture and berry swirl for consistent sizes, ensuring even baking and presentation.

Variations

Flavor Variations

One great way to mix things up is by creating different flavors of mini cheesecakes. Here are two of my favorites:

Chocolate Mini Cheesecakes: Start with the same crust and cream cheese base. Melt dark chocolate and fold it into the cream cheese mix. This will give you a rich and creamy chocolate flavor that is hard to resist.

Pumpkin Spice Mini Cheesecakes: For a fall twist, add pumpkin puree and pumpkin spice to the cream cheese mixture. This gives you a warm, cozy flavor that is perfect for autumn gatherings.

Alternative Toppings

Toppings can make your mini cheesecakes even more delightful. Here are some tasty ideas:

Caramel sauce drizzled on top: A drizzle of warm caramel adds sweetness and a lovely look. It pairs well with both chocolate and plain cheesecakes.

Nut toppings for added crunch: Chopped nuts, like pecans or walnuts, give a nice crunch. They also add a nice contrast to the creamy texture of the cheesecake.

Gluten-Free Options

You can make these mini cheesecakes gluten-free with some easy swaps:

Use gluten-free graham crackers: Many brands offer gluten-free options. They work just like regular graham crackers in the crust.

Alternative crust options such as almond flour or oats: If you want to get creative, use almond flour or oats for the crust. Both options taste great and ensure everyone can enjoy these treats!

Storage Info

How to Store Mini Cheesecakes

To keep your mini cheesecakes fresh, store them in the fridge. Place the cheesecakes in an airtight container. Cover them with a lid or plastic wrap to prevent them from drying out. This keeps their creamy texture and rich flavor intact.

Freezing Instructions

You can freeze mini cheesecakes for longer storage. To do this, first, let them cool completely. Then, wrap each cheesecake in plastic wrap tightly. Place the wrapped cheesecakes in a freezer-safe container. To serve, thaw them in the fridge overnight. This helps maintain their texture.

Shelf Life

Mini cheesecakes last about one week in the fridge. After that, they may start to spoil. Look for signs like a sour smell or a change in texture. If you see any mold, it’s best to toss them. Enjoy your cheesecakes while they are fresh for the best taste!

FAQs

Can I make mini cheesecakes ahead of time?

Yes, you can make mini cheesecakes ahead of time. They taste even better after chilling. To prepare them in advance, bake and cool the cheesecakes. After cooling, cover them well with plastic wrap or store them in an airtight container. Refrigerate them for up to three days. If you want to store them longer, freeze them. Wrap each cheesecake in plastic wrap, then place them in a freezer-safe bag. They will stay fresh for up to two months.

How do I prevent the crust from getting soggy?

To keep your crust from getting soggy, bake it properly. Make sure to pre-bake the crust for about ten minutes. This helps it set. After baking, let it cool completely before adding the filling. Cooling allows the crust to harden. Also, avoid overfilling your cups with the cream cheese mixture. Leave a little space at the top. This helps the steam escape during baking, keeping the crust crisp.

What can I use if I don’t have muffin liners?

If you don’t have muffin liners, you have options. You can use parchment paper cut into circles. Just place the circles in the muffin tin to help with removal. Another choice is to grease the muffin tin well with butter or cooking spray. This method works well too. You can also use silicone muffin cups. They are reusable and help the cheesecakes pop out easily.

You learned how to make delicious mini cheesecakes with fresh berries. We covered the key ingredients for the crust and filling, plus tips for a creamy texture. I shared steps to create a perfect berry swirl and options for tasty variations. Storing your mini cheesecakes properly is easy with the right methods. With these techniques, you’ll impress everyone at your next gathering. Baking should be fun and rewarding, so enjoy every bite of your tasty trea

- 1 cup graham cracker crumbs - 16 oz cream cheese, softened to room temperature - 1 cup mixed fresh berries For mini cheesecakes, the main ingredients create a creamy and rich dessert. I love using graham cracker crumbs for the crust. They give a nice sweet crunch. The cream cheese is the star of the show. It makes the filling smooth and rich. I add mixed fresh berries for a pop of flavor and color. Strawberries, blueberries, and raspberries work best. They add freshness and a hint of tartness. - 1/2 cup unsalted butter, melted - 1 tablespoon fresh lemon juice - 1 tablespoon cornstarch The berry swirl adds a fun twist to your mini cheesecakes. I melt unsalted butter to mix with the graham cracker crumbs. This helps the crust hold together. The fresh lemon juice brightens up the berry flavor. It makes the taste more lively. Cornstarch thickens the berry mixture. This creates a lovely swirl that blends with the cream cheese. - Whipped cream - Additional fresh berries for garnish Toppings make your mini cheesecakes look even more inviting. I often serve mine with whipped cream. It adds a light and airy feel. Fresh berries on top not only look pretty, but they also add extra flavor. You can mix and match these toppings for fun and tasty results. {{ingredient_image_2}} 1. Preheat your oven to 325°F (160°C). Line a muffin tin with paper liners. This helps with easy removal later. 2. In a medium bowl, mix 1 cup of graham cracker crumbs and 1/4 cup of sugar. Pour in 1/2 cup of melted butter. Stir until the crumbs look like wet sand. 3. Take about one tablespoon of this mixture and press it down into each muffin cup. Use the back of a spoon to flatten it. Bake for 10 minutes. Let the crust cool completely. 1. In a new bowl, beat 16 oz of softened cream cheese with a mixer. Make it smooth and creamy. 2. Gradually add 1 cup of sugar and 1 teaspoon of pure vanilla extract. Mix until it’s all combined. 3. Add 2 large eggs one at a time. Mix on low speed just until each egg is mixed in. Be careful not to overmix; this helps avoid cracks in your cheesecakes. 1. In a small saucepan, combine 1 cup of mixed fresh berries and 1 tablespoon of fresh lemon juice. Cook over medium heat. Stir gently until the berries soften, about 5 minutes. 2. Once the berries bubble, add 1 tablespoon of cornstarch. Stir until the mixture thickens. Remove it from heat and let it cool slightly. 3. Carefully pour the cream cheese mixture over the cooled crusts in the muffin tin. Fill each cup about two-thirds full. 4. Drop spoonfuls of the berry mixture on top of the cream cheese. Use a toothpick to swirl the berry mixture into the cream cheese for a beautiful marbled look. 5. Bake for 18-20 minutes. The centers should be set but still a bit jiggly. Let the cheesecakes cool to room temperature in the tin. Then, move them to the fridge to chill for at least 4 hours or overnight. To keep your mini cheesecakes crack-free, mix at low speed once you add the eggs. Overmixing can bring in too much air. Air makes cracks appear as the cheesecake bakes. After baking, cool the cheesecakes slowly at room temperature. Rapid temperature changes can also cause cracks. For a smooth and creamy texture, use room temperature cream cheese. Cold cream cheese can lead to lumps. Beat it well until smooth before adding other ingredients. Chill your cheesecakes adequately before serving. A good chill helps the texture firm up nicely. Serve your mini cheesecakes with a generous dollop of whipped cream and fresh berries. This adds color and a fresh taste. Use a decorative platter for serving. A beautiful display makes these treats even more inviting for guests. Pro Tips Chill for Best Flavor: Allow the mini cheesecakes to chill overnight in the refrigerator. This not only enhances their flavor but also helps achieve the perfect creamy texture. Mix Berries Wisely: Use a variety of berries to create a colorful and flavorful swirl. Strawberries, blueberries, and raspberries complement each other beautifully. Avoid Overmixing: When combining the eggs with the cream cheese mixture, mix on low speed to prevent incorporating too much air, which can lead to cracks in your cheesecakes. Perfect Portioning: Use a cookie scoop to evenly distribute the cream cheese mixture and berry swirl for consistent sizes, ensuring even baking and presentation. {{image_4}} One great way to mix things up is by creating different flavors of mini cheesecakes. Here are two of my favorites: - Chocolate Mini Cheesecakes: Start with the same crust and cream cheese base. Melt dark chocolate and fold it into the cream cheese mix. This will give you a rich and creamy chocolate flavor that is hard to resist. - Pumpkin Spice Mini Cheesecakes: For a fall twist, add pumpkin puree and pumpkin spice to the cream cheese mixture. This gives you a warm, cozy flavor that is perfect for autumn gatherings. Toppings can make your mini cheesecakes even more delightful. Here are some tasty ideas: - Caramel sauce drizzled on top: A drizzle of warm caramel adds sweetness and a lovely look. It pairs well with both chocolate and plain cheesecakes. - Nut toppings for added crunch: Chopped nuts, like pecans or walnuts, give a nice crunch. They also add a nice contrast to the creamy texture of the cheesecake. You can make these mini cheesecakes gluten-free with some easy swaps: - Use gluten-free graham crackers: Many brands offer gluten-free options. They work just like regular graham crackers in the crust. - Alternative crust options such as almond flour or oats: If you want to get creative, use almond flour or oats for the crust. Both options taste great and ensure everyone can enjoy these treats! To keep your mini cheesecakes fresh, store them in the fridge. Place the cheesecakes in an airtight container. Cover them with a lid or plastic wrap to prevent them from drying out. This keeps their creamy texture and rich flavor intact. You can freeze mini cheesecakes for longer storage. To do this, first, let them cool completely. Then, wrap each cheesecake in plastic wrap tightly. Place the wrapped cheesecakes in a freezer-safe container. To serve, thaw them in the fridge overnight. This helps maintain their texture. Mini cheesecakes last about one week in the fridge. After that, they may start to spoil. Look for signs like a sour smell or a change in texture. If you see any mold, it’s best to toss them. Enjoy your cheesecakes while they are fresh for the best taste! Yes, you can make mini cheesecakes ahead of time. They taste even better after chilling. To prepare them in advance, bake and cool the cheesecakes. After cooling, cover them well with plastic wrap or store them in an airtight container. Refrigerate them for up to three days. If you want to store them longer, freeze them. Wrap each cheesecake in plastic wrap, then place them in a freezer-safe bag. They will stay fresh for up to two months. To keep your crust from getting soggy, bake it properly. Make sure to pre-bake the crust for about ten minutes. This helps it set. After baking, let it cool completely before adding the filling. Cooling allows the crust to harden. Also, avoid overfilling your cups with the cream cheese mixture. Leave a little space at the top. This helps the steam escape during baking, keeping the crust crisp. If you don't have muffin liners, you have options. You can use parchment paper cut into circles. Just place the circles in the muffin tin to help with removal. Another choice is to grease the muffin tin well with butter or cooking spray. This method works well too. You can also use silicone muffin cups. They are reusable and help the cheesecakes pop out easily. You learned how to make delicious mini cheesecakes with fresh berries. We covered the key ingredients for the crust and filling, plus tips for a creamy texture. I shared steps to create a perfect berry swirl and options for tasty variations. Storing your mini cheesecakes properly is easy with the right methods. With these techniques, you'll impress everyone at your next gathering. Baking should be fun and rewarding, so enjoy every bite of your tasty treat!

Mini Cheesecakes with Berry Swirl

Delicious mini cheesecakes with a vibrant berry swirl, perfect for any occasion.
Course Dessert
Cuisine American
Servings 12
Calories 250 kcal

Ingredients
  

  • 1 cup graham cracker crumbs
  • 1/4 cup granulated sugar
  • 1/2 cup unsalted butter, melted
  • 16 oz cream cheese, softened to room temperature
  • 1 cup granulated sugar
  • 1 teaspoon pure vanilla extract
  • 2 large eggs
  • 1 cup mixed fresh berries (strawberries, blueberries, raspberries), roughly chopped
  • 1 tablespoon fresh lemon juice
  • 1 tablespoon cornstarch
  • to taste additional fresh berries for garnish
  • to taste whipped cream (optional, for serving)

Instructions
 

  • Preheat your oven to 325°F (160°C) and prepare a muffin tin by lining it with paper liners.
  • In a medium mixing bowl, combine the graham cracker crumbs and 1/4 cup of sugar. Pour in the melted butter and mix until the crumbs are evenly coated.
  • Press about one tablespoon of the crumb mixture into the bottom of each muffin cup and bake for 10 minutes. Allow to cool completely.
  • In another medium bowl, beat the softened cream cheese until smooth. Gradually add 1 cup of sugar and the vanilla extract, mixing until fully combined.
  • Add the eggs one at a time, mixing on low speed just until incorporated.
  • In a small saucepan, combine the mixed berries and lemon juice. Cook over medium heat until the berries soften, then add the cornstarch and stir until thickened. Allow to cool slightly.
  • Pour the cream cheese mixture over the cooled crusts, filling each cup about two-thirds full.
  • Drop dollops of the berry mixture on top and swirl gently with a toothpick.
  • Bake for 18-20 minutes, or until the centers are set but still slightly jiggly.
  • Allow to cool to room temperature in the muffin tin, then refrigerate for at least 4 hours or overnight.

Notes

Serve with whipped cream and fresh berries for a beautiful presentation.
Keyword berries, cheesecake, dessert

WANT TO SAVE THIS RECIPE?