
Looking for a delicious, protein-packed treat? These High-Protein Cheesecake Jars are your answer! Imagine enjoying a creamy dessert that not only satisfies your sweet tooth but also boosts your protein intake. In this recipe, I’ll guide you step-by-step on how to create these delightful jars, offering tips for custom flavors and the perfect texture. Let’s dive in and whip up something amazing that you’ll love to share!
Why I Love This Recipe
- High in Protein: This cheesecake jars recipe is packed with protein from the Greek yogurt and protein powder, making it a perfect post-workout treat.
- Quick and Easy: With just 15 minutes of prep time, these jars are simple to make and can be prepared in advance for a hassle-free dessert.
- Customizable: You can easily adjust the sweetness and flavors by choosing between honey or maple syrup and selecting your favorite toppings.
- Perfect for Meal Prep: These jars can be stored in the fridge for a few days, making them an excellent option for healthy snacks throughout the week.
Ingredients
Main Ingredients for High-Protein Cheesecake Jars
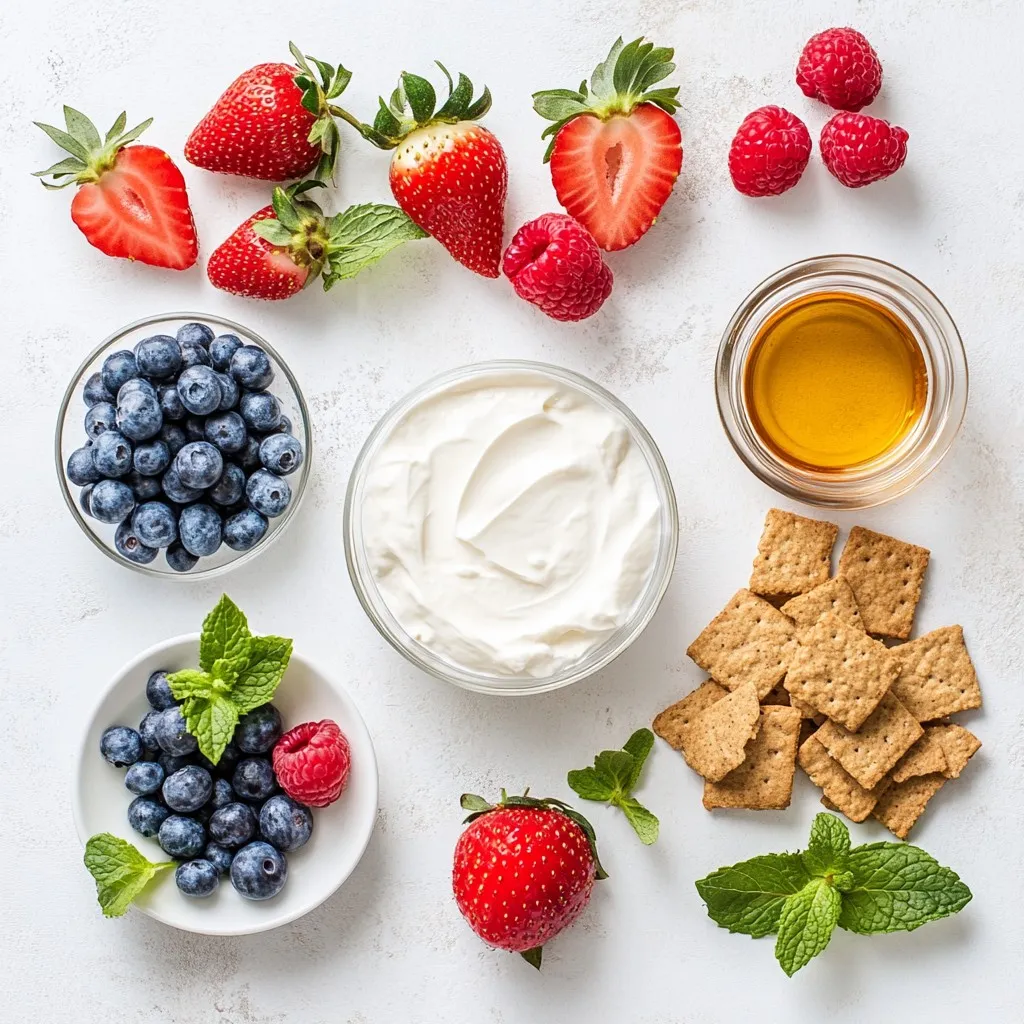
– 1 cup low-fat cream cheese, softened
– 1 cup plain Greek yogurt
– 1/2 cup vanilla-flavored protein powder
– 1/4 cup honey or maple syrup
– 1/2 teaspoon pure vanilla extract
– 1 cup crushed graham crackers (or almond flour)
– 2 tablespoons melted coconut oil
– Fresh berries for topping
Optional Ingredients for Customization
– Fresh mint leaves for garnish
– Different flavored protein powders
– Nuts or seeds for crunch
Nutritional Overview
These cheesecake jars are rich in protein. Each jar packs a punch with low-fat cream cheese and Greek yogurt. They offer a balanced mix of carbs from the graham crackers and healthy fats from the coconut oil. You can customize sweetness with honey or maple syrup. Each jar is not just a treat but a tasty way to fuel your body. If you use almond flour, you lower the carbs even more. These jars make a healthy dessert anyone can enjoy!
Step-by-Step Instructions
Preparation of Cheesecake Base
To start, gather your ingredients. You will need low-fat cream cheese, Greek yogurt, protein powder, honey, and vanilla extract. In a medium bowl, mix the softened cream cheese and Greek yogurt together. Use a hand mixer or whisk to blend until smooth. No lumps should remain. Next, add the protein powder, honey, and vanilla extract. Mix until everything is well combined and creamy.
Assembling the Cheesecake Jars
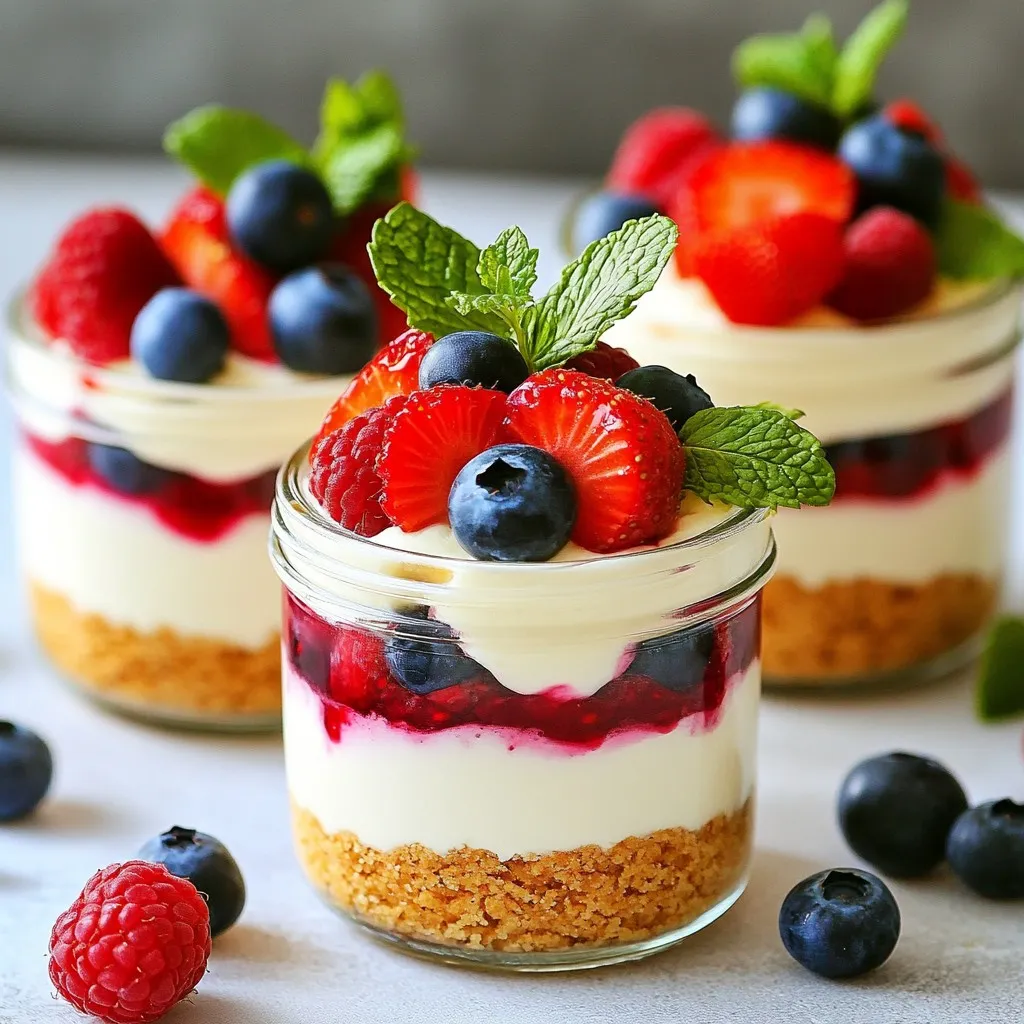
Now, take another bowl and combine crushed graham crackers with melted coconut oil. Stir this until it feels like wet sand. Grab your mason jars or dessert cups. Add about 2-3 tablespoons of the graham cracker mixture to the bottom of each jar. Then, scoop in about 1/4 cup of the cheesecake mixture on top. Layer these two mixtures until you fill the jar. Make sure the last layer is cheesecake.
Chilling and Serving Tips
Once your jars are full, cover them with lids or plastic wrap. Place them in the fridge. Let them chill for at least 2 hours. For best results, leave them overnight. When you’re ready to serve, add fresh berries on top. A sprig of mint can add a nice touch too. Enjoy your high-protein cheesecake jars!
Tips & Tricks
How to Achieve the Creamiest Texture
To get a creamy cheesecake, use room temperature cream cheese. Cold cream cheese will clump. Mix the cream cheese and Greek yogurt well until smooth. Blend until no lumps remain. This step is key for a silky texture.
Substitutions for Dietary Preferences
If you’re dairy-free, try using a dairy-free cream cheese. For vegan options, use coconut yogurt. If you want low-carb, swap graham crackers with almond flour. You can also use a sugar substitute for honey or maple syrup. These swaps keep the recipe tasty for everyone.
Best Practices for Layering
When layering, start with the graham cracker base. Use 2-3 tablespoons in each jar. Follow with 1/4 cup of cheesecake mix. Repeat until the jars are full. Make sure the last layer is cheesecake mix. This ensures a great look and taste.
Pro Tips
- Room Temperature Cream Cheese: Ensure the cream cheese is softened to room temperature for a smoother, lump-free cheesecake mixture.
- Layering Technique: For a visually appealing presentation, alternate layers of the graham cracker mixture and cheesecake mixture evenly in the jars.
- Chilling Time: Allow the cheesecake jars to chill overnight for the best texture and flavor development.
- Berry Variety: Experiment with different fresh berries on top, such as blackberries or sliced kiwis, to add a unique twist to your cheesecake jars.
Variations
Flavored Protein Powder Options
You can change the taste of your cheesecake jars by using different protein powders. Chocolate protein powder adds a rich and sweet flavor. If you prefer fruit, try strawberry or banana protein powder. Each flavor brings a new twist to the dessert. Just remember to keep the same amount in the recipe for balance.
Different Crust Ideas
The crust is key to a great cheesecake jar. You can use crushed graham crackers, which give a classic taste. For a low-carb option, almond flour works well. You can even mix in nuts for crunch. If you want something unique, try crushed cookies like Oreos or gingersnaps. Each crust adds its own fun flavor.
Alternative Toppings and Garnishes
The toppings make your cheesecake jars pop. Fresh berries like strawberries, blueberries, or raspberries are always a hit. You can also use sliced bananas or peaches for a fruity kick. For added flair, sprinkle some crushed nuts or drizzle honey on top. A few mint leaves can brighten the look and taste. Don’t be afraid to get creative with your toppings!
Storage Info
How to Store Cheesecake Jars
To keep your cheesecake jars fresh, store them in the fridge. Use airtight containers or keep them in their original jars. Make sure the lids are sealed tightly. This helps to prevent any odors from other foods in the fridge. It also keeps the cheesecake creamy and delicious.
Freezing Instructions
You can freeze your cheesecake jars for later enjoyment. First, let them chill in the fridge for at least two hours. Then, remove the lids and cover each jar tightly with plastic wrap. After that, place them in a freezer-safe bag. They can last in the freezer for up to three months. When you’re ready to eat them, thaw the jars overnight in the fridge.
Shelf Life and Best Practices
These cheesecake jars can stay fresh in the fridge for up to one week. However, for the best taste and texture, eat them within four days. Always check for any changes in smell or texture before eating. If they look or smell off, it’s best to throw them away. To enjoy the best flavor, add fresh toppings just before serving.
FAQs
Can I use regular cream cheese instead of low-fat?
Yes, you can use regular cream cheese. However, it will increase the fat content. Low-fat cream cheese gives you a lighter option. This choice keeps the overall dish healthier while still tasting great.
How long do the cheesecake jars last in the fridge?
These cheesecake jars last about 5 days in the fridge. Keep them sealed tightly. This helps maintain their creamy texture and flavor. Just remember to add fresh berries just before serving.
Can I make this recipe dairy-free?
Yes, you can make it dairy-free! Use dairy-free cream cheese and coconut yogurt instead of Greek yogurt. Choose a plant-based protein powder. This way, you still get the same creamy taste without dairy.
What is the best way to serve these jars?
Serve these jars chilled for the best taste. Add fresh berries on top for a burst of flavor. You can also garnish them with mint leaves. This will make your dessert look even more inviting!
High-protein cheesecake jars are easy to make and delightful to eat. We covered the key ingredients, both main and optional, and highlighted their nutritional benefits. The step-by-step guide helped you prepare, assemble, and chill your jars for the perfect treat. I shared tips for a creamy texture and ways to customize your jars. We also explored fun variations and provided storage advice for freshness.
Now, you have a delicious and nutritious dessert option to enjoy anytime. Happy cookin


