Garlic Parmesan Cheeseburger Bombs Easy Bake Recipe

WANT TO SAVE THIS RECIPE?

If you love burgers and garlic, you’re in for a treat! Garlic Parmesan Cheeseburger Bombs are easy to make and delicious. With just a few simple ingredients like ground beef, cheddar, and biscuit dough, you can create a fun and filling snack. Perfect for game night or a quick meal, these bombs are sure to impress family and friends. Let’s dive into the easy bake recipe!

Ingredients

Main Ingredients Required

– 1 lb (450g) ground beef

– 1 cup (100g) shredded cheddar cheese

– 1/2 cup (120g) cream cheese, softened at room temperature

– 1/2 cup (50g) grated Parmesan cheese

– 1 teaspoon garlic powder

– 1 teaspoon onion powder

– 1 teaspoon Worcestershire sauce

– 1 package of refrigerated biscuit dough (8-count)

You need good quality ground beef for these bombs. It gives the best flavor. Adding cheddar cheese makes the filling creamy and rich. Cream cheese helps bind everything together for a smooth texture. Parmesan brings a nice salty kick. Garlic and onion powder add depth. Worcestershire sauce boosts the savory flavor. The biscuit dough wraps all this goodness perfectly.

Optional Ingredients and Garnishes

– 2 tablespoons melted butter

– 2 tablespoons fresh parsley, finely chopped (for garnish)

– Dipping sauces

You can brush the tops with melted butter. This gives them a golden brown color. Fresh parsley adds a nice touch of green and freshness. Dipping sauces like ketchup or ranch make great pairings. They add extra flavor and fun for dipping.

Kitchen Tools Needed

– Mixing bowl

– Baking sheet

– Parchment paper

A mixing bowl helps combine the filling well. Use a baking sheet to hold the bombs while they bake. Parchment paper keeps them from sticking. This means cleaner bombs and an easier cleanup.

For the full recipe, check the complete details on how to make Garlic Parmesan Cheeseburger Bombs.

Step-by-Step Instructions

Preparation Steps

1. Preheat your oven to 375°F (190°C). This temperature will give the bombs a nice, golden color.

2. Line a baking sheet with parchment paper. This step helps the bombs not stick while baking.

3. In a large bowl, combine the ground beef, shredded cheddar cheese, cream cheese, and grated Parmesan cheese.

4. Add garlic powder, onion powder, Worcestershire sauce, and salt and pepper.

5. Use your hands or a spatula to mix everything well. You want a smooth, tasty filling.

Assembling the Cheeseburger Bombs

1. Open the biscuit dough package and separate each biscuit.

2. Flatten each biscuit into a circle about 4 inches wide. You can use your fingers or a rolling pin for this.

3. Spoon about 1 tablespoon of the cheeseburger filling into the center of each biscuit.

4. Fold the edges of the biscuit over the filling. Pinch them together to seal. Make sure no filling can escape.

5. Place the sealed bombs seam-side down on your lined baking sheet, leaving space between each one.

Baking Instructions

1. Brush the tops of the bombs with melted butter. This adds flavor and helps them brown.

2. Optionally, sprinkle more grated Parmesan cheese and garlic powder on top for extra taste.

3. Bake in the preheated oven for 12-15 minutes. They should be golden brown and cooked inside.

4. The meat should reach 160°F (70°C) to be safe.

5. Let the bombs cool for a few minutes after baking. Garnish with fresh parsley for a pop of color.

You can find the full recipe in the recipe section above. Enjoy making these tasty Garlic Parmesan Cheeseburger Bombs!

Tips & Tricks

How to Make Perfect Cheeseburger Bombs

To make the best cheeseburger bombs, mix your filling well. Combine the ground beef, cheeses, and spices until smooth. This ensures each bite is packed with flavor. Use your hands or a spatula for even mixing.

For sealing the biscuits, flatten each dough piece to about four inches wide. Add a tablespoon of filling in the center. Fold the edges over the filling and pinch them tightly. Make sure there are no gaps. This keeps the cheesy goodness inside while baking.

Flavor Enhancements

You can easily boost the flavor of your cheeseburger bombs. Add spices like smoked paprika or chili powder for a kick. Fresh herbs like basil or thyme also work great. They add a nice twist to the classic taste.

If you want to switch up the cheese, try using pepper jack or gouda. Each cheese brings a different taste and melts beautifully. Experimenting with cheese can lead to exciting new flavors.

Serving Suggestions

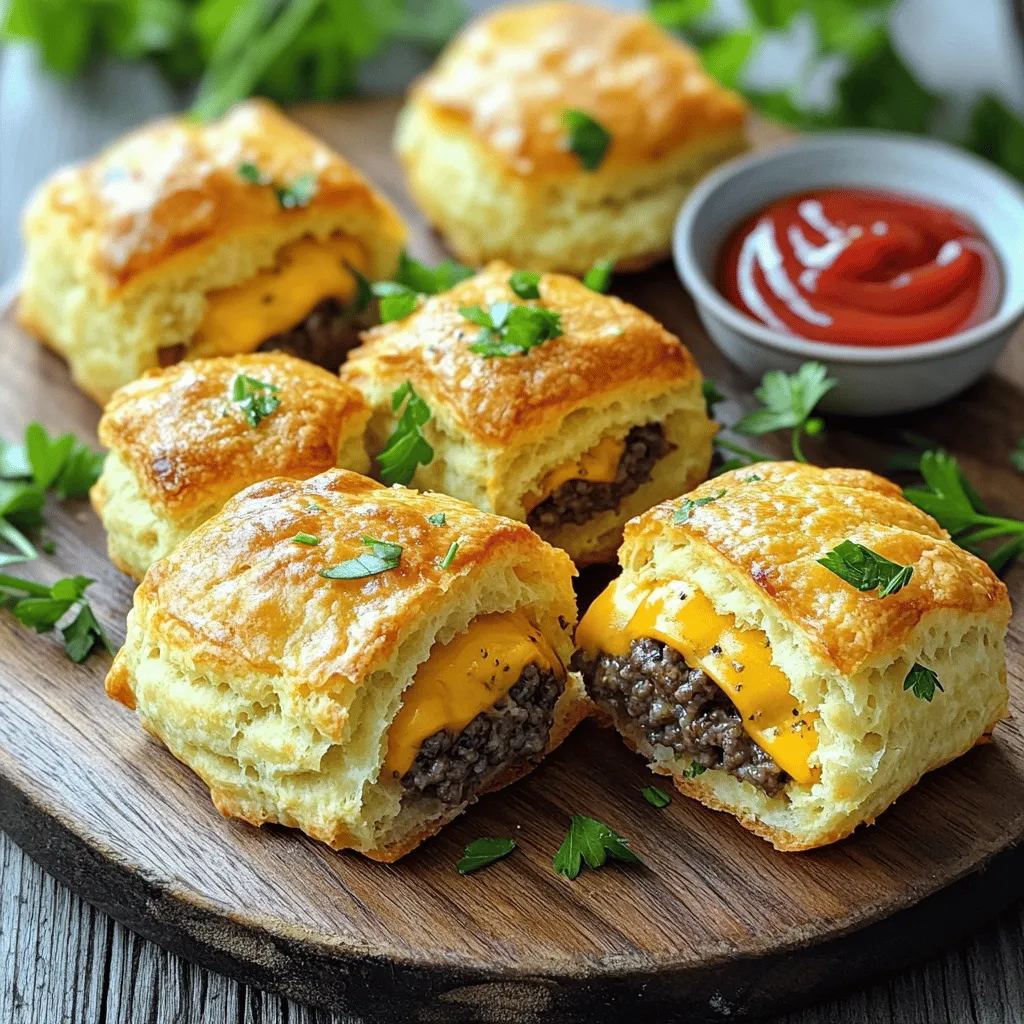
Presentation matters when serving your bombs. Arrange them on a rustic wooden platter for a cozy feel. Garnish with fresh parsley for color and aroma. This simple touch makes your dish look fancy.

For dips, ketchup is a classic choice. You can also try ranch dressing or spicy mustard. Each dip enhances the flavors and adds variety to each bite. Don’t hesitate to explore different dips to find your favorite.

For the full recipe, check out the details above. Enjoy your cooking adventure!
Variations

Ingredient Substitutions

You can swap ground beef for ground turkey or chicken. This change makes the bombs lighter. If you want a different taste, try mixing cheeses. Blend mozzarella or gouda with the cheddar and Parmesan. Each cheese brings its own unique flavor.

Dietary Adjustments

If you’re gluten-free, look for gluten-free biscuit dough. Many brands make tasty options now. For vegetarian bombs, replace the meat with a mix of mushrooms and beans. This keeps the dish hearty without losing flavor.

Flavor Variations

Want a spicy kick? Add jalapeños to the meat mix. You can also sprinkle in cayenne pepper or hot sauce. For a twist, try different seasoning blends like taco or barbecue spices. Each option gives the bombs a fun new taste.

Explore the Full Recipe for more ideas and tips!

Storage Info

Storing Leftovers

To store your leftover Garlic Parmesan Cheeseburger Bombs, first let them cool. Place them in an airtight container. This keeps them fresh and tasty. You can store them in the fridge for up to three days. If you want them to last longer, freezing is a great option.

Freezing Instructions

To freeze the cheeseburger bombs, wrap each one tightly in plastic wrap. Then, place them in a freezer bag. Squeeze out extra air to prevent freezer burn. They can last for up to three months in the freezer. When you want to enjoy them, take them out and thaw them in the fridge overnight.

Reheating Methods

When it’s time to eat, there are a few ways to reheat your bombs. You can use an oven, which keeps them crispy. Preheat the oven to 350°F (175°C). Place the bombs on a baking sheet and heat for about 10-15 minutes. You can also use an air fryer for a quick reheating. This gives them a nice crunch. Avoid using the microwave, as it can make them soggy. For the best taste, enjoy them warm!

FAQs

What are Garlic Parmesan Cheeseburger Bombs?

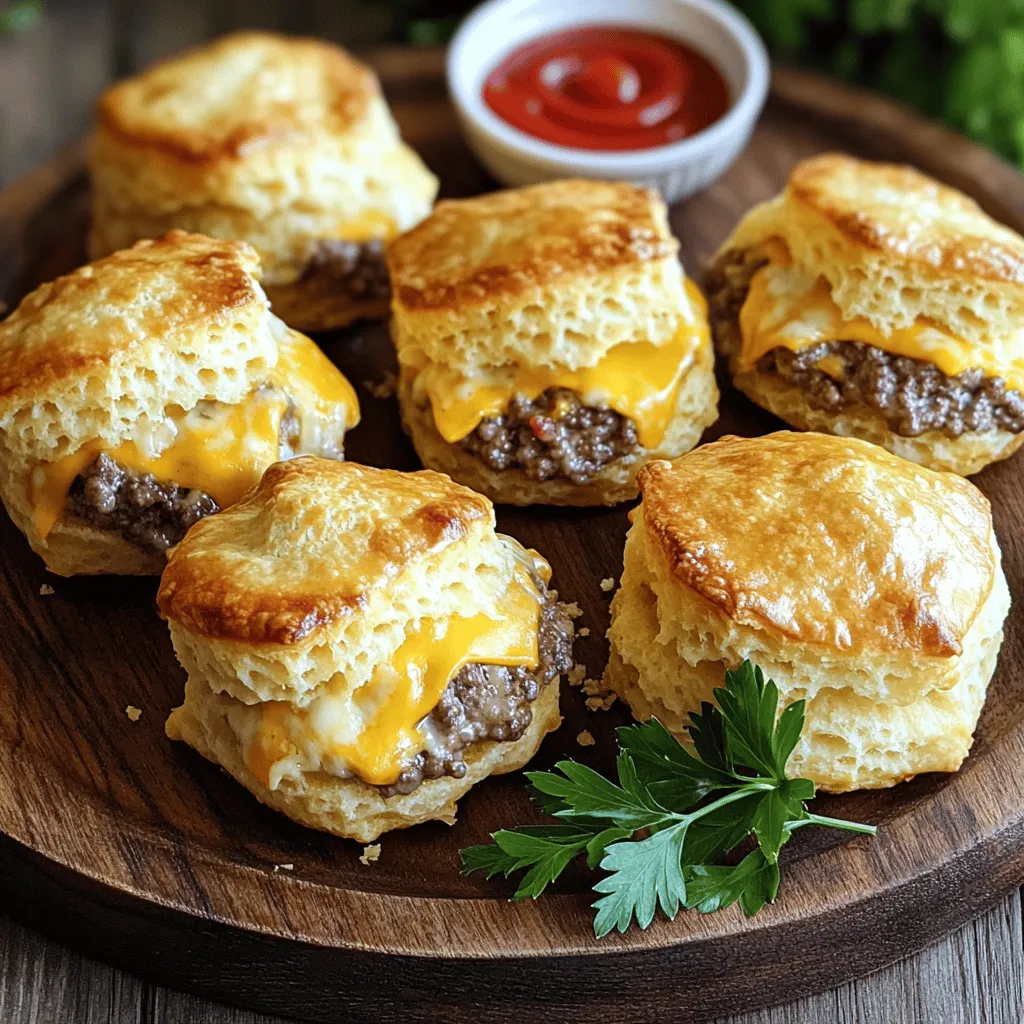
Garlic Parmesan Cheeseburger Bombs are tasty bites filled with ground beef and cheese. You wrap seasoned beef and creamy cheese in biscuit dough. When baked, they turn golden brown and crispy. The garlic and Parmesan add a rich flavor that many love. They are perfect for parties or a fun family meal.

Can I make these bombs in advance?

Yes, you can make these bombs ahead of time. Prepare them up to the baking step, then store them in the fridge. Cover them tightly with plastic wrap or foil. You can keep them in the fridge for about 24 hours. When ready, just bake them straight from the fridge. They may need an extra minute or two to bake.

What can I serve with Garlic Parmesan Cheeseburger Bombs?

You can serve these bombs with many sides and drinks. Here are some ideas:

– French fries

– Potato salad

– Fresh salad

– Veggie sticks with dip

For drinks, try:

– Soda

– Beer

– Lemonade

These options pair well and make your meal even more enjoyable. For the full recipe, check out the earlier section!

In this post, we explored how to make delicious cheeseburger bombs. We covered the main ingredients needed, like ground beef and cheeses, and discussed kitchen tools for easy prep. You learned step-by-step instructions for mixing, assembling, and baking. Plus, I shared tips for flavor and variations to suit diets. Storing and reheating leftovers was also covered.

Now, you can enjoy these tasty bites anytime. They’re fun to make and share! Enjoy serving them with your favorite dips and sides.

- 1 lb (450g) ground beef - 1 cup (100g) shredded cheddar cheese - 1/2 cup (120g) cream cheese, softened at room temperature - 1/2 cup (50g) grated Parmesan cheese - 1 teaspoon garlic powder - 1 teaspoon onion powder - 1 teaspoon Worcestershire sauce - 1 package of refrigerated biscuit dough (8-count) You need good quality ground beef for these bombs. It gives the best flavor. Adding cheddar cheese makes the filling creamy and rich. Cream cheese helps bind everything together for a smooth texture. Parmesan brings a nice salty kick. Garlic and onion powder add depth. Worcestershire sauce boosts the savory flavor. The biscuit dough wraps all this goodness perfectly. - 2 tablespoons melted butter - 2 tablespoons fresh parsley, finely chopped (for garnish) - Dipping sauces You can brush the tops with melted butter. This gives them a golden brown color. Fresh parsley adds a nice touch of green and freshness. Dipping sauces like ketchup or ranch make great pairings. They add extra flavor and fun for dipping. - Mixing bowl - Baking sheet - Parchment paper A mixing bowl helps combine the filling well. Use a baking sheet to hold the bombs while they bake. Parchment paper keeps them from sticking. This means cleaner bombs and an easier cleanup. For the full recipe, check the complete details on how to make Garlic Parmesan Cheeseburger Bombs. 1. Preheat your oven to 375°F (190°C). This temperature will give the bombs a nice, golden color. 2. Line a baking sheet with parchment paper. This step helps the bombs not stick while baking. 3. In a large bowl, combine the ground beef, shredded cheddar cheese, cream cheese, and grated Parmesan cheese. 4. Add garlic powder, onion powder, Worcestershire sauce, and salt and pepper. 5. Use your hands or a spatula to mix everything well. You want a smooth, tasty filling. 1. Open the biscuit dough package and separate each biscuit. 2. Flatten each biscuit into a circle about 4 inches wide. You can use your fingers or a rolling pin for this. 3. Spoon about 1 tablespoon of the cheeseburger filling into the center of each biscuit. 4. Fold the edges of the biscuit over the filling. Pinch them together to seal. Make sure no filling can escape. 5. Place the sealed bombs seam-side down on your lined baking sheet, leaving space between each one. 1. Brush the tops of the bombs with melted butter. This adds flavor and helps them brown. 2. Optionally, sprinkle more grated Parmesan cheese and garlic powder on top for extra taste. 3. Bake in the preheated oven for 12-15 minutes. They should be golden brown and cooked inside. 4. The meat should reach 160°F (70°C) to be safe. 5. Let the bombs cool for a few minutes after baking. Garnish with fresh parsley for a pop of color. You can find the full recipe in the recipe section above. Enjoy making these tasty Garlic Parmesan Cheeseburger Bombs! To make the best cheeseburger bombs, mix your filling well. Combine the ground beef, cheeses, and spices until smooth. This ensures each bite is packed with flavor. Use your hands or a spatula for even mixing. For sealing the biscuits, flatten each dough piece to about four inches wide. Add a tablespoon of filling in the center. Fold the edges over the filling and pinch them tightly. Make sure there are no gaps. This keeps the cheesy goodness inside while baking. You can easily boost the flavor of your cheeseburger bombs. Add spices like smoked paprika or chili powder for a kick. Fresh herbs like basil or thyme also work great. They add a nice twist to the classic taste. If you want to switch up the cheese, try using pepper jack or gouda. Each cheese brings a different taste and melts beautifully. Experimenting with cheese can lead to exciting new flavors. Presentation matters when serving your bombs. Arrange them on a rustic wooden platter for a cozy feel. Garnish with fresh parsley for color and aroma. This simple touch makes your dish look fancy. For dips, ketchup is a classic choice. You can also try ranch dressing or spicy mustard. Each dip enhances the flavors and adds variety to each bite. Don't hesitate to explore different dips to find your favorite. For the full recipe, check out the details above. Enjoy your cooking adventure! {{image_4}} You can swap ground beef for ground turkey or chicken. This change makes the bombs lighter. If you want a different taste, try mixing cheeses. Blend mozzarella or gouda with the cheddar and Parmesan. Each cheese brings its own unique flavor. If you're gluten-free, look for gluten-free biscuit dough. Many brands make tasty options now. For vegetarian bombs, replace the meat with a mix of mushrooms and beans. This keeps the dish hearty without losing flavor. Want a spicy kick? Add jalapeños to the meat mix. You can also sprinkle in cayenne pepper or hot sauce. For a twist, try different seasoning blends like taco or barbecue spices. Each option gives the bombs a fun new taste. Explore the Full Recipe for more ideas and tips! To store your leftover Garlic Parmesan Cheeseburger Bombs, first let them cool. Place them in an airtight container. This keeps them fresh and tasty. You can store them in the fridge for up to three days. If you want them to last longer, freezing is a great option. To freeze the cheeseburger bombs, wrap each one tightly in plastic wrap. Then, place them in a freezer bag. Squeeze out extra air to prevent freezer burn. They can last for up to three months in the freezer. When you want to enjoy them, take them out and thaw them in the fridge overnight. When it’s time to eat, there are a few ways to reheat your bombs. You can use an oven, which keeps them crispy. Preheat the oven to 350°F (175°C). Place the bombs on a baking sheet and heat for about 10-15 minutes. You can also use an air fryer for a quick reheating. This gives them a nice crunch. Avoid using the microwave, as it can make them soggy. For the best taste, enjoy them warm! Garlic Parmesan Cheeseburger Bombs are tasty bites filled with ground beef and cheese. You wrap seasoned beef and creamy cheese in biscuit dough. When baked, they turn golden brown and crispy. The garlic and Parmesan add a rich flavor that many love. They are perfect for parties or a fun family meal. Yes, you can make these bombs ahead of time. Prepare them up to the baking step, then store them in the fridge. Cover them tightly with plastic wrap or foil. You can keep them in the fridge for about 24 hours. When ready, just bake them straight from the fridge. They may need an extra minute or two to bake. You can serve these bombs with many sides and drinks. Here are some ideas: - French fries - Potato salad - Fresh salad - Veggie sticks with dip For drinks, try: - Soda - Beer - Lemonade These options pair well and make your meal even more enjoyable. For the full recipe, check out the earlier section! In this post, we explored how to make delicious cheeseburger bombs. We covered the main ingredients needed, like ground beef and cheeses, and discussed kitchen tools for easy prep. You learned step-by-step instructions for mixing, assembling, and baking. Plus, I shared tips for flavor and variations to suit diets. Storing and reheating leftovers was also covered. Now, you can enjoy these tasty bites anytime. They’re fun to make and share! Enjoy serving them with your favorite dips and sides.
Garlic Parmesan Cheeseburger Bombs

Discover the ultimate crowd-pleaser with these Garlic Parmesan Cheeseburger Bombs! Filled with a mouthwatering blend of beef, cheddar, cream cheese, and savory seasonings, these easy-to-make bites are perfect for game day or family gatherings. With just 30 minutes of prep and cooking time, you can impress your guests in no time. Click through to explore the full recipe and bring this tasty delight to your table today!

Ingredients
  

1 lb (450g) ground beef

1 cup (100g) shredded cheddar cheese

1/2 cup (120g) cream cheese, softened at room temperature

1/2 cup (50g) grated Parmesan cheese

1 teaspoon garlic powder

1 teaspoon onion powder

1 teaspoon Worcestershire sauce

1 package of refrigerated biscuit dough (8-count)

2 tablespoons melted butter

2 tablespoons fresh parsley, finely chopped (for garnish)

Salt and pepper to taste

Instructions
 

Preheat your oven to 375°F (190°C). Line a baking sheet with parchment paper to prevent sticking.

    In a large mixing bowl, add the ground beef along with the shredded cheddar cheese, softened cream cheese, grated Parmesan cheese, garlic powder, onion powder, Worcestershire sauce, and a generous pinch of salt and pepper. Mix thoroughly with your hands or a spatula until everything is combined into a cohesive filling.

      Open the package of biscuit dough and carefully separate each biscuit. Using your fingers or a rolling pin, flatten each biscuit into a larger circle, approximately 4 inches in diameter.

        Spoon about 1 tablespoon of the cheeseburger filling into the center of each flattened biscuit.

          Carefully fold the edges of the biscuit over the filling, bringing them together at the top. Pinch the seams firmly to seal the bombs, ensuring that none of the filling escapes during baking.

            Position the cheeseburger bombs seam-side down on the prepared baking sheet, evenly spaced apart.

              Brush the tops of the bombs with the melted butter for a beautiful golden finish. Optionally, sprinkle additional grated Parmesan cheese and a dash of garlic powder on top for extra flavor.

                Bake in the preheated oven for 12-15 minutes, or until the tops are golden brown and the meat inside is cooked through (internal temperature should reach 160°F or 70°C).

                  Once baked, remove the bombs from the oven and let them cool on the baking sheet for a few minutes. Before serving, garnish with freshly chopped parsley for a pop of color.

                    Prep Time: 15 minutes | Total Time: 30 minutes | Servings: 8

                      - Presentation Tips: Arrange the Garlic Parmesan Cheeseburger Bombs on a rustic wooden platter, and serve with a small bowl of your favorite dipping sauce, such as ketchup or ranch dressing, to complement the flavors. Enjoy your delicious creation!

                        WANT TO SAVE THIS RECIPE?