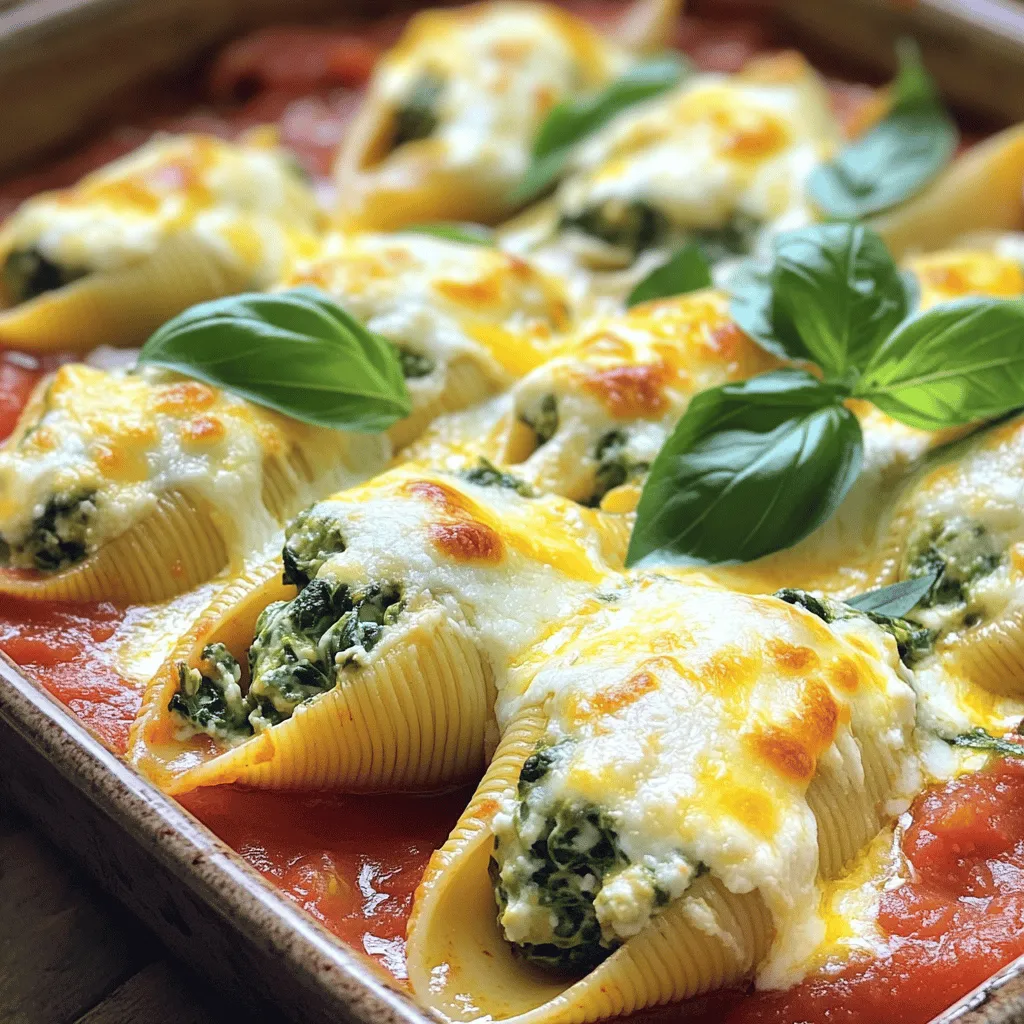
If you’re looking for a cozy meal, you need to try my Easy Spinach and Ricotta Stuffed Shells. This dish combines creamy ricotta and fresh spinach, making it a comforting classic that’s easy to prepare. Whether you’re feeding a family or just want a satisfying dinner, these shells pack flavor and warmth. Ready to dive into a world of cheesy goodness? Let me show you how to make this delicious dish step by step!
Ingredients
Overview of Ingredients
To make Easy Spinach and Ricotta Stuffed Shells, you need simple yet tasty ingredients. Here’s what you will need:
– 12 jumbo pasta shells
– 1 cup ricotta cheese
– 2 cups fresh spinach, chopped
– 1 cup shredded mozzarella cheese (divided)
– 1/2 cup grated Parmesan cheese
– 1 large egg
– 2 cloves garlic, minced
– 1 teaspoon dried oregano
– 1 teaspoon salt
– 1/2 teaspoon black pepper
– 2 cups marinara sauce
– Fresh basil leaves for garnish
These ingredients work together to create a dish that is creamy, cheesy, and full of flavor.
Fresh vs. Frozen Spinach
You can choose between fresh or frozen spinach for this dish. Fresh spinach gives a bright taste and a nice texture. It also has a higher nutrient level. You can chop it easily and mix it with the ricotta. On the other hand, frozen spinach is convenient. It is already chopped and ready to use. Just be sure to thaw and drain it well before mixing. Either way, you’ll end up with a tasty filling.
Alternatives for Ricotta Cheese
If you want to switch up the cheese, there are a few options. Cottage cheese can work well. It has a similar texture and taste. Cream cheese can add a rich flavor, too. For a dairy-free option, try using cashew cream or tofu. Just blend it well to get a smooth texture. Each option gives a different twist to your stuffed shells while keeping them delicious.
For the full recipe, check out the Cheesy Spinach & Ricotta Stuffed Shells Delight.
Step-by-Step Instructions
Preheat and Cook the Pasta Shells
First, preheat your oven to 375°F (190°C). This step warms the oven so the shells bake evenly. Next, grab a large pot and fill it with salted water. Bring the water to a boil. Carefully add the jumbo pasta shells to the boiling water. Cook them as per the package instructions until they are al dente. This means they should be firm but not hard. Once cooked, drain the shells in a colander. Set them aside to cool slightly.
Mixing the Filling Ingredients
Now it’s time to make the filling. In a large mixing bowl, combine the ricotta cheese and chopped spinach. Add half of the shredded mozzarella cheese, the grated Parmesan cheese, and the egg. Don’t forget the minced garlic, dried oregano, salt, and black pepper. Mix all these ingredients together until they are creamy and well blended. This mixture will be rich and flavorful.
Stuffing and Arranging the Shells
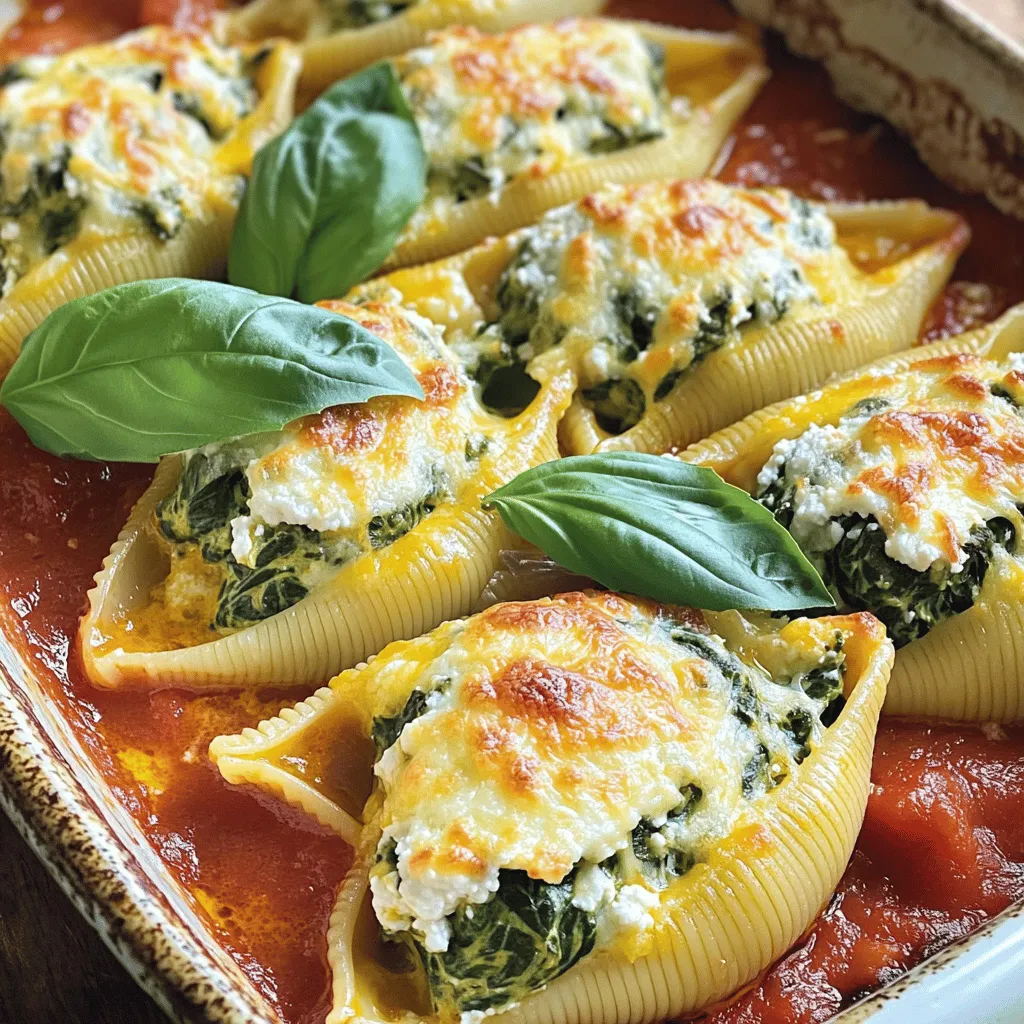
Take a spoon or a small cookie scoop to fill each cooked shell. Gently stuff each shell with the creamy spinach and ricotta filling. As you fill them, place the stuffed shells seam-side up in a lightly greased baking dish. This helps them stay upright while baking. After all the shells are filled, pour marinara sauce over them. Make sure each shell is well coated. Finally, sprinkle the remaining mozzarella cheese on top for that cheesy goodness.
Tips & Tricks
Perfecting the Spinach and Ricotta Filling
To make the best filling, start with fresh spinach. Wash and chop it finely. Mix it well with ricotta cheese, half of the mozzarella, and some grated Parmesan. Use a large bowl for this. Add a large egg to help bind the mixture. Garlic adds a nice touch, so don’t skip it! Season with salt, pepper, and oregano. This will give your filling depth and flavor.
Making It Ahead of Time
You can prepare the filling ahead of time. Just cover it and store it in the fridge. You can also stuff the shells a day before baking. Keep them in a greased dish and cover with plastic wrap. When ready, pour the marinara sauce over and bake. This makes dinner easy on busy days.
Best Baking Techniques for Cheesy Perfection
When baking, cover your dish with foil for the first 25 minutes. This keeps the cheese from burning. After that, remove the foil to let the cheese bubble and brown. This gives a nice golden top. Make sure to check if the cheese is melted. You want it gooey and delicious. For extra flavor, drizzle a bit of olive oil on top before serving. This is a great way to add a touch of richness to your Easy Spinach and Ricotta Stuffed Shells.
For the complete recipe, check the Full Recipe section.
Variations
Adding Protein: Chicken or Sausage
You can easily add protein to your stuffed shells. Cooked chicken or sausage works well. For chicken, use rotisserie or grilled chicken. Chop it into small pieces and mix it with the spinach and ricotta filling. For sausage, cook it first, then crumble it. Both options will make your dish heartier and more filling.
Vegetarian Add-Ins: Mushrooms or Bell Peppers
If you want to keep it vegetarian, consider adding mushrooms or bell peppers. Sauté chopped mushrooms in a pan until they soften. You can also dice bell peppers and mix them into the filling. These add flavor and texture, making your stuffed shells more interesting.
Gluten-Free Options for the Shells
For a gluten-free version, use gluten-free pasta shells. Many brands offer great options that taste just as good. You can follow the same steps in the recipe. Just make sure to check the cooking time, as it may vary. This way, everyone can enjoy this comfort dish, no matter their dietary needs.
Find the full recipe [here](#).
Storage Info
How to Store Leftovers
After you enjoy your Easy Spinach and Ricotta Stuffed Shells, store any leftovers in an airtight container. This keeps the shells fresh. Place them in the fridge within two hours of cooking. They can last about three to five days. If you want to keep them longer, freezing is a great option.
Reheating Instructions
When you’re ready to eat the leftovers, heat them gently. Preheat your oven to 350°F (175°C). Place the stuffed shells in a baking dish and cover with foil. Bake for about 20 minutes. This warms them through without drying them out. If you want, add a little marinara sauce on top before reheating for extra flavor.
Freezing for Meal Prep
To freeze your stuffed shells, let them cool completely first. Arrange them in a single layer on a baking sheet. Freeze them for about an hour. Then, transfer them to a freezer-safe bag or container. They can last up to three months in the freezer. When you’re ready to cook them, bake them straight from the freezer. Just add about 10 extra minutes to the cooking time. This way, you can enjoy a delicious meal anytime! For the full recipe, refer back to the main section.
FAQs
Can I use regular pasta shells instead of jumbo?
Yes, you can use regular pasta shells. However, regular shells hold less filling. This means you may need to adjust the amount of filling you make. You will also need to check the cooking time, as smaller shells may cook more quickly.
How long can I store cooked stuffed shells in the fridge?
You can store cooked stuffed shells in the fridge for up to three days. Make sure to place them in an airtight container. This keeps them fresh and prevents them from drying out. When you are ready to eat, just reheat them in the oven or microwave.
What can I pair with Easy Spinach and Ricotta Stuffed Shells?
You can pair these stuffed shells with many sides. A simple green salad adds freshness. Garlic bread is always a favorite for soaking up sauce. You might also enjoy a side of roasted vegetables for added flavor and nutrition. If you want to make it special, serve it with a glass of red wine.
In this blog post, we explored how to make Easy Spinach and Ricotta Stuffed Shells. We covered ingredient choices, including fresh spinach and alternatives for ricotta. You learned step-by-step instructions, tips for perfecting your dish, and variations to suit your taste. We also discussed storage options and FAQs for your convenience. Remember, this dish not only warms the belly but also invites creativity. You can easily adapt it to your liking and enjoy delicious leftovers. Happy cooking, and enjoy your tasty stuffed shells!