
Are you ready to indulge in a dessert that perfectly blends creamy goodness with crunchy texture? This Crunchy Honeycomb Cheesecake is a delight for your taste buds. With simple ingredients and easy steps, you can create a show-stopping treat that will impress your family and friends. Let me guide you through this tempting recipe that promises sweet satisfaction with every bite. Dive in and make your dessert dreams come true!
Ingredients
Key Ingredients for Crunchy Honeycomb Cheesecake
– 200g digestive biscuits, crushed
– 100g unsalted butter, melted
– 400g cream cheese, softened
– 200g sour cream
– 150g powdered sugar
– 2 teaspoons vanilla extract
– 3 large eggs
– 100g honeycomb pieces, chopped
– 50g dark chocolate, grated (for garnish)
– Additional honeycomb pieces (for decoration)
The ingredients are simple but make a big impact. I love using digestive biscuits for the crust. They add a great crunch and balance well with the creamy filling. Mixing them with melted butter creates a solid base.
Cream cheese adds richness to the cheesecake. It gives that smooth, creamy texture we all adore. Sour cream enhances the flavor and makes it extra creamy.
I always use powdered sugar for sweetness. It blends well and keeps the filling smooth. The vanilla extract adds a nice aroma and flavor.
Eggs bind everything together. They create the perfect creamy consistency. Honeycomb pieces add a delightful crunch and sweetness.
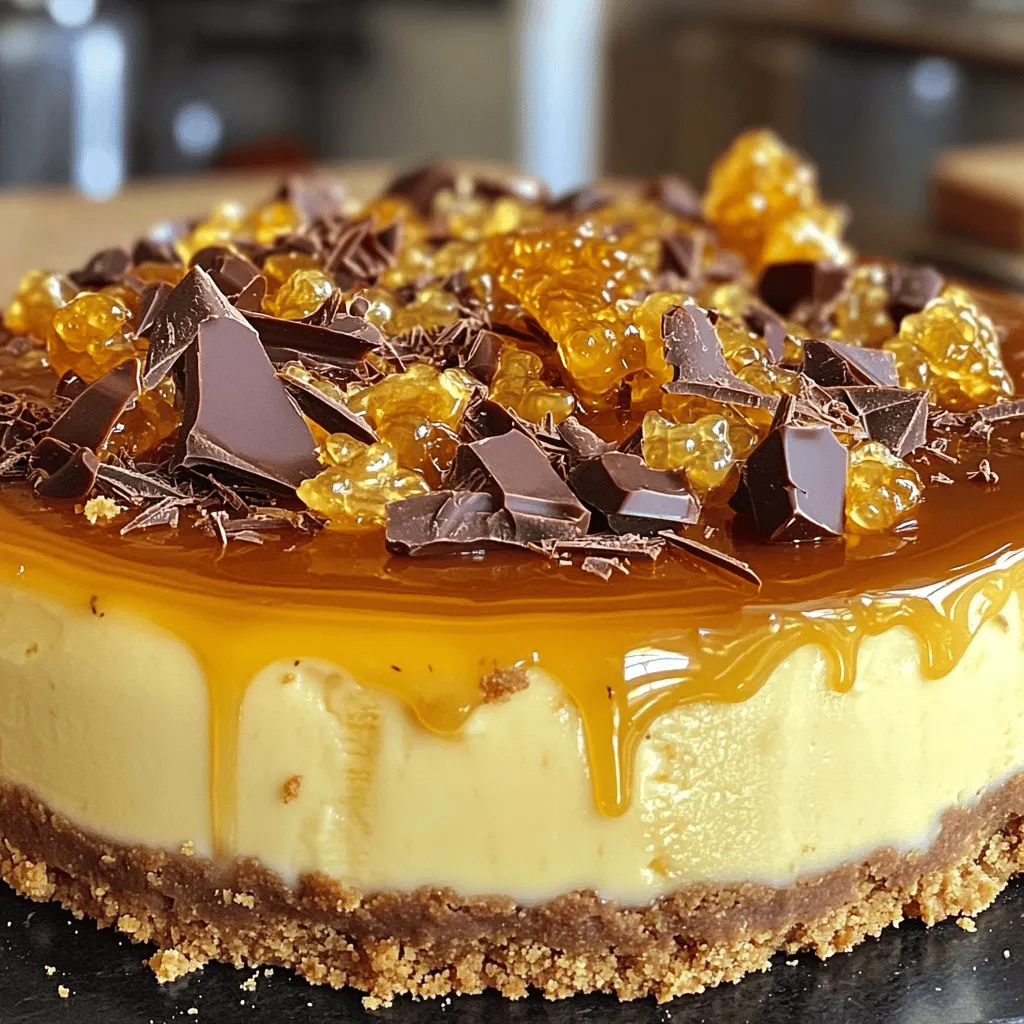
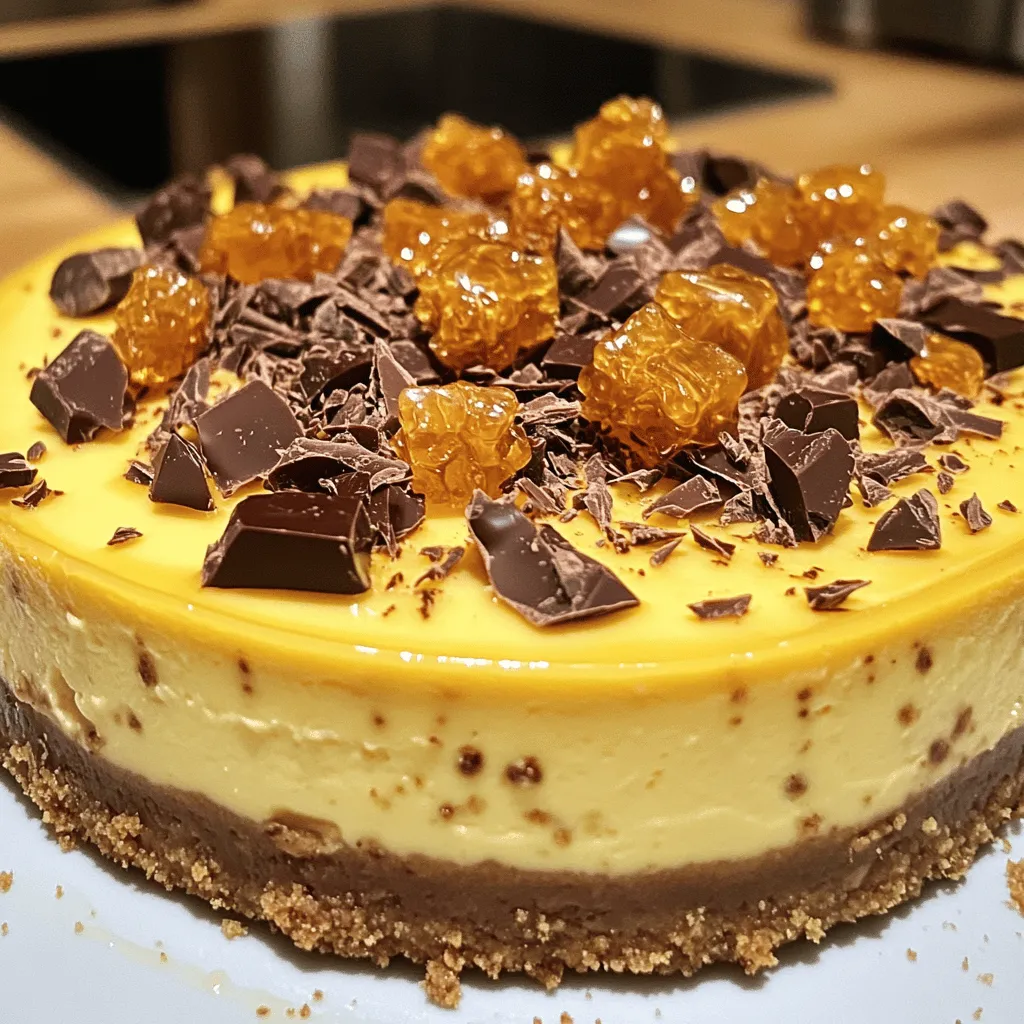
For decoration, dark chocolate grated on top is a must. It gives a nice contrast to the dessert. Using extra honeycomb pieces makes it look stunning.
You can find the full recipe linked above. Enjoy creating this delightful treat!
Step-by-Step Instructions
Preparation of the Crust
– Preheat your oven to 160°C (320°F).
– Prepare a 9-inch springform pan with parchment paper.
– In a bowl, mix 200g of crushed digestive biscuits with 100g of melted butter.
– Press this mixture firmly into the bottom of the pan.
Making the Cheesecake Filling
– Beat 400g of cream cheese in a bowl until smooth.
– Add 200g of sour cream, 150g of powdered sugar, and 2 teaspoons of vanilla extract.
– Mix until well combined.
– Add 3 large eggs one at a time, mixing gently after each addition.
Baking the Cheesecake
– Pour the filling over the cooled crust.
– Bake in the oven for 50-60 minutes until the edges are firm.
– After baking, turn off the oven and let the cheesecake cool for one hour inside.
Tips & Tricks
Achieving a Perfect Crunchy Texture
To get that crunchy texture in your cheesecake, mixing is key. Start by blending your digestives with melted butter well. This creates a strong base. When adding eggs, mix gently. Overmixing can make the filling dense. For the honeycomb, fold it in carefully. This keeps the pieces intact and adds great bites of flavor.
Essential Baking and Cooling Tips
Baking time can vary based on your oven. Keep an eye on the edges; they should be set while the center wobbles slightly. After baking, let the cheesecake cool in the oven with the door ajar. This step helps prevent cracks. Once cooled, chill it in the fridge for at least four hours. Chilling is very important for the best texture.
Presentation Suggestions
A great way to make your cheesecake look stunning is by garnishing it with dark chocolate. Shave the chocolate and sprinkle it on top. Adding honeycomb pieces on the surface gives a beautiful finish. For the best experience, serve slices with extra honeycomb on the side. This will delight your guests and elevate the dessert! You can find the full recipe for this Crunchy Honeycomb Cheesecake online.
Variations
Flavor Variations
You can change the taste of your Crunchy Honeycomb Cheesecake easily. Here are some fun ideas:
– Adding fruit purees: Blend berries or mangoes into a puree. Swirl this into the cheesecake for a fruity twist.
– Experimenting with different extracts: Use almond or lemon extract instead of vanilla. This adds a unique flavor that surprises your taste buds.
– Alternative toppings: Top with fresh fruits or a drizzle of caramel sauce. You can also use crushed cookies for extra crunch.
Ingredient Substitutions
If you need to change some ingredients, here are some options:
– Gluten-free options for the crust: Use gluten-free cookies instead of digestive biscuits. This makes the recipe safe for gluten-free diets.
– Non-dairy creams and cheeses: Swap cream cheese for a non-dairy cream cheese. Coconut cream is a great choice for a rich texture.
– Sugar alternatives: Try using honey or maple syrup instead of powdered sugar. These sweeteners give a nice flavor while being more natural.
Seasonal Twists
Make your cheesecake fit the season with these ideas:
– Holiday-inspired flavors: Add spices like cinnamon or nutmeg for a festive taste. You can also make a pumpkin version for fall.
– Summer fruit additions: Mix in fresh strawberries or peaches for a light and refreshing dessert. These fruits brighten up the cheesecake.
– Themed decorations: Use edible flowers or colored sprinkles for fun, festive looks. This makes your cheesecake stand out at any gathering.
For the full recipe, check the details above. Enjoy exploring these variations!
Storage Info
Storing Leftovers
After you enjoy your Crunchy Honeycomb Cheesecake, store leftovers in the fridge. Wrap the cheesecake tightly in plastic wrap or place it in an airtight container. This keeps it fresh. Enjoy your cheesecake within 3 to 5 days for the best taste and texture.
Freezing Tips
Want to save some cheesecake for later? You can freeze it! First, slice the cheesecake into portions. Wrap each piece in plastic wrap, then place them in a freezer-safe bag. This helps keep the flavor. You can freeze it for up to 3 months. When you’re ready to eat, take out a slice. Let it thaw in the fridge for 4 to 6 hours or overnight for best results.
Reheating Suggestions
If you want to serve it warm, you can gently reheat the cheesecake. Place a slice on a microwave-safe plate. Heat it for about 10 to 15 seconds. Check often to avoid melting the texture. You want it warm, not hot. This keeps the cheesecake smooth and creamy. Enjoy your delicious dessert! For the complete recipe, check out the Full Recipe for Crunchy Honeycomb Cheesecake.
FAQs
What is Crunchy Honeycomb Cheesecake?
Crunchy honeycomb cheesecake is a delightful dessert. It has a smooth, creamy filling with honeycomb pieces. The crust is made from crushed digestive biscuits and butter. This cheesecake combines rich cream cheese, sour cream, and sweet honey. Topping it with dark chocolate makes it extra special. You get a mix of creamy and crunchy textures in every bite.
Can I make this recipe ahead of time?
Yes, you can make this cheesecake ahead of time. It tastes even better after chilling. Prepare it a day before serving for best results. After baking, let it cool completely. Then, refrigerate it for at least four hours or overnight. This helps the flavors meld together.
Where can I buy honeycomb?
You can find honeycomb at many local grocery stores. Look in the baking aisle or near the honey. Specialty food stores often carry it too. If you cannot find it locally, try online shops. Websites like Amazon or specialty food retailers offer honeycomb.
Can I use store-bought cheesecake instead?
You can use store-bought cheesecake, but it has pros and cons. A store-bought cheesecake saves time. It might not have the same texture or flavor as homemade. If you want to save effort, it’s a good option. However, making it yourself gives you control over taste and texture.
How do I know when the cheesecake is done?
Check the edges of the cheesecake during baking. They should look firm while the center remains slightly wobbly. This means it is done but not overcooked. After baking, let it cool in the oven for an hour. This helps avoid cracks. Always chill it properly before serving.
This blog post shared how to make a delicious Crunchy Honeycomb Cheesecake. I covered essential ingredients, step-by-step instructions, and tips for a perfect texture. You learned about variations, storage, and even FAQs to guide you.
Baking can be fun and rewarding, especially with unique recipes like this one. Give it a try, and enjoy a treat that impresses everyone! The effort will be worth it when you serve this delightful dessert.


