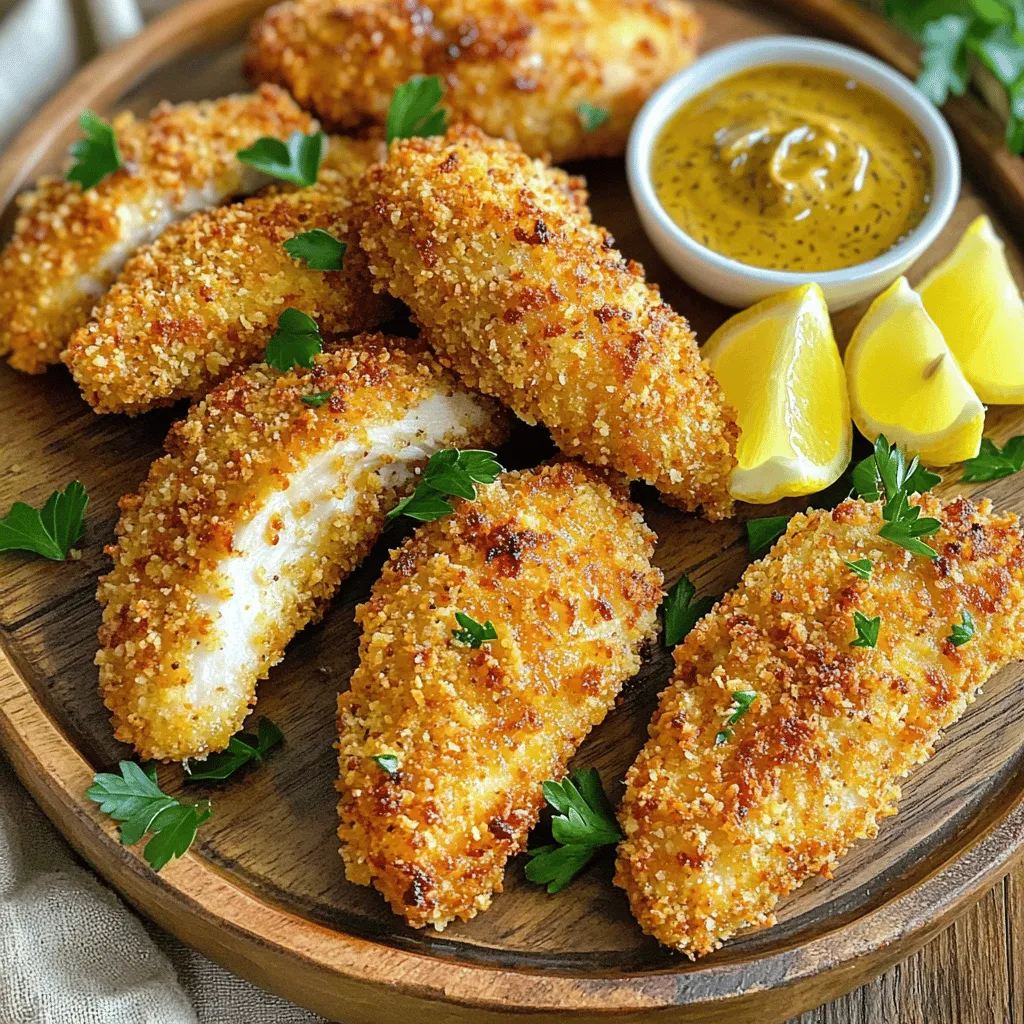
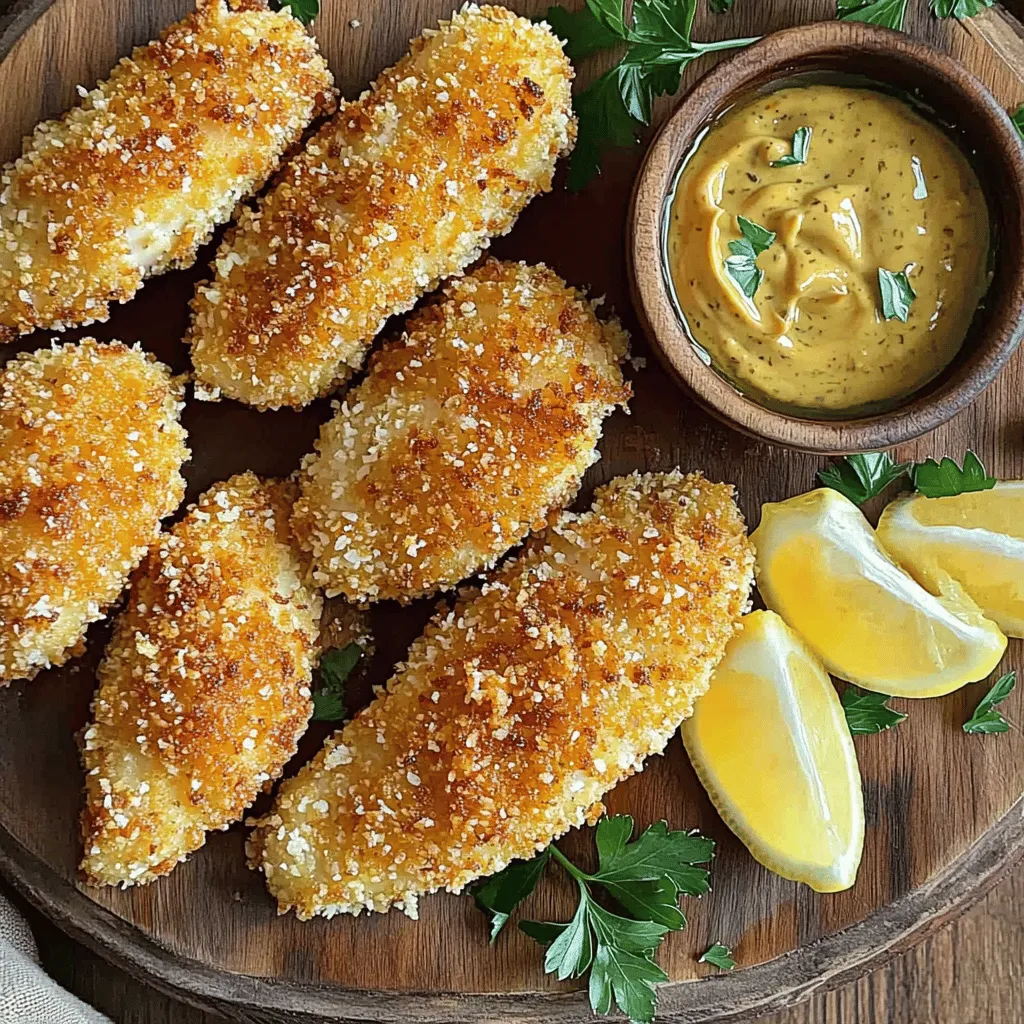
If you’re craving crispy baked chicken tenders that are easy to make, you’re in the right place! I’ll guide you through each step, from marinating the chicken to achieving that perfect crunch. These tasty tenders will impress your family and friends while satisfying your cravings. Get ready to whip up a dish that’s flavorful, simple, and sure to please everyone at the table! Let’s dive into this delightful recipe.
Ingredients for Crispy Baked Chicken Tenders
Chicken and Marinade
For this recipe, you need fresh chicken breast. Use about 1 lb, cut into strips. The marinade is key for juicy chicken. Soak the strips in 1 cup of buttermilk. This helps tenderize the meat and adds flavor. You can marinate for 30 minutes or leave it overnight for more taste.
Dry Coating Mixture
The dry coating gives the tenders their crispy crunch. You need:
– 1 cup all-purpose flour
– 1 cup Panko breadcrumbs
– 1 teaspoon garlic powder
– 1 teaspoon onion powder
– 1 teaspoon smoked paprika
– 1/2 teaspoon cayenne pepper (optional)
– Salt and pepper to taste
Mix these ingredients well in a bowl. The flour helps the breadcrumbs stick. Panko breadcrumbs add extra crunch. The spices bring out great flavor, so don’t skip them!
Optional Ingredients for Extra Flavor
To make your chicken tenders even tastier, think about adding some extra ingredients. You can use:
– Grated Parmesan cheese for a cheesy crust
– Fresh herbs like parsley or thyme for a hint of freshness
– Lemon zest for a bright, zesty touch
These additions can elevate your dish and impress your guests. Follow the Full Recipe for guidance on how to bring it all together!
Step-by-Step Instructions
Preheating the Oven
Start by preheating your oven to 400°F (200°C). This step is key for crispiness. Use parchment paper on your baking sheet to prevent sticking. It makes cleanup easy and keeps the tenders intact.
Marinating the Chicken
In a medium bowl, add the chicken strips. Pour in the buttermilk, covering each piece. This helps keep the chicken juicy. Cover the bowl with plastic wrap and place it in the fridge. Let it sit for at least 30 minutes, or longer for better taste.
Preparing the Dry Mixture
In a separate bowl, mix the all-purpose flour, garlic powder, onion powder, smoked paprika, cayenne pepper, and a good pinch of salt and pepper. This blend gives the chicken a flavorful crust. Whisk it well to combine all the spices evenly.
Coating the Chicken
Take the chicken out of the buttermilk. Let the excess drip off. First, coat each strip in the flour mixture. Make sure each piece is well-covered. Next, dip it into the Panko breadcrumbs. Press lightly to help them stick. This step is crucial for that crispy finish.
Baking the Chicken Tenders
Arrange the coated chicken on the baking sheet. Place them in a single layer, leaving space between each piece. Lightly spray or drizzle the tops with cooking spray or olive oil. Bake for 15-20 minutes. Flip them halfway through to ensure even cooking. They should be golden brown and reach an internal temperature of 165°F (75°C).
Final Cooling and Serving
Once baked, let the chicken tenders cool for a few minutes on the baking sheet. This helps them stay crispy. Serve them hot with your favorite dipping sauce. Enjoy every crunchy bite! For the full recipe, check out the details shared earlier.
Tips & Tricks for Perfecting Your Chicken Tenders
Achieving Maximum Crispiness
To get the best crunch, start with the chicken. Use fresh chicken breast cut into strips. Marinating in buttermilk helps. The acids in buttermilk tenderize the meat. This also adds flavor. After marinating, coat the chicken in flour first. This helps the breadcrumbs stick better. Use Panko breadcrumbs for extra crunch. They are lighter and crispier than regular breadcrumbs. A light spray of oil before baking helps too. It promotes browning and crispiness as the chicken cooks.
Common Mistakes to Avoid
One common mistake is overcrowding the baking sheet. Leave space between each chicken tender. This allows hot air to circulate. If you don’t, they will steam instead of crisp. Another mistake is skipping the marination step. It may seem fast, but marinating adds so much flavor. Avoid using too much flour or breadcrumbs. This can make the coating thick and soggy. Finally, don’t forget to flip them halfway through cooking. This ensures they brown evenly on both sides.
Recommended Cooking Tools
For this recipe, a few tools can help. Use a sharp knife to cut the chicken easily. A whisk is great for mixing the dry ingredients. Bowls for marinating and breading are essential. Parchment paper keeps the chicken from sticking. A baking sheet is needed for cooking. I also recommend a meat thermometer. This ensures your chicken reaches 165°F (75°C). Having these tools ready makes the process smooth. For the full recipe, check out the complete guide.
Variations of Crispy Baked Chicken Tenders
Gluten-Free Alternatives
You can easily make gluten-free chicken tenders. Instead of all-purpose flour, use almond flour or gluten-free flour. For breadcrumbs, try gluten-free Panko or crushed rice cereal. These swaps keep the crispy texture while meeting gluten-free needs.
Spicy Chicken Tenders
To make your chicken tenders spicy, add cayenne pepper to the dry mixture. You can also mix in hot sauce with the buttermilk. For extra heat, use a spicy seasoning blend. This variation brings a kick that many will enjoy.
Ingredients Add-ins for Flavor Diversity
You can add different flavors to your chicken tenders. Try mixing dried herbs, like thyme or oregano, into the coating. Adding grated Parmesan cheese to the Panko gives a savory twist. Lemon zest in the buttermilk also brightens the dish. These simple changes make your tenders unique and tasty. For the full recipe, see above.
Storage Info for Leftover Chicken Tenders
Best Practices for Refrigeration
To keep your crispy baked chicken tenders fresh, store them in an airtight container. Make sure they cool down before sealing. This way, they won’t get soggy. You can keep them in the fridge for up to three days.
Freezing Leftovers
If you want to save some for later, freezing is a great option. Place the chicken tenders in a single layer on a baking sheet. Freeze them for about an hour until firm. Then, transfer them to a freezer bag. This prevents them from sticking together. You can freeze them for up to three months.
Reheating Tips for Maintaining Crispiness
To reheat, use the oven for best results. Preheat your oven to 400°F (200°C). Place the chicken tenders on a baking sheet. Bake for about 10-15 minutes, or until heated through. This helps keep them crispy. Avoid using the microwave, as it makes them soggy. Enjoy your delicious tenders again!
FAQs about Crispy Baked Chicken Tenders
Can I use chicken thighs instead of breasts?
Yes, you can use chicken thighs. They are juicy and flavorful. Thighs have more fat, adding richness. Just adjust the cooking time slightly. Bake them until they reach 165°F (75°C).
How can I make chicken tenders more flavorful?
To boost flavor, try using these tips:
– Marinate longer: Let the chicken soak in buttermilk for at least 2 hours.
– Spices: Add herbs like thyme or rosemary to the dry mix.
– Seasoning: Mix in more garlic or onion powder for a punch.
– Citrus: Squeeze lemon juice over the cooked tenders for brightness.
What’s the best dipping sauce for chicken tenders?
My favorite dipping sauce is honey mustard. It’s sweet and tangy, perfect with the crispy tenders. You can also try:
– BBQ sauce for smokiness.
– Ranch dressing for a creamy option.
– Sriracha mayo for a spicy kick.
How do I know when chicken tenders are fully cooked?
Check the internal temperature. It should reach 165°F (75°C). Use a meat thermometer for the best accuracy. Look for a golden brown color too. If you cut into the chicken, the juices should run clear. Enjoy your crispy chicken tenders! For the Full Recipe, refer to the main section.
Crispy baked chicken tenders are simple to make and full of flavor. We covered all you need: chicken prep, dry coating mixes, and cooking tips. Remember, you can adjust the recipe for extra zest or dietary needs. Always use the right tools and avoid common mistakes for the best results. Enjoy your crispy tenders with your favorite dipping sauce. Whether you make spicy or gluten-free versions, these tenders are a hit. Try these methods, and you’ll impress everyone at the table. Happy cooking!