Chocolate Chip Pumpkin Scones Irresistible Fall Treat

WANT TO SAVE THIS RECIPE?

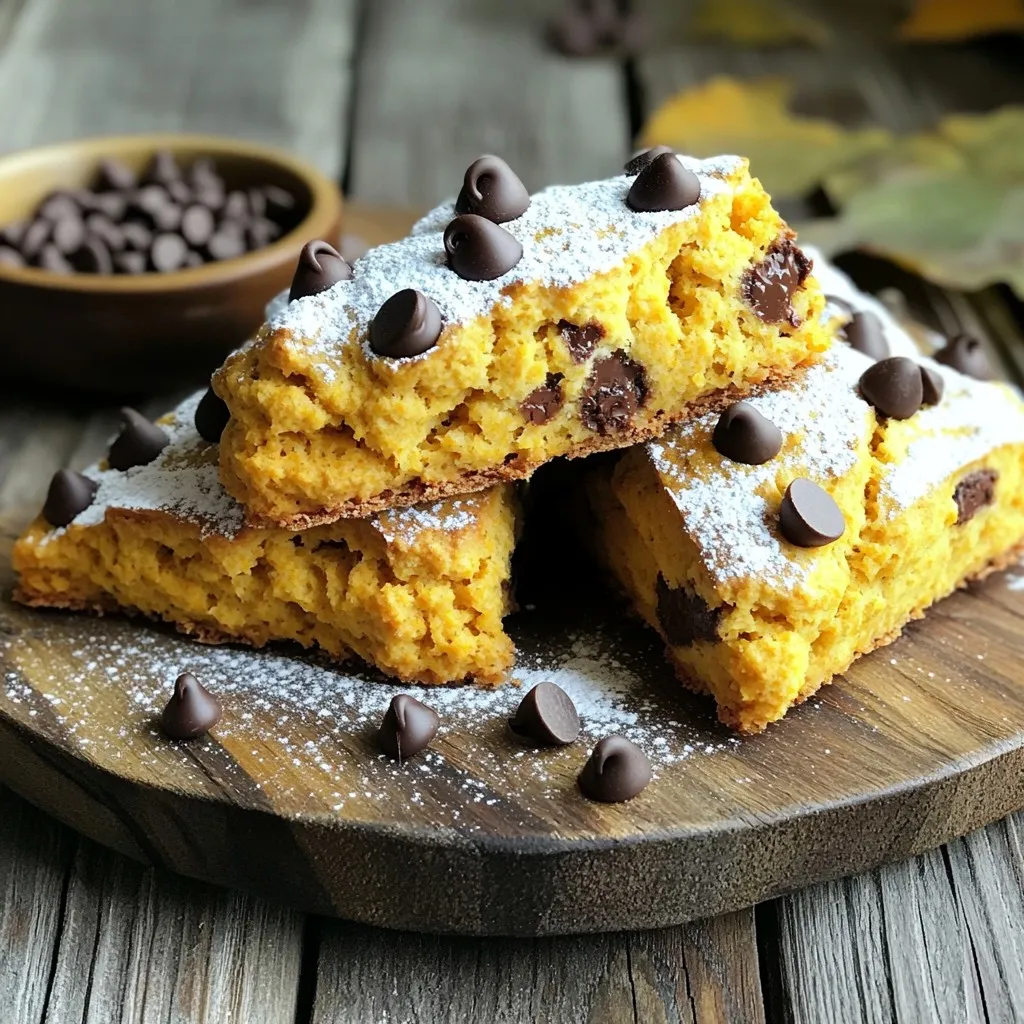
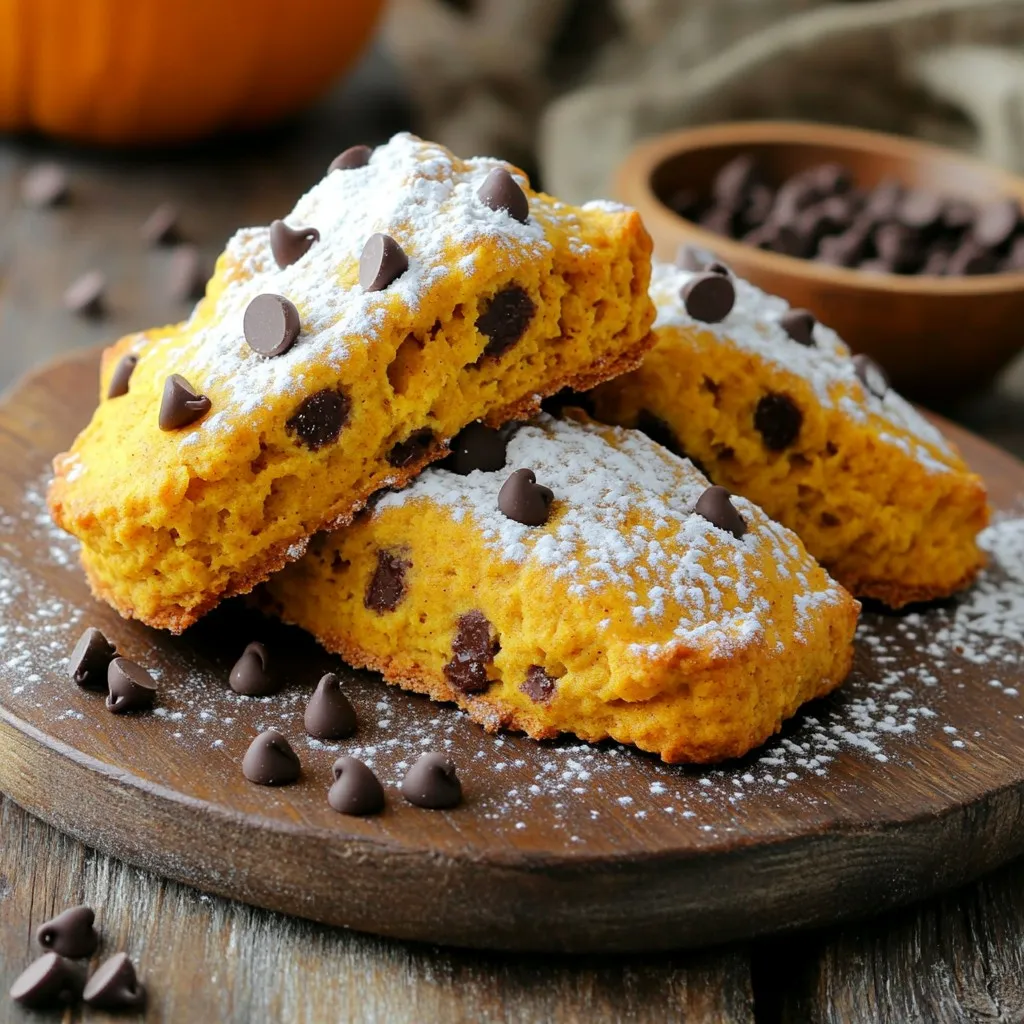
Fall is here, and it’s time to indulge in warm, comforting treats! If you love pumpkin and chocolate, then my Chocolate Chip Pumpkin Scones are perfect for you. These scones are easy to make, moist, and packed with flavor. In this post, I’ll guide you through the simple steps to create this irresistible fall delight. Get ready to impress your friends and family with this cozy recipe that you won’t want to miss!

Ingredients

Creating Chocolate Chip Pumpkin Scones requires a few key ingredients. Here’s what you need:

– 2 cups all-purpose flour

– 1/2 cup brown sugar, packed

– 1 tablespoon baking powder

– 1/2 teaspoon baking soda

– 1/2 teaspoon salt

– 1 teaspoon ground cinnamon

– 1/2 teaspoon ground nutmeg

– 1/4 teaspoon ground ginger

– 1/2 cup unsalted butter, cold and cubed

– 1/2 cup pumpkin puree

– 1/4 cup heavy cream

– 1/2 teaspoon vanilla extract

– 1/2 cup semi-sweet chocolate chips

– Optional: 1 egg for egg wash

Each element plays a role. The all-purpose flour provides structure. The brown sugar adds sweetness and moisture. Baking powder and baking soda help the scones rise. The spices give that warm, cozy fall flavor.

Butter adds richness and helps create a flaky texture. Pumpkin puree brings moisture and a lovely color. Heavy cream adds fat, making the scones tender. Vanilla extract enhances flavor, while chocolate chips give sweetness and a delightful contrast.

If you want a shiny finish, use the optional egg wash. It makes the scones look beautiful and appetizing. Gather these ingredients, and you are ready to make a delicious fall treat!

Step-by-Step Instructions

Preheat the Oven

First, set your oven to 400°F (200°C). This hot temperature helps the scones rise well. Line a baking sheet with parchment paper for easy cleanup later.

Mix Dry Ingredients

In a large bowl, whisk together the flour, brown sugar, baking powder, baking soda, salt, and spices. Whisking is important; it blends all the dry ingredients evenly. Set this mixture aside to keep it ready for the next steps.

Incorporate Butter

Now, take the cold, cubed butter and add it to the dry mixture. Use your fingers or a pastry cutter to blend it in. You want the mix to look like coarse crumbs. Leave some pea-sized pieces of butter; they add flakiness.

Combine Wet Ingredients

In a separate bowl, mix pumpkin puree, heavy cream, and vanilla extract. Stir until it is smooth and creamy. This mix brings moisture and taste to the scones, so make sure it is well combined.

Bring It Together

Gently pour the pumpkin mix into the dry ingredients. Use a spatula or wooden spoon to mix until just combined. Avoid overmixing to keep the scones tender. Then, fold in the chocolate chips carefully.

Shape the Dough and Cut

Move the dough onto a lightly floured surface. Knead it gently two or three times to form a ball. Pat it down into a circle that is about 1 inch thick.

Cut and Arrange

With a sharp knife or pizza cutter, slice the dough into 8 wedges. Place each wedge on the prepared baking sheet, leaving space between them. For a shiny top, brush each scone with a beaten egg, if you like.

Bake to Perfection

Put the baking sheet in your hot oven and bake for 15 to 20 minutes. They are ready when they turn golden brown. You can check doneness with a toothpick; it should come out clean from the center.

Cool and Serve

After baking, let the scones cool on the baking sheet for a few minutes. Then, move them to a wire rack to cool completely. Serve them warm or at room temperature for a delightful treat.

Tips & Tricks

Achieving Perfect Scones

Avoiding overmixing: Mix the dough just until combined. Too much mixing makes scones tough.

Texture tips: Aim for a crumbly texture. You want some small pieces of butter to remain.

Baking Variations

Gluten-free options: Swap all-purpose flour for a gluten-free blend. Look for one that includes xanthan gum for best results.

Vegan alternatives: Use coconut oil instead of butter and almond milk in place of heavy cream.

Presentation Suggestions

How to serve scones: Serve warm on a decorative platter. Dust lightly with powdered sugar for a touch of elegance.

Optional garnishes: Offer extra chocolate chips in a small bowl for dipping. You can also add a drizzle of chocolate on top for flair.

Variations

Flavor Variations

You can make these scones even more delightful. Consider adding nuts or dried fruits. Chopped walnuts or pecans add crunch. Dried cranberries or raisins bring a sweet chewiness.

You can also switch up the chocolate types. Try dark chocolate for a richer taste. White chocolate creates a sweet contrast with the pumpkin flavor.

Dietary Adjustments

If you want a healthier option, you can substitute whole wheat flour for all-purpose flour. You can also use coconut oil instead of butter. This change can make the scones dairy-free.

Adjusting sweetness is easy too. If you like less sugar, use less brown sugar. Honey or maple syrup can replace some sugar and add more flavor.

Indoor & Outdoor Serving Options

These scones work well any time of day. Pair them with a warm drink, like coffee or tea. They also go great with apple cider in the fall.

Serve them fresh from the oven for breakfast or as a snack. They also make a lovely afternoon treat. Just remember to share!

Storage Info

Storing Leftover Scones

Store leftover scones in an airtight container. This keeps them fresh and moist. You can use a plastic container or a resealable bag. If you stack them, use parchment paper between layers. This prevents sticking and keeps the scones looking nice.

Freezing Tips

To freeze scones, first let them cool completely. Wrap each scone in plastic wrap. Place the wrapped scones in a freezer bag. Press out the air before sealing. For best results, eat them within three months. When ready to enjoy, take a scone out and let it thaw at room temperature. This keeps them tasty and fresh.

Reheating Guidelines

To reheat scones, use an oven or toaster oven. Preheat to 350°F (175°C). Place the scones on a baking sheet. Heat for about 10 minutes. This method keeps them crisp on the outside and soft inside. If you need a quick option, use a microwave. Heat for 15-20 seconds. However, this may make them a bit chewy. Enjoy your warm scones with coffee or tea!

FAQs

How do I know when the scones are done?

Look for a golden brown color on the tops of the scones. They should feel firm to the touch. You can also use a toothpick to check for doneness. Insert it into the center of a scone. If it comes out clean, the scones are ready. This simple test helps ensure you don’t underbake or overbake.

Can I use pumpkin spice instead of individual spices?

Yes, you can use pumpkin spice as a substitute! If you want a quick fix, swap out the individual spices for 1 to 2 teaspoons of pumpkin spice. This will still give your scones that warm, fall flavor we love.

What can I replace chocolate chips with?

You have great options! Try using nuts like walnuts or pecans for a nice crunch. You can also use dried fruits like cranberries or raisins for a sweet twist. Each mix-in offers a different flavor profile, so feel free to get creative with what you like.

How long do the scones last?

These scones last about 2 to 3 days at room temperature. Store them in an airtight container to keep them fresh. If you want them to last longer, consider freezing them. They can stay good for up to 3 months in the freezer.

Can I make this recipe ahead of time?

Absolutely! You can prepare the dough a day in advance. Just wrap it tightly in plastic wrap and keep it in the fridge. When you’re ready, simply shape and bake the scones. This saves time and helps you enjoy fresh scones anytime!

You now have a complete guide to making delicious pumpkin scones. We covered essential ingredients, step-by-step baking instructions, and handy tips for perfect results. You can even try different variations or storage options.

Remember, successful baking requires practice and a bit of creativity. Don’t hesitate to experiment with flavors. Enjoy your baking journey and the tasty treats you create. Trust me, your friends and family will appreciate your efforts!

Creating Chocolate Chip Pumpkin Scones requires a few key ingredients. Here’s what you need: - 2 cups all-purpose flour - 1/2 cup brown sugar, packed - 1 tablespoon baking powder - 1/2 teaspoon baking soda - 1/2 teaspoon salt - 1 teaspoon ground cinnamon - 1/2 teaspoon ground nutmeg - 1/4 teaspoon ground ginger - 1/2 cup unsalted butter, cold and cubed - 1/2 cup pumpkin puree - 1/4 cup heavy cream - 1/2 teaspoon vanilla extract - 1/2 cup semi-sweet chocolate chips - Optional: 1 egg for egg wash Each element plays a role. The all-purpose flour provides structure. The brown sugar adds sweetness and moisture. Baking powder and baking soda help the scones rise. The spices give that warm, cozy fall flavor. Butter adds richness and helps create a flaky texture. Pumpkin puree brings moisture and a lovely color. Heavy cream adds fat, making the scones tender. Vanilla extract enhances flavor, while chocolate chips give sweetness and a delightful contrast. If you want a shiny finish, use the optional egg wash. It makes the scones look beautiful and appetizing. Gather these ingredients, and you are ready to make a delicious fall treat! First, set your oven to 400°F (200°C). This hot temperature helps the scones rise well. Line a baking sheet with parchment paper for easy cleanup later. In a large bowl, whisk together the flour, brown sugar, baking powder, baking soda, salt, and spices. Whisking is important; it blends all the dry ingredients evenly. Set this mixture aside to keep it ready for the next steps. Now, take the cold, cubed butter and add it to the dry mixture. Use your fingers or a pastry cutter to blend it in. You want the mix to look like coarse crumbs. Leave some pea-sized pieces of butter; they add flakiness. In a separate bowl, mix pumpkin puree, heavy cream, and vanilla extract. Stir until it is smooth and creamy. This mix brings moisture and taste to the scones, so make sure it is well combined. Gently pour the pumpkin mix into the dry ingredients. Use a spatula or wooden spoon to mix until just combined. Avoid overmixing to keep the scones tender. Then, fold in the chocolate chips carefully. Move the dough onto a lightly floured surface. Knead it gently two or three times to form a ball. Pat it down into a circle that is about 1 inch thick. With a sharp knife or pizza cutter, slice the dough into 8 wedges. Place each wedge on the prepared baking sheet, leaving space between them. For a shiny top, brush each scone with a beaten egg, if you like. Put the baking sheet in your hot oven and bake for 15 to 20 minutes. They are ready when they turn golden brown. You can check doneness with a toothpick; it should come out clean from the center. After baking, let the scones cool on the baking sheet for a few minutes. Then, move them to a wire rack to cool completely. Serve them warm or at room temperature for a delightful treat. - Avoiding overmixing: Mix the dough just until combined. Too much mixing makes scones tough. - Texture tips: Aim for a crumbly texture. You want some small pieces of butter to remain. - Gluten-free options: Swap all-purpose flour for a gluten-free blend. Look for one that includes xanthan gum for best results. - Vegan alternatives: Use coconut oil instead of butter and almond milk in place of heavy cream. - How to serve scones: Serve warm on a decorative platter. Dust lightly with powdered sugar for a touch of elegance. - Optional garnishes: Offer extra chocolate chips in a small bowl for dipping. You can also add a drizzle of chocolate on top for flair. {{image_4}} You can make these scones even more delightful. Consider adding nuts or dried fruits. Chopped walnuts or pecans add crunch. Dried cranberries or raisins bring a sweet chewiness. You can also switch up the chocolate types. Try dark chocolate for a richer taste. White chocolate creates a sweet contrast with the pumpkin flavor. If you want a healthier option, you can substitute whole wheat flour for all-purpose flour. You can also use coconut oil instead of butter. This change can make the scones dairy-free. Adjusting sweetness is easy too. If you like less sugar, use less brown sugar. Honey or maple syrup can replace some sugar and add more flavor. These scones work well any time of day. Pair them with a warm drink, like coffee or tea. They also go great with apple cider in the fall. Serve them fresh from the oven for breakfast or as a snack. They also make a lovely afternoon treat. Just remember to share! Store leftover scones in an airtight container. This keeps them fresh and moist. You can use a plastic container or a resealable bag. If you stack them, use parchment paper between layers. This prevents sticking and keeps the scones looking nice. To freeze scones, first let them cool completely. Wrap each scone in plastic wrap. Place the wrapped scones in a freezer bag. Press out the air before sealing. For best results, eat them within three months. When ready to enjoy, take a scone out and let it thaw at room temperature. This keeps them tasty and fresh. To reheat scones, use an oven or toaster oven. Preheat to 350°F (175°C). Place the scones on a baking sheet. Heat for about 10 minutes. This method keeps them crisp on the outside and soft inside. If you need a quick option, use a microwave. Heat for 15-20 seconds. However, this may make them a bit chewy. Enjoy your warm scones with coffee or tea! Look for a golden brown color on the tops of the scones. They should feel firm to the touch. You can also use a toothpick to check for doneness. Insert it into the center of a scone. If it comes out clean, the scones are ready. This simple test helps ensure you don’t underbake or overbake. Yes, you can use pumpkin spice as a substitute! If you want a quick fix, swap out the individual spices for 1 to 2 teaspoons of pumpkin spice. This will still give your scones that warm, fall flavor we love. You have great options! Try using nuts like walnuts or pecans for a nice crunch. You can also use dried fruits like cranberries or raisins for a sweet twist. Each mix-in offers a different flavor profile, so feel free to get creative with what you like. These scones last about 2 to 3 days at room temperature. Store them in an airtight container to keep them fresh. If you want them to last longer, consider freezing them. They can stay good for up to 3 months in the freezer. Absolutely! You can prepare the dough a day in advance. Just wrap it tightly in plastic wrap and keep it in the fridge. When you’re ready, simply shape and bake the scones. This saves time and helps you enjoy fresh scones anytime! You now have a complete guide to making delicious pumpkin scones. We covered essential ingredients, step-by-step baking instructions, and handy tips for perfect results. You can even try different variations or storage options. Remember, successful baking requires practice and a bit of creativity. Don’t hesitate to experiment with flavors. Enjoy your baking journey and the tasty treats you create. Trust me, your friends and family will appreciate your efforts!

Chocolate Chip Pumpkin Scones

Indulge in the delightful flavor of Chocolate Chip Pumpkin Scones with this easy recipe! Perfect for fall, these scones are a scrumptious blend of pumpkin, spices, and chocolate that’s sure to impress. From mixing ingredients to baking, follow our simple steps for a cozy treat that's ideal for breakfast or a snack. Click through to discover how to whip up these delicious scones and bring warmth to your kitchen!

Ingredients
  

2 cups all-purpose flour

1/2 cup brown sugar, packed

1 tablespoon baking powder

1/2 teaspoon baking soda

1/2 teaspoon salt

1 teaspoon ground cinnamon

1/2 teaspoon ground nutmeg

1/4 teaspoon ground ginger

1/2 cup unsalted butter, cold and cubed

1/2 cup pumpkin puree

1/4 cup heavy cream

1/2 teaspoon vanilla extract

1/2 cup semi-sweet chocolate chips

Optional: 1 egg for egg wash

Instructions
 

Preheat Your Oven: Start by preheating your oven to 400°F (200°C). Line a baking sheet with parchment paper for easy cleanup.

    Mix Dry Ingredients: In a large mixing bowl, whisk together the all-purpose flour, packed brown sugar, baking powder, baking soda, salt, ground cinnamon, nutmeg, and ginger. Ensure all the dry ingredients are well combined and set aside.

      Incorporate Butter: Add the cold, cubed unsalted butter to the dry mixture. Using a pastry cutter or your fingers, blend the butter into the flour mixture until it resembles coarse crumbs, with some pea-sized pieces remaining.

        Combine Wet Ingredients: In a separate bowl, mix the pumpkin puree, heavy cream, and vanilla extract until smooth and creamy. This will add moisture and flavor to the scones.

          Bring It Together: Gently pour the pumpkin mixture into the bowl with the dry ingredients. Using a spatula or wooden spoon, stir until the mixture is just combined; be careful not to overmix, as this can lead to tough scones. Gently fold in the semi-sweet chocolate chips.

            Shape the Dough: Transfer the dough onto a lightly floured surface. With clean hands, gently knead the dough two or three times until it forms a cohesive ball. Pat it down into a circle about 1 inch thick.

              Cut and Arrange: Using a sharp knife or pizza cutter, slice the dough into 8 equal wedges. Carefully place each wedge on the prepared baking sheet, leaving a little space between them. If you desire a shiny, golden top, brush the surface of each scone with a beaten egg.

                Bake to Perfection: Place the baking sheet in your oven and bake for 15-20 minutes. The scones are ready when they are golden brown, and a toothpick inserted into the center comes out clean.

                  Cool and Serve: Once baked, allow the scones to cool on the baking sheet for a few minutes. Then transfer them to a wire rack to cool completely or enjoy while warm.

                    Prep Time: 15 min | Total Time: 35 min | Servings: 8 scones

                      - Presentation Tips: Serve the warm scones on a decorative platter, lightly dusted with powdered sugar. For an extra indulgence, provide a small bowl of additional chocolate chips alongside for dipping or sprinkling on top.

                        WANT TO SAVE THIS RECIPE?