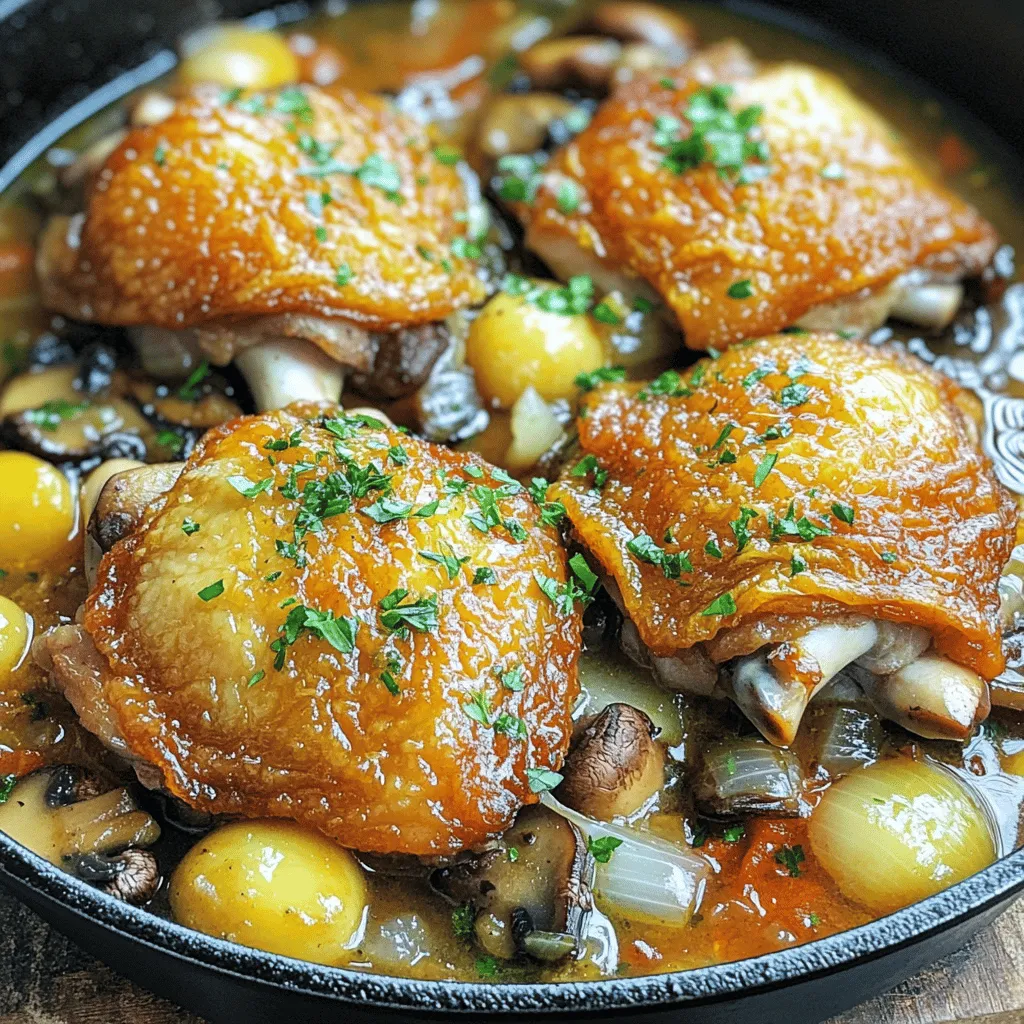
Welcome to my flavorful world of Chicken Chasseur! This simple and tasty recipe brings classic French flavors to your kitchen. I’ll guide you through every step, from picking the freshest ingredients to searing chicken to perfection. Whether you’re a novice cook or a seasoned pro, you’ll find tips that make this dish a hit. Trust me, with my easy instructions, you’ll impress your family and friends in no time!
Ingredients
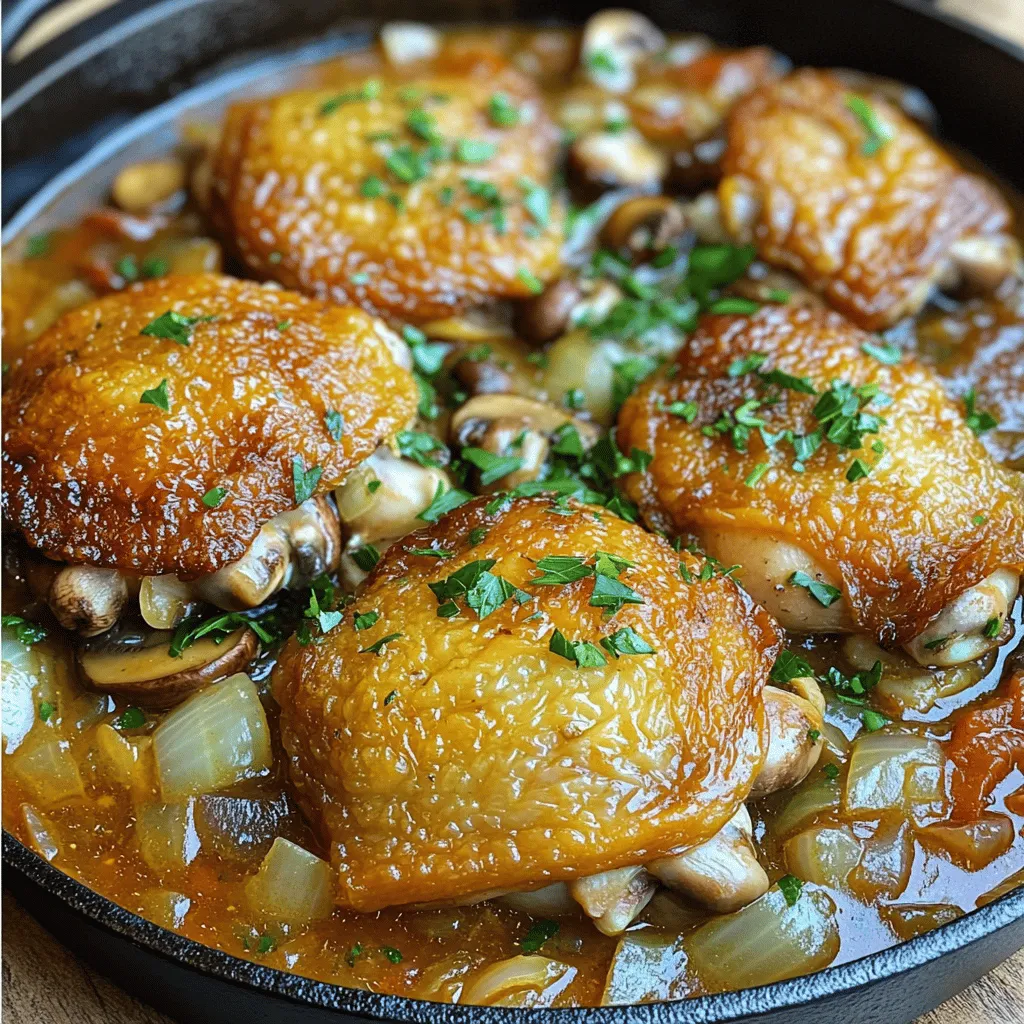
Complete Ingredient List for Chicken Chasseur
– 4 chicken thighs (skin-on and bone-in for optimal flavor)
– 1 tablespoon olive oil (extra virgin for added richness)
– 1 cup mushrooms, sliced (cremini or button for depth of flavor)
– 1 medium onion, diced (yellow or white for sweetness)
– 2 cloves garlic, minced
– 1 cup chicken broth (low-sodium preferred)
– 1 tablespoon tomato paste (for a hint of sweetness and color)
– 1 teaspoon dried thyme (or fresh if available)
– 1 teaspoon dried rosemary (or fresh, finely chopped)
– 1 tablespoon fresh parsley, chopped (for garnish)
– Salt and freshly ground pepper to taste
Tips for Selecting Fresh Ingredients
When you shop for ingredients, look for bright colors. Choose chicken with smooth skin. The meat should feel firm and not sticky. For mushrooms, select ones that are plump and dry. Avoid any with dark spots or a slimy texture. Pick fresh herbs that smell strong and vibrant. They should be green and crisp, not wilted. Fresh onions should feel heavy and firm.
Substitutions for Common Allergens
If you have allergies, there are easy swaps. Use vegetable broth instead of chicken broth for a vegetarian dish. If you can’t eat garlic, try shallots or omit it. For those avoiding gluten, check your broth and tomato paste labels. Many brands offer gluten-free options. You can also use olive oil alternatives like canola oil, if needed.
Step-by-Step Instructions
Preheat the Oven and Prepare the Skillet
Start by preheating your oven to 375°F (190°C). This is key for cooking the chicken just right. While the oven heats, grab a large, oven-safe skillet. Place it on the stove over medium-high heat. You want it hot to get great flavor.
Searing the Chicken for Flavor
Now, let’s add some flavor by searing the chicken. Pour in one tablespoon of olive oil and let it heat up. Once it shimmers, add the chicken thighs skin-side down. Sear them for about 4-5 minutes until the skin turns golden brown.
Carefully flip the thighs and cook for another 3-4 minutes on the other side. This creates a lovely crust. When done, remove the chicken from the skillet and set it aside on a plate.
Creating a Flavorful Sauce
In the same skillet, add the diced onion and sliced mushrooms. Sauté them for about 5 minutes. Stir occasionally until the onions are soft and clear.
Next, stir in the minced garlic. Cook for an extra minute to let the garlic bloom without burning. Pour in one cup of chicken broth. Add one tablespoon of tomato paste, one teaspoon of dried thyme, one teaspoon of dried rosemary, and season with salt and pepper. Mix it well and let it simmer gently.
Nestle the seared chicken thighs back into the skillet, skin-side up. Ladle some sauce over each piece. Transfer the skillet to your preheated oven. Bake for 25-30 minutes or until the chicken hits 165°F (74°C).
Once cooked, remove the skillet from the oven and let it rest. Before serving, sprinkle with freshly chopped parsley. This dish will impress anyone at your table! For more details, check out the Full Recipe.
Tips & Tricks
How to Achieve Perfectly Crispy Skin
To get crispy skin on your chicken, start with bone-in, skin-on thighs. Pat the skin dry with a paper towel. This helps remove excess moisture. Next, heat your skillet over medium-high heat. Add olive oil and let it get hot. Carefully place the chicken skin-side down. Sear for about 4-5 minutes until golden brown. Then, flip the chicken and brown the other side for 3-4 minutes. This method locks in flavor and gives you that perfect crunch.
Recommended Cooking Tools
Using the right tools makes cooking easier. Here are some must-haves for this recipe:
– Oven-safe skillet: Ideal for searing and baking.
– Meat thermometer: Ensures chicken reaches 165°F (74°C).
– Sharp knife: Great for chopping veggies and herbs.
– Cutting board: Protects your counters and keeps things tidy.
These tools will help you make Chicken Chasseur like a pro!
Adjusting Seasoning to Taste
Seasoning is key to great flavor. Start with the basics: salt and pepper. Taste your sauce as you cook. If it lacks flavor, add more salt or pepper. Fresh herbs can boost taste too. Dried thyme and rosemary work well, but fresh is even better. If you like heat, a pinch of red pepper flakes adds a nice kick. Remember, you can always add more, but you can’t take it out! Adjust until it’s just right for you.
For the full recipe, check the section above.
Variations
Adding Seasonal Vegetables to Enhance Flavor
You can add seasonal vegetables to make Chicken Chasseur even better. Think about using carrots, zucchini, or bell peppers. Slice them into small pieces and add them when you sauté the onions and mushrooms. This change gives you more color and taste. Plus, it helps you eat more veggies!
Making a Lighter Version of Chicken Chasseur
If you want a lighter dish, use skinless chicken thighs or breasts. You can also replace the olive oil with a light cooking spray. Use low-sodium chicken broth to cut down on salt. You can still enjoy the rich flavors while keeping it healthy.
Alternate Cooking Methods (Slow Cooker, Instant Pot)
Using a slow cooker or Instant Pot is simple. For a slow cooker, sear the chicken first, then place everything in the pot. Cook on low for 6-8 hours. For an Instant Pot, use the sauté setting to brown the chicken and veggies. Then add broth and cook on high pressure for about 10 minutes. Both methods keep the chicken tender and juicy.
For the full recipe, check out the Chicken Chasseur Delight section!
Storage Info
Best Practices for Storing Leftovers
To keep your Chicken Chasseur fresh, store it properly. First, let the dish cool to room temperature. Then, place leftovers in an airtight container. Make sure to enjoy your Chicken Chasseur within three days. This keeps the flavors vibrant and tasty. If you have extra sauce, store it separately to prevent sogginess.
Reheating Tips to Maintain Flavor and Texture
Reheating Chicken Chasseur can be simple. You can use a microwave or the stove. For the microwave, place a portion in a bowl and cover it with a damp paper towel. Heat in short bursts, stirring in between. On the stove, warm it in a pan over low heat. Add a splash of chicken broth if the sauce is thick. This keeps it moist and flavorful.
Freezing Chicken Chasseur for Later Use
You can freeze Chicken Chasseur for later. First, let it cool completely. Then, transfer it to a freezer-safe container. Label it with the date for easy tracking. When ready to eat, thaw it in the fridge overnight. Reheat it gently to savor all the flavors. Freezing is a great way to enjoy this dish again. For the full recipe, refer to the provided section.
FAQs
What is the history of Chicken Chasseur?
Chicken Chasseur, often called Hunter’s Chicken, has French roots. This dish dates back to the 19th century. It draws from rustic French cooking. The name comes from the word “chasseur,” meaning hunter. Traditionally, hunters made it with freshly caught game. Over time, chicken became the star ingredient. It captures the essence of countryside cooking with herbs and mushrooms.
Can I use boneless chicken for this recipe?
Yes, you can use boneless chicken. Boneless thighs provide great flavor and cook quickly. You will need to adjust cooking time. Cook them for about 20-25 minutes in the oven. Always check for an internal temperature of 165°F (74°C). This ensures your chicken is safe to eat while staying juicy.
What sides pair well with Chicken Chasseur?
Chicken Chasseur pairs well with several sides. Here are some great options:
– Mashed potatoes
– Crusty bread
– Green beans
– Roasted carrots
– Rice or quinoa
These sides add balance and soak up the rich sauce. Enjoy experimenting with your favorite sides! For the full recipe, check out the Chicken Chasseur Delight.
To sum up, we covered Chicken Chasseur from start to finish. We discussed key ingredients and how to choose the best ones. You learned step-by-step instructions to create a delicious dish. Tips on achieving crispy skin and adjusting flavors made the process easier. Variations open the door to new tastes and methods. Lastly, we shared how to store and reheat leftovers wisely. Embrace the joy of cooking this classic dish, and make it your own!