
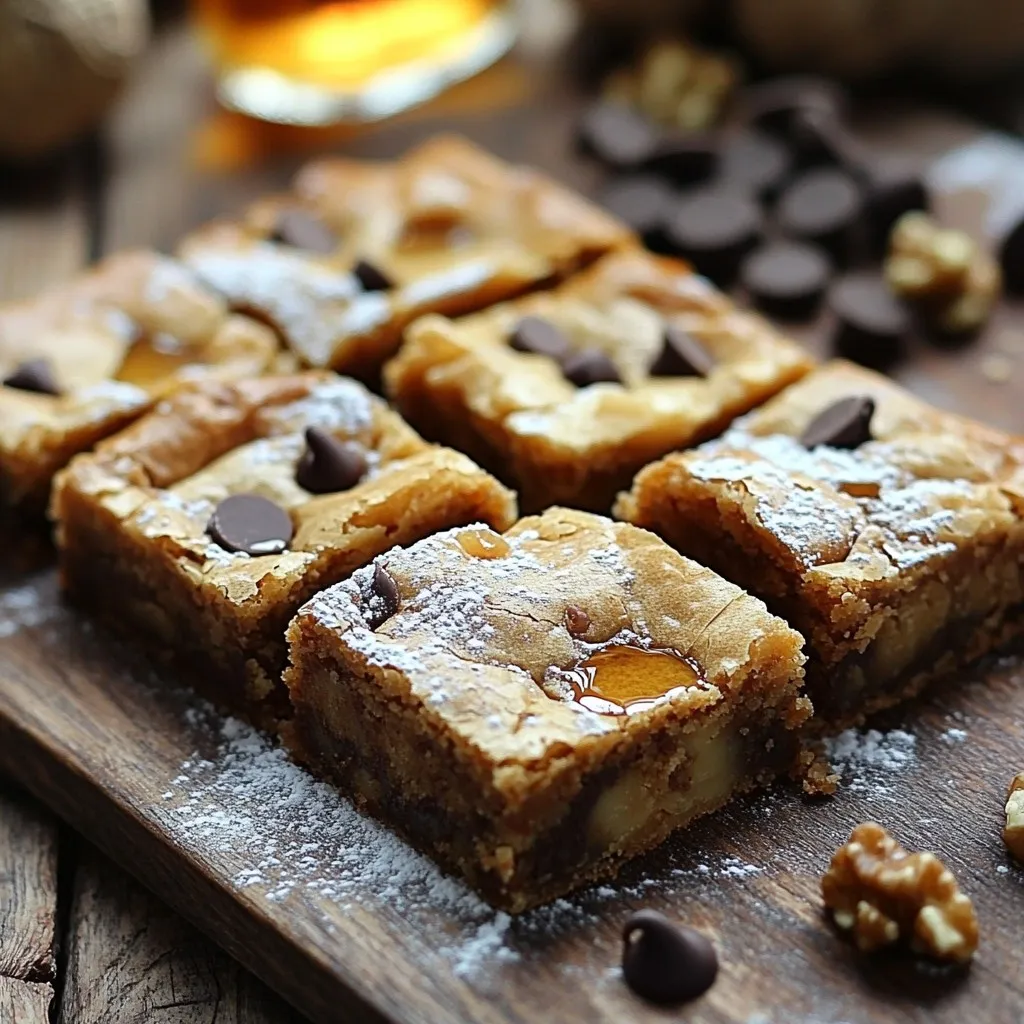
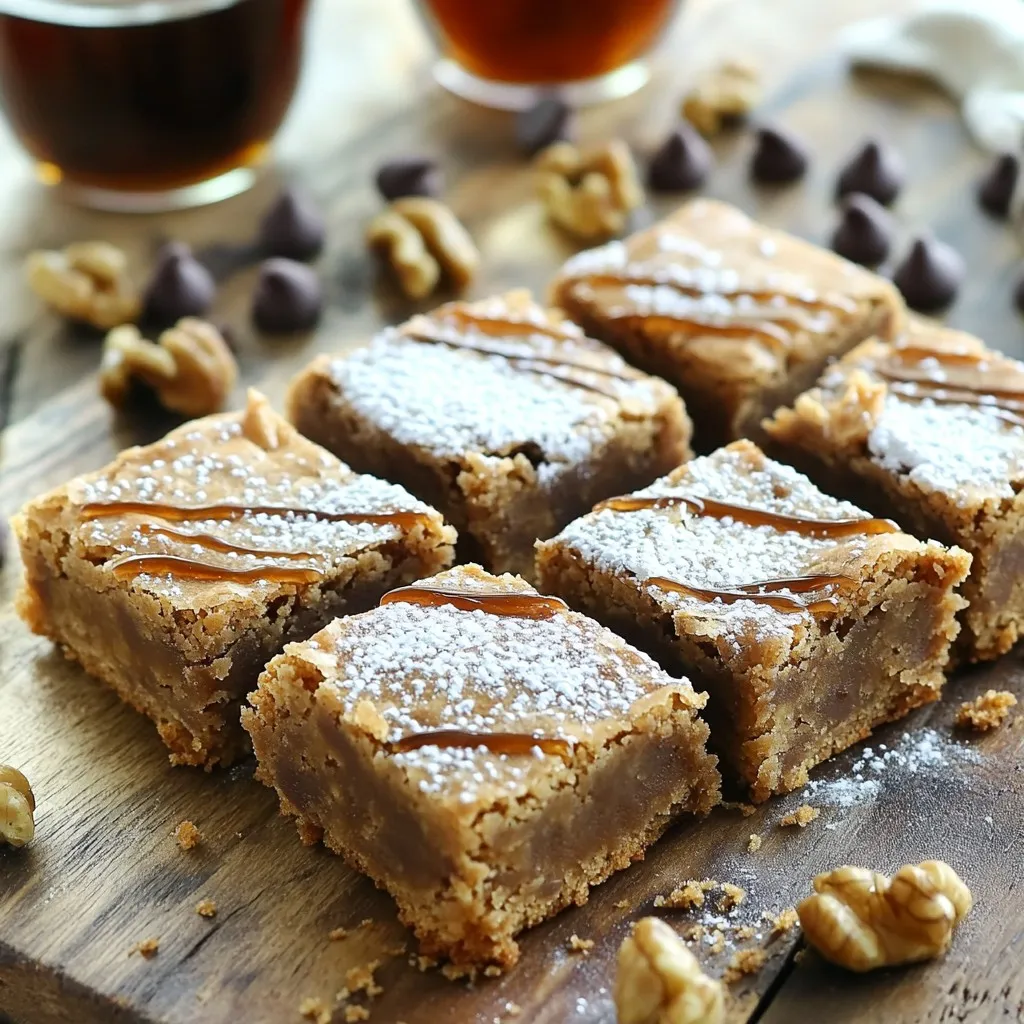
Get ready to indulge in a sweet delight! Brown Butter Maple Blondies bring a warm, nutty flavor that you won’t forget. With simple ingredients and easy steps, anyone can create these tasty treats. Whether you want to impress friends or enjoy a cozy night in, these blondies are perfect. Stick around, and I’ll guide you on how to make these delicious bites that are sure to satisfy your sweet cravings!
Ingredients
To make Brown Butter Maple Blondies, you need some key ingredients. Each one adds flavor and texture to these treats. Here’s the complete list:
– 1 cup unsalted butter
– 1 cup packed light brown sugar
– 1/2 cup granulated sugar
– 2 large eggs
– 2 teaspoons pure vanilla extract
– 1 1/2 cups all-purpose flour
– 1 teaspoon baking powder
– 1/2 teaspoon baking soda
– 1/4 teaspoon fine sea salt
– 1/2 cup pure maple syrup
– 1/2 cup chopped walnuts (optional)
– 1/2 cup semi-sweet chocolate chips (optional)
Now, let’s dive into why these ingredients matter.
1. Unsalted Butter: This gives a rich, creamy base. Brown it to add depth.
2. Light Brown Sugar: This adds sweetness and a hint of caramel flavor.
3. Granulated Sugar: It balances the brown sugar’s flavor.
4. Eggs: These provide structure and moisture.
5. Vanilla Extract: A dash of vanilla brings warmth to the flavor.
6. All-Purpose Flour: The main structure of the blondies.
7. Baking Powder and Baking Soda: These help the blondies rise.
8. Fine Sea Salt: A small amount enhances all the flavors.
9. Maple Syrup: This gives a lovely, sweet maple flavor.
10. Chopped Walnuts: Optional, but they add a nice crunch.
11. Semi-Sweet Chocolate Chips: Also optional, but they add sweetness and richness.
Each ingredient plays an important role. Make sure to measure carefully for the best results. Experiment with the optional ingredients to make these blondies your own!
Step-by-Step Instructions
Prepping the Oven and Pan
– Preheat the oven to 350°F (175°C).
– Prepare a 9×13 inch baking pan. Grease it lightly with cooking spray or butter. Line the bottom with parchment paper. This makes it easy to lift the blondies out later.
Making the Brown Butter
– In a medium saucepan, melt the unsalted butter over medium heat.
– Swirl the pan while it melts. Watch as it turns golden brown. It will smell nutty after about 5-7 minutes. Be careful not to burn it!
– Once browned, remove the pan from heat. Let the butter cool for about a minute.
Mixing the Batter
– In a large bowl, combine the light brown sugar and granulated sugar with the warm browned butter. Mix until smooth.
– Add the eggs one at a time, mixing well after each addition.
– Stir in the vanilla extract and maple syrup. Mix until the batter is smooth.
– In another bowl, whisk together the flour, baking powder, baking soda, and salt.
– Gradually fold the dry ingredients into the wet mixture. Mix until no dry flour remains. Don’t overmix!
Adding Optional Ingredients
– If you like, gently fold in the chopped walnuts and semi-sweet chocolate chips. This adds a nice crunch and flavor.
Baking the Blondies
– Pour the batter into the prepared baking pan. Spread it out evenly with a spatula.
– Bake for 20-25 minutes. To check if they are done, insert a toothpick in the center. It should come out with a few moist crumbs.
Cooling and Cutting
– Once baked, let the blondies cool in the pan for about 10 minutes.
– Use the parchment overhang to lift them out. Transfer to a wire rack to cool completely.
– Once cool, cut them into squares and enjoy!
Tips & Tricks
Perfecting the Brown Butter
To avoid burning the butter, keep the heat at medium. Swirl the pan often. Watch closely as the color changes. Once it turns a deep golden brown, it is ready. You will smell a nice, nutty aroma when it is done.
Signs of properly browned butter include a rich color and a strong scent. If it looks dark brown or smells burnt, you need to start over.
Achieving the Right Texture
To not overmix the batter, stir gently when adding the dry ingredients. Mix just until you no longer see dry flour. This will keep your blondies soft and chewy.
The ideal baking time is 20-25 minutes. To check for doneness, insert a toothpick into the center. If it comes out with a few moist crumbs, your blondies are ready!
Presentation Tips
Dusting the cooled blondies with powdered sugar adds a nice touch. It makes them look fancy and inviting.
Drizzling with maple syrup enhances the flavor. Use a spoon or squeeze bottle to create pretty patterns on top. Enjoy your blondies warm for an extra treat!
Variations
Nut-Free Version
If you want a nut-free blondie, simply leave out the walnuts. You can replace them with more chocolate chips or dried fruit. Dried cranberries or raisins add a nice chew. You can also add seeds like pumpkin or sunflower seeds for crunch.
Flavor Variations
To change the flavor, try adding spices. Cinnamon or nutmeg can give warmth and depth. You can also mix in different types of chocolate. Dark chocolate chips offer a rich taste, while white chocolate gives a sweet twist. Experimenting with flavors makes your blondies unique.
Dietary Adjustments
For a vegan version, swap the eggs for flax eggs. Mix 1 tablespoon of flaxseed meal with 2.5 tablespoons of water. Let it sit for five minutes to thicken. Use a plant-based butter and maple syrup. For gluten-free blondies, you can use a gluten-free flour blend instead of all-purpose flour. These swaps keep the taste while meeting your needs.
Storage Info
How to Store Blondies
To keep your blondies fresh, store them in an airtight container. This method keeps them soft and moist. For best results, place a piece of parchment paper between layers. Blondies stay fresh at room temperature for up to four days. If you live in a hot area, refrigerate them to avoid spoilage.
When storing in the fridge, put them in a tightly sealed container. They will last for about a week. However, the cold can change the texture. So, let them sit at room temperature for a bit before serving. This helps restore their soft, gooey texture.
Freezing Blondies
Freezing blondies is easy and great for meal prep. Here’s how to do it:
1. Cool Completely: First, let the blondies cool all the way. This prevents ice crystals from forming.
2. Wrap: Cut them into squares. Wrap each piece tightly in plastic wrap. Make sure there are no gaps.
3. Package: Place the wrapped blondies in a freezer bag. Squeeze out as much air as possible before sealing.
Blondies can freeze for up to three months. When you’re ready to enjoy them, here’s how to thaw:
1. Refrigerate: Move the blondies to the fridge overnight. This keeps them fresh.
2. Room Temperature: For a quick option, leave them out for about an hour. This brings back their original softness.
Now you can enjoy your Brown Butter Maple Blondies anytime!
FAQs
What are Blondies?
Blondies are sweet bars made with brown sugar. They have a chewy texture. Unlike brownies, blondies do not have cocoa. Brownies are rich and dark, while blondies are light and buttery. Both treats are delicious, but they offer different flavors.
Can I substitute ingredients?
Yes, you can easily swap some ingredients. Here are common substitutions:
– Butter: Use coconut oil or a dairy-free spread.
– Brown sugar: White sugar works, but it will change the flavor.
– Eggs: Try flax eggs for a vegan option.
– Walnuts: Omit them or use pecans instead.
– Maple syrup: Honey or agave syrup can be used.
How do I know when my blondies are done?
To check if your blondies are ready, look for these signs:
– The top should be golden brown.
– A toothpick inserted in the center should come out with a few moist crumbs.
– The edges should pull away slightly from the pan.
What can I serve with Brown Butter Maple Blondies?
These blondies pair well with many treats. Here are some ideas:
– Serve warm with vanilla ice cream.
– Top with whipped cream for a fun twist.
– A drizzle of extra maple syrup adds sweetness.
– Pair with a cup of coffee or tea for a cozy snack.
You now have all the tools to make delicious brown butter maple blondies. We covered the key ingredients, from butter to chocolate chips, and the steps to create the perfect texture. With tips on variations and storage, you can customize these treats to your taste and keep them fresh. Remember, the secret lies in browning the butter just right. Enjoy your baking journey and share these sweet blondies with friends—your efforts will surely impress!


