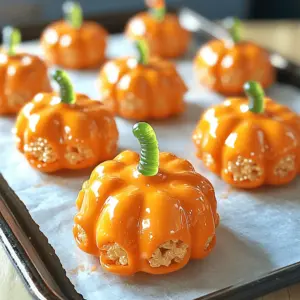
Rice Krispie Treat Pumpkins
Get ready to impress this Halloween with Rice Krispie Treat Pumpkins! These adorable and delicious treats are easy to make and perfect for any festive gathering. With just a few ingredients like Rice Krispies cereal, mini marshmallows, and orange candy melts, you can create tasty pumpkin-shaped snacks that everyone will love. Click through to discover the full recipe and make your Halloween sweeter!