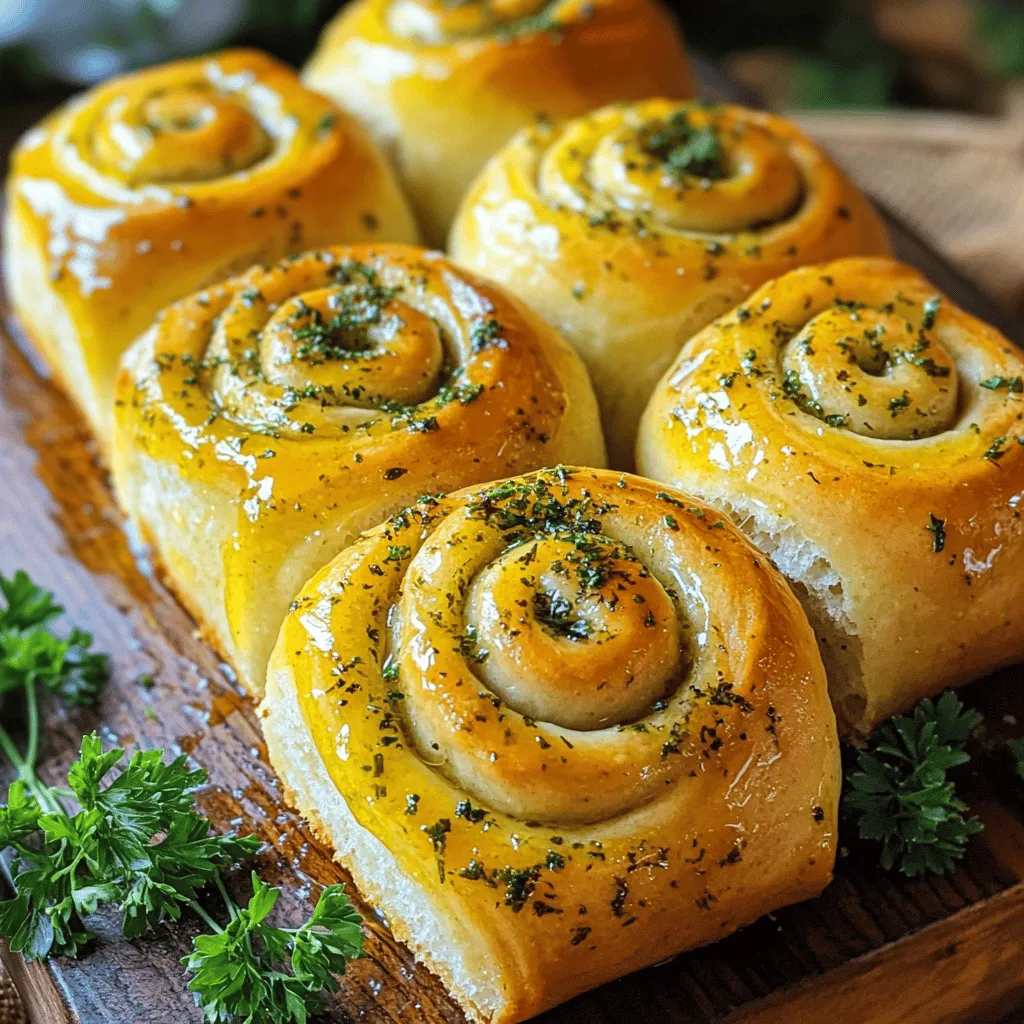
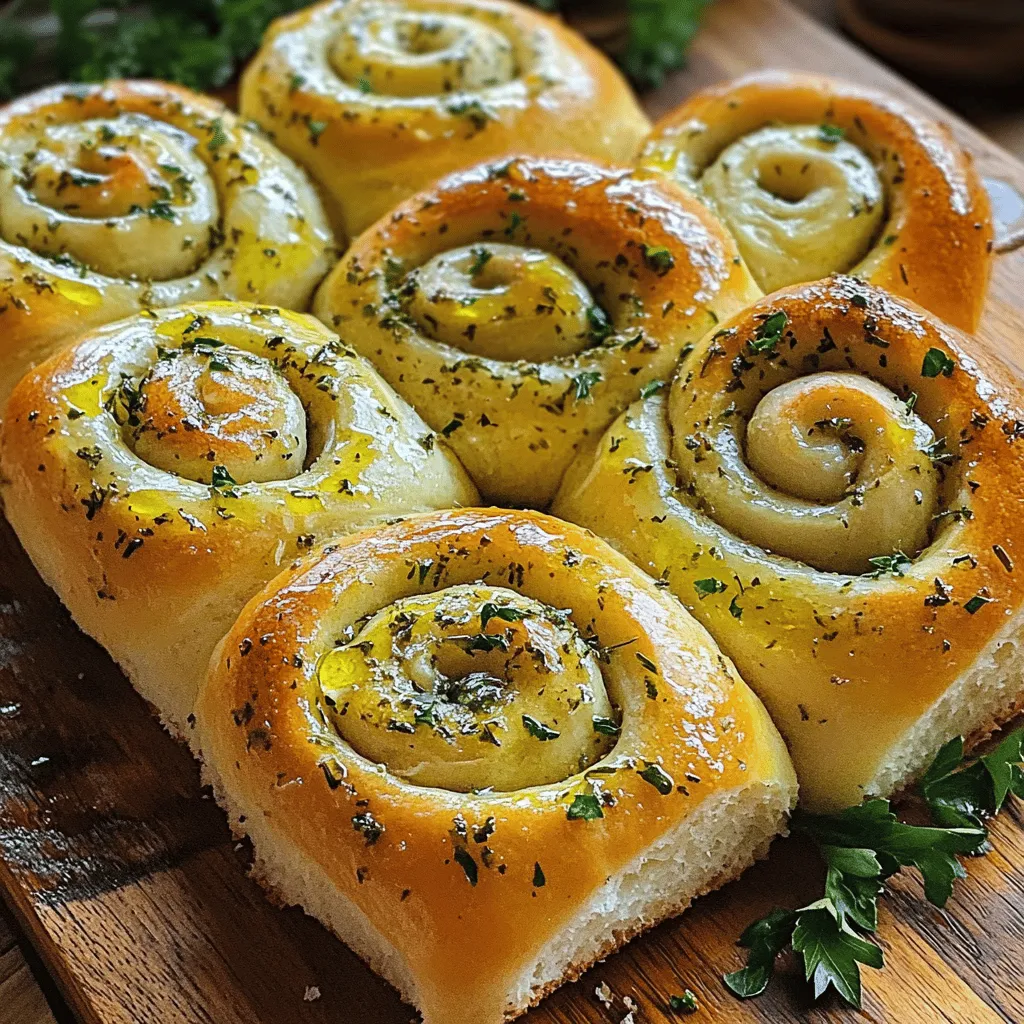
Looking for a fun and tasty baking project? Herb & Garlic Swirl Rolls are the perfect choice! With warm, buttery dough packed full of flavor, these rolls are easy to make and deliciously satisfying. You’ll learn how to create this delightful treat, including essential tips and tricks to ensure perfect results every time. Grab your apron, and let’s dive into the fun of baking these savory rolls together!
Ingredients
Main Ingredients for Herb & Garlic Swirl Rolls
– 3 ½ cups all-purpose flour
– 1 packet (2 ¼ teaspoons) active dry yeast
– 1 cup warm milk (110°F / 43°C)
– ¼ cup granulated sugar
– ½ teaspoon salt
– 1 large egg
– ¼ cup unsalted butter, melted
Flavorful Add-Ins
– 4 cloves garlic, minced
– ¼ cup fresh parsley, finely chopped
– ½ teaspoon dried oregano
– ½ teaspoon dried thyme
– ½ cup shredded mozzarella cheese (optional)
Essential Tools and Equipment
– Mixing bowls
– Wooden spoon or spatula
– Rolling pin
– Baking dish
– Sharp knife
When making Herb & Garlic Swirl Rolls, you need the right ingredients and tools. The main ingredients form the base of the rolls. Flour, yeast, and milk create a soft, tasty dough. Sugar adds a hint of sweetness, while salt balances the flavors. The egg and melted butter give the rolls a rich texture.
For flavor, you’ll want garlic and fresh herbs. The garlic brings a punch, while parsley, oregano, and thyme add depth. If you love cheese, sprinkle in some mozzarella for extra creaminess.
To make these rolls, gather a few essential tools. Mixing bowls help combine your ingredients. A wooden spoon or spatula stirs the dough. A rolling pin shapes it, while a sharp knife slices the rolls. Finally, a baking dish holds the rolls as they rise and cook.
This recipe is fun to make and share with family and friends. Check out the Full Recipe for all the steps to create these delightful rolls!
Step-by-Step Instructions
Preparation of the Dough
To start, we need to bloom the yeast. In a small bowl, sprinkle the yeast over warm milk. Let it sit for about 5 minutes. You will see it become frothy. This means the yeast is alive and ready to work.
Next, grab a large mixing bowl. Combine the all-purpose flour, granulated sugar, and salt. Make a well in the center of the dry ingredients. Pour in the yeast mixture, melted butter, and the egg. Use a wooden spoon or spatula to mix until a dough begins to form.
Kneading and Rising
Now it’s time to knead the dough. Place it on a lightly floured surface. Knead the dough by hand for about 7 to 10 minutes. You want it to be smooth and elastic. When it feels just right, place the dough in a greased bowl. Cover it with a clean kitchen towel. Let it rise in a warm spot for about 1 hour, or until it doubles in size.
Herb & Garlic Filling Preparation
While the dough rises, let’s prepare the filling. In a medium bowl, mix the minced garlic, chopped parsley, dried oregano, and dried thyme. If you want, you can add shredded mozzarella cheese for extra flavor. Stir well and set it aside for later.
Now you are ready to shape your rolls. The dough will be fluffy and full of flavor. This step is where the fun begins! For the full recipe, check out the details above.
Tips & Tricks
Perfecting the Dough
To make the best rolls, pay close attention to your yeast. Use warm milk at 110°F (43°C). This helps activate the yeast nicely. If the milk is too hot, it can kill the yeast. If it’s too cool, the yeast won’t wake up.
When kneading the dough, I suggest using your palms. Push the dough down and fold it over. Repeat this for about 7-10 minutes. This builds the gluten, making the rolls rise well. You want the dough to feel smooth and elastic. If it sticks to your hands, add a little flour.
Enhancing Flavor
Fresh herbs bring a bright taste. Use fresh parsley for a pop of flavor. Dried herbs work too, but they lack that fresh punch. If you like cheese, try adding mozzarella. It melts beautifully and adds richness. Mix it in with your herb filling for a cheesy twist.
Ensuring Proper Bake
Oven temperature matters for baking. Preheat your oven to 350°F (175°C) before baking. Use an oven thermometer to check accuracy. If your rolls are golden brown and sound hollow when tapped, they are ready. This means they baked well inside. Enjoy the warm aroma filling your kitchen as they bake. For more details, check the Full Recipe.
Variations
Different Herb Combinations
You can easily change the herbs in your rolls. Try using basil instead of parsley. Basil gives a sweet flavor that brightens the rolls. Chives also work well for a mild onion taste. If you want to add some color and nutrition, try spinach. Simply chop fresh spinach and mix it in with the herbs. This green twist makes the rolls even more fun!
Cheese Swirl Options
Cheese adds a great taste to your rolls. You can use different kinds like feta or cheddar. Feta brings a tangy flavor, while cheddar gives a rich, creamy touch. If you want a dairy-free option, vegan cheese works too. Look for varieties that melt well. They will add a nice gooey texture to your rolls.
Serving Ideas
Herb and garlic swirl rolls pair nicely with dips or spreads. Try serving them with olive oil, balsamic vinegar, or a creamy dip. They also go well with soups or salads. You can enjoy them alongside a hearty pasta dish or a fresh garden salad. Each bite is a delightful mix of flavors that can enhance your meal. For more fun, make a platter and invite friends to share! Check out the Full Recipe for ideas on how to make these rolls shine.
Storage Info
Short-Term Storage
To keep your herb and garlic swirl rolls fresh for a few days, place them in an airtight container. This method helps to keep the rolls soft and moist. You can also wrap them in plastic wrap or foil. Be sure to store them at room temperature, away from direct sunlight. Avoid refrigerating the rolls, as this can make them dry out faster.
Long-Term Storage
Freezing baked rolls is a great way to save them for later. Let the rolls cool completely before wrapping them. Use plastic wrap or freezer bags to prevent freezer burn. You can freeze the rolls for up to three months. When you’re ready to enjoy them, simply take out the rolls and leave them at room temperature to thaw. For reheating, pop them in the oven at 350°F (175°C) for about 10 minutes. This restores their soft texture and warm flavors.
Best Ways to Revive Leftovers
To bring back the fresh taste of your rolls, try reheating them in the oven. Preheat your oven to 350°F (175°C) and warm the rolls for about 10 minutes. You can also use a microwave for a quick fix. Just cover the rolls with a damp paper towel and heat in short bursts of 15-20 seconds. For creative leftover ideas, you can slice the rolls and use them for sliders. They also make a great base for mini pizzas or savory sandwiches. For the full recipe, check out the Herb & Garlic Swirl Rolls section above.
FAQs
How do I make Herb & Garlic Swirl Rolls from scratch?
To make Herb & Garlic Swirl Rolls from scratch, follow these simple steps:
1. Bloom the yeast: Mix warm milk with yeast and let it sit until frothy.
2. Combine dry ingredients: In a bowl, mix flour, sugar, and salt.
3. Make the dough: Add the yeast mix, melted butter, and egg to the dry mix. Stir until a dough forms.
4. Knead: On a floured surface, knead the dough for 7-10 minutes until smooth.
5. First rise: Place dough in a greased bowl, cover it, and let it rise for 1 hour.
6. Prepare filling: Mix minced garlic, parsley, oregano, and thyme in a bowl.
7. Shape the rolls: Roll out the dough, add the filling, roll it up, and cut into pieces.
8. Second rise: Let the rolls rise for 30 minutes in a greased dish.
9. Bake: Bake at 350°F for 20-25 minutes until golden brown.
This method helps anyone make tasty rolls. You can find the full recipe in this article.
Can I make these rolls ahead of time?
Yes, you can prepare these rolls ahead of time. Here are some tips:
– Make the dough: You can prepare the dough and let it rise. Cover it and refrigerate for up to 24 hours.
– Shape then chill: Shape the rolls, place them in the pan, and cover. You can store them in the fridge overnight.
– Bake later: Allow the rolls to come to room temperature before baking. This way, they will rise nicely.
This helps save time for busy days or special meals.
What can I do if my rolls don’t rise?
If your rolls don’t rise, here are some common issues and fixes:
– Check yeast freshness: Make sure your yeast is not expired. Old yeast won’t activate.
– Warm environment: Ensure the dough rises in a warm, draft-free spot. Cold air can slow rising.
– Proper kneading: Knead the dough well. Under-kneading can lead to dense rolls.
These tips will help you troubleshoot and enjoy fluffy rolls!
In this post, we covered how to make delicious Herb & Garlic Swirl Rolls. We discussed the key ingredients, tools needed, and detailed step-by-step instructions. You learned helpful tips for perfecting your dough and flavoring options. We also explored variations and storage methods to keep your rolls fresh.
Enjoying homemade rolls can be simple and satisfying. I encourage you to experiment with different flavors to find your favorite. Happy baking!