
Are you looking for a quick, tasty treat? These Easy No-Bake Cheerio and Peanut Butter Bars are your answer! With just a few simple ingredients like Cheerios, creamy peanut butter, and honey, you can whip up a delicious snack in no time. Whether you want a healthy dessert or a fun activity with the kids, this recipe is ideal. Let’s dive into the easy steps and tips to make these bars a hit!
Ingredients
Main Ingredients
– 3 cups Cheerios
– 1 cup creamy peanut butter
– 1/2 cup honey or maple syrup
The main ingredients create the base of these bars. Cheerios give a nice crunch, while creamy peanut butter adds richness. Honey or maple syrup binds it all together.
Optional Ingredients
– 1/4 cup mini chocolate chips
– 1/4 cup chopped nuts (almonds or pecans)
– A pinch of salt
Optional ingredients can enhance the flavor and texture. Mini chocolate chips add sweetness, and chopped nuts give a satisfying crunch. A pinch of salt balances the flavors and brings them to life. You can mix and match as you like!
Step-by-Step Instructions
Preparation
1. Start by mixing the creamy peanut butter and honey. If you use honey, warm it in the microwave for about 10 seconds. This step makes it easier to blend. Stir until it’s smooth and creamy.
2. Now, add a pinch of salt to the mixture. Stir thoroughly to mix it well. The salt balances the sweetness and enhances the flavor.
Combining Ingredients
1. Carefully fold in the Cheerios. Make sure each piece is coated without crushing them. This keeps the bars crunchy.
2. If you want, add optional chocolate chips and chopped nuts. Gently fold them in for extra taste and texture. These additions make the bars even more fun.
Setting the Bars
1. Prepare an 8×8 inch baking pan. Line it with parchment paper. Leave some paper hanging over the sides. This makes it easy to lift the bars out later.
2. Spoon the mixture into the pan. Press it down firmly and evenly. You can use a spatula or your hands. Make sure to pack it tightly to help the bars hold their shape.
3. Refrigerate the pan for at least 1 hour. This chilling time is key. It helps the bars set properly and makes them easy to cut.
4. Once the bars are firm, lift them out using the parchment paper. Transfer to a cutting board and cut them into squares or rectangles. Enjoy your delicious creation! For the full recipe, check out the details above.
Tips & Tricks
Perfecting Texture
To mix the ingredients without crushing your Cheerios, use a gentle folding method. Start by combining the peanut butter and honey in a large bowl. Once smooth, slowly add the Cheerios. Use a spatula or your hands to carefully fold them in. This keeps the cereal intact and gives your bars a nice crunch.
Chilling time is just as important. After you press the mixture into the pan, refrigerate it for at least one hour. This helps the bars firm up and hold their shape. If you skip this step, your bars may fall apart when you cut them.
Presentation Ideas
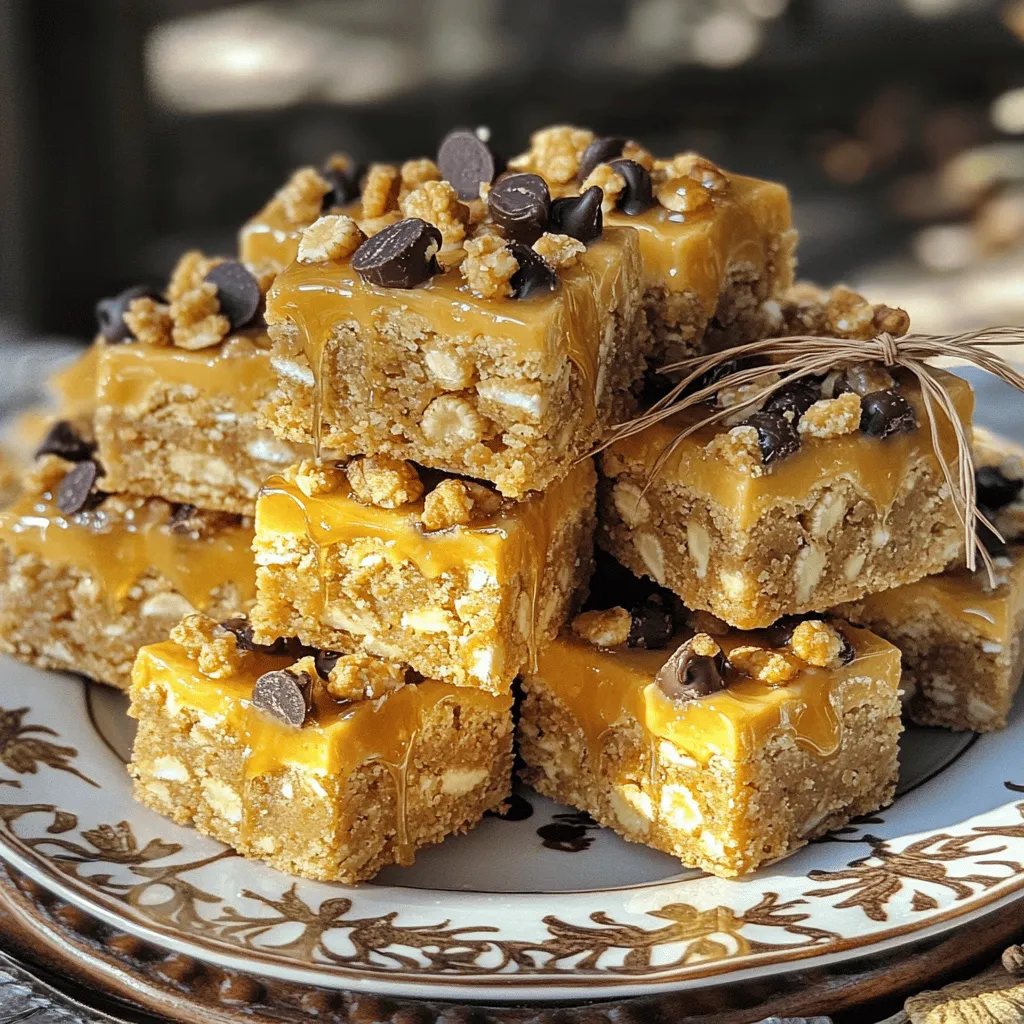
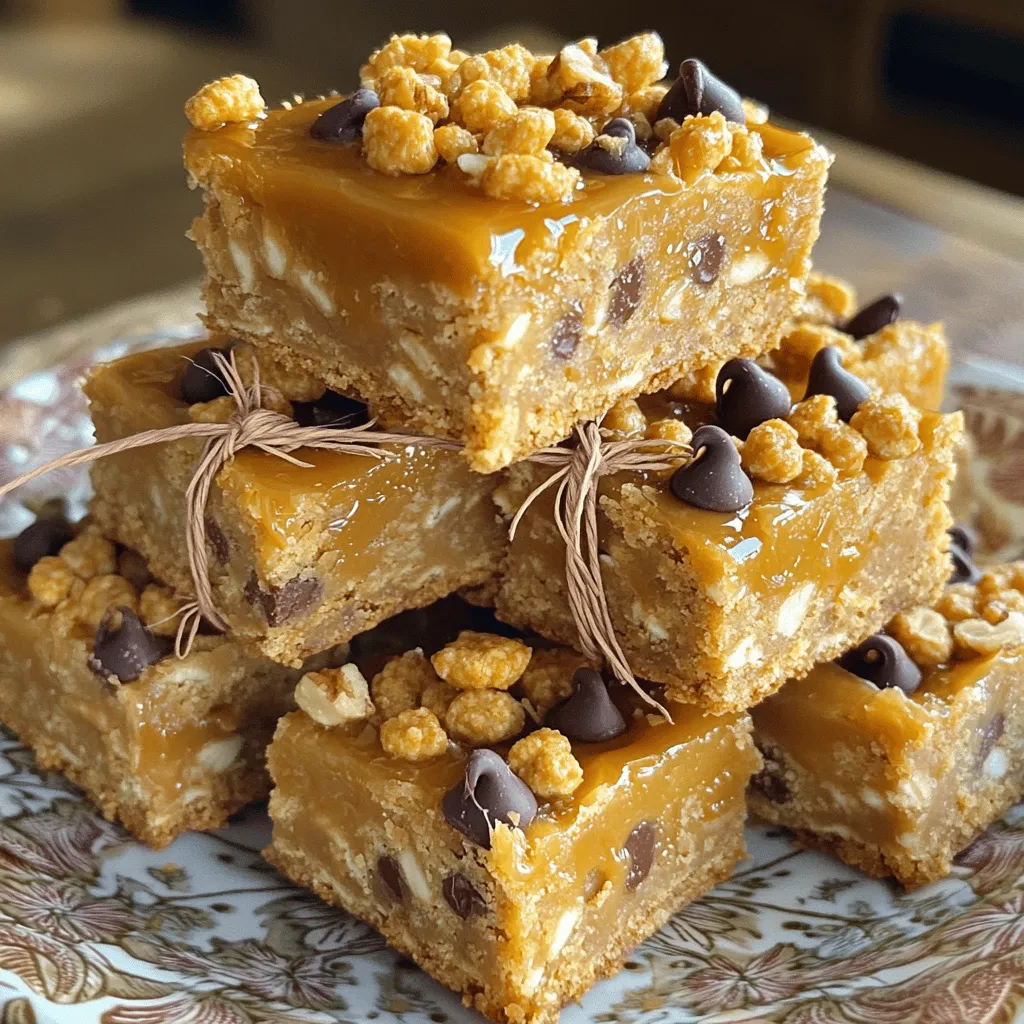
For a great display, stack your bars on a pretty plate. Consider using different heights to make it visually interesting. You can also drizzle some melted chocolate on top for a fancy touch.
If you want to gift these bars, wrap each one in parchment paper. Tie them with twine for a nice look. This not only makes them easy to carry but also adds a personal touch to your gift.
Variations
Healthy Alternatives
For a twist on the classic recipe, try using almond butter. It gives a nutty taste and is a great option for those who want to avoid peanut butter. Almond butter is rich in vitamins and healthy fats, making your bars even better.
You can also substitute agave syrup for honey. Agave syrup is a low-glycemic sweetener. It works well in this recipe and keeps your bars sweet without spiking your blood sugar.
Flavor Additions
Want to add some variety? Try adding dried fruits like cranberries or raisins. They provide a burst of sweetness and chewiness that pairs well with the crunchy Cheerios.
You can also use different nut varieties. Chopped walnuts or pistachios can add a unique flavor and texture. Mix and match to find your favorite combination.
Storage Info
Proper Storage Method
To keep your Cheerio and peanut butter bars fresh, store them in an airtight container. Layer parchment paper between the bars to prevent sticking. This way, you can easily grab one when you need a snack! If stored correctly, these bars can last up to a week at room temperature. For longer freshness, keep them in the fridge, where they can last up to two weeks.
Freezing Options
Freezing your bars is a great way to extend their shelf life. It helps maintain their flavor and texture. To freeze, wrap each bar tightly in plastic wrap or aluminum foil. Place them in a freezer-safe bag or container. They can stay fresh for up to three months in the freezer.
When you’re ready to enjoy, simply take them out and let them thaw at room temperature for about 30 minutes. You can also microwave them for a few seconds if you’re in a hurry. Enjoy your tasty treat any time!
FAQs
How do I make these bars vegan?
To make these bars vegan, you can substitute honey with maple syrup. This switch keeps the bars sweet and sticky. Use a creamy peanut butter that does not have added sugars or oils. Always check the labels to ensure all ingredients are vegan-friendly.
Can I use gluten-free Cheerios?
Yes, you can use gluten-free Cheerios. They are made without gluten, making them safe for those with gluten allergies. Look for options labeled “gluten-free” in stores. This way, you can enjoy these treats without worry.
What is the best way to cut the bars?
To cut the bars cleanly, use a sharp knife. First, chill the bars well for at least one hour. This helps them stay firm. After removing them from the pan, place them on a cutting board. Cut them into squares or rectangles with even pressure for a neat finish.
This blog post highlighted a simple recipe for delicious peanut butter bars. You learned about key ingredients like Cheerios, peanut butter, and honey. We covered preparation steps, perfecting texture, and creative presentation ideas. You also discovered storage tips and variations to suit your taste.
These bars are easy to make and packed with flavor. Enjoy making them and share your results! Your kitchen adventure awaits!


