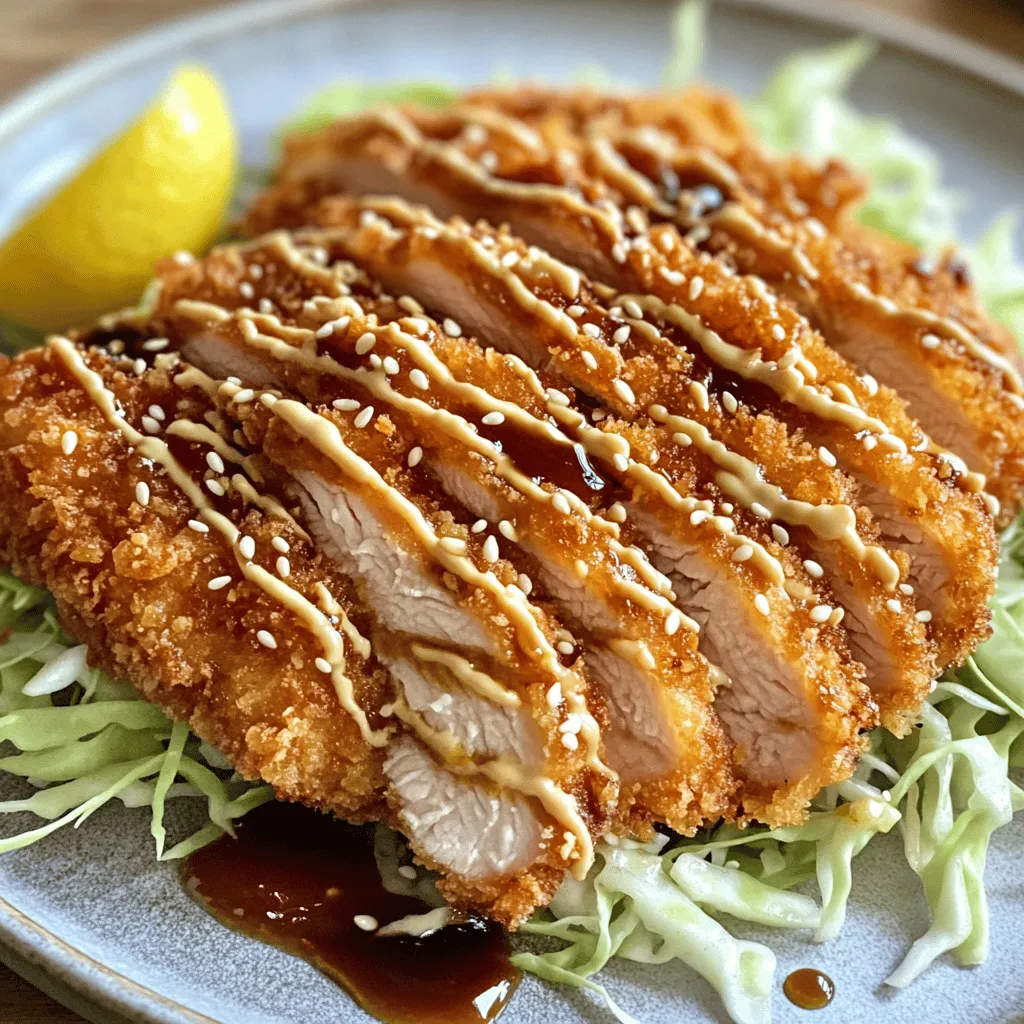
If you’re craving a dish that combines crunch, flavor, and comfort, then crispy chicken katsu is for you! In this simple and tasty recipe, I’ll guide you through every step, from selecting fresh ingredients to achieving that perfect golden crisp. Whether you’re a beginner or a seasoned cook, this dish will impress your family and friends. Let’s dive into the delicious world of chicken katsu!
Ingredients
Main Ingredients
– 2 boneless, skinless chicken breasts
– 1 cup all-purpose flour
– 2 large eggs, beaten
– 1 ½ cups panko breadcrumbs
Seasonings and Oil
– ½ teaspoon salt
– ½ teaspoon black pepper
– ½ teaspoon garlic powder
– ½ teaspoon onion powder
– 1 teaspoon sesame oil
– Vegetable oil, for frying
Serving Suggestions
– Tonkatsu sauce for serving (store-bought or homemade)
To make crispy chicken katsu, you need fresh ingredients. The chicken breasts should be plump and tender. Panko breadcrumbs are key for that crunch. They are lighter than regular breadcrumbs. The flour will help the chicken stick to the coating. Be sure to season your flour mix well. This step adds flavor right to the meat.
I like to use sesame oil in the breadcrumbs. It gives a unique taste. You can find tonkatsu sauce in stores or make your own. This sauce adds a sweet and savory touch. It pairs perfectly with the crispy chicken. For serving, I often add a side of shredded cabbage. It adds crunch and freshness to the meal.
For the full recipe, check out the complete instructions. Enjoy making this simple and tasty dish!
Step-by-Step Instructions
Preparing the Chicken
Start by pounding the chicken breasts. Place each one between two sheets of plastic wrap. Use a meat mallet or rolling pin to pound them gently. Aim for an even thickness of about ½ inch. This step helps the chicken cook evenly and stay juicy.
Setting Up Breading Stations
Next, set up your breading stations. In a shallow dish, mix the all-purpose flour with salt, black pepper, garlic powder, and onion powder. In another dish, beat the eggs until smooth. In a third dish, combine the panko breadcrumbs with sesame oil. This step adds flavor to the breadcrumbs.
Bread the Chicken
Now, it’s time to bread the chicken. Take one chicken breast and dredge it in the flour mixture. Make sure it’s fully coated. Next, dip it into the beaten eggs, allowing any excess to drip off. Finally, press the chicken into the panko mixture, coating both sides. Repeat this for the second chicken breast.
Cooking the Chicken
Heat oil in a large skillet until it measures about ½ inch deep. Set the heat to medium-high. To check if the oil is ready, drop a few panko breadcrumbs in. If they sizzle, your oil is hot enough. Carefully place the breaded chicken into the hot oil. Fry each breast for about 4-5 minutes on one side until golden brown. Flip and cook for another 4-5 minutes. If your skillet is small, cook in batches.
Final Touches
Once the chicken is golden and crispy, remove it from the skillet. Place it on a plate lined with paper towels to drain excess oil. Let the chicken rest for a minute before slicing it into strips.
Serving the Dish
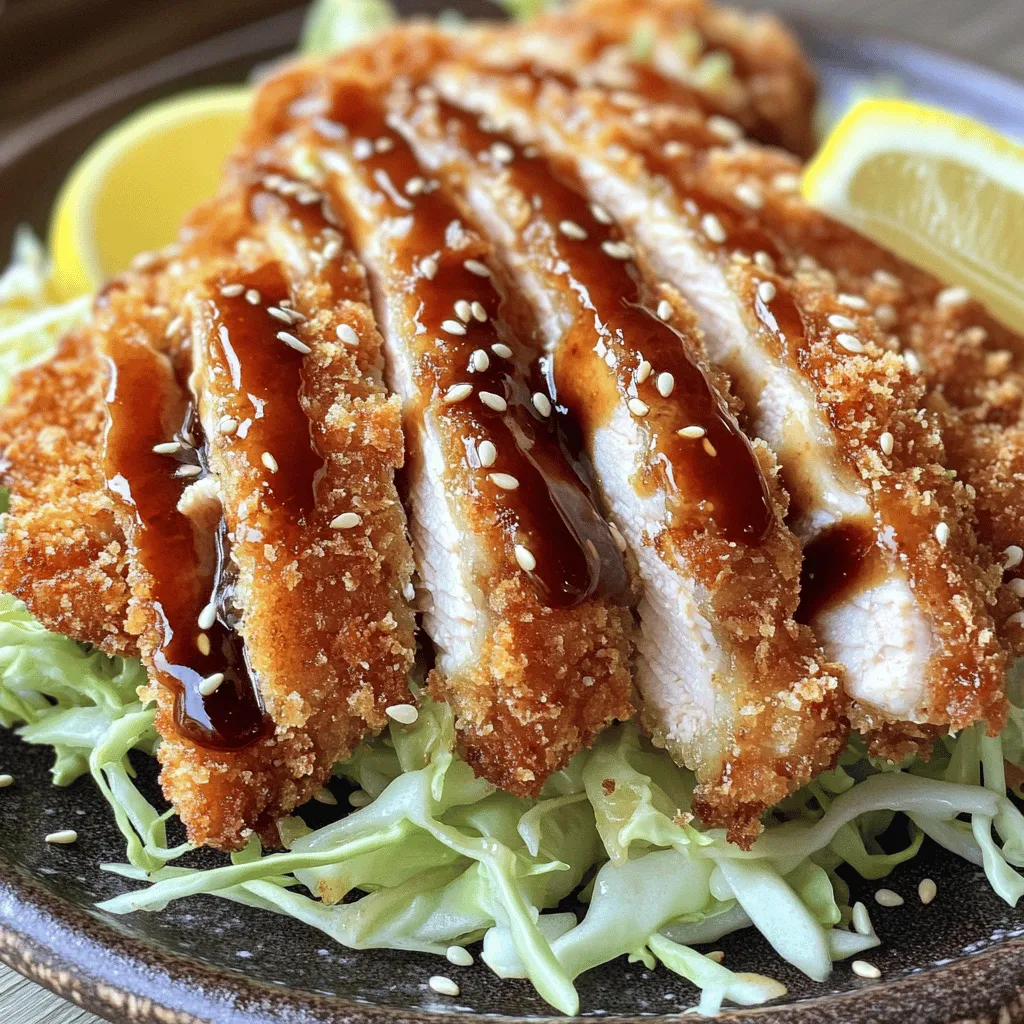
To serve, plate the crispy chicken katsu. You can drizzle tonkatsu sauce over it or serve it on the side. For a beautiful presentation, add finely shredded cabbage and a wedge of lemon. Enjoy your delicious creation! If you want the full recipe, check out the details above.
Tips & Tricks
Achieving the Perfect Crunch
To get that perfect crunch, use panko breadcrumbs. They are light and airy, creating a great texture. Make sure the oil is hot enough before frying. If it’s too cool, the chicken absorbs oil, losing its crunchiness. Heat the oil to about 350°F (175°C) for best results. You can test it by dropping in a few breadcrumbs. If they sizzle, you’re good to go!
Cooking in Batches
When frying, avoid overcrowding the pan. If you add too much chicken, it lowers the oil temperature. This will lead to soggy chicken instead of crispy. Fry in batches, giving each piece plenty of space. This way, the heat stays even, and your chicken gets that perfect golden-brown color.
Resting Period
Let the chicken rest after frying. This step is key to keeping it juicy. When you cut into hot chicken right away, the juices run out. Allow it to rest for a few minutes on paper towels. This helps the flavors settle and keeps your chicken katsu tasty and moist.
Variations
Pork Katsu
If you want a tasty twist, try pork katsu. Use pork loin or tenderloin instead of chicken. Just follow the same steps as for chicken katsu. Pound the pork to an even thickness first. This helps it cook well and stay juicy. Then, bread and fry as you would the chicken. The result is a crispy, savory delight that many enjoy.
Vegetarian Options
For a vegetarian take, swap the chicken with eggplant or tofu. If using eggplant, slice it into thick rounds. Salt the slices and let them sit for 15 minutes to draw out moisture. Then, rinse and dry them. For tofu, use firm or extra-firm blocks. Slice them into even pieces. Coat and fry just like the chicken. Both options give you a satisfying crunch and delicious flavor.
Flavor Variants
You can easily change the flavors of your katsu. Try adding different spices to the breadcrumb mixture. For a kick, include some cayenne pepper or smoked paprika. You can also marinate the meat before breading. Soy sauce, ginger, and garlic make a great marinade. Let the meat soak for about 30 minutes. This will add depth to your dish and make it even more enjoyable.
For more ideas, check the Full Recipe for crispy chicken katsu!
Storage Info
Leftovers
To store leftover chicken katsu, first let it cool down. Place the chicken in an airtight container. This keeps it fresh and tasty. Store it in the fridge for up to three days. If you want to enjoy it later, don’t forget to save the tonkatsu sauce separately. This way, it won’t make the chicken soggy.
Reheating
When reheating chicken katsu, the goal is to keep it crispy. Preheat your oven to 375°F (190°C). Place the chicken on a baking sheet lined with parchment paper. Bake for about 10-15 minutes. This method helps regain that crunchy texture. Avoid using a microwave, as it can make the katsu soft and chewy.
Freezing
To freeze cooked katsu, follow these steps:
1. Cool Completely: Allow the chicken to cool down completely before freezing.
2. Wrap Well: Wrap each piece in plastic wrap. This prevents freezer burn.
3. Use a Freezer Bag: Place the wrapped chicken in a freezer-safe bag. Squeeze out as much air as possible.
4. Label and Date: Write the date on the bag. This helps you track how long it’s been in the freezer.
5. Freeze: Store the bag in the freezer for up to three months.
When you’re ready to eat it, thaw in the fridge overnight. Then, reheat as discussed to keep that crispiness. Enjoy your katsu at any time! For the full recipe, check the earlier section.
FAQs
What is the origin of chicken katsu?
Chicken katsu comes from Japan. It is a dish inspired by Western cooking. The term “katsu” means cutlet. It often features breaded and fried meat. This dish became popular in Japan after World War II. Today, chicken katsu is loved for its crispy texture and savory flavor. It often pairs with tonkatsu sauce, which adds a sweet and tangy kick.
Can I use regular breadcrumbs instead of panko?
You can use regular breadcrumbs, but the texture will change. Panko breadcrumbs are lighter and crispier. They soak up less oil, which keeps the chicken crunchy. Regular breadcrumbs are denser and might make the katsu heavier. If you want that perfect crunch, stick with panko.
How do I know when the chicken is fully cooked?
To check if chicken is done, use a meat thermometer. Insert it into the thickest part of the chicken. It should read 165°F (75°C) for safety. If you don’t have a thermometer, cut a small slit in the chicken. The juices should run clear, not pink. This way, you ensure it is fully cooked without ruining the presentation.
Is chicken katsu gluten-free?
Chicken katsu is not gluten-free because it uses all-purpose flour and panko. However, you can make it gluten-free. Use gluten-free flour and gluten-free breadcrumbs instead. Many brands offer these alternatives. This way, you can enjoy chicken katsu without gluten. Just keep the cooking methods the same for great results. For the full recipe, check out the details above.
In this post, I shared a simple recipe for chicken katsu. We covered the ingredients needed, step-by-step instructions, and tips for making it perfectly crunchy. Remember to let the chicken rest for optimal flavor. You can also try variations like pork katsu or vegetarian options. Whether you store leftovers or freeze some for later, this dish is versatile. Enjoy creating delicious meals that bring joy to the table!