
Ice cream cake is the ultimate treat that brings joy to any gathering. You don’t need to be a master baker to create this classic dessert. With just a few simple ingredients and steps, you can whip up a delicious cake everyone will love. In this guide, I’ll share my expert tips and easy instructions to help you create the best classic ice cream cake ever. Let’s dive in!
Ingredients
Detailed List of Ingredients
For a classic ice cream cake, gather these tasty items:
– 1 pint of velvety vanilla ice cream, softened to room temperature
– 1 pint of rich chocolate ice cream, softened to room temperature
– 1 package (15 oz) of crisp chocolate wafer cookies
– 1 cup of heavy whipping cream for a luscious topping
– 1/4 cup of powdered sugar to sweeten the cream
– 1 teaspoon of pure vanilla extract for flavor enhancement
– 1 cup of sweet chocolate fudge sauce for drizzling
– Colorful sprinkles for a festive finish
Substitutions for Ingredients
You can swap ingredients easily. Here are some ideas:
– Use any flavor of ice cream you like, such as strawberry or mint.
– If you want a gluten-free option, choose gluten-free cookies.
– For a lighter version, use whipped topping instead of heavy cream.
– Maple syrup can replace chocolate fudge for a unique taste.
– Use fresh fruit instead of sprinkles for a healthier touch.
Equipment Needed
To make this ice cream cake, you will need:
– A springform pan for easy removal of the cake
– A mixing bowl for whipping cream
– An electric mixer to whip the cream
– A spatula for spreading ice cream and cream
– Plastic wrap for covering the cake during freezing
Gather these items before you start, so you can make this delicious treat with ease!
Step-by-Step Instructions
How to Prepare the Base
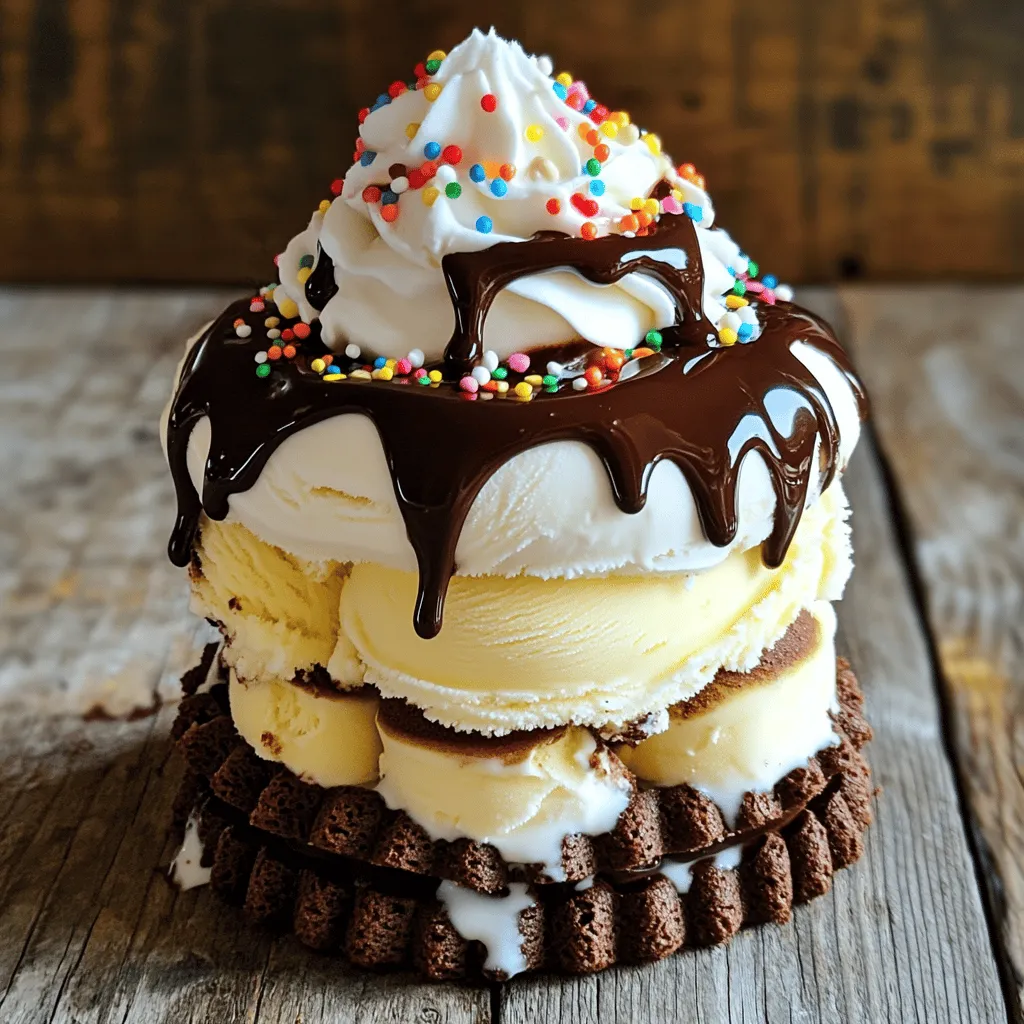
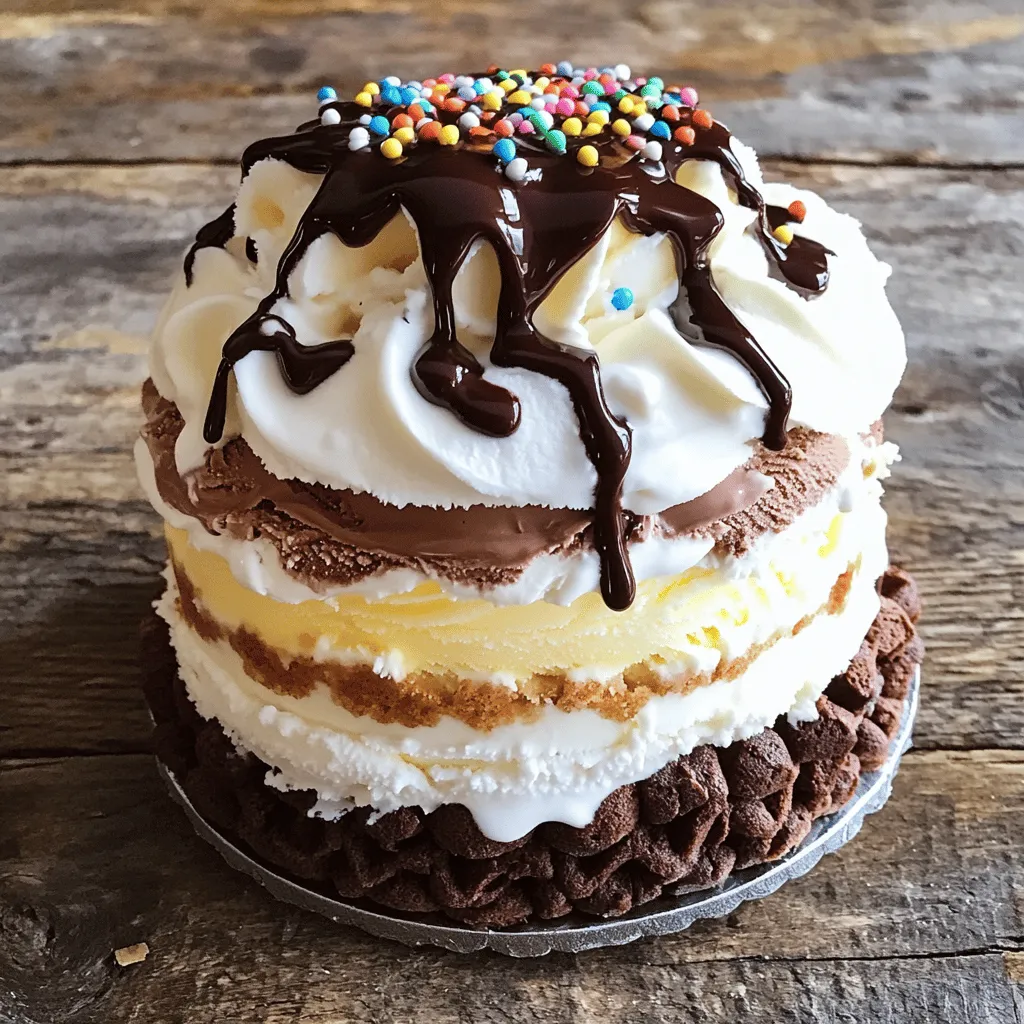
To start, pick a springform pan. This pan has removable sides, which helps when serving. Lay half of the chocolate wafer cookies in an even layer at the bottom. If some cookies break, that’s okay! Just fill in the gaps. Use your hands to press the cookies down gently. This creates a strong base for your cake.
Creating the Ice Cream Layers
Now it’s time to add the ice cream. Take the softened vanilla ice cream and spread it over the cookie base. Use a spatula to smooth it out evenly. After that, pop the pan into the freezer for about 30 minutes. This helps the ice cream firm up a bit. Next, bring out the pan and drizzle half of the chocolate fudge sauce on top. Spread it evenly for a rich chocolate taste. Now, take the softened chocolate ice cream and layer it on top of the fudge sauce. Make sure to smooth it out as well.
Lastly, place another layer of chocolate wafer cookies on this layer. Press them down gently to help them stick to the ice cream.
Whipped Cream and Final Touches
In a mixing bowl, combine the heavy whipping cream, powdered sugar, and vanilla extract. Use an electric mixer to whip it until soft peaks form. This means it will be fluffy and light. Spread the whipped cream evenly over the top layer of cookies. Cover the cake with plastic wrap to keep out any freezer smells. Freeze it for at least 4 hours, or better yet, overnight.
When you’re ready to serve, gently remove the sides of the springform pan. Drizzle the remaining fudge sauce on top and add colorful sprinkles for fun. Slice into wedges, serve, and enjoy every bite of your delicious classic ice cream cake! For the full recipe, check out the details provided above.
Tips & Tricks
Achieving the Perfect Ice Cream Consistency
To get the best texture, softening the ice cream is key. Leave it out for about 10-15 minutes. This makes it easy to spread. If it’s too firm, you might end up with chunks. That’s not what we want! When you spread the ice cream, use a spatula for smooth layers.
Decorating Your Ice Cream Cake
Decorating your cake can be fun! Use whipped cream on top for a fluffy look. Add colorful sprinkles for a festive touch. Drizzle extra chocolate fudge sauce for extra flavor. You can also place fresh fruit on top, like strawberries or raspberries. This makes your cake look pretty and tasty!
Common Mistakes to Avoid
Avoid these mistakes for the best cake. First, don’t rush the freezing time. Let your cake freeze for at least four hours. Better yet, freeze it overnight for a firmer cake. Also, make sure to cover your cake with plastic wrap. This keeps it fresh and avoids freezer odors. Lastly, don’t skip the whipped cream. It adds a light and airy finish that everyone loves!
For all the details, check out the Full Recipe and create your own ice cream cake masterpiece!
Variations
Flavor Combinations for Ice Cream Layers
You can mix and match flavors for your ice cream layers. Instead of vanilla and chocolate, try strawberry and mint. The bright taste of strawberry pairs well with the coolness of mint. For a tropical twist, use coconut and mango. This gives your cake a fun island vibe.
You can also layer different ice creams to create a fun surprise. How about coffee ice cream with a layer of hazelnut? This makes a rich and tasty combo. Get creative with your favorite flavors. The options are endless!
Alternative Toppings and Decorations
Toppings can take your ice cream cake to the next level. Instead of just sprinkles, think about crushed cookies or nuts. They add great texture. You could also drizzle caramel sauce or chocolate syrup on top. Fresh fruits like berries or banana slices make it look pretty and fresh.
For a fun theme, use seasonal decorations. For Halloween, add candy corn or gummy worms. For birthdays, use colorful candles or themed cake toppers. The right toppings make your dessert even more special.
Gluten-Free and Dairy-Free Options
If you need gluten-free options, swap out chocolate wafer cookies for gluten-free ones. Look for brands that use rice flour or almond flour.
For dairy-free options, use coconut or almond milk ice cream. Many stores offer great flavors. Use coconut cream for your whipped topping instead of heavy cream. It whips up nicely and tastes amazing.
These options make it easy for everyone to enjoy this classic treat. You don’t need to miss out on delicious ice cream cake anymore. Try these variations to suit your needs and preferences. For the full recipe, check below!
Storage Info
How to Store Your Ice Cream Cake
Storing your ice cream cake is simple. Keep it in the freezer. Use plastic wrap or a lid to cover it. This helps keep ice and odor away.
Freezing and Thawing Instructions
To freeze, place the cake in the coldest part of your freezer. It should freeze for at least four hours. For the best taste, freeze it overnight. When you want to serve it, take it out. Let it sit at room temperature for about 10 minutes. This makes slicing easier. Avoid using a knife directly from the freezer, as it can break the cake.
Best Practices for Freshness
For the best flavor, eat the cake within two weeks. After that, it may lose its taste. If you notice ice crystals, the cake has been in the freezer too long. Always check for freshness before serving. Keep some sprinkles or fudge sauce handy for a fresh touch. This ice cream cake is a treat for everyone, so enjoy it fresh!
FAQs
Can I use store-bought ice cream for this recipe?
Yes, you can use store-bought ice cream for this recipe. It saves time and effort. Just pick your favorite flavors! Vanilla and chocolate are classic choices. Make sure the ice cream is softened for easy spreading. This helps you create smooth layers.
How long can I keep the ice cream cake in the freezer?
You can keep the ice cream cake in the freezer for about two weeks. After that, the texture may change. It’s best to wrap it well in plastic wrap. This keeps out any unwanted freezer smells. If you want it to last longer, consider placing it in an airtight container.
What is the best way to slice an ice cream cake?
To slice an ice cream cake, use a warm knife. Dip it in hot water, then dry it off. This helps the knife glide through the cake easily. Slice quickly for neat pieces. Remember to wipe the knife between cuts for clean edges. Enjoy those beautiful slices!
In this post, we covered how to make a delicious ice cream cake. We explored the ingredients and their substitutes, and I shared the essential equipment you need. I provided step-by-step instructions to help you create the perfect base and layers. You learned tips to achieve ideal texture and how to avoid common mistakes. We also looked at tasty variations and how to store your cake for the best taste. By following this guide, you can enjoy a delightful treat that’s both fun and satisfying. Now, get ready to impress everyone with your amazing ice cream cake!


