Salads

Fruit Salad with Honey Lime Dressing Fresh and Yummy
Looking to brighten up your meals? You’ll love this Fruit Salad with Honey Lime Dressing! It’s fresh, tasty, and easy to make. This simple dish
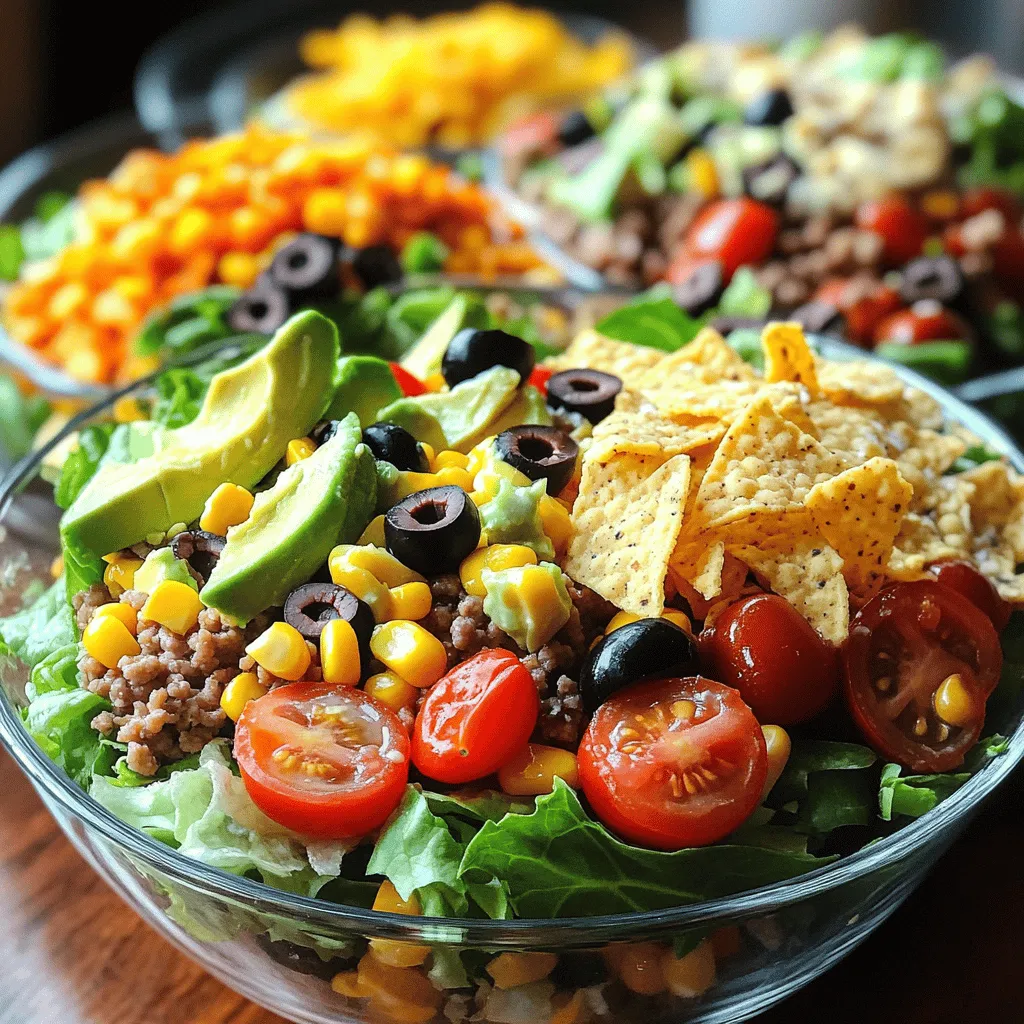
Taco Salad with Chipotle Ranch Dressing Delightful Meal
Are you craving a fun, fresh meal that is quick to whip up? Look no further! This Taco Salad with Chipotle Ranch Dressing offers a
![- Spinach leaves - Strawberries - Feta cheese - Walnuts or pecans - Honey - Balsamic vinegar - Extra-virgin olive oil - Salt and pepper Choosing the right ingredients makes your salad shine. Fresh spinach is key. Look for vibrant green leaves. They should feel crisp and not wilted. If you can, buy organic. It often tastes better and is healthier. Strawberries need to be ripe and sweet. Check for bright red color and a sweet smell. Avoid berries with white spots or mushy areas. These may not taste good. Feta cheese adds creaminess and tang. Choose a block-style feta for better flavor. Crumbling it yourself keeps it fresh. If you prefer a different taste, try goat cheese or blue cheese. Finally, nuts add crunch. Walnuts have a rich flavor. Pecans are sweeter and milder. Choose what you like best! Use high-quality honey and balsamic vinegar. Local honey enhances flavor. Aged balsamic has deeper, richer notes. Extra-virgin olive oil adds richness too. Always opt for a good brand to elevate your dish. For a full list and quantities, check the [Full Recipe]. Start by taking a small mixing bowl. Add 2 tablespoons of honey, 1 tablespoon of balsamic vinegar, and 1 tablespoon of extra-virgin olive oil. These three ingredients work great together. This mix gives the salad a sweet and tangy flavor. Add a pinch of salt and freshly cracked black pepper. Whisk the mixture well with a fork. You want it to blend smoothly, creating a nice emulsion. Set the dressing aside for now. It needs a moment for the flavors to come together. Grab a large salad bowl. Place 4 cups of fresh, washed spinach leaves at the bottom. This will create a lush base. Next, take 1 cup of fresh strawberries. Slice them into thin rounds and gently layer them on top of the spinach. This way, every bite bursts with freshness. Now, sprinkle 1/2 cup of crumbled feta cheese all over the salad. The creamy cheese adds a delicious contrast. Finally, add 1/4 cup of roughly chopped walnuts for extra crunch. You can switch walnuts for pecans if you prefer. Drizzle the prepared dressing over the salad. Use salad tongs or two large spoons to mix the ingredients. Be gentle to avoid wilting the spinach. Lightly toss until everything is coated. Before you serve, taste the salad. You may want to add more salt or pepper for extra flavor. Adjust as you see fit. Serve the salad in individual bowls for an elegant touch. Add a few whole strawberries and walnut halves on top for a beautiful presentation. A sprig of fresh mint can also brighten the dish. For the full recipe, check out the details above. To make your salad burst with flavor, consider adjusting the seasoning. Add a pinch of salt and a dash of black pepper. This helps to bring out the sweetness of the strawberries and the creaminess of the feta. Always use fresh ingredients. Fresh spinach and ripe strawberries make a huge difference in taste. They keep the salad bright and full of life. Serving suggestions can turn a simple salad into a feast. Use individual bowls for a nice touch. Place a few whole strawberries and walnut halves on top. This gives a hint of what’s inside. A sprig of mint adds a pop of color and freshness. You can also layer the ingredients in a large bowl for a family-style presentation. Prep your ingredients ahead of time. Wash and tear spinach leaves the night before. Slice strawberries and store them in a container. This way, you can make the salad in under 10 minutes. For a quick dressing, mix honey, balsamic vinegar, and olive oil in a jar. Shake it up and you're ready to go. Check out the Full Recipe for more tips. {{image_4}} You can easily make this salad fit your diet. For a gluten-free option, skip any croutons or bread. The core ingredients are naturally gluten-free. If you're dairy-free, swap feta cheese with avocado or a nut-based cheese. Both choices keep the salad creamy and tasty. To add more flavor, consider protein sources. Grilled chicken or tofu works well. Just slice them thin and mix them in. You can also toss in fresh herbs. Mint and basil add a bright touch. They pair nicely with strawberries and spinach. Change up the ingredients based on the season. In summer, add ripe peaches or blueberries for sweetness. In fall, try apples or pears for crunch. Nuts like pecans or almonds can switch too. Use whatever is fresh and available to keep it exciting. For the full recipe, check out the main section. To keep your salad fresh, store it in the fridge. Use an airtight container. This helps maintain its crispness. Avoid mixing the dressing with the salad if you plan to save leftovers. This prevents wilting. If you have leftover dressing, store it separately in a small jar. Enjoy your salad within three days for the best taste. After three days, the spinach can get mushy. Check for signs of spoilage. If the strawberries look dull or the spinach has brown spots, it’s time to toss them. Use leftover spinach in smoothies or omelets. You can also add it to soups for extra nutrition. If you have extra strawberries, toss them in yogurt or oatmeal. The leftover dressing is great on grilled veggies or as a dip for bread. You can mix it with grains for a tasty side dish. For the full recipe, check back to make sure you have all the ingredients on hand before you start! Yes, you can make this salad ahead of time. I recommend preparing the dressing first. Mix the honey, balsamic vinegar, and olive oil. Store it in the fridge. Keep the spinach and strawberries separate until you serve. This keeps the salad fresh and crisp. You can store the salad in an airtight container for up to a day. Just remember to toss it gently before serving. If you want a change from spinach, try these options: - Arugula for a peppery taste - Kale for a hearty flavor - Mixed greens for a variety of textures - Romaine for a crunchy base These greens can add different flavors and nutrients to your salad. This salad is already vegetarian. To ensure it’s vegetarian-friendly, check the feta cheese. Some brands use animal rennet. Opt for a vegetarian-friendly feta. You can also add more veggies like cucumbers or bell peppers. This keeps the dish fresh and tasty while sticking to vegetarian options. This salad pairs well with many dishes. Here are a few ideas: - Grilled chicken for a protein boost - Baked salmon for healthy omega-3s - Quinoa for a hearty grain option - Roasted veggies for added flavor These side dishes complement the fresh taste of the salad nicely. Enjoy them together for a complete meal. For the full recipe, check out the details above. This post covered how to make a fresh and tasty salad. We discussed key ingredients, like spinach and strawberries. I shared tips on pairing and storing, plus some useful hacks. You learned ways to enhance flavors and tried various ingredient swaps. Remember, using fresh, quality items makes your salad better. Feel free to mix and match based on what you like. Enjoy your salad adventure!](https://meltedrecipes.com/wp-content/uploads/2025/06/dc2e2725-1e2b-404f-b62d-494f5fb19201.webp)
30-Minute Strawberry Spinach Salad Fresh and Flavorful
Are you ready to whip up a fresh and flavorful dish in just 30 minutes? My Strawberry Spinach Salad is not only quick to make
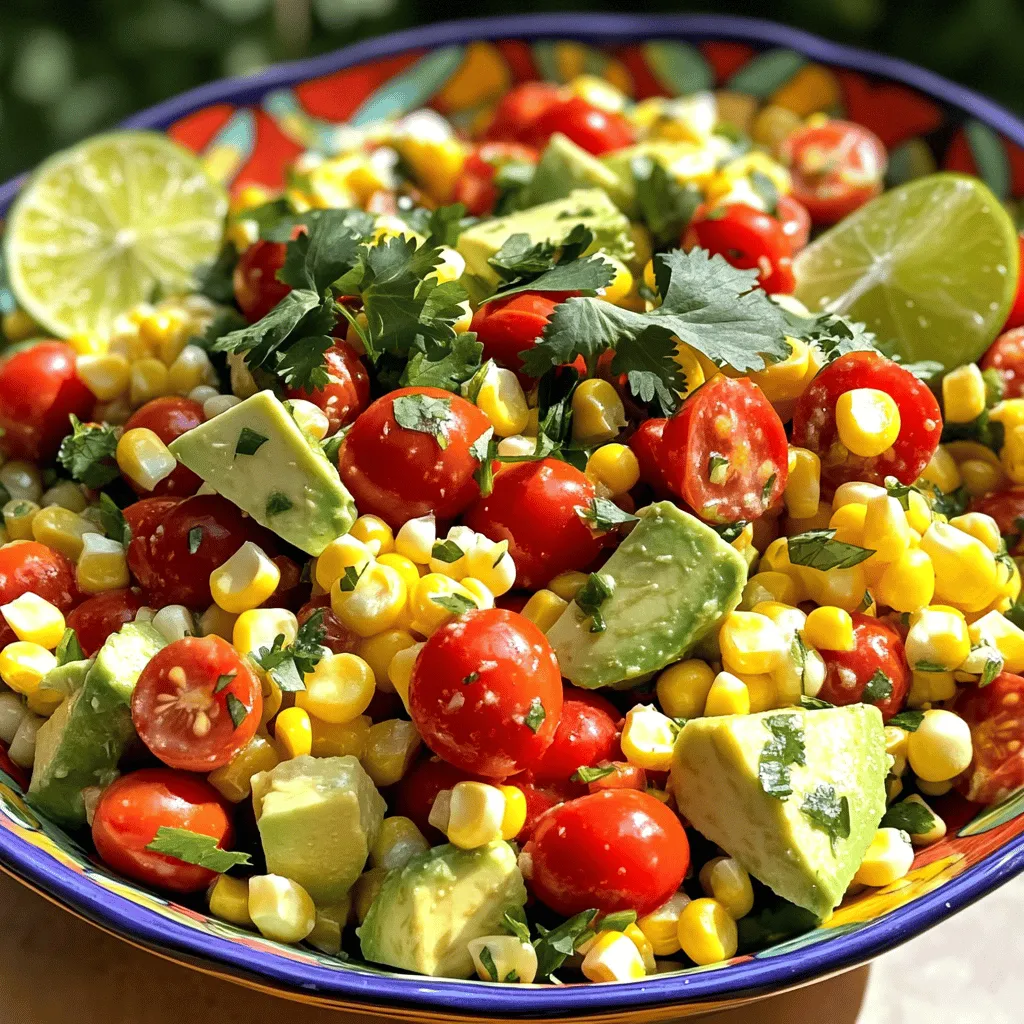
Summer Corn Salad Fresh and Flavorful Delight
Summer brings sweet corn and bright days, making it the perfect time for a refreshing Summer Corn Salad. I’ll show you how to create a
![- Mixed greens (spinach, arugula, kale) - Cherry tomatoes - Yellow bell pepper - Avocado - Canned chickpeas - Roasted sunflower seeds - Feta cheese (optional) - Fresh lemon juice - Olive oil - Salt and pepper to taste - Fresh basil leaves The Sunshine Salad shines with fresh and tasty ingredients. Each bite bursts with flavor. You start with mixed greens, which add a great base. Spinach, arugula, and kale work well together. They bring a mix of textures and nutrients. Next, toss in cherry tomatoes. Their bright color and sweetness enhance the salad. Yellow bell pepper adds crunch and a sweet zest. Avocado brings creaminess that ties everything together. Don’t forget the canned chickpeas. They add protein and make the salad more filling. Roasted sunflower seeds give a nice crunch. If you like cheese, sprinkle on feta for a salty touch. For the dressing, you need fresh lemon juice. It adds brightness. Olive oil keeps the salad moist. Just a pinch of salt and pepper will do. Finally, garnish your salad with fresh basil leaves. They add a lovely aroma and extra flavor. For the full recipe, check the details above. Enjoy making your Sunshine Salad! Start by taking your mixed greens. Use spinach, arugula, and kale for the best flavor. Place them in a big bowl. Mix the greens well to make a colorful base for your salad. This step is key for a fresh taste. Next, you will add vegetables. Carefully slice the cherry tomatoes in half. Dice the yellow bell pepper into small pieces. Cube the avocado gently to keep its shape. Add these colorful veggies to your greens. They bring sweetness and vibrancy. Now, sprinkle canned chickpeas over the salad. Rinse and drain them first. Chickpeas add protein and a nice texture. They make the salad more filling and nutritious. This is a simple way to boost your meal. For a delightful crunch, top the salad with roasted sunflower seeds. These seeds add a nutty flavor. If you like, crumble some feta cheese on top too. It gives a creamy touch that pairs well with the other ingredients. In a small bowl, mix fresh lemon juice with olive oil. Add salt and pepper to taste. Whisk everything together until it blends well. This dressing adds a zesty kick to your salad. It brings all the flavors together. Use salad tongs to gently toss the salad. Make sure to coat the greens and veggies with the dressing. Be careful not to mash the avocado. You want to keep its nice texture. Mixing well helps every bite taste amazing. Finally, garnish your salad with fresh basil leaves. They add a pop of color and flavor. Serve your salad right away for the best taste. Enjoy this Sunshine Salad as a refreshing dish any time! For the full recipe, check [Full Recipe]. You can change the ingredients in Sunshine Salad based on what’s fresh. In spring, try adding peas or radishes. In summer, use cucumbers or zucchini for crunch. Fall brings sweet apples or pears, which add a nice touch. In winter, roasted root veggies like beets or sweet potatoes work well. Adjust the salad to match the season and your taste! To keep your ingredients fresh, store them correctly. Keep greens in a damp paper towel inside a plastic bag. This helps them stay crisp. Store tomatoes at room temperature, not in the fridge. Avocados should ripen on the counter, then be used right away. If you prep early, wash and dry chickpeas thoroughly before storing. To turn the salad into a full meal, add protein or grains. Grilled chicken or shrimp pairs well with the flavors. For a plant-based option, try adding quinoa or farro. Tofu or tempeh can boost protein, too. Beans like black or kidney beans also make a filling addition. Each choice adds a unique taste and texture to elevate the dish. {{image_4}} You can change ingredients in the Sunshine Salad to suit your taste. Try adding sliced cucumbers for a refreshing crunch. Carrots add sweetness and color, while radishes give a peppery kick. For protein, you can swap chickpeas with grilled chicken or shrimp. You can also try adding nuts like almonds or walnuts for a different texture. You have many options to make this salad your own! This salad shines with seasonal produce. In winter, use hearty greens like kale or Swiss chard. Add roasted root vegetables like sweet potatoes or beets for warmth. In fall, consider using apples or pears for sweetness. You can even add nuts for a satisfying crunch. Adjusting the salad with seasonal ingredients keeps it fresh and exciting. If you follow a vegan diet, skip the feta cheese and use avocado for creaminess. You can also replace the honey in dressings with maple syrup. For gluten-free options, check that all ingredients, especially canned goods, are certified gluten-free. You can enjoy this salad while staying true to your dietary needs. To keep your Sunshine Salad fresh, store it in an airtight container. This helps keep moisture in check. Place the salad in the fridge right after serving. Avoid adding dressing to the entire salad if you plan to store leftovers. Instead, keep the dressing separate. This keeps the greens crisp and tasty. Use the salad within two days for the best flavor. For quick assembly, pre-prepare ingredients. Wash and chop your greens and vegetables. Store them in separate containers in the fridge. You can also prepare the dressing ahead of time. Just mix lemon juice, olive oil, salt, and pepper in a jar. Shake it well before using. This meal prep method saves time and keeps everything fresh. Freezing salad is not recommended. Greens and vegetables lose their crispness when thawed. However, you can freeze chickpeas if you like. Rinse and drain them first, then freeze in a bag. When you're ready to use them, just cook them straight from the freezer. Remember, fresh is best for salads like this one. For the full recipe, check the details above. If you want to skip feta cheese, there are great options. You can use vegan cheese made from nuts or tofu. These choices give a creamy texture. Crumbled avocado also works well for a rich taste. If you don’t need it to be vegan, goat cheese is another tasty alternative. It adds a tangy flavor that pairs nicely with the salad. Yes, you can make the dressing ahead of time. Store the homemade dressing in a sealed jar or container. Keep it in the fridge for up to a week. Just give it a good shake before using it again. This saves time when you’re ready to enjoy your Sunshine Salad. Sunshine Salad will last about 2-3 days in the fridge. However, the freshness depends on the ingredients. If the greens look wilted or slimy, it’s time to toss it out. Check for any odd smells or discoloration as well. Always store it in an airtight container to keep it fresh longer. This blog post explored how to create a vibrant Sunshine Salad. You learned about fresh ingredients and how to prepare them. We discussed easy dressing steps and serving suggestions. Tips on customization and storage will help you enjoy this salad longer. In conclusion, this salad is quick, healthy, and versatile. Feel free to adapt it to your taste and seasons. Enjoy your wholesome meal!](https://meltedrecipes.com/wp-content/uploads/2025/06/731908be-f637-4e06-ba5d-1ad3548c8e34.webp)
Sunshine Salad Fresh and Crisp Flavorful Delight
Are you ready to brighten your meal with a delightful Sunshine Salad? This fresh and crisp explosion of flavors will make your taste buds sing.
![To make this vibrant pineapple cucumber salad, you will need the following fresh ingredients: - 2 cups fresh pineapple, diced into bite-sized pieces - 1 large cucumber, carefully thinly sliced - 1 red bell pepper, diced into small cubes - 1 jalapeño, finely chopped (optional, for added heat) - 1/4 red onion, sliced thinly - 1/4 cup fresh cilantro, coarsely chopped - Juice of 2 fresh limes - 2 tablespoons honey or agave syrup for sweetness - Salt and freshly ground pepper to taste - 1/4 cup crumbled feta cheese (optional, for a creamy and savory touch) These bright ingredients create a refreshing dish that bursts with flavor. Each component adds its own unique taste and texture. The sweetness of the pineapple balances the crunch of the cucumber. The bell pepper adds a touch of color and sweetness, while the jalapeño can give a slight kick. Lime juice brings brightness, and honey adds a hint of sweetness. Feta cheese, if you choose to include it, adds creaminess. Using fresh ingredients makes a big difference in taste. When you prepare this salad, pick ripe pineapple and crisp cucumbers for the best results. You can find the full recipe to guide you through the steps of creating this delicious salad. - First, take your large mixing bowl. Combine diced pineapple, cucumber, red bell pepper, jalapeño, and red onion in it. - Next, prepare the dressing. In a small bowl, whisk together lime juice and honey or agave syrup until smooth. - Now, drizzle the dressing over your salad mix. Gently toss everything to coat well. - Add chopped cilantro to the salad. Season it with salt and pepper to taste. - If you like, top the salad with crumbled feta cheese for an extra flavor kick. - Finally, cover the salad and refrigerate it for at least 30 minutes. This allows the flavors to blend nicely. Enjoy this fresh and vibrant pineapple cucumber salad! For the full recipe, check out the details provided earlier. - Use ripe, fresh ingredients for optimal taste. - Allow the salad to chill for better flavor fusion. Ripe pineapple and cucumber bring out the best taste. Fresh herbs like cilantro also add more flavor. I always choose ingredients that are in season. They taste better and are often cheaper. When you let the salad chill, it helps the flavors mix. The lime juice and honey will blend nicely. I recommend at least 30 minutes in the fridge. - Garnish with additional cilantro or lime slices before serving. - Serve in colorful bowls for visual appeal. A great-looking dish makes every meal special. I love to add extra cilantro on top. It gives a nice pop of green. Lime slices also add a bright touch. Using colorful bowls makes the salad stand out. It’s fun to eat when it looks good. For the full recipe, check out the details provided. {{image_4}} You can enhance your pineapple cucumber salad in fun ways. Adding avocado gives it a creamy texture. The rich, smooth taste of avocado pairs well with the fresh crunch of cucumber and pineapple. Another option is to mix in different herbs. Mint or basil can add a unique flavor twist. They bring a refreshing taste that elevates the salad. If you want to make this salad vegan, just skip the feta cheese. The salad will still be tasty and colorful. You can also swap honey with maple syrup for a vegan-friendly sweetener. Maple syrup brings a lovely flavor that complements the other ingredients. These simple changes keep the dish fresh and fun while meeting dietary needs. For the full recipe, check out the [Full Recipe]. Store any leftover pineapple cucumber salad in an airtight container. This keeps it fresh. If you plan to eat it later, keep the salad and dressing separate. This helps maintain its crunchiness. For the best taste, eat the salad within 2 days. After that, it may lose its fresh flavor and texture. Enjoy your salad while it's still at its peak! Yes, but fresh pineapple is recommended for the best flavor. Canned pineapple can be mushy and lacks the crispness of fresh fruit. Fresh pineapple offers a sweet and tangy taste that brightens the whole dish. If you use canned, drain it well to avoid excess liquid. This salad is best enjoyed chilled. Cooling the salad allows the flavors to blend nicely. The cold temperature enhances the refreshing taste of the pineapple and cucumber. It makes a perfect dish for hot days or barbecues. Yes, it can be prepared a few hours in advance. Just refrigerate until serving. Making it ahead lets the flavors meld together beautifully. However, if you plan to add feta, do so right before serving to keep it fresh and creamy. Check out the Full Recipe for more details! This blog post shared a fresh salad recipe that blends pineapple, cucumber, and bell pepper. You learned how to prepare a simple dressing and add flavor with herbs and seasonings. I also shared tips for enhancing taste and making variations. Remember to chill the salad for the best flavor. Storing it in the fridge keeps it fresh. Enjoy this vibrant dish at your next meal or gathering. It's colorful, tasty, and easy to make!](https://meltedrecipes.com/wp-content/uploads/2025/05/b6c9fb18-45d5-4f4d-9be3-5f640c95b761.webp)
Pineapple Cucumber Salad Fresh and Flavorful Dish
Are you ready to brighten your meal with a delightful mix of flavors? This Pineapple Cucumber Salad is a refreshing dish that combines juicy pineapple,
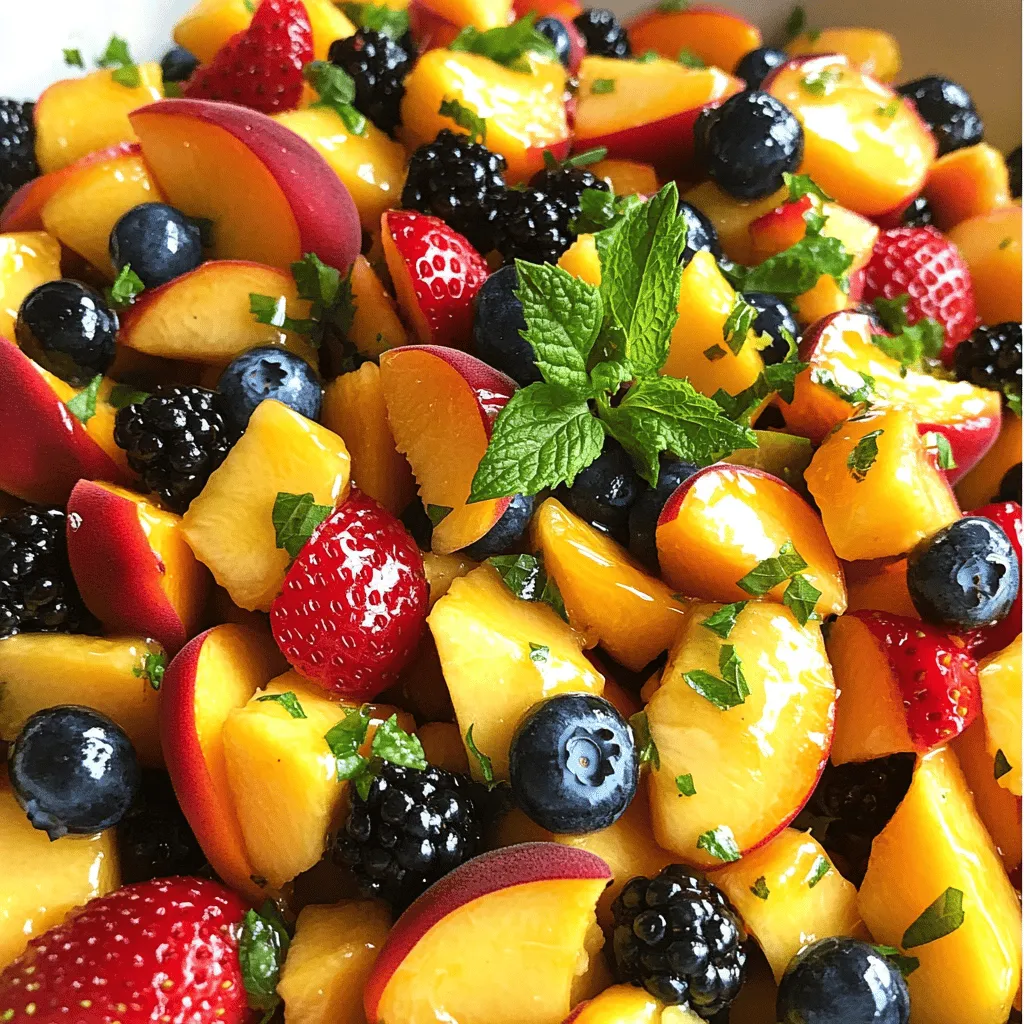
Peach Berry Fruit Salad Refreshing and Healthy Delight
Looking for a tasty and healthy treat? Our Peach Berry Fruit Salad is the answer! Bursting with fresh flavors, this salad combines juicy peaches and
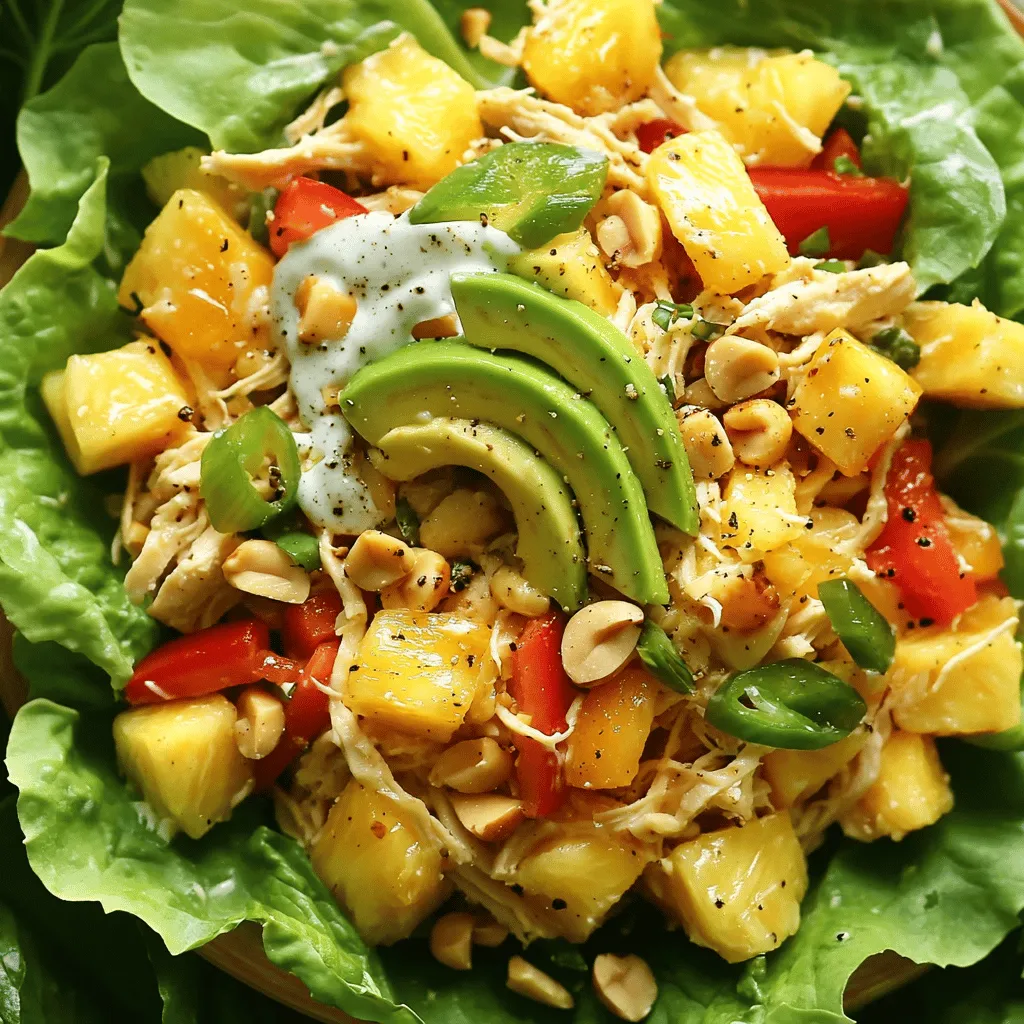
Hawaiian Chicken Salad Flavorful Quick Prep Recipe
Craving a fresh, tropical twist for lunch? My Hawaiian Chicken Salad is packed with flavor and simple to make. You’ll find a mix of tender
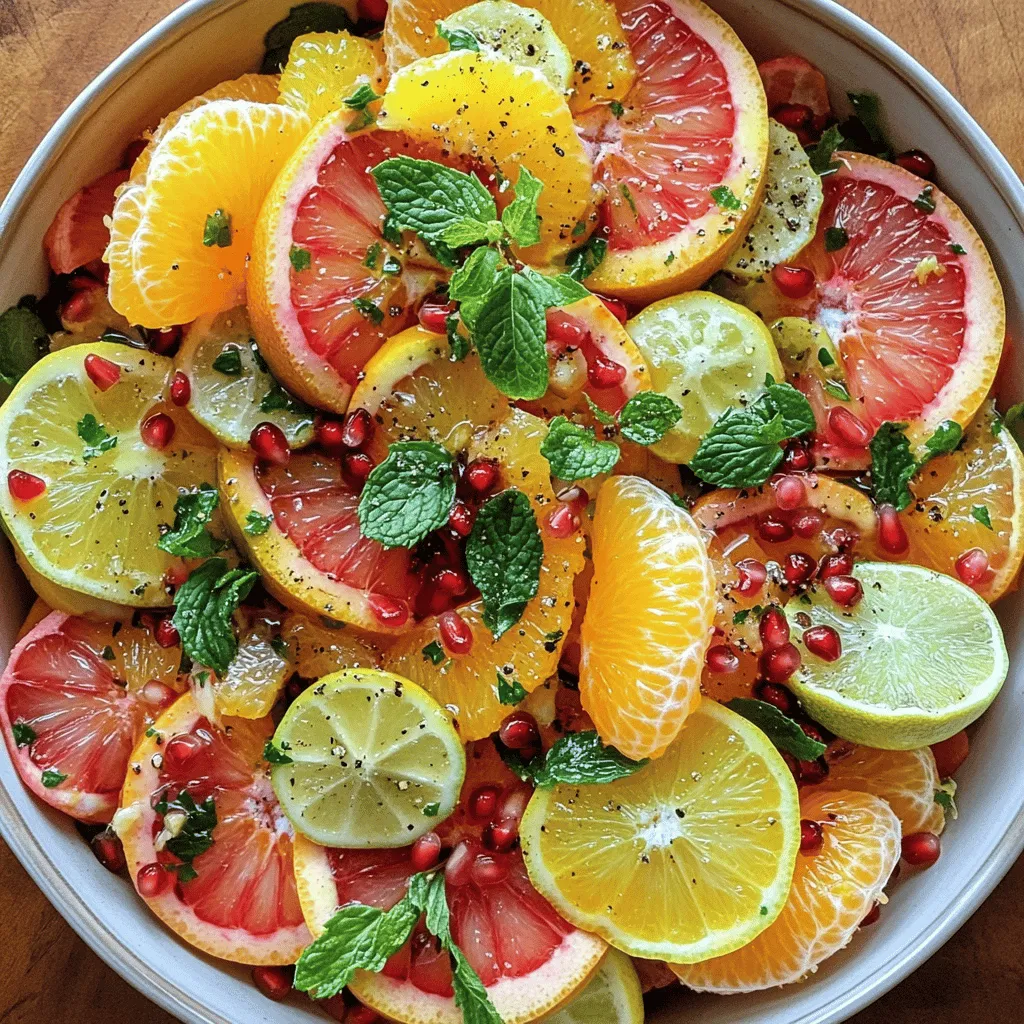
Citrus Salad Refreshing and Colorful Delight
Looking for a vibrant, refreshing dish that brightens your day? This Citrus Salad is a perfect blend of juicy fruits like oranges, grapefruit, and lemons,
. To get the perfect texture in your potato salad, start with baby potatoes. They hold their shape well after cooking. Cook them until fork-tender but not mushy. This keeps them firm and nice to bite into. The creamy Greek yogurt adds a rich taste without being too heavy. Mix in fresh dill for a burst of flavor. It brightens the salad and adds a touch of elegance. Always taste and adjust salt and pepper to bring out the best in your dish. You can make this potato salad a day ahead. Just prepare it and chill it in the fridge. This lets the flavors blend together nicely. Just remember to stir it again before serving. If it seems too thick after chilling, add a splash of lemon juice. This keeps it fresh and vibrant. Serve this potato salad in a bright bowl for a fun touch. Top it with fresh dill sprigs and lemon zest for a pop of color. You can pair it with grilled meats or serve it at picnics. It also goes well with sandwiches or wraps. For extra crunch, sprinkle some crispy bacon bits or toasted nuts on top. This adds a delightful texture that everyone will love. For the full recipe, check out the details above. {{image_4}} You can make a vegan-friendly potato salad easily. Swap the Greek yogurt and mayonnaise for plant-based versions. Use cashew cream or silken tofu for a creamy base. Add a splash of apple cider vinegar for bite. Fresh herbs like parsley or chives boost flavor. You won't miss the dairy! For a Mediterranean flavor, add olives, feta cheese, and sun-dried tomatoes. Use olive oil instead of mayonnaise for richness. Toss in fresh basil or oregano for a vibrant touch. You can add artichoke hearts for more texture. This version brightens up any meal and is sure to impress! If you love heat, try the spicy kick option. Add diced jalapeños or a pinch of cayenne pepper to the dressing. You can mix in chopped pickled jalapeños for extra flavor. A splash of hot sauce can spice things up too. This version pairs well with grilled meats and adds excitement to your table. Each variation offers a new twist on the classic. Try them all for a fresh take on potato salad! For the full recipe, check out Not Your Grandma's Potato Salad. To keep your potato salad fresh, place it in an airtight container. Make sure the lid seals tightly. This helps prevent any strong odors from other foods in your fridge. If you use a bowl, cover it tightly with plastic wrap. Store it in the refrigerator right away. While potato salad tastes best when chilled, you can enjoy it warm too. If you want to heat it, use a microwave. Heat it in short bursts, about 30 seconds each time. Stir it gently to make sure it heats evenly. Avoid heating it too long; you don’t want it to cook further. Properly stored, your potato salad can last up to 3-5 days in the fridge. After that time, check for any off smells or changes in texture. If you notice anything strange, it's best to toss it. For longer storage, consider freezing it. However, freezing may change the texture of the potatoes. For the best taste, enjoy it fresh. For the full recipe, check out Not Your Grandma's Potato Salad. This potato salad stands out for its fresh flavors. I use creamy Greek yogurt and rich mayonnaise. The Dijon mustard adds a tangy kick. Fresh dill and lemon zest brighten the dish. The mix of baby potatoes, cherry tomatoes, cucumber, and celery gives it a crunchy texture. You get a classic feel, but with a twist. Yes, you can! Feel free to swap in your favorites. Try bell peppers for crunch. Add radishes for spice. You can even toss in peas for sweetness. Just make sure to keep the balance of flavors. Mix and match to create your perfect blend. This potato salad is already gluten-free! All the ingredients are safe for a gluten-free diet. Check labels on mayonnaise or yogurt, just in case. You won’t miss the gluten with this tasty salad. Absolutely! Preparing it a day ahead is a great idea. The flavors meld together beautifully overnight. Just store it in the fridge. Give it a quick stir before serving. The chilled taste is refreshing. You can serve it warm if you prefer! Just toss the cooked potatoes with the dressing while they are still warm. This gives a different texture and flavor. It’s a fun way to change things up. Enjoy the warmth with added freshness! This blog post covered all the key steps for making a great potato salad. We listed ingredients, offered swaps, and shared healthier options. I provided clear steps from cooking potatoes to serving tips. You can make this salad your own with different flavors and variations. Remember to store leftovers correctly to enjoy them later. With these tips, your potato salad will shine at any gathering. Now, go ahead and create your tasty dish!](https://meltedrecipes.com/wp-content/uploads/2025/05/a903a250-eea5-4e83-a7bc-c1ff617c147d.webp)
Not Your Grandma’s Potato Salad Fresh Flavor Boost
Are you tired of the same old potato salad? You’re in the right place! In Not Your Grandma’s Potato Salad Fresh Flavor Boost, I’ll show