Dinner

- 1 lb potato gnocchi (store-bought or homemade) - 2 large red bell peppers - 1 cup heavy cream - 1/2 cup freshly grated Parmesan cheese - 2 tablespoons olive oil - 2 cloves garlic, finely minced - 1 teaspoon smoked paprika - Salt and pepper, to taste - Fresh basil leaves, for garnish Gathering the right ingredients is key to making creamy roasted red pepper gnocchi. You can use store-bought gnocchi for speed or make your own for fun. The two large red bell peppers give the dish its vibrant color and sweet taste. Heavy cream makes the sauce rich and luscious. The freshly grated Parmesan cheese adds a savory touch. Olive oil and minced garlic bring depth of flavor. Smoked paprika adds a unique, smoky taste, while salt and pepper balance the dish. Fresh basil leaves are perfect for a bright, finishing touch. Every ingredient plays a role in making this dish a dreamy delight. - Preheat oven to 400°F (200°C). - Prepare the baking sheet with parchment paper. - Slice and seed the red bell peppers. - Roast in the oven for 25-30 minutes. I love watching the peppers roast. The skin gets blistered and charred, which adds great flavor. Once they cool, the skins peel away easily. This is a key step that boosts the taste of the sauce. - Blend roasted peppers with cream, smoked paprika, salt, and pepper. - Sauté garlic in olive oil. In a blender, mix the roasted peppers, heavy cream, smoked paprika, salt, and pepper. Blend until smooth. This creates a creamy and bright sauce. In a skillet, add olive oil and sauté minced garlic for about one minute. The smell will fill your kitchen and get you excited for the dish. - Cook gnocchi until they float, then drain. - Mix gnocchi with the cream sauce and Parmesan cheese. Cook the gnocchi in salted water. Once they float, they are ready! Drain them and add them to the sauce in the skillet. Toss gently to coat every piece. Then, sprinkle the grated Parmesan cheese on top. Stir until it melts. This mix makes the dish so rich and tasty. - Use fresh heavy cream for best results. - Blend until completely smooth. To get that perfect creamy texture in your sauce, fresh heavy cream is a must. It adds richness that makes each bite delightful. When blending, ensure no lumps remain. A smooth sauce coats the gnocchi better. This is key for a dreamy dish! - Experiment with adding herbs like thyme or oregano. - Consider a splash of lemon juice for brightness. Herbs can take your dish to the next level. Adding thyme or oregano brings depth. A splash of lemon juice adds a bright, fresh taste. This balance of flavors makes the dish pop! - Salt water before boiling for added flavor. - Watch for gnocchi to float as an indicator of doneness. Cooking gnocchi is simple but important. Salt your water first. This step gives flavor right from the start. When the gnocchi float, they are ready. This is your cue to drain them. Perfectly cooked gnocchi makes your meal shine! {{image_4}} You can try different cheeses in this dish. Goat cheese or feta can add a tangy flavor. They melt well and blend nicely. If you want a faster prep time, use roasted red peppers from a jar. This saves time and effort without losing flavor. Want to make your gnocchi even better? Add sautéed spinach or mushrooms for extra taste. They bring a nice texture and nutrition. You can also add protein like grilled chicken or shrimp. This makes your meal more filling and hearty. If you're looking for gluten-free options, there are many brands of gluten-free gnocchi. They taste great and work well in this dish. For those on a vegan diet, use plant-based cream and cheese. This way, everyone can enjoy this creamy roasted red pepper gnocchi! To keep your creamy roasted red pepper gnocchi fresh, store it in an airtight container in the fridge. This dish tastes best when you eat it within 2-3 days. The flavors stay rich and vibrant during this time. When you reheat your gnocchi, do it gently. Use the stove and add small amounts of cream. This helps keep the sauce smooth. If you use a microwave, be careful. Heat it in short bursts to avoid overcooking, which can ruin the texture. If you need to save some gnocchi for later, freeze it. Make sure to freeze the gnocchi separately from the sauce. This keeps both parts at their best. When you are ready to eat, thaw everything in the fridge overnight before reheating. This keeps the dish fresh and tasty. To make homemade gnocchi, you need just a few simple ingredients. You will need: - 2 lbs of potatoes - 1 ½ cups all-purpose flour - 1 egg - A pinch of salt Start by boiling the potatoes until soft. Then, peel and mash them in a bowl. Mix in the flour, egg, and salt. Knead the dough lightly. Roll it into long ropes and cut into small pieces. Use a fork to create ridges on each piece. This helps sauce stick to the gnocchi. Yes, you can use jarred roasted red peppers. They save time and are still tasty. Just drain and rinse them to remove excess liquid. Blend them with cream and spices as you would with fresh peppers. This shortcut makes the dish quicker while still full of flavor. Serve creamy roasted red pepper gnocchi in shallow bowls. This way, everyone can enjoy the sauce. Top with fresh basil and extra Parmesan cheese. This adds color and flavor. You can also serve it with a side salad or garlic bread for a complete meal. Yes, you can make this dish ahead. Prepare the sauce and gnocchi separately. Store them in airtight containers in the fridge. When ready to serve, reheat the sauce and cook the gnocchi just before mixing. This keeps the flavors fresh and delicious. This blog post shared a tasty recipe for creamy roasted red pepper gnocchi. You learned about the key ingredients, steps to prepare, and cooking tips. Each part builds a delicious dish you can enjoy. Remember, you can make variations and use different ingredients to fit your taste. Whether you choose to add protein or adjust for dietary needs, this recipe is flexible. Try it out, and enjoy cooking!
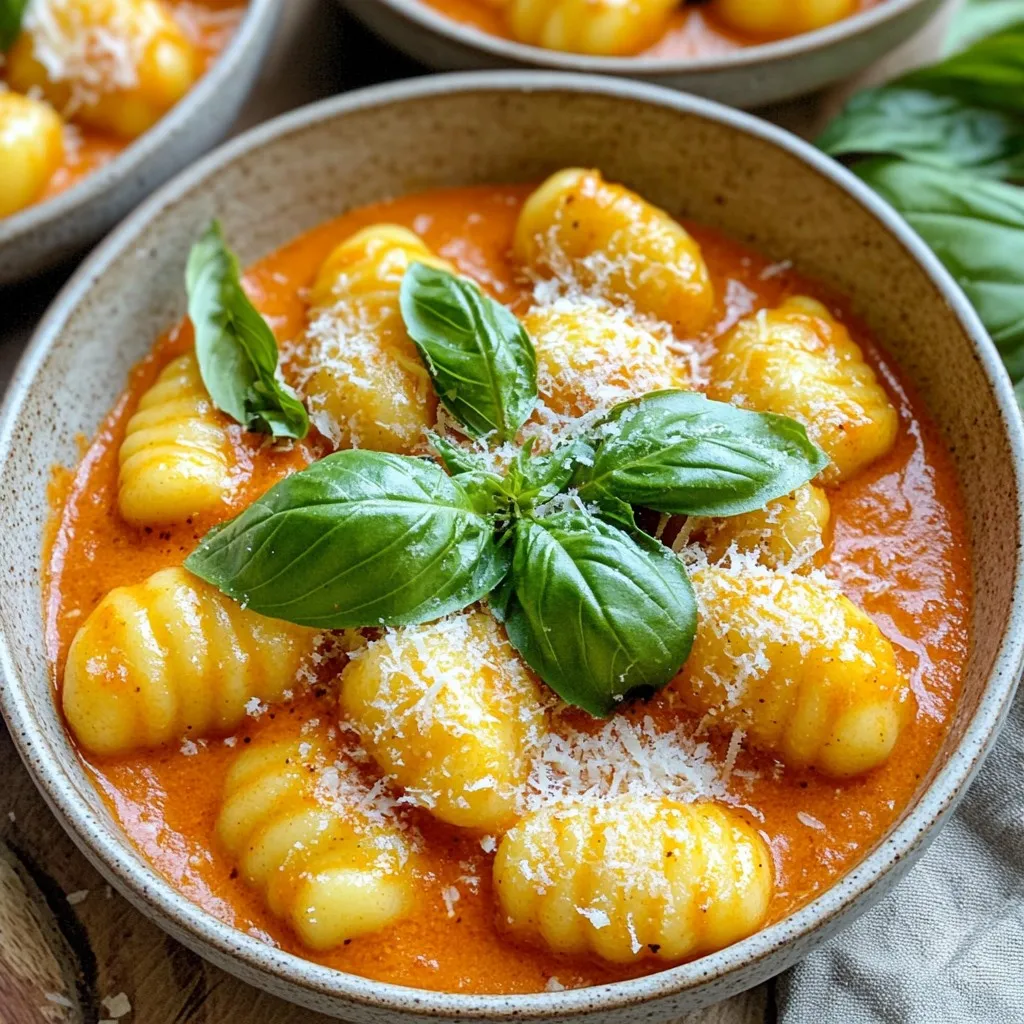
Creamy Roasted Red Pepper Gnocchi Dreamy Dish
Are you ready to savor a dish that oozes comfort? My Creamy Roasted Red Pepper Gnocchi is a delightful blend of flavors that will impress
- 500g boneless chicken thighs - 2 cups fresh broccoli florets - 1/4 cup honey - 3 tablespoons Sriracha sauce - 2 tablespoons soy sauce - 1 tablespoon sesame oil - 3 cloves garlic, minced - 1 inch ginger, grated - 1 tablespoon cornstarch - 2 tablespoons water - Salt and black pepper to taste - Sesame seeds and green onions for garnish Gathering your ingredients is the first step to making Honey Sriracha Chicken & Broccoli. I love using boneless chicken thighs because they are tender and juicy. Fresh broccoli adds a nice crunch and bright color to the dish. For the marinade, mix honey, Sriracha, soy sauce, sesame oil, garlic, and ginger. This mix gives the chicken a sweet and spicy kick. Adjust the Sriracha to fit your taste if you prefer less heat. Don't forget the cornstarch and water to thicken the sauce later. I always season with salt and black pepper for extra flavor. For garnish, sprinkle sesame seeds and chopped green onions on top. They really enhance the dish's look and taste. With these ingredients, you're ready to create a delicious meal that everyone will love! {{ingredient_image_2}} First, grab a large mixing bowl. In this bowl, you will whisk together: - 1/4 cup honey - 3 tablespoons Sriracha sauce - 2 tablespoons soy sauce - 1 tablespoon sesame oil - 3 cloves garlic, finely minced - 1 inch fresh ginger, grated Whisk these ingredients well. This forms a tasty marinade that adds great flavor. Next, take 500g of diced chicken thighs. Add this chicken to your marinade. Make sure each piece is nicely coated. Cover the bowl with plastic wrap. Place it in the fridge. Let it marinate for at least 30 minutes. For a deeper taste, let it sit for up to 2 hours. Now, heat 1 tablespoon of oil in a large skillet over medium-high heat. Once the oil is shimmering, remove the chicken from the marinade. Save the marinade for later use. Stir-fry the chicken for about 5-7 minutes. It should be browned and cooked through. Once cooked, take the chicken out and set it aside. In the same skillet, add 2 cups of fresh broccoli florets. Stir-fry the broccoli for 3-4 minutes. It should be bright and tender-crisp. While the broccoli cooks, make a cornstarch slurry. In a small bowl, mix 1 tablespoon of cornstarch with 2 tablespoons of water until smooth. Return the chicken to the skillet with the broccoli. Pour the reserved marinade over the chicken and broccoli. Let everything simmer for 2-3 minutes. This melds all the flavors together. Gradually add the cornstarch slurry to the skillet. Stir continuously as the sauce thickens to a glossy finish. Season your dish with salt and freshly ground black pepper to taste. Finally, take it off the heat. Serve your Honey Sriracha Chicken & Broccoli hot. Garnish with sesame seeds and chopped green onions for a great look and crunch. For the best flavor, marinate the chicken for at least 30 minutes. This allows the honey and Sriracha to soak in well. If you have time, marinate for up to 2 hours. This gives the dish a richer taste. Always cover the bowl when marinating to keep the chicken fresh. When stir-frying, use a large skillet or wok. Heat the oil over medium-high heat until it shimmers. This ensures even cooking. Add the chicken in batches if needed. Don't crowd the pan. Stir frequently to brown the chicken and cook it through. For the broccoli, stir-fry until it turns vibrant and tender-crisp, about 3-4 minutes. This keeps its bright color and crunch. You can elevate this dish with a few extra touches. Consider adding a splash of lime juice for a zesty kick. Fresh herbs like cilantro or basil can brighten the flavors too. Sesame seeds and chopped green onions add a nice crunch and color when you finish the dish. These small additions make a big difference in taste and presentation. Pro Tips Marinate Longer for More Flavor: Allow the chicken to marinate for at least 2 hours, or even overnight, to deeply infuse the flavors into the meat. Adjust the Spice Level: Modify the amount of Sriracha sauce according to your heat preference. Start with less if you're sensitive to spice, and add more to taste. Use Fresh Ingredients: Fresh garlic and ginger will elevate the dish's flavor profile significantly compared to using powdered alternatives. Perfect Broccoli Texture: Stir-fry the broccoli until it's just tender-crisp to retain its vibrant color and crunch, ensuring a delightful contrast to the chicken. {{image_4}} You can switch out chicken thighs for chicken breast or tofu. Chicken breast offers a leaner option. It cooks faster but can dry out if overcooked. Tofu is great for a plant-based meal. Use firm tofu and press it to remove excess water. Dice the tofu into bite-sized pieces and follow the same steps. Sriracha is spicy, but you can change the heat. For milder flavor, reduce the Sriracha to one tablespoon. You can also mix in honey to balance the heat. If you like it hot, add more Sriracha or top the dish with chili flakes. Experiment with your spice level until you find what you love. Serve Honey Sriracha Chicken & Broccoli with a side of fluffy rice. Steamed quinoa is another healthy choice. You can also add a fresh salad with crunchy vegetables. A simple cucumber salad or a tangy coleslaw pairs well too. These sides help balance the flavors and add texture to your meal. Store your Honey Sriracha Chicken & Broccoli in an airtight container. This keeps it fresh and tasty. Leftovers can last for about 3 to 4 days in the fridge. Make sure to let it cool to room temperature before sealing. This helps prevent moisture buildup. To freeze, place your cooled chicken and broccoli in a freezer-safe container. You can also use freezer bags. Try to remove as much air as possible to prevent freezer burn. When you're ready to eat, thaw it in the fridge overnight. Reheat it on the stove or in the microwave until it's hot throughout. For the best taste, eat your leftovers within 4 days if stored in the fridge. If frozen, aim to use it within 3 months for optimal flavor. Always check for any signs of spoilage before enjoying your meal. Yes, you can use frozen broccoli. It saves time and is convenient. When using frozen broccoli, do not thaw it before cooking. Add it directly to the hot skillet. This helps keep the broccoli bright and tender. Frozen broccoli cooks faster, so stir-fry it for about 2-3 minutes. Always check for the right texture. You want it tender but still a bit crunchy. Fresh broccoli has a better taste, but frozen is a good option too. Yes, you can prepare this dish ahead of time. Cook the chicken and broccoli, then cool them. Store them in an airtight container in the fridge. You can keep it for up to three days. When ready to eat, reheat it in a skillet over medium heat. Add a splash of water or stock to help it heat evenly. Stir until hot. This keeps the flavors fresh and the chicken moist. To adjust the sweetness, you can change the honey amount. If you want it less sweet, cut the honey to 2 tablespoons. If you prefer more sweetness, add an extra tablespoon. You can also balance the sweetness with more Sriracha. Adding a bit of lime juice can brighten the flavors without making it too sweet. Taste as you go to find the right mix. This way, you can create a dish that fits your taste buds perfectly. This blog post covered how to make Honey Sriracha Chicken and Broccoli. We discussed fresh ingredients, the marinade, and step-by-step cooking instructions. I shared tips for marinating and cooking, as well as variations to suit your tastes. Don't forget storage tips to keep your leftovers fresh. With this easy recipe, you can enjoy a tasty meal that fits your schedule. Dive in and savor the flavors!
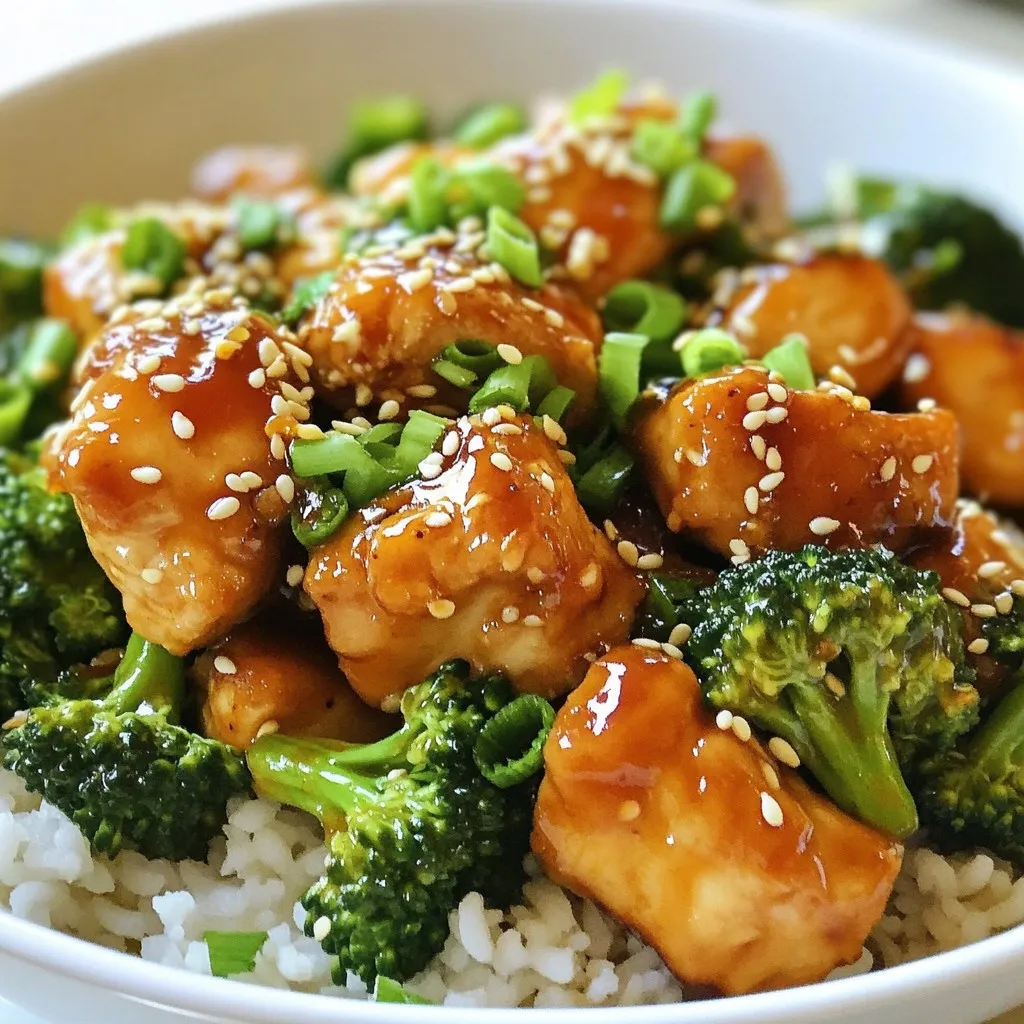
Honey Sriracha Chicken & Broccoli Flavor Boost Meal
Are you ready to spice up your weeknight dinner routine? My Honey Sriracha Chicken & Broccoli flavor boost meal is the perfect mix of sweet
- 8 oz spaghetti - 4 tablespoons unsalted butter - 4 cloves garlic, finely minced - 1 cup heavy cream - 1 cup freshly grated Parmesan cheese - 1/2 teaspoon freshly cracked black pepper - Salt, to taste - 2 tablespoons fresh parsley, finely chopped (for garnish) - Optional: A pinch of red pepper flakes When I think of creamy garlic Parmesan spaghetti, I think of comfort. You need a few simple yet rich ingredients to make this dish shine. First, I love using fresh spaghetti, but any pasta works great. The unsalted butter gives a rich base. Garlic is where the magic starts. Use fresh garlic, finely minced, for the best flavor. The heavy cream makes it rich and creamy. I always use freshly grated Parmesan cheese because it melts better and tastes amazing. For seasoning, a touch of salt and black pepper adds depth. Fresh parsley gives a pop of color and freshness. If you like a little heat, a pinch of red pepper flakes can take this dish to the next level. Gather these ingredients, and you're on your way to a warm, tasty meal that feels special. {{ingredient_image_2}} Start by filling a large pot with salted water. Bring that water to a rapid boil. Once boiling, add 8 oz of spaghetti. Cook the spaghetti according to the package instructions until it is al dente. Before draining, reserve about 1/2 cup of the pasta water. This water will help adjust the sauce later. After reserving the water, drain the spaghetti and set it aside in a large mixing bowl. In a spacious skillet, melt 4 tablespoons of unsalted butter over medium heat. Once the butter has melted, add 4 cloves of finely minced garlic. Sauté the garlic for about 1-2 minutes. Watch closely so it doesn’t turn brown, as brown garlic can taste bitter. Next, gradually pour in 1 cup of heavy cream. Stir continuously to mix it with the garlic butter. Let this mixture simmer gently for 2-3 minutes. Stir occasionally until the sauce starts to thicken. Then, slowly whisk in 1 cup of freshly grated Parmesan cheese. Keep stirring until the cheese melts completely. If the sauce seems too thick, add some of the reserved pasta water until it reaches your desired creaminess. Carefully add the drained spaghetti into the skillet with the creamy garlic sauce. Toss gently to coat the spaghetti evenly. Season with 1/2 teaspoon of freshly cracked black pepper and salt to taste. If you like a little heat, sprinkle in a pinch of red pepper flakes. Spoon the creamy garlic Parmesan spaghetti into individual serving bowls. Finish with a sprinkle of finely chopped parsley for a fresh touch. For a lovely presentation, add more grated Parmesan cheese on top. You can also drizzle a bit of high-quality olive oil or include halved cherry tomatoes for added color and flavor. Enjoy your meal! To get that nice, creamy sauce, always save some pasta water. This water has starch from the pasta, which helps thicken the sauce. If your sauce feels too thick, add a bit of this water. It will keep the sauce smooth and silky. Choosing the right Parmesan is also key. Always use freshly grated Parmesan. Pre-grated cheese often has additives that can change the texture of your sauce. Fresh cheese melts better and adds more flavor. Want to spice things up? Adding red pepper flakes gives your dish a nice kick. Just a pinch can make a big difference. You can also try other herbs, like basil or oregano, for added depth. Fresh parsley adds a pop of color and freshness. Be careful not to overcook the garlic. It should be fragrant, not brown. Brown garlic can taste bitter, ruining your dish. Also, don’t skip the pasta water. It’s essential for making your sauce creamy. Without it, your sauce might be too thick or dry. Always reserve some before draining the spaghetti. Pro Tips Use Fresh Ingredients: Always opt for fresh garlic and high-quality Parmesan cheese. Fresh ingredients enhance the flavor and creaminess of the dish. Reserve Pasta Water: Don't forget to save some pasta water before draining. It’s perfect for adjusting the sauce’s consistency and adding flavor. Control the Heat: When sautéing garlic, keep the heat on medium to low. This prevents the garlic from burning and turning bitter, which can ruin the dish. Experiment with Add-ins: Feel free to add your favorite protein, such as grilled chicken or shrimp, or vegetables like spinach or cherry tomatoes for added nutrition and flavor. {{image_4}} You can make creamy garlic Parmesan spaghetti even heartier by adding protein. Here are two easy options: - Grilled chicken: Slice grilled chicken breast and toss it with the spaghetti. It adds a nice texture and flavor. - Shrimp: Sauté shrimp in the garlic butter before adding cream. It cooks quickly and makes the dish feel special. If you want a vegetarian twist, adding fresh veggies can enhance your meal. Consider these options: - Spinach: Toss in fresh spinach leaves right before you add the cream. They wilt nicely and add nutrition. - Mushrooms: Sauté sliced mushrooms with the garlic. They bring an earthy taste and a meaty texture. - Cherry tomatoes: Halve cherry tomatoes and add them at the end. They add a pop of sweetness and color. For those avoiding gluten, you can still enjoy this dish with some simple changes: - Alternative pasta types: Use gluten-free spaghetti made from rice or lentils. They cook well and blend perfectly with the creamy sauce. These variations let you customize your creamy garlic Parmesan spaghetti. Enjoy experimenting with flavors! Store leftover creamy garlic parmesan spaghetti in an airtight container. Keep it in the fridge for up to three days. Make sure it cools down before sealing. This helps to prevent extra moisture. To reheat spaghetti, use a skillet over low heat. Add a splash of water or cream to help it warm evenly. Stir gently to mix in the sauce. You can also use a microwave. Place it in a bowl, cover with a lid, and heat in short bursts. Stir in between to avoid hot spots. You can freeze creamy garlic parmesan spaghetti. Place it in a freezer-safe container. It can last up to two months. When ready to eat, thaw in the fridge overnight. Reheat it on the stove for the best texture. You can use whole milk or half-and-half instead of heavy cream. These options make the dish lighter. If you want a dairy-free choice, try coconut cream or cashew cream. Both add creaminess without the dairy. Yes, you can make this dish ahead. Cook the spaghetti and sauce separately. Store them in airtight containers. When you're ready to eat, reheat them together for a quick meal. To thicken the sauce, add more Parmesan cheese or let it simmer longer. For a thinner sauce, mix in some reserved pasta water. Start with a little and adjust until you reach the right consistency. Yes, this recipe is vegetarian. It has no meat or fish. To make it vegan, use plant-based butter and cheese. This way, you can enjoy the same creamy goodness without dairy. In this post, we explored making creamy garlic Parmesan spaghetti. We covered the main ingredients, cooking steps, and helpful tips. I shared ways to add protein or make it vegetarian. Storing and reheating tips ensure you enjoy it later. Remember to avoid common mistakes for the best flavor and creaminess. This dish is versatile and fun to make. Enjoy creating your creamy spaghetti masterpiece!
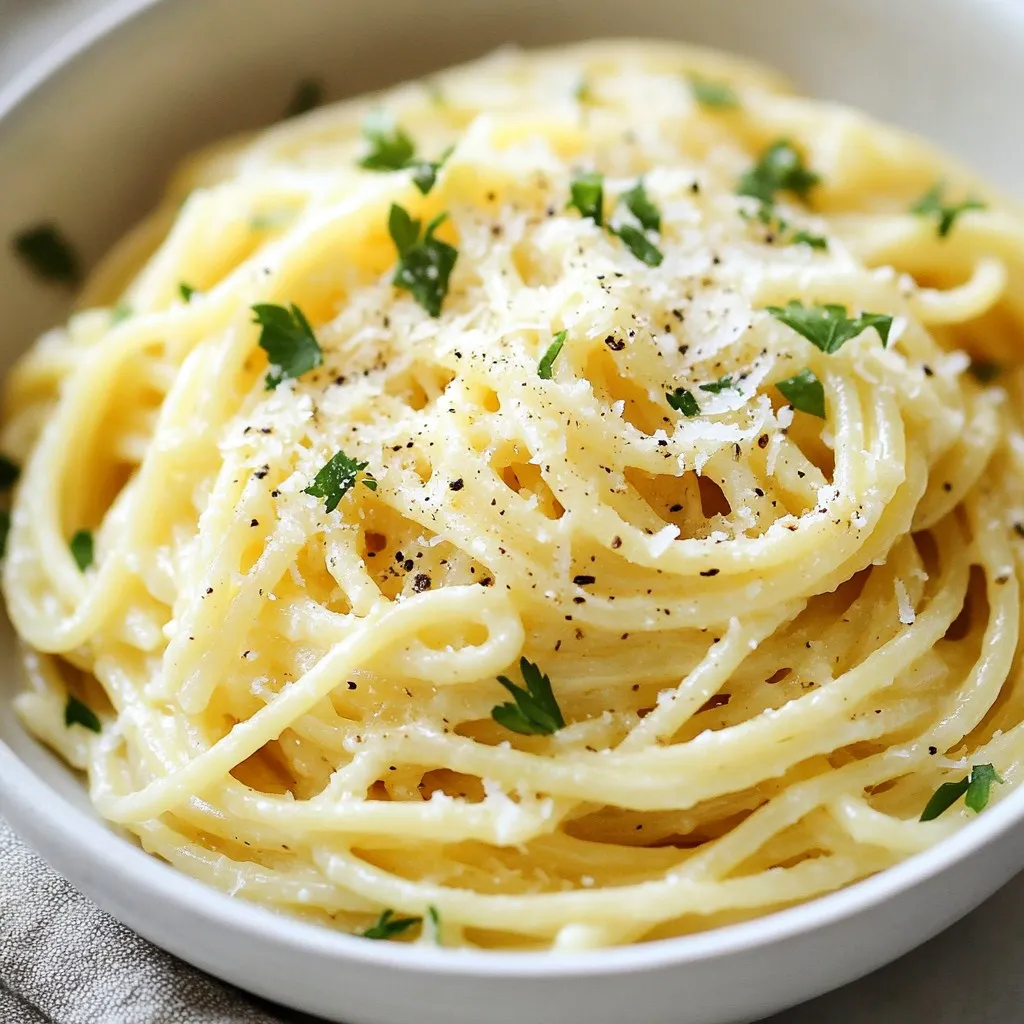
Creamy Garlic Parmesan Spaghetti Rich and Easy Meal
Looking for a quick and tasty meal? My Creamy Garlic Parmesan Spaghetti is rich, easy to make, and perfect for any night. This dish packs
Here’s what you need to make this creamy mushroom wild rice soup: - 1 cup wild rice, thoroughly rinsed and drained - 1 tablespoon extra-virgin olive oil - 1 medium onion, finely chopped - 3 cloves garlic, freshly minced - 8 ounces (approximately 2 cups) mixed mushrooms, sliced (cremini and button varieties) - 2 medium-sized carrots, diced into small cubes - 2 celery stalks, diced evenly - 6 cups rich vegetable broth - 1 teaspoon dried thyme - 1 teaspoon dried rosemary - 1 bay leaf - 1 cup heavy cream or coconut cream (for a dairy-free alternative) - Salt and black pepper to taste - Fresh parsley, finely chopped (for garnish) Using fresh ingredients can give your soup a bright taste. Fresh mushrooms add great flavor and texture. You can use a mix of cremini and button mushrooms for depth. Fresh herbs like thyme and rosemary also bring more aroma. However, dried herbs still work well if fresh isn’t available. They are easy to store and have a long shelf life. If you have dietary needs, there are easy swaps. Use coconut cream instead of heavy cream for a dairy-free version. For gluten-free diets, this recipe is naturally safe as it uses wild rice. If you're vegan, use vegetable broth and coconut cream. You can also add tofu for protein. Always check labels for hidden allergens. Start by preparing your vegetables. First, chop one medium onion finely. Next, mince three cloves of garlic. Slice about eight ounces of mixed mushrooms—cremini and button work great. Dice two medium carrots into small cubes and chop two celery stalks evenly. In a medium skillet, heat one tablespoon of extra-virgin olive oil over medium heat. Add the chopped onion and sauté it for about five minutes. You want the onion to be soft and translucent. Next, add the minced garlic, sliced mushrooms, diced carrots, and diced celery. Sauté this mix for another five minutes until the mushrooms are tender and smell amazing. Once you finish sautéing, transfer this vegetable medley to the slow cooker. Now, let’s cook the soup! To your slow cooker, add one cup of rinsed wild rice. Pour in six cups of rich vegetable broth. Add one teaspoon of dried thyme, one teaspoon of dried rosemary, and one bay leaf. Stir everything well to mix the ingredients. Cover the slow cooker. You can set it on low for four to five hours or high for two to three hours. Cook until the wild rice is tender and fully cooked. When the cooking time is up, it’s time for the final touches. Stir in one cup of heavy cream or coconut cream for a dairy-free option. Season the soup with salt and black pepper to taste. Before serving, remember to remove the bay leaf. Ladle the creamy soup into individual bowls. To make it beautiful, garnish each bowl with some fresh, chopped parsley. Enjoy your delicious soup! To get the best creamy texture in your soup, use heavy cream or coconut cream. Add it at the end of cooking. This way, it mixes well without curdling. If you want a lighter feel, use half-and-half. Whisk it in gently. If you want to make it vegan, stick to coconut cream. It adds a nice flavor too. Cooking wild rice well is key. Always rinse it first. This removes extra starch and helps it cook evenly. Add it to the slow cooker with the broth. Let it cook until tender; this usually takes 4 to 5 hours on low. Check it near the end. If it’s still tough, give it a bit more time. Want to amp up the taste? Add fresh herbs like thyme or parsley. You can also try a pinch of nutmeg for warmth. If you like a kick, add red pepper flakes. These extras can really make your soup shine. Experiment to find your favorite combo. Each tweak can lead to a delightful surprise. {{image_4}} You can easily make this soup vegan. Simply replace heavy cream with coconut cream. It gives a nice, rich taste without the dairy. Use vegetable broth to keep it plant-based. The mushrooms and wild rice add depth, ensuring you won’t miss the dairy. This option is tasty and kind to your tummy. Want to add protein? You can toss in cooked chicken or tofu. If you use chicken, shred it and add it at the end. It warms up quickly in the soup. For tofu, use firm or extra-firm. Cut it into cubes and add it during cooking. Both options will make your soup heartier. This soup loves extra veggies! You can add spinach, kale, or peas for a burst of color and flavor. Just chop them up and stir them in before serving. They’ll add nutrition and freshness. If you have leftover veggies from your fridge, throw them in too. This soup is very flexible and will adapt to what you have on hand. To store your leftover soup, let it cool first. Use airtight containers for best results. You can keep it in the fridge for easy access. If you want to save it longer, consider freezing some. Keep the soup in single servings to make reheating easier. When freezing, make sure to leave some space in the container. The soup will expand as it freezes. When you’re ready to enjoy it, thaw the soup overnight in the fridge. To reheat, either use the stovetop or microwave. Heat it slowly to avoid burning. Stir often to ensure even warmth. Mushroom soup lasts about 3 to 4 days in the fridge. Keep an eye out for any signs of spoilage. If it smells off or has strange colors, it's best to throw it away. Always trust your senses when it comes to food safety. Yes, you can use long-grain rice. However, the soup will taste different. Wild rice has a nutty flavor and chewy texture. Long-grain rice cooks faster. So, if you use it, check for doneness early. If your soup is too thin, try a few methods. You can mix a tablespoon of cornstarch with cold water. Stir this into the soup and let it simmer. Another option is to blend a cup of soup, then return it to the pot. This adds body without changing the taste. This soup pairs well with many sides. You can serve it with crusty bread. A simple salad adds freshness. Grilled cheese also makes a great match. Try garlic bread for a tasty twist. Each option adds flavor and makes your meal special. This post explored the key ingredients and steps to make a delicious soup. You learned how fresh ingredients can elevate flavors. We discussed tips for a creamy texture and variations for every diet. Proper storage methods keep the soup fresh longer. In the end, making soup is fun and flexible. You can adapt it to your taste or dietary needs. Now, gather your ingredients and enjoy the cooking process!
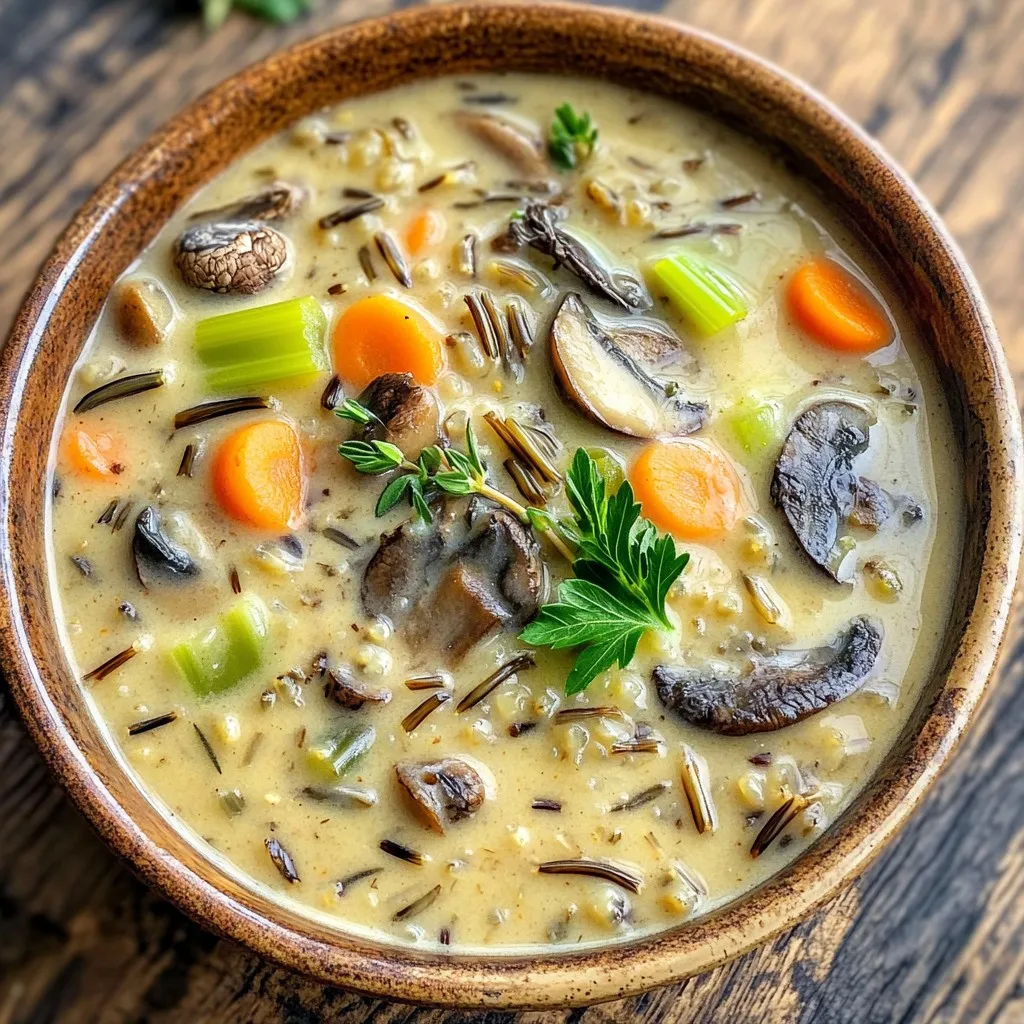
Slow Cooker Creamy Mushroom Wild Rice Soup Delight
Are you ready to warm your soul with a delicious, creamy soup? This Slow Cooker Creamy Mushroom Wild Rice Soup is the perfect cozy meal.
- 4 boneless, skinless chicken thighs - 2 cups Brussels sprouts, halved - 1 cup cherry tomatoes, halved - 1 red bell pepper, sliced into strips - 1 medium red onion, cut into thick slices - 1/4 cup balsamic vinegar - 2 tablespoons honey - 2 tablespoons olive oil - 4 cloves garlic, minced - 1 teaspoon dried thyme - 1 teaspoon dried oregano - Salt and pepper to taste - Fresh basil leaves for garnish Each ingredient plays a key role in the dish. If you want to switch out the chicken, try chicken breasts or even tofu for a vegetarian option. For the veggies, feel free to swap Brussels sprouts with green beans or broccoli. The balsamic vinegar gives a sweet and tangy taste, but you can use red wine vinegar if you need a different flavor. Honey adds sweetness, but maple syrup works too. This dish serves four people and is wholesome. Each serving has about: - Calories: 350 - Protein: 30g - Carbohydrates: 25g - Fat: 15g - Fiber: 5g This meal gives you a great balance of protein, veggies, and healthy fats. Enjoying it will surely satisfy your taste buds while keeping your meal plan on track. 1. Preheat the Oven: Heat your oven to 425°F (220°C). This warms the oven for roasting. 2. Make the Marinade: In a bowl, mix 1/4 cup balsamic vinegar, 2 tablespoons honey, 2 tablespoons olive oil, and 4 cloves minced garlic. Add 1 teaspoon dried thyme, 1 teaspoon dried oregano, and a pinch of salt and pepper. Whisk until blended. 3. Marinate the Chicken: Place 4 boneless, skinless chicken thighs in a large bowl. Pour half the marinade over them. Toss to coat well. Let it marinate for 15 minutes. 4. Prepare the Vegetables: On a large sheet pan, arrange 2 cups halved Brussels sprouts, 1 cup halved cherry tomatoes, 1 sliced red bell pepper, and 1 medium thickly sliced red onion. Drizzle the remaining marinade over the veggies. Toss gently to coat. 5. Arrange on Sheet Pan: Make space in the middle of the sheet pan. Place the marinated chicken thighs there. Do not overcrowd. 6. Roast the Dish: Place the sheet pan in the oven. Roast for 25-30 minutes. The chicken should reach 165°F (74°C). The veggies should be tender and caramelized. 7. Broil for Extra Glaze: For the last 5 minutes, set the oven to broil. This creates a nice glaze on the chicken. Watch closely to avoid burning. 8. Garnish and Serve: Take the sheet pan out of the oven. Let it rest for a few minutes. Top with fresh basil leaves for color and flavor. - Use fresh ingredients. They give a better flavor. - Don't skip the broiling step. It adds a delicious finish. - Let the chicken rest before serving. This helps keep it juicy. - Experiment with spices. Add a dash of red pepper flakes for heat. This sheet pan balsamic glazed chicken and vegetables dish is simple yet full of flavor. Enjoy your cooking! You can easily change this recipe to fit your tastes. Swap chicken thighs for breasts if you like leaner meat. You can also try different veggies, like zucchini or carrots. If you want more spice, add red pepper flakes to the marinade. For a sweeter taste, use maple syrup instead of honey. This dish is all about what you love! If you're busy, you can marinate the chicken the night before. Just keep it in the fridge until you are ready to cook. You can also chop the veggies ahead of time. Store them in a sealed bag or container. If you forget to marinate, no worries! Just let the chicken sit in the marinade for 15 minutes while you prepare the veggies. Pair this dish with a simple grain, like rice or quinoa. A fresh green salad also goes well with it. For a heartier meal, serve it with roasted potatoes. You can even add some crusty bread to soak up the glaze. Each side will help make your meal more filling and tasty! {{image_4}} You can switch the veggies in this dish to suit your taste. Try using green beans, zucchini, or carrots. Each adds a unique flavor and texture. For proteins, swap chicken for turkey or tofu. Tofu absorbs the marinade well and gives a nice touch. Want to spice it up? Add paprika, cumin, or chili flakes to the marinade. This will give your dish a warm kick. You can also mix in a little soy sauce or mustard for depth. These additions make each bite exciting. This dish is easy to make gluten-free. Just check your balsamic vinegar and honey for hidden gluten. For a low-carb option, skip the honey or use a sugar substitute. You can also add more non-starchy veggies like broccoli or cauliflower for a filling meal. After enjoying your sheet pan balsamic glazed chicken and veggies, store leftovers in an airtight container. Make sure to cool the dish to room temperature first. This way, the flavor stays fresh. You can keep it in the fridge for up to three days. If you want to keep it longer, consider freezing. When you're ready to eat leftovers, reheating is simple. Preheat your oven to 350°F (175°C). Spread the chicken and veggies on a baking sheet. Heat for about 15-20 minutes or until warmed through. This helps keep the chicken juicy and the veggies tender. You can also use a microwave, but the oven gives a better texture. To freeze, place the cooled chicken and veggies in a freezer-safe bag or container. Squeeze out as much air as possible to prevent freezer burn. You can freeze them for up to three months. When ready to eat, thaw overnight in the fridge before reheating. This way, the flavors stay intact. Enjoy your meal even later! You can use red wine vinegar or apple cider vinegar. They both have a tangy taste. If you prefer a sweeter option, try using a mix of vinegar and a bit of honey. This will mimic the balsamic flavor without losing the balance. Check the internal temperature of the chicken. It should reach 165°F (74°C). You can use a meat thermometer for the best results. If you don’t have a thermometer, cut into the chicken. The juices should run clear and the meat should no longer be pink. Yes, you can use bone-in chicken thighs. They will add more flavor, but they will take longer to cook. Adjust the cooking time to about 35-40 minutes to ensure they are fully cooked. Make sure to check the temperature in the thickest part of the thigh. Absolutely! You can adapt this recipe for an air fryer. Cook the chicken and vegetables at 375°F (190°C) for about 20-25 minutes. Be sure to shake the basket halfway through for even cooking. The air fryer will give you a nice crisp on the chicken. This guide covered the essential ingredients, step-by-step cooking, and helpful tips. You learned how to customize your dish, store leftovers, and make variations. In the end, cooking is about finding joy in each bite. Use the tips and tricks to make your dish unique and tasty. I hope you feel inspired to create a delicious meal. Happy cooking!
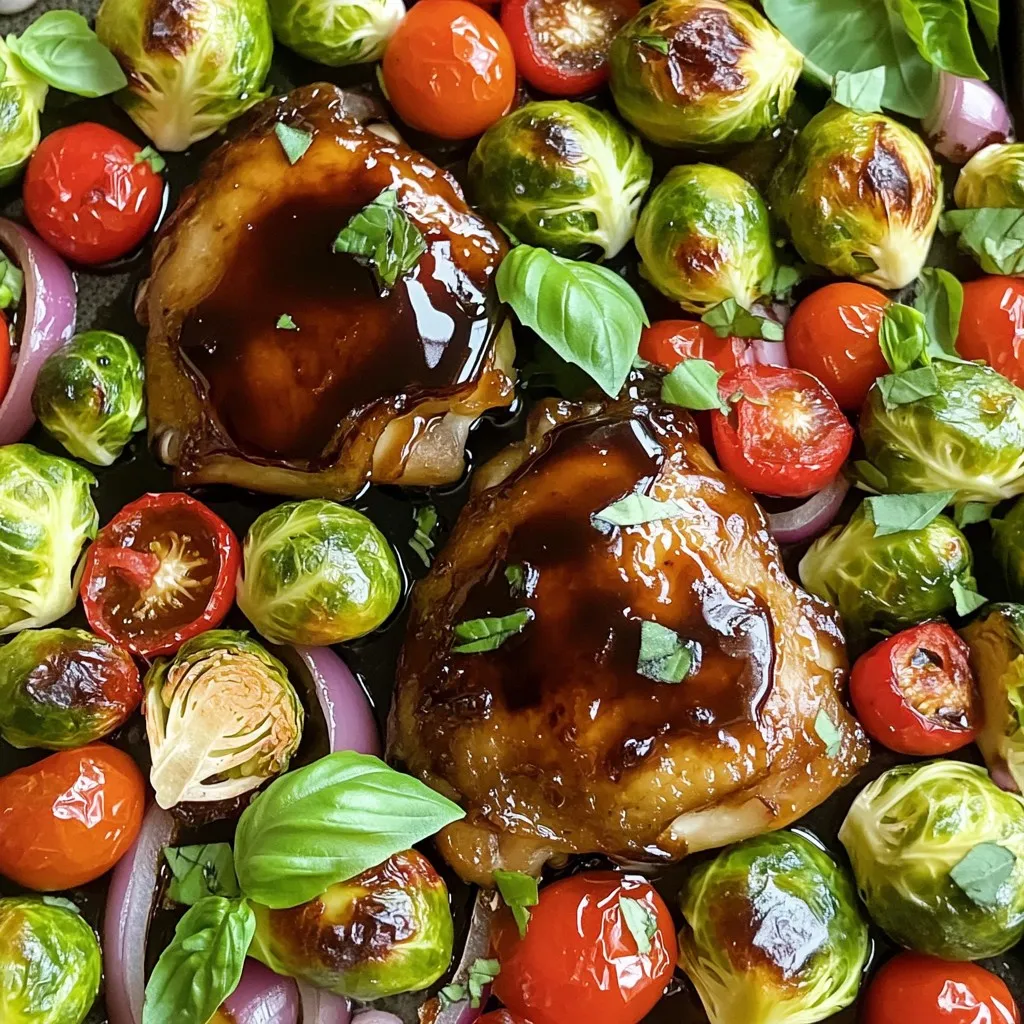
Sheet Pan Balsamic Glazed Chicken and Vegetables Dish
Looking to impress at dinner without spending hours in the kitchen? My Sheet Pan Balsamic Glazed Chicken and Vegetables dish is your perfect solution! This
For a tasty Cheesy Taco Pasta, gather these ingredients: - 8 ounces elbow macaroni - 1 pound ground beef or ground turkey - 1 packet taco seasoning (about 1 ounce) - 1 cup diced tomatoes (canned or fresh) - 1 cup corn (frozen or canned, drained) - 1 bell pepper, diced (any color for vibrancy) - 1 small onion, finely chopped - 2 cups shredded cheddar cheese - 1 cup sour cream - 2 tablespoons olive oil - Salt and pepper to taste - Fresh cilantro, chopped, for garnish You will need a few basic tools to make this dish: - Large pot for boiling pasta - Colander to drain the macaroni - Spatula for stirring and breaking meat - Cutting board and knife for chopping vegetables When selecting fresh ingredients, keep these tips in mind: - Look for firm and bright bell peppers. They should be free from spots. - Choose tomatoes that feel heavy and have a smooth skin. - Pick corn that is sweet and plump, avoiding any bruises. - Check the ground meat for a bright color and no off-smell. - Fresh herbs like cilantro should be vibrant and fragrant. Using fresh ingredients will enhance the taste of your Cheesy Taco Pasta. Enjoy the flavors! {{ingredient_image_2}} Fill a large pot with water. Add a generous pinch of salt. Bring the water to a rapid boil. Add 8 ounces of elbow macaroni. Cook according to the package instructions until al dente. Drain the macaroni in a colander and set it aside. In the same pot, pour in 2 tablespoons of olive oil. Heat it over medium heat. Once warm, add 1 small onion, finely chopped, and 1 diced bell pepper. Sauté for about 4 to 5 minutes. Stir occasionally until the vegetables soften and smell great. Add 1 pound of ground beef or turkey to the pot. Use a spatula to break the meat apart as it cooks. Cook for about 6 to 8 minutes until the meat is browned. If there is excess fat, carefully drain it off. Sprinkle 1 packet of taco seasoning over the browned meat. Stir in 1 cup of diced tomatoes and 1 cup of corn. Cook this mixture for an additional 2 to 3 minutes. Stir frequently until everything heats up completely. Return the cooked macaroni to the pot. Reduce the heat to low. Stir in 1 cup of sour cream and half of the shredded cheddar cheese. Mix until creamy and well combined. Then, sprinkle the remaining cheddar cheese on top. Cover the pot with a lid for 2 to 3 minutes. This allows the cheese to melt beautifully. Taste the dish and adjust with salt and pepper if needed. Serve hot in vibrant bowls. Sprinkle extra cheddar cheese and chopped cilantro on top. A dollop of sour cream adds creaminess and looks great too. To make the best Cheesy Taco Pasta, follow these simple tips: - Cook pasta al dente: This keeps it firm and avoids mushiness. - Use fresh veggies: Fresh bell peppers and onions add great flavor. - Brown the meat well: This step gives depth to the dish. - Mix evenly: Stir well to spread flavors throughout the pasta. - Let cheese melt: Cover the pot for a few minutes to get a creamy texture. Avoid these common mistakes to ensure your dish shines: - Overcooking pasta: Keep an eye on the time to prevent softness. - Not draining excess fat: Drain fat after browning meat for a healthier dish. - Skipping seasoning: Always taste and adjust salt and pepper as needed. - Adding too much cheese at once: Layering cheese helps it melt better. Boost the flavor of your Cheesy Taco Pasta with these ideas: - Cilantro: Fresh cilantro adds a bright note when served. - Chili powder: A pinch can add a nice kick. - Garlic powder: This gives an aromatic touch without extra chopping. - Lime juice: A squeeze right before serving brightens the dish. These tips will help you create a tasty and satisfying meal that everyone will love. Pro Tips Use High-Quality Cheese: Opt for a good quality sharp cheddar cheese for a more robust flavor that enhances the overall dish. Customizable Protein: Feel free to substitute ground beef or turkey with other proteins like chicken or vegetarian alternatives for a different taste. Add Extra Veggies: Incorporate more vegetables like zucchini or spinach for added nutrition and color, making it a more balanced meal. Meal Prep Friendly: This dish can be made ahead of time and stored in the refrigerator for up to 3 days, making it perfect for meal prepping. {{image_4}} You can easily make this dish vegetarian. Swap the ground meat for plant-based meat or beans. Use lentils, black beans, or chickpeas for protein. These options add great flavor and texture. Don't forget to add more veggies like zucchini or mushrooms. They will enhance the dish and keep it filling. This way, you get a hearty meal that everyone will enjoy. For those who prefer different proteins, consider chicken or pork. Ground chicken or shredded rotisserie chicken works well. You can also try tofu for a vegetarian option. This adds a unique twist to the cheesy taco pasta. Use your favorite taco seasoning to blend flavors. Experiment with different cheeses too. Pepper jack cheese adds a spicy kick, while mozzarella keeps it mild. If you want a low-carb version, replace the pasta with zucchini noodles or spaghetti squash. Both options are low in carbs yet high in flavor. You can also use cauliflower rice for a grain-free meal. This keeps the dish light while still being satisfying. Adjust the seasoning to match your taste preference. Enjoy a delicious, guilt-free meal that fits your lifestyle! To keep your Cheesy Taco Pasta fresh, let it cool. Once cool, place it in an airtight container. This helps keep moisture in and air out. Store it in the fridge for up to three days. If you want to enjoy it later, freezing is a great option. When it's time to reheat, use the microwave or a skillet. If using a microwave, add a splash of water. This keeps the pasta moist. Heat it in short bursts, stirring often until warm. In a skillet, add a little oil, and stir the pasta over low heat. This method helps keep the flavors intact. For long-term storage, freeze the pasta in individual portions. Use freezer-safe bags or containers. Be sure to remove as much air as possible. Label each bag with the date. You can freeze it for up to three months. When ready to eat, thaw it in the fridge overnight. Reheat as described above. Yes, you can use other pasta shapes. Penne or rotini work well. These shapes hold sauce nicely. You can even try gluten-free pasta if needed. Just follow the cooking time on the package. You can use Greek yogurt instead of sour cream. It adds creaminess with a tangy flavor. Cream cheese or cottage cheese also works well. Choose what you have on hand for a tasty option. To add spice, use jalapeños or chili powder. You can also add hot sauce to the mix. For more flavor, try spicier taco seasoning. Adjust to your taste for the right kick. Yes, you can make it ahead. Prepare the dish, let it cool, and store it in the fridge. Reheat it on the stove or in the oven. It tastes great even the next day! Serve it with a simple salad or garlic bread. Corn on the cob or tortilla chips makes a good match too. These sides add crunch and balance to the meal. Enjoy a well-rounded dinner! In this post, we explored making Cheesy Taco Pasta. We looked at key ingredients, step-by-step instructions, and tips for the best results. I shared variations for different diets and how to store leftovers. Remember to choose fresh ingredients and avoid common mistakes for the best flavor. Feel free to add your favorite spices or try new proteins. This dish is easy to adapt and fun to make. Enjoy cooking and sharing your delicious creation!
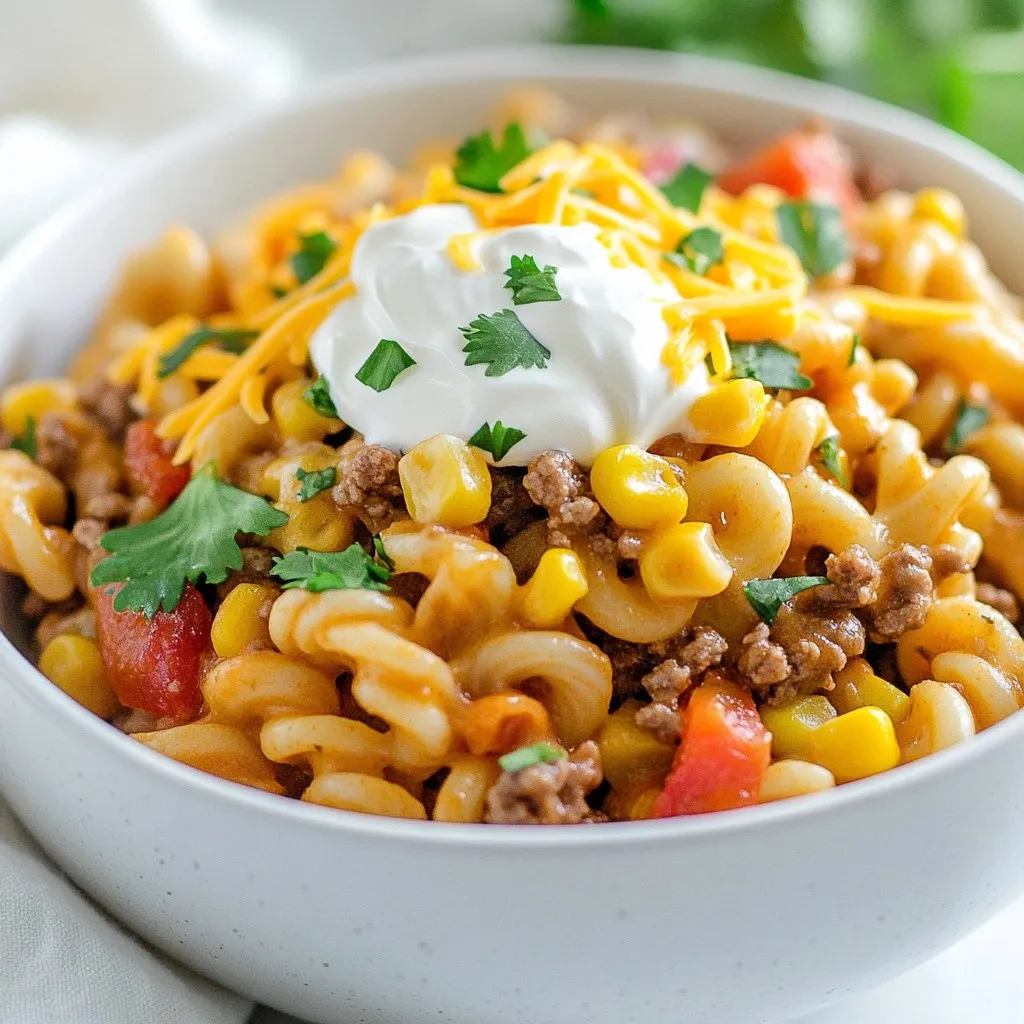
Ingredient Cheesy Taco Pasta Simple and Flavorful Meal
Are you ready to whip up a simple, yet delicious meal? This Cheesy Taco Pasta combines your favorite taco flavors with creamy goodness. Whether you’re
- 4 large russet potatoes, peeled and cut into 1-inch cubes - 3 leeks, thoroughly cleaned and sliced (include white and light green parts) - 1 medium yellow onion, finely diced - 4 cloves garlic, minced - 4 cups vegetable broth (preferably low sodium) - 1 cup heavy cream or coconut cream (for a vegan alternative) - 2 tablespoons extra virgin olive oil - 1 teaspoon dried thyme - Salt and freshly ground black pepper, to taste - Fresh chives, chopped (for garnish) I love using russet potatoes for this soup. They break down well and create a creamy base. Leeks add a soft, sweet flavor that makes every bite special. When you slice the leeks, be sure to wash them well. They can hold dirt in their layers. A good rinse keeps your soup clean and tasty. Onions and garlic give depth to the soup. They add warmth and richness. I prefer using a medium yellow onion for this dish. Its flavor balances well with the potatoes and leeks. The garlic brings a nice kick. The vegetable broth is essential. It gives the soup a savory base. I often choose low-sodium broth. This way, I can control the salt level. Adding heavy cream gives a rich texture. If you want a lighter option, coconut cream works just as well. Don't forget the thyme! It adds a lovely herbal note. A sprinkle of salt and black pepper brings everything together. Finally, fresh chives add a pop of color and taste. They make the soup look pretty too. This mix of ingredients creates a comforting and nourishing dish that warms the heart. First, you need to clean the leeks. To do this, slice the leeks thinly. Then, place the slices in a bowl of cold water. Swirl the leeks around to remove any grit. Let them soak for a few minutes. After soaking, drain the leeks and set them aside. This method helps keep your soup clean and fresh. Next, slicing the leeks is simple. Use a sharp knife for clean cuts. You want to include both the white and light green parts. Avoid the dark green tops, as they can be tough. Thin slices will cook evenly in the soup. Now it’s time to layer the ingredients in your crockpot. Start with the diced russet potatoes. Next, add the cleaned and sliced leeks. After that, layer the diced onion and minced garlic. This order helps the flavors mix well during cooking. Even distribution is key here. Make sure each ingredient is spread out. This way, every bite of soup will be tasty. Cover the crockpot with its lid. Set it to cook on low for 6-8 hours. If you're in a hurry, choose the high setting for 3-4 hours. The potatoes should be fork-tender when done. This means they’re ready for blending into a creamy soup. Once cooking is complete, it’s blending time. Use an immersion blender for quick and easy blending. This tool lets you blend the soup right in the crockpot. If you don’t have one, use a regular blender. Pour the soup in batches into the blender. Blend until smooth but leave some chunks for texture. After blending, stir in the heavy cream or coconut cream. This adds richness to the soup. Mix until the cream is fully blended in. Next, taste the soup and adjust the seasoning. Add more salt or pepper if needed. Finally, let the soup cook on low for an extra 30 minutes. This step warms the cream and thickens the soup, making it even more delicious. To make your creamy potato leek crockpot soup shine, consider adding fresh herbs. Chopped parsley or dill can give a burst of freshness. You might also add a pinch of smoked paprika for a warm depth. Balance the creaminess by tasting as you go. If the soup feels too rich, add a splash of lemon juice. This brightens the flavors nicely. Crockpots can vary a lot. If yours cooks faster, start checking after 5 hours on low. For models that run cooler, you may need an extra hour. Your soup is ready when the potatoes are tender. Use a fork for testing. They should break apart easily. Serve your soup hot in deep bowls for a cozy feel. Garnish with fresh chives for a pop of color. A drizzle of cream adds a nice touch too. Pair the soup with crusty artisan bread. It’s perfect for dipping and makes a great meal. For a bit of crunch, serve with a simple green salad on the side. {{image_4}} If you want a vegan version of this soup, you can use coconut cream instead of heavy cream. Coconut cream adds a rich and creamy texture, just like dairy does. It also gives a nice hint of sweetness that blends well with the potatoes and leeks. You can find coconut cream in cans at most grocery stores. Just make sure to use the thick part at the top. This way, you keep the soup creamy without using any dairy. You may also add a splash of lemon juice for brightness, enhancing the overall flavor. Adding protein makes this soup heartier. If you like meat, consider adding cooked chicken or crispy bacon. Just chop them into small pieces and stir them in after blending the soup. For a vegetarian option, try adding white beans or chickpeas. They not only boost protein but also add a nice texture to the soup. You can also use lentils for a different twist. They cook well in the crockpot and take on the flavors of the soup. You can mix in other root vegetables to change the flavor. Carrots, parsnips, or sweet potatoes work great. They add sweetness and depth to the soup. You can also use seasonal vegetables like squash or pumpkin in the fall. Just peel and cube them the same way you do with potatoes. This keeps the cooking time similar. Feel free to experiment with whatever vegetables you have on hand for a unique touch! For storing your creamy potato leek soup, choose airtight containers. Glass or plastic containers work well. Make sure they seal tightly to keep the soup fresh. The soup lasts up to five days in the fridge. Check for any off smells or colors before eating. Enjoy it warm, as it tastes great even after a few days! You can freeze the soup for later use. First, let it cool completely. Then, pour it into freezer-safe bags or containers. Leave some space at the top for expansion. Label each bag with the date. The soup can last up to three months in the freezer. When you’re ready to eat, thaw the soup in the fridge overnight. To reheat, pour it into a pot and warm it on low heat. Stir occasionally to keep it smooth. If it seems thick, add a splash of broth or water to loosen it up. Enjoy your cozy meal anytime! Yes, you can easily adapt this recipe for the stove. Start by heating olive oil in a large pot. Add the diced onion, garlic, and leeks. Cook until soft, about 5 minutes. Then, add the potatoes and broth. Bring it to a boil, then reduce the heat. Let it simmer for 30-40 minutes until the potatoes are tender. Blend as you would in the crockpot and stir in the cream. This method is quicker and still tasty! If you want a thicker soup, try a few methods. First, mash some of the cooked potatoes in the pot. This adds creaminess without changing the flavor. Second, you can mix a bit of cornstarch with cold water. Stir it in while the soup cooks for a few more minutes. Lastly, using a blender will also help achieve the desired thickness. To reheat the soup, you can use the stove or microwave. On the stove, pour the soup into a pot over medium heat. Stir often until it’s hot. In the microwave, place the soup in a microwave-safe bowl and cover it. Heat it for 1-2 minutes, stirring halfway through. Both ways work well to keep the flavors intact. Yes, this soup is great for meal prep! You can make a big batch and store it in the fridge. Use airtight containers for best results. It lasts about 4-5 days. You can also freeze it for up to three months. Just thaw it overnight in the fridge before reheating. This makes for a quick and easy meal later! This blog post covered a tasty soup recipe using potatoes, leeks, and herbs. You learned how to prepare the ingredients, layer them in a crockpot, and achieve a creamy texture. I shared tips to enhance flavor and variations for different diets. Remember, this soup is easy to customize and perfect for any meal. Try it out and make it your own! Enjoy the warmth and comfort it brings.
Creamy Potato Leek Crockpot Soup Nourishing Comfort Dish
Warm up with my creamy potato leek crockpot soup, the perfect comfort dish! This rich and hearty soup combines simple ingredients like russet potatoes and
To make the creamy garlic mushroom pasta, you need a few simple ingredients. Here is the full list: - 12 oz fusilli pasta - 2 cups sliced mushrooms (either cremini or button) - 4 cloves garlic, finely minced - 1 medium onion, finely chopped - 1 cup vegetable broth - 1 cup heavy cream (or coconut cream for a vegan alternative) - 1 cup grated Parmesan cheese (or nutritional yeast for a vegan option) - 2 tablespoons olive oil - 1 teaspoon dried thyme - 1 teaspoon dried basil - Salt and freshly ground black pepper to taste - Fresh parsley, chopped (for garnish) Each ingredient plays a key role in the dish. The fusilli pasta has ridges that hold the creamy sauce well. Mushrooms add a rich and earthy flavor that pairs perfectly with garlic. Garlic and onion bring a strong base flavor that makes the dish so tasty. Vegetable broth adds depth to the sauce. Cream makes everything smooth and rich, while Parmesan cheese gives it that classic Italian touch. Seasonings like thyme and basil lift the whole dish, giving it an aromatic touch. Olive oil helps to cook the veggies and adds a nice sheen to the final dish. Finally, parsley garnishes the pasta, giving it color and fresh taste. With these ingredients, you can create a dish that delights the senses. You will love how they come together to create creamy garlic mushroom pasta. 1. Heat 2 tablespoons of olive oil in a large pot over medium heat. 2. Add 1 medium finely chopped onion. Sauté for about 3-4 minutes. The onion should become soft and clear. 3. Mix in 4 minced garlic cloves. Then, add 2 cups of sliced mushrooms. Cook for 5-7 minutes. Stir often until the mushrooms turn golden brown. You’ll smell a nice aroma! 1. Sprinkle in 1 teaspoon of dried thyme and 1 teaspoon of dried basil. 2. Season with salt and freshly ground black pepper. Taste as you go. This step builds the dish’s flavor. 3. Pour in 1 cup of vegetable broth. Raise the heat to bring it to a gentle simmer. 1. Add 12 oz of fusilli pasta to the pot. Make sure the pasta is fully submerged in the broth. 2. Check the package for cooking time. It usually takes about 10-12 minutes. Stir occasionally to stop it from sticking together. 1. Once the pasta is al dente, lower the heat. Gradually mix in 1 cup of heavy cream. 2. Add 1 cup of grated Parmesan cheese. Stir until the cheese melts. This makes the sauce creamy and rich. 3. If the sauce looks too thick, add a splash of broth or cream. Adjust the seasoning with salt and pepper to your taste. This simple method creates a rich and creamy garlic mushroom pasta that delights every time! To make your pasta creamy, adjust the broth or cream. If the sauce is too thick, add more broth. For a richer taste, use extra cream. Stir gently while cooking. This helps mix the flavors well. Timing is key; add cream at the end for the best texture. Fresh herbs add a bright taste. They can make your dish pop. Dried herbs work too but might not be as strong. You can also try cheese alternatives like nutritional yeast. This gives a nice flavor without dairy. Experiment with what you like best! Serve your creamy garlic mushroom pasta in wide, shallow bowls. This lets the sauce shine. Garnish with chopped parsley and grated cheese on top. It looks fancy and tastes great! Adding a sprinkle of black pepper can also enhance the look and taste. Enjoy your beautiful meal! {{image_4}} To make this dish vegan, swap out the cream and cheese. Use coconut cream instead of heavy cream. This keeps the dish nice and rich. For cheese, use nutritional yeast. It adds a cheesy flavor that makes the pasta taste great. You can add protein for a heartier meal. Sauté chicken until golden and mix it in. Chicken pairs well with the creamy sauce. Tofu is another great choice. For a seafood twist, consider shrimp. Just cook them until pink, then add them to the pasta. Boost the nutrition by adding greens. Spinach or kale are both good choices. They cook down nicely and add color. You can also mix in other vegetables. Think about bell peppers, zucchini, or peas. These veggies not only taste great but also add health benefits. To store your creamy garlic mushroom pasta, let it cool first. Place it in a container with a tight lid. This keeps it fresh. I recommend using glass containers or BPA-free plastic. Both are good choices for keeping your food safe. You can store it in the fridge for up to three days. When you reheat this dish, you want to keep it creamy. The best way is to warm it on the stove over low heat. Add a splash of broth or cream to help bring back the sauce. Stir it often to mix everything well. If it feels too thick, just add a bit more broth. This helps it stay smooth and tasty. You can freeze leftover pasta, but it may change in texture. If you want to freeze it, use a freezer-safe container. Leave some space at the top for the pasta to expand. You can freeze it for up to three months. When you’re ready to eat, thaw it in the fridge overnight. Reheat gently on the stove, adding liquid as needed to restore creaminess. Yes, you can use other types of pasta. Here are some good options: - Penne - Farfalle - Spaghetti - Rotini Each pasta shape brings a unique texture. Choose what you like best! To make this dish gluten-free, select a gluten-free pasta. Here are some great choices: - Brown rice pasta - Quinoa pasta - Chickpea pasta Always check the cooking time since gluten-free pasta cooks differently. If you want a lighter or dairy-free option, try these: - Coconut cream - Cashew cream - Almond milk with cornstarch These alternatives can still give you that creamy texture. To store leftovers, follow these tips: - Let the pasta cool completely. - Place it in an airtight container. - Store in the fridge for up to three days. For longer storage, freeze it in a freezer-safe container for up to two months. This blog post has covered a simple, delicious fusilli pasta dish. We discussed the key ingredients, from mushrooms to seasonings. I shared step-by-step instructions to help you make the creamy sauce. You learned useful tips for flavor and presentation. Lastly, I provided variations and storage tips to keep your dish fresh. Now you can enjoy this meal in many ways and make it your own. Happy cooking!
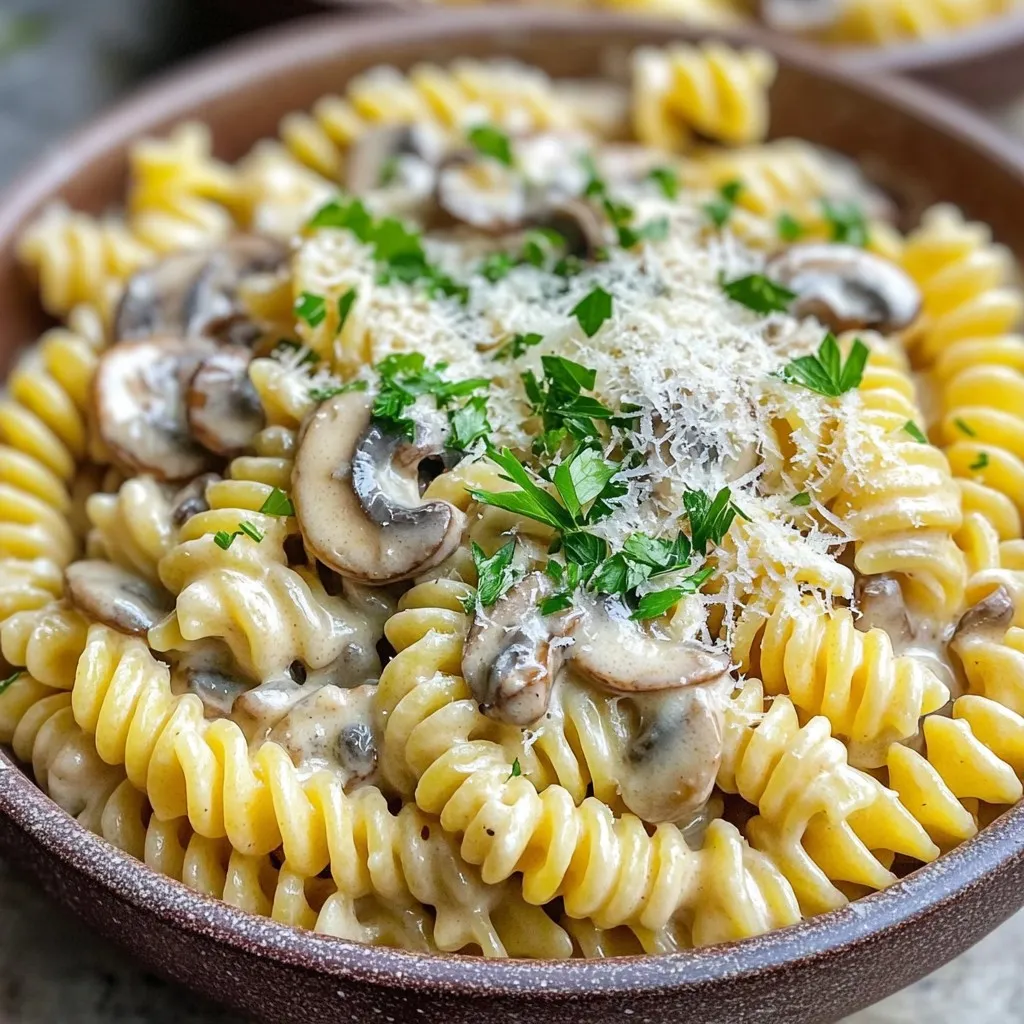
Creamy Garlic Mushroom Pasta One Pot Delight
In this blog post, I’ll share my favorite one-pot dish: Creamy Garlic Mushroom Pasta. This meal combines rich flavors and simple ingredients, making it perfect
To make this soup, you will need: - 1 pound Italian sausage (mild or spicy) - 1 medium onion, finely chopped - 3 cloves garlic, minced - 3 medium carrots, peeled and sliced - 3 celery stalks, diced - 4 cups low-sodium chicken broth - 1 can (14.5 oz) diced tomatoes, undrained - 1 teaspoon Italian seasoning blend - 1/2 teaspoon red pepper flakes (optional) - 2 cups fresh baby spinach, roughly chopped - 1 cup heavy cream - Salt and freshly ground black pepper to taste - Fresh parsley, chopped (for garnish) These ingredients create a rich and satisfying base for the soup. The Italian sausage adds depth, while the fresh vegetables bring balance. You can enhance the soup's taste with: - A squeeze of lemon juice for brightness - A dash of Worcestershire sauce for umami - Grated Parmesan cheese for serving These additions can take your soup to the next level. They add layers of flavor that elevate each bite. When choosing ingredients, look for: - Fresh Italian sausage from a trusted butcher or store - Organic vegetables for better taste and quality - Low-sodium chicken broth to control salt levels Always check the freshness dates on packaged items. Quality ingredients will make your soup shine and ensure a delicious result. Start by heating a large skillet over medium heat. Add 1 pound of Italian sausage to the pan. Use a wooden spoon to break the sausage into smaller pieces. Cook it for about 5 to 7 minutes until it turns brown and no longer pink. This step helps build flavor. Once cooked, drain any extra fat from the sausage. Now, transfer it to your slow cooker. Next, in the same skillet, add the onion, garlic, carrots, and celery. You will need 1 finely chopped onion, 3 minced garlic cloves, 3 sliced carrots, and 3 diced celery stalks. Sauté these veggies for 3 to 4 minutes. Stir often until the onion looks soft and clear. This softening brings out the natural sweetness. After that, add the sautéed mix to the slow cooker with the sausage. Now, it's time to add the rest of the ingredients. Pour 4 cups of low-sodium chicken broth into the slow cooker. Next, add 1 can of undrained diced tomatoes. Sprinkle in 1 teaspoon of Italian seasoning and, if you want a little heat, 1/2 teaspoon of red pepper flakes. Stir everything well to mix it together. This mix will be the base of your soup. Cover the slow cooker with its lid. You can cook the soup on low for 6 to 7 hours. If you are short on time, you can also use the high setting for 3 to 4 hours. This slow cooking allows all the flavors to blend beautifully. About 30 minutes before you serve, stir in 2 cups of roughly chopped fresh baby spinach and pour in 1 cup of heavy cream. Cover the slow cooker again until the spinach wilts and the soup heats up. Before serving, taste the soup. Adjust with salt and freshly ground black pepper to your liking. This simple step ensures the soup is full of flavor. Enjoy your creamy, savory Tuscan sausage soup! To boost the taste of your soup, try these tips: - Use fresh herbs: Add fresh basil or thyme for a bright flavor. - Add lemon juice: A squeeze of lemon gives a nice zing that brightens the dish. - Experiment with spices: Try adding smoked paprika or a dash of cayenne for warmth. - Layer flavors: Sauté your veggies before adding them to the slow cooker. This brings out their natural sweetness. Here are some common pitfalls to watch out for: - Skipping the browning step: Browning the sausage adds rich flavor. Don’t rush this step. - Overcooking spinach: Add spinach near the end to keep it vibrant and fresh. - Not seasoning enough: Always taste before serving. Adjust salt and pepper to your liking. - Using low-quality broth: A good broth is key. Go for low-sodium options to control the salt. To make your meal even better, consider these pairings: - Serve with crusty bread: A warm, crusty loaf is perfect for dipping. - Add a side salad: A fresh salad balances the soup's richness. - Top with cheese: Grate some Parmesan over your bowl for added flavor. - Pair with wine: A light white wine, like Pinot Grigio, complements the dish nicely. These tips will help you create a creamy Tuscan sausage soup that stands out and delights the taste buds! {{image_4}} You can switch the Italian sausage for turkey or chicken sausage. These options reduce fat but keep flavor. Cook them the same way you would with pork sausage. Ground turkey or chicken works best. Both give a lighter taste, but they still pair well with spices and veggies. For a vegetarian soup, replace the sausage with hearty vegetables or legumes. Try using mushrooms, lentils, or chickpeas for protein. Instead of heavy cream, use coconut milk or cashew cream for richness. This keeps the soup creamy while making it plant-based. Feel free to experiment with herbs and spices. You can add basil or thyme for extra depth. A splash of lemon juice brightens the flavors. For a spicy kick, try adding more red pepper flakes. Each change can create a new taste experience, making this soup fun to customize. After enjoying your delicious soup, store any leftovers in an airtight container. Let the soup cool to room temperature first. This helps keep your soup fresh and prevents sogginess. Place it in the fridge if you plan to eat it within a few days. Consume it within 3-4 days for the best taste. When reheating your soup, do it slowly on the stove. Pour the soup into a pot and heat it over medium-low heat. Stir occasionally to prevent sticking. If you prefer the microwave, use a microwave-safe bowl. Heat in short bursts of 1-2 minutes, stirring in between. This method helps keep the flavors balanced and the cream smooth. If you want to freeze your soup, do so before adding the cream and spinach. This step helps maintain the soup's texture. Use a freezer-safe container, leaving some space for expansion. When you're ready to enjoy it, thaw the soup in the fridge overnight. Reheat it gently on the stove and add cream and spinach before serving. Enjoy your hearty soup at a later date! Yes, you can make this soup ahead of time. Cook it as directed and let it cool. Store it in an airtight container in the fridge for up to three days. The flavors will deepen as it sits. When ready to serve, reheat it gently on the stove or in the microwave. If your soup is too watery, there are a few quick fixes. You can blend a portion of the soup with an immersion blender. This will create a creamy texture. Another option is to add a cornstarch slurry. Mix one tablespoon of cornstarch with two tablespoons of water. Stir this into the soup, then cook for a few more minutes. You have several tasty options to replace heavy cream. A good choice is full-fat coconut milk if you want a dairy-free version. You can also use half-and-half for a lighter option. Greek yogurt adds creaminess too, but stir it in just before serving to avoid curdling. This blog post covered how to make Slow Cooker Creamy Tuscan Sausage Soup. We explored essential and optional ingredients, giving you tips on choosing the best ones. I shared easy steps on preparation, cooking, and ways to enhance flavor. We also discussed variations and storage tips. In closing, I hope you feel ready to create a warm and tasty soup that suits your taste. Enjoy cooking and sharing this meal with loved ones!
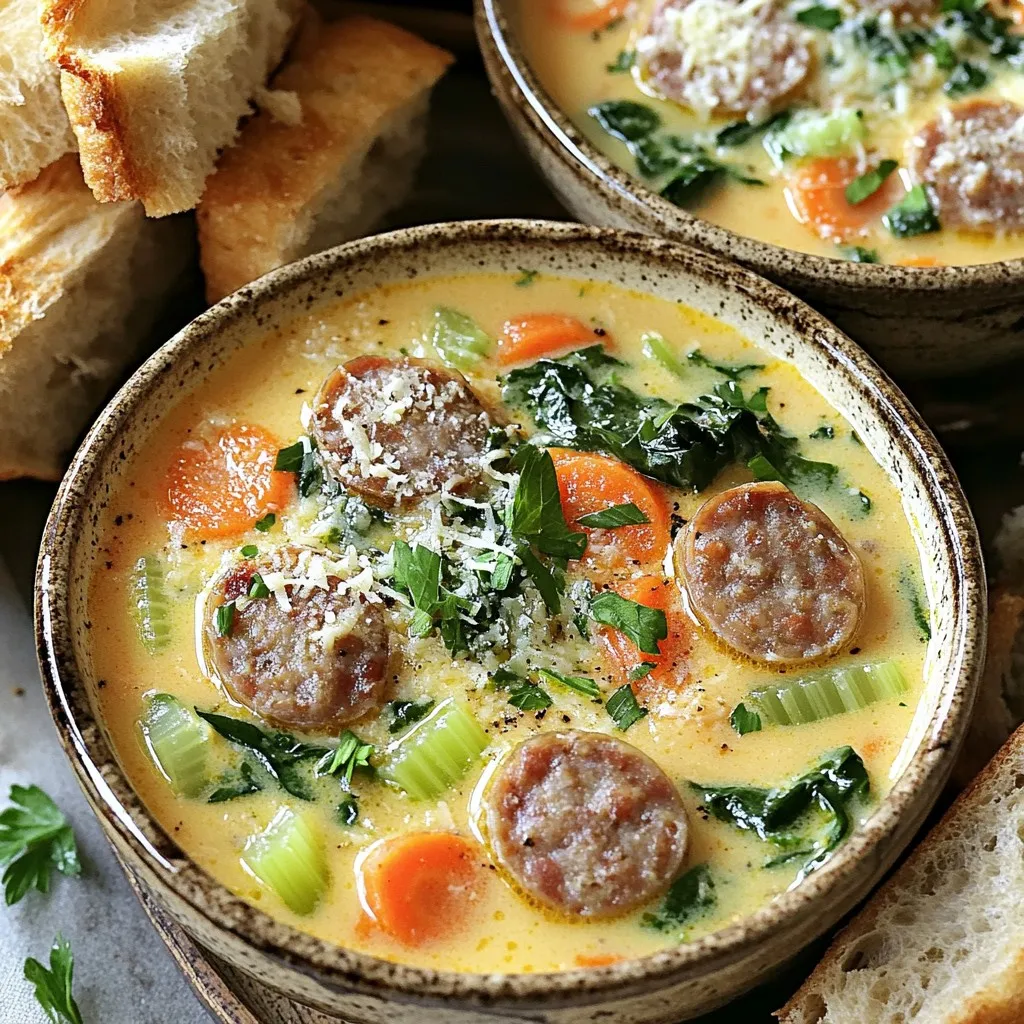
Flavorful Slow Cooker Creamy Tuscan Sausage Soup Recipe
Looking for a hearty meal that practically makes itself? My Flavorful Slow Cooker Creamy Tuscan Sausage Soup is just what you need. This cozy dish
- 4 bone-in chicken thighs, skin-on - 2 tablespoons extra-virgin olive oil - 1 teaspoon sweet paprika - 1 teaspoon dried oregano - 1 teaspoon garlic powder - 1 cup cherry tomatoes, halved - 1 bell pepper, sliced (any color, such as red, yellow, or green) - 1 medium red onion, cut into wedges - 1 cup Kalamata olives, pitted and halved - Fresh parsley, finely chopped (for garnish) - Juice and zest of 1 large lemon - Salt and freshly cracked black pepper The key to this dish is using quality ingredients. The bone-in chicken thighs bring rich flavor and moisture. I prefer skin-on thighs because they crisp up nicely in the oven. The extra-virgin olive oil adds a fruity taste that enhances the dish. Sweet paprika and garlic powder lend warmth and depth. Dried oregano gives it that classic Mediterranean touch. For the veggies, I love using halved cherry tomatoes. They burst with juice as they roast. Sliced bell peppers add sweetness and color. The red onion caramelizes beautifully, giving a rich flavor contrast. Kalamata olives add briny goodness, making every bite exciting. Lemon juice and zest brighten the dish. They cut through the richness and tie all flavors together. Salt and freshly cracked black pepper are essential. They help to balance all the tastes in this vibrant meal. - Preheat your oven to 400°F (200°C). - In a large bowl, mix the olive oil, sweet paprika, dried oregano, garlic powder, salt, pepper, lemon juice, and zest. Whisk until smooth. - Add the chicken thighs to the marinade. Make sure each thigh is well coated. - Let the chicken marinate for at least 20 minutes. For better flavor, marinate overnight in the fridge. - Place the marinated chicken thighs skin-side up in an oven-safe skillet. - Add cherry tomatoes, bell pepper, onion wedges, and Kalamata olives around the chicken. - Pour any leftover marinade over the vegetables. - Roast everything in the oven for 35-40 minutes. The chicken is ready when it hits 165°F (75°C) and is golden brown. - Once cooked, take the pan out of the oven. Let the chicken rest for 5 minutes. - Sprinkle chopped parsley over the dish to add color. Serve the chicken hot with roasted veggies and olives. To get the best flavor, marinate your chicken thighs well. Use a big bowl for mixing. Combine olive oil, spices, salt, and lemon juice. Whisk until it’s smooth. Add the chicken and coat each piece. Let it sit for at least 20 minutes. For deeper taste, marinate overnight in the fridge. This helps the flavors soak in. For crispy skin, make sure you start with dry chicken. Pat it dry with paper towels before marinating. When cooking, place the chicken skin-side up in the skillet. The oven should be hot at 400°F (200°C). Roast for 35-40 minutes until golden brown. Use a meat thermometer to check. The chicken must reach 165°F (75°C) inside to be safe. Serving family-style makes it fun. Keep the chicken and veggies in the skillet. This way, everyone can help themselves. Add lemon wedges on the side. They brighten the dish and add extra zest. You can also sprinkle fresh parsley on top for color. This makes your meal look as good as it tastes. {{image_4}} You can switch up the veggies in this dish. Try using zucchini or asparagus for a fresh twist. Carrots can also add sweetness and color. If you're not in the mood for chicken, you can use bone-in pork chops or even firm tofu. Both options will soak up the flavors well. To kick up the flavor, consider adding spices like cumin or coriander. Fresh herbs, such as thyme or rosemary, can also brighten the dish. For marinades, mix in some yogurt or honey for a unique taste. You can even add a splash of balsamic vinegar for a tangy kick. This dish pairs well with fragrant rice or a light couscous salad. A crunchy green salad with lemon vinaigrette can balance the rich chicken. For wine, a chilled Sauvignon Blanc or a light Pinot Grigio complements the meal nicely. Both wines enhance the lemony notes in the chicken. After you enjoy your One-Pan Mediterranean Lemon Chicken Thighs, save any leftovers. Place the chicken and vegetables in an airtight container. This helps keep them fresh. Store in the fridge for up to three days. If you want to keep them longer, freezing is a great option. To reheat, I recommend using an oven or a skillet. Preheat your oven to 350°F (175°C). Place the chicken and veggies on a baking sheet. Heat for about 15-20 minutes. This keeps the chicken juicy and the skin crispy. If you use a skillet, heat on medium-low. Add a splash of water or broth to keep moisture. Stir gently to warm up. Yes, you can freeze this dish! To freeze, let the chicken and veggies cool completely. Place them in freezer-safe bags or containers. Make sure to remove as much air as possible. This helps prevent freezer burn. You can freeze for up to three months. When you’re ready to eat, thaw in the fridge overnight. Reheat as mentioned before for best flavor and texture. You should marinate chicken thighs for at least 20 minutes. For the best taste, let them sit overnight in the fridge. This time allows the flavors to soak in deeply. Yes, you can use boneless chicken thighs. They will cook faster, so reduce roasting time by about 10 minutes. Always check the internal temperature for safety. If you don’t have Kalamata olives, try green olives or black olives. Each type adds a unique taste, but they all work well in this dish. Check the internal temperature of the chicken thighs. They are done when they reach 165°F (75°C). The skin should also look crispy and golden brown. Yes, you can cook this dish in a slow cooker. Place the marinated chicken and vegetables in the slow cooker. Cook on low for 6-8 hours or on high for 3-4 hours. This recipe highlights simple, fresh ingredients, like chicken thighs and vibrant vegetables. You learned how to prepare, marinate, and roast your dish for perfect flavor. Remember to use fresh herbs and seasonings for a tasty finish. Feel free to mix in different veggies or proteins for variety. Whether you keep leftovers or serve it fresh, this dish will impress. Embrace these steps, and enjoy delicious meals that bring joy to your table!
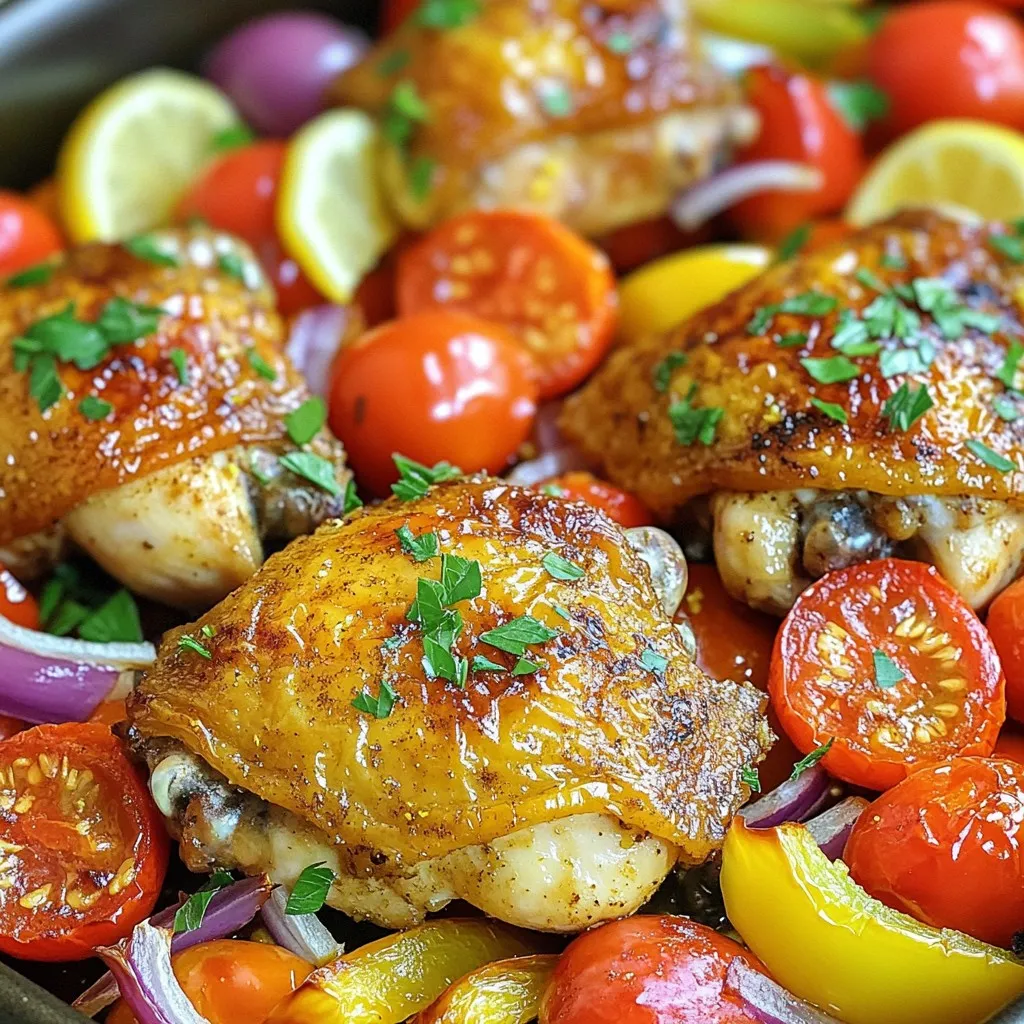
One-Pan Mediterranean Lemon Chicken Thighs Delight
Looking for a quick and tasty dinner? Try my One-Pan Mediterranean Lemon Chicken Thighs! This dish bursts with vibrant flavors, thanks to fresh ingredients like