Dinner

Sheet Pan Chicken Pitas with Ranch Flavor Boost
Looking for a tasty and quick dinner idea? You’ll love these Sheet Pan Chicken Pitas with Ranch Flavor Boost! This simple recipe combines juicy chicken,

Air Fryer Crispy Chicken Caesar Wraps Recipe Easy
Looking for an easy, tasty meal? Try my Air Fryer Crispy Chicken Caesar Wraps! These wraps pack crispy chicken, fresh romaine, and creamy Caesar dressing

Savory Spicy Garlic Chili Crisp Noodles Recipe
If you crave a quick, bold dish that packs a punch, you’re in the right place. My Savory Spicy Garlic Chili Crisp Noodles are easy
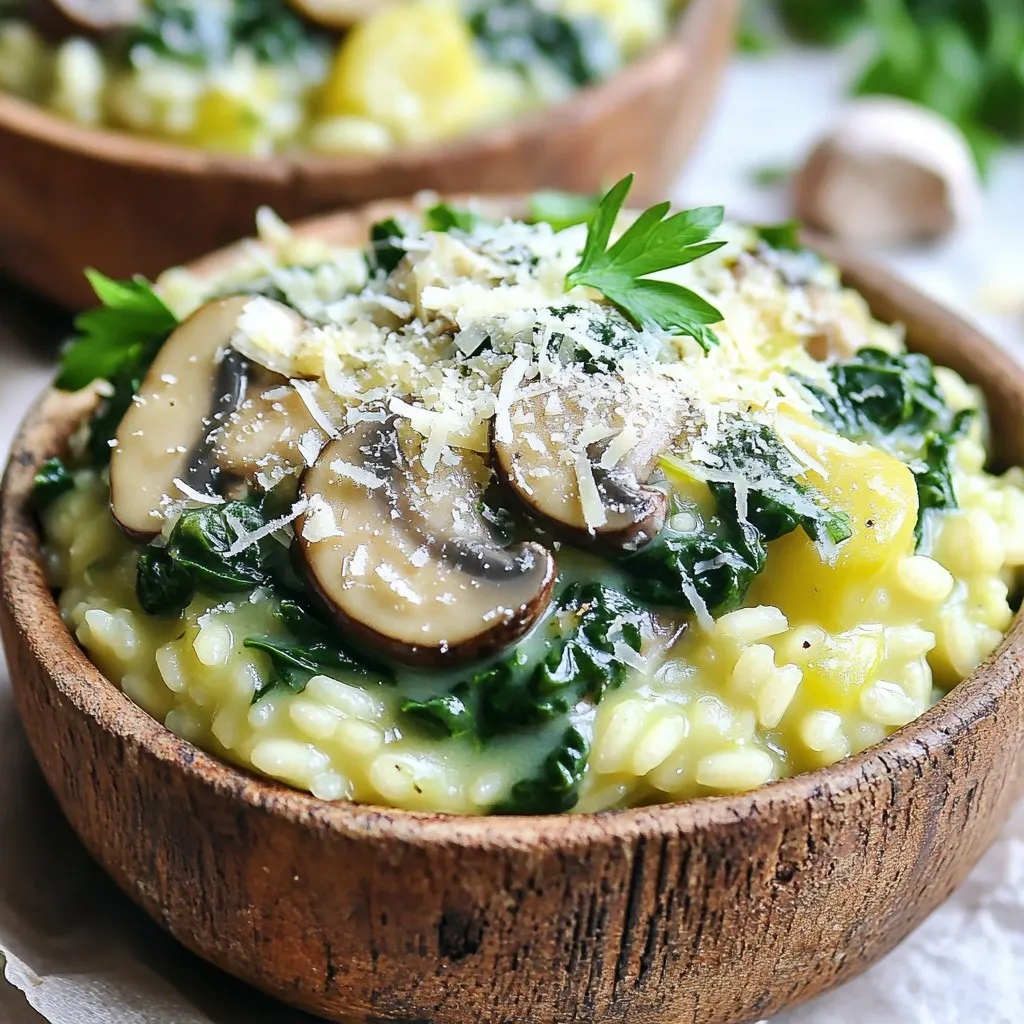
One-Pot Mushroom Spinach Risotto Creamy Delight
Welcome to your new favorite comfort dish: One-Pot Mushroom Spinach Risotto! This creamy delight combines fresh mushrooms and spinach to create a rich, satisfying meal—all

Slow Cooker Teriyaki Beef & Broccoli Flavorful Delight
Are you ready to impress your family with a delicious meal that cooks itself? My Slow Cooker Teriyaki Beef & Broccoli is packed with flavor
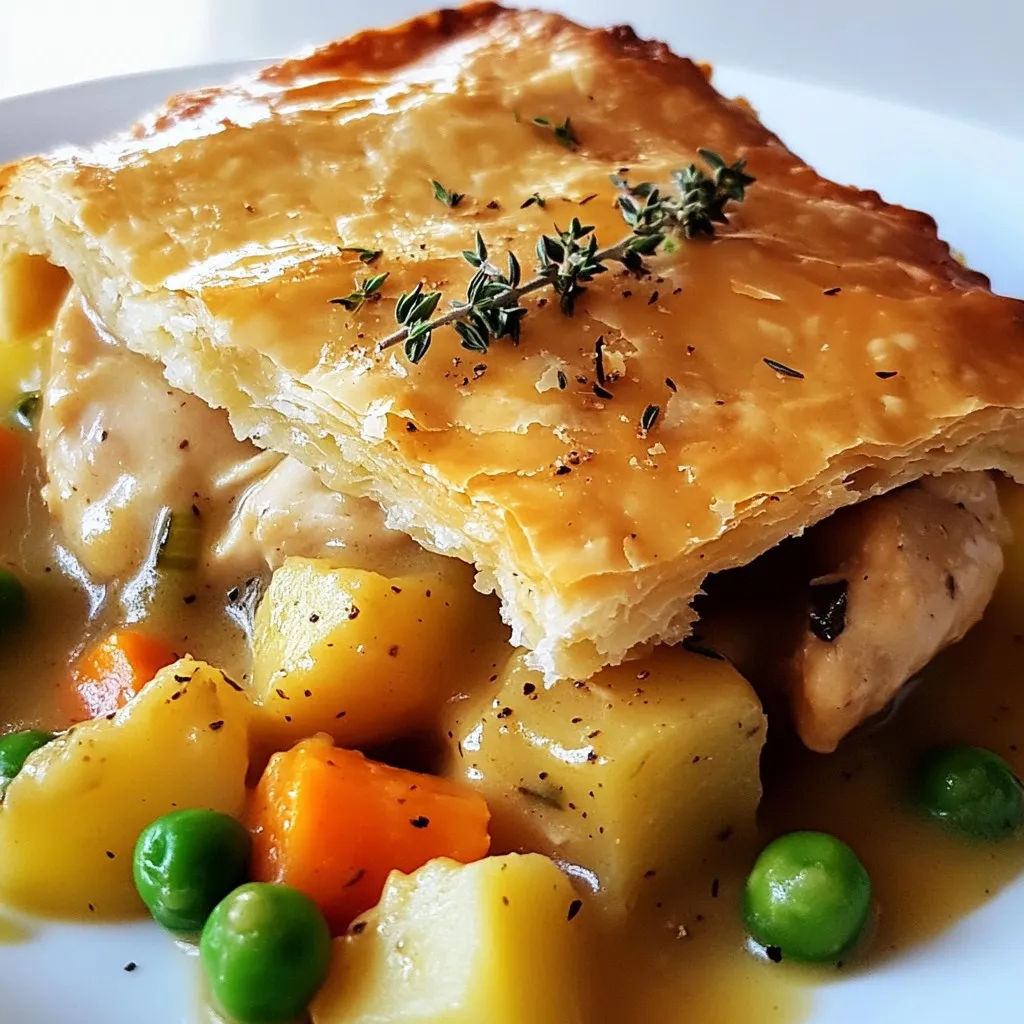
Savory Slow Cooker Chicken Pot Pie Recipe to Enjoy
Craving a warm, hearty dish that fills your home with savory scents? Let me introduce you to my Savory Slow Cooker Chicken Pot Pie recipe!

Minute Honey Butter Ramen Quick and Tasty Meal
Craving a quick and tasty meal? You’ll love Minute Honey Butter Ramen! This dish combines sweet honey butter with rich noodles for a flavor explosion
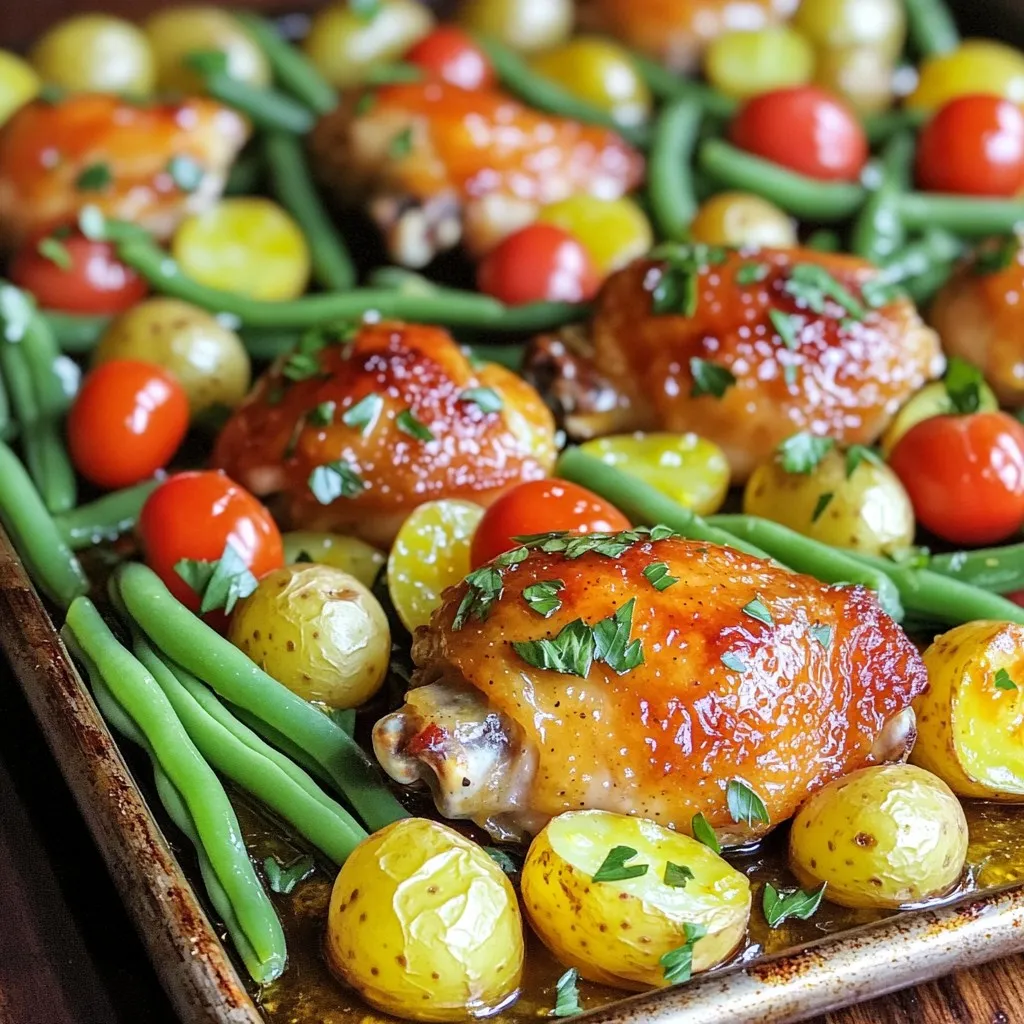
Sheet Pan Lemon Dijon Chicken & Veggies Delight
Ready for a quick, savory meal that’s packed with flavor? My Sheet Pan Lemon Dijon Chicken & Veggies Delight brings together juicy chicken thighs and

Slow Cooker Spiced Apple Cider Cozy and Inviting Drink
As the leaves turn and the air gets crisp, nothing warms you up like a cozy mug of spiced apple cider. This easy slow cooker
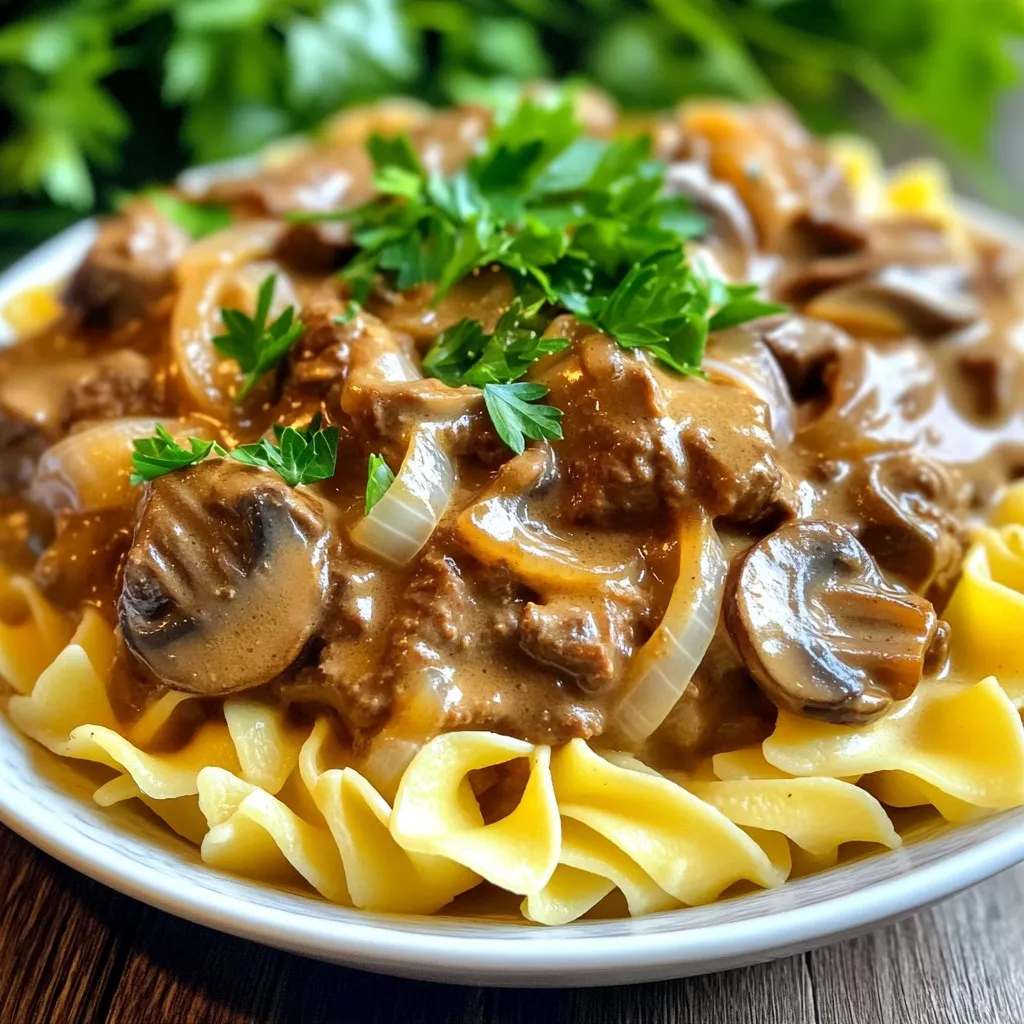
Slow Cooker Beef & Mushroom Stroganoff Simple Recipe
Are you looking for a cozy dinner that’s easy to make? Try my Slow Cooker Beef & Mushroom Stroganoff! This dish uses tender beef, savory