Dinner
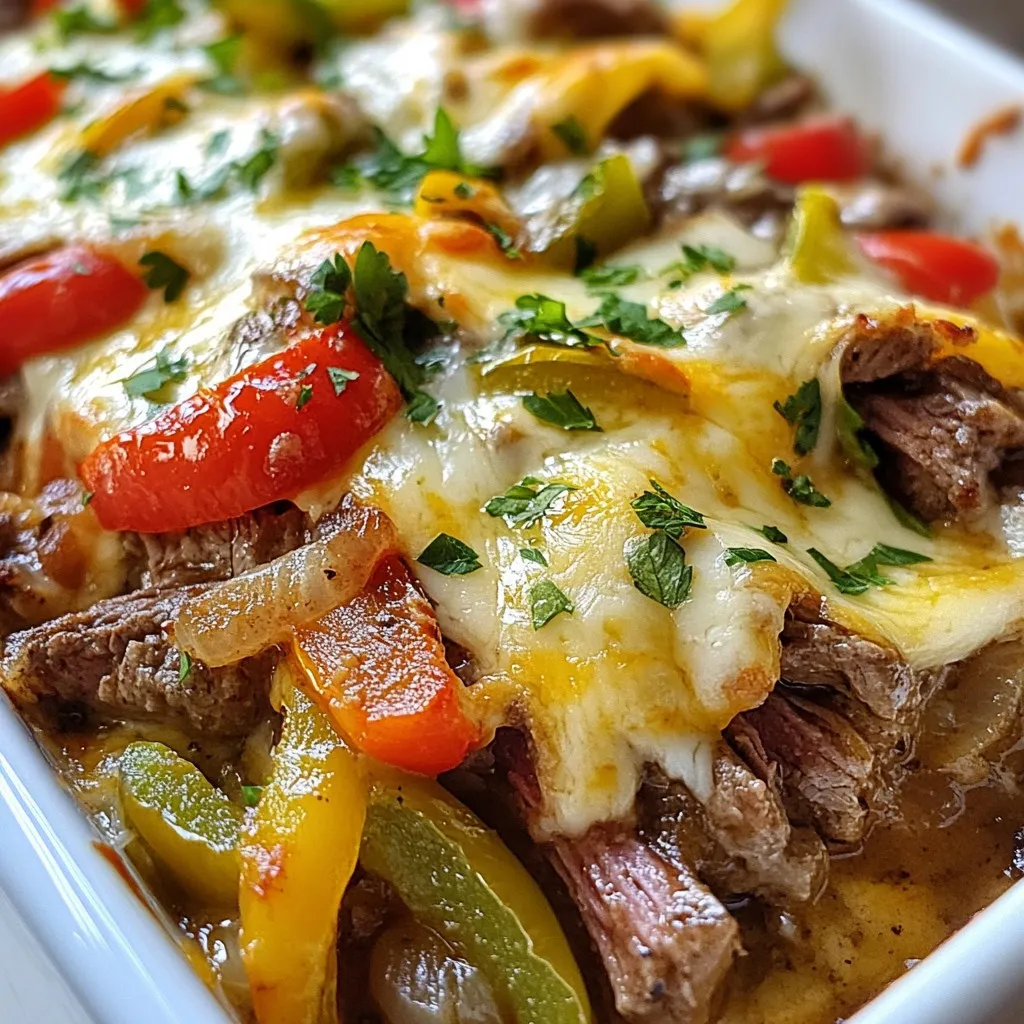
Low-Carb Philly Cheesesteak Casserole Delight
If you crave a cheesy, meaty delight without the carbs, you’re in for a treat! This Low-Carb Philly Cheesesteak Casserole combines tender sirloin, colorful veggies,
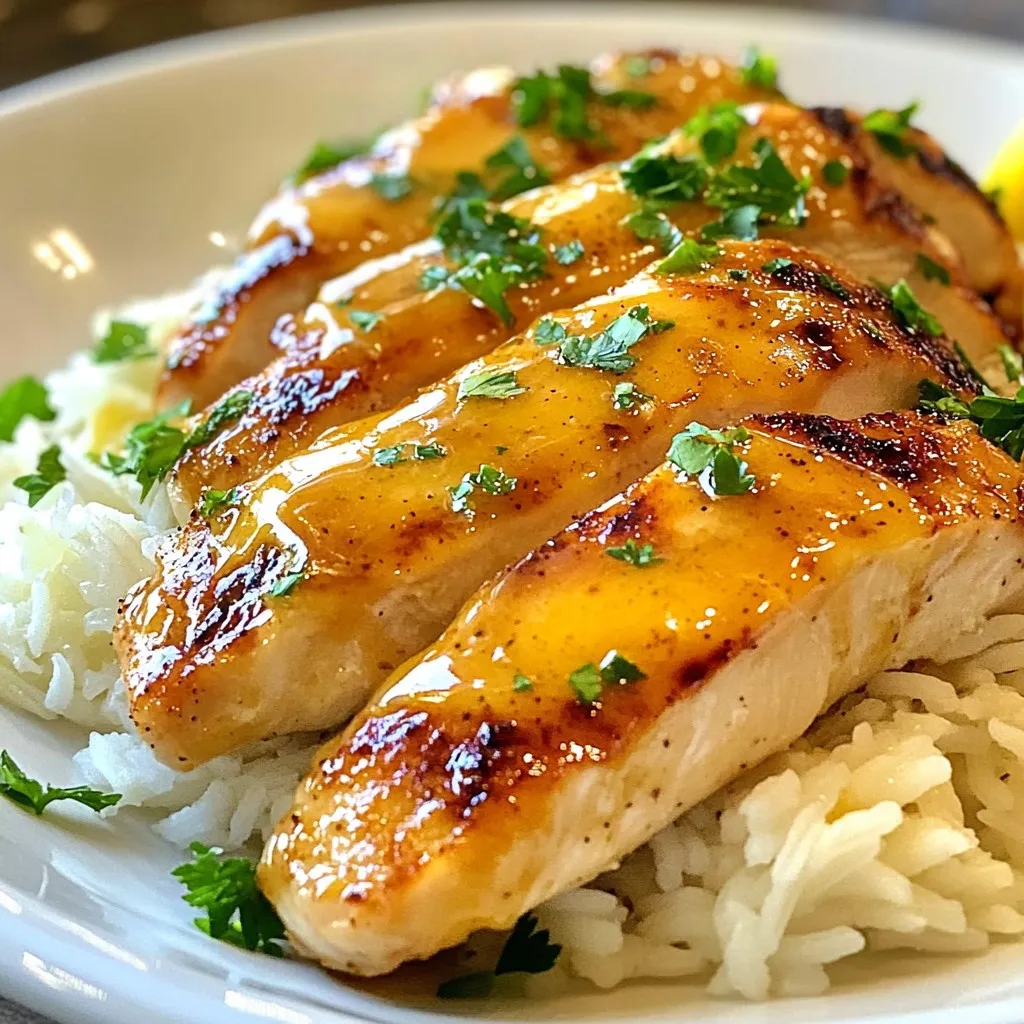
Honey Mustard Chicken & Rice Simple Weeknight Meal
Looking for a quick, tasty meal to make on busy nights? Honey Mustard Chicken & Rice is your answer! This dish combines tender chicken, sweet

Crockpot Crack Potato Soup Savory Comfort Dish
Warm up your dinner table with my Crockpot Crack Potato Soup. This dish is pure comfort in a bowl. It’s packed with flavor and made

Creamy Chicken Tortilla Soup Rich and Flavorful Recipe
Are you ready to dive into a bowl of pure comfort? My Creamy Chicken Tortilla Soup is rich, flavorful, and perfect for any day. With
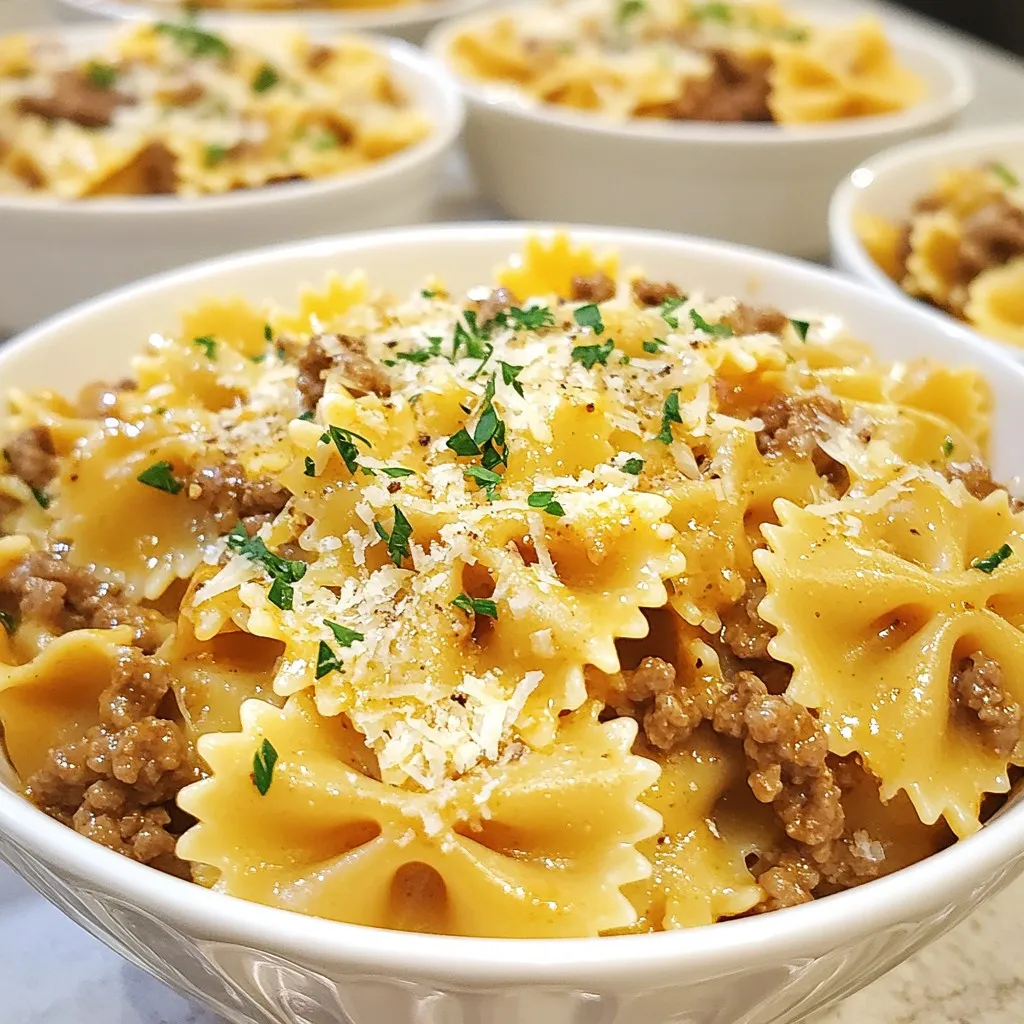
Creamy Garlic Parmesan Beef Bowtie Pasta Delight
Welcome to a cheesy, savory adventure with my Creamy Garlic Parmesan Beef Bowtie Pasta Delight! This dish is rich, filling, and perfect for any night.
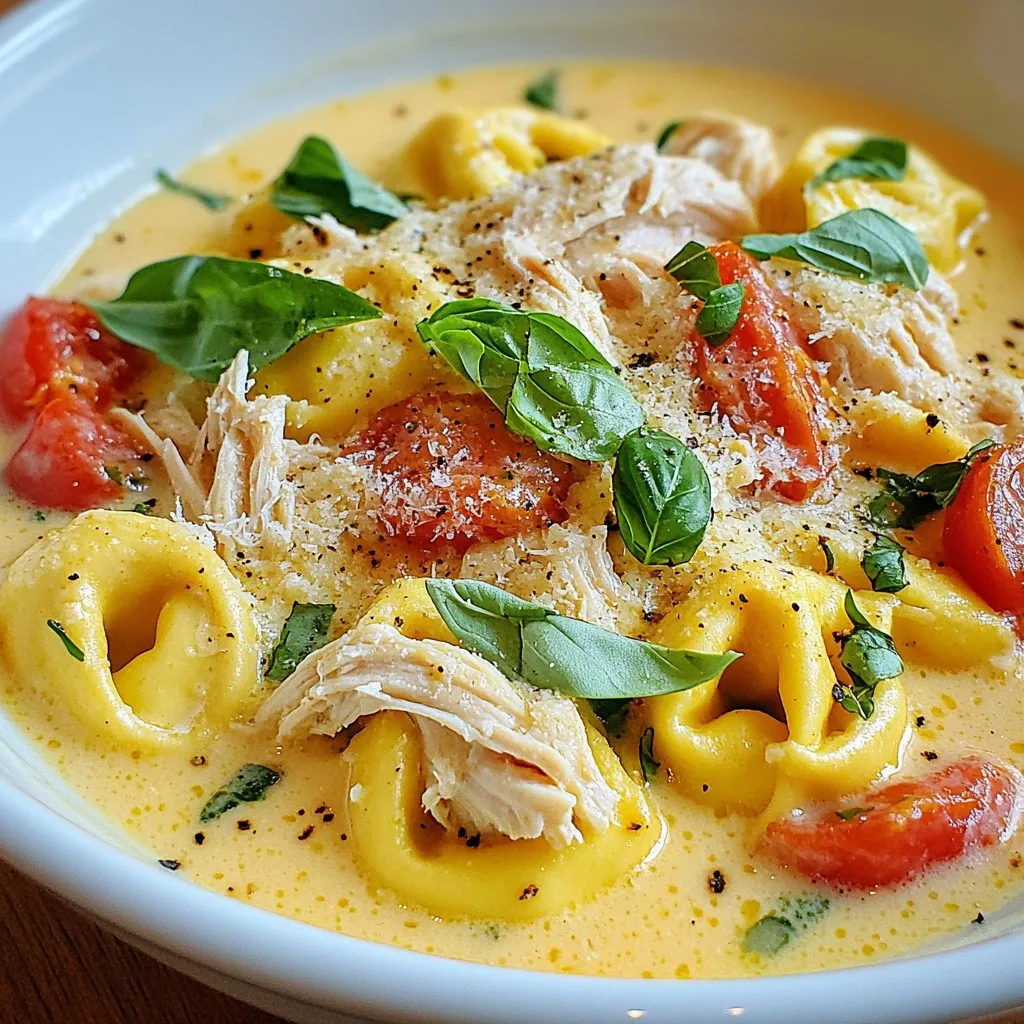
Crockpot Chicken Tortellini Delightful Creamy Meal
Are you searching for an easy and creamy meal perfect for busy nights? Look no further! My Crockpot Chicken Tortellini combines tender chicken, rich broth,
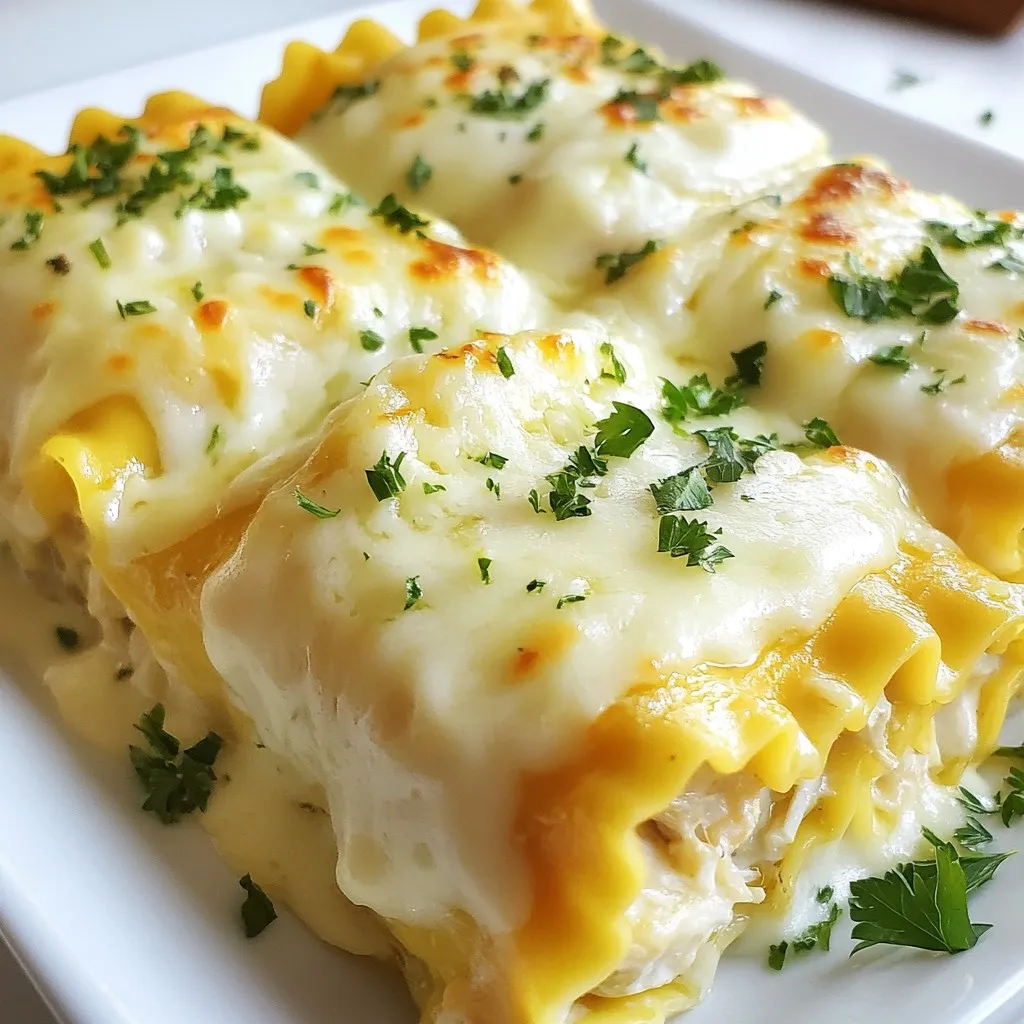
Chicken Alfredo Lasagna Rolls Flavorful and Easy Recipe
Love lasagna but crave a twist? Chicken Alfredo Lasagna Rolls blend creamy flavors with cheesy goodness in one easy dish. This recipe lets you roll
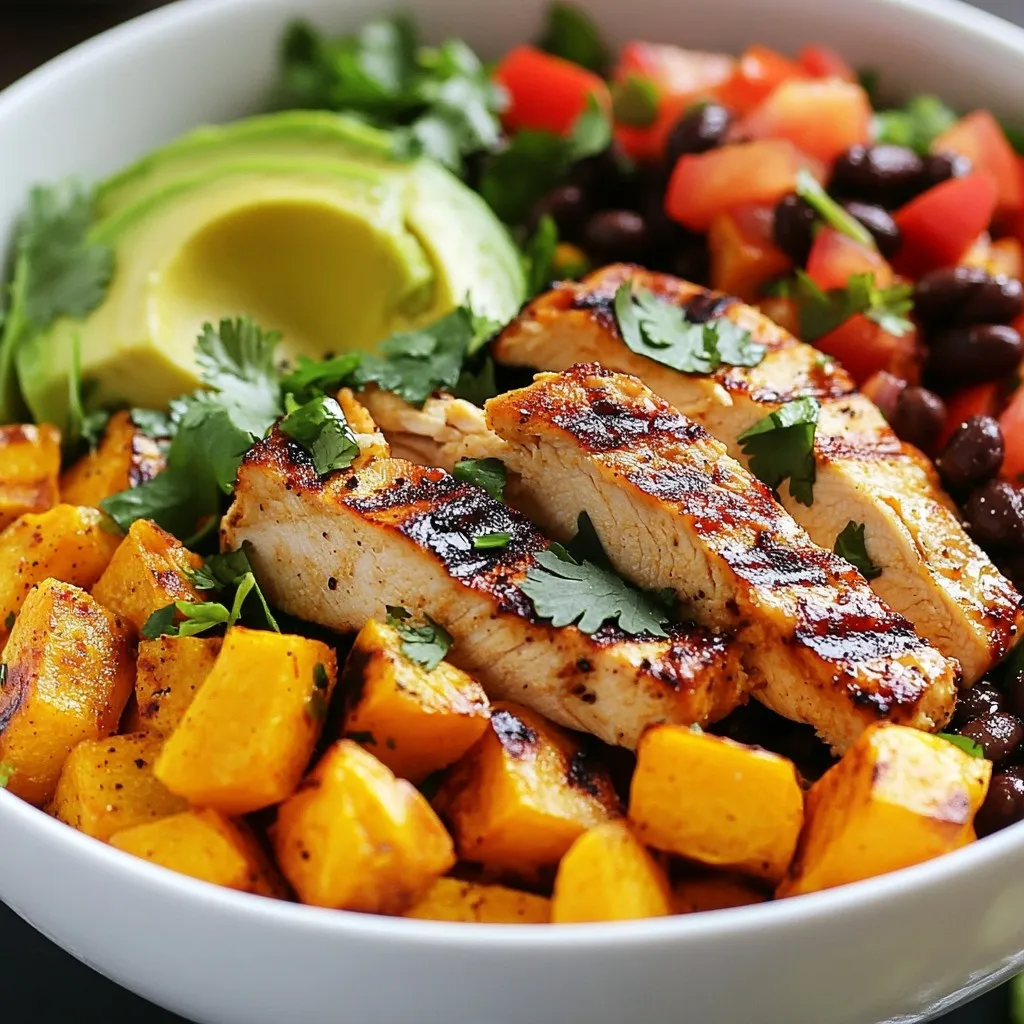
Grilled Chicken Sweet Potato Bowls Healthy Meal Idea
Looking for a quick, healthy meal? Try my Grilled Chicken Sweet Potato Bowls! This colorful dish is packed with flavor and nutrition. You’ll enjoy tender

Layered Taco Lasagna Savory and Hearty Meal
Looking for a fun twist on taco night? Try my Layered Taco Lasagna! This dish combines your favorite taco flavors into a hearty meal everyone

Savory Ultimate Butter Chicken Recipe to Delight You
Are you ready to taste the ultimate comfort food? My Savory Ultimate Butter Chicken Recipe will leave your taste buds dancing in delight. With tender