Dinner

To make French Onion Chicken Orzo Casserole, gather these key items: - 2 cups cooked orzo pasta - 2 tablespoons olive oil - 1 large onion, thinly sliced - 3 cloves garlic, minced - 2 cups cooked chicken, shredded - 4 cups chicken broth - 1 teaspoon dried thyme - 1 teaspoon dried rosemary - 1 cup shredded Gruyère cheese - 1 cup shredded mozzarella cheese - 1 tablespoon soy sauce - Salt and pepper to taste - ¼ cup fresh parsley, chopped (for garnish) You can enhance this dish with a few extra ingredients: - Sliced mushrooms for added earthiness - Baby spinach for a burst of color and nutrition - Chopped bell peppers for extra crunch - A dash of hot sauce for a spicy kick If you need to swap out some items, here are a few ideas: - Use quinoa instead of orzo for a gluten-free option. - Swap chicken with cooked turkey or rotisserie chicken. - Replace Gruyère with Swiss or cheddar cheese for different flavors. - Use vegetable broth instead of chicken broth for a vegetarian option. These adjustments make the casserole fit your taste and pantry. Happy cooking! {{ingredient_image_2}} Start by gathering your ingredients. You will need: - 2 cups cooked orzo pasta - 2 tablespoons olive oil - 1 large onion, thinly sliced - 3 cloves garlic, minced - 2 cups cooked chicken, shredded - 4 cups chicken broth - 1 teaspoon dried thyme - 1 teaspoon dried rosemary - 1 cup shredded Gruyère cheese - 1 cup shredded mozzarella cheese - 1 tablespoon soy sauce - Salt and pepper to taste - ¼ cup fresh parsley, chopped Make sure everything is ready. This helps the cooking go smoothly. First, preheat the oven to 375°F (190°C). In a large skillet, add the olive oil. Heat it over medium heat. Once hot, add the sliced onion. Stir it often. Cook until the onion is deep golden brown, about 15 to 20 minutes. This step is key for that sweet flavor. When the onion is ready, stir in the minced garlic. Cook for an additional 2 to 3 minutes. The garlic should smell great and be lightly golden. In a large mixing bowl, combine the cooked orzo, shredded chicken, and the onion and garlic mixture. Pour in the chicken broth next. Then add the dried thyme, dried rosemary, and soy sauce. Season with salt and pepper to taste. Mix everything well. Ensure the orzo is coated in all those tasty flavors. Next, transfer the mixture into a greased 9x13-inch baking dish. Spread it out evenly. Now, it’s time for the cheese! Sprinkle the shredded Gruyère and mozzarella on top. This will create a delightful, cheesy crust. Place the baking dish in your preheated oven. Bake for 25 to 30 minutes. Look for bubbling cheese that has turned a lovely golden color. When it’s done, take it out and let it cool for a few minutes. Finally, garnish with fresh parsley to add a pop of color. Enjoy your tasty casserole! To get the best cheese layer, use a mix of Gruyère and mozzarella. Gruyère gives a rich flavor, while mozzarella adds nice stretch. Sprinkle the cheese evenly over the top before baking. This helps it melt nicely. For an extra crispy layer, broil the casserole for a few minutes at the end. Watch it closely to prevent burning. To ensure even cooking, spread the orzo and chicken mix evenly in the dish. Mix well before transferring it to the baking dish. This helps all ingredients heat up together. Keep the oven temperature steady at 375°F (190°C). Also, let it cool slightly after baking. This helps it set and makes serving easier. Serve the casserole in warm bowls. Scrape some of the cheesy crust for each plate. This adds a nice touch. Garnish with fresh parsley for color and flavor. You can pair it with a simple green salad or crusty bread. A glass of white wine also complements the dish nicely. Pro Tips Caramelize the Onions Properly: Take your time when caramelizing the onions; the deeper the golden color, the richer the flavor you'll develop for your casserole. Use Fresh Herbs: For an enhanced aroma and flavor, consider using fresh thyme and rosemary instead of dried, if available. Cheese Variations: Feel free to experiment with different cheese combinations, like adding sharp cheddar or fontina for a unique twist on the cheese layer. Rest Before Serving: Allow the casserole to rest for about 5 minutes after baking; this helps the flavors meld and makes serving easier. {{image_4}} You can make this dish vegetarian. Start by omitting the chicken. Use veggie broth instead of chicken broth. Add more vegetables like bell peppers or mushrooms. Sauté them with the onions and garlic. This keeps the flavor rich and hearty. Cheese can change the taste of the casserole. Gruyère and mozzarella are great choices, but you can try others. Cheddar adds a sharp taste. Fontina gives a creamy texture. Mix and match to find your favorite combo. Just remember to use about two cups of cheese total. Add extra spices for more flavor. A dash of smoked paprika can bring warmth. If you like spice, try red pepper flakes. Fresh herbs like thyme or basil can enhance the taste. A splash of white wine can add depth, too. Each tweak makes this dish your own! After cooking, let your casserole cool down. Once cool, cover it tightly with plastic wrap or aluminum foil. Store it in the fridge for up to three days. This keeps the flavors fresh and tasty. You can freeze this casserole for later. First, let it cool completely. Then, transfer it to an airtight container. You can also use a freezer bag. Make sure to remove as much air as possible. This dish will stay good in the freezer for up to three months. To reheat, take the casserole out of the fridge or freezer. If frozen, thaw it overnight in the fridge. Preheat your oven to 350°F (175°C). Cover the dish with foil to prevent drying out. Heat for about 25-30 minutes or until it's hot all the way through. You can also use a microwave for quicker reheating. Just heat it in short bursts, stirring in between. Enjoy your creamy, cheesy delight again! Yes, you can make this casserole ahead. Prepare it up to the baking step. Store it in the fridge for up to 24 hours. When you are ready to bake, just add a few extra minutes to the cooking time. This makes it easy for busy days. You have many options for sides. Here are some ideas: - A simple green salad with vinaigrette. - Steamed green beans or broccoli. - Crusty bread slices for dipping. - A light soup like tomato or vegetable. These sides complement the casserole well and add color to your meal. Watch for the cheese to bubble and turn golden brown. This usually takes about 25 to 30 minutes in the oven. You can also use a food thermometer. The center should reach 165°F (74°C). Let it cool for a few minutes before serving. This helps it set and makes it easier to serve. This blog post covered all you need for a great French Onion Chicken Orzo Casserole. We looked at the ingredients, step-by-step instructions, and helpful tips. You learned about variations, storage info, and common questions. In the end, enjoy your cooking. Make it your own. A few tweaks can create a meal just for you!
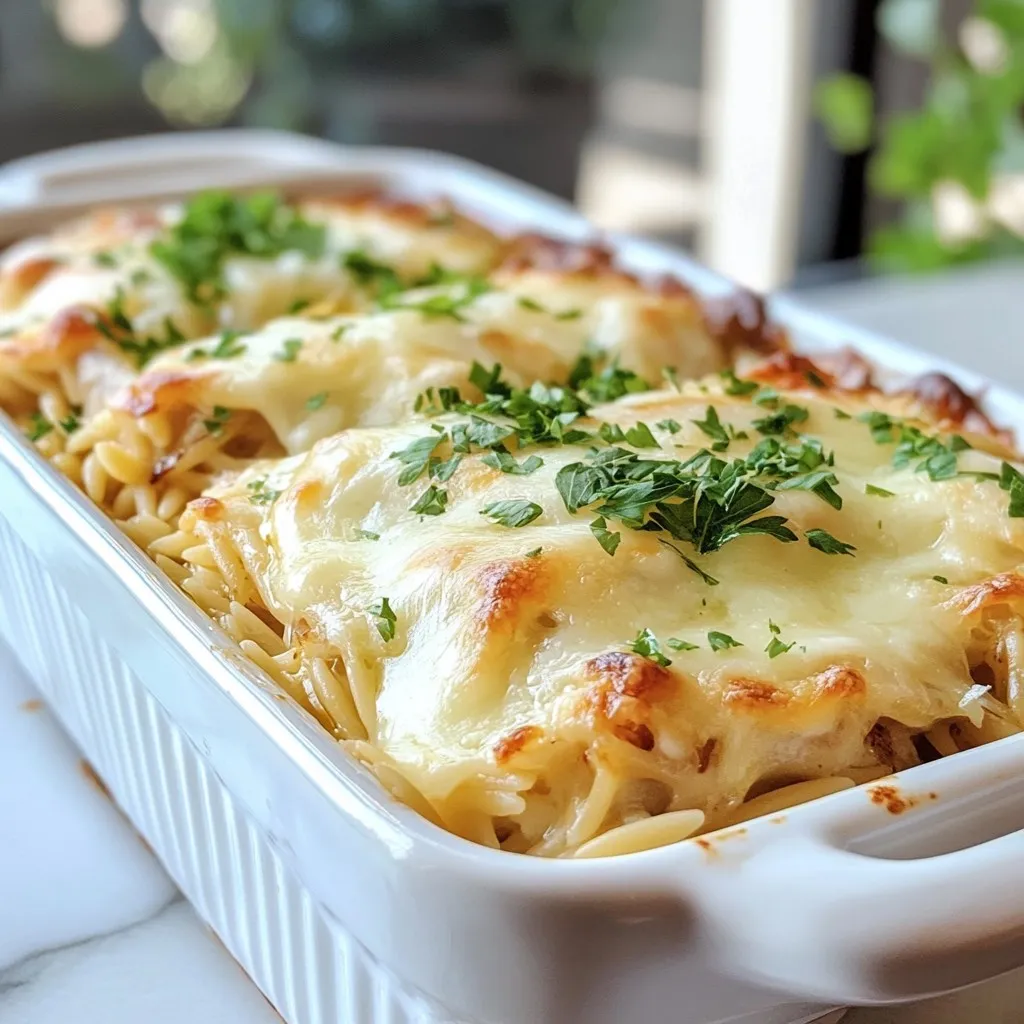
French Onion Chicken Orzo Casserole Delightful Meal
Looking for an easy, hearty meal? This French Onion Chicken Orzo Casserole is a dish you’ll love. It combines savory chicken, tender orzo, and the
Here’s what you need to make Minute Garlic Butter Ramen Noodles. Gather these items: - 2 packs of instant ramen noodles (discard the seasoning packets) - 4 tablespoons unsalted butter - 6 cloves garlic, finely minced - 1 teaspoon red pepper flakes (optional, for a spicy kick) - 1 tablespoon soy sauce - 2 green onions, thinly sliced - 1 tablespoon sesame oil - Salt and freshly cracked black pepper, to taste - Fresh cilantro or parsley, for garnish (optional) These simple ingredients come together quickly. You can find most in your pantry. The garlic and butter give the dish a rich flavor. The soy sauce adds depth. If you want heat, use red pepper flakes. Fresh herbs like cilantro or parsley can brighten the dish. Enjoy the mix of flavors! {{ingredient_image_2}} To start, grab a large pot. Fill it with water and bring it to a rapid boil. This step is key for perfect noodles. Once the water is bubbling, gently add the instant ramen noodles. Cook them for about 3 to 4 minutes. Be sure to check the package for exact times. When they are done, carefully drain the noodles in a colander. Set them aside for later. Now, let's make the garlic butter. In the same pot, turn the heat to medium. Add 4 tablespoons of unsalted butter. Watch it melt until it starts to bubble gently. Keep an eye on the butter so it does not brown too much. This will keep the flavor just right. Once the butter is bubbling, add 6 cloves of finely minced garlic. Stir the garlic for about 1 to 2 minutes. You want it to smell great and turn light golden. Be careful not to let it burn, as burnt garlic can taste bad. If you like heat, sprinkle in 1 teaspoon of red pepper flakes and stir for another 30 seconds. Next, gently add the cooked ramen noodles back into the pot. Use tongs or a fork to toss the noodles in the garlic butter. Make sure every noodle is coated well. Now, pour in 1 tablespoon of soy sauce and 1 tablespoon of sesame oil. Add a dash of salt and freshly cracked black pepper. Toss the noodles again until all the flavors blend nicely. Finally, remove the pot from heat. Fold in the thinly sliced green onions for a fresh taste. Your Minute Garlic Butter Ramen Noodles are ready to serve. Enjoy your quick and tasty meal! - Monitoring garlic cooking time: Start by melting the butter in a pot. Add minced garlic when the butter bubbles. Cook the garlic for just 1-2 minutes. You want it fragrant and lightly golden. Watch closely! If it turns dark, it can taste bitter. - Options for adjusting spice level: If you like heat, add red pepper flakes. Start with 1 teaspoon. You can always add more if you want it spicier. If you prefer mild flavors, skip the spice. The garlic and soy sauce will still give great taste. - Suggestions for additional ingredients: Want to make it heartier? Try adding cooked chicken, shrimp, or tofu. You can also mix in veggies like spinach or bell peppers. Cook them briefly in the garlic butter before adding the noodles. - Best practices for tossing noodles: Use tongs or a fork to toss the noodles. Make sure each noodle gets coated in the garlic butter mix. This helps all the flavors blend. Toss gently but thoroughly so you don’t break the noodles. Pro Tips Butter Temperature: Make sure your butter is at room temperature before melting to ensure it blends smoothly with the garlic. Don’t Overcook the Garlic: Keep a close eye on the garlic while sautéing; it should be fragrant and lightly golden, not browned, to avoid bitterness. Customize Your Noodles: Feel free to add in your favorite vegetables or proteins, such as spinach or cooked chicken, for a heartier meal. Serving Suggestions: Pair these noodles with a side of steamed vegetables or a fresh salad for a complete meal experience. {{image_4}} You can make Minute Garlic Butter Ramen Noodles even better by adding protein. Here are some options: - Cooked chicken - Cooked shrimp - Cubed tofu For chicken, use cooked pieces. Add them to the garlic butter just before you toss in the noodles. If you choose shrimp, cook them in the butter for a few minutes until they turn pink. For tofu, sauté it in the butter until it's golden. Adjust cooking times as needed to ensure your protein is fully cooked. Adding vegetables can give your dish more flavor and nutrients. Here are some vegetables to try: - Spinach - Bell peppers - Broccoli - Carrots You can add fresh spinach right at the end. It wilts quickly. For bell peppers and broccoli, sauté them in the butter before adding the garlic. This way, they will cook nicely and soak up flavors. Carrots can be sliced thin and added the same way. If you need a gluten-free meal, you can swap out the noodles. Here are some great alternatives: - Rice noodles - Zucchini noodles - Shirataki noodles For rice noodles, follow the cooking instructions on the package. Use zucchini noodles or shirataki noodles by sautéing them briefly in the garlic butter. This will keep them tender but not mushy. Adapt the recipe by checking the cooking times for your chosen noodles. To keep your garlic butter ramen fresh, follow these tips: - Refrigeration: Store leftovers in the fridge within two hours of cooking. - Containers: Use airtight containers to prevent moisture loss. Glass or plastic containers work well. To enjoy your ramen again, reheating is key. Here’s how: - Method Options: Use the microwave or a pan. For the best texture, heat in a pan with a splash of water. Stir often. - Safety Considerations: Always heat until steaming hot. This kills any harmful bacteria and ensures safe eating. Yes, you can use other noodles! Soba, udon, or rice noodles work well. Just adjust the cooking time based on the noodle type. This opens up many flavor options and makes the dish fun. To make this dish vegetarian, simply skip the butter and use plant-based margarine. You can also replace the soy sauce with a vegan alternative. This ensures the recipe stays tasty and meat-free. Serve your garlic butter ramen with: - Soft-boiled eggs for protein - Steamed broccoli for crunch - Crispy tofu for a filling option - A sprinkle of sesame seeds for extra flavor These pairings add variety and enhance the meal's taste. You can keep leftover noodles in the fridge for up to three days. Store them in an airtight container to keep them fresh. Reheat them in a pan with a splash of water to restore moisture. In this guide, you learned how to make garlic butter ramen noodles. We covered the ingredients and the steps to cook them perfectly. You can adjust spice levels and add proteins or veggies for more flavor. Don't forget about the best ways to store leftovers! Enjoying this dish can be simple and tasty. Experiment with your favorite ingredients. With practice, you can make it your own!
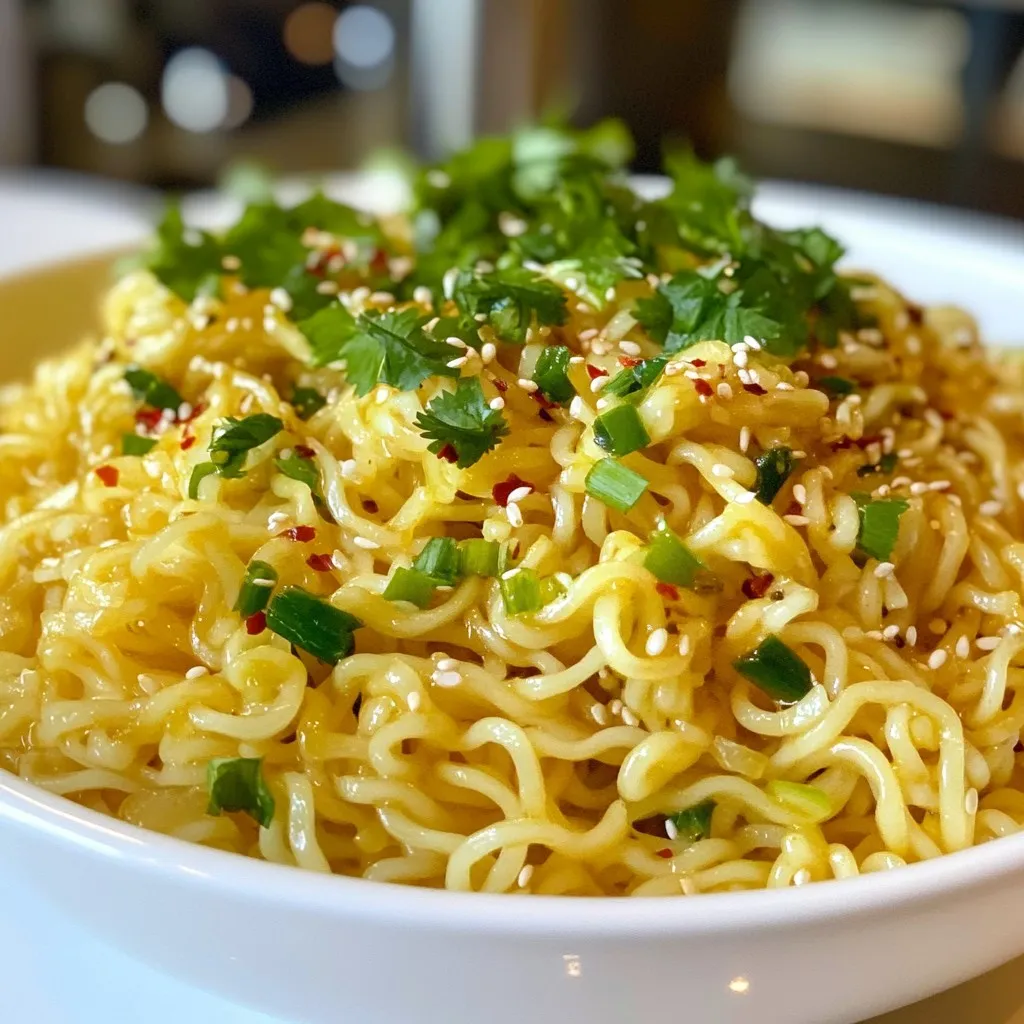
Minute Garlic Butter Ramen Noodles Quick and Tasty Meal
Craving a quick and tasty meal? You’re in the right place! These Minute Garlic Butter Ramen Noodles are simple to make and packed with flavor.
- 8 oz elbow macaroni - 2 cups cooked chicken, shredded - 1 cup honey BBQ sauce - 2 cups sharp cheddar cheese, shredded - 1 cup mozzarella cheese, shredded - 1/2 cup cream cheese - 1 teaspoon garlic powder - 1/2 cup panko breadcrumbs - 2 tablespoons olive oil Gather these ingredients before you start cooking. The elbow macaroni gives a nice shape. The chicken adds protein and flavor. Honey BBQ sauce brings sweetness to the dish. For cheese, I use sharp cheddar and mozzarella. They melt well and create a creamy texture. Cream cheese makes the sauce extra smooth. Garlic powder boosts the flavor. Panko breadcrumbs give a nice crunch on top. Olive oil helps the breadcrumbs brown nicely in the oven. Make sure you have everything ready. This way, the cooking will go smoothly. Enjoy your time in the kitchen! {{ingredient_image_2}} Start by boiling water in a large pot. Add a good amount of salt. Once the water boils, add 8 oz of elbow macaroni. Cook until the pasta is al dente, about 7-8 minutes. Drain the macaroni and set it aside in a large mixing bowl. This helps keep the pasta from getting soggy. In a medium saucepan, combine 1/2 cup of softened cream cheese and 1/2 cup of milk. Heat this mixture over medium heat. Stir it well until the cream cheese melts completely. Once it’s smooth, add 2 cups of shredded sharp cheddar and 1 cup of shredded mozzarella. Stir until both cheeses melt into a creamy sauce. This sauce gives the dish its rich and cheesy flavor. In a large mixing bowl, mix 2 cups of shredded chicken with 1 cup of honey BBQ sauce. Stir until the chicken is fully coated with the sauce. Next, add the cooked macaroni and the creamy cheese sauce to the chicken bowl. Carefully mix everything together. Make sure all the ingredients are well combined. Preheat your oven to 350°F (175°C). Grease a baking dish with a little oil or cooking spray. Transfer the cheesy mixture into the dish, spreading it out evenly. In a small bowl, mix 1/2 cup of panko breadcrumbs with 2 tablespoons of olive oil. Sprinkle this mixture over the top for a crunchy finish. Bake the dish for 25-30 minutes. Look for a golden brown topping and bubbling edges. Enjoy your delicious Honey BBQ Chicken Mac and Cheese! The best types of cheese for mac and cheese are sharp cheddar and mozzarella. Sharp cheddar gives a bold flavor. Mozzarella adds creaminess and stretch. For a richer taste, mix different cheeses. You can try gouda or fontina. These cheeses melt well and enhance the dish. Shredding chicken can be easy. Use two forks to pull apart the meat. Make sure to shred it into small pieces for better mixing. When it comes to honey BBQ sauce, look for brands like Sweet Baby Ray's or Stubb's. You can also make your own sauce. Combine honey, ketchup, and a bit of vinegar for a quick recipe. To coat panko breadcrumbs, mix them with olive oil in a bowl. This helps them get crispy when baked. You can also use crushed crackers or cornflakes for crunch. Both give a nice texture on top of the mac and cheese. Pro Tips Use Leftover Chicken: This recipe is perfect for using up leftover rotisserie chicken. It saves time and adds delicious flavor. Cheese Variations: Feel free to mix different types of cheese! Adding gouda or pepper jack can give a unique twist to the dish. Adjust BBQ Sauce: If you prefer a sweeter or spicier flavor, adjust the amount of honey BBQ sauce to suit your taste. Make Ahead: This dish can be assembled ahead of time. Just bake it when you're ready to serve for a quick meal! {{image_4}} For gluten-free options, you can swap elbow macaroni with gluten-free pasta. Many brands offer tasty choices that cook up just right. If you're looking for vegan alternatives, use plant-based cheese and cream cheese. There are great brands available that melt well and taste great. To kick up the flavor, try adding cayenne pepper or chili powder. These spices can give your dish a nice kick. You can also add veggies like spinach or bell peppers. They add color and nutrients to your meal. Just chop them finely and mix them in with your mac and cheese. Instead of chicken, you can use pulled pork or beef. Both options add a different twist to your dish. For a vegetarian version, consider soy products like tofu or tempeh. These options provide protein and keep the meal satisfying. To keep your Honey BBQ Chicken Mac and Cheese fresh, store it in an airtight container. Place it in the refrigerator right after it cools down. This helps keep the flavors intact. You can store it for up to three days. After that, the taste may fade. Make sure to label your container with the date you made it. When you reheat your mac and cheese, keep it from drying out. The best way is to use the oven. Preheat it to 350°F (175°C). Place the mac and cheese in a baking dish. Cover it with foil and heat for about 20 minutes. You can also use the microwave. Add a splash of milk to keep it creamy. Heat in short bursts, stirring in between. Yes, you can freeze Honey BBQ Chicken Mac and Cheese. Just place it in a freezer-safe container. It can last up to two months in the freezer. When you want to eat it, thaw it in the fridge overnight before reheating. For sides, a simple green salad works best. It adds a nice crunch to the meal. You can also serve it with garlic bread for extra flavor. If you want to meal prep, this dish is great for busy weekdays. Make a big batch and store it in individual containers. This way, you have a quick meal ready to go. Yes, you can prepare this dish ahead. To do this, cook the pasta and mix all ingredients as outlined. Instead of baking, cover the dish and store it in the fridge. When you’re ready to eat, simply preheat your oven to 350°F. Bake for 30-35 minutes. If you want to avoid drying, add a splash of milk before baking. This method keeps everything flavorful and ready when you are. I recommend using a honey BBQ sauce for this recipe. Look for brands that have a balanced sweetness and smokiness. Some great options include Sweet Baby Ray's Honey BBQ or KC Masterpiece Honey Barbecue Sauce. If you prefer, you can also make your own. Just mix ketchup, honey, vinegar, and spices to taste. This gives you full control over the flavor. Absolutely! While elbow macaroni is classic, you can use other pasta shapes too. Try shells, penne, or fusilli. Each type holds the cheese and sauce differently. For a fun twist, use whole wheat or gluten-free pasta if needed. This keeps the recipe fresh and lets you customize it to your liking. Feel free to experiment! This recipe for Honey BBQ Chicken Mac and Cheese combines simple ingredients and easy steps. You learned how to cook pasta, prepare a creamy cheese sauce, and combine all flavors. I hope you feel ready to create your own tasty dish. Experiment with different cheeses or add veggies for a personal touch. Make it your own! Enjoy your cooking adventure and share the joy of this meal with others. Happy cooking!
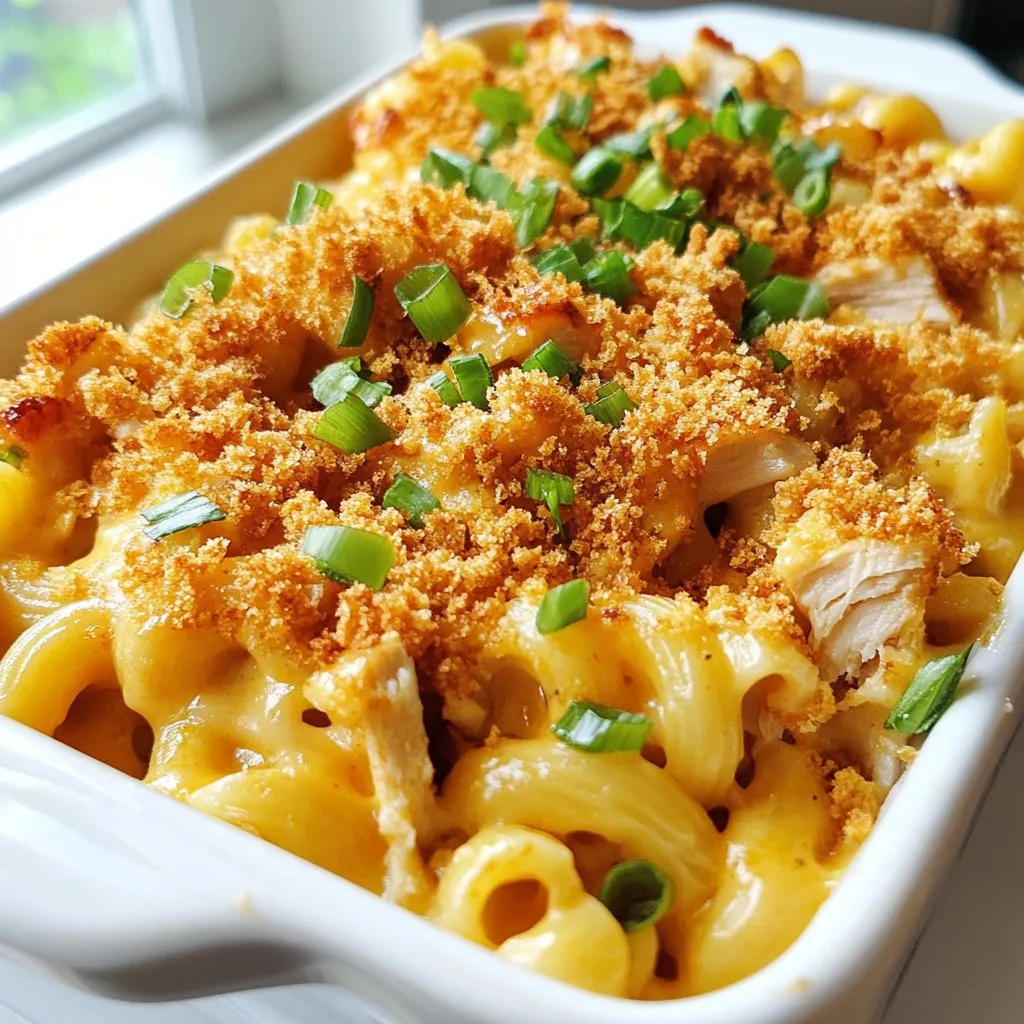
Honey BBQ Chicken Mac and Cheese Delightful Recipe
If you love the rich taste of mac and cheese but want a twist, you’re in for a treat! My Honey BBQ Chicken Mac and
- 2 large chicken breasts, diced into bite-sized pieces - 1 cup long grain rice, rinsed - 2 cups chicken broth (low sodium recommended) - 1 red bell pepper, diced - 1 green bell pepper, diced - 1 medium onion, diced - 3 cloves garlic, minced - 2 teaspoons Cajun seasoning (adjust to taste) - 1 teaspoon smoked paprika - 1 teaspoon onion powder - Salt and pepper to taste - 2 tablespoons olive oil - 1 cup frozen corn (no need to thaw) - 1 cup black beans, rinsed and drained - Fresh parsley, chopped (for garnish) You can swap chicken for turkey or tofu. These options give similar taste and texture. If you want less salt, use low-sodium broth. For a spicy kick, add more Cajun seasoning or hot sauce. Frozen corn is easy to use, but fresh corn adds a sweet crunch. Black beans can be swapped for kidney beans or chickpeas if you prefer. Fresh herbs are great for flavor, but dried herbs can work too. Just use less, as dried herbs are more concentrated. - Calories: 450 - Protein: 35g - Carbohydrates: 55g - Dietary Fiber: 10g - Fat: 10g - Sodium: 600mg This meal packs protein and fiber. It keeps you full and satisfied. The colorful veggies add vitamins and minerals to your dish. Each serving is a balanced meal that's perfect for your meal prep needs. {{ingredient_image_2}} To start, you need to marinate the chicken. In a medium bowl, combine the diced chicken breast with olive oil, Cajun seasoning, smoked paprika, onion powder, salt, and pepper. Mix everything well, so each piece is coated. Cover the bowl and let the chicken sit in the fridge for at least 30 minutes. This step helps build great flavor in your dish. Next, heat a large skillet over medium heat. Once it's hot, add the marinated chicken in a single layer. Cook for about 5-7 minutes. Stir occasionally until the chicken turns golden brown and reaches an internal temperature of 165°F (75°C). Once done, remove the chicken from the skillet and set it aside on a plate. Now, use the same skillet for the vegetables. Add diced onion, red bell pepper, and green bell pepper. Sauté these for about 5 minutes, stirring now and then until they soften. After that, add the minced garlic and sauté for another minute until you smell its rich aroma. Next, add the rinsed rice into the skillet. Stir it well with the vegetables. Then, pour in the chicken broth. Turn the heat up to high and bring it all to a rolling boil. Once it boils, lower the heat to a simmer. Cover the skillet and let it cook for 15-20 minutes until the rice is tender and all the liquid is absorbed. When the rice is ready, take the skillet off the heat. Fluff the rice gently with a fork. Stir in the cooked chicken, frozen corn, and black beans. Put the skillet back on low heat for about 5 minutes. Stir occasionally to ensure everything heats through and blends well. Transfer the Cajun chicken and rice mixture into meal prep containers. Divide it evenly among the containers. To add a nice touch, sprinkle fresh chopped parsley on top. This not only adds flavor but also makes your meal look inviting. Meal prep saves time and makes cooking easy. Here are some tips: - Plan Ahead: Choose a day to prep your meals. - Use Quality Containers: Invest in sturdy containers. Glass works well for reheating. - Portion Control: Divide meals into single servings. This helps with portion sizes. - Label Everything: Write the date and contents on each container. Boost the taste of your dish with these simple tricks: - Marinate Chicken: Let the chicken sit in the marinade longer. This builds flavor. - Use Fresh Herbs: Add fresh parsley right before serving. It adds brightness. - Adjust Seasoning: Taste as you cook. Add more Cajun seasoning if needed. - Sauté Vegetables: Cook veggies until they are soft. This brings out their natural sweetness. Keep your meals fresh and safe to eat with these tips: - Cool Before Storing: Let the dish cool down before sealing containers. - Store in the Fridge: Keep meals in the fridge if you plan to eat them within 4 days. - Freeze Extra Portions: If not eating soon, freeze meals for later. - Reheat Fully: Ensure meals reach 165°F (75°C) when reheating. This ensures safety. Pro Tips Marination Matters: Allowing the chicken to marinate for at least 30 minutes helps to infuse the Cajun flavors deeply into the meat, enhancing the overall taste. Perfect Rice Texture: Rinsing the rice before cooking removes excess starch, preventing it from becoming gummy and ensuring each grain remains fluffy. Vegetable Variations: Feel free to mix in other vegetables like zucchini or spinach for added nutrition and color. Just adjust cooking times as needed. Meal Prep Storage: Use glass containers for meal prep to keep the dish fresh longer and make reheating easier. Avoid plastic containers to reduce chemical exposure. {{image_4}} You can easily make this dish vegetarian or vegan. Instead of chicken, use firm tofu or tempeh. Both options soak up flavors well. Marinate the tofu or tempeh the same way as the chicken. Cook it until golden brown. Add the same veggies and spices. This gives you a hearty meal full of flavor. If you prefer other proteins, consider shrimp or sausage. Shrimp cooks quickly and adds a nice taste to the dish. If using sausage, choose turkey or plant-based sausage for a lighter option. Slice the sausage and cook it before adding the veggies. Both options keep the dish exciting and tasty. While long grain rice is great, you can try other grains too. Quinoa is a healthy choice with a nutty flavor. Brown rice adds more fiber and a chewy texture. For a gluten-free option, use cauliflower rice. Simply sauté it for a few minutes before adding the other ingredients. Each grain adds its unique touch to your meal prep. When storing Cajun chicken and rice, use airtight containers. Glass containers are a great choice. They are durable and safe for reheating. If you prefer plastic, choose BPA-free options. Look for containers that are sectioned to keep the chicken separate from the rice. This helps keep each part fresh and tasty. Use smaller containers for single servings. This makes it easy to grab and go. To freeze Cajun chicken and rice, let it cool first. Place it in freezer-safe bags. Remove as much air as possible. This prevents freezer burn. Label the bags with the date and contents. You can freeze it for up to three months. When ready to eat, thaw it in the fridge overnight. Reheat it on the stove or in the microwave until it’s hot. Cajun chicken and rice can last in the fridge for 4 to 5 days. Store it in airtight containers to keep it fresh. Check for any off smells or changes in texture before eating. If it looks or smells bad, it’s best to throw it out. Proper storage helps you enjoy this meal safely. You can reheat Cajun chicken and rice in a few ways. The best method is to use the microwave. Place your meal in a microwave-safe bowl. Cover it with a damp paper towel to keep it moist. Heat for 1-2 minutes or until warm. Stir halfway through heating for even warmth. You can also reheat it on a stove. Just add a splash of chicken broth to the pan. Heat over low until warm, stirring often. This helps keep the rice from drying out. Yes, you can use brown rice. Brown rice adds more fiber and nutrients. However, it takes longer to cook. You will need to adjust the cooking time. Usually, brown rice needs about 40-45 minutes to cook. Make sure to use more broth for better flavor. Follow the package instructions for best results. You can add many other vegetables to this dish. Some great options include: - Zucchini, diced - Carrots, diced - Spinach, chopped - Mushrooms, sliced - Peas, frozen or fresh These veggies add color and nutrition. They also help you customize the dish to your taste. To add more heat, you have several options: - Increase the Cajun seasoning. - Add cayenne pepper or crushed red pepper flakes. - Mix in diced jalapeños or serrano peppers. Start with a small amount, then taste and adjust. This way, you control the spice level to your liking. Yes, Cajun chicken and rice is a healthy option for meal prep. It has lean protein from chicken and fiber from beans and veggies. You can control the amount of oil and seasoning. Using low-sodium chicken broth helps keep it heart-friendly. This meal is balanced and filling, making it great for busy days. This blog post has guided you through creating a tasty Cajun Chicken & Rice. We covered the key ingredients, step-by-step cooking instructions, and smart tips for meal prep. You’ve learned how to store leftovers and make variations to suit your taste. Remember, cooking is all about exploring flavors. Use these tips to enjoy meals that are both delicious and healthy. Embrace your creativity in the kitchen, and don’t hesitate to try new things. Happy cooking!
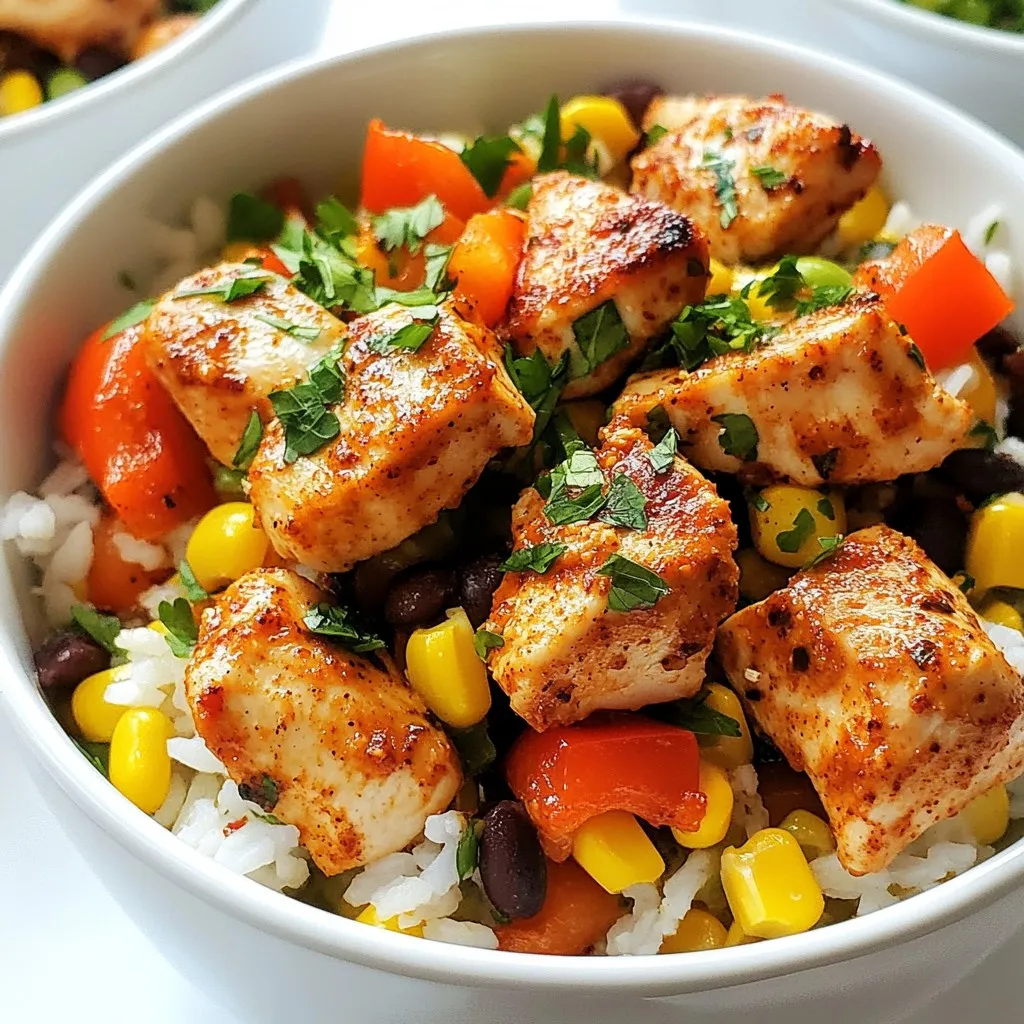
Cajun Chicken & Rice Meal Prep Simple and Tasty Dish
Looking for an easy and tasty meal prep idea? You’ll love my Cajun Chicken & Rice! This dish packs a flavorful punch while being quick
- 2 boneless, skinless chicken breasts, cut into bite-sized pieces - 1 tablespoon extra virgin olive oil - 1 red bell pepper, thinly sliced - 1 yellow bell pepper, thinly sliced - 1 medium zucchini, diced into half-moons - 1 cup fresh broccoli florets - 2 cloves garlic, finely minced - 1 teaspoon dried oregano - 1 teaspoon smoked paprika - Salt and freshly ground black pepper to taste - 1 cup low-sodium chicken broth - Fresh parsley, finely chopped (for garnish) In this dish, chicken is the star. I recommend using boneless, skinless breast meat. It cooks quickly and stays juicy. For veggies, I love bright bell peppers and crunchy broccoli. They add color and nutrition. Zucchini gives a nice texture. Seasonings bring the flavor to life. Dried oregano and smoked paprika are my favorites. They add depth without overpowering the dish. Adding garlic gives an aromatic punch. Use fresh garlic for the best taste. Olive oil keeps everything moist. It also helps the chicken brown nicely. Using low-sodium chicken broth adds more flavor without too much salt. Finally, a sprinkle of fresh parsley brightens up the meal. It adds a pop of color and freshness, making each bite delightful. {{ingredient_image_2}} Heating the Olive Oil Start by grabbing a large non-stick skillet. Place it on the stove over medium heat. Pour in one tablespoon of extra virgin olive oil. Wait until the oil shimmers, which means it is hot and ready. Planning Cooking Order It helps to plan the order of cooking. First, cook the chicken. Then, sauté the veggies. This way, everything cooks evenly and stays fresh. Seasoning Tips Cut the chicken breasts into small, bite-sized pieces. Once the oil is hot, add the chicken to the skillet. Use salt, black pepper, dried oregano, and smoked paprika to season. This combination will give the chicken great flavor. Cooking Time and Temperature Cook the chicken for about 5 to 7 minutes. Stir it occasionally so it browns nicely. The chicken is done when it reaches an internal temperature of 165°F. Use a meat thermometer to check. Adding Aromatics Once the chicken is cooked, add two finely minced garlic cloves. Stir them for 1 to 2 minutes until they smell amazing. This adds a rich flavor to the dish. Achieving Perfect Texture Next, toss in the sliced red and yellow bell peppers, diced zucchini, and fresh broccoli florets. Sauté everything together for about 5 to 6 minutes. You want the veggies to be bright and slightly tender but still a bit crisp. Combining Ingredients Now it’s time to pour in one cup of low-sodium chicken broth. Stir well to mix everything together. Increase the heat a little to bring it to a gentle simmer. Tasting and Adjusting Seasoning Let it cook for 3 to 4 more minutes. This helps the flavors blend beautifully. Finally, taste the dish. Adjust the salt and pepper if needed. For a fresh pop, sprinkle chopped parsley on top before serving. Ensuring Moist Chicken To keep chicken juicy, avoid overcooking it. Cook until it reaches 165°F. Use a meat thermometer for accuracy. Season the chicken well before cooking. This adds flavor and helps retain moisture. Vegetable Cooking Times Different veggies cook at different speeds. Bell peppers need about 5-6 minutes. Zucchini cooks quickly, around 3-4 minutes. Broccoli takes about 4-5 minutes to get tender. Keep an eye on them to maintain their color and crunch. Plating Ideas For a homey feel, serve the skillet right from the pan. Guests love to help themselves. For a fancier look, use individual bowls. Arrange chicken and veggies neatly, and drizzle with olive oil for shine. Garnishing for Color Add a sprinkle of fresh parsley on top for a pop of green. You can also use lemon wedges on the side. Lemon adds a zesty touch and brightens the dish visually. Low-Fat Substitutions You can swap olive oil for a low-calorie spray. This cuts down on fat while still adding flavor. Use skinless chicken breasts for less fat. Adding Extra Nutrition Want more fiber? Toss in spinach or kale at the end. Both wilt quickly and boost nutrition. You can also add beans for protein and texture. This makes your skillet even more filling. Pro Tips Perfectly Cooked Chicken: Ensure the chicken pieces are uniform in size for even cooking. Use a meat thermometer to check for doneness (165°F or 75°C) to avoid overcooking. Colorful Veggies: To retain the vibrant colors of the bell peppers and broccoli, add them to the skillet towards the end of the cooking process. This keeps them tender-crisp and visually appealing. Flavor Boost: For an extra layer of flavor, marinate the chicken in olive oil, garlic, and spices for at least 30 minutes before cooking. This enhances the taste and tenderness of the chicken. Serving Suggestions: Serve with a side of quinoa or brown rice to make the meal more filling. Drizzling with a squeeze of fresh lemon juice right before serving can brighten the dish. {{image_4}} Alternative Veggies You can switch up the veggies in this skillet. Try using: - Asparagus for a crunchy bite. - Carrots for a touch of sweetness. - Spinach for a leafy addition. Feel free to mix and match! Use what you enjoy or have on hand. Protein Substitutions Not feeling chicken? You can use other proteins, like: - Turkey breast for a leaner option. - Shrimp for a seafood twist. - Tofu for a veggie-friendly meal. Each choice brings a unique flavor! Spices and Herbs to Experiment With Change the flavors with different spices. Consider: - Italian seasoning for an herbaceous taste. - Curry powder for a warm, spicy kick. - Cumin for a smoky depth. These can transform your dish! Adding Sauces for Different Cuisines Sauces can shift the whole meal vibe. Think about: - Soy sauce for an Asian flair. - Salsa for a zesty Mexican twist. - Coconut milk for a creamy, tropical vibe. Each sauce adds a new layer of deliciousness! To keep your chicken and veggie skillet fresh, store it in the fridge. Place leftovers in an airtight container. This method keeps the dish safe for up to three days. Make sure to cool the skillet to room temperature before sealing. Best Practices for Freshness: - Store in a shallow container to cool quickly. - Keep the lid on tight to prevent air exposure. - Reheat only the portion you plan to eat. This helps maintain quality. Freezing is a great option if you want to save the skillet for later. Portion the dish into freezer-friendly bags or containers. Remove as much air as you can before sealing. This step prevents freezer burn. Preparing for Freezing: - Allow the skillet to cool completely before freezing. - Label containers with the date to track freshness. - Use within three months for best taste. Thawing and Reheating Tips: - Thaw in the fridge overnight for safe reheating. - Reheat in a skillet over medium heat until hot. - Add a splash of chicken broth if it seems dry. This helps revive the flavors. Yes, you can use frozen vegetables in this dish. They are a great time-saver. However, they may release extra water while cooking. This can change the texture of your skillet. To adjust for this, reduce the chicken broth by a quarter cup. You might need to cook the veggies a bit longer too. This ensures they heat through properly. This chicken and veggie skillet goes well with many sides. Here are some great options: - Brown rice for a hearty base - Quinoa for a protein boost - A simple side salad for freshness - Whole-grain bread for a nice crunch All these sides add different flavors and textures to your meal. To check if the chicken is done, use a meat thermometer. Insert it into the thickest part of the chicken. It should read 165°F or 75°C. If you don’t have a thermometer, cut into the chicken. It should be white, with no pink inside. Cooking it to the right temperature keeps it safe and juicy. This blog post covered how to make a tasty chicken and veggie skillet. We looked at the main ingredients, step-by-step cooking instructions, and helpful tips. You learned about ingredient swaps for fun flavors and easy storage options. Stick to these steps, and your skillet will impress everyone. Cooking can be simple and rewarding. Enjoy your meal, and remember, happy cooking means happy eating!
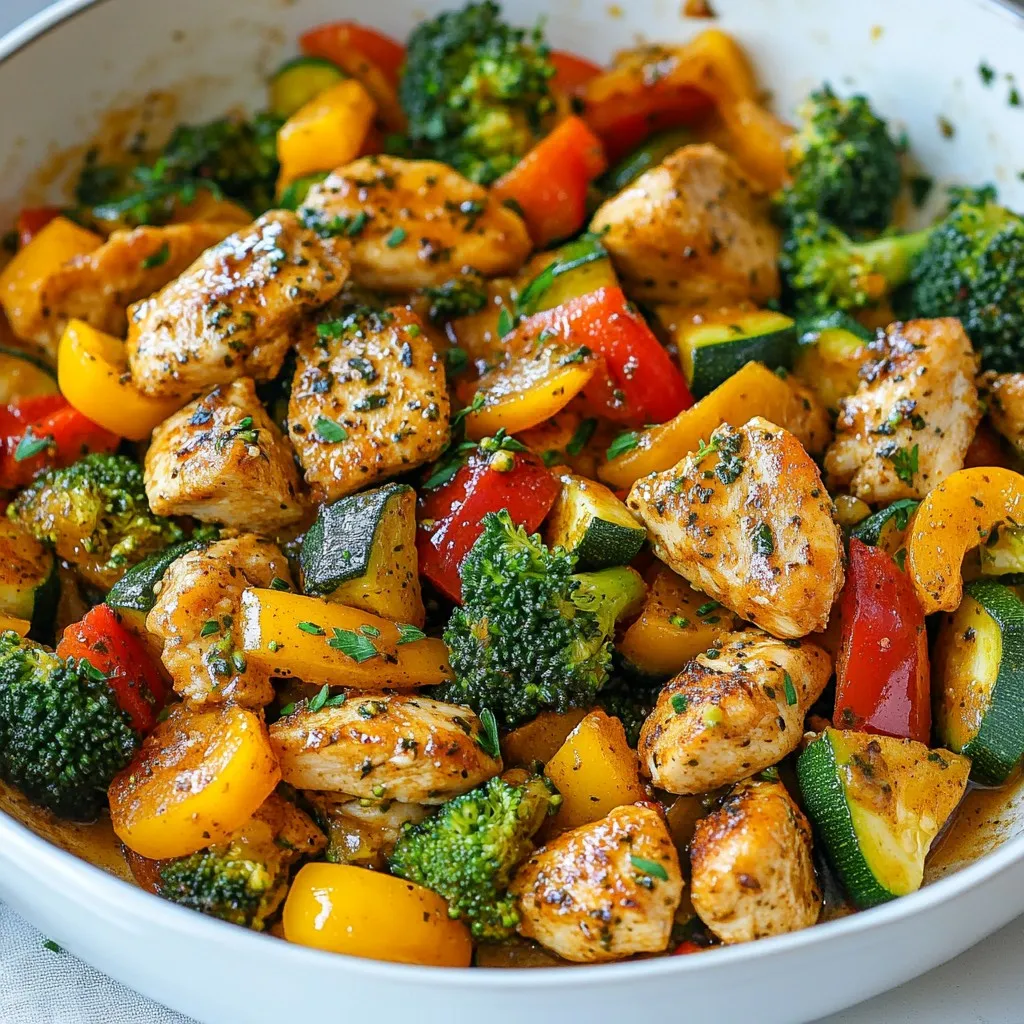
Healthy Chicken & Veggie Skillet Quick and Simple Meal
Looking for a quick and healthy meal that packs flavor? I’ve got you covered with my Healthy Chicken & Veggie Skillet. This simple recipe lets
- 4 large bell peppers (any colors: red, yellow, green, or orange) - 1 lb ground beef (you can use ground turkey or a plant-based option) - 1 cup cooked rice (white, brown, or quinoa for a twist) - 1 can (15 oz) diced tomatoes, drained - 1 small onion, finely chopped - 2 cloves garlic, minced - 1 teaspoon ground cumin - 1 teaspoon chili powder - ½ teaspoon smoked paprika - Salt and pepper to taste - 1 cup shredded cheese (cheddar, Monterey Jack, or a Mexican blend) - Fresh cilantro or parsley for garnish (optional) When I make stuffed bell peppers, I love using ripe, vibrant peppers. They add color and sweetness. Ground beef gives a rich flavor, but you can swap it for turkey or a plant-based meat. Cooked rice fills the peppers well and keeps everything together. Diced tomatoes add moisture and taste. The seasonings make the dish pop. Cumin, chili powder, and smoked paprika bring warmth and depth. Don't forget to taste and adjust the salt and pepper. Topping each pepper with cheese creates a gooey finish. Fresh herbs like cilantro or parsley add a nice touch. These ingredients come together to make a filling meal that is also fun to eat. They look great and taste even better! {{ingredient_image_2}} 1. Preheat your oven to 375°F (190°C). This helps the peppers cook evenly. 2. Cut the tops off the bell peppers. Save the tops for later if you like. 3. Remove the seeds and membranes. This gives you space for the filling. 4. Stand the peppers upright in a baking dish. Make sure they fit snugly. 1. In a large skillet, add a splash of olive oil and warm it. 2. Sauté the chopped onion for about 3-4 minutes. It should become soft and clear. 3. Add the minced garlic and cook for one more minute. It will smell great! 4. Now, increase the heat a bit. Add the ground beef to the skillet. 5. Sprinkle in the ground cumin, chili powder, smoked paprika, and salt and pepper. 6. Cook the beef, stirring often, for 6-8 minutes. Break it into small pieces as it cooks. 7. Gently fold in the cooked rice and drained diced tomatoes. Mix well. 8. Taste the filling and adjust the seasoning if needed. 1. Use a spoon to fill each pepper with the beef and rice mix. Pack it in well. 2. Generously sprinkle shredded cheese on top of each filled pepper. 3. Cover the dish with aluminum foil. This keeps the moisture in. 4. Bake in the oven for 20 minutes. 5. Remove the foil and bake for another 10-15 minutes. The cheese should be melted and bubbly. 6. Let the peppers cool for about 5 minutes before serving. Enjoy your meal! You can prep stuffed bell peppers a day ahead. This saves time on busy nights. Here’s how to do it: - Prep the Filling: Cook the beef, rice, and spices as usual. Let it cool. - Stuff the Peppers: Fill each bell pepper with the mix. - Store: Place them in a covered dish in the fridge. When ready to cook, just bake them. This method keeps flavors fresh. To make your stuffed peppers even better, adjust your seasonings. Here are some tips: - Seasoning: Taste the filling before stuffing. If it lacks flavor, add more salt or spices. - Cheese Choice: Use cheese you love. Cheddar is great, but try Monterey Jack for a mild touch. Substituting cheeses can change the dish's taste. Experiment to find your favorite blend. You can cook stuffed peppers in different ways. Each method has its perks: - Skillet Method: If you want a quicker meal, cook the filling in a skillet. Then, serve it on a bed of rice. - Oven Method: Baking gives the peppers a nice char. It also melts the cheese perfectly. Both methods work well. Choose what fits your time or mood! Pro Tips Choose Colorful Peppers: Using a mix of red, yellow, green, and orange bell peppers not only makes the dish visually appealing but also adds a variety of flavors to your stuffed peppers. Experiment with Grains: Substitute the rice with quinoa or couscous for a different texture and nutritional profile, making this dish adaptable to various dietary needs. Add More Veggies: Enhance the filling by incorporating other vegetables such as corn, black beans, or zucchini for added nutrition and flavor. Customize the Cheese: Mix different types of cheese such as feta or pepper jack with the cheddar for a unique twist that complements the spices in the stuffing. {{image_4}} You can switch the ground beef for other proteins. Ground turkey is a lean choice. It keeps the dish light but still tasty. Chicken works great if you want a milder flavor. You can also try plant-based options. These give a hearty feel without meat. Brands like Beyond Meat or lentils are good choices. They add texture and flavor to the stuffing. You don’t have to stick with regular rice. Brown rice adds a nutty taste and more fiber. Quinoa is also a smart choice. It is packed with protein and cooks quickly. If you're looking for a low-carb option, go for cauliflower rice. It absorbs flavors well and keeps the dish light. Each choice brings its own flair to the stuffed peppers. Want to amp up the taste? Try adding beans for extra protein. Black beans or kidney beans work well. Corn adds a sweet crunch that brightens the dish. If you like heat, jalapeños are your best friend. They add a nice kick to the stuffing. Each of these options lets you customize your stuffed peppers to fit your taste. To store your stuffed peppers, let them cool first. Place them in an airtight container. They stay fresh for up to four days in the fridge. You can also wrap them tightly in plastic wrap. This method helps keep them moist and tasty. To freeze stuffed peppers, let them cool completely. Wrap each pepper in plastic wrap, then place them in a freezer bag. Press out the air to prevent freezer burn. They can last up to three months in the freezer. When ready to eat, thaw them in the fridge overnight. Reheat in the oven at 350°F (175°C) until hot, about 20-25 minutes. In the fridge, stuffed peppers last about four days. In the freezer, they can stay fresh for up to three months. Always check for any signs of spoilage before eating. If they look or smell off, it's best to toss them. Yes, you can make stuffed peppers without meat! Here are some tasty options: - Beans: Use black beans or kidney beans for protein. - Lentils: Cooked lentils add texture and are very filling. - Quinoa: This grain is packed with protein and adds a nice crunch. - Vegetables: Mix in chopped zucchini, mushrooms, or spinach for more flavor. - Cheese: Add ricotta or feta for creaminess. Try different combinations to find what you love! To reheat stuffed peppers, use the oven or microwave. Here’s how: - Oven: Preheat to 350°F (175°C) and place peppers in a dish. Cover with foil and heat for about 20 minutes. - Microwave: Place one pepper on a microwave-safe plate. Heat for 2-3 minutes, checking often. These methods help keep the flavor and texture nice! To keep your peppers crisp, follow these tips: - Avoid overcooking: Bake them just until tender, about 30-35 minutes total. - Choose firm peppers: Look for fresh and firm bell peppers. - Don’t overstuff: Pack the filling, but leave a little space at the top. - Bake uncovered for the last few minutes: This helps them stay crispy. With these tricks, your peppers will stay delicious and crunchy! You now have a complete guide to making stuffed peppers. We covered the key ingredients, like bell peppers and ground beef, along with seasonings for great flavor. I shared steps to prepare, fill, and bake your peppers, plus tips for storage and variations with different proteins and rice types. Stuffed peppers are versatile and quick, making them a perfect meal idea. Enjoy experimenting with flavors and ingredients to make this dish your own. Happy cooking!
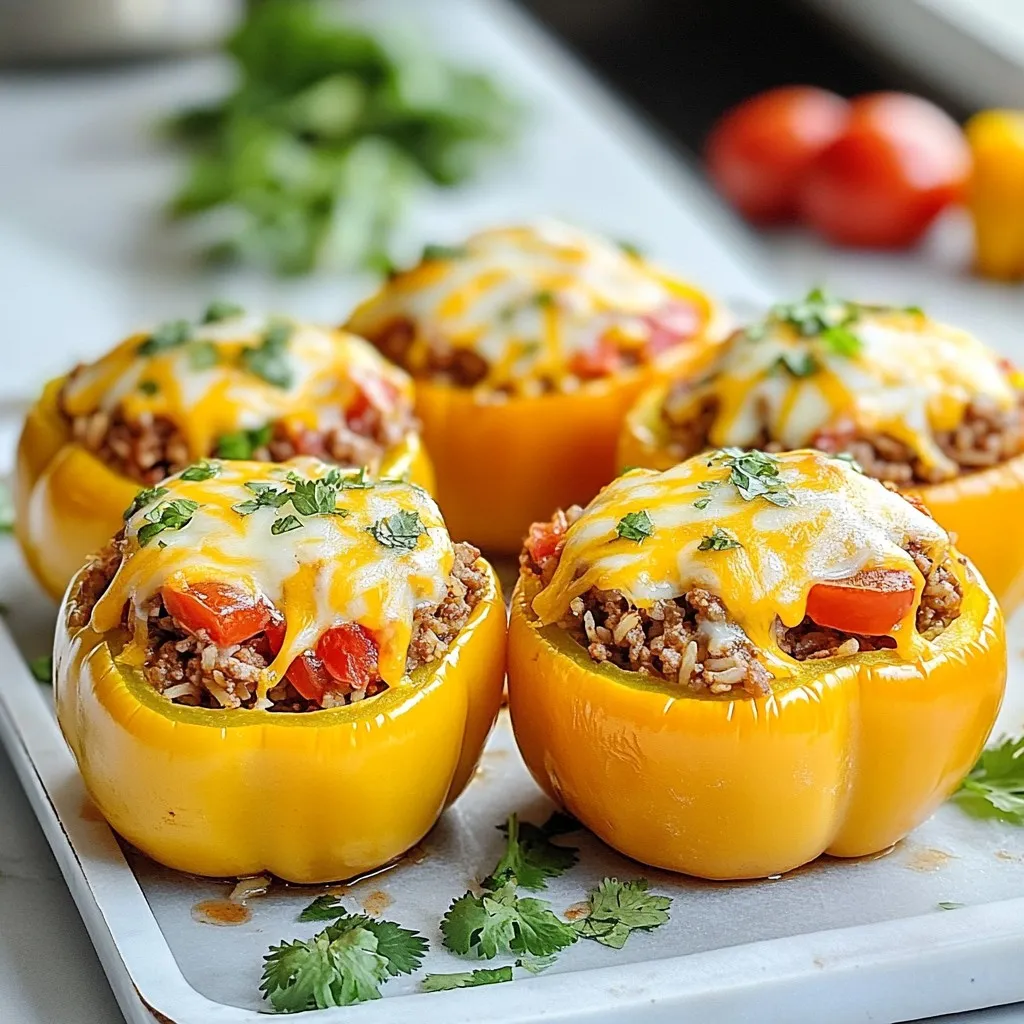
Stuffed Bell Peppers with Beef & Rice Simple Recipe
If you’re looking for a tasty and easy dinner idea, stuffed bell peppers with beef and rice is a perfect choice! This simple recipe brings
- 2 lbs beef chuck roast, cut into large chunks for optimal tenderness - 2 dried guajillo peppers, stems and seeds removed for a mild heat - 2 dried pasilla peppers, stems and seeds removed for depth of flavor - 1 large onion, quartered to enhance sweetness in the sauce - 4 cloves garlic, minced for aromatic richness - 2 teaspoons ground cumin for warmth - 1 teaspoon dried oregano for an herby note - 1 teaspoon smoked paprika to enhance smokiness - Salt and pepper to taste, to enhance flavors - 4 cups beef broth, homemade or low-sodium - 1 tablespoon apple cider vinegar for acidity - 12 small corn tortillas, fresh or store-bought - Chopped fresh cilantro and diced onions for garnish - Fresh cilantro and diced onions add great crunch and flavor - Lime wedges for serving, adding a fresh zest {{ingredient_image_2}} To start, toast the dried guajillo and pasilla peppers. Heat them in a dry skillet over medium heat. Watch them closely for 2-3 minutes. They will darken and smell great. Next, place the toasted peppers in a blender. Add the quartered onion, minced garlic, ground cumin, oregano, smoked paprika, and apple cider vinegar. Pour in 1 cup of beef broth. Blend this mixture until it is smooth. This sauce will be rich and flavorful. Set it aside for later. Now, it's time to sear the meat. Heat a tablespoon of oil in a large pot or Dutch oven over medium-high heat. Season the beef chunks with salt and pepper. Sear the meat in batches. Brown each piece for about 4-5 minutes on all sides. This step adds a deep flavor to the dish. Once browned, remove the beef and set it aside. In the same pot, pour in the blended sauce. Let it bubble for 3-4 minutes, stirring often. This helps deepen the flavors. After bubbling, return the seared beef to the pot. Add the remaining beef broth and bring it to a gentle simmer. Cover the pot and reduce the heat to low. Let it cook for about 2-3 hours. This long cooking time makes the meat fork-tender. When the beef is done, take it out and shred it with two forks. Return the shredded beef to the pot, mixing it well with the sauce. This way, every bite is juicy and full of flavor. To get the best texture and flavor from your birria, start with good meat. I recommend beef chuck roast. It's tender and full of flavor. Cut it into large chunks. This helps it cook evenly. Season the beef well with salt and pepper before searing. The browning adds a rich taste. When you make the sauce, toast the guajillo and pasilla peppers. This step brings out their natural flavors. Blend them with onion, garlic, and spices. A smooth sauce makes a big difference. After simmering the beef, shred it finely. This helps the meat soak up the sauce. For the most juicy tacos, use fresh corn tortillas. They hold up well and keep their texture. Heat them on a skillet for about 30 seconds on each side. This makes them soft and pliable, perfect for wrapping around the filling. If you can't find fresh tortillas, choose high-quality store-bought ones. Presentation matters! Serve your birria tacos on a colorful platter. Scatter chopped cilantro and diced onions over the top for a fresh look. Add lime wedges on the side. A squeeze of lime enhances the flavors. Don’t forget to serve small bowls of the reserved broth. This adds an interactive element to the meal. Guests can dip their tacos in the broth for extra flavor. It's a fun way to enjoy every bite! Pro Tips Choose the Right Cut: Opt for beef chuck roast for its marbling and tenderness, ensuring juicy and flavorful tacos. Toast the Peppers: Toasting the dried guajillo and pasilla peppers enhances their flavor profile, making your sauce richer and more aromatic. Let it Simmer: Allow the meat to simmer low and slow for at least 2-3 hours for fork-tender results and maximum flavor absorption. Serve with Broth: Offering a small bowl of reserved broth for dipping elevates the experience, allowing everyone to enjoy the juicy flavors in every bite. {{image_4}} You can switch up the beef for other meats. Pork or chicken are great choices. Pork brings a sweet flavor, while chicken offers a lighter taste. For pork, use a shoulder cut for tenderness. If you choose chicken, boneless thighs work best for juicy meat. Just follow the same cooking steps. You’ll still get delicious birria tacos. Want a spicy kick? You can adjust the heat with different peppers. Try adding dried chiles like arbol or chipotle. They add more heat and a smoky flavor. If you prefer less spice, use more guajillo peppers. You can also remove the seeds from the peppers to tone down the heat. Experiment until you find your perfect balance. If you want a healthier birria, consider some easy swaps. Use lean cuts of meat, like sirloin or chicken breast. For a gluten-free option, check your broth and tortillas. Many brands offer gluten-free tortillas made from corn. You can even add more veggies, like diced bell peppers or zucchini, to the filling. These changes keep the flavor while making it lighter. To store your juicy birria tacos, first let them cool down. Place the leftover meat in an airtight container. For the tortillas, wrap them in foil or keep them in a sealed bag. Make sure to separate the meat from the tortillas to keep them fresh. Store everything in the fridge. They will last for about 3-4 days. This way, you can enjoy them again soon. When you’re ready to eat, reheating is key. For the meat, use a skillet on low heat. Add a splash of beef broth to keep it moist. Stir occasionally until heated through. For the tortillas, warm them in a dry skillet or microwave. This helps maintain their soft texture. Avoid using high heat, as it can make them tough. If you want to save birria for later, freezing works well. Place the shredded meat in a freezer-safe bag. Squeeze out the air and seal it tightly. You can freeze the meat for up to 3 months. For the tortillas, wrap them well in plastic wrap before placing them in a freezer bag. To thaw, move the meat to the fridge overnight. Reheat as mentioned above. Enjoy your delicious tacos anytime! The best meat for birria tacos is beef chuck roast. This cut has good fat content. The fat keeps the meat juicy and tender. You can also use brisket or short ribs for added richness. Remember to cut the meat into large chunks. This helps it cook evenly and stay tender. Yes, you can make birria in a slow cooker. First, sear the meat in a pan. This step adds great flavor. After that, place the seared meat in the slow cooker. Pour the blended sauce over the meat. Cook on low for 6-8 hours. This will make the meat very tender and flavorful. You know the meat is done when it is fork-tender. Test it with a fork; it should shred easily. If it feels tough, let it cook longer. Look for a rich color and a juicy texture. This means the meat absorbed all the flavors well. Birria is a delicious dish made with beef chuck roast and flavorful dried peppers. You learned how to prepare the sauce, sear the meat, and achieve perfect texture. I shared tips on tortillas and serving ideas for a tasty meal. Feel free to tweak the recipe with different proteins or spice levels. Storing leftovers properly preserves taste, so don’t forget those steps. Enjoy making birria, whether for a gathering or a cozy night in!
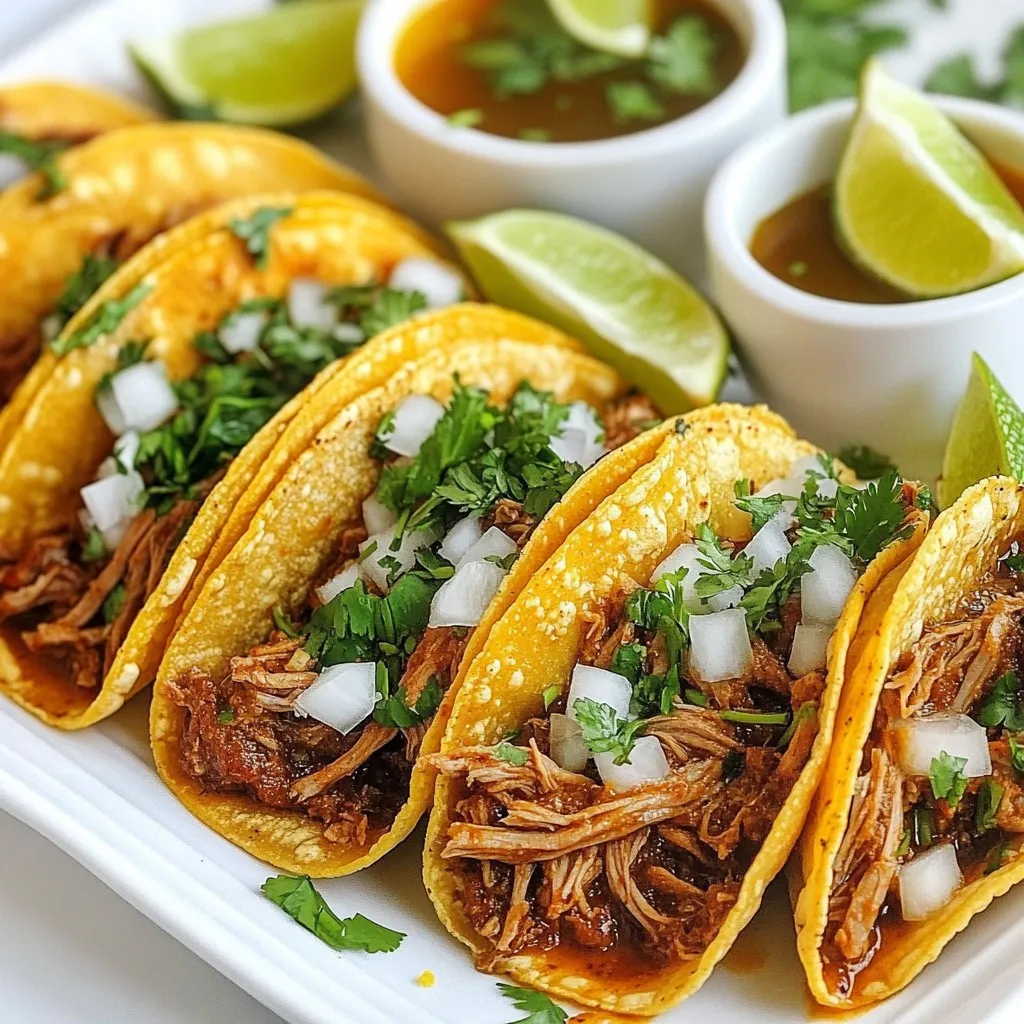
Juicy Birria Tacos Flavorful and Satisfying Meal
Craving something delicious and filling? Juicy Birria Tacos are the answer! This dish packs bold flavors and a satisfying texture, making it a perfect choice
- 1 lb (450g) ground beef - 1 cup (100g) breadcrumbs - 1 small onion, finely chopped - 2 cloves garlic, minced - 1 cup (100g) shredded cheddar cheese - 1/2 cup (120ml) milk - 1 large egg - 1 tablespoon Worcestershire sauce - 1 teaspoon dried Italian herbs - 1/2 teaspoon salt - 1/4 teaspoon black pepper The heart of this dish is the meatloaf. The ground beef gives it a nice texture. Breadcrumbs keep it moist and help it hold together. The onion and garlic add flavor, while cheddar cheese brings a cheesy twist. Milk helps blend everything perfectly. The egg acts as a binder, making sure it stays together. Worcestershire sauce gives a rich taste, and Italian herbs add a hint of warmth. Finally, salt and pepper make it all come alive. - 4 large potatoes, peeled and cubed - 1/2 cup (120ml) sour cream - 3 tablespoons butter For the mashed potatoes, I like to use large potatoes. They mash well and create a creamy texture. Sour cream adds a tangy flavor, making them rich. Butter gives them a smooth finish that everyone loves. - Chives for garnish (optional) To finish off your dish, add chives for a pop of color and freshness. You can also drizzle melted cheese over the meatloaf for an extra cheesy touch. If you want to spice things up, sprinkle some nutmeg in the potatoes for more flavor. {{ingredient_image_2}} First, set your oven to 350°F (175°C). Preheating helps the meatloaf cook evenly. It’s like warming up your car before a drive; it just works better! In a large bowl, mix together these ingredients: - 1 lb (450g) ground beef - 1 cup (100g) breadcrumbs - 1 small onion, finely chopped - 2 cloves garlic, minced - 1 cup (100g) shredded cheddar cheese - 1/2 cup (120ml) milk - 1 large egg - 1 tablespoon Worcestershire sauce - 1 teaspoon dried Italian herbs - 1/2 teaspoon salt - 1/4 teaspoon black pepper Use your hands or a spoon to combine everything. Be gentle and don’t overmix. This keeps the meatloaf tender and juicy! Next, transfer the mixture into a greased loaf pan. Press it down evenly. Bake in the preheated oven for 60-70 minutes. You want it to reach an internal temperature of 160°F (70°C). This means it's safe to eat! While the meatloaf bakes, prepare the potatoes. Take 4 large peeled and cubed potatoes and place them in a pot. Cover with salted water and bring to a boil. Cook for 15-20 minutes until tender. Drain well. Return the drained potatoes to the pot. Add in: - 1/2 cup (120ml) sour cream - 3 tablespoons butter Mash everything until creamy. Season with salt and pepper to taste. This step brings out the best flavors in your mashed potatoes. Once the meatloaf is done, let it sit for 10 minutes. Then, slice it up. Serve each slice with a generous scoop of mashed potatoes. For a nice touch, you can garnish with chopped chives. This adds color and a fresh taste! To keep your meatloaf juicy, use a mix of ground beef and breadcrumbs. The breadcrumbs soak up moisture, creating a soft texture. Don't overmix the meat; this can make it tough. Instead, mix just until combined. Adding Worcestershire sauce adds depth of flavor. Let the meatloaf rest for ten minutes before slicing. This helps keep it moist. To make creamy mashed potatoes, start with starchy potatoes like Russets. Boil them until tender but not mushy. Drain well to remove excess water. Return them to the pot and mash with sour cream and butter. This creates a rich and smooth blend. Season with salt and pepper to taste. For extra creaminess, use a potato ricer. Adding cheddar cheese to your meatloaf brings a delicious twist. The cheese melts and adds moisture and flavor. Mix it in with the meat before baking. You can also sprinkle some cheese on top during the last few minutes of baking. This gives a golden crust that's irresistible. For the mashed potatoes, consider adding cheese for a cheesy kick! Pro Tips Ingredient Freshness: Always use fresh ingredients for the best flavor. Fresh herbs and vegetables can significantly elevate the dish. Meatloaf Moisture: To keep your meatloaf moist, consider adding a layer of bacon on top before baking. This not only adds flavor but helps retain moisture. Mashed Potato Texture: For ultra-creamy mashed potatoes, use a potato ricer instead of a regular masher. This helps achieve a smooth, lump-free texture. Resting Time: Allow the meatloaf to rest for a few minutes after baking. This helps the juices redistribute, resulting in a more flavorful slice. {{image_4}} If you want to change things up in your meatloaf, you can try different meats. Ground turkey or chicken works well too. You can also use pork for a richer taste. If you're looking for a meat-free option, lentils or black beans make a great base. For added flavor, mix in diced bell peppers or carrots. You can even replace breadcrumbs with oats or crushed crackers for a gluten-free version. Mashed potatoes are great with various cheese types. While cheddar cheese is a classic, you can use cream cheese for extra creaminess. Parmesan adds a nice salty flavor, while gouda gives a smoky taste. For a bold twist, try blue cheese. Mixing different cheeses can create a unique flavor profile. Just remember to adjust salt levels to match the cheese you choose. Seasonal ingredients can boost your dish. In fall, add roasted pumpkin or butternut squash to your mashed potatoes. During summer, fresh herbs like basil or parsley can brighten the flavors. In winter, consider using root vegetables like parsnips in your mash. For meatloaf, seasonal spices like sage or thyme can enhance taste. These small changes keep the dish fresh and exciting all year round. To store leftover meatloaf, let it cool first. Wrap it tightly in plastic wrap or foil. Place the wrapped meatloaf in an airtight container. It will stay fresh in the fridge for up to four days. For longer storage, freeze it. Wrap it well in plastic and then in foil. Frozen meatloaf can last up to three months. Store mashed potatoes in a clean, airtight container. Let them cool before sealing. They can last in the fridge for up to three days. To freeze, put them in small portions. Use freezer-safe bags for easy thawing later. Mashed potatoes can be stored in the freezer for about two months. To reheat meatloaf, preheat your oven to 350°F (175°C). Place the meatloaf in a baking dish. Add a splash of beef broth or water to keep it moist. Cover it with foil to prevent drying out. Heat for about 20-25 minutes, or until warmed through. For mashed potatoes, use a microwave. Heat them in short bursts, stirring in between. Add a little milk or butter to keep them creamy. Cook the meatloaf for 60 to 70 minutes at 350°F. This time ensures it reaches 160°F inside. Use a meat thermometer for best results. You can serve a fresh salad, steamed veggies, or green beans. They add color and balance to the meal. Yes, you can prepare the meatloaf mixture and store it in the fridge. Shape it and bake it later. This saves time on busy days. Ground beef works best for meatloaf. It gives a rich flavor and good texture. You can mix in ground pork or turkey for variety. Add breadcrumbs and an egg to bind the meat. Avoid overmixing the meatloaf mixture. This keeps it tender and helps it hold together. In this post, we explored the key ingredients for cheesy meatloaf and creamy mashed potatoes. I shared step-by-step instructions to help you cook both dishes perfectly. You learned tips for juicy meatloaf and creamy potatoes, plus some tasty variations. Proper storage and reheating methods will keep your meals fresh longer. Cooking can be simple and fun. With the right ingredients and techniques, you’ll impress anyone at your table. Enjoy these recipes as a comforting meal for family or friends. Keep experimenting to find your unique twist!
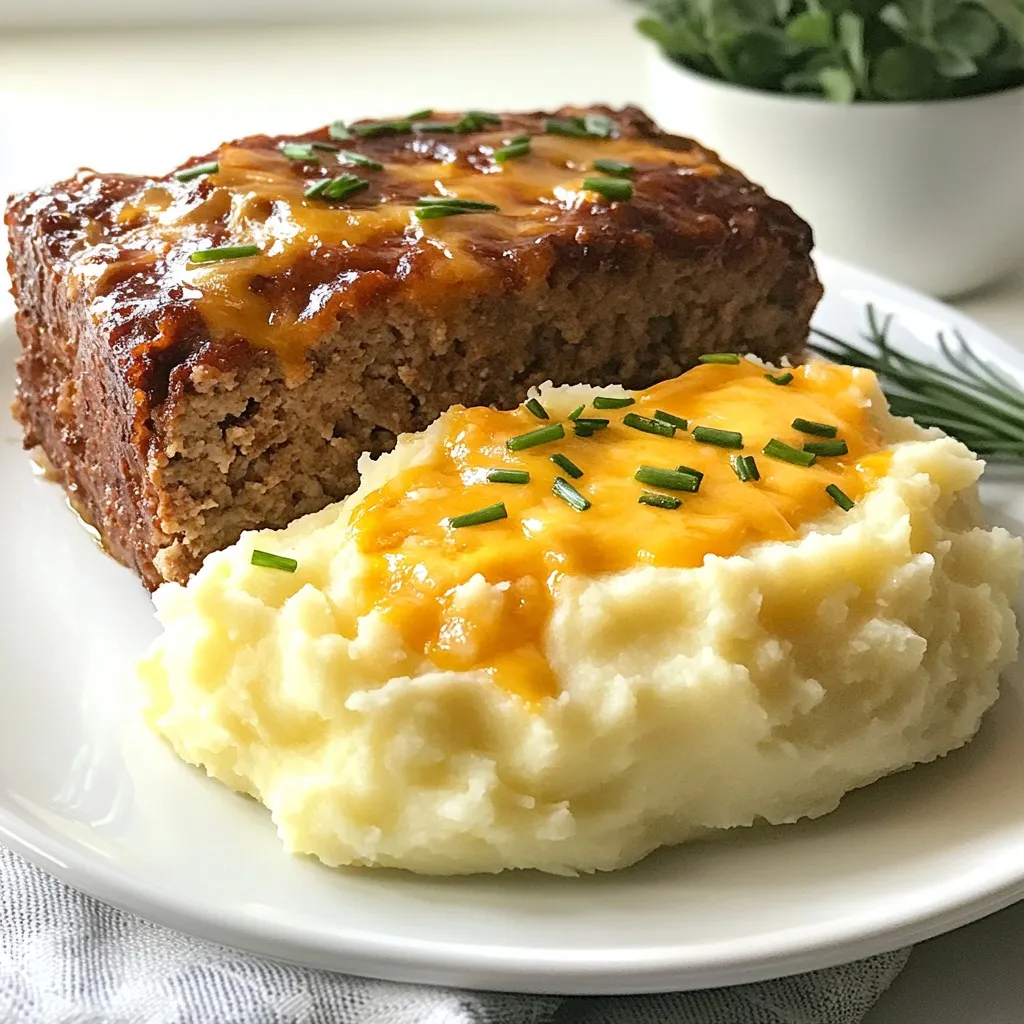
Cheesy Meatloaf and Mashed Potatoes Comfort Dish
Craving comfort food? Look no further! Cheesy Meatloaf and Mashed Potatoes is the perfect dish for cozy nights. This recipe blends savory meatloaf with creamy,
- 4 large flour tortillas - 1 cup shredded cheddar cheese - 1 cup shredded Monterey Jack cheese - 1 cup cooked and seasoned ground beef or black beans - 1 cup cooked rice (white or brown) - 1 medium tomato, diced - 1/2 cup sour cream - 1/4 cup chopped fresh cilantro - 1 ripe avocado, sliced - 1 teaspoon taco seasoning - Cooking spray or butter for grilling These ingredients will help create a tasty grilled cheese burrito. Each item plays a key role in the flavor and texture. The cheeses melt beautifully, while the seasoned beef or beans add depth. The rice fills the burrito, making it hearty. Fresh tomato, avocado, and cilantro bring brightness. Sour cream adds creaminess and balances flavors. Remember, you can swap out the beef for beans to make it vegetarian. Enjoy each bite of your creation! {{ingredient_image_2}} To start, mix your ground beef or black beans with the cooked rice in a bowl. This gives your burrito a hearty base. Next, add one teaspoon of taco seasoning and one medium diced tomato to the mix. This will bring in the flavor. Stir everything well until the ingredients blend evenly. Lay a large flour tortilla flat on a clean surface. Grab a quarter of your cheese mixture, which is half cheddar and half Monterey Jack, and place it in the center of the tortilla. On top of the cheese, add a quarter of your beef or rice filling. Don't forget to add a generous dollop of sour cream, a few slices of ripe avocado, and a sprinkle of fresh cilantro. This step is key for layers of flavor. To secure the filling, first fold in the sides of the tortilla. Then, roll the tortilla tightly from the bottom to the top. This ensures everything stays inside. Preheat a grill pan or skillet on medium heat. Lightly coat it with cooking spray or a bit of butter. Place the burritos seam-side down in the pan. Grill each side for about 3-4 minutes until golden brown and crispy. You'll know they are ready when the cheese inside melts perfectly. To grill your burritos just right, use medium heat. This helps melt the cheese and crisp the tortilla. If the heat is too high, the outside will burn before the inside cooks. Using cooking spray or butter is key. It gives a nice, golden crust and adds flavor. Make sure to coat the grill pan or skillet lightly before adding the burritos. This step is simple but makes a big difference. Adding spices can make your burrito pop. Try a pinch of garlic powder or smoked paprika for more flavor. These spices add warmth without being too strong. When picking tortillas, choose large flour ones. They are soft and hold the filling well. Look for ones that are fresh and pliable for the best results. Fresh tortillas make a big difference in taste and texture. Plating can elevate your meal. Serve each burrito on a colorful plate. This adds visual interest. Pair it with a small bowl of salsa and a wedge of lime. It looks great and adds extra flavor. For garnishing, sprinkle fresh cilantro on top. You can also add a dollop of sour cream for a creamy touch. These simple steps make your burrito look as good as it tastes. Pro Tips Use Fresh Ingredients: Always opt for fresh vegetables and herbs, as they enhance the flavor and texture of your burrito. Perfectly Melted Cheese: For an even melt, bring your cheese to room temperature before adding it to the burrito filling. Toast the Tortillas: Lightly toasting the tortillas before assembly adds an extra layer of flavor and helps prevent them from tearing. Customize Your Fillings: Feel free to swap out proteins and add veggies like bell peppers or corn for a personalized touch. {{image_4}} You can easily swap ground beef for black beans. This change keeps the burrito hearty and satisfying. Black beans add protein and fiber. They also bring a rich flavor that complements the other ingredients. For toppings, consider adding grilled peppers, corn, or diced jalapeños. You might also enjoy fresh lettuce or a dollop of guacamole. These choices boost flavor while keeping it plant-based. While cheddar and Monterey Jack are classic, don’t stop there! Try pepper jack for a spicy kick, or goat cheese for creamy richness. Mixing cheeses can create a gourmet experience. For a fun twist, use mozzarella for stretchiness or blue cheese for bold flavor. Don’t be afraid to experiment; the right cheese can elevate your burrito. You can easily adjust the spice levels to suit your taste. If you love heat, add more taco seasoning or some crushed red pepper flakes. For a milder version, skip the seasoning altogether. Toppings like sour cream, avocado, or fresh salsa can also help balance flavors. Try adding some fresh lime juice for a zesty touch! These small changes can make a big difference in your meal. To keep your burritos fresh, cool them first. Let them sit at room temperature for no more than two hours. Wrap each burrito tightly in plastic wrap. You can also use aluminum foil for extra protection. Place the wrapped burritos in an airtight container. This keeps them safe from freezer burn. When you want to enjoy your leftovers, use the oven or a skillet. The oven keeps the burrito crispy. Preheat it to 350°F (175°C). Place the burrito on a baking sheet for about 15-20 minutes. If using a skillet, heat it over medium heat for about 5 minutes on each side. Cover it with a lid. This helps the cheese stay melty and fresh. To freeze your burritos, wrap them well in plastic wrap. Place them in a freezer-safe bag. Be sure to squeeze out as much air as possible. This helps keep them fresh for up to three months. When you're ready to eat, take a burrito out. Let it defrost in the fridge overnight. For quick thawing, use the microwave for 1-2 minutes on low power. After thawing, reheat as described above to enjoy that cheesy goodness. Yes, you can make these burritos ahead of time. To do this, prepare the filling and assemble the burritos. Wrap each burrito tightly in plastic wrap. Store them in the fridge for up to two days. You can also freeze them for up to three months. Just remember to thaw them in the fridge overnight before grilling. This way, you'll enjoy a quick meal without losing flavor. If you need a tortilla substitute, try using lettuce wraps for a low-carb option. Rice paper wraps also work well for a gluten-free choice. You can use large cabbage leaves if you want a sturdy wrap. These alternatives add a fresh twist to your grilled cheese burrito. To keep your burritos from leaking, focus on folding them tightly. Start by folding in the sides to cover the filling. Then roll the tortilla from the bottom upwards, pressing gently. Use enough filling, but don’t overstuff. This balance helps secure everything inside. Grilling seam-side down first also helps seal the burrito and prevents spills. You learned how to make Grilled Cheese Burritos and all the tasty options. With simple steps, you can mix flavors, grill them just right, and make them your own. Don't forget to store leftovers correctly or freeze them for later. These tips help you serve them fresh every time. Exploring variations keeps your meals exciting. You can share these fun recipes with your friends and family. Enjoy creating and tasting your homemade burritos!
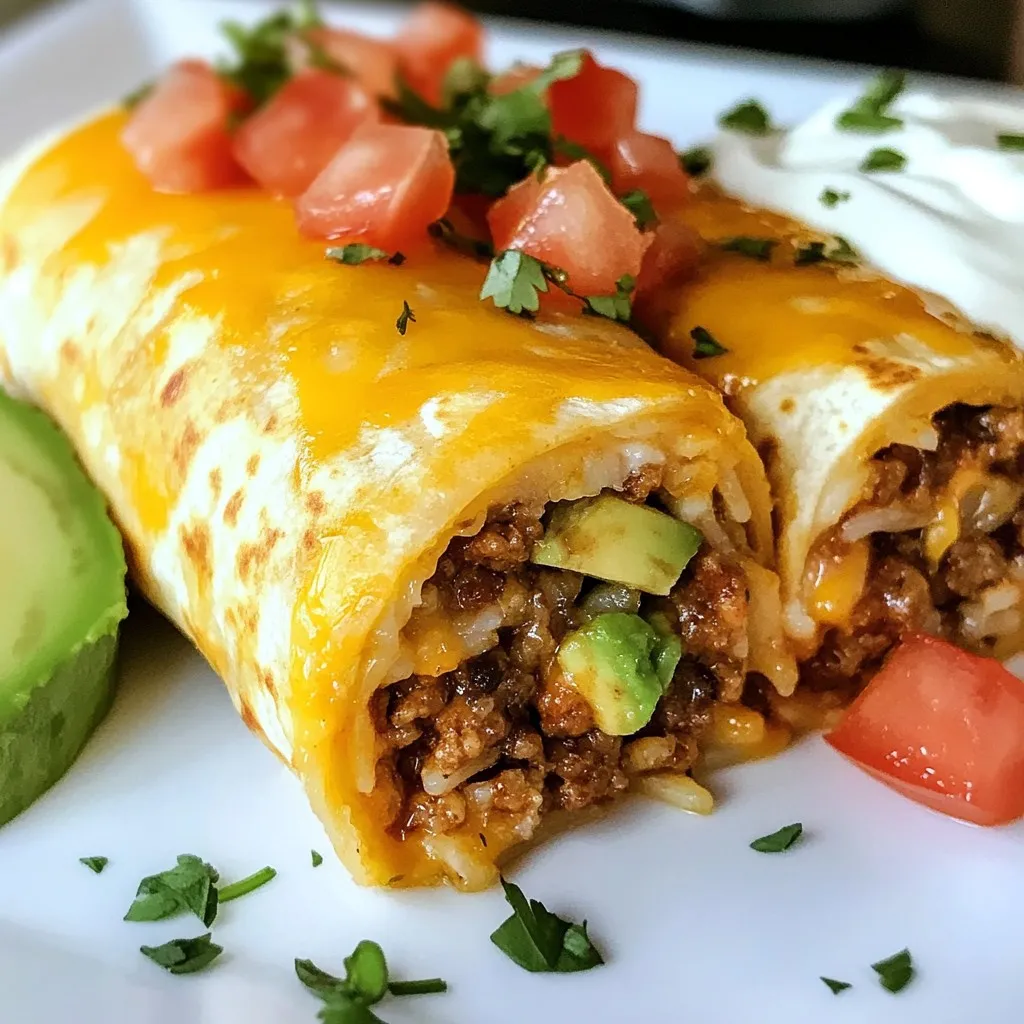
Grilled Cheese Burrito Copycat Recipe to Savor
Craving a tasty twist on classic comfort food? This Grilled Cheese Burrito Copycat recipe combines cheesy goodness with the flavorful kick of a burrito. With
For these chicken fajitas, gather these main items: - 2 large chicken breasts, thinly sliced into strips - 1 red bell pepper, sliced into thin strips - 1 green bell pepper, sliced into thin strips - 1 yellow onion, sliced into rings These ingredients provide a great mix of flavors and colors. The chicken gives protein, while the peppers and onion add sweetness and crunch. Next, you need these spices to bring out the taste: - 3 tablespoons extra virgin olive oil - 2 teaspoons chili powder - 1 teaspoon ground cumin - 1 teaspoon smoked paprika - Sea salt and freshly cracked black pepper to taste - Juice of 1 lime These spices create a warm and smoky flavor. The lime juice adds a fresh kick that brightens the dish. Finally, consider these garnishes and serving ideas: - Fresh cilantro leaves, chopped, for garnish - Warm tortillas, for serving Cilantro adds a fresh note, while warm tortillas make it easy to enjoy. You can also add toppings like salsa or guacamole for extra flavor. {{ingredient_image_2}} First, set your oven to 450°F (230°C). This high heat helps the chicken and veggies roast well. While the oven heats, prepare your ingredients. Slice the chicken breasts into thin strips. Cut the red and green bell peppers into thin strips, and slice the onion into rings. Having everything ready makes cooking smooth. In a large bowl, combine the sliced chicken, bell peppers, and onion. Next, drizzle three tablespoons of extra virgin olive oil over them. Sprinkle in two teaspoons of chili powder, one teaspoon of ground cumin, and one teaspoon of smoked paprika. Add sea salt and black pepper to your taste. Use your hands or a spatula to mix until everything is well-coated. This step is crucial for flavor. Now, spread the chicken and vegetable mix evenly on a large, rimmed sheet pan. Avoid overcrowding to ensure even cooking. Place the pan in your preheated oven. Roast for 20-25 minutes. Halfway through, stir the mix to cook it evenly. The chicken should no longer be pink, and the veggies should be tender with slight char marks. Once done, remove the pan and squeeze the juice of one lime over the dish for a zesty kick. Garnish with fresh cilantro leaves. Serve hot with warm tortillas. Enjoy your meal! To get perfectly cooked chicken, slice it thinly. Thin strips cook faster and stay juicy. Use fresh chicken breasts for the best flavor. Make sure your oven is preheated to 450°F. This high heat helps the chicken roast quickly and evenly. Stir the chicken halfway through cooking. This gives you even browning and prevents any dry spots. For the best vegetable texture, cut your peppers and onions into thin strips. This helps them cook at the same rate as the chicken. Use a mix of red and green peppers for color and flavor. Spread everything out on the sheet pan. Avoid overcrowding to allow steam to escape. This ensures your veggies get nice and charred, giving you a tasty crunch. Serve your fajitas straight from the sheet pan for a fun, casual look. You can also plate them individually. Place warm tortillas on the side for easy wrapping. Top with fresh cilantro for a pop of color. Add lime wedges for extra zest. For more flavor, consider small bowls of salsa or guacamole. This way, everyone can customize their fajitas just how they like! Pro Tips Choose the Right Chicken: Opt for organic, free-range chicken breasts for better flavor and texture. Don't Skip the Lime: Fresh lime juice not only adds brightness but also balances the spices beautifully. Customize Your Spices: Feel free to adjust the spice levels by adding more chili powder or including jalapeños for extra heat. Serve Immediately: For the best taste and texture, serve the fajitas right out of the oven while they're still sizzling hot. {{image_4}} You can easily swap chicken for beef or shrimp. This change gives a fresh taste. Try using zucchini or mushrooms instead of bell peppers. They add a nice texture. You can also use corn for a sweet crunch. If you want a vegetarian option, go for tofu. It soaks up flavors well. Spice things up with different seasonings. Use taco seasoning for a classic twist. For a smoky depth, add chipotle powder. If you love heat, cayenne pepper brings the fire. You can also mix in garlic powder for more flavor. Each spice gives a new vibe to your fajitas. Tortillas are great, but there are other fun ways to serve fajitas. Try over rice for a filling meal. You can even use lettuce leaves for a low-carb option. Another idea is to layer the fajita mix on nachos. Top with cheese and bake until bubbly. Each option makes fajitas exciting and new! To keep your Minute Sheet Pan Chicken Fajitas fresh, store them in an airtight container. Allow the fajitas to cool before sealing. This helps prevent moisture buildup. Store them in the fridge for up to three days. If you plan to eat them later, make sure to use a clean spoon to avoid contamination. Reheat your fajitas in the oven for the best texture. Preheat your oven to 350°F (175°C). Place the fajitas on a baking sheet and cover with foil. Heat for about 15 minutes or until warmed through. If you’re in a hurry, you can use the microwave. Place the fajitas in a microwave-safe dish and cover. Heat in 30-second intervals until hot. You can freeze the fajitas for later use. Place cooled fajitas in a freezer-safe bag or container. Remove as much air as possible before sealing. They can last in the freezer for up to three months. To thaw, move them to the fridge overnight. Reheat as mentioned above for the best taste and texture. It takes about 35 minutes to make these fajitas. You spend 10 minutes prepping the food. Then, you roast the chicken and veggies for 20 to 25 minutes. This quick method is perfect for busy nights. I do not recommend using frozen chicken. It takes longer to cook and may not cook evenly. Fresh chicken helps keep the fajitas tender and juicy. If you have only frozen chicken, thaw it first in the fridge. You can serve fajitas with warm tortillas. Add toppings like salsa, guacamole, or sour cream. Rice or beans also pair well. For a fresh touch, add a side salad or corn. Enjoy customizing your meal! We covered all you need for delicious chicken fajitas. You learned the ingredients, cooking steps, and tips for perfect results. Remember, variations can add fun. Store leftovers right, and they’ll taste great later. This dish is easy, fun, and full of flavor. Try it out next time you cook! Enjoy your meal and share it with friends!
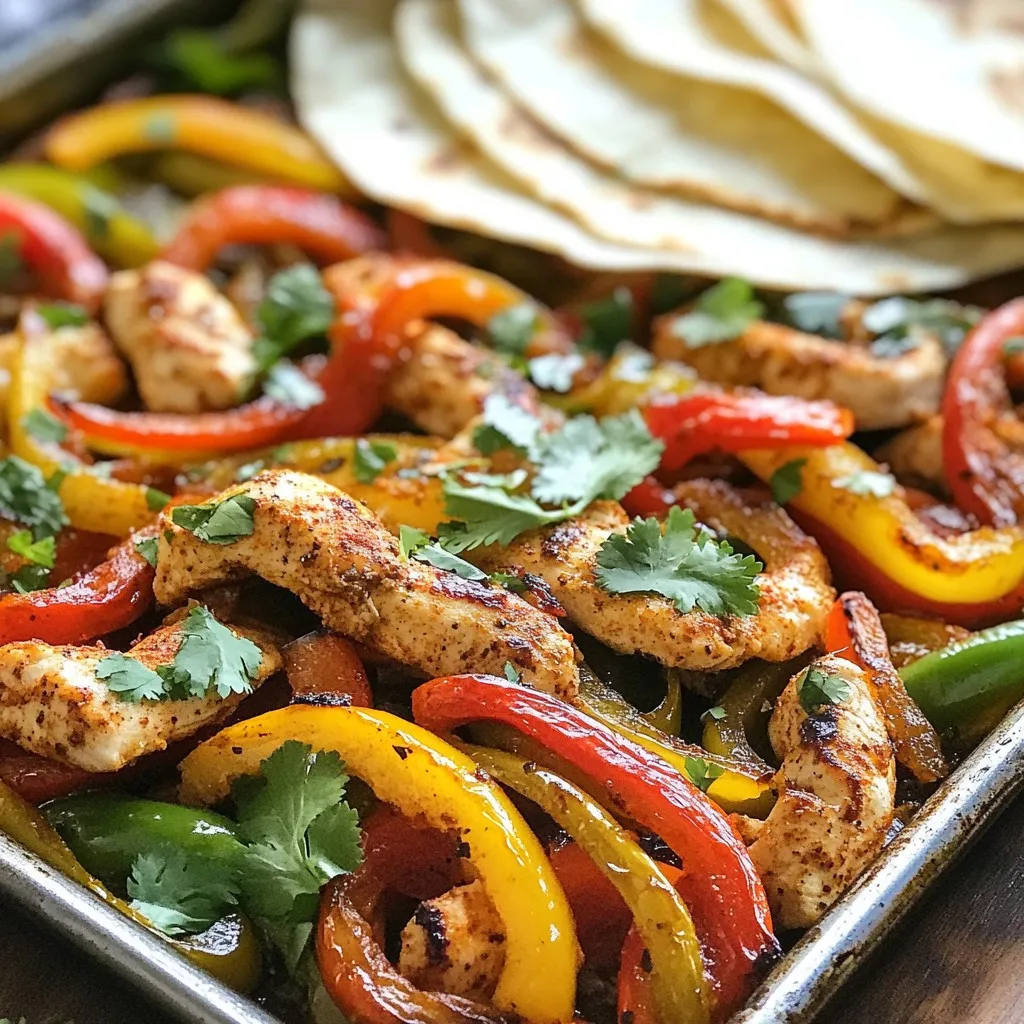
Minute Sheet Pan Chicken Fajitas Simple and Quick
Looking for a fast and tasty meal? Let me show you how to make Minute Sheet Pan Chicken Fajitas. This dish is simple, quick, and