Dinner

To make Chicken Alfredo Garlic Bread Bowls, you need a few key ingredients that bring rich flavor and comfort. Here’s what you will need: - 2 large loaves of soft Italian bread - 2 cups cooked chicken breast, shredded - 1 cup heavy cream - 1 cup grated Parmesan cheese - 2 tablespoons butter - 4 cloves garlic, minced - 1 teaspoon garlic powder - 1 teaspoon Italian seasoning - Salt and pepper to taste - Fresh parsley, chopped (for garnish) These ingredients form the base of this hearty dish. The soft Italian bread serves as the perfect vessel for the creamy Alfredo mixture. The chicken adds protein, while the garlic and seasonings elevate the flavor. Don’t forget the fresh parsley on top; it adds a nice pop of color and taste. Using quality ingredients makes a big difference. I always recommend fresh garlic for the best flavor. Each ingredient plays a role in creating a comforting and satisfying meal. Let’s get cooking! {{ingredient_image_2}} 1. Preheat the oven: Start by setting your oven to 350°F (175°C). This step ensures your bread bowls bake evenly. 2. Hollowing out the bread: Take your large loaves of soft Italian bread. Carefully slice off the top of each loaf. Use a spoon to scoop out the soft insides. Aim for a sturdy half-inch shell. Keep the bread you scoop out; it’s great for breadcrumbs or dipping. 3. Preparing the leftover bread: Store the scooped-out bread in a bag. You can use it later for other recipes. It won’t go to waste! 1. Melting butter and sautéing garlic: In a medium saucepan, melt 2 tablespoons of butter over medium heat. When it’s bubbly, add 4 minced garlic cloves. Sauté for about 1 minute. Stir often until it smells great, but don’t let it brown. 2. Combining cream and cheese: Gradually pour in 1 cup of heavy cream. Stir as it gently simmers. Then, mix in 1 cup of grated Parmesan cheese, 1 teaspoon of garlic powder, and 1 teaspoon of Italian seasoning. Add salt and pepper to taste. Keep whisking until the sauce is smooth and thickens a bit, which takes about 3-5 minutes. 3. Adding seasonings and chicken: Stir in 2 cups of shredded chicken. Make sure every piece gets coated with that creamy sauce. Remove the saucepan from heat to stop it from cooking further. 1. Filling the bread bowls: Carefully fill each hollowed bread bowl with the warm chicken Alfredo mixture. Press down gently to pack it in, but don’t overfill. 2. Baking process: Place the filled bread bowls on a baking tray. Transfer them to your preheated oven. Bake for about 15-20 minutes. Watch for the tops to get toasted and the bread to turn golden brown. 3. Garnishing the bowls: Once they’re out of the oven, let them cool for a few minutes. Then, sprinkle chopped fresh parsley on top. This adds a nice touch of color and freshness. To make a smooth Alfredo sauce, start by melting butter in a pan over medium heat. Add minced garlic and cook it for one minute. Then, pour in the heavy cream slowly while stirring. This helps blend the cream well. Mix in grated Parmesan cheese next. Keep stirring as it thickens. For taste, add salt and pepper. If you want more flavor, sprinkle in a bit of garlic powder or Italian seasoning. Taste the sauce and adjust as you like. For a great look, serve the bread bowls on a rustic wooden board. You can also use a large platter. Place a small dish of the scooped-out bread pieces next to the bowls. This invites people to dip into the Alfredo sauce. For a fresh touch, add a simple side salad. A mixed green salad pairs well with rich Alfredo flavors. When choosing bread, pick soft Italian loaves. Avoid bread that is too hard or crusty. This will help you create a good bowl that holds the sauce. Another mistake is overfilling the bowls. Pack the chicken Alfredo gently inside. If you overfill, the bread can break or overflow. Keep it neat for better taste and a nice presentation. Pro Tips Choose the Right Bread: Opt for soft Italian bread as it provides the perfect texture and flavor for these bowls. A crusty bread may crack under the weight of the filling. Perfectly Cooked Chicken: Use pre-cooked or leftover chicken for convenience, but ensure it's moist. If using raw chicken, consider poaching it for a tender result. Customize the Sauce: Feel free to add vegetables like spinach or broccoli to the Alfredo mix for extra nutrition and color. This will elevate the dish even further. Serving Suggestions: Serve with a side salad or steamed vegetables to balance the richness of the Alfredo and add freshness to the meal. {{image_4}} You can switch up the protein in your Chicken Alfredo Garlic Bread Bowls. Try shrimp or mix in some sautéed vegetables. Bell peppers, spinach, or mushrooms add great taste and color. If you want a dairy-free option, use nut milk or coconut cream for the sauce. Nutritional yeast can replace Parmesan cheese, giving it a cheesy flavor without dairy. To boost flavor, add spices or herbs to your Alfredo sauce. A pinch of red pepper flakes adds heat. Fresh basil or thyme can brighten the dish. You can also mix in vegetables to the creamy sauce. Try adding peas or broccoli for added texture and flavor. This not only makes the dish more colorful, but it also packs in more nutrients. For fun appetizers, make mini bread bowls. Use small rolls instead of large loaves. These bite-sized treats are perfect for parties. You can also try different types of bread. Sourdough or whole wheat can give a unique taste. Each bread type changes the flavor and texture, making this dish versatile and exciting. To keep your leftover bread bowls fresh, store them in an airtight container. This keeps moisture out and preserves the bread. You can also wrap them tightly in plastic wrap or foil. They last about 2-3 days in the fridge. After that, they may become stale. For reheating, the oven is your best friend. Preheat it to 350°F (175°C). Place the bread bowls on a baking sheet. Heat for 10-15 minutes until warm. This method keeps the bread crispy. Avoid using the microwave; it makes the bread soggy. If you have leftover Alfredo sauce, it’s great for pasta! Toss it with any cooked pasta and some veggies. For leftover chicken, you can make a tasty chicken salad. Just mix shredded chicken with mayo, celery, and spices. These ideas help you waste less food! I recommend using soft Italian bread. It has a nice texture and holds the filling well. You can also try French bread for a crusty outside. Both options work great for these bowls. Yes, you can! Make the sauce ahead of time and store it in the fridge. Just let it cool before putting it in a container. When ready to use, reheat it gently on the stove or in the microwave. To make it lighter, use low-fat cream instead of heavy cream. You can also substitute grilled chicken for rotisserie chicken. Adding more veggies, like spinach or broccoli, boosts nutrition too. Yes, you can freeze them! Just make sure they are completely cool before wrapping. Use plastic wrap and then foil to keep them fresh. When ready to eat, thaw them in the fridge and reheat. These bowls pair well with a simple salad, like Caesar or mixed greens. You can also serve them with garlic bread or roasted vegetables for a full meal. In this post, we explored how to create delicious Chicken Alfredo Garlic Bread Bowls. We covered the key ingredients, easy steps to prepare, and helpful tips to enhance flavor. Remember to choose the right bread and avoid overfilling your bowls. You can even try fun variations with different proteins or spices. This dish not only tastes amazing but also impresses at any meal. Try it, and enjoy the rich, creamy goodness in every bite!
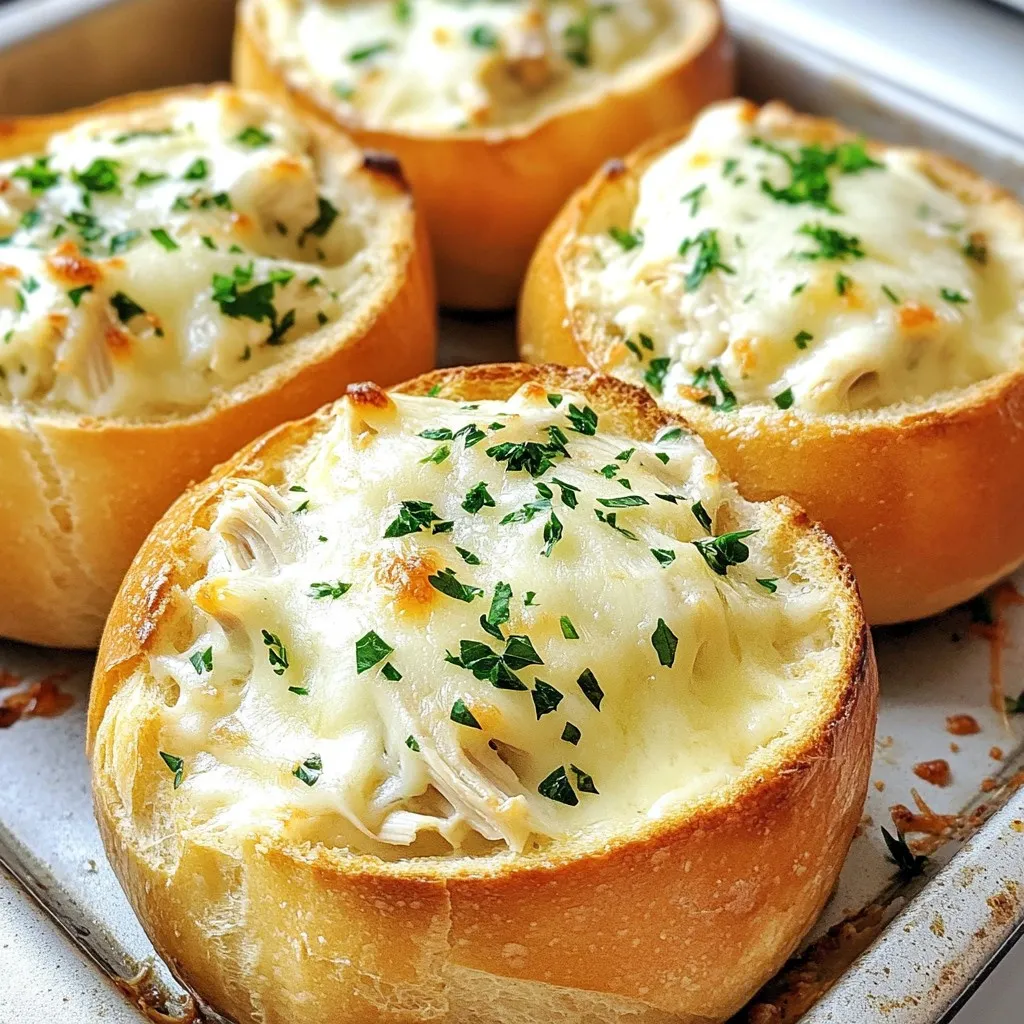
Chicken Alfredo Garlic Bread Bowls Delightful Recipe
If you’re craving a warm, cheesy comfort food, look no further! My Chicken Alfredo Garlic Bread Bowls are a delightful way to enjoy a classic
- 4 large russet potatoes, peeled and cut into 1-inch cubes - 1 medium onion, finely diced - 3 cloves of garlic, minced - 4 cups vegetable broth - 1 cup heavy cream - 1 cup shredded cheddar cheese - 1/2 cup sour cream - 4 slices turkey bacon, crumbled (optional) - 1/4 cup green onions, chopped - Salt and pepper, to taste - 2 tablespoons unsalted butter - 1 teaspoon smoked paprika When I make Loaded Baked Potato Soup, I focus on fresh, quality ingredients. The russet potatoes give a creamy texture that makes this soup a delight. I peel and cube them into 1-inch pieces for even cooking. Onions and garlic add depth to the flavor. I finely dice the onion for a sweet, soft base. The minced garlic brings a nice punch that mixes well with the broth. For the broth, I use vegetable broth as it adds richness without overpowering the potato flavor. The heavy cream is key for that creamy finish. I also mix in sour cream for tang and extra creaminess. Cheddar cheese is a must. I love using the sharp kind because it melts perfectly and adds a wonderful taste. If you enjoy bacon, crumbled turkey bacon gives that smoky touch. Green onions make a great garnish. They add a pop of color and fresh taste. Always season with salt and pepper to enhance all the flavors. Finally, unsalted butter and smoked paprika round out the dish. The butter helps with sautéing, and the paprika adds a warm, smoky hint. These ingredients come together to create a cozy, comforting soup you’ll love. {{ingredient_image_2}} - Sauté onion and garlic in butter - Add potatoes and vegetable broth To start, take a large pot and melt two tablespoons of unsalted butter over medium heat. Once it's hot, add one finely diced onion and three minced garlic cloves. Stir them around for about five minutes. You want the onion soft and clear. Now, add four large russet potatoes, cut into one-inch cubes. Pour in four cups of vegetable broth. This mix is where the magic begins. - Simmer until potatoes are tender - Purée soup to desired consistency Bring the pot to a rolling boil. Once it boils, lower the heat to let it simmer. Let it bubble gently for about 15 to 20 minutes. You’ll know it’s done when the potatoes are fork-tender. Next, use an immersion blender to purée the soup. You can blend it until smooth or leave some chunks. It’s up to your taste. - Stir in cream, cheese, sour cream, and paprika - Add crumbled bacon and season to taste Once you have the right texture, it’s time to add creaminess! Stir in one cup of heavy cream, one cup of shredded cheddar cheese, and half a cup of sour cream. Don’t forget one teaspoon of smoked paprika for a nice smoky flavor. Let it simmer gently for another five to ten minutes. Finally, fold in four slices of crumbled turkey bacon if you want. Season with salt and black pepper to make it perfect. Serve hot and enjoy every creamy bite! How to choose the best potatoes for soup When picking potatoes, look for russets. They are starchy and creamy. Choose ones without blemishes or dark spots. Fresh potatoes will give your soup a nice texture. Importance of sautéing onions Sautéing onions brings out their sweet flavor. Cook them in butter until soft. This step adds depth to your soup. It also makes your kitchen smell amazing! Achieving the perfect soup consistency You want a creamy soup, but some chunkiness is good too. Start by blending half the soup. This keeps some potato pieces for texture. If you like it smooth, blend all of it. Tips on blending for chunkiness vs. creaminess Use an immersion blender for easy blending. If you want a creamy soup, blend longer. For more chunks, blend just a little. Adjust to your taste. Recommended spices to elevate flavor Add smoked paprika for a warm, smoky taste. A pinch of pepper adds heat. These spices make your soup richer. Don’t forget to taste and adjust as you go! Suggestions for garnishing the soup Top your soup with green onions and extra cheese. A dollop of sour cream adds creaminess. You can also sprinkle bacon bits for crunch. This makes the soup look and taste better! Pro Tips Choose the Right Potatoes: For the best texture and flavor, use russet potatoes as they provide a fluffy and creamy base for the soup. Enhance the Flavor: Consider adding a splash of white wine or a dash of Worcestershire sauce while cooking to deepen the soup's flavor profile. Texture Control: If you prefer a creamier soup, blend all of the potatoes. For a heartier version, blend just half and leave chunks for added texture. Garnish Creatively: Experiment with different toppings like crispy shallots, fresh herbs, or a drizzle of olive oil to elevate your soup presentation. {{image_4}} You can easily make Loaded Baked Potato Soup fit your diet. For gluten-free options, just check your broth label. Most vegetable broths are gluten-free, so you're good to go. If you're vegetarian or vegan, swap the heavy cream for coconut milk or cashew cream. Use plant-based cheese, too. It will still taste great! Adding different types of cheese can make this soup even better. Try gouda or pepper jack for a fun twist. You can also mix in some grated parmesan for a salty kick. If you want more nutrition, add vegetables. Chopped kale or spinach works well. You can stir them in at the end for a pop of color and flavor. Pairing your soup with crusty bread or a fresh salad makes a great meal. The bread soaks up the soup. It’s perfect for dipping! For gatherings, consider serving the soup in small cups. This way, guests can easily enjoy a taste. You can also set up a toppings bar. Let everyone add their own green onions, cheese, or bacon. This adds fun to your meal! To keep your leftover soup fresh, use an airtight container. Glass or plastic containers work well. Make sure to let the soup cool to room temperature. This step helps prevent condensation. Once cooled, seal the container tightly. Label it with the date so you know when to use it. You can reheat your soup in two ways: microwave or stovetop. For the microwave, pour the soup into a bowl. Heat it for one minute, then stir. Repeat until it’s hot. For stovetop, pour the soup into a pot. Heat it on low, stirring often. To avoid a watery texture, add a bit more cream or cheese. This will help keep the soup thick and creamy. If you want to freeze the soup, use a freezer-safe container. Leave some space at the top for expansion. The soup can last up to three months in the freezer. To thaw, move the container to the fridge overnight. For quicker thawing, you can use the microwave on defrost mode. After thawing, reheat it on the stovetop. Stir often to keep the texture smooth. How long will Loaded Baked Potato Soup keep in the fridge? Loaded Baked Potato Soup can last for about 3 to 5 days in the fridge. Store it in an airtight container. It’s best to cool it before placing it in the fridge. Can I make this soup ahead of time? Yes, you can make this soup ahead of time. In fact, it often tastes better the next day! Just store it in the fridge and reheat when you’re ready to enjoy. Can I use low-fat cream instead of heavy cream? You can use low-fat cream, but the soup may not be as rich or thick. Heavy cream gives it a creamy texture that makes the soup so delightful. What are some alternatives to turkey bacon? If you want alternatives to turkey bacon, try regular bacon, or even veggie bacon. You can also skip the bacon for a lighter soup. Can I use a regular blender instead of an immersion blender? Yes, you can use a regular blender. Just be careful when blending hot soup. Blend in batches and hold the lid down with a towel to prevent spills. Is it necessary to peel the potatoes? Peeling the potatoes is not necessary. The skin adds texture and nutrients. If you like a heartier soup, keep the skins on for extra flavor. This blog post covered how to make a delicious Loaded Baked Potato Soup. We discussed the key ingredients like potatoes, cream, and cheese and shared step-by-step cooking instructions. I offered tips on texture and flavor, along with variations for special diets. Lastly, I covered how to store and reheat your soup properly. When you make this soup, enjoy its creamy richness and customizable options. You can impress family or friends with a comforting bowl that warms the soul.
Loaded Baked Potato Soup Creamy and Comforting Delight
Are you craving a warm and cozy bowl of Loaded Baked Potato Soup? This creamy dish packs flavors with every spoonful. I’ll show you how
- 2 cups cooked brown rice - 1 lb boneless, skinless chicken thighs, diced into bite-sized pieces - 1 cup broccoli florets, washed and trimmed - 1 cup bell peppers, sliced (choose a colorful mix) - 1 cup snap peas, washed - 1 tablespoon olive oil - 1 tablespoon sesame oil - ½ cup low-sodium teriyaki sauce - 2 cloves garlic, finely minced - 1 inch piece of ginger, finely grated The heart of these meal prep bowls is the chicken and fresh veggies. The chicken thighs are juicy, and they soak up the teriyaki sauce well. Brown rice gives you good fiber and fills you up. The mix of broccoli, bell peppers, and snap peas adds color and crunch. - Sesame seeds, for garnish - Green onions, thinly sliced for garnish I love to add sesame seeds and green onions on top. They add a nice crunch and fresh taste. You can also add chili flakes if you like heat. - For a vegetarian option, swap chicken for tofu or chickpeas. - Use quinoa or cauliflower rice instead of brown rice for a low-carb choice. - For gluten-free, ensure you pick a gluten-free teriyaki sauce. These swaps keep the dish tasty while fitting different diets. You can customize your meal prep bowls to suit your needs and tastes! {{ingredient_image_2}} To start, you need to marinate the chicken. In a mixing bowl, add 1 pound of diced chicken thighs. Then, include 2 cloves of minced garlic and 1 inch of grated ginger. Pour in half of the ½ cup of low-sodium teriyaki sauce. Mix everything well so the chicken is fully coated. Cover the bowl with plastic wrap. Place it in the refrigerator for at least 30 minutes. For best flavor, marinate overnight. Next, it’s time to cook the chicken. Heat a large skillet on medium-high heat. Add 1 tablespoon of olive oil and 1 tablespoon of sesame oil. Wait until the oils are hot, then add the marinated chicken. Cook for 6 to 8 minutes. Stir occasionally until the chicken is browned and reaches an internal temperature of 165°F. After cooking the chicken, it’s time for the veggies. In the same skillet, add 1 cup of broccoli florets, 1 cup of sliced bell peppers, and 1 cup of snap peas. Stir-fry these vegetables for 5 to 7 minutes. You want them to be tender-crisp and colorful. Then, pour in the remaining teriyaki sauce. Mix it all well and cook for another 2 minutes. This helps the sauce thicken and coat the chicken and veggies. Now for the fun part—assembling the meal prep bowls! Divide 2 cups of cooked brown rice evenly among four containers. On top of the rice, add a generous portion of the teriyaki chicken and sautéed vegetables. Make sure to distribute everything evenly for a balanced meal. To make your meal prep bowls look great, add some garnishes. Sprinkle sesame seeds over each bowl. Then, add thinly sliced green onions for a fresh touch. This not only adds flavor but also makes your bowls pop with color. Finally, let the meal prep bowls cool to room temperature. Once cooled, seal each container with a lid. Store them in the refrigerator for up to 4 days. This way, you have healthy meals ready to enjoy all week long. To cook chicken thighs well, start with a good marinade. I recommend using garlic and ginger with teriyaki sauce. This gives the chicken great flavor. After marinating, heat your skillet to medium-high. Add olive oil and sesame oil. Make sure the oil is hot before adding the chicken. Cook for about 6-8 minutes. Stir occasionally to brown the chicken evenly. Always check that the chicken reaches 165°F. This ensures it is safe to eat. Using the right oils can enhance your dish. I love a mix of olive oil and sesame oil. The olive oil cooks well while the sesame oil adds a nutty flavor. You could also use avocado oil for high heat cooking. It has a light taste and works great in stir-fries. Avoid oils with strong flavors that can overpower your meal. Meal prep can save you time during the week. I suggest cooking your rice in bulk. You can make a large batch and use it for several meals. Also, chop your veggies ahead of time. Store them in the fridge for quick access. When you marinate the chicken, do it overnight if you can. This gives it more time to soak up the flavors. Finally, consider using a microwave for quick reheating. This keeps your meal prep simple and fast! Pro Tips Marination Time: Allow the chicken to marinate overnight for deeper flavor absorption, making each bite more delicious. Vegetable Crunch: For extra crunch, add carrots or water chestnuts to the stir-fry, enhancing texture and flavor. Rice Substitute: You can swap brown rice with quinoa or cauliflower rice for a lower-carb option. Storage Tips: Use glass containers for meal prep; they keep food fresh longer and are microwave-safe. {{image_4}} You can change up the protein in these meal prep bowls. Chicken is a classic choice. If you want something plant-based, try tofu. Tofu absorbs flavors well and gives a nice texture. For a seafood option, shrimp works beautifully too. Just remember to adjust cooking times. Shrimp cooks fast, while tofu may need a bit longer to crisp up. Feel free to mix and match your veggies. Seasonal vegetables keep your bowls fresh and exciting. Try carrots, zucchini, or asparagus when they are in season. You can also use green beans or mushrooms. Just chop them into similar sizes for even cooking. The key is to keep your colors bright and flavors bold. If you need a gluten-free version, look for gluten-free teriyaki sauce. Many brands offer this now, so check the label. You can also make your own using tamari or coconut aminos. Both options are great for adding that sweet and savory flavor without gluten. To keep your teriyaki chicken meal prep bowls fresh, let them cool first. Place each bowl in a meal prep container with a tight lid. This will keep the food safe and tasty. Use glass or BPA-free plastic containers for the best results. Store them in the refrigerator for easy access. When you're ready to eat, reheating is key. For best results, use a microwave-safe container. Heat the meal on medium power for about 2-3 minutes. Stir halfway through to ensure even heating. If you prefer, you can reheat on the stove. Just add a splash of water to keep it moist. Stir until hot. These meal prep bowls can last in the fridge for up to four days. Check for signs of spoilage before eating. If the chicken looks dry or has an off smell, it’s best to toss it. Also, if the vegetables appear mushy or discolored, do not eat them. Always trust your senses to keep your meals safe. Yes, you can freeze these meal prep bowls. Just make sure they cool down first. Use airtight containers or freezer bags to avoid air. They last for about three months in the freezer. When ready to eat, thaw overnight in the fridge. Reheat in the microwave or on the stove until hot. There are many great sides for these bowls. You can serve them with: - Steamed dumplings - Fresh salad - Edamame - Miso soup - Roasted sweet potatoes These sides bring extra flavor and texture. Marinate the chicken for at least 30 minutes. For a deeper flavor, let it sit overnight. This allows the garlic and ginger to soak in. You’ll get tender, tasty chicken for your bowls. Teriyaki sauce can be healthy in moderation. It has sugar, but you can choose low-sodium options. This helps reduce salt intake. Look for sauces with natural ingredients. Homemade teriyaki sauce is another great choice. Absolutely! Brown rice is a great choice for more fiber. Quinoa adds protein and is gluten-free. Both options fit well with teriyaki chicken. Use what you enjoy most for your meal prep bowls. You learned how to make teriyaki chicken meal prep bowls with great flavor and ease. We covered key ingredients, steps for cooking, and tips to ensure success. You can choose options to fit your diet, like tofu or gluten-free sauce. Storing and reheating are simple, keeping your meals fresh. With these ideas, you can enjoy delicious and healthy meals all week. Meal prepping saves time and makes eating right easy and fun. Enjoy your cooking and the tasty results!
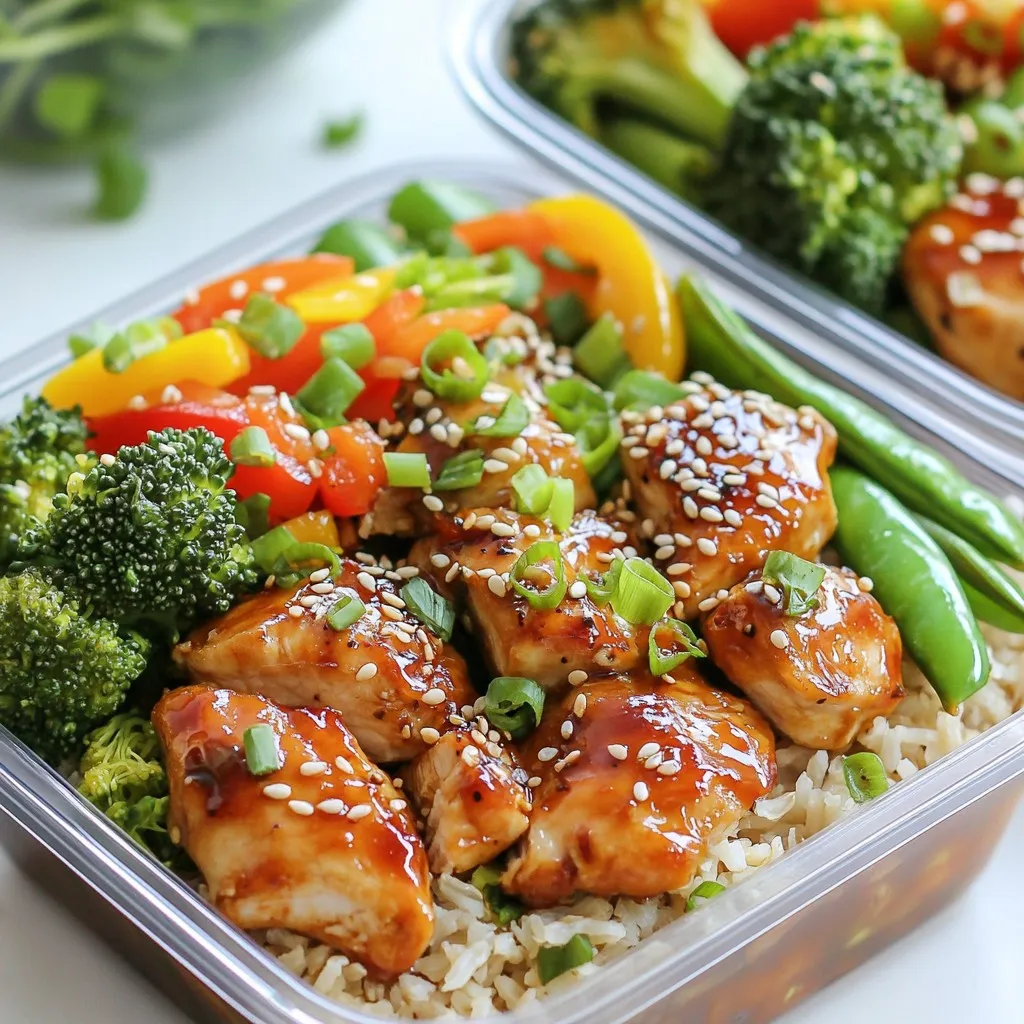
Teriyaki Chicken Meal Prep Bowls Easy and Tasty Recipe
Looking for a quick and tasty meal prep idea? Teriyaki Chicken Meal Prep Bowls are perfect for you! This easy recipe features juicy chicken, fresh
To make Million Dollar Chicken Casserole, gather these simple items: - 3 cups cooked chicken, shredded - 1 cup white rice, uncooked - 1 can (10.5 oz) cream of chicken soup - 1 cup sour cream - 1 cup shredded cheddar cheese (divided) - 1 cup frozen mixed vegetables (peas, carrots, corn) - 1 tablespoon garlic powder - 1 teaspoon onion powder - 1 teaspoon dried thyme - Salt and black pepper to taste - 1 cup panko breadcrumbs - 2 tablespoons melted butter You can add extra flavor with these items: - Fresh herbs like parsley or chives - Different types of cheese, like pepper jack or mozzarella - Fresh veggies such as bell peppers or spinach These can make the dish even more special. If you need swaps, here are some ideas: - Use rotisserie chicken for quick prep. - Swap white rice for brown rice or quinoa for a healthy twist. - Substitute Greek yogurt for sour cream for a lighter version. - Use cream of mushroom soup instead of cream of chicken for a different taste. These options let you customize the casserole to your likes! {{ingredient_image_2}} Start by preheating your oven to 350°F (175°C). This step is key. A hot oven helps cook the casserole evenly. While it warms up, gather your ingredients. You will need cooked chicken, rice, soup, sour cream, cheese, and more. Grab a large mixing bowl. Add the shredded chicken and uncooked rice. Next, pour in the cream of chicken soup and sour cream. Then, add half of the shredded cheddar cheese. Mix everything until it blends well. Now, add the frozen mixed veggies, garlic powder, onion powder, thyme, salt, and pepper. Stir again until it’s all combined nicely. Grease a 9x13-inch baking dish with cooking spray or butter. Spoon the chicken mixture into the dish, spreading it out evenly. In another bowl, mix the panko breadcrumbs with melted butter until coated. Sprinkle this mix on top of the chicken mixture. Then, add the remaining cheddar cheese for extra flavor. Cover the dish with aluminum foil to stop it from browning too fast. Place it in the preheated oven and bake for 25 minutes. After that, remove the foil and bake for another 15 to 20 minutes. The top should be golden brown and bubbly. Once done, let it cool for 5 minutes before serving. This helps it set for easier cutting. To get the best texture, use cooked chicken. Shred it well. This helps it mix evenly. The rice should be uncooked. It absorbs moisture and flavors as it cooks. Mixing the cream of chicken soup with sour cream adds creaminess. The frozen veggies bring color and crunch. Serve the casserole hot from the oven. It tastes best fresh. Pair it with a light salad. A crisp green salad balances the rich dish. You can also serve it with crusty bread. This adds texture and completes the meal. Make it look pretty! Serve it directly from the dish. Top it with fresh parsley or chives. This adds a splash of color. For an extra touch, sprinkle some cheddar cheese on top before serving. It will melt beautifully. Pro Tips Use Rotisserie Chicken: For a quicker option, consider using store-bought rotisserie chicken. It saves time and adds a delicious flavor. Customize Your Veggies: Feel free to swap out the frozen mixed vegetables for your favorites, such as broccoli, bell peppers, or spinach for added nutrition. Make Ahead: This casserole can be prepared in advance and stored in the fridge overnight. Just bake it when you're ready to serve. Leftover Magic: This dish is perfect for using up leftover chicken or turkey. Just shred and mix it in for a quick and hearty meal. {{image_4}} You can easily change up the flavors in this dish. Try using different cheeses like mozzarella or pepper jack for a kick. Swap the chicken for turkey or even a meat alternative for a fun twist. If you want more veggies, add bell peppers or broccoli. You can also mix in some cooked bacon or ham for extra flavor. Each swap can bring a new taste to your casserole. If you want a lighter version, use low-fat sour cream and cheese. You can also replace white rice with brown rice or quinoa for more fiber. Instead of cream of chicken soup, try a homemade version with chicken broth and cornstarch. Adding fresh herbs can boost flavor without extra calories. These changes keep the dish tasty while making it more nutritious. Seasonal foods can make this dish even better. In the fall, add butternut squash or pumpkin for warmth. In the summer, fresh zucchini or tomatoes can brighten the meal. For winter, try adding hearty greens like kale or spinach. Each season offers unique flavors that can make your Million Dollar Chicken Casserole shine. After enjoying your Million Dollar Chicken Casserole, store leftovers safely. First, let the casserole cool down to room temperature. Then, transfer it to an airtight container. This helps keep it fresh. You can store it in the fridge for up to three days. Make sure to label the container with the date. This way, you know when to eat it by. To reheat your casserole, preheat your oven to 350°F (175°C). Place the casserole in a baking dish. Cover it with foil to keep it moist. Heat for about 20 minutes or until it is hot all the way through. If you want a crispy top, remove the foil for the last 5 minutes. You can also microwave individual portions. Just heat for about 2-3 minutes until hot. To freeze your casserole, first cool it completely. Then, cut it into individual portions. Wrap each piece tightly in plastic wrap and place them in a freezer-safe bag. Remove as much air as possible. Label the bags with the date. You can freeze it for up to three months. When you’re ready to eat, let it thaw in the fridge overnight. Reheat as mentioned above. You can prepare Million Dollar Chicken Casserole a day in advance. Start by mixing all the ingredients as directed in the recipe. Place the mixture in your greased baking dish. Cover it tightly with plastic wrap or foil. Store it in the fridge until you're ready to bake. When it's time to cook, remove it from the fridge. Let it sit at room temperature for about 30 minutes. Then, bake it as directed. This helps ensure even cooking. Yes, you can use cooked rice. Just make sure it is cooled down. Substitute 3 cups of cooked rice for the uncooked rice in the recipe. This change will cut down on the baking time. You will want to bake the casserole for about 20-25 minutes. Keep an eye on it. The mixture needs to heat all the way through. This casserole pairs well with many sides. A light green salad adds freshness. You can also serve it with steamed veggies for a colorful plate. Garlic bread provides a nice crunch. If you want something warm, try mashed potatoes or rice. These sides balance the creamy casserole and create a hearty meal. Enjoy your dinner! This blog post covered all you need for a great casserole. We discussed ingredients, steps, and tips to make it perfect. Remember to try different flavor swaps and seasonal ingredients to keep it fresh. Proper storage helps your leftovers keep for longer. Now, you have everything to bake a delicious Million Dollar Chicken Casserole. Enjoy your cooking journey and serve a meal everyone will love!
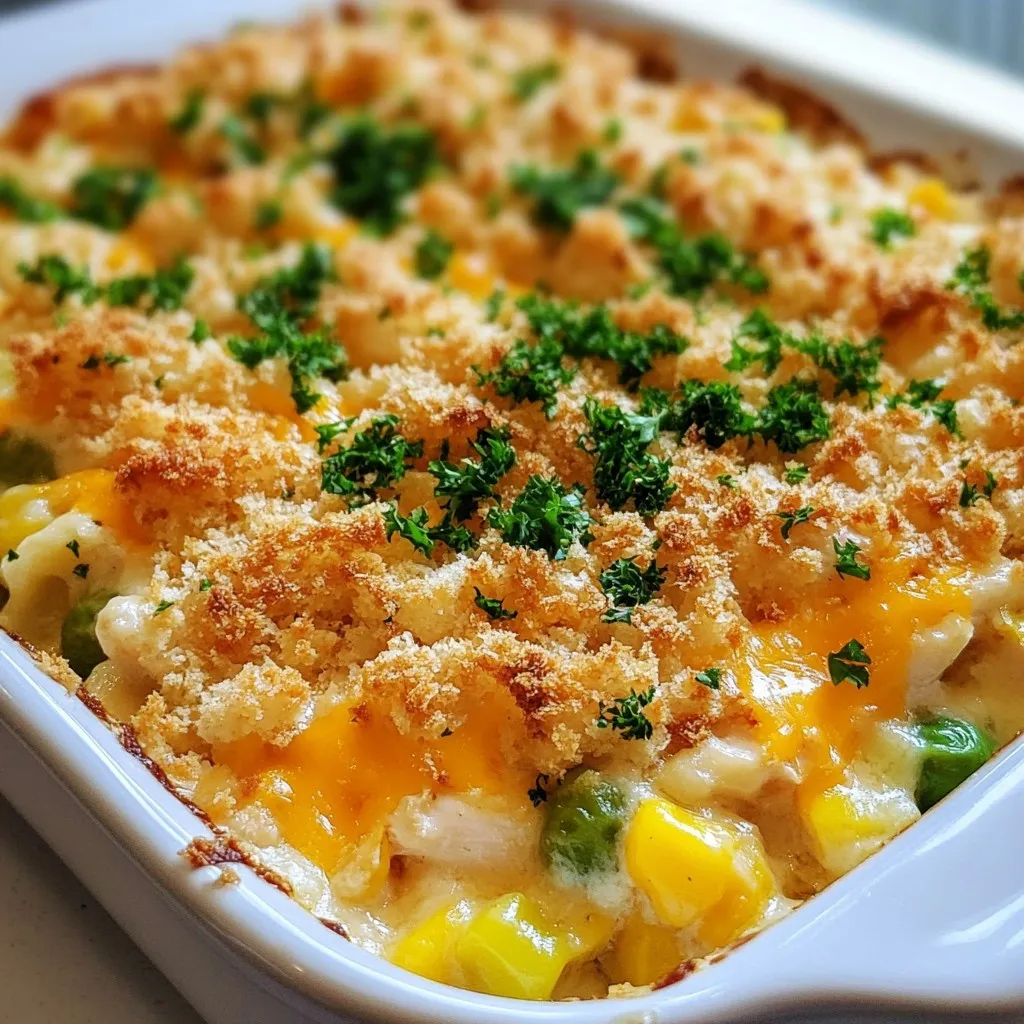
Million Dollar Chicken Casserole Tasty and Simple Dish
Are you ready to impress your family with a simple yet scrumptious meal? The Million Dollar Chicken Casserole brings together great taste and easy preparation.
- 1 pound ground beef - 8 slices provolone cheese - 4 hoagie rolls - 1 onion, thinly sliced - 1 green bell pepper, thinly sliced - 1 red bell pepper, thinly sliced - 2 cloves garlic, minced - 1 teaspoon Worcestershire sauce - 1 teaspoon smoked paprika - Salt and pepper to taste - Olive oil for cooking - Fresh parsley, chopped (for garnish) Ground beef forms the heart of this dish. It adds rich flavor and texture. Provolone cheese gives that classic cheesesteak taste. Hoagie rolls hold everything together and add crunch. The vegetables bring color and flavor. Onions and bell peppers soften as they cook. Garlic adds a nice aroma and taste. Worcestershire sauce gives a touch of umami, while smoked paprika adds warmth. Salt and pepper enhance all the flavors. Olive oil is essential for cooking. It helps the beef brown and the veggies soften. Fresh parsley not only makes the dish look pretty but also adds freshness. When you gather these ingredients, you're ready for a delicious meal. Each part plays a role in making your Ground Beef Philly Cheesesteaks a hit! {{ingredient_image_2}} Heating the Skillet Start by heating a large skillet over medium-high heat. Add a drizzle of olive oil. Make sure the oil coats the bottom well. This helps the beef cook evenly. Breaking and Seasoning the Beef Once the oil shimmers, add 1 pound of ground beef. Break the beef into smaller pieces with a spatula. Season it with salt, pepper, and 1 teaspoon of smoked paprika. Cook the beef for about 5-7 minutes. You want it browned and cooked through. If there's any excess fat, drain it off. Adding Vegetables to the Beef Push the cooked beef to one side of the skillet. On the other side, add the sliced onion, green bell pepper, and red bell pepper. Sauté the veggies for 3-5 minutes until they soften. Stir them into the beef when they are tender. Incorporating Garlic and Worcestershire Sauce Next, add 2 minced cloves of garlic and 1 teaspoon of Worcestershire sauce to the mix. Stir everything well and cook for another 2 minutes. This helps the flavors blend and makes the garlic fragrant. Arranging Provolone Cheese Now, turn the heat down to medium-low. Arrange 8 slices of provolone cheese over the beef and vegetable mix. Let it cook for 2-3 minutes. You want the cheese to melt into a gooey delight. Tips for Melting Cheese Effectively If you want to speed up melting, cover the skillet with a lid. This traps heat and helps the cheese melt faster. Your Philly cheesesteaks will soon be ready for assembly! - Avoiding Excess Fat: To keep your cheesesteaks lean, drain any fat after cooking the ground beef. This step helps make the dish less greasy and lets the flavors shine through. Use a spatula to break up the meat into small bits while it cooks for even browning. - Seasoning Tips for Extra Flavor: Season your beef with salt, pepper, and smoked paprika. Smoked paprika adds a nice depth to the flavor. Don’t be shy with the seasoning! This is key to a tasty cheesesteak. - Best Methods for Toasting: For the best hoagie rolls, use a pan with a bit of olive oil or place them under the broiler. Both methods create a warm, crispy texture. - Timing for Optimal Crispiness: Keep an eye on the rolls while toasting. Just a few minutes will do. You want them golden brown but not burnt. Perfectly toasted rolls hold all the delicious filling well. - Pairing with Sides: Serve your cheesesteaks with crunchy fries or a fresh salad. You can also add chips for extra crunch. These sides balance the rich flavors of the sandwich. - Presentation Ideas: For a fun touch, cut the cheesesteaks in half and arrange them on a platter. Sprinkle chopped parsley on top to add color. Serve with dipping sauces like ketchup or hot sauce for extra flavor. Pro Tips Choose the Right Beef: Use a blend of ground beef that has some fat content (like 80/20) for a juicier and more flavorful cheesesteak. Veggie Variations: Feel free to add other vegetables like mushrooms or jalapeños for extra flavor and texture. Cheese Melting Tips: Cover the skillet with a lid while melting the cheese to create steam, which helps it melt evenly and quickly. Toasting Rolls: For the best texture, toast the hoagie rolls until they are crispy on the outside but still soft on the inside. {{image_4}} You can switch up the cheese for your Ground Beef Philly Cheesesteaks. Provolone adds a nice creaminess, but Swiss cheese brings a nutty flavor. Cheddar cheese melts well and has a sharp taste. American cheese is classic and super creamy. Choose the cheese that makes your taste buds dance! Want to add more crunch? Toss in some mushrooms for a rich flavor. Spinach adds a fresh touch and is packed with nutrients. If you like heat, jalapeños can spice things up! Mix and match vegetables to make your cheesesteak your own. If you're looking for lighter options, try ground turkey or chicken. Both meats are lean and cook well in this recipe. Ground turkey has a mild flavor, while chicken brings a unique taste. Adjust the seasoning to enhance the meat's natural flavors. To keep your Ground Beef Philly Cheesesteaks fresh, follow these steps: - Cool Down: Let the cheesesteaks cool to room temperature. - Use Airtight Containers: Place them in airtight containers. This keeps moisture out. - Refrigerate: Store in the fridge for up to 3 days. - Label: Write the date on the container. This helps track freshness. When you are ready to enjoy your leftovers, reheating properly is key to taste: - Skillet Method: Heat a skillet over low heat. Add a splash of water. Place the cheesesteak in the pan. Cover with a lid. This keeps it moist. - Microwave Method: Use a microwave-safe plate. Cover the cheesesteak with a damp paper towel. Heat in 30-second intervals until warm. This helps prevent drying. - Oven Method: Preheat the oven to 350°F. Wrap the cheesesteak in foil. Heat for about 10-15 minutes. This method keeps the crust crispy. If you want to save some for later, freezing is a good choice: - Cool Completely: Make sure the cheesesteaks are fully cooled before freezing. - Wrap Tightly: Wrap each cheesesteak in plastic wrap. Then, place in a freezer bag. Squeeze out as much air as possible. - Label and Date: Mark the bag with the date. They can last for up to 2 months in the freezer. - Thawing: To thaw, place them in the fridge overnight. For quicker results, use the microwave on the defrost setting. These storage tips help you enjoy your Ground Beef Philly Cheesesteaks again while keeping them fresh and tasty. It takes about 30 minutes to make Ground Beef Philly Cheesesteaks. You will spend 15 minutes prepping the ingredients. Cooking the beef and veggies takes an additional 15 minutes. This quick meal is perfect for busy days. Yes, you can make these cheesesteaks ahead. Store the cooked beef and veggie mix in an airtight container. Keep it in the fridge for up to three days. When you are ready to eat, just reheat it on the stove or in the microwave. Toast fresh rolls for the best taste. These cheesesteaks pair well with many sides. Try crispy fries or onion rings for a classic touch. You can also serve a light salad or coleslaw for balance. For drinks, consider soda, iced tea, or a cold beer. Enjoy mixing and matching! You learned about making delicious Ground Beef Philly Cheesesteaks. We covered key ingredients like ground beef, provolone cheese, and fresh veggies. I shared simple steps for cooking and melting cheese, along with tips for the best flavor. These cheesesteaks are easy to customize and store well for later. Enjoy your tasty creations with friends or family. Dive in and let your taste buds celebrate!
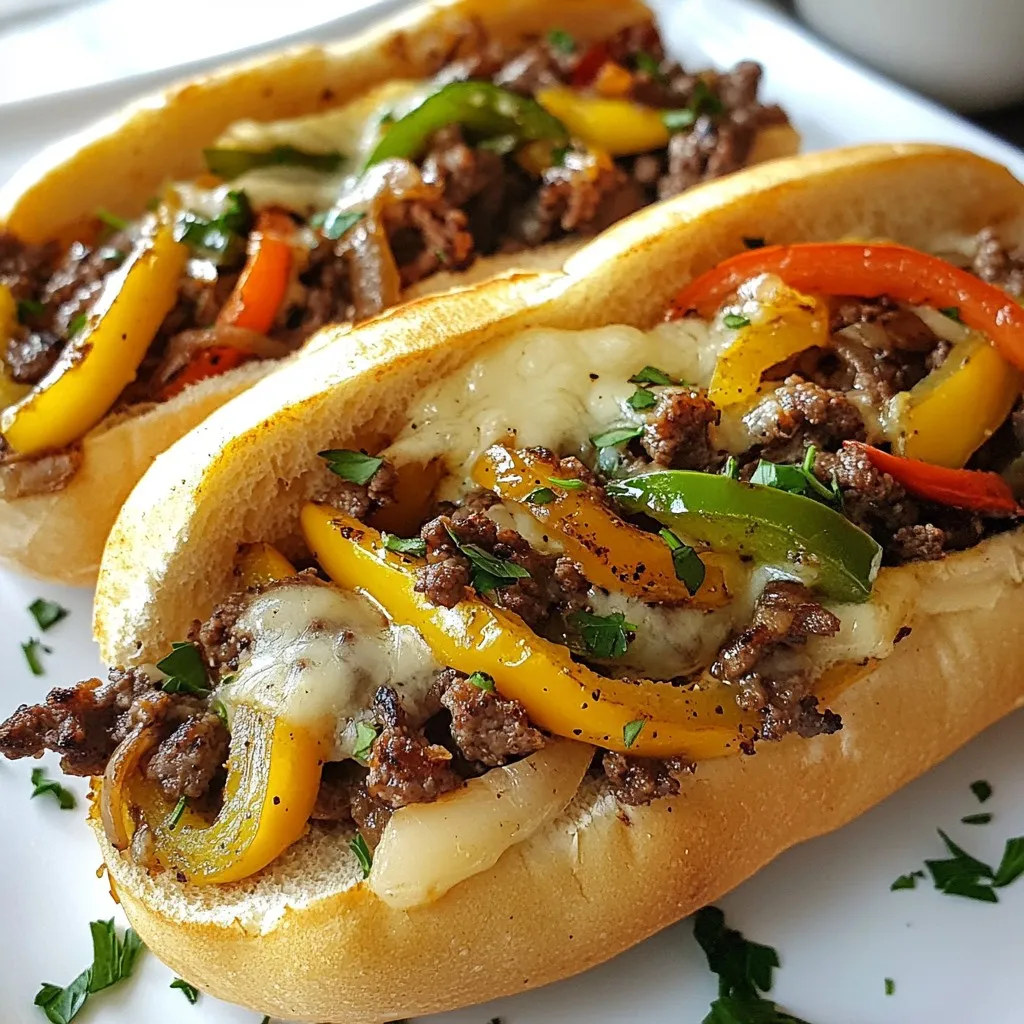
Ground Beef Philly Cheesesteaks Delicious and Easy Meal
Are you ready to make a delicious meal that everyone will love? Ground Beef Philly Cheesesteaks are quick, easy, and packed with flavor. With just
To make Garlic Parmesan Chicken Meatloaf, you'll need the following simple ingredients: - 1 lb (450g) ground chicken - 1 cup seasoned breadcrumbs - 1/2 cup grated Parmesan cheese - 1/4 cup fresh parsley, finely chopped - 4 cloves garlic, minced - 1/2 cup onion, finely chopped - 1 large egg, beaten - 1/4 cup milk - 1 teaspoon Italian seasoning blend - 1/2 teaspoon kosher salt - 1/4 teaspoon freshly ground black pepper - 1/4 cup ketchup (for topping) - 2 tablespoons olive oil (for sautéing) These ingredients work together to create a tasty meatloaf that's moist and full of flavor. The ground chicken keeps it light, while the seasoned breadcrumbs add texture. Grated Parmesan cheese gives it a rich taste, and fresh parsley brightens it up. Garlic and onion bring depth to the dish, making each bite exciting. The egg binds everything together, while milk ensures it stays moist. Italian seasoning, salt, and pepper enhance the flavors, creating a balanced profile. Finally, the ketchup on top adds a sweet and tangy glaze that makes the meatloaf visually appealing. This mix of ingredients results in a dish that's perfect for any dinner table. {{ingredient_image_2}} Set your oven to 350°F (175°C). This temperature cooks the meatloaf evenly. Grease a standard loaf pan lightly. You can use cooking spray or a bit of olive oil to prevent sticking. Heat 2 tablespoons of olive oil in a medium skillet over medium heat. Add in the finely chopped onions and minced garlic. Cook them for about 4-5 minutes. You want the onions to be soft and translucent. Once done, take the skillet off the heat and let it cool for a few minutes. In a big mixing bowl, combine the ground chicken, seasoned breadcrumbs, grated Parmesan cheese, and chopped parsley. Then add in the sautéed onions and garlic. Now, pour in the beaten egg, milk, Italian seasoning, salt, and black pepper. Mix it all together well. When mixing, use your hands or a spoon. Gently combine the ingredients until just blended. Avoid over-mixing, as this can make the meatloaf tough and dense. Transfer the mixture into the greased loaf pan. Shape it into a classic loaf form. Spread the ketchup evenly over the top for a tasty glaze that adds flavor. Place the meatloaf in the oven. Bake for 45-50 minutes. Check for doneness when the meatloaf reaches an internal temperature of 165°F (75°C). It should be cooked through and firm. Once out of the oven, let the meatloaf rest for 10 minutes. This step is key! Resting helps the juices redistribute. After resting, slice the meatloaf for serving. Enjoy it with your favorite sides! To make the best Garlic Parmesan Chicken Meatloaf, avoid density. Start by mixing the ingredients gently. Over-mixing can make the meatloaf tough. Use your hands or a spoon to combine everything until just mixed. This keeps the meatloaf light and fluffy. To keep it moist, add milk and an egg. They add moisture and help bind the meatloaf. Cooking the onion and garlic in olive oil also adds flavor and keeps it juicy. Let the meatloaf rest after baking. This helps the juices settle, making it more tender. For a beautiful dish, slice the meatloaf and arrange it on a serving platter. Garnish it with freshly chopped parsley and a sprinkle of Parmesan cheese. This adds color and visual appeal. Pair your meatloaf with sides like roasted vegetables or a fresh garden salad. Bright colors on the plate make the meal more inviting. You can also serve it with mashed potatoes for a classic touch. The best type of loaf pan for this recipe is a standard metal pan. It heats evenly and helps the meatloaf cook well. If you want a crispier outer layer, use a glass or ceramic pan. Helpful kitchen tools include a large mixing bowl and a medium skillet. A good knife helps with slicing the meatloaf. A meat thermometer is also handy to check for doneness. Aim for an internal temperature of 165°F (75°C) for safe eating. Pro Tips Use Fresh Herbs: Fresh parsley adds a vibrant flavor to the meatloaf. Feel free to experiment with other herbs like basil or thyme for a unique twist. Don’t Overmix: Mixing the ingredients too much can lead to a dense texture. Gently combine until just mixed for a light and moist meatloaf. Check Temperature: Using a meat thermometer ensures your meatloaf is cooked perfectly. Aim for an internal temperature of 165°F (75°C). Let It Rest: Allowing the meatloaf to rest for 10 minutes before slicing helps retain its juices, ensuring every bite is tender and flavorful. {{image_4}} You can switch up the ground chicken with other proteins. Ground turkey works well too. If you prefer beef, use lean ground beef for a richer flavor. For a vegetarian option, try using lentils or chickpeas. If you need a gluten-free version, use gluten-free breadcrumbs. You can also make your own breadcrumbs from gluten-free bread. This way, you still get that crunchy texture without the gluten. Want to boost the flavor? Add spices like paprika or cayenne for heat. Fresh herbs like basil or thyme can also brighten the dish. You might even try some crushed red pepper for a little kick. For toppings, instead of ketchup, consider barbecue sauce or a spicy sriracha glaze. You can also sprinkle more cheese on top for extra richness. You can make this meatloaf in a slow cooker. Just shape the mixture and place it in the cooker. Cook on low for about 6 hours. This method keeps the meatloaf super moist. If you have an air fryer, you can use it too. Set the temperature to 350°F (175°C) and cook for 25-30 minutes. The air fryer gives a nice crust while keeping the inside juicy. After cooking the Garlic Parmesan Chicken Meatloaf, let it cool down. This step helps keep it fresh. Store the meatloaf in an airtight container. You can also wrap it tightly with plastic wrap. It will last in the fridge for up to four days. If you want to keep it longer, consider freezing it. To freeze the meatloaf, first, let it cool completely. Cut it into slices for easier storage. Wrap each slice in plastic wrap, then place them in a freezer-safe bag. This method helps prevent freezer burn. You can freeze the meatloaf for up to three months. When you're ready to eat it, take it out and thaw in the fridge overnight. For reheating, use the oven for best results. Preheat the oven to 350°F (175°C). Place the meatloaf on a baking dish and cover it with foil. Bake for 20-25 minutes or until heated through. Enjoy it just like it was fresh! You can serve this meatloaf with many tasty sides. Here are some ideas: - Mashed potatoes - Roasted vegetables - Steamed green beans - Garden salad - Garlic bread These sides add flavor and balance to your meal. To check if the meatloaf is done, look for these signs: - An internal temperature of 165°F (75°C) - A nice golden-brown color on the outside Use a meat thermometer for best results. It ensures your meatloaf is safe to eat. Yes, you can make this meatloaf ahead of time. Here’s how: - Prepare the meatloaf mixture and shape it. - Cover it and store in the fridge for up to 24 hours. - Bake it when ready to eat. This method saves time and is handy for busy days. To reheat leftovers, follow these steps: - Preheat your oven to 350°F (175°C). - Place the meatloaf in a baking dish. - Add a splash of broth or water to keep it moist. - Cover with foil and heat for 20-25 minutes. This way, your meatloaf stays juicy and delicious. This blog post guides you through making a tasty Garlic Parmesan Chicken Meatloaf. I covered ingredients, simple steps, and tips to ensure your meatloaf is moist and flavorful. Remember to let it rest after baking for the best slices. With variations and storage tips, you can enjoy this dish in many ways. I hope you try these ideas and find your perfect meatloaf recipe. Cooking should be fun, and this dish makes it easy to impress everyone at your table. Enjoy your cooking journey!
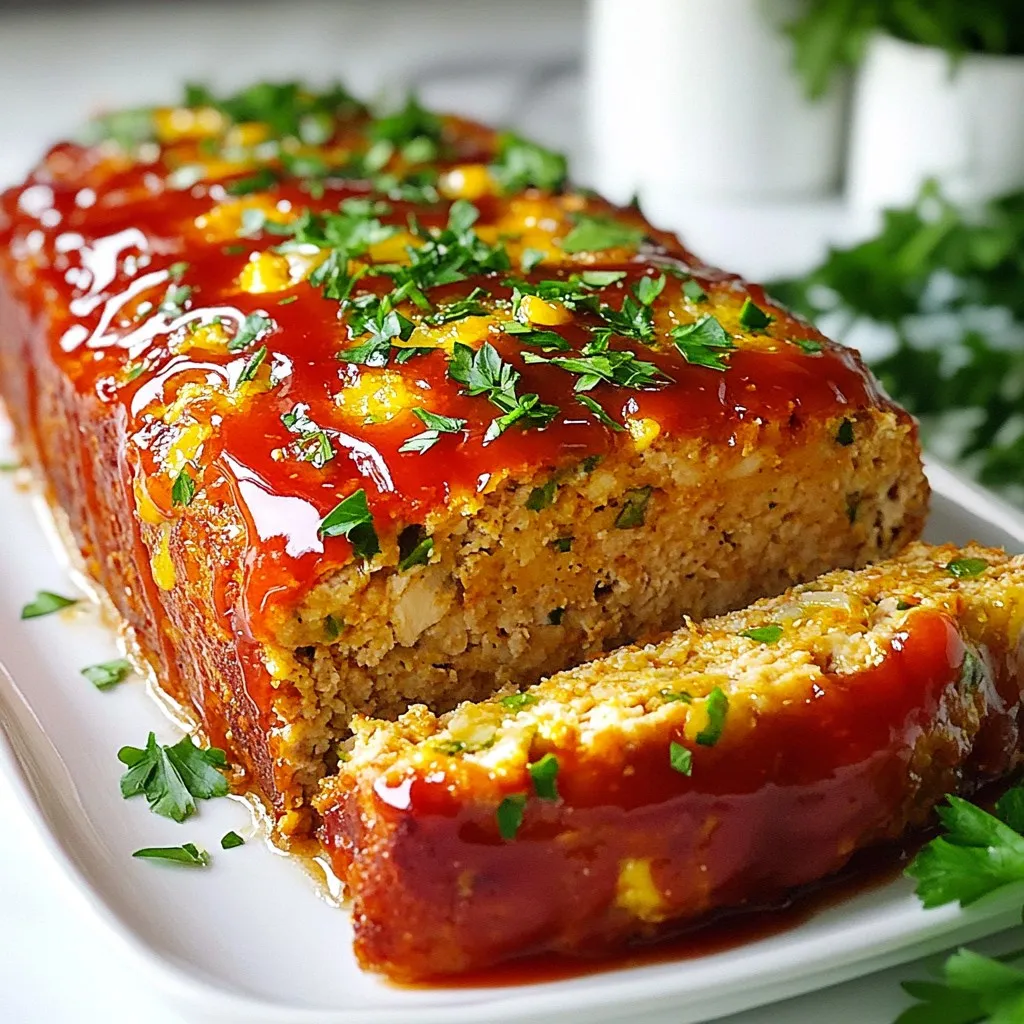
Garlic Parmesan Chicken Meatloaf Flavorful Dinner Delight
Are you ready to transform your dinner table with a Garlic Parmesan Chicken Meatloaf? This dish is not just meatloaf—it’s a flavorful dinner delight that
To make a French Onion Beef Rice Casserole, you need a few key ingredients. Here’s the list: - Ground Beef - Onions - Rice - Beef Broth - French Onion Dip - Shredded Swiss Cheese - Seasonings - Olive Oil - Garnish Each ingredient plays an important role. The ground beef gives the dish its hearty base. Onions add a sweet and rich flavor. Rice makes the casserole filling and satisfying. Beef broth enhances the taste with depth. French onion dip brings a creamy, savory element. Shredded Swiss cheese melts beautifully on top, adding a rich layer. Seasonings like garlic powder and thyme bring out the best flavors. Olive oil is used for cooking the onions, making them golden brown. Finally, you can garnish with fresh parsley for a pop of color. With these ingredients, you will create a warm and tasty dish that comforts the soul. Each bite will remind you of home and good cooking. {{ingredient_image_2}} Start by preheating your oven to 350°F (175°C). This step helps the casserole cook evenly. In a large skillet, heat 2 tablespoons of olive oil over medium heat. Add 1 large onion, thinly sliced. Cook for 10-12 minutes. Stir the onions often. You want them golden brown and sweet. This process brings out their natural sugars. Once the onions are done, push them to one side of the skillet. Add 1 pound of ground beef to the empty side. Cook the beef until it is fully browned. Break it apart with a spatula as it cooks. Season it with 1 teaspoon of garlic powder, 1 teaspoon of dried thyme, salt, and pepper to taste. Mix the beef with the onions when it’s cooked. In a large mixing bowl, combine the cooked rice, beef, and onion mixture. Add 2 cups of beef broth and 1 cup of French onion dip. Stir everything together until well mixed. This helps all the flavors blend nicely. Transfer the mixture into a greased 9x13 inch casserole dish. Spread it out evenly. This ensures that every part cooks the same way. Sprinkle 1 cup of shredded Swiss cheese on top. Cover the dish with aluminum foil. Bake it in the preheated oven for 25 minutes. Then, remove the foil and bake for another 10-15 minutes. This helps the cheese melt and bubble. When done, let it rest for 5 minutes before serving. Garnish with fresh parsley if you like. To get sweet, golden onions, you need patience. Start with medium heat. Use a large skillet for even cooking. Add olive oil and let it warm. Stir the onions often for even browning. It takes about 10 to 12 minutes. Watch for that deep, rich color. If they stick, lower the heat slightly. You can sprinkle a pinch of salt to help draw out moisture. This extra step enhances their flavor. For juicy beef, use ground beef with some fat. It adds flavor and keeps it moist. Cook in the same skillet after the onions. This helps blend flavors. Break the beef apart with a spatula for even cooking. Season with garlic powder, thyme, salt, and pepper. Make sure it's fully browned. This means no pink spots remain. To keep your casserole from being soggy, use cooked rice that’s not overcooked. If possible, use day-old rice. This rice is firmer and absorbs less moisture. When mixing ingredients, don’t add too much broth. You want a creamy texture but not a soup. Spread the mixture evenly in the casserole dish. Cover with foil for the first part of baking. This traps steam for cooking, but remove it later to crisp the cheese. Pro Tips Use Fresh Ingredients: Always opt for fresh onions and beef for the best flavor. Fresh ingredients can elevate the dish significantly. Layering Cheese: For an extra cheesy top, consider using a mix of cheeses like mozzarella and Gruyère along with the Swiss cheese. Resting Time: Allowing the casserole to rest after baking helps the flavors meld together and makes serving easier. Customize Your Rice: Feel free to use flavored rice or add sautéed vegetables to the rice mixture for additional texture and taste. {{image_4}} If you want to switch up the protein in this dish, you have options. Ground turkey or chicken works great. You can also use a plant-based meat substitute if you prefer. These proteins still give that tasty flavor we love in this casserole. Just remember to adjust cooking times based on what you choose. To make a vegetarian version, skip the meat. Use lentils or mushrooms for hearty texture. Cooked quinoa can also add protein and flavor. Use vegetable broth instead of beef broth. Combine with the rice, onion, and dip, and you’ll have a delicious dish without meat. If you want to change the cheese, you have some choices. Gruyère or mozzarella works well in place of Swiss cheese. You can try a vegan cheese for a dairy-free option. Just make sure whatever cheese you pick melts well. This will keep your casserole creamy and rich. After enjoying your French Onion Beef Rice Casserole, let it cool. Place any leftovers in an airtight container. You can keep it in the fridge for up to three days. This way, you can enjoy it again soon! To reheat, simply take your casserole from the fridge. Preheat your oven to 350°F (175°C). Cover the dish with foil to keep it moist. Heat for 20-25 minutes or until hot. You can also microwave individual portions for about 2-3 minutes. Just make sure they are heated all the way through. If you want to freeze your casserole, it’s easy! First, allow it to cool completely. Then, wrap it tightly in plastic wrap and foil. This helps to prevent freezer burn. It can last in the freezer for up to three months. When you’re ready to eat, thaw it in the fridge overnight. Then, reheat it in the oven as mentioned before. Enjoy your comforting dish anytime! Yes, you can use brown rice. It adds a nuttier taste. Brown rice also has more fiber. Cooking time may be a bit longer. Make sure it is fully cooked before mixing. You can use sour cream or cream cheese. Mix them with onion powder and some seasoning. This gives a similar flavor. You can also try using a homemade onion dip. Store the casserole in the fridge for up to four days. Make sure to cover it well. This keeps it fresh and tasty. You can also freeze it for up to three months. Yes, you can make this casserole ahead. Prepare it up to the baking step. Just cover it and store it in the fridge. When ready, bake it as directed. This casserole goes well with a fresh salad. You can also serve it with steamed veggies. Garlic bread or crusty rolls are great too. They balance the richness of the dish. This blog post covered how to make a tasty casserole using simple ingredients. We went through each step, from preheating the oven to baking the dish. I shared tips for caramelizing onions and perfecting beef. You also learned about variations and how to store leftovers. In conclusion, this recipe is easy to follow and great for sharing. It’s perfect for busy nights or meal prepping. Enjoy creating a dish that your family will love!
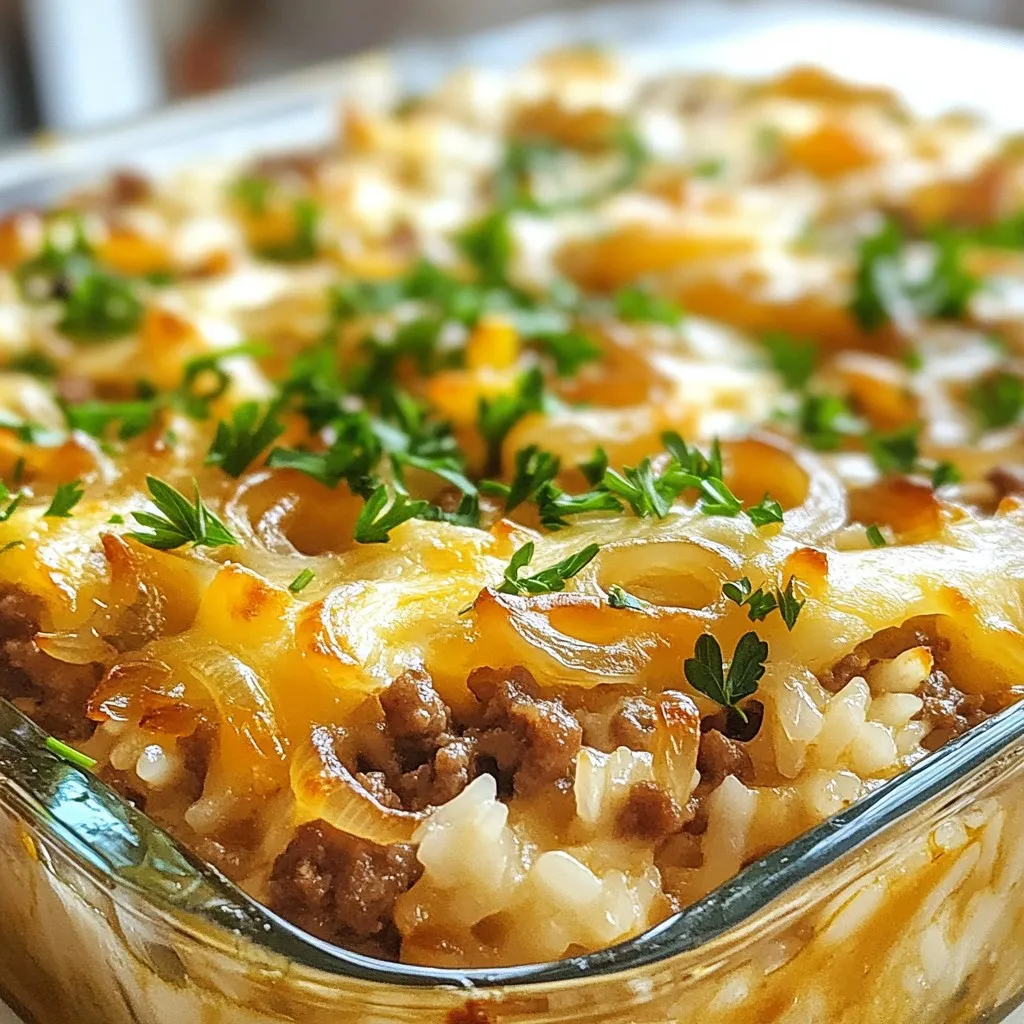
French Onion Beef Rice Casserole Flavorful Comfort Dish
Are you craving a hearty meal that feels like a warm hug? Look no further than my French Onion Beef Rice Casserole. This dish combines
To make One-Pot Hearty Lasagna Soup, gather these items: - 1 tablespoon olive oil - 1 medium onion, diced - 2 cloves garlic, minced - 1 pound ground beef or ground turkey - 1 teaspoon dried oregano - 1 teaspoon dried basil - ½ teaspoon red pepper flakes (optional) - 1 can (28 ounces) crushed tomatoes - 4 cups chicken broth or vegetable broth - 8 ounces lasagna noodles, broken into pieces - 1 cup ricotta cheese - 1 cup shredded mozzarella cheese, plus more for topping - ¼ cup grated Parmesan cheese, plus more for garnish - Salt and freshly ground black pepper to taste - Fresh basil or parsley leaves for garnish To make your soup even better, consider adding: - Fresh herbs like thyme or rosemary for a fragrant touch. - A splash of balsamic vinegar for depth. - Spinach or kale for extra nutrients and color. - Sliced mushrooms for an earthy flavor. These additions can boost taste and nutrition, making your meal even more satisfying. If you have dietary needs, here are some swaps: - Use ground chicken or plant-based meat for a lighter option. - For a vegetarian soup, skip the meat and add more veggies. - Use gluten-free lasagna noodles if needed. - Swap ricotta for cottage cheese for a lower-fat choice. These substitutions keep the dish tasty while meeting your needs. You can enjoy this hearty soup no matter your diet! {{ingredient_image_2}} Start by gathering your ingredients. You need olive oil, onion, garlic, ground beef or turkey, dried oregano, dried basil, red pepper flakes, crushed tomatoes, broth, lasagna noodles, ricotta cheese, mozzarella cheese, Parmesan cheese, salt, and pepper. Next, dice the onion and mince the garlic. This makes them ready for cooking. In a large pot or Dutch oven, heat one tablespoon of olive oil over medium heat. Once hot, add the diced onion. Sauté it for about five minutes. You want the onion to become soft and clear. Then, add the minced garlic. Cook it for one more minute. Stir often so it does not burn. Now, add the pound of ground beef or turkey. Break it apart with a wooden spoon. Cook for five to seven minutes. Stir it until the meat is brown and cooked through. Next, season the meat with one teaspoon of dried oregano and one teaspoon of dried basil. If you like heat, add half a teaspoon of red pepper flakes. Then, sprinkle in some salt and pepper. Stir well to mix the spices. Pour in one can of crushed tomatoes and four cups of broth. Stir everything together and turn up the heat a bit. Bring this mixture to a gentle simmer. Now, add eight ounces of broken lasagna noodles. Make sure they are all in the liquid. Cook them for about ten to twelve minutes until they are al dente and tender. While the noodles cook, prepare the cheese mixture. In a bowl, mix one cup of ricotta cheese, half of the mozzarella, and half of the Parmesan. Blend until smooth. When the noodles are done, take the pot off the heat. Carefully stir in the ricotta cheese mixture. Blend it into the soup until mixed well. For great flavor, use fresh herbs like basil or parsley as a garnish. They add color and taste. Also, let the soup sit for a few minutes before serving. This helps the flavors blend together. If you want creamier soup, add more ricotta or mozzarella on top. Remember, taste your soup before serving. Adjust the salt and pepper as you like. This makes sure it’s perfect for you. When making One-Pot Hearty Lasagna Soup, avoid overcooking the noodles. They can turn mushy if left too long. Always check the package time and taste them for doneness. Another mistake is not seasoning well. Taste your soup before serving. Don’t be shy with salt and pepper. Lastly, remember to mix the ricotta cheese mixture in gently. You want it creamy, not clumpy. To boost the flavor, consider adding fresh herbs. A handful of chopped basil or oregano can elevate the taste. You might also try a splash of balsamic vinegar. It adds a nice tang. For a spicy kick, toss in some sliced jalapeños or a dash of hot sauce. If you love veggies, add diced bell peppers or zucchini. They fit right in and add nutrition. A large pot or Dutch oven works best for this soup. It holds all the ingredients well and helps with even cooking. A wooden spoon is perfect for stirring the meat and noodles without scratching the pot. Use a sharp knife for dicing onions and garlic quickly. Finally, having measuring cups and spoons on hand keeps your portions accurate. Pro Tips Use Fresh Herbs: Fresh basil or parsley can enhance the flavor profile of the soup significantly. Add them just before serving for maximum freshness. Customize Your Protein: Feel free to substitute ground beef with ground chicken, turkey, or even plant-based proteins for a healthier or vegetarian option. Thicker Soup Option: If you prefer a thicker consistency, reduce the amount of broth or add a bit more ricotta cheese to create a creamier texture. Make It Spicy: For those who love heat, add more red pepper flakes or a splash of hot sauce to the soup for an extra kick! {{image_4}} You can easily make a vegetarian version of this hearty lasagna soup. Start by swapping the ground beef or turkey for plant-based meat or lentils. Use the same amount of diced vegetables like zucchini, bell peppers, or mushrooms. These add flavor and texture. You can also add extra greens like spinach or kale for more nutrients. This version still keeps the rich taste and comfort of the original soup. For a gluten-free option, use gluten-free lasagna noodles. Many brands offer tasty alternatives made from rice or corn. You can also use spiralized zucchini noodles. They add a nice crunch and flavor. Just remember to adjust the cooking time, as zucchini cooks faster than regular noodles. Always check labels on broth and cheese to ensure they are gluten-free. If you love spice, add some heat! You can increase the red pepper flakes to taste. For even more zing, try adding diced jalapeños or a dash of hot sauce. Another great idea is to mix in different herbs, like thyme or rosemary, for extra flavor. You can also add a splash of balsamic vinegar for a tangy twist. These additions will make your soup stand out and suit your taste buds. To keep your One-Pot Hearty Lasagna Soup fresh, store it in an airtight container. Let the soup cool down before sealing it. This helps prevent moisture build-up inside. It will last in the fridge for about three to four days. If you want to keep it longer, consider freezing it. When you’re ready to enjoy leftovers, reheat the soup on the stove. Pour the desired amount into a pot and heat over medium heat. Stir often to warm it evenly. You can also use a microwave. Place the soup in a microwave-safe bowl and heat in short intervals, stirring in between. This keeps the texture and flavor intact. To freeze the soup, store it in freezer-safe containers. Leave space at the top for expansion. The soup can be frozen for up to three months. When you’re ready to eat it, transfer it to the fridge to thaw overnight. For a faster method, you can use the microwave on the defrost setting. After thawing, reheat as mentioned above for best results. You can store One-Pot Hearty Lasagna Soup in the fridge for about 3 to 4 days. Use an airtight container to keep it fresh. If you want to keep it longer, freezing works well too. It can last for up to 3 months in the freezer. Just make sure to let it cool down before you freeze it. Yes, you can use a slow cooker for this soup. Start by cooking the onion, garlic, and meat in a pan first. Then, transfer them to the slow cooker. Add the tomatoes, broth, and spices. Let it cook on low for about 6 to 8 hours. Add the broken lasagna noodles in the last 30 minutes of cooking. Stir in the cheese mixture before serving. This soup pairs well with a simple green salad. A side of garlic bread makes it even better. You can also serve it with a sprinkle of extra cheese or fresh herbs on top. This adds a nice touch to your meal. Enjoy your comforting bowl of soup! This blog covered how to make One-Pot Hearty Lasagna Soup. You learned about key ingredients and tasty problems. I shared cooking steps to bring out the best flavors. We also explored tips to avoid common mistakes and enhance your dish. Finally, I offered variations for different diets and smart storage tips. This soup is flexible, so feel free to get creative. Enjoy your cooking adventure with this easy, delicious recipe!
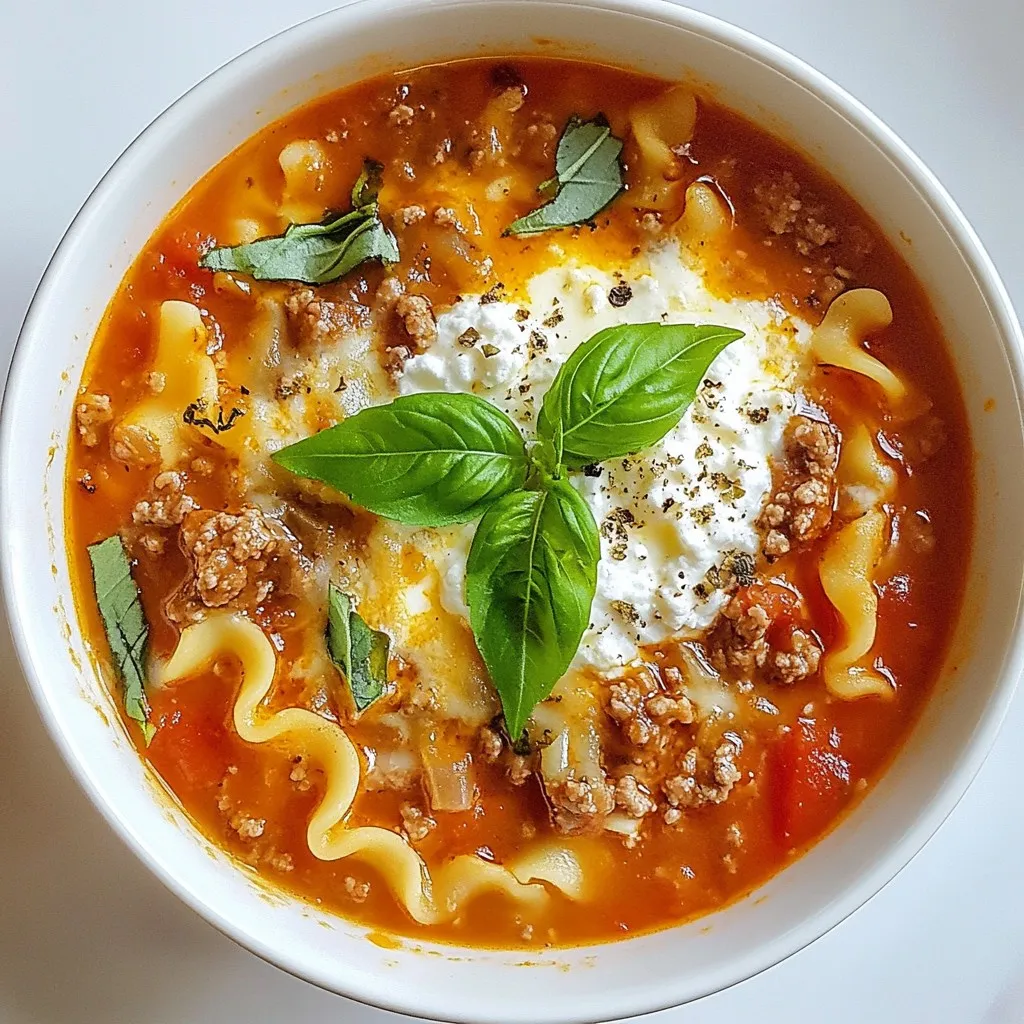
One-Pot Hearty Lasagna Soup Easy Comfort Meal
Craving a warm, filling meal that’s super easy to make? You’re in the right place! This One-Pot Hearty Lasagna Soup is the ultimate comfort dish
- 20 jumbo pasta shells - 2 cups cooked chicken, shredded - 1 cup buffalo sauce - 1 cup cream cheese, softened - 1 cup ranch dressing - 1 cup mozzarella cheese, shredded - 1/2 cup blue cheese crumbles (optional) - 2 tablespoons green onions, thinly sliced - Salt and pepper to taste - Cooking spray or oil for greasing Cream cheese makes the filling rich and creamy. It balances the heat from the buffalo sauce. This sauce is key for that spicy kick. You can adjust the amount based on your taste. The cream cheese and buffalo sauce together create a flavorful blend that makes these shells a delight. Blue cheese crumbles add a sharp taste. They enhance the overall flavor of the dish. If you love blue cheese, sprinkle some into the filling. It gives an extra layer of taste. You can also use it as a topping if you like. {{ingredient_image_2}} Start by preheating your oven to 375°F (190°C). This helps the shells bake evenly. Next, bring a large pot of salted water to a rolling boil. Gently add the jumbo pasta shells. Cook them according to the package instructions until they are al dente, which means they should be firm when you bite them. Once cooked, drain the pasta in a colander. Let them cool for a few minutes. This step is important to avoid burns when stuffing the shells. In a large mixing bowl, combine the shredded chicken, buffalo sauce, cream cheese, ranch dressing, and half of the mozzarella cheese. If you love blue cheese, add those crumbles too! Use a fork or spatula to mix everything well until it’s smooth. Taste the mixture and add salt and pepper as needed. Adjust the buffalo sauce if you want more heat. Lightly grease a 9x13-inch baking dish with cooking spray or oil. This helps the shells not stick. Now, take each cooled shell and fill it with the buffalo chicken mixture. Use a spoon or your fingers to pack them well. Place the stuffed shells in the baking dish side by side. Sprinkle the remaining mozzarella cheese evenly over the top. This makes a delicious cheesy crust. Cover the dish tightly with aluminum foil. This keeps the moisture in while baking. Bake in the preheated oven for 20 minutes. After 20 minutes, remove the foil and bake for an additional 10 minutes. This will melt the cheese and make it bubbly. Once done, let the dish rest for a few minutes. Before serving, garnish with sliced green onions for a fresh touch. Enjoy these tasty buffalo chicken stuffed shells! To cook pasta shells just right, start with a large pot. Fill it with water and add a good amount of salt. Bring the water to a full boil. Add the shells carefully and cook until al dente, which means they are firm. This usually takes about 9 to 11 minutes. Stir them gently to prevent sticking. Once done, drain them in a colander and let them cool. This helps avoid a soggy filling. If you like it spicy, use more buffalo sauce in your filling. For a milder taste, reduce the sauce or mix in some cream cheese. You can also add more ranch dressing to balance the heat. If you want a little kick, sprinkle in some cayenne pepper. Always taste your mixture before stuffing the shells to find your perfect heat level. To store leftover stuffed shells, let them cool first. Place them in an airtight container. They will stay fresh in the fridge for about three days. To reheat, preheat your oven to 350°F (175°C). Put the shells in a baking dish and cover with foil. Heat for about 20 minutes or until warm. You can also microwave them. Just cover with a damp paper towel and heat for about 1 to 2 minutes. Enjoy your tasty leftovers! Pro Tips Adjust the Heat: If you prefer milder flavors, reduce the amount of buffalo sauce or mix in some additional cream cheese to balance the spice. Make Ahead: You can prepare the stuffed shells a day in advance. Just cover them tightly and store in the refrigerator before baking. Increase the baking time if they are cold from the fridge. Experiment with Cheese: Try mixing different types of cheese like cheddar or pepper jack for a unique twist on the flavor profile. Garnish for Color: Fresh herbs like cilantro or parsley can add a vibrant color and enhanced flavor to your dish when sprinkled on top just before serving. {{image_4}} You can make this dish lighter with simple swaps. Try using ground turkey instead of chicken. This choice cuts calories and fat. For the sauces, look for low-fat buffalo sauce and ranch dressing. These options lower the calorie count. You can also use Greek yogurt instead of cream cheese. It adds creaminess with extra protein. You can easily make this meal vegetarian or vegan. For a vegetarian version, replace chicken with cooked lentils or black beans. These ingredients still provide protein and a nice texture. For a vegan option, use plant-based cream cheese and vegan ranch dressing. You can also substitute the cheese with a vegan cheese blend. This way, everyone can enjoy the dish! Cheese adds richness to these stuffed shells. If you want a twist, try different cheeses. Goat cheese gives a tangy flavor that pairs well with buffalo sauce. You could also use pepper jack cheese for a spicy kick. For a milder taste, mozzarella is a great choice. Mixing cheeses can create a unique flavor profile. Experiment to find your favorite! To keep your creamy buffalo chicken stuffed shells fresh, store them properly. After baking, let the dish cool for about 30 minutes. Then, cover it tightly with plastic wrap or foil. This keeps moisture in and helps prevent drying out. You can also store individual servings in airtight containers. Make sure to label them with the date for easy tracking. Freezing stuffed shells is a great option if you want leftovers for later. First, allow the shells to cool completely. Then, place them in a single layer on a baking sheet. Freeze them for about an hour. Once frozen, transfer them to a freezer-safe bag or container. Remove as much air as possible to prevent freezer burn. These shells can last up to three months in the freezer. When you're ready to enjoy your stuffed shells again, reheating properly is key. For best results, preheat your oven to 350°F (175°C). Place the shells in a baking dish and cover with foil. Heat for about 20 minutes or until warmed through. If you want a crispy top, remove the foil for the last 5 minutes. You can also use a microwave if you're short on time. Heat in short bursts, checking often to avoid overheating. Enjoy the creamy, spicy goodness again and again! Yes, you can switch the buffalo sauce for another hot sauce. Use your favorite sauce to match your taste. BBQ sauce works well for a sweeter flavor. The key is to keep it spicy enough for that kick. Try a garlic sauce for a different spin. Just remember, the flavor should still shine through the cream cheese and ranch. You can prepare the shells in advance. Stuff the shells as directed but do not bake them yet. Instead, cover the baking dish tightly with plastic wrap or foil. Store them in the fridge for up to 24 hours. When you’re ready to bake, add an extra 5-10 minutes to the cooking time. This ensures they heat through nicely. I do not recommend using uncooked chicken. Cooked chicken ensures the filling is safe to eat. If you want to use raw chicken, you must cook it first. Shred the chicken after cooking, then mix it with the sauce and cheese. This way, you get all the flavors while keeping it safe and tasty. In this blog post, we explored making delicious stuffed jumbo pasta shells. We reviewed key ingredients like cream cheese and buffalo sauce, enhancing flavors with options like blue cheese crumbles. I shared step-by-step instructions for prepping, filling, and assembling the shells. Cooking tips ensured perfect pasta every time. We also covered variations, healthier swaps, and storage best practices to enjoy these meals later. Stuffed shells are fun to make and full of flavor. Try them and create your favorite version.
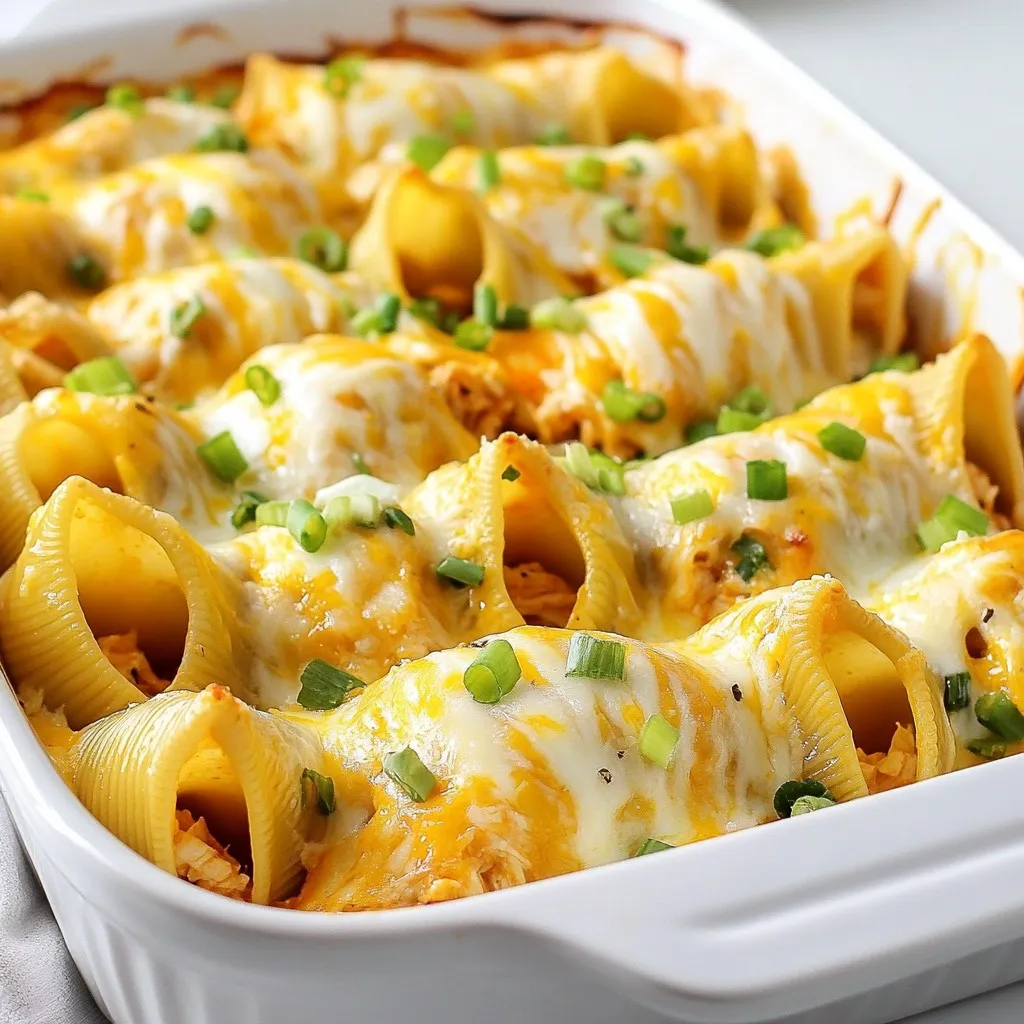
Creamy Buffalo Chicken Stuffed Shells Tasty Delight
Get ready to spice up your dinner with my Creamy Buffalo Chicken Stuffed Shells! This dish combines tender pasta, creamy filling, and a kick of
- 2 cups cooked chicken, shredded - 1 cup shredded mozzarella cheese - 1/2 cup cream cheese, softened - 4 large flour tortillas - 1/2 cup diced bell peppers - Fresh spinach - 2 cloves garlic, minced - 1/4 cup fresh parsley, finely chopped - 1 teaspoon paprika - 1/2 teaspoon salt - 1/2 teaspoon black pepper - 1 tablespoon olive oil for cooking The main ingredients create the tasty base for these wraps. Cooked chicken gives protein and heartiness. Shredded mozzarella brings gooey, melty goodness. Cream cheese adds creaminess and binds everything together. Flour tortillas wrap it all up perfectly. You can add diced bell peppers for crunch and color. Fresh spinach boosts the nutrition and adds a nice touch. These add-ins are not required but can make your wraps even better. Seasoning is key. Minced garlic adds a strong, rich flavor. Fresh parsley brings a pop of color and freshness. Paprika gives warmth and a hint of smokiness. Salt and black pepper enhance all the flavors. Finally, olive oil is great for cooking the wraps to golden perfection. Use these ingredients to make your Cheesy Garlic Chicken Wraps flavorful and fun! {{ingredient_image_2}} Start by mixing the chicken and cheese in a bowl. You need 2 cups of cooked chicken, shredded. Add 1 cup of shredded mozzarella cheese and 1/2 cup of softened cream cheese. This mix creates a creamy filling. Next, add flavor with garlic and spices. Mince 2 cloves of garlic and toss them into the bowl. Then add 1/4 cup of finely chopped parsley, 1 teaspoon of paprika, 1/2 teaspoon of salt, and 1/2 teaspoon of black pepper. Mix everything well. You want a smooth and tasty filling. Now, lay out the tortillas on a clean surface. You will use 4 large flour tortillas. With a spoon, distribute the filling evenly. Place it along the center of each tortilla. If you want more crunch and color, add diced bell peppers or fresh spinach. Sprinkle this on top of the filling before you wrap. Heat a skillet on medium heat. Add 1 tablespoon of olive oil and let it warm up. Once hot, place the wraps seam-side down in the skillet. Cook them for 3-4 minutes. They should turn golden brown and crispy. After that, use tongs to flip the wraps. Cook the other side for another 3-4 minutes. Look for melted cheese seeping out as a sign they are ready. Remove the wraps from the skillet. Let them cool for a minute. Then slice each wrap in half diagonally. This makes for a nice presentation. Enjoy your cheesy garlic chicken wraps! To amp up the cheese flavor, try mixing in different types of cheese. You can use sharp cheddar, pepper jack, or even gouda. These cheeses melt well and add a rich taste. If you want a fun twist, add cream cheese to your filling. It makes everything super creamy and tasty. You can also mix in some crumbled feta or goat cheese for a tangy touch. For crispy wraps, heat your skillet well before cooking. Use medium heat and add enough olive oil to coat the bottom. This will help the wraps turn golden brown. Don’t overcrowd the skillet. Cook a few wraps at a time for even cooking. After flipping, cook until the cheese melts and the outside is crispy. Let the wraps cool for a minute before cutting. This helps keep the filling from spilling out. Dips and sauces can make your wraps even better. Try serving them with ranch dressing, marinara, or garlic aioli. These flavors pair well with the cheesy filling. You can also sprinkle fresh herbs on top, like parsley or basil, for extra color and taste. If you like heat, add hot sauce or sriracha on the side. Pro Tips Use Fresh Ingredients: Fresh garlic and herbs will elevate the flavor of your wraps significantly. Always opt for fresh parsley and minced garlic instead of dried alternatives for a more vibrant taste. Experiment with Cheese: While mozzarella works great, try mixing in other cheeses like cheddar or pepper jack for a different flavor profile. This can add a nice kick to your wraps. Warm Tortillas: Before filling, warm the tortillas slightly in the microwave or a dry skillet. This will make them more pliable and easier to roll without tearing. Don’t Overfill: While it can be tempting to pack the wraps with extra filling, overfilling can make them difficult to roll and can lead to spills while cooking. Stick to a generous yet manageable amount. {{image_4}} You can change the flavor of your cheesy garlic chicken wraps easily. Try using different cheese options. Cheddar cheese adds a sharp taste. Pepper jack gives a spicy kick. You can even mix cheeses for a fun twist. For extra flavor, switch up the spices. Try adding red pepper flakes for heat. Cajun seasoning can bring a bold taste. Experiment with your favorite spices to find what you love. If you need gluten-free options, use gluten-free tortillas. They work well with the filling. You won't miss the regular tortillas at all. For a vegetarian version, swap the chicken for beans. Black beans or chickpeas can add protein. You can also use grilled mushrooms for a meaty texture. Fresh vegetables can brighten your wraps. In spring or summer, add fresh spinach or diced tomatoes. These add color and nutrients. During the hot months, create a summer version. Use grilled zucchini and corn. They add a fresh taste and crunch. These simple changes make your wraps exciting all year round. To store leftovers, let the wraps cool first. Place them in an airtight container. This keeps them fresh for up to three days. If you want to keep them longer, avoid stacking them. This prevents sogginess. You can also wrap each one in plastic wrap for better protection. You can freeze these wraps before or after cooking. To freeze before cooking, assemble the wraps and place them in a single layer on a baking tray. Once they are frozen, transfer them to a freezer bag. They will last for up to two months. To freeze after cooking, let them cool completely. Then, wrap each one tightly in plastic wrap and place them in a freezer bag. For the best taste, reheat the wraps in a skillet. Heat it on medium-low. Add a little oil to keep them crispy. Cook each side for about 3-4 minutes until heated through. If you use a microwave, place a damp paper towel over the wrap. This helps keep it moist but may make it less crispy. Enjoy your cheesy garlic chicken wraps warm for the best experience! Yes, you can use raw chicken. Here’s how to prepare it: - Start with 2 cups of raw chicken breast. - Cut the chicken into small cubes. - Heat a skillet over medium heat and add 1 tablespoon of olive oil. - Cook the chicken for about 6-8 minutes until it is no longer pink. - Once cooked, shred the chicken and mix it with the cheeses and spices as in the recipe. To add spice, try these options: - Add 1 teaspoon of cayenne pepper to the filling. - Mix in chopped jalapeños for a fresh kick. - Serve with a spicy dipping sauce like sriracha or hot sauce. - Try a sprinkle of crushed red pepper flakes on top before serving. These small changes will give your wraps a tasty heat! Here are some great side dishes to serve: - A fresh garden salad with a light dressing. - Crispy sweet potato fries for a fun crunch. - Steamed veggies like broccoli or green beans. - A bowl of creamy ranch or marinara for dipping. - Chips and salsa for a casual vibe. These sides will balance the flavors and make your meal more enjoyable! This blog post detailed how to make cheesy garlic chicken wraps using simple ingredients and easy steps. We explored the main items like shredded chicken and cheese, seasonal changes, and tips for perfecting your dish. Remember, you can personalize your wraps with fresh veggies or spices. Enjoy your time cooking these delicious wraps. They are perfect for any meal. Keep experimenting and make them your own! Happy cooking!
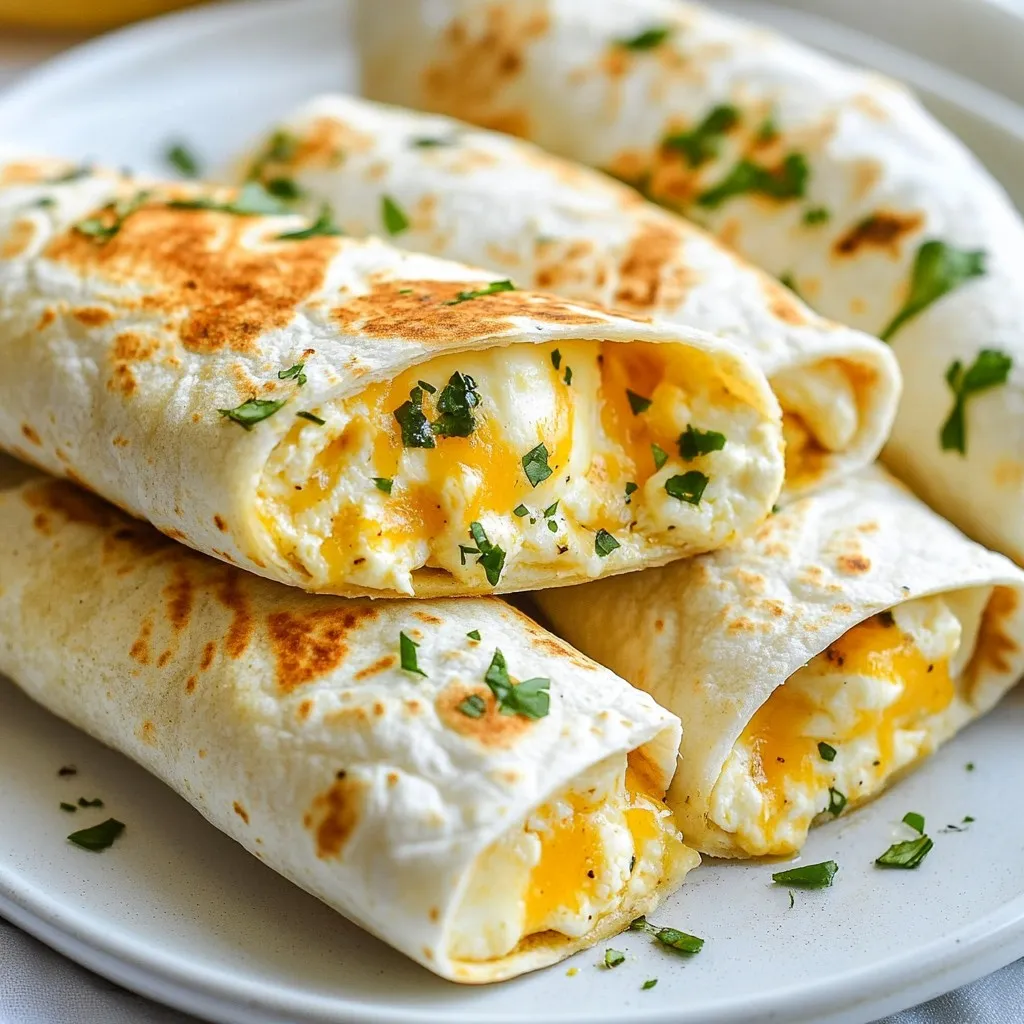
Cheesy Garlic Chicken Wraps Easy and Flavorful Recipe
Looking for a quick and tasty meal? Try my Cheesy Garlic Chicken Wraps! These wraps burst with flavor. They’re loaded with tender chicken, creamy cheese,