Dinner
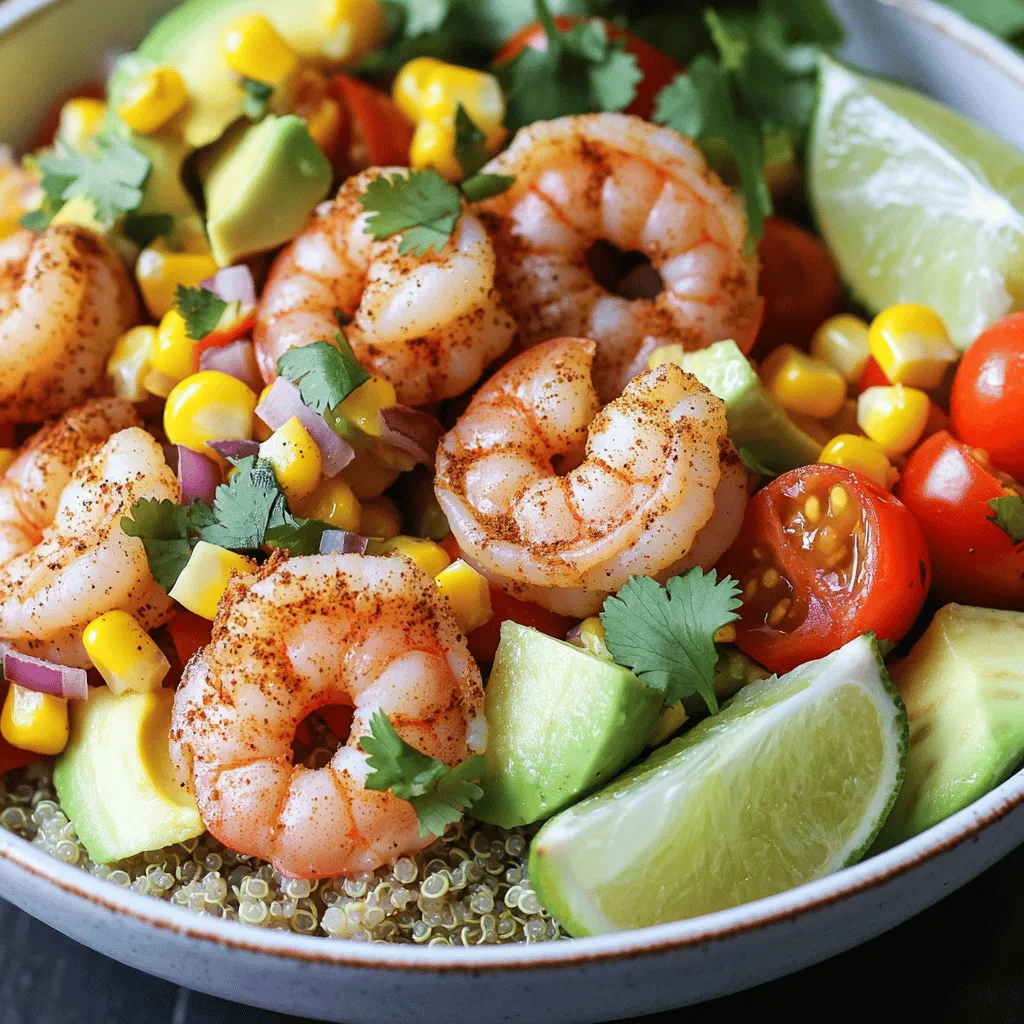
![- 1 pound large shrimp, peeled and deveined - 2 tablespoons blackening seasoning - 2 tablespoons olive oil - 1 cup brown rice or quinoa, cooked - 1 cup corn, fresh or frozen - 1 red bell pepper, diced - 1 ripe avocado, sliced - 1 cup cherry tomatoes, halved - Juice of 1 lime - Salt and pepper, to taste - Fresh cilantro, chopped To make your Blackened Shrimp Bowls shine, focus on fresh ingredients. Start with shrimp that are large and firm. Their size holds up well during cooking. The blackening seasoning is key. You can buy it or make your own blend with paprika, garlic powder, and cayenne. For the base, I love using brown rice or quinoa. Both add great texture and nutrients. If you want a pop of color, diced red bell pepper brings sweetness. Corn adds crunch and sweetness too, whether fresh or frozen. Finally, toppings make your bowl special. Sliced avocado gives creaminess, while cherry tomatoes add freshness. A squeeze of lime juice brightens the dish. Don’t forget salt and pepper to enhance the flavors. Fresh cilantro is a must for a final touch. This recipe is about balance. You have protein, grains, veggies, and bright flavors. For the full recipe, check out the details above. - In a medium bowl, combine 1 pound of peeled and deveined shrimp with 2 tablespoons of blackening seasoning. - Toss the shrimp until they are evenly coated with the spice mix. Each shrimp should be covered well. - Heat a large skillet over medium-high heat and add 2 tablespoons of olive oil. - Once the oil shimmers, add the shrimp in a single layer. Cook the shrimp for 2-3 minutes on each side. They will turn opaque and get a nice char. Remove them from the skillet once cooked. - In the same skillet, add 1 cup of diced red bell pepper and 1 cup of corn. - Stir-fry for 3-4 minutes until the bell pepper is tender but still has some crunch. Season with salt and pepper to taste. Remove from heat. - Start with a scoop of warm cooked brown rice or quinoa in four bowls. - Layer the sautéed corn and bell pepper mixture on top. Add the blackened shrimp next, followed by slices of avocado and halved cherry tomatoes. - Finish by squeezing fresh lime juice over each bowl and garnish with chopped cilantro for a fresh touch. For the complete recipe, check out the [Full Recipe]. To achieve the perfect char on shrimp, use high heat. A hot skillet helps sear the shrimp quickly. This gives a nice crust while keeping the inside tender. Make sure the shrimp are dry before seasoning. Pat them with a paper towel. This helps the spices stick well. Choosing the right blackening seasoning is key. You can buy it or make your own. A mix of paprika, cayenne, garlic powder, and onion powder works great. Adjust the spice level to your taste. A little heat can make your dish exciting. You can grill or use a skillet for cooking shrimp. Grilling adds a smoky flavor. If you choose to grill, preheat the grill well. Place the shrimp on skewers for easy handling. If you prefer the skillet, follow the recipe closely. The skillet gives a nice char and is quick. You can also bake shrimp in the oven. Preheat your oven to 400°F. Place the shrimp on a sheet pan and bake for 8-10 minutes, checking for doneness. Pair your blackened shrimp bowls with sides like sautéed greens or a fresh salad. A refreshing drink, like iced tea or lemonade, complements the meal well. For meal prep, these bowls store well. You can make extra shrimp or veggies for lunch. Leftovers taste great the next day. Just reheat and enjoy your tasty blackened shrimp bowls again. For the full recipe, check the link! {{image_4}} You can easily swap shrimp for other proteins. Chicken is a great choice. Just cut it into bite-sized pieces. Cook it for about 5-7 minutes, until it's no longer pink. Tofu is another option. Use firm tofu and cube it. Sauté it for 3-4 minutes until golden. Fish like salmon or tilapia works well too. Cook fish for about 4-5 minutes per side, depending on thickness. Adjust cooking times for each protein. This way, you ensure everything is cooked perfectly. Want to add some creaminess? Try a smooth avocado dressing or a yogurt sauce. Both pair well with the rich flavors of the blackened shrimp. For a spicy kick, mix in sriracha or hot sauce. A citrus-based dressing is also great. Combine olive oil, lime juice, and a hint of honey for a fresh twist. These sauces can elevate your dish and add new layers of flavor. Feel free to get creative with your toppings! Extra veggies can boost nutrition and taste. Add shredded carrots, diced cucumbers, or even roasted sweet potatoes. Nuts like sliced almonds or chopped walnuts add crunch. If you have dietary restrictions, you can customize easily. Use gluten-free grains or plant-based proteins. This flexibility allows you to make a bowl that fits your needs perfectly. For the full recipe, check out the Blackened Shrimp Bowls section. To store your Blackened Shrimp Bowls, let them cool first. Place leftovers in an airtight container. This helps keep them fresh and tasty. You can store them in the fridge for up to three days. After that, the shrimp may lose flavor and texture. If you want to save the shrimp bowls for later, freezing is a great option. Make sure to pack them in a freezer-safe container. They can last up to three months in the freezer. When you’re ready to eat, thaw them overnight in the fridge. To reheat, use the microwave or a skillet until everything is hot. This way, you enjoy a quick, delicious meal anytime. For the full recipe, check out the details to make these tasty bowls. It takes about 30 minutes to make Blackened Shrimp Bowls. You’ll spend 10 minutes for prep and 20 minutes for cooking. This quick time makes it perfect for busy nights. Yes, you can prepare the components ahead of time. Cook the shrimp and veggies, then store them separately. When you’re ready to eat, just reheat and assemble. You can use Cajun spice or a mix of paprika, garlic powder, and cayenne. These options will give you similar flavors. Experiment with spices to find what you love best. Absolutely! You can swap shrimp for firm tofu or chickpeas. Just season and cook them the same way. This way, you’ll still get a tasty and satisfying meal. To lower the spice, use less blackening seasoning. For more heat, add extra cayenne or hot sauce. Taste as you go to find your perfect balance. You now have a tasty way to enjoy blackened shrimp bowls. We explored the ingredients, cooking steps, and possible variations. You can customize this dish based on your tastes. Remember to store leftovers properly for later meals. Enjoy experimenting with flavors and textures. These bowls are not just delicious; they are fun to prepare too. Try them out and make them your own!](https://meltedrecipes.com/wp-content/uploads/2025/05/52806d95-a0ae-432f-b8bb-b3553b91349f.webp)
Blackened Shrimp Bowls Flavorful and Quick Dinner Option
Looking for a quick, flavorful dinner idea? Try Blackened Shrimp Bowls! This meal combines tender shrimp, vibrant veggies, and a zesty kick that packs a
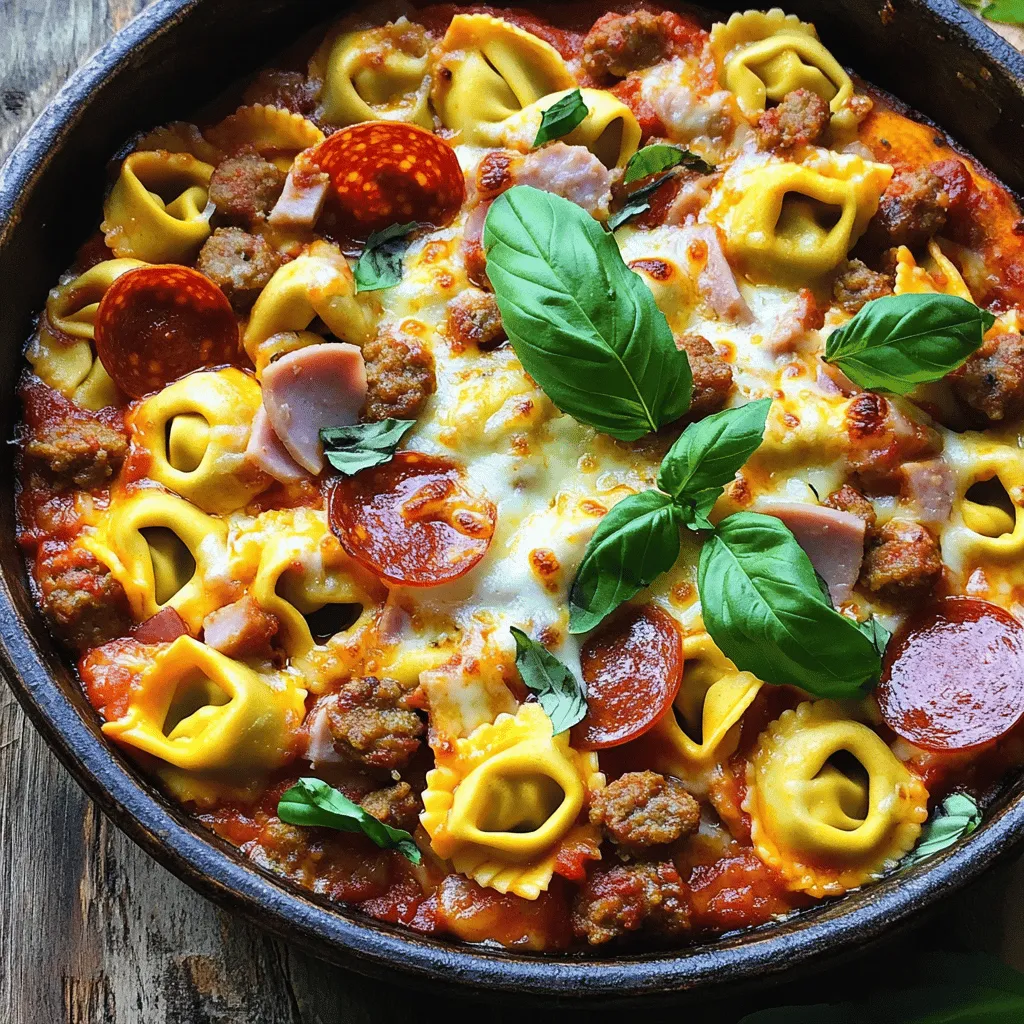
Meat Lovers Pizza Tortellini Flavorful Easy Dish
If you love pizza and pasta, you’re in for a treat! My Meat Lovers Pizza Tortellini fuses cheesy tortellini with savory meats and a rich
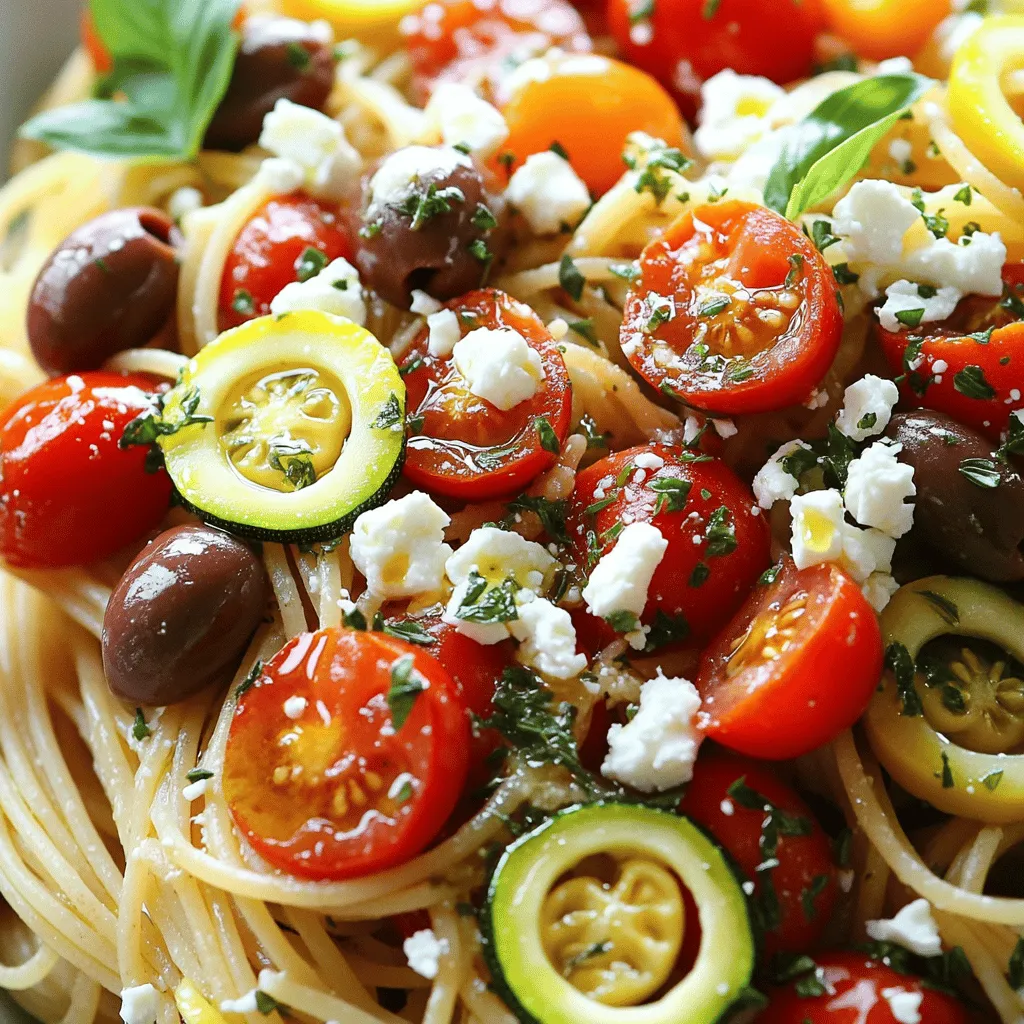
Mediterranean Pasta Flavorful and Easy Recipe Guide
If you crave a dish that bursts with flavor and is quick to make, then Mediterranean Pasta is your answer! This guide will walk you
![This Pizza Tater Tot Casserole is a fun and easy dish. It combines classic pizza flavors with crispy tater tots. You can make it in about 45 minutes. This dish is perfect for family dinners or gatherings. - Frozen tater tots - Ground beef or turkey - Fresh vegetables (onion, bell pepper, garlic) - Pizza sauce - Seasonings (Italian seasoning, garlic powder) - Cheeses (mozzarella, cheddar) - Pepperoni slices - Salt and pepper for taste - Fresh herbs for garnish Using these simple ingredients, you can create a dish that everyone will love. The tater tots give it a crunchy top, while the meat and cheese make it hearty. Don't forget to check the Full Recipe for detailed steps! 1. Preheat the oven: Start by setting your oven to 425°F (220°C). A hot oven makes the tater tots crispy. 2. Cooking the meat and vegetables: In a large skillet, cook 1 pound of ground beef or turkey over medium heat. Add a small, chopped onion, a diced bell pepper, and 2 minced garlic cloves. Stir it all together until the meat is brown and the veggies are soft. Drain any extra fat to keep it tasty and not greasy. 3. Adding pizza sauce and seasonings: Now, pour in 1 cup of pizza sauce. Add 1 teaspoon of Italian seasoning and 1 teaspoon of garlic powder. Season it with salt and pepper to taste. Mix well until it’s hot and combined. 4. Layering the casserole: Lightly grease a 9x13 inch baking dish. Spread the meat mixture evenly on the bottom. This creates a yummy base for your casserole. 5. Baking instructions: Next, cover the meat with a single layer of frozen tater tots. Make sure they sit evenly on top. Sprinkle 1 cup of shredded mozzarella and 1 cup of shredded cheddar cheese over the tater tots. Finally, add 1 cup of sliced pepperoni for that pizza flavor you love. 6. Place the dish in your preheated oven. Bake for 25-30 minutes. You want the tater tots to turn golden brown and the cheese to melt and bubble. - Allowing the casserole to cool: After taking it out of the oven, let it cool for a few minutes. This step helps avoid burns from hot cheese and makes serving easier. - Presentation tips: Use a spatula to cut the casserole into squares. Place them on plates and drizzle a bit of extra pizza sauce on the side for dipping. You can also garnish with fresh basil or parsley to make it look even nicer. Enjoy your delicious Pizza Tater Tot Casserole Delight! To get crispy tater tots, spread them evenly in the baking dish. Avoid stacking them too high. This allows hot air to circulate and crisp them up. Bake them until they turn golden brown. Mixing flavors can make this dish even better. Add some Italian sausage or mushrooms to the meat mix. This can deepen the taste and add extra texture. You can adjust spiciness by adding red pepper flakes or jalapeños. For a milder dish, skip these. You can also use sweet bell peppers for a hint of sweetness. Use a 9x13 inch baking dish for this casserole. It provides enough space for layers without overflow. A large skillet works well for cooking the meat and veggies. You’ll need a spatula to serve the casserole. A sharp knife is handy for cutting it into squares. Have a cutting board ready for chopping the vegetables. These tools make cooking easier and more fun! {{image_4}} You can switch up the protein in your Pizza Tater Tot Casserole. Try using chicken or sausage instead of ground beef or turkey. Each option gives a unique twist to the dish. For a vegetarian or vegan version, use plant-based meat or skip the meat altogether. You can add more veggies like mushrooms or spinach for flavor and texture. If you're gluten-sensitive, look for gluten-free tater tots. Many brands offer tasty options that work well in this recipe. To kick up the flavor, add toppings or spices. Consider adding olives, jalapeños, or even pineapple for a sweet twist. Experiment with different cheeses too. Try provolone or pepper jack for a bold taste. Mixing cheeses can create a rich, gooey topping that everyone loves. For the full recipe, check out the [Full Recipe]. - Storing in the refrigerator: After you enjoy your Pizza Tater Tot Casserole, let it cool. Place any leftovers in an airtight container. Store it in the fridge for up to three days. This helps keep the flavors fresh and tasty. - Freezing for later use: If you want to save more for later, you can freeze it. Cut the casserole into portions. Wrap each piece tightly in plastic wrap, then place in a freezer-safe bag. It can last up to three months in the freezer. - Best ways to reheat for optimal crispiness: To keep the tater tots crispy, use the oven. Preheat it to 350°F (175°C). Place the casserole in an oven-safe dish. Cover it loosely with foil to stop it from drying out. Heat for about 20-25 minutes. Check that it is warm all the way through before serving. Enjoy your tasty leftovers! You can serve a fresh salad. A simple green salad adds crunch and balance. Garlic bread is another great option. It pairs well with the cheesy casserole. For drinks, try soda or iced tea to keep it casual. Yes, you can prepare the casserole a day in advance. Just follow the steps until you layer the tater tots. Cover it and place it in the fridge. When you're ready, bake it straight from the fridge. This saves time on busy nights. You can store leftovers in the fridge for about 3-4 days. Make sure to place them in an airtight container. For longer storage, freeze the casserole. It can last up to 2-3 months in the freezer. Just reheat it thoroughly when you’re ready to enjoy it again. Using fresh tater tots is a great idea. Just note that you may need to adjust the cooking time. Fresh tots may cook faster, so keep an eye on them. The goal is a crispy top and melted cheese underneath. This blog post guides you through making a tasty Pizza Tater Tot Casserole. We covered the ingredients you'll need, like frozen tater tots, ground meat, and fresh veggies. I shared step-by-step cooking instructions and tips for perfect texture and flavor. You can even explore different ingredient options and storage tips. With this recipe, you'll create a dish that is fun and easy. Enjoy cooking and experimenting with flavors unique to you!](https://meltedrecipes.com/wp-content/uploads/2025/05/1d84f8b6-bba5-4008-bc31-2b9394be5bc2.webp)
Pizza Tater Tot Casserole Easy Family Dinner Recipe
Are you ready to transform dinner into a fun and tasty experience? This Pizza Tater Tot Casserole combines all your favorite pizza flavors with the
Savory Shrimp and Avocado Bowls Delicious and Fresh
Do you want a meal that’s fresh, healthy, and oh-so-delicious? Look no further! My Savory Shrimp and Avocado Bowls are a perfect blend of flavors

Delicious Ravioli with Fresh Tomatoes Tasty Family Dish
If you’re ready to impress your family with something special, try this Delicious Ravioli with Fresh Tomatoes! Made from scratch, it’s a delightful blend of
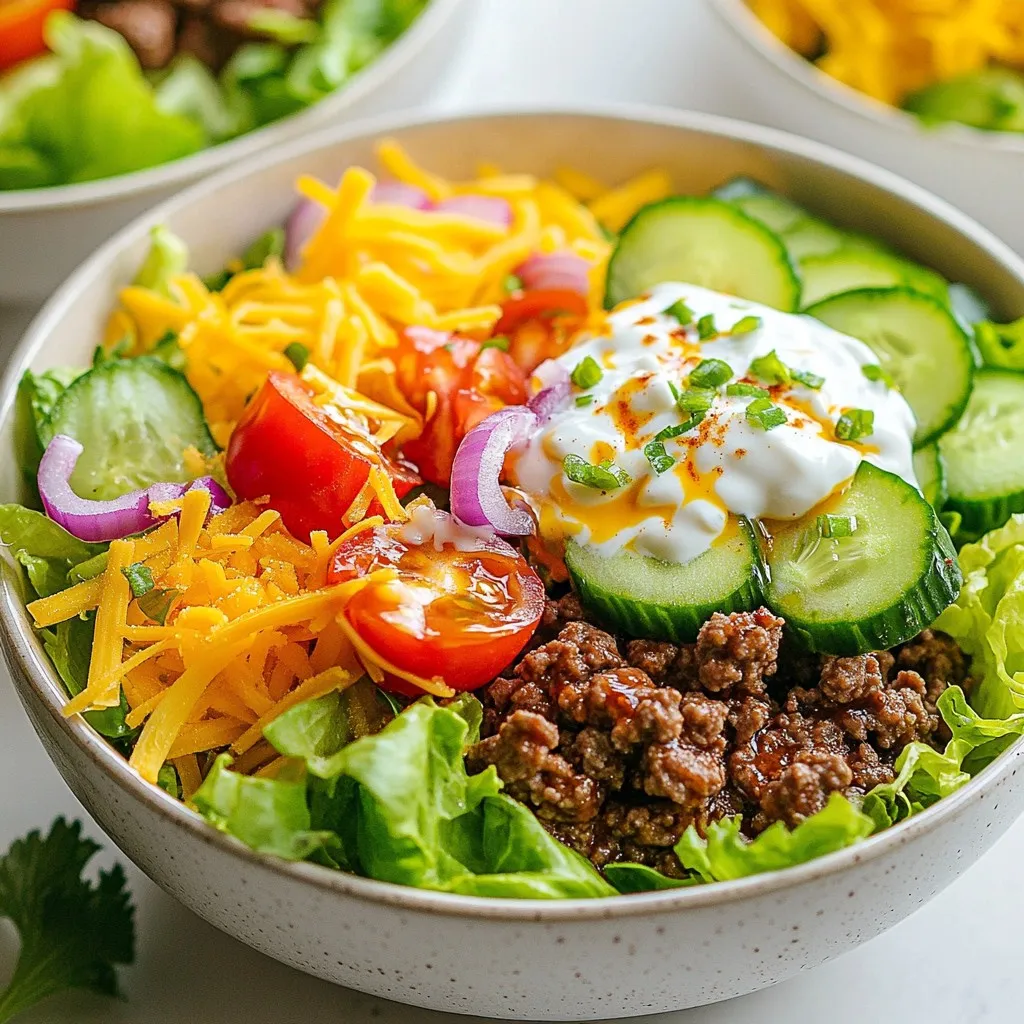
Low-Carb Burger Bowls Quick and Tasty Meal Guide
Craving a quick, tasty meal that fits your low-carb lifestyle? You’ve come to the right place! In Low-Carb Burger Bowls Quick and Tasty Meal Guide,
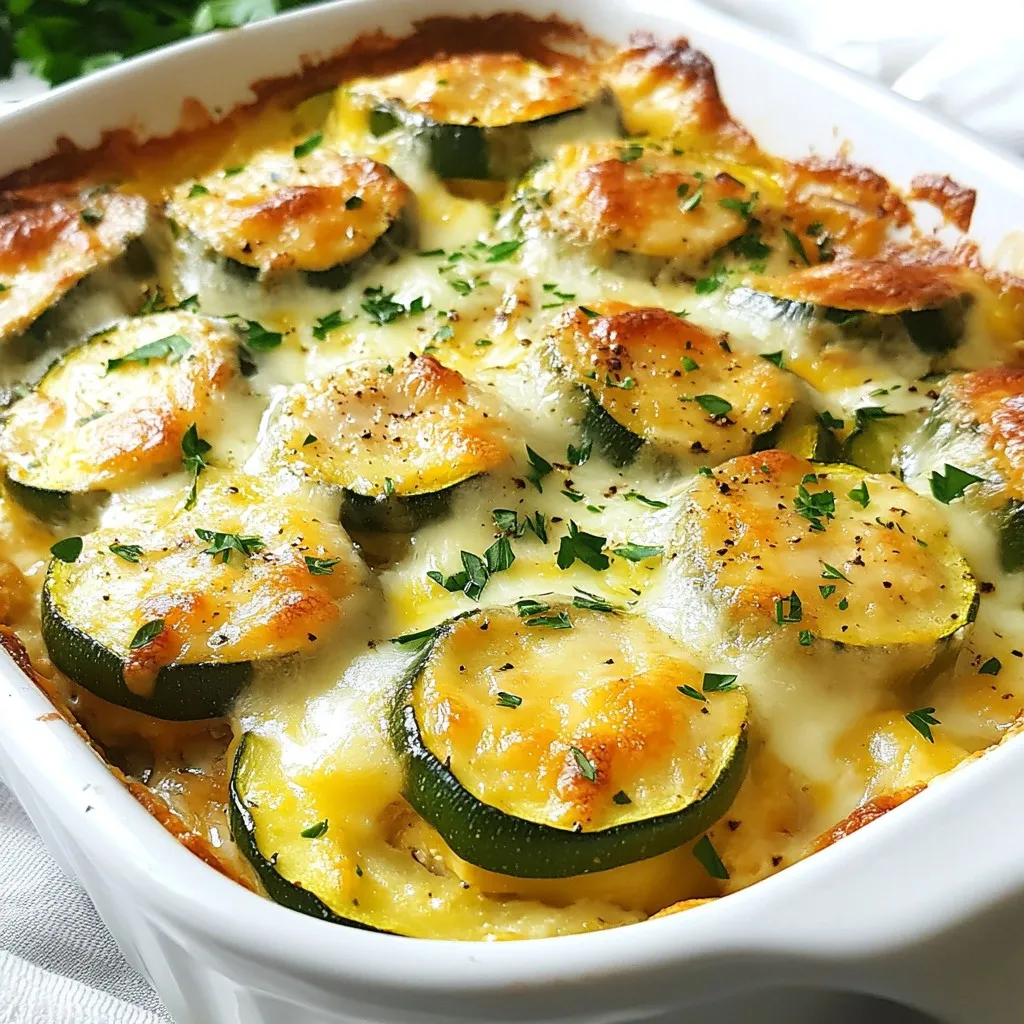
High-Protein Chicken Zucchini Bake Healthy and Easy
Looking for a healthy, delicious meal that’s quick to make? Try my High-Protein Chicken Zucchini Bake! This dish combines tender chicken, fresh zucchini, and creamy
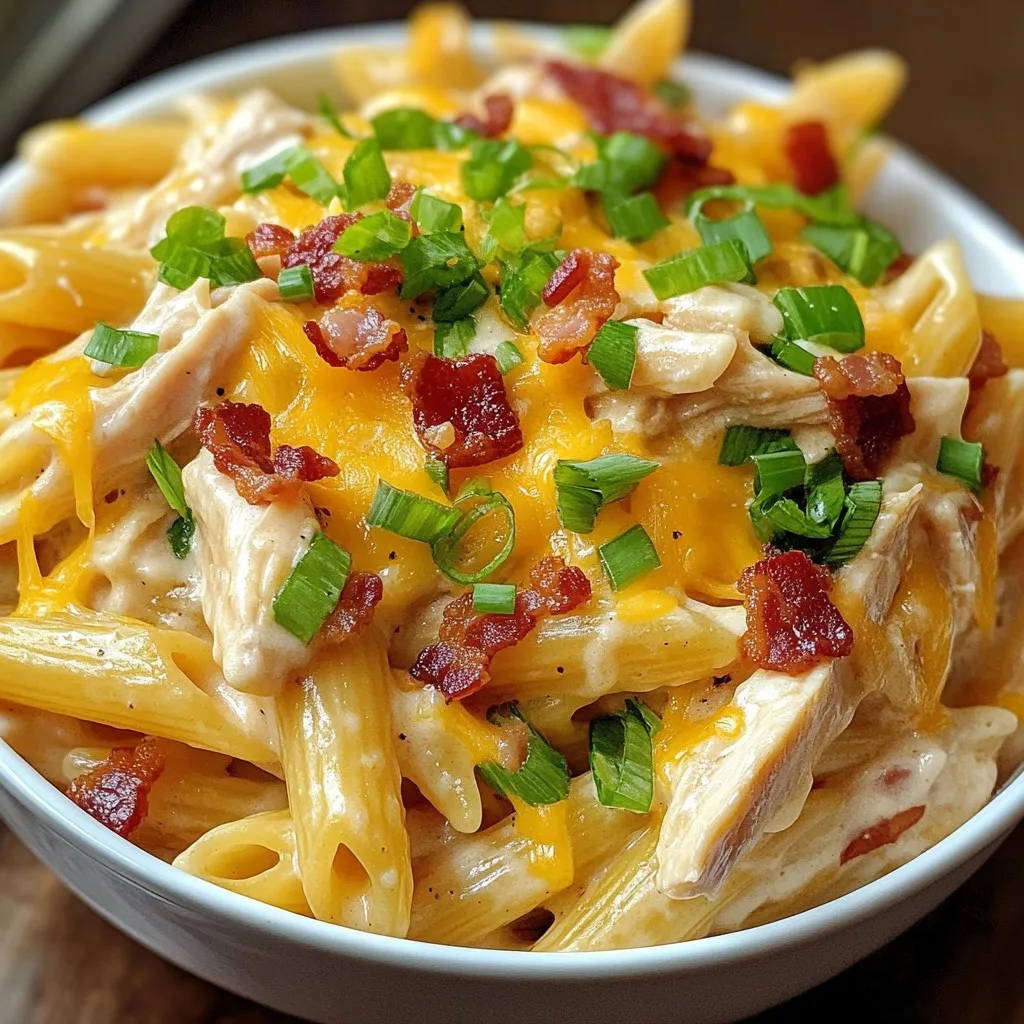
Crack Chicken Penne Creamy Dinner Delight Recipe
Are you ready to enjoy a creamy, dreamy dinner? This Crack Chicken Penne recipe transforms simple ingredients into a mouthwatering delight. With tender pasta, juicy
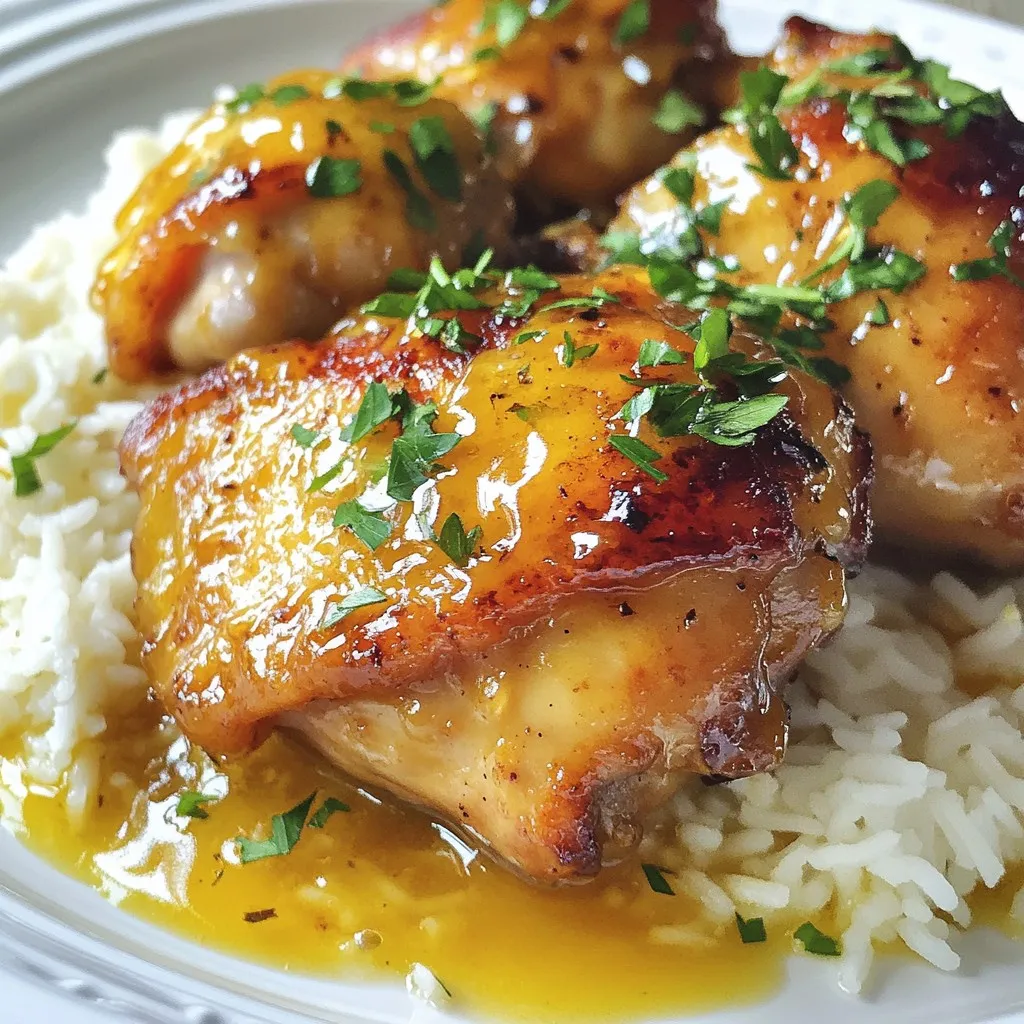
Sticky Honey Butter Chicken Flavorful and Easy Recipe
Are you ready to whip up a dish that will impress your family and friends? Sticky Honey Butter Chicken is the perfect blend of sweet