Dinner

- 1 lb ground beef (80/20 for juicy flavor) - 1 teaspoon garlic powder - 1 teaspoon onion powder - 1 teaspoon smoked paprika - Salt and freshly ground black pepper, to taste - 4 hamburger buns - 4 slices of sharp cheddar cheese - Crisp romaine lettuce leaves - 1 ripe tomato, sliced - Pickles (optional) - Ketchup and mustard for serving To create your Air Fryer Hamburgers, start with ground beef. I prefer 80/20 because it gives great flavor and juiciness. The seasonings are key. I use garlic powder, onion powder, and smoked paprika for depth. This mix brings out the best in your meat. Next, the buns and toppings complete your burger. Choose soft hamburger buns and sharp cheddar cheese. Fresh romaine lettuce and juicy tomato add crunch and freshness. Pickles are optional, but they add a nice tang. Don’t skip the ketchup and mustard; they add classic flavors. - Alternative cheeses (Swiss, pepper jack) - Additional toppings (avocado, grilled onions) For a twist, consider alternative cheeses. Swiss or pepper jack can change the taste. You might also add additional toppings like creamy avocado or sweet grilled onions. These extras can make your burgers unique and fun. - Air fryer - Mixing bowl - Meat thermometer To cook your burgers perfectly, you’ll need a few tools. An air fryer is essential for that crispy texture. A mixing bowl helps you combine your ground beef and spices. Finally, a meat thermometer ensures your burgers are cooked just right. Aim for 160°F (71°C) for medium. For the full recipe, check out the complete guide to crispy Air Fryer Hamburgers! - In a large bowl, combine 1 lb ground beef with: - 1 teaspoon garlic powder - 1 teaspoon onion powder - 1 teaspoon smoked paprika - Salt and pepper to taste - Mix gently with your hands. Be careful not to overwork it. This keeps the burgers juicy. - Divide the beef mixture into four equal parts. Shape each part into a patty about ¾ inch thick. - Press your thumb gently into the center of each patty. This helps stop them from puffing up while cooking. - Preheat your air fryer to 375°F (190°C) for about 5 minutes. This makes sure the burgers cook evenly. - Arrange the patties in the air fryer basket. Make sure they do not touch. This allows for good air flow. You might need to cook in batches. - Cook the burgers for 8-10 minutes. Flip them halfway through. This helps them cook evenly on both sides. - Use a meat thermometer to check for doneness. Aim for 160°F (71°C) for medium. - In the last minute, add a slice of cheddar cheese on each patty. Let it melt nicely. - After cooking, carefully take the burgers out and let them rest for a few minutes. This keeps them juicy. Now you have delicious, juicy hamburgers ready to enjoy! For the complete recipe, check the [Full Recipe]. To know when your burger is done, check the internal temperature. For a medium burger, aim for 160°F. This temperature ensures your burger is safe to eat and juicy. You can also use visual cues. Look for a nice brown crust on the outside and clear juices running from the burger. If the juices are pink, it needs more time. Do not overwork the meat when mixing in the seasonings. Overworking can make the burgers tough. Mix just until combined. After cooking, let your burgers rest for a few minutes. This helps them stay juicy. The juices will redistribute, making each bite more flavorful. Now for the fun part—toppings! Some great options are fresh romaine lettuce, slices of ripe tomato, and sharp cheddar cheese. You can also add pickles if you like a tangy crunch. Pair your burgers with sides like crispy fries or a fresh salad. For a pop of color, garnish your plate with fresh herbs. These small touches make your meal look amazing. For the complete process, check the Full Recipe. {{image_4}} You can swap ground beef for other meats. Turkey and chicken work well. They make lighter burgers but stay juicy if you choose the right fat content. For a plant-based choice, try black bean or lentil patties. They add flavor and nutrition. Just remember to adjust your seasoning for these alternatives. Want to spice things up? Add jalapeños or a dash of hot sauce to your beef mix. You can also create regional styles. For a BBQ twist, mix in some barbecue sauce. For a Greek vibe, try adding feta cheese and oregano. Each style gives your burger a unique taste. Not just for traditional buns! Try burger bowls for a fun twist. Serve your patty over a bed of greens with toppings on the side. Sliders are great for parties. These mini burgers are easy to grab and enjoy. They let guests try different flavors without filling up. To keep your leftover hamburgers fresh, follow these steps: - Cool Down: Let the burgers cool at room temperature for no more than two hours. - Wrap or Seal: Wrap each burger tightly in plastic wrap or aluminum foil. You can also use an airtight container. - Label and Date: Write the date on the container or wrap so you know when to use them. I recommend using glass or plastic containers with tight lids for best results. These help keep your burgers moist and tasty. When it’s time to eat your leftovers, reheating is key. Here are the best methods: - Air Fryer: Preheat your air fryer to 350°F (175°C). Cook the burgers for about 3-4 minutes. Check to ensure they are heated through. - Stovetop: Place the burger in a skillet over low heat. Cook for about 4-5 minutes on each side. To avoid dryness, add a small splash of water in the pan if using the stovetop. Cover with a lid to steam gently while reheating. Enjoy your juicy burgers again soon! Yes, you can! If you don’t have a meat thermometer, use these methods: - Touch Test: Press the center of the patty. If it feels firm, it's done. - Juice Test: Cut the burger in half; clear juices mean it's cooked. - Time Method: Cook the burgers for about 8-10 minutes at 375°F. Flip halfway. These tests help ensure your burgers are safe to eat. I recommend using a thermometer for best results. Cooked hamburgers last about 3-4 days in the fridge. Store them in an airtight container. For longer shelf life, freeze them. Frozen burgers can last up to 4 months. Make sure they cool down before wrapping. Use plastic wrap or freezer bags to prevent freezer burn. The best air fryer temperature for hamburgers is 375°F (190°C). This setting cooks them evenly. For different doneness levels, here are the internal temperatures to aim for: - Medium-Rare: 130°F (54°C) - Medium: 160°F (71°C) - Well-Done: 170°F (77°C) Adjust cooking time based on how you like your burgers. Always check the internal temperature for safety. For an easy guide, follow the [Full Recipe]. It includes every step to make juicy hamburgers. Enjoy your cooking adventure! In this guide, we explored how to make delicious air fryer hamburgers. We covered the essential ingredients, step-by-step cooking instructions, and tips for juicy results. You can experiment with different meats and toppings for variety. Remember to store leftovers correctly and use proper reheating methods to retain flavor. Making air fryer hamburgers is simple and fun. Enjoy trying these recipes, and don’t hesitate to add your favorite twist!
Air Fryer Hamburgers Juicy and Flavorful Recipe
Are you ready to make the juiciest, most flavorful hamburgers ever? In this guide, I’ll show you how to whip up delicious air fryer hamburgers
To make Chia Banana Bread Energy Bites, gather these items: - 2 ripe bananas, thoroughly mashed - 1 cup rolled oats - ¼ cup almond butter (or your preferred nut butter) - 2 tablespoons chia seeds - 1 teaspoon vanilla extract - ½ teaspoon ground cinnamon - 1 tablespoon honey or maple syrup (optional, for extra sweetness) - ¼ cup chopped walnuts (or pecans if you prefer) - A pinch of salt You can swap almond butter for sunflower seed butter for a nut-free option. For sweetness, honey can be replaced with agave syrup or left out. If you have nut allergies, use sunflower seed butter and skip the walnuts. You can mix in seeds, dried fruit, or even chocolate chips for added flavor. These energy bites are versatile and can fit many diets. To start, I grab a large mixing bowl. First, I add the two ripe bananas. I mash them well until smooth. Next, I mix in the almond butter and vanilla extract. I stir these ingredients together until they blend nicely. Now, it's time to add the dry ingredients. I sprinkle in one cup of rolled oats, two tablespoons of chia seeds, and a pinch of salt. I also add half a teaspoon of ground cinnamon for flavor. I gently fold these into the banana mixture. It should all come together well. If you like a sweeter taste, this is the moment to add honey or maple syrup. I suggest one tablespoon, but you can adjust to your liking. Finally, I fold in a quarter cup of chopped walnuts for some crunch. The mix should look thick and inviting. Next, I cover the bowl with plastic wrap. I let the mixture chill in the fridge for 20 to 30 minutes. This step is key. Chilling helps the mixture firm up, making it easier to roll into bites. Once chilled, I scoop out about one tablespoon of the mixture. I roll it into a ball, about one inch wide. I keep doing this until I’ve shaped all the mixture into bites. I place them on a baking sheet lined with parchment paper to prevent sticking. Chilling is crucial for the best texture. It helps the energy bites hold their shape. After rolling them, I put the baking sheet back in the fridge. I let them chill for at least another 30 minutes before serving. This step ensures they firm up nicely for a perfect snack. Enjoy these tasty bites as a quick treat or energy boost throughout your day! For the full recipe, check out the details above. To get the best texture for your Chia Banana Bread Energy Bites, smoothness is key. Start with very ripe bananas. They mash easily and add natural sweetness. Use a fork or a potato masher to blend them well. Aim for a creamy consistency; this makes mixing easier. To avoid sticky bites, let the mixture chill. After combining the ingredients, cover the bowl and refrigerate. This step firms up the mixture, making it easier to shape. You can also adjust the amount of oats. If your mixture feels too wet, add a little more rolled oats. To boost the flavor of your bites, consider adding spices. Ground nutmeg or a hint of ginger can bring warmth and depth. You might also try adding a splash of almond extract for a unique twist. For extra texture and crunch, think about mix-ins. Dried fruits like cranberries or apricots can add sweetness. You can also add seeds such as sunflower or pumpkin seeds. These not only enhance the flavor but also add healthy fats and protein to your bites. {{image_4}} You can change the flavor of your Chia Banana Bread Energy Bites easily. Start by swapping out the almond butter for another nut butter. Options like peanut butter, cashew butter, or sunflower seed butter work great. Each nut butter adds its own taste and texture. You can also create unique flavors by adding ingredients like cocoa powder or matcha. A tablespoon of cocoa gives a rich chocolatey taste. If you want a green twist, add a teaspoon of matcha. Both options are fun ways to make your bites stand out. Making your energy bites fit your diet is simple. To make them vegan, skip the honey and use maple syrup instead. For a gluten-free version, ensure you select certified gluten-free oats. You can also mix in fun extras. Dried fruits like cranberries or apricots add sweetness and chewiness. You can chop up dark chocolate for a sweet treat. Seeds like pumpkin or sunflower seeds can add crunch and nutrition, too. These small changes can turn a tasty snack into a delightful surprise. To keep your Chia Banana Bread Energy Bites fresh, use an airtight container. Glass or plastic containers work well. Make sure they seal tightly to keep out air. Store your bites in the fridge. They will stay fresh for about a week. For longer shelf-life, you can add a piece of parchment paper between layers. This prevents them from sticking together. If you want to save some for later, you can freeze them. First, arrange the energy bites on a baking sheet. Make sure they are not touching each other. Freeze them for about two hours until solid. Then, transfer them to a freezer-safe bag or container. Label the bag with the date. They can last up to three months in the freezer. When you want to enjoy some, take out what you need. Let them thaw at room temperature for about 30 minutes. You can also pop them in the microwave for a few seconds. Now, you have a quick and tasty snack ready to go! For the full recipe, check out the detailed instructions on preparing these delicious bites. How long do Chia Banana Bread Energy Bites last? These energy bites last about one week in the fridge. Keep them in an airtight container to stay fresh. You can also freeze them for up to three months. Just thaw before eating. Can I use quick oats instead of rolled oats? Yes, you can use quick oats. They will change the texture a bit but will still work well. The bites may turn out a bit softer, which some people prefer. Are these energy bites suitable for kids? Absolutely! Kids love these bites. They are healthy and tasty, making them a great snack. The ingredients are safe and nutritious for children. What can I substitute if I don't have chia seeds? If you don’t have chia seeds, try flaxseeds. Ground flaxseeds can work similarly in this recipe. You can also skip them if needed, but they do add a great texture. Can I make these energy bites without bananas? You can use applesauce instead of bananas. This will keep the bites moist. Another option is to use mashed sweet potato for a different flavor. In this article, we explored how to make delicious and nutritious energy bites. We covered ingredients, including options for allergies and substitutions. You learned the step-by-step preparation and chilling process for optimal texture. We shared tips on perfecting texture and enhancing flavor, along with creative variations to suit different diets. Lastly, we discussed proper storage and freezing techniques. These energy bites are easy to make and perfect for snacks. Enjoy experimenting with flavors and ingredients!
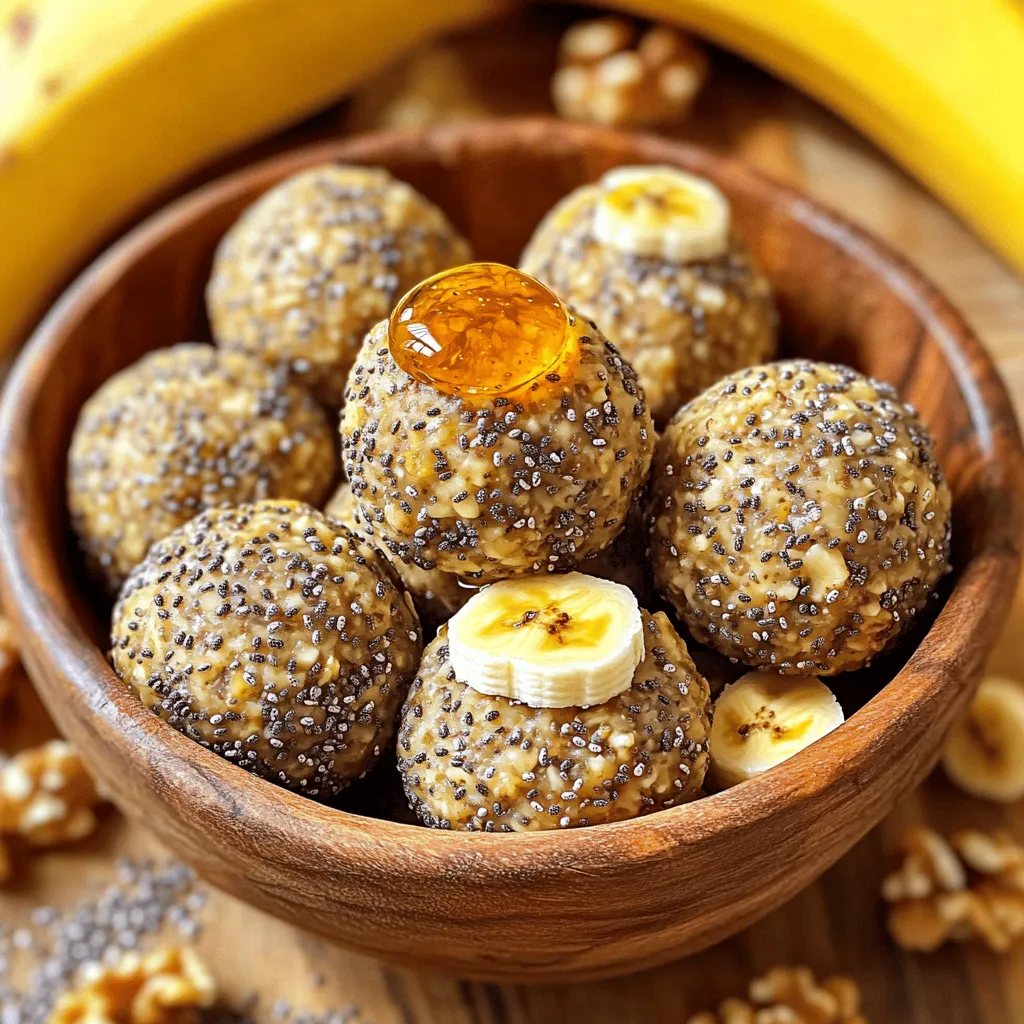
Chia Banana Bread Energy Bites Nutritious Snack Idea
Looking for a tasty snack that packs a nutritional punch? Chia Banana Bread Energy Bites are your answer! These easy-to-make bites are perfect for busy
Air Fryer Cheesy Garlic Steaks are quick and delicious. You can make them in just 30 minutes. The ribeye steaks are juicy and tender. Garlic and cheese add a rich flavor. This meal is great for a weeknight dinner or a special occasion. - 2 ribeye steaks (approximately 1 inch thick) - 3 cloves garlic, finely minced - 2 tablespoons extra virgin olive oil - 1 teaspoon smoked paprika - 1 teaspoon sea salt - ½ teaspoon freshly ground black pepper - 1 cup shredded mozzarella cheese - Fresh parsley, finely chopped (for garnish) Gather these ingredients for a flavorful meal. Each item plays a key role in making your steaks shine. The ribeye offers a great balance of fat and meat. The garlic provides a strong and savory taste. Olive oil helps the spices stick to the steak. Smoked paprika adds depth and warmth. Sea salt and black pepper bring out the natural flavors. Mozzarella cheese gives a gooey, melty finish that everyone loves. Finally, fresh parsley brightens the dish with color and freshness. Check the Full Recipe to dive into the cooking process and enjoy this tasty meal! Start by making the marinade. In a small bowl, mix the minced garlic, olive oil, smoked paprika, sea salt, and black pepper. Stir well until all the ingredients blend together. This simple mix adds a punch of flavor to the steaks. Next, take your ribeye steaks and coat both sides with the garlic marinade. Make sure to cover every inch for the best taste. Let the steaks sit at room temperature for about 30 minutes. This time helps the flavors soak in. If you want a stronger taste, you can refrigerate them for up to 2 hours. - Preheat the air fryer: Set your air fryer to 400°F (200°C) and preheat for about 5 minutes. This step helps sear the steaks perfectly. - Cooking times for desired doneness: Place the marinated steaks in the air fryer basket in a single layer, ensuring they do not touch. For medium-rare, cook for 10-12 minutes, flipping halfway. If you prefer medium or medium-well, add 1-2 more minutes. - Adding cheese in the final moments: When the steaks are almost done, sprinkle shredded mozzarella cheese on top. Air fry for an extra 2 minutes until the cheese melts and bubbles up into a golden crust. For the full recipe, refer to the previously mentioned details. Enjoy your delicious Air Fryer Cheesy Garlic Steaks! To make a great steak, start with quality meat. Choose ribeye steaks for their rich flavor and marbling. Marinating is key. A good marinade adds flavor and helps tenderize the meat. I recommend letting the steaks sit in the marinade at room temperature for 30 minutes. This allows the garlic and spices to soak in. When air frying, preheat your air fryer. This step helps give the steak a nice sear. Cook the steaks in a single layer for even cooking. Flip them halfway through for the best results. Aim for 10-12 minutes for medium-rare, adjusting time for your preferred doneness. You can play with flavors in this recipe. Try adding herbs like thyme or rosemary to the marinade. A splash of Worcestershire sauce can also enhance the steak's umami flavor. If you like heat, consider adding crushed red pepper flakes to the mix. For a smoky touch, smoked paprika works wonders. Don't forget the cheese! Adding mozzarella in the last few minutes creates a gooey, delicious topping. Experiment with other cheeses like cheddar or gouda for different tastes. Serve your cheesy garlic steaks on a rustic wooden board or a warm plate. Drizzle some olive oil over the top and add a sprig of parsley for color. This simple touch makes the dish look elegant. For sides, roasted vegetables or a fresh side salad pair well. You might also enjoy a glass of red wine, like Cabernet Sauvignon, to complement the rich flavors. For a lighter drink, a sparkling water with lime works great too. {{image_4}} If you want to switch things up, try different cheeses. Cheddar gives a sharp bite. Gouda offers a smoky flavor. Blue cheese adds a rich creaminess. Each cheese brings a unique taste. Mix and match to find your favorite. You can even use a blend of cheeses for depth. Feel free to play with seasonings. A dash of chili powder can add heat. Italian herbs like oregano and thyme bring freshness. You can also try a steak rub for a robust flavor. Experimenting with seasonings opens up new taste experiences. Each blend can change the whole dish. You can choose between air frying and grilling. Grilling adds a nice char and smoky flavor. However, air frying cooks evenly and is less messy. Both methods yield tasty steaks. You can also switch cuts of steak. Flank steak is lean and great for marinating. Sirloin is tender and budget-friendly. Each cut has its own texture and taste. Adjust cooking times based on the cut you choose. This flexibility makes it easy to enjoy your favorite steak, no matter the method. To store leftover cheesy garlic steaks, let them cool first. Place the steaks in an airtight container. They will stay fresh in the fridge for up to three days. If you want to keep them longer, freezing is a great option. For the best reheating results, use the air fryer. Set it to 350°F (175°C). Heat the steaks for about 5 to 7 minutes. This method keeps the steaks juicy and the cheese melty. You can also use a microwave, but the texture may not be as nice. To freeze, wrap each steak tightly in plastic wrap. Then, place them in a freezer bag. This helps to avoid freezer burn. You can store them for up to three months. For the best flavor, try to eat them sooner. - Best practices for flavor retention: - Keep the steaks in the coldest part of the freezer. - Label the bag with the date. - Thaw in the fridge overnight before reheating for the best taste. This storage info ensures your Air Fryer Cheesy Garlic Steaks remain delicious, even after a day or two! Use the [Full Recipe] to recreate this dish whenever you crave it. Yes, you can use other cuts. Sirloin, flank, or tenderloin work well. Each cut has a different taste and texture. Ribeye is great for its marbling, but sirloin is leaner. Flank steak is thinner and cooks quickly. Just adjust the cooking time based on the cut. The best way to marinate steak is to mix oil, acid, and spices. Use olive oil for richness and acid like lemon juice or vinegar for tang. Add garlic, herbs, and spices for flavor. Coat the steak well and let it sit. Marinate for at least 30 minutes at room temperature. For deeper flavor, marinate for several hours in the fridge. To make your steaks spicier, add chili powder or cayenne pepper to the marinade. You can also use hot sauce for a kick. If you love heat, consider adding sliced jalapeños on top before cooking. Adjust the spice levels to suit your taste. Enjoy the heat with the cheesy flavor! This blog post gave you a full guide on making delicious ribeye steaks. You learned about the key ingredients and how to prepare them. With step-by-step instructions, you can easily marinate and air fry your steaks to perfection. I shared tips for flavor and presentation, as well as helpful variations and storage info. Now you have all the tools to create a tasty meal. Enjoy your cooking adventure and impress your family and friends with your steak skills!
Air Fryer Cheesy Garlic Steaks Flavorful Quick Meal
Ready to impress with a quick meal that’s packed with flavor? My Air Fryer Cheesy Garlic Steaks are your answer! This dish combines juicy ribeye
To make a tasty White Cheddar Baked Corn, you need some key ingredients. Here’s what you’ll need: - 4 cups corn kernels (fresh, frozen, or canned, drained) - 1 cup white cheddar cheese, shredded - 1/2 cup whole milk - 1/4 cup heavy cream - 2 tablespoons unsalted butter, melted - 1/4 cup grated Parmesan cheese - 2 tablespoons granulated sugar - 1 teaspoon garlic powder - 1 teaspoon onion powder - Salt and freshly ground black pepper to taste - 1/4 cup breadcrumbs (optional, for a crunchy topping) - Fresh parsley, finely chopped (for garnish) These ingredients work together to create a rich and creamy dish. The white cheddar cheese gives it a sharp flavor that pairs well with the sweet corn. You can change up the recipe to fit your taste. Here are some ideas: - Add jalapeños for a spicy kick. - Mix in cooked bacon or chicken for added protein. - Toss in other veggies, like bell peppers or zucchini. - Use different cheeses, like mozzarella or gouda, for a twist. These options allow you to customize your baked corn to your liking. If you don’t have some ingredients, don’t worry. Here are some easy swaps: - Use almond milk instead of whole milk for a dairy-free option. - Swap heavy cream for coconut cream if you want a lighter dish. - Replace white cheddar with a blend of cheddar and Monterey Jack for a milder taste. - For a gluten-free option, skip the breadcrumbs or use gluten-free ones. These substitutions help you make the dish fit your needs while keeping it delicious. For the full recipe, check the details above. Start by preheating your oven to 375°F (190°C). This step is key for even cooking. While the oven warms up, grab a 2-quart baking dish. Use 1 tablespoon of melted butter to grease the dish. This helps prevent sticking and makes serving easier later. In a large mixing bowl, add the corn kernels and shredded white cheddar cheese. Stir gently to mix them well. Next, pour in the whole milk and heavy cream. Then add the melted butter and grated Parmesan cheese. Mix until everything is blended well. Now, it’s time to add flavor! Sprinkle in the granulated sugar, garlic powder, and onion powder. Season with salt and pepper to taste. Stir until all the ingredients are well combined, ensuring every bite is packed with flavor. Carefully pour the corn mixture into the prepared baking dish. Spread it out evenly with a spatula. If you like a crunchy topping, sprinkle breadcrumbs on top. This adds a nice texture. Place the baking dish in your preheated oven. Bake for 30 to 35 minutes. You’ll know it’s ready when the top is golden brown and bubbly. Once done, remove it from the oven and let it cool for about 5 minutes. This helps the dish set, making it easier to serve. For a touch of color, garnish with finely chopped fresh parsley just before serving. Enjoy your delicious White Cheddar Baked Corn! For more details, check out the Full Recipe. When baking White Cheddar Baked Corn, avoid some common mistakes. First, don’t rush to mix. Stir gently to keep the corn intact. Over-mixing can turn your bake mushy. Next, watch your oven temperature. If it’s too hot, the top burns before the inside cooks. Always preheat your oven fully for even baking. Lastly, let it cool slightly before serving. This helps the dish set and makes it easier to serve. If you cut it too soon, it may fall apart. To boost the flavor, try adding a few extra spices. Consider a pinch of smoked paprika for warmth. A dash of cayenne pepper can add a nice kick without overwhelming the dish. Herbs also work wonders. Fresh thyme or rosemary can brighten the flavors. You can mix in some chopped green onions for a fresh touch. Experiment with your favorite seasonings, but taste as you go. This way, you can adjust and find the perfect balance. Serve White Cheddar Baked Corn warm from the oven. It pairs well with grilled chicken or fish. A fresh salad makes a great side dish too. For a fun twist, try using it as a filling. Spoon it into baked potatoes or tacos for a new experience. Don’t forget to garnish with fresh parsley. It adds color and a hint of freshness. Enjoy this dish, and share it with family and friends! {{image_4}} You can add protein to your white cheddar baked corn for extra flavor. Cooked chicken or bacon works great. To add chicken, use shredded rotisserie chicken. Mix it in with the corn and cheese. For bacon, cook until crispy. Chop it and fold it into the mixture before baking. This gives your dish a smoky taste and a hearty feel. If you like heat, spice things up! You can add jalapeños or red pepper flakes. Chop fresh jalapeños and mix them into the corn. This adds a nice kick. If you want it milder, sprinkle in red pepper flakes. Start with a small amount and taste as you go. Adjust to your heat level for a perfect balance. For a vegetarian twist, mix in other vegetables. Bell peppers, zucchini, or spinach are great choices. Dice them up and sauté them lightly before adding to the corn mix. This not only boosts flavor but also adds color and nutrition. Try a mix of your favorite veggies for a fresh and fun variation. You can find the full recipe linked above to explore all these tasty options! If you have leftovers, store them in an airtight container. Let the dish cool down first. This keeps it fresh and tasty. Place it in the fridge for up to four days. You can also cover the dish with plastic wrap if you don't have a container. When you're ready to enjoy your leftovers, preheat your oven to 350°F (175°C). Place the corn bake in an oven-safe dish. Cover it with foil to keep it moist. Heat for about 20 minutes. Check if it's hot all the way through. You can also use a microwave, but it may not get the same crispy top. Heat on medium for 2-3 minutes, stirring halfway. You can freeze White Cheddar Baked Corn for later enjoyment. To freeze, let it cool completely. Then, transfer it to a freezer-safe container. It can last for about three months. When you're ready to eat it, thaw it in the fridge overnight. Reheat it using the oven for the best results. This way, you keep that cheesy flavor and creamy texture. For the full recipe, refer to the section above. To add more cheese, simply increase the amount of white cheddar. You can add an extra half cup for a richer flavor. If you love cheese, try mixing in some mozzarella or gouda too. These cheeses melt well and add a creamy texture. Just remember, more cheese means a more indulgent dish. Yes, you can use canned corn. Just make sure to drain it well to avoid too much liquid in the dish. Canned corn works great when you want a fast option. It saves time and still tastes good. If using canned corn, keep an eye on the bake time. It may cook a bit faster than frozen corn. White Cheddar Baked Corn pairs well with many dishes. You can serve it with grilled chicken or fish for a balanced meal. A fresh side salad also complements its creamy texture. For a heartier option, consider serving it with barbecued ribs or pulled pork. Each of these choices enhances the meal and adds variety. For more ideas, check out the Full Recipe for additional suggestions. In this post, we explored how to make White Cheddar Baked Corn. We covered must-have ingredients and optional variations. The step-by-step guide helped you prep, mix, and bake this dish to perfection. I shared tips to avoid common mistakes and enhance flavors. You also learned about storage and reheating options to enjoy leftovers. White Cheddar Baked Corn is simple and versatile. Try different flavors or add protein for a twist. Enjoy this dish with your favorite sides and make it your own!
White Cheddar Baked Corn Flavorful and Easy Recipe
Are you ready to elevate your side dish game? This White Cheddar Baked Corn recipe combines creamy cheese with sweet corn for a delightful treat.
- 2 boneless, skinless chicken breasts - 4 cups chicken broth - 2 packs of ramen noodles (discard the seasoning packets) - 1 cup coconut milk - 2 tablespoons soy sauce - 2 tablespoons sesame oil - 1 tablespoon ginger, freshly grated - 3 cloves garlic, minced - 1 cup mushrooms, sliced (shiitake or button mushrooms work well) - 1 cup baby spinach - 2 green onions, sliced thinly - 1 tablespoon chili paste (adjust according to your heat preference) - Salt and black pepper to taste - Fresh cilantro leaves for garnish The chicken stands out in this dish. It adds protein and a nice texture. I love using boneless, skinless chicken breasts. They cook quickly and soak up flavors well. The chicken broth gives the ramen richness. It serves as the base that ties all flavors together. Coconut milk brings creaminess to the soup. It balances the spices and adds a slight sweetness. Soy sauce enhances the umami flavor. The sesame oil adds a nutty taste that makes it feel special. Ginger and garlic provide a warm, aromatic touch. Mushrooms add an earthy flavor and nice texture. Baby spinach gives a fresh element and color. The green onions provide a crunch and a pop of color. Finally, chili paste adds heat. You can adjust the spice level to your liking. - Fresh herbs like cilantro or basil - Sliced jalapeños for extra heat - Soft-boiled eggs for added richness - Toasted sesame seeds for crunch Garnishes can take your ramen to the next level. Fresh herbs like cilantro bring brightness. Sliced jalapeños can add a fun kick. A soft-boiled egg adds richness and protein. Toasted sesame seeds give a nice crunch and flavor. Choose the garnishes you love. They make the dish even more delicious and fun to eat! {{ingredient_image_2}} Start by heating sesame oil in a large pot over medium heat. Season the chicken breasts with salt and black pepper. Place them in the pot when the oil is hot. Sear each side for 4-5 minutes. Look for a nice golden-brown crust. This adds flavor and texture. While the chicken is searing, grate fresh ginger and mince garlic. Once the chicken is brown, take it out and set aside. In the same pot, add ginger and garlic. Sauté them for about a minute until they smell good. Be careful not to burn them, as burnt garlic can taste bitter. After you sauté the aromatics, pour in the chicken broth. Use a wooden spoon to scrape the tasty bits from the pot's bottom. Bring the broth to a gentle simmer. Cover the pot and let it cook for about 15 minutes. The chicken should be cooked through and no longer pink. Take the chicken out, cool it slightly, and shred it into bite-sized pieces. Return the shredded chicken to the pot. Stir in coconut milk, soy sauce, and chili paste. Let it simmer again. Next, add the ramen noodles and sliced mushrooms. Cook according to the package instructions, usually 3-4 minutes. When the noodles are almost done, stir in baby spinach. Cook for another minute until it wilts nicely. Taste your ramen and adjust the seasoning. Add more salt and black pepper if needed. This step is key for making the flavors pop. Ladle the warm ramen into serving bowls. Top with green onions and fresh cilantro leaves. For an extra zing, serve with a lime wedge on the side. A drizzle of sesame oil can also boost the aroma and flavor. Enjoy this hearty and flavorful delight! To sear chicken well, use a hot pan. Heat sesame oil until it shimmers. This gives your chicken a nice crust. Place the seasoned chicken breasts in the pan, cooking for 4 to 5 minutes on each side. Avoid moving the chicken too much. This helps it brown evenly. Common mistakes include overcrowding the pan and not letting the chicken rest. If you add too much chicken, it cools the pan. This leads to steaming instead of searing. Always let your chicken rest before shredding. This keeps it juicy. To boost flavor, try adding herbs like basil or cilantro. You can also use lime juice for a zesty kick. Adjust the chili paste based on your heat tolerance. A little chili can add depth without overpowering. When cooking your broth, use fresh garlic and ginger. Their flavors mix well in the ramen. Simmering the broth with mushrooms adds umami. This makes each spoonful rich and satisfying. For efficient prep, chop all your ingredients first. This saves time while cooking. Keep your workspace organized. It makes cooking smoother and more fun. To save time, boil your water for the ramen while the chicken cooks. This cuts down on overall cooking time. You can also use pre-sliced mushrooms. They save you a few precious minutes in prep. Pro Tips Fresh Ingredients: Always use fresh ginger and garlic for the best flavor. They provide a vibrant kick that enhances the overall taste of the dish. Broth Boost: For a deeper flavor, consider adding a splash of fish sauce or a tablespoon of miso paste to the broth along with the soy sauce. Perfect Noodles: Avoid overcooking the ramen noodles by adding them to the pot only when the broth is simmering to ensure they cook evenly. Customize it: Feel free to add other vegetables like bok choy, carrots, or bell peppers for added nutrition and color. {{image_4}} You can make Marry Me Chicken Ramen your own by adding different proteins. For a vegetarian option, use tofu or tempeh instead of chicken. Simply cube the tofu and sauté it until golden. This gives a nice texture and flavor. You can also add chickpeas for extra protein. They blend well with the broth. If you want a seafood twist, shrimp or fish works great. Add shrimp in the last few minutes of cooking. It cooks fast and keeps its flavor. For fish, try salmon or cod. Just ensure it’s cooked through, and break it into pieces before serving. Noodles can change the dish's feel. For a gluten-free option, use rice noodles or gluten-free ramen. Cook them separately and add them to the broth. This way, everyone can enjoy the dish. You can explore different types of ramen too. Try thick udon noodles for a chewier texture. Soba noodles can also be a fun choice. They add a nutty flavor that pairs nicely with the broth. Adjusting the spice level can make a big difference. If you love heat, add more chili paste or fresh chilies. For a milder taste, reduce the chili paste or omit it altogether. You can switch up the ingredients for unique flavors. Add lime juice for a zesty kick. You can also toss in miso paste for a deep umami flavor. Experiment with different herbs like basil or mint for a fresh twist. To keep your Marry Me Chicken Ramen fresh, follow these tips: - Refrigeration Guidelines: Store leftovers in an airtight container. They will last for 3 to 4 days in the fridge. Make sure the ramen cools down before sealing to avoid moisture buildup. - Freezing Instructions: If you want to save it longer, freeze the ramen. Use freezer-safe containers. It can last for up to 2 months. Remember, noodles might lose some texture when thawed. When it's time to enjoy your ramen again, here’s how to reheat it: - Best Practices for Leftovers: For the best taste, reheat only what you plan to eat. This keeps the noodles from becoming mushy. - Microwave vs. Stovetop Reheating: You can reheat in the microwave for 1-2 minutes. Stir halfway for even heating. If you prefer the stovetop, warm it over low heat. Stir gently to avoid breaking the noodles. Enjoy your delicious ramen! You can use several dairy-free alternatives. Almond milk works well, but it may lack creaminess. Soy milk can also work, but choose the unsweetened kind. If you want a richer flavor, use cashew cream. To adjust for flavor, add a bit of lime juice or a pinch of salt. This helps mimic the taste of coconut milk. You can also add a dash of vanilla for sweetness. Yes, homemade broth is a great choice. It often tastes better than store-bought. You can control the flavor and salt level, making it healthier. Homemade broth also lets you use fresh ingredients. You can simmer bones, veggies, and herbs to create a rich taste. This deep flavor shines through in your ramen. Leftover ramen can last for about three to four days in your fridge. Store it in an airtight container to keep it fresh. Signs of spoilage include off smells and changes in color. If the broth looks cloudy or the noodles feel slimy, it's best to toss it. Always trust your senses when deciding if food is still good. This blog post covered everything you need for Marry Me Chicken Ramen. We explored main ingredients such as chicken, broth, and seasonings. You learned how to prepare your dish step by step. The tips offer ways to enhance flavor and save time. Variations allow you to customize protein and noodles. Lastly, we shared storage methods to keep your ramen fresh. I hope you feel ready to make this dish your own. Enjoy your cooking adventure!
Marry Me Chicken Ramen Hearty and Flavorful Delight
If you’re ready to impress with a delightful dish, let me introduce you to Marry Me Chicken Ramen. This recipe combines tender chicken, rich broth,
- 1 pound shrimp, peeled and deveined - 2 ears of corn, cut into quarters - 1 pound baby potatoes, halved - 1 tablespoon olive oil - 4 cloves garlic, minced - 1 tablespoon Old Bay seasoning - 1 tablespoon freshly squeezed lemon juice - 1 teaspoon smoked paprika - Salt and pepper to taste - Fresh parsley, chopped, for garnish - Lemon wedges, for serving When making Shrimp Boil Foil Packs, you want fresh and tasty ingredients. Start with shrimp that are peeled and deveined, so they cook quickly. The corn adds a sweet crunch, while the baby potatoes provide heartiness. Next, let's talk about seasonings. Olive oil keeps everything moist, and minced garlic gives a nice kick. Old Bay seasoning is a must for that classic seafood flavor. Fresh lemon juice adds brightness, and smoked paprika brings warmth. Don't forget to use salt and pepper to enhance all the flavors. For garnishes, fresh parsley adds color and a burst of freshness. Lemon wedges are perfect for squeezing on top when you serve. This mix of ingredients makes these packs easy and fun to make. For the full recipe, check out the detailed steps. - Preheat grill or oven to 400°F (200°C). - In a large mixing bowl, combine the shrimp, corn, baby potatoes, and olive oil. Add minced garlic, Old Bay seasoning, lemon juice, smoked paprika, and salt and pepper. Mix well until everything is coated. - Tear off four sheets of aluminum foil, each 12x18 inches. - Place an equal amount of the shrimp mixture in the center of each foil sheet. Fold the sides over the mixture and seal the top tightly. This keeps the steam and flavors inside. - Put the foil packs on the grill or a baking sheet if using an oven. - Cook for 15-20 minutes. Check doneness by seeing if the shrimp turns pink and the potatoes are tender with a fork. For the full recipe, refer to the earlier section. Enjoy this fun and easy meal! To make your shrimp boil foil packs even better, try some fun twists. You can add different seasonings like Cajun spice or lemon pepper. These spices change the flavor, making each meal unique. Don’t be afraid to mix in other veggies or proteins. Think about adding bell peppers, asparagus, or even sausage. These ingredients bring new tastes and textures to your meal. You can also use crab or lobster instead of shrimp for a more luxurious touch. Cooking times may change based on your method. If you use a grill, your packs will cook faster than in the oven. Always check the shrimp and potatoes to see if they are tender. A food thermometer can help you. Shrimp should reach an internal temperature of 120°F (49°C) and potatoes should be soft when poked with a fork. When opening hot foil packs, be careful. The steam can burn you. Use tongs or an oven mitt to pull back the foil. This keeps your hands safe from the heat. Cleaning up is simple too. Let the foil cool before you toss it. If there’s food stuck on it, soak it in warm water for a bit. Then, it will be easy to wipe clean. {{image_4}} You can switch things up by using crab or lobster instead of shrimp. Both options add a rich flavor. Crab meat has a sweet, delicate taste, while lobster brings a luxurious touch. Simply follow the same cooking steps as with shrimp. Adding clams or mussels is another great idea. They add a briny kick and enhance the seafood flavor. Just ensure they are fresh and clean. When they cook, they will open up and release their juices, making your meal even tastier. If you want to swap corn, try using zucchini or bell peppers. Both vegetables cook well in foil packs. Zucchini adds a mild flavor, while bell peppers bring a sweet crunch. Choosing different types of potatoes is also fun. Try red or sweet potatoes for a unique taste. They cook well and give a different texture. Mix and match to find your favorite combo! For a spicy twist, create a version using Cajun seasoning. It gives your dish a warm, zesty kick. You can also make a lemon garlic butter sauce instead of using dry seasoning. Melt butter and mix it with lemon juice and minced garlic. This sauce adds a rich, tangy flavor that pairs well with shrimp or crab. Feel free to adjust the spice level to your taste. Enjoy exploring these variations for your shrimp boil foil packs! For the full recipe, check the link provided. To store leftover shrimp boil foil packs, let them cool first. This helps keep the texture nice. Place the packs in an airtight container. You can also wrap them tightly in plastic wrap. This keeps the shrimp and veggies fresh. I recommend using glass or BPA-free plastic containers. They work well and do not absorb odors. When it's time to enjoy the leftovers, you have a few good options. The microwave is quick and easy. Just place the foil pack on a microwave-safe plate. Heat it for about 1-2 minutes. Check if it's hot enough. If you want a crispy finish, use the oven or grill. Preheat your oven to 350°F (175°C). Place the foil pack on a baking sheet and heat for 10-15 minutes. This keeps the flavor and texture nice. You can freeze shrimp boil foil packs, but the method depends on when you freeze them. If you freeze them cooked, let them cool completely. Then, wrap them tightly in foil and place them in a freezer bag. For uncooked packs, assemble them and freeze right away. When you want to use them, thaw in the fridge overnight. After thawing, cook them straight away for best results. To know when shrimp is cooked, look for a few clear signs. First, shrimp should change color from gray to a bright pink. Second, they will curl into a C shape. Lastly, the flesh will become opaque and firm. If you see these signs, your shrimp is ready to eat! Yes, you can prepare shrimp boil foil packs ahead of time! Mix all the ingredients and seal them in foil. Then, store them in the fridge for up to 24 hours. This makes meal prep easy! Just remember to cook them within a day for the best taste. You can serve shrimp boil foil packs with many tasty sides. Here are a few ideas: - Garlic bread or crusty rolls - Coleslaw for some crunch - A light salad with vinaigrette - Lemonade or iced tea to drink These sides will enhance the meal and add even more flavor! For the full recipe, check out the Shrimp Boil Foil Packs section. This blog post covered how to make delicious shrimp boil foil packs. We discussed the key ingredients like shrimp, corn, and potatoes. You learned step-by-step instructions for preparation, assembling, and cooking. Tips on enhancing flavor and variations made the process easier. Storing leftovers and reheating methods will keep your meals fresh. In conclusion, making foil packs is fun and easy. Enjoy experimenting with flavors and ingredients. You can create tasty meals your family will love. Happy cooking!
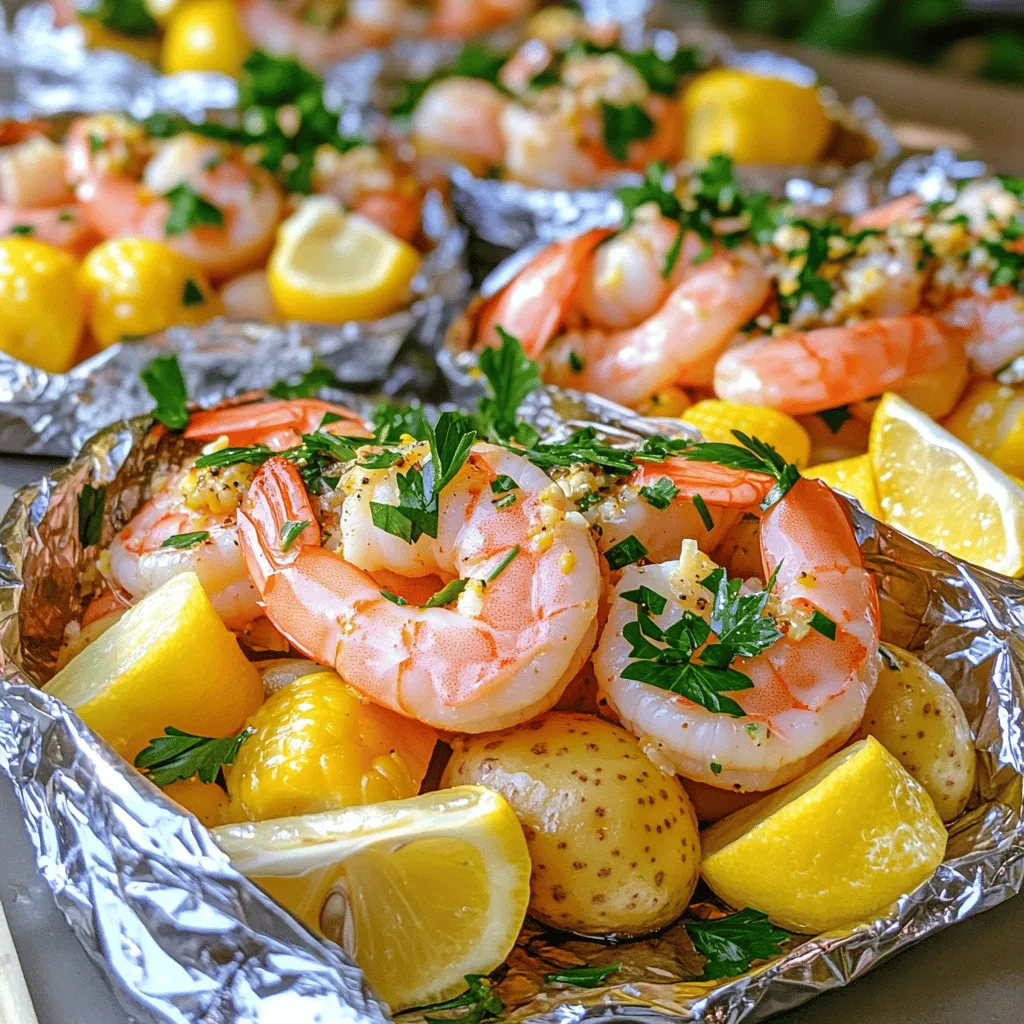
Savory Shrimp Boil Foil Packs Easy and Fun to Make
Are you ready to whip up a delicious meal that’s easy to make and fun to share? Our Savory Shrimp Boil Foil Packs combine juicy
- 1 pound ground turkey - 2 bell peppers (one red and one yellow), diced - 1 medium onion, finely chopped - 2 cloves garlic, minced - 1 teaspoon smoked paprika - 1 teaspoon ground cumin - ½ teaspoon chili powder - Salt and black pepper to taste - 2 tablespoons olive oil - Fresh cilantro, chopped (for garnish) - Optional: Slices of fresh avocado (for serving) Gather these ingredients to make a tasty dish. Ground turkey adds lean protein. The bell peppers bring color and crunch. Onions and garlic add depth of flavor. Using spices like smoked paprika and cumin gives the dish a warm taste. Olive oil helps cook the veggies and turkey. Garnish with cilantro for a fresh finish. You can also add avocado for creaminess. This meal is easy to make and full of flavor. For the full recipe, check the section above. How to sauté the onion and garlic Start by heating 2 tablespoons of olive oil in a large skillet over medium heat. When the oil is hot, add 1 medium onion, finely chopped. Stir it often for about 3-4 minutes. You want the onion to be fragrant and clear. Next, add 2 cloves of minced garlic. Cook for 1 more minute. Keep stirring to prevent the garlic from burning. Cooking the ground turkey Now, add 1 pound of ground turkey to the skillet. Use a spatula to break it into small pieces. Cook the turkey for 6-8 minutes. You need it to be brown and fully cooked. Adding spices and mixing well Once the turkey is done, sprinkle in these spices: 1 teaspoon smoked paprika, 1 teaspoon ground cumin, and ½ teaspoon chili powder. Add a pinch of salt and black pepper to taste. Mix everything well to coat the turkey with the spices. Incorporating bell peppers and tomatoes Now it’s time to add veggies! Fold in 2 diced bell peppers (one red and one yellow) and 1 can of drained diced tomatoes. Cook for another 5-7 minutes. This helps the bell peppers soften and lets the flavors combine. Timing and adjusting seasonings Taste the mixture. If you want more flavor, you can add a little more salt or spices. Adjust according to your taste. How to plate and garnish for serving Remove the skillet from heat and let it sit for a minute. For a lovely finish, garnish with fresh chopped cilantro. Serve warm. You can add slices of fresh avocado on the side or on top for extra flavor. Enjoy your meal! For the full recipe, check out the details above. - To brown ground turkey well, use a hot skillet. - Don't overcrowd the pan; this helps it brown nicely. - Stir it often to cook evenly and avoid burning. - Use a non-stick skillet to prevent sticking. - If you experience sticking, add a bit more oil. - Try adding Italian herbs for a fresh twist. - A dash of cayenne pepper can add heat. - Serve with rice or quinoa for a complete meal. - Fresh lime juice adds brightness to the dish. - Top with shredded cheese or sour cream for creaminess. - Ground chicken or lean beef works well in place of turkey. - Use low-sodium diced tomatoes to cut down on salt. - Swap olive oil for avocado oil for a different flavor. - Cauliflower rice can replace regular rice for a low-carb option. - Fresh herbs can replace some of the salt for flavor. {{image_4}} You can easily adapt this dish to fit your needs. If you need gluten-free options, use gluten-free spices and sauces. Always check labels to ensure they do not contain gluten. For dairy-free variations, skip any cheese toppings. This dish is flavorful enough on its own! Choosing different types of peppers can change the taste. Green bell peppers add a sharper flavor. If you like heat, try jalapeños or poblano peppers. You can also swap out ground turkey for other proteins. Chicken or beef works well in this recipe. If you want a vegetarian option, use lentils or chickpeas instead of turkey. For low-carb options, serve the mixture in lettuce wraps. This keeps it light and fresh. You can also use the leftovers in many ways. Try adding it to a salad for a quick lunch. Mix it with cooked quinoa for a healthy grain bowl. The possibilities are endless! To store your ground turkey and peppers leftovers properly, place them in an airtight container. This keeps the food fresh and prevents spills. Make sure to let the dish cool down to room temperature before sealing it. This helps avoid condensation, which can cause sogginess. The recommended storage duration for this dish is up to three days in the fridge. If you want to eat it later, freezing is your best bet. For freezing the dish, allow it to cool completely first. Transfer the cooled turkey and peppers into freezer-safe bags or containers. Squeeze out as much air as possible to prevent freezer burn. Label the bags with the date, so you know when you made it. When it's time to enjoy your frozen meal, thaw it in the fridge overnight. To reheat, warm it in a skillet over medium heat until it's hot. You can also use a microwave, but stir it every minute to heat evenly. Enjoy your meal just like the first time! How can I make ground turkey and peppers more flavorful? You can boost flavor by adding herbs and spices. Try using more smoked paprika or a pinch of cayenne. Fresh herbs like cilantro or parsley can also add a burst of freshness. You might even consider a splash of lime juice for a zesty kick. Can I use frozen vegetables instead of fresh? Yes, you can use frozen vegetables. They are quick and easy to add. Just make sure to thaw them first. Frozen peppers can work well in this dish, saving you prep time. How long does it take to cook ground turkey? Ground turkey typically cooks in about 6-8 minutes. Cook it until it is no longer pink in the center. Use a spatula to break it apart for even cooking. What can I substitute for bell peppers? If you don’t have bell peppers, consider using zucchini or mushrooms. Both add great texture and flavor. You can also try using chopped spinach or kale for a different twist. Is ground turkey a healthy protein choice? Ground turkey is a great source of lean protein. It has less fat than beef, making it a healthier option. Plus, it is rich in vitamins and minerals, which help support your health. What are the calorie counts per serving? This dish has about 250 calories per serving. This can vary based on added ingredients or sides. It’s a filling and nutritious meal that fits well into most diets. This blog post covered a tasty ground turkey dish with bell peppers and spices. We explored key ingredients, preparation steps, and helpful cooking tips. I shared variations for diet needs and creative serving ideas. Remember, cooking is about fun and flavor. Experiment with spices or adapt the dish to your taste. Enjoy your cooking adventure and make this dish your own!
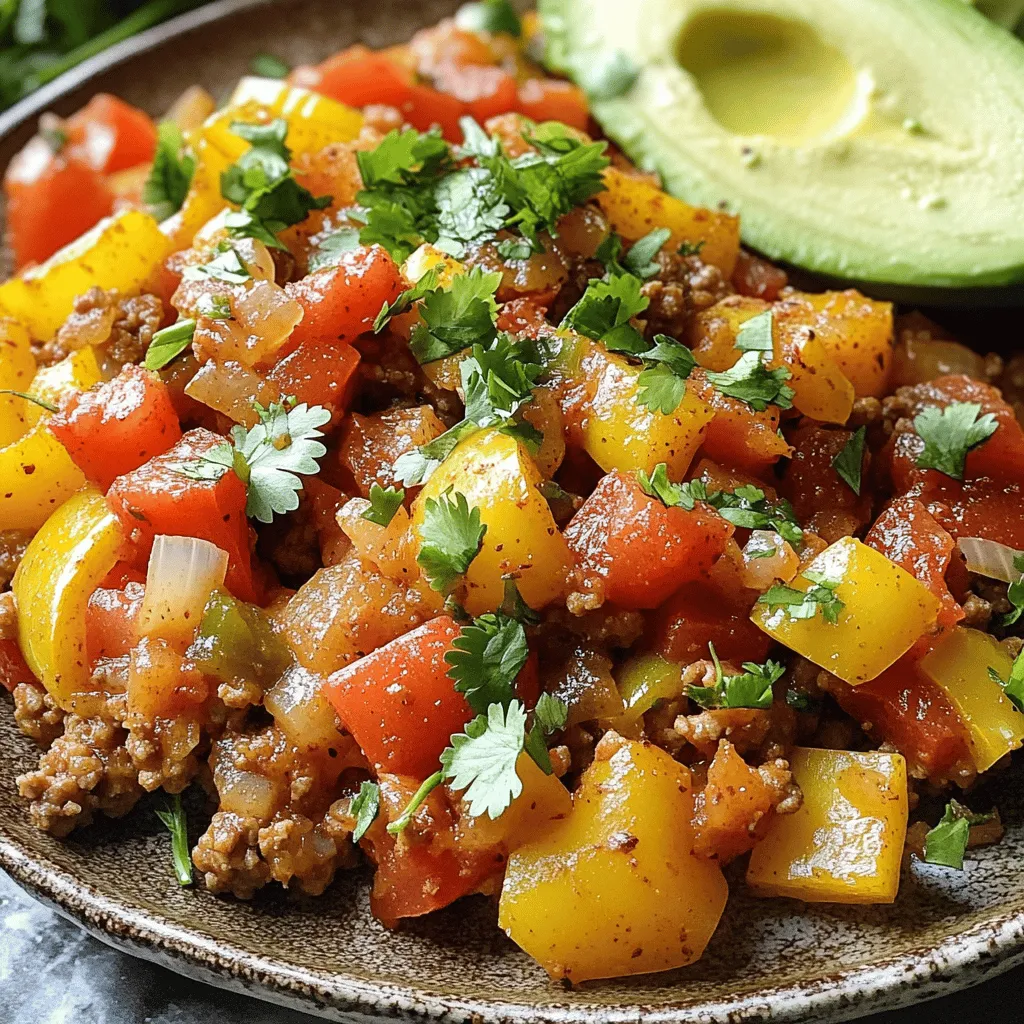
Ground Turkey and Peppers Flavorful Quick Recipe
Looking for a quick, delicious meal? This Ground Turkey and Peppers recipe is your answer! In just a few simple steps, you can create a
- 1 pound ground beef - 1 cup fresh spinach, finely chopped - 8 oz mozzarella cheese, cut into small cubes - 3 cloves garlic, minced - 1/2 cup breadcrumbs - 1/4 cup grated Parmesan cheese - 1/4 cup milk - 1 teaspoon Italian seasoning - Salt and freshly ground black pepper to taste - 1 large egg, beaten - 1 tablespoon olive oil These ingredients create a tasty mix. The ground beef gives the meatballs a rich flavor. Fresh spinach adds a pop of color and nutrients. Mozzarella cheese brings a creamy surprise inside each bite. Garlic and Italian seasonings make the dish fragrant and savory. Breadcrumbs and egg help bind the meatballs, ensuring they hold their shape. You can also add some garnishes, like fresh herbs, for a pretty touch. For the full recipe, check out the detailed steps to create these delicious Spinach Garlic Meatballs Stuffed with Mozzarella. To ensure even cooking, use a uniform size for your meatballs. Aim for about 2 tablespoons of meat mixture per ball. This size helps them cook at the same rate. When searing, don't crowd the pan. Leave space between meatballs, allowing heat to circulate and brown them evenly. Achieving the perfect meatball texture comes down to mixing. Don't overmix or under-mix. Combine the ingredients until just blended. This keeps the meatballs tender. The egg in the mixture helps bind everything together, giving them a nice structure. For serving suggestions, arrange your meatballs on a large platter. Drizzle them with marinara sauce for added flavor. This also adds a nice color contrast. Pair the meatballs with a side of pasta or garlic bread for a complete meal. Garnishing ideas can elevate your dish. Sprinkle freshly chopped basil or parsley on top. This adds a burst of color and freshness. You might also consider shaved Parmesan for a touch of elegance. The visual appeal of the dish makes it more inviting to your guests. If you want more details, check the Full Recipe for tips on cooking and serving! To keep your spinach garlic meatballs stuffed with mozzarella fresh, follow these simple steps: - Refrigerating: Place the cooled meatballs in an airtight container. They stay good for 3 to 4 days in the fridge. - Freezing: For longer storage, freeze the meatballs. Lay them on a baking sheet first. Once frozen solid, transfer them to a freezer bag. They can last up to 3 months. When you're ready to enjoy the leftovers, here’s how to reheat them properly: - Methods for reheating: You can use an oven, microwave, or skillet. For the oven, set it to 350°F (175°C) and bake for about 15 minutes. In the microwave, heat for 1-2 minutes until hot. In a skillet, warm them over medium heat. - Tips to retain moisture and flavor: Add a splash of broth or sauce when reheating. This helps keep the meatballs juicy and full of flavor. {{image_4}} How do I know when the meatballs are cooked? The best way to check is by using a meat thermometer. Insert it into the center of a meatball. When it reads 160°F (70°C), they are done. If you don’t have a thermometer, cut one open. The meat should be brown, and the juices should run clear. Can I prepare these meatballs in advance? Yes, you can! Make the meatballs and store them in the fridge for up to a day. You can also freeze them. Just place the uncooked meatballs on a baking sheet. Freeze them for about an hour, then transfer them to a freezer bag. They will stay fresh for up to three months. What to do if meatballs fall apart? If your meatballs fall apart, they might need more binding. Try adding a bit more breadcrumbs or an extra egg. Mixing well helps too. Make sure to shape them tightly when rolling. How to adjust flavor if too bland? Add salt or pepper gradually while mixing. You can also add more garlic or Italian seasoning for extra flavor. Taste the mixture before cooking for the best results. Can I cook these meatballs in sauce? Yes, you can! After searing, place the meatballs in marinara sauce to simmer. This will add flavor and keep them moist. Cook them for about 20 minutes on low heat. Can I use a slow cooker for this recipe? Absolutely! Sear the meatballs first for a nice crust. Then, place them in the slow cooker with sauce. Cook on low for 4-6 hours or high for about 2-3 hours. They will be tender and full of flavor! For the full recipe, check out the Spinach Garlic Meatballs Stuffed with Mozzarella. In this post, we explored how to make delicious meatballs with ground beef, fresh spinach, and mozzarella cheese. You learned the preparation steps, cooking tips, and variations to customize your meatballs. We covered how to store leftovers and reheat them for the best taste. Remember, cooking should be fun and creative, so try different flavors and ingredients. With these steps, you can impress anyone with your meatball skills and enjoy great meals. Happy cooking!
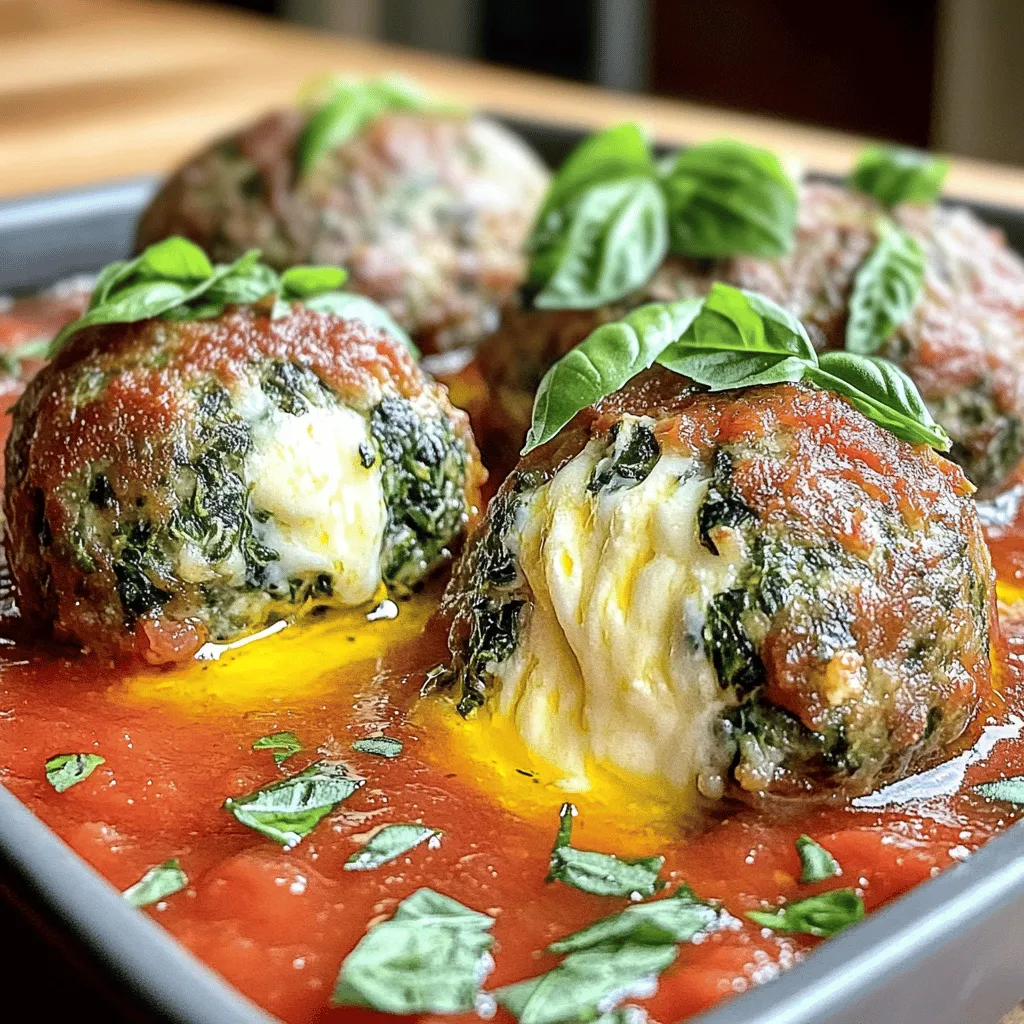
Spinach Garlic Meatballs Stuffed with Mozzarella Wonder
Imagine biting into a juicy meatball, bursting with flavor and gooey mozzarella inside. Sounds amazing, right? That’s what you get with my Spinach Garlic Meatballs
To make Mexican Street Corn Soup, you need a few simple ingredients. Here’s what you’ll need: - 4 ears of fresh corn, husked and kernels removed - 1 tablespoon olive oil - 1 small onion, finely diced - 2 cloves garlic, minced - 1 red bell pepper, finely diced - 1 jalapeño, seeds removed (optional for spice) - 4 cups vegetable broth - 1 cup coconut milk - 1 teaspoon smoked paprika - 1 teaspoon ground cumin - Salt and black pepper to taste - 1/2 cup crumbled queso fresco or feta cheese (for garnish) - 1/4 cup freshly chopped cilantro (for garnish) - Juice of 1 lime Each ingredient plays a key role in building the soup's flavor. The fresh corn brings sweetness. The onion and garlic add depth. The bell pepper and jalapeño offer a nice crunch and spice. Coconut milk gives a creamy texture, balancing the spices. Smoked paprika and cumin add warmth. The queso fresco and cilantro make a lovely garnish. Finally, a squeeze of lime brightens every bite. You can find the full recipe in the section above. Now, gather these ingredients, and let’s cook up something delicious! - Sauté the aromatics: Start by heating olive oil in a large pot over medium heat. Add the diced onion and cook until it turns clear. This takes about 3 to 4 minutes. - Incorporate the vegetables: Next, mix in the minced garlic, diced red bell pepper, and optional jalapeño. Stir and cook for about 3 minutes. The veggies should be soft but not mushy. - Add the corn and spices: Now it's time to add the corn kernels, smoked paprika, ground cumin, salt, and black pepper. Stir this mixture for 2 to 3 minutes. This will help the corn get a nice caramel color and bring out its sweet flavor. - Simmer the soup: Pour in the vegetable broth and increase the heat until it boils. Once boiling, lower the heat and let it simmer for 10 to 15 minutes. This allows the flavors to mix well. - Blend for creaminess: Use an immersion blender to puree the soup until smooth. If you don’t have one, carefully blend in batches in a regular blender. - Finish with coconut milk: Return the blended soup to the pot and mix in the coconut milk. Let it simmer for another 5 minutes on low heat. This will warm it up and blend all the flavors. - Add lime juice and serve: Off the heat, add fresh lime juice and stir well. This gives the soup a bright and zesty touch. Ladle the soup into bowls and top with crumbled queso fresco and chopped cilantro for that perfect finish. You can find the complete recipe in the [Full Recipe] section. Enjoy every spoonful of this comforting soup! - How to select fresh corn: Look for corn with bright green husks. The silk should be moist and golden. Fresh kernels should feel plump and firm. If they feel dry, pass them by. - Adjusting spice level with jalapeño: If you want a kick, add jalapeño. Remove the seeds for less heat. Start with a small amount, then taste. You can always add more if you want it spicier. - Using an immersion blender versus regular blender: An immersion blender is easy. You blend right in the pot. It saves time and reduces mess. If you use a regular blender, be careful. Blend in small batches to avoid splatters. - Creaminess hacks for a richer texture: For a creamier soup, add more coconut milk. You can also fold in some cream cheese or sour cream after blending. This adds richness and depth to your soup. - Ideal garnishes for presentation: Sprinkle crumbled queso fresco on top. Add chopped cilantro for a pop of color. A squeeze of lime brightens the dish, making it visually appealing. - Flavor variations with different cheese options: Try feta cheese for a tangy twist. Parmesan can add a salty note. Each type of cheese will change the flavor, so pick based on your taste. For the complete recipe, check out the Full Recipe section! {{image_4}} You can easily switch out some ingredients in this recipe. - Replace coconut milk with regular dairy milk or almond milk. - If you don’t like cilantro, try fresh parsley or green onions instead. This soup can be vegan-friendly with a few changes. - Use vegetable broth and coconut milk, which are both plant-based. - To make it heartier, add black beans or chickpeas for protein. You can make this soup even better with some sides. - Serve with tortilla chips for crunch or avocado for creaminess. - To make a full meal, add grilled chicken or shrimp on top. For the full recipe, visit the [Full Recipe] link. To keep your Mexican Street Corn Soup fresh, store it in the fridge. Place it in a container with a tight seal. This helps keep the flavors and texture intact. I recommend using glass containers. They do not retain odors and are easy to clean. You can freeze this soup for later. First, let it cool to room temperature. Then, use freezer-safe bags or containers. Remove as much air as possible before sealing. This helps prevent freezer burn. When you’re ready to eat, thaw the soup in the fridge overnight. For quick thawing, place it under cold running water. To reheat your soup, use a pot on low heat. Stir often to keep it from sticking. You can also use a microwave. Heat in short bursts, stirring in between. This method keeps the soup creamy and flavorful. If it seems thick, add a splash of broth or water. Enjoy your soup just as delicious as the first time! You can find the Full Recipe above. What is the origin of Mexican Street Corn Soup? Mexican Street Corn Soup comes from the beloved street food called elote. This dish features grilled corn on the cob, slathered in creamy toppings. The soup takes those rich flavors and turns them into a comforting bowl. You can find it sold by vendors across Mexico. Can I make this soup ahead of time? Yes, you can! Making this soup a day ahead is a great idea. Just store it in the fridge after it cools down. The flavors will deepen overnight. When you are ready to eat, heat it on the stove until warm. How to make the soup spicier or more flavorful? To amp up the spice, add more jalapeño or use a hotter pepper like serrano. You can also mix in cayenne pepper. For more flavor, try adding fresh herbs like cilantro or more smoked paprika. Adjust these to fit your taste. What can I serve with Mexican Street Corn Soup? This soup pairs well with tortilla chips or crusty bread. You might also enjoy it with a fresh salad or tacos. Top it with extra cheese or avocado for a fun twist. How long does the soup last in the fridge? The soup lasts about 3 to 4 days in the fridge. Store it in an airtight container to keep it fresh. If you notice any off smell, it’s best to toss it out. For the full recipe, check out the [Full Recipe]. This article shared a simple and tasty recipe for Mexican Street Corn Soup. You learned what ingredients to use, how to make it step-by-step, and some helpful tips. You can customize the soup with different garnishes or spice levels. Don't forget the storage tips to enjoy leftovers later. I hope you feel inspired to cook this warm dish. Enjoy your cooking and share this recipe with friends!
Mexican Street Corn Soup Flavorful and Simple Recipe
If you love the bold flavors of Mexican street corn, you’re in for a treat! This creamy Mexican Street Corn Soup is easy to make
- 1 lb ground beef (80/20 blend) - 1 cup shredded sharp cheddar cheese - 4 large flour tortillas - 1/2 cup dill pickles, sliced - 1 teaspoon garlic powder - 1 teaspoon onion powder - 1 teaspoon smoked paprika - Salt and freshly cracked black pepper to taste - 1/4 cup ketchup - 1/4 cup yellow mustard - Cooking spray Gathering fresh ingredients is key to making these Air Fryer Cheeseburger Wraps shine. Start with ground beef that has enough fat, like an 80/20 blend. This blend keeps the meat juicy and full of flavor. Use sharp cheddar cheese for a strong taste that melts well. The tortillas should be large and soft, making them easy to roll. When it comes to pickles, choose dill pickles for a tangy crunch. They add a great contrast to the rich meat and cheese. Seasonings are simple but important. Garlic powder, onion powder, and smoked paprika give the beef a tasty kick. Salt and black pepper help bring all the flavors together. For condiments, ketchup and yellow mustard keep it classic. They add moisture and flavor inside the wrap. Lastly, a light spray of cooking oil helps achieve that crispy outer layer in the air fryer. This mix of ingredients will create a delicious wrap that everyone will love. For a full guide on how to prepare these tasty wraps, check the Full Recipe. - In a large bowl, combine 1 lb of ground beef with: - 1 teaspoon garlic powder - 1 teaspoon onion powder - 1 teaspoon smoked paprika - Salt and freshly cracked black pepper to taste - Heat a skillet over medium heat. - Add the seasoned beef mixture, breaking it apart as it cooks. - Cook for about 6 to 8 minutes until the meat is browned. - Drain any excess fat if necessary. - Remove the skillet from heat and stir in 1 cup of shredded sharp cheddar cheese. - Lay 4 large flour tortillas flat on a clean surface. - Spread a thin layer of ketchup and mustard in the center of each tortilla. - Spoon the cheeseburger filling on top of the condiments. - Add some sliced dill pickles for extra flavor. - Fold the sides of the tortilla inward. - Roll tightly from the bottom up to secure the filling inside. - Preheat your air fryer to 380°F (193°C) for about 5 minutes. - Lightly spray the outside of each wrap with cooking spray. - Place the wraps in the air fryer basket in a single layer. - Air fry for 8 to 10 minutes, flipping halfway through. - Cook until the wraps are golden brown and crispy. - Allow the wraps to cool for a minute before slicing in half for serving. For detailed instructions, you can check the Full Recipe. To cook your wraps evenly, make sure to spread the filling well. Distribute the meat mixture across the tortillas before rolling. This ensures every bite is packed with flavor. For a crispy exterior, use cooking spray on the outside. A light coat helps the wraps brown nicely. Set your air fryer to the right temperature. Preheating it ensures the wraps cook uniformly. For a great presentation, place the wraps on a colorful platter. You can cut them in half for easy eating. Add small bowls of ketchup and mustard for dipping. To enhance your meal, serve with fresh veggies or a side salad. Crunchy fries or onion rings also pair well with the wraps. Feel free to change the filling to fit your taste. You can use turkey or chicken instead of beef. For a vegetarian option, try black beans or lentils. Switch up the cheese, too! Pepper jack or mozzarella can add a fun twist. If you love spice, add jalapeños or hot sauce to the mix. {{image_4}} If you want a meat-free meal, try using plant-based meat. You can swap the ground beef for a meat alternative like lentils or black beans. Both options pack a punch of flavor. Just season them like you would the beef. Cook until they are warm and soft. This way, you keep the taste while being kind to the planet. Cheese makes everything better. You can use various cheese types to switch things up. Try mozzarella for a gooey texture or pepper jack for a spicy kick. Goat cheese can add a unique tang. Mix and match until you find your favorite combo. The cheese can really change the flavor of your wrap. Adding veggies is a great way to boost nutrition. You can throw in sliced bell peppers, onions, or spinach. These add crunch and color to your wraps. Just sauté them lightly before adding them to your filling. This makes your wraps even more delicious and healthy. Don’t forget to experiment with different veggies to find your perfect mix. To keep your Air Fryer cheeseburger wraps fresh, store them in an airtight container. Place parchment paper between layers to prevent sticking. Refrigerate them right away. They stay good for about 3 to 4 days. To reheat without losing crispiness, use the air fryer again. Preheat it to 350°F (175°C). Air fry the wraps for 3 to 5 minutes. This method keeps them crispy and warm. You can also use a skillet on medium heat for about 2 to 3 minutes on each side. For long-term storage, you can freeze the wraps. Wrap each one in plastic wrap, then place them in a freezer bag. They last up to 2 months in the freezer. To thaw, leave them in the fridge overnight. Reheat in the air fryer as mentioned above for the best texture. For the complete recipe, check out the Full Recipe section. Yes, you can use many types of meat. Ground turkey or chicken works well. You could also try ground pork for a different taste. For a vegetarian option, use lentils or black beans. Both give a hearty texture and flavor. Just make sure to season them well. To make gluten-free wraps, choose gluten-free tortillas. Many brands offer good options now. Look for ones made from rice or corn. You can also make your own using almond flour. This way, you control the ingredients and taste. You can pair these wraps with many sides. A fresh salad works great. Try a creamy coleslaw for crunch. Sweet potato fries add a tasty twist. For dips, serve extra ketchup and mustard. You could also try ranch or barbecue sauce for something different. Check out the Full Recipe for more ideas! This blog post shared a simple recipe for Air Fryer Cheeseburger Wraps. You learned about the key ingredients, step-by-step instructions, and storage tips. I also highlighted ways to customize the wraps and suggested delicious variations. These wraps are versatile and easy to make, perfect for family meals or quick snacks. Enjoy exploring flavors that suit your tastes. Now, gather your ingredients and start creating your tasty wraps today!
Air Fryer Cheeseburger Wraps Crispy and Flavorful Dish
Looking for a quick, delicious family dinner? Try my Air Fryer Cheeseburger Wraps! These crispy, flavor-packed wraps are easy to make and satisfy everyone’s cravings.