Dinner

To make easy Mongolian meatballs, gather these key items: - 1 lb ground beef - 1/2 cup breadcrumbs - 1 large egg - 2 green onions, finely chopped - 2 cloves garlic, minced - 2 tablespoons soy sauce - 1 tablespoon sesame oil - 1 tablespoon brown sugar - 1 teaspoon fresh ginger, grated - Salt and pepper to taste - 1/4 cup hoisin sauce - 2 tablespoons water These ingredients create a flavorful mix. The ground beef gives the meatballs their main protein. Breadcrumbs help bind the mix, while the egg adds moisture. Green onions and garlic provide a nice crunch and flavor. Add a finishing touch with these garnishes: - Sesame seeds - Additional chopped green onions These garnishes add a nice look and extra flavor. The sesame seeds add crunch. Green onions bring freshness to the dish. To make this recipe, you will need: - A large mixing bowl - Baking sheet - Parchment paper or cooking spray - Meat thermometer - Frying pan Using these tools makes the cooking process easy. The mixing bowl helps you blend all the ingredients well. The baking sheet is perfect for cooking the meatballs evenly. A meat thermometer ensures they are safe to eat. For the full recipe, check out the detailed steps later. Enjoy making these quick and tasty Mongolian meatballs! Start with a large bowl. Add the ground beef, breadcrumbs, and egg. Next, chop the green onions and mince the garlic. Toss them in. Now, add the soy sauce, sesame oil, brown sugar, and grated ginger. Sprinkle in salt and pepper to taste. Use your hands or a spatula to mix everything well. Make sure all the ingredients combine evenly. This step is key to flavor. The mixture should feel sticky and moist. Preheat your oven to 400°F (200°C). While it heats, line a baking sheet with parchment paper. You can also grease it lightly to help with sticking. Now, shape the meat mixture into small meatballs, about 1 inch wide. Place them on the baking sheet, leaving space between each. This helps them cook evenly. Bake the meatballs for 15 to 20 minutes. Look for a nice golden brown color. You can check if they are done using a meat thermometer. They should reach 160°F (70°C). While the meatballs bake, grab a small bowl. Mix the hoisin sauce and water together. Stir until the sauce is smooth. This sauce adds a sweet and savory kick. Once the meatballs are done, transfer them to a frying pan. Pour the hoisin sauce over them. Gently toss to coat each meatball evenly. Let them simmer for 2 to 3 minutes. This melds the flavors and warms the sauce. Now, your easy Mongolian meatballs are ready to serve! For the full recipe, check out the details above. To make your meatballs perfect, ensure your meat is fresh. Use ground beef with a bit of fat. Fat gives flavor and keeps them juicy. Mix your ingredients gently. Over-mixing makes them tough. Shape them into equal sizes, about one inch wide. This helps them cook evenly. Lastly, let them rest for a few minutes before baking. Adding fresh herbs can boost the taste. Chopped cilantro or parsley brings brightness. You can also mix in spices like paprika or chili powder. This gives a nice kick. For a sweet touch, add a bit more brown sugar. If you like heat, a dash of red pepper flakes works great too. Don't rush this step; let the flavors come together. Baking at 400°F (200°C) is key for great meatballs. This temperature cooks them through without drying them out. Aim for 15-20 minutes in the oven. Use a meat thermometer to check they reach 160°F (70°C). This ensures they are safe and delicious. If you want a little crispiness, broil them for a minute at the end. This gives a nice golden color. For more tips, check out the Full Recipe. {{image_4}} You can use different meats for your Mongolian meatballs. Ground turkey or chicken works well. These options stay juicy and flavorful. If you prefer pork, it adds a nice sweetness. For a lighter meal, consider using ground lamb. Just remember to adjust the cooking time slightly. You can make meatballs without meat! Use lentils or quinoa as a base. Combine them with breadcrumbs and spices for flavor. You can also try using plant-based meat alternatives. These options give a similar texture. For binding, use ground flaxseed mixed with water. It’s a great vegan substitute for eggs. While hoisin sauce is traditional, try other sauces for fun. Teriyaki sauce adds a sweet and savory twist. You can also use sweet chili sauce for a spicy kick. If you like a tangy flavor, mix in some barbecue sauce. Each sauce creates a unique taste experience. Feel free to experiment with your favorites! For the full recipe, check out the details above. To keep your leftover meatballs fresh, place them in an airtight container. Make sure they cool down first. You can store them in the fridge for up to three days. Label the container with the date for easy tracking. You can freeze Mongolian meatballs for later use. First, let them cool completely. Next, place them in a single layer on a baking sheet. Freeze them for about one hour. Once frozen, transfer the meatballs to a freezer-safe bag. They can last in the freezer for up to three months. When you’re ready to enjoy the meatballs again, you can reheat them easily. For the oven, preheat it to 350°F (175°C). Place the meatballs on a baking sheet and heat for about 15 minutes. If you prefer the microwave, place them on a microwave-safe plate. Heat in 30-second bursts until hot. Always check the center to ensure they are warmed through. Enjoy your delicious leftover Mongolian meatballs! You can check if the meatballs are done by using a meat thermometer. They need to reach an internal temperature of 160°F (70°C). If you don’t have a thermometer, cut one open. The meat should be brown, and the juices should run clear. Yes, you can make these meatballs ahead of time. After shaping them, place them on a baking sheet. Cover and refrigerate for up to 24 hours. You can also freeze them for longer storage. Just thaw them in the fridge before cooking. Mongolian meatballs pair well with many sides. Here are some great options: - Steamed rice - Noodles - Stir-fried vegetables - A fresh salad - Warm bread You can mix and match to find your favorite combo! This blog post covered how to make Mongolian meatballs from start to finish. We explored the main ingredients and optional garnishes, along with the tools you'll need. I shared step-by-step instructions for mixing, baking, and preparing the sauce. You learned tips for the best meatballs and variations for different diets. Finally, I discussed storage and reheating for leftovers. Now you can enjoy a delicious meal that fits your tastes! Happy cooking!
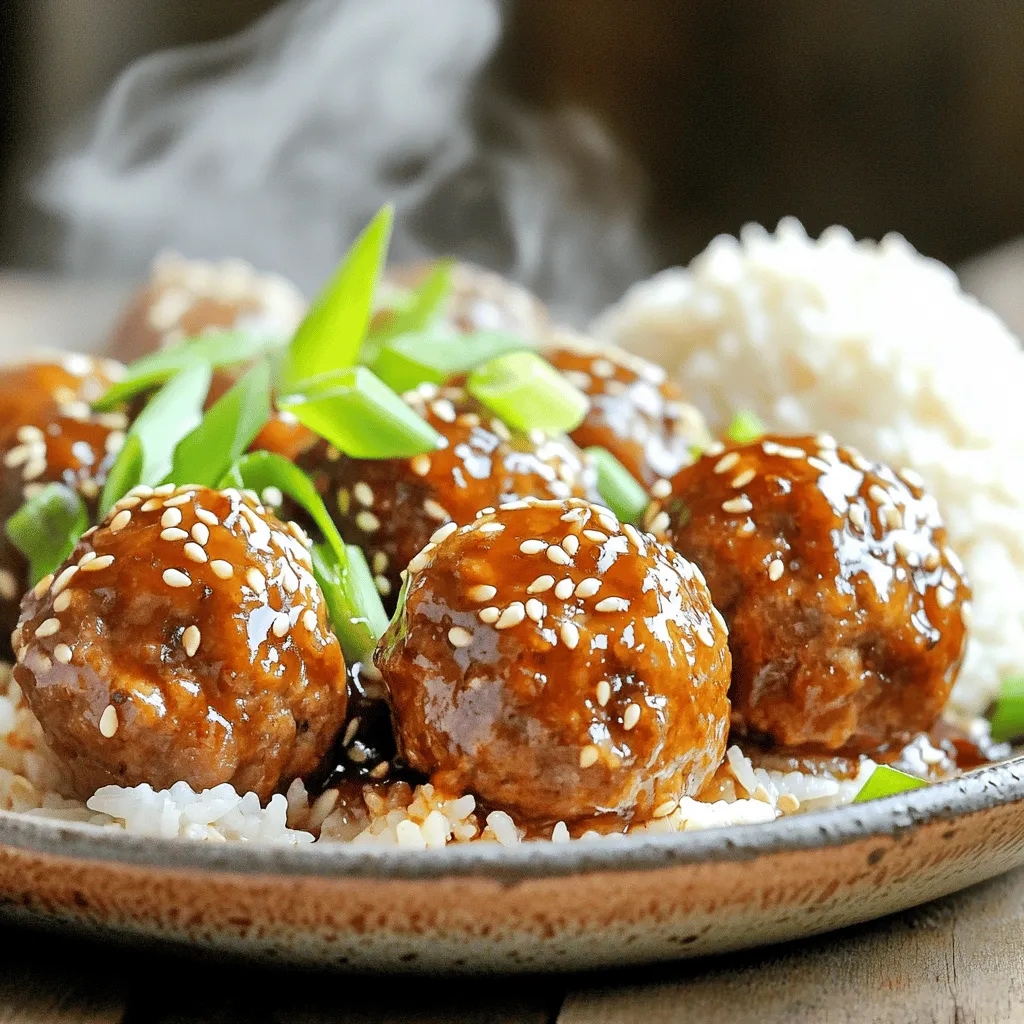
Easy Mongolian Meatballs Quick and Flavorful Recipe
Craving a quick and tasty meal? You’re in the right place! My Easy Mongolian Meatballs recipe packs bold flavors into simple steps. You’ll find all
- 1 pound ground beef - 1 medium onion, finely chopped - 2 cloves garlic, minced - 2 cups enchilada sauce (can be store-bought or homemade) - 1 can (15 oz) black beans, rinsed and drained - 1 cup corn kernels (use frozen or canned) - 1 teaspoon chili powder - 1 teaspoon ground cumin - 8 corn tortillas, cut into strips - 2 cups shredded cheese (a blend of cheddar and Monterey Jack works well) - Fresh cilantro leaves, for garnish - Sour cream, for serving (optional) This list covers all the tasty items you need for a savory Beef Enchilada Casserole. Each ingredient plays a key role in building rich flavors. Ground beef gives a hearty base. Onion and garlic add depth. Enchilada sauce brings spice and moisture. Don't forget the black beans and corn; they add texture and nutrients. Tortillas create layers, and cheese melts perfectly on top. For a fresh kick, add cilantro. Sour cream offers a cool contrast. Check out the Full Recipe for more details! - Preheat your oven to 350°F (175°C). - Heat a large skillet over medium heat and add 1 pound of ground beef. - Cook the beef until it turns brown. Break it apart with a spatula. - If there is extra fat, drain it from the skillet. - Add 1 medium chopped onion and 2 cloves of minced garlic. - Sauté these for about 5 minutes until the onion is soft. - Stir in 1 can of rinsed black beans, 1 cup of corn, 1 teaspoon of chili powder, and 1 teaspoon of ground cumin. - Mix in half of your enchilada sauce and cook for 2-3 minutes. - Grease a 9x13-inch baking dish. - Layer half of the tortilla strips across the bottom. - Pour half of the beef mixture evenly over the tortilla strips. - Drizzle the remaining enchilada sauce on top. - Sprinkle half of the shredded cheese over this layer. - Repeat: add the rest of the tortilla strips, the remaining beef, and more enchilada sauce. - Top with the remaining cheese. - Cover the baking dish tightly with aluminum foil. - Bake for 20 minutes in the preheated oven. - After 20 minutes, remove the foil. - Continue baking for an additional 10-15 minutes. - You want the cheese to be bubbly and lightly golden brown. - Let the casserole rest for a few minutes before cutting into squares. For the full recipe, check out the Full Recipe link. Enjoy your delicious beef enchilada casserole! - Meat cooking tips: Cook the ground beef until brown. This step adds flavor. Drain any extra fat for a leaner dish. - Casserole layer techniques: Start with tortilla strips at the bottom. This keeps the layers from sticking. Alternate layers of beef, sauce, and cheese for even cooking. - Serving suggestions: Cut the casserole into squares for easy serving. Place on colorful plates for a nice touch. - Creative garnishing ideas: Add fresh cilantro on top for color. A dollop of sour cream adds creaminess and flavor. - Overcooking cheese: Watch the cheese closely while baking. You want it melted, not burnt. - Uneven layering: Make sure to spread the layers evenly. This helps all parts cook well and taste great. Explore the Full Recipe to get all the details. Enjoy making this tasty meal! {{image_4}} You can easily change the meat in this dish. Try ground turkey or chicken instead of beef. They give a lighter taste while keeping it tasty. If you want a vegetarian option, use lentils or black beans as the base. Both add protein and flavor. To boost flavor, add spices like smoked paprika or cayenne pepper. These spices bring warmth and depth to the dish. You can also try different sauces. A green salsa or a spicy chipotle sauce can add a unique twist. Pair the casserole with side dishes for a full meal. A fresh garden salad is a great choice. You might also enjoy rice or guacamole alongside it. For drinks, serve with iced tea or a light beer to complement the flavors. To store leftovers, let the casserole cool down. Cut it into squares. Place the pieces in an airtight container. You can keep it in the fridge for up to 3 days. For reheating, use the microwave or oven. Heat it until it is hot all the way through. If using the oven, cover it with foil to keep it moist. You can freeze this casserole for later. Cut it into portions and wrap each piece tightly in plastic wrap. Then, place the wrapped pieces in a freezer bag. This way, they stay fresh. When you’re ready to eat, take a piece out and thaw it in the fridge overnight. To reheat, use the oven for the best texture. In the fridge, the casserole lasts about 3 days. After that, it may spoil. Look for signs like a sour smell or mold. If you see either, throw it away. Always trust your senses! You can swap ground beef for other meats. Here are some ideas: - Ground turkey - Ground chicken - Plant-based meat - Shredded pork These options work great. They give you different flavors and textures. Yes, you can use flour tortillas. They will change the texture but taste good. Corn tortillas are traditional and add a nice flavor. Try both to see which you prefer. Yes, you can prepare the casserole in advance. Layer all your ingredients in the dish. Cover it and store it in the fridge for up to 24 hours. Bake it when ready. This saves time on busy nights. To add heat, try these tips: - Use spicy enchilada sauce - Add jalapeños to the beef mixture - Sprinkle red pepper flakes on top - Mix in chopped chipotle peppers Adjust the heat to match your taste. You can find the Full Recipe for this savory beef enchilada casserole on my cooking page. It has all the details you need to make it perfect! This blog post covered a tasty casserole you can make with ground beef, onion, and enchilada sauce. I guided you through steps like prepping the oven, layering ingredients, and baking the dish. I also shared tips to improve your cooking and ways to store leftovers. New ideas and variations can make the recipe fun. You can swap ingredients easily or add spices for extra flavor. Enjoy creating this yummy casserole that fits your taste!
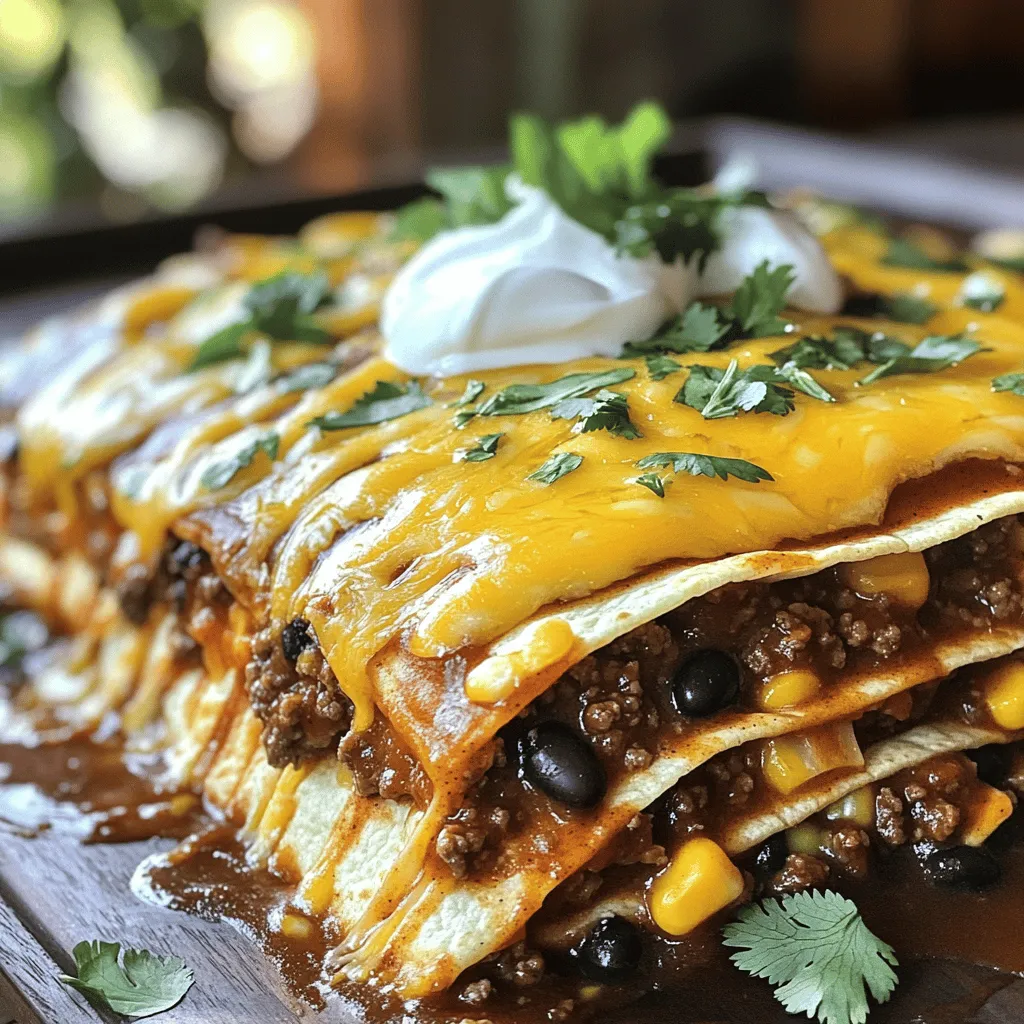
Savory Beef Enchilada Casserole Easy Family Dinner
Looking for an easy family dinner that packs flavor? Try my Savory Beef Enchilada Casserole! This dish combines ground beef, cheese, and tortillas in a
- 8 ounces pasta (fettuccine or penne) - 3 large onions, thinly sliced - 4 cups vegetable broth - 2 tablespoons olive oil - 1 tablespoon unsalted butter - 1 teaspoon fresh thyme leaves (or ½ teaspoon dried thyme) - 1 teaspoon garlic powder - ½ teaspoon sugar - Salt and freshly ground black pepper, to taste - 1 cup shredded Gruyère cheese - Fresh parsley, chopped for garnish To create a rich and savory dish, you'll want to start with the main ingredients. The pasta is the base, and I love using fettuccine or penne. Both hold the creamy sauce well. The onions bring sweetness and depth, and the vegetable broth adds a nice umami flavor. Next, for flavor enhancers, the olive oil and butter work together to caramelize the onions. This step is key for bringing out their natural sweetness. Fresh thyme adds an earthy touch that pairs perfectly with the onions. For seasonings, garlic powder gives a nice kick. A bit of sugar helps the onions caramelize better. Finally, the Gruyère cheese melts into a creamy sauce that makes this dish truly special. Don't forget to sprinkle fresh parsley on top! It adds color and a fresh taste. You can find the full recipe [Full Recipe]. - Warm olive oil and butter in a large pot. - Add thinly sliced onions and sprinkle with sugar. - Cook for 15-20 minutes, stirring often. Aim for soft, golden brown onions. - Stir in garlic powder and thyme once onions are caramelized. - Cook until the aroma fills the kitchen. - Pour in vegetable broth and bring it to a gentle simmer. - Add uncooked pasta, seasoning it with salt and pepper. - Cook pasta according to package instructions, usually 10-12 minutes. - Remove pot from heat and stir in shredded Gruyère cheese. - Mix until the cheese melts, creating a creamy sauce. - Taste and adjust seasonings if needed. For a detailed guide, check the Full Recipe. - Use a heavy-bottomed pot for even heat distribution. - Stir frequently but allow onions to sit for deeper flavor. Caramelizing onions can take time, but it’s worth it. A heavy pot helps the onions cook evenly. Stir them often but let them rest. This way, they get soft and sweet. The goal is golden brown onions. This deep flavor adds to the dish. - Use a blend of Gruyère and mozzarella for added creaminess. - Incorporate cheese gradually for best results. For a creamy texture, combine Gruyère with mozzarella. Gruyère gives a nutty taste, while mozzarella adds stretch. When you add cheese, do it slowly. This helps it melt evenly, creating a smooth sauce. - Stir occasionally during cooking. - Make sure to fully submerge pasta. To keep the pasta from sticking, stir it every few minutes. This keeps it separate and helps it cook evenly. Make sure the pasta is fully submerged in the broth. If it’s not, some pieces may stay hard. For the full recipe, check out One Pot French Onion Pasta. {{image_4}} You can easily add protein to your One Pot French Onion Pasta. Chicken or sausage work great here. Cook them in the same pot for extra flavor. If you prefer plant-based options, try using tofu or chickpeas. These will give your dish a hearty feel without meat. Adding veggies boosts nutrition and flavor. Spinach or mushrooms fit well into this dish. They add color and health benefits too. You can also use seasonal vegetables like zucchini or bell peppers. This keeps the dish fresh and exciting. Cheese is key for creaminess but feel free to explore. Gruyère gives a rich flavor, but you can try others too. Cheddar or fontina can change the taste profile. For vegans, look for plant-based cheese options. You still get the creaminess, minus the dairy. For the full experience, check out the Full Recipe. To keep your One Pot French Onion Pasta fresh, start by letting it cool. This step helps avoid condensation in your storage container. Use airtight containers to best preserve flavor and texture. This way, your pasta stays tasty for days. When you're ready to enjoy leftovers, reheat on the stovetop. Add a splash of broth to keep it moist and creamy. This method helps maintain the pasta's texture. Avoid microwaving, as it can make the pasta rubbery. If you have leftover portions, freezing is a great option. Place the uneaten pasta in airtight containers or freezer bags. Make sure to remove as much air as possible. For best results, thaw in the fridge overnight before reheating. This method helps keep the flavors intact. Yes, you can use other pasta types. Fettuccine and penne work well, but feel free to try: - Rigatoni - Farfalle - Rotini These shapes hold sauce nicely and offer fun bites. Just remember to adjust cooking times based on the pasta shape. To make this dish gluten-free, choose gluten-free pasta. Options include: - Brown rice pasta - Chickpea pasta - Quinoa pasta These alternatives cook well and taste great. Check the package for cooking times since they can vary. This pasta pairs well with many sides. Consider these options: - A simple green salad with vinaigrette - Garlic bread for dipping - Roasted vegetables for a healthy touch These sides balance the rich flavors of the pasta and make the meal complete. One Pot French Onion Pasta lasts in the fridge for up to 3 days. To store it: - Let it cool before placing it in an airtight container. - Ensure it’s sealed tightly to keep it fresh. When reheating, warm it on the stove. Add a splash of broth to keep it creamy. This blog post covered how to make a delicious One Pot French Onion Pasta. We explored the main ingredients, tips for perfect caramelization, and various ways to customize the dish. Remember, you can easily add proteins or vegetables to fit your taste. Proper storage and reheating will keep your leftovers tasty. Enjoy creating a creamy and flavorful pasta dish that will impress everyone. Your cooking skills will shine with this simple yet satisfying recipe.
One Pot French Onion Pasta Flavorful and Savory Dish
Discover a dish that warms your heart—One Pot French Onion Pasta! This savory recipe combines sweet caramelized onions with rich Gruyère cheese, all in one
- 2 packs instant ramen noodles (discard the seasoning packets) - 2 cups vegetable or chicken broth - 1 cup creamy coconut milk - 1 tablespoon miso paste - 1 teaspoon soy sauce - 1 teaspoon toasted sesame oil - 1 cup baby spinach, tightly packed - 1 medium carrot, julienned (thinly sliced into matchsticks) - 2 green onions, finely sliced (white and green parts separated) Gather these ingredients to make a quick and tasty ramen. Instant ramen noodles are the star here, making this dish a breeze. Use vegetable or chicken broth for a rich base. The creamy coconut milk adds a smooth texture. Miso paste and soy sauce boost the flavor. These add umami that makes the broth rich and savory. Toasted sesame oil gives a nutty finish that elevates the dish. Fresh veggies make the ramen bright and colorful. Baby spinach wilts quickly, adding nutrients. Julienned carrots bring a sweet crunch. Green onions add crunch and a mild onion taste. With these ingredients, you can whip up a delicious bowl of creamy ramen in just 10 minutes! {{ingredient_image_2}} 1. Start by pouring 2 cups of broth into a medium pot. 2. Heat over medium flame until it simmers gently. 3. Stir in 1 tablespoon of miso paste. Mix until it dissolves. 4. Add 1 teaspoon of soy sauce and blend well. 1. Now, pour in 1 cup of coconut milk. 2. Stir continuously until the broth turns smooth and creamy. 1. Toss in 1 cup of packed baby spinach and 1 medium carrot, julienned. 2. Let them cook for about 2-3 minutes. The spinach should wilt and the carrot should soften. 1. Add 2 packs of instant ramen noodles to the pot. 2. Cook for 3-4 minutes. Check for your preferred noodle texture. 1. Drizzle 1 teaspoon of toasted sesame oil into the pot. 2. Season with salt, pepper, and a pinch of chili flakes for extra spice. 1. Ladle the creamy ramen into bowls, mixing noodles and veggies. 2. For a nice touch, garnish with sliced green onions and more chili flakes. 3. Serve with chopsticks and lime wedges for a zesty kick! To make your ramen just right, you can tweak the spices. If you like it spicy, add a pinch of chili flakes. For a milder dish, skip the heat. Recommended garnishes can really elevate your meal. I suggest topping your ramen with sliced green onions. You can also add a sprinkle of sesame seeds or even fresh herbs for a pop of flavor and color. If you want to switch things up, you can change the broth. Use chicken broth for a richer taste or stick with vegetable broth for a lighter option. For vegetables, feel free to get creative! You can add mushrooms, bell peppers, or even peas. They will all cook quickly and add nice flavors to your dish. To make your ramen even creamier, try adding different ingredients. You can use cream cheese or even sour cream for a rich twist. Another option is to blend in some nut butter, like almond or cashew. This adds a unique taste and an extra layer of creaminess. Experiment to find what you enjoy! Pro Tips Fresh Ingredients: Using fresh spinach and carrots can enhance the flavor and texture of your ramen, making it even more delightful. Customize Your Broth: Feel free to experiment with different broth bases such as mushroom or beef for a unique twist or add more miso for a richer flavor. Add Protein: For a heartier meal, consider adding cooked chicken, tofu, or a soft-boiled egg to your ramen before serving. Perfect Noodle Cook Time: Keep an eye on the noodles while cooking; they can turn mushy quickly, so taste them a minute or two before the recommended cooking time. {{image_4}} You can easily add protein to your creamy ramen. Options include chicken, tofu, or shrimp. - Chicken: Cook bite-sized pieces in a pan until golden. Add them to your ramen for a hearty meal. - Tofu: Use firm tofu. Cut it into cubes and pan-fry until crispy. Add it for a great texture. - Shrimp: Sauté shrimp in a pan until pink. Toss them into the ramen just before serving. Each protein option brings a unique taste and texture to your dish. Want a kick in your ramen? Adding chili or hot sauce can make a big difference. - Start with a pinch of chili flakes. If you like more heat, add more. - For hot sauce fans, a tablespoon of your favorite sauce works well. Adjust to your spice level. This twist makes the dish exciting and full of flavor. You can make this ramen vegetarian or vegan by swapping out some ingredients. - Vegetable Broth: Use vegetable broth instead of chicken broth for a vegan base. - Coconut Milk: This is already vegan, so you can keep it. - Tofu: Use tofu as your protein. It fits perfectly into a vegan diet. These changes keep your ramen delicious while meeting dietary needs. To keep your creamy ramen fresh, store it in an airtight container. Place it in the fridge right after it cools. This keeps bacteria away and helps maintain flavor. It stays good for about three days. After that, the noodles can get mushy. When you want to enjoy leftovers, reheat gently. You can use a pot on low heat or the microwave. If using the microwave, cover the bowl to keep moisture in. Add a splash of broth or water to help keep it creamy. Stir well as it heats. You can freeze creamy ramen, but it changes texture. To freeze, let it cool completely. Then place it in a freezer-safe bag, squeezing out the air. When you’re ready to eat, thaw it in the fridge overnight. Reheat gently, adding some liquid to restore creaminess. You can add chili flakes for heat. Start with a pinch and taste. If you want more spice, add more. You can also use hot sauce or Sriracha. Both options give a nice kick. Adjust the heat to fit your taste. Yes, you can try many types of noodles. Soba, udon, or rice noodles work great. These options give unique textures and flavors. Choose according to what you like best. Just make sure to adjust the cooking time as needed. If you need a substitute, try almond milk or soy milk. Both give a creamy texture. For dairy options, use heavy cream or whole milk. Each option changes the flavor slightly, so pick what suits you. This ramen keeps well for about 3 days in the fridge. Store it in an airtight container. Reheat it on the stove or in the microwave. If it thickens, add a splash of broth or water when reheating. Yes, creamy ramen is great for meal prep. Make a big batch and store it in portions. Just keep the noodles and broth separate if you can. This way, the noodles stay firm. When you're ready, combine them and heat up. This blog post covered how to make creamy ramen with simple steps and tasty ingredients. You learned about the main components like instant noodles, rich broth, and coconut milk. Flavor enhancers like miso and soy sauce add depth, while fresh veggies boost nutrition and color. Remember, you can customize it to your taste, with options for protein or spice. With the proper storage and reheating tips, your ramen stays delicious. Enjoy making your perfect bowl and experimenting with flavors that excite your palate. Happy cooking!
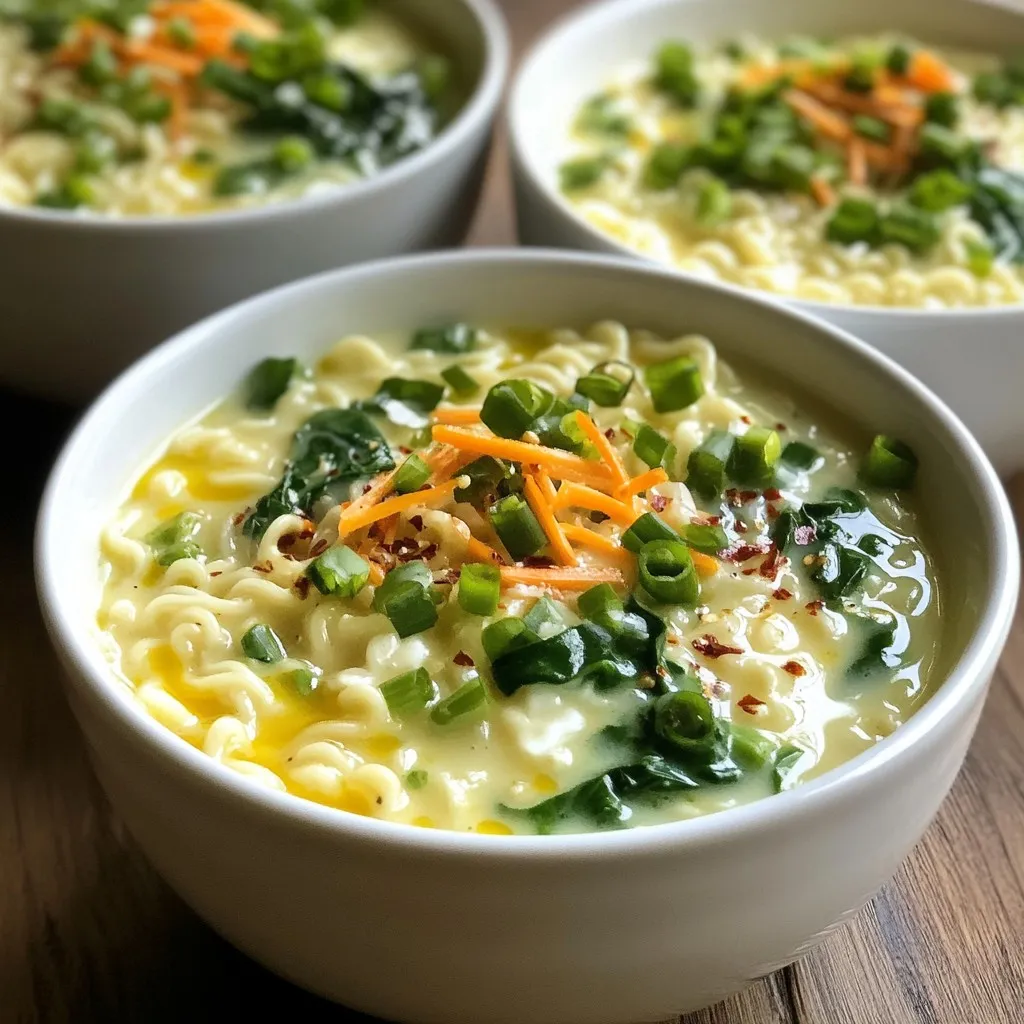
Creamy 10-Minute Ramen Quick and Easy Recipe
Craving a quick meal that packs a punch? This Creamy 10-Minute Ramen recipe is your answer! With just a handful of simple ingredients, like instant
- 8 oz whole grain pasta (such as penne or fusilli) - 1 cup roasted red peppers (either jarred or homemade) - 1 cup cooked chickpeas (use canned or boil your own) - 1/2 cup Greek yogurt (plain) - 2 cloves garlic, finely minced - 1 tablespoon extra virgin olive oil The main ingredients in this dish give it a hearty and rich flavor. Whole grain pasta adds fiber and nutrition. Roasted red peppers bring sweetness and depth. Chickpeas offer protein and creaminess. Greek yogurt adds tang and creaminess. Garlic gives a nice punch. Olive oil rounds it all out. - 1 teaspoon smoked paprika - 1/2 teaspoon red pepper flakes (optional for extra heat) - Salt and freshly ground black pepper to taste Spices make a big difference. Smoked paprika adds warmth. Red pepper flakes can bring heat if you want it. Salt and black pepper enhance all the flavors. Always taste as you go! - Fresh basil leaves, for a fragrant garnish - Grated Parmesan cheese or nutritional yeast, for serving (optional) Garnishes are fun! Fresh basil adds color and aroma. Parmesan cheese or nutritional yeast can give a savory finish. These small touches elevate the dish. Feel free to be creative with your garnishes! {{ingredient_image_2}} 1. Bringing water to a boil: Fill a large pot with water. Add a pinch of salt. Heat on high until water bubbles vigorously. 2. Cooking pasta to al dente: Add 8 oz of whole grain pasta. Cook according to package directions. Aim for al dente, which means the pasta should be firm yet tender. 3. Draining and setting aside: Once cooked, pour the pasta into a colander to drain. Set the pasta aside while you make the sauce. 1. Blending roasted red peppers and other ingredients: Grab a blender or food processor. Add 1 cup of roasted red peppers, 1 cup of cooked chickpeas, ½ cup of Greek yogurt, 2 minced garlic cloves, 1 tablespoon of olive oil, 1 teaspoon of smoked paprika, and red pepper flakes if you want heat. 2. Achieving a smooth consistency: Blend all the ingredients until the mixture is creamy and smooth. This will be the heart of your dish. 1. Heating the sauce on medium: Pour the creamy sauce into a large skillet. Heat it over medium heat for about 5-7 minutes. Stir often to avoid sticking. 2. Tossing pasta with the sauce: Once the sauce is hot, add the drained pasta. Gently toss it with the sauce. Ensure every piece of pasta gets coated. 3. Adjusting sauce consistency: If the sauce looks too thick, add a splash of pasta cooking water. Stir until you reach the preferred creaminess. Season with salt and black pepper to taste. To make the sauce smooth, blend the roasted red peppers well. This step is key for a creamy texture. If your sauce tastes bland, adjust the seasoning. Add salt or pepper slowly, tasting as you go. You want a balance that enhances the flavors. Timing is crucial for pasta. Follow the package instructions closely. This ensures the pasta is firm but not hard. Drain the pasta quickly to prevent it from cooking further. Rinse it briefly under cold water to stop the cooking process. This keeps the texture just right. For a beautiful presentation, serve the pasta in shallow bowls. Drizzle some olive oil on top for richness. A sprinkle of crushed red pepper flakes adds a nice touch for those who like heat. Finish with a fresh basil leaf to brighten the dish. Pair it with a simple side salad or crusty bread for a complete meal. Pro Tips Choose Quality Pasta: Opt for whole grain pasta as it adds more fiber and nutrients compared to regular pasta, making your dish healthier and more filling. Blend Smoothly: When making the sauce, ensure all ingredients are blended until completely smooth for a creamy texture that clings beautifully to the pasta. Adjust Consistency: If your sauce is too thick, gradually add a splash of the reserved pasta water until you achieve your desired creaminess without compromising flavor. Herb Variations: Experiment with different herbs like parsley or oregano instead of basil for a unique flavor twist that complements the roasted red peppers. {{image_4}} You can use different proteins in this dish. Beans, lentils, and tofu are great options. If you choose lentils, cook them until soft. For tofu, cube it and sauté until golden. Adjust the cooking time based on the protein you select. Canned beans heat up quickly, so add them near the end. If you're vegan, swap Greek yogurt and cheese for plant-based options. Use cashew cream or coconut yogurt for a creamy texture. Nutritional yeast adds a cheesy flavor without dairy. You can even blend silken tofu for a creamy base. These options keep the dish rich while meeting vegan needs. To boost flavor, add sun-dried tomatoes or fresh spinach. Sun-dried tomatoes bring a tangy taste that pairs well with roasted peppers. Spinach adds color and nutrients. You can also play with spices. Try adding more smoked paprika or a pinch of cumin for depth. Each choice adds a unique twist to your pasta dish. To store your Roasted Red Pepper Protein Pasta, let it cool first. Place it in an airtight container. This keeps it fresh and tasty. You can refrigerate it for up to three days. Make sure to stir it before serving again. If it seems dry, add a little water or olive oil. Freezing this dish is easy and great for meal prep. Use freezer-safe containers or heavy-duty bags. Make sure to remove as much air as possible. This helps prevent freezer burn. You can freeze it for up to three months. When you are ready to eat, just thaw it in the fridge overnight before reheating. For thawing, the fridge is the best method. This keeps the pasta safe and prevents bacteria. If you need it fast, you can use the microwave. Just set it to low power and check every minute. When reheating, make sure it’s hot all the way through. Add a splash of water or olive oil if it looks dry. Enjoy your pasta just like it was fresh! To make this dish vegan, swap Greek yogurt for a plant-based yogurt. Use nutritional yeast instead of Parmesan cheese for a cheesy flavor. For a protein boost, try adding extra chickpeas or lentils. These swaps keep the meal tasty and creamy. You won’t miss the dairy! Yes, you can use fresh peppers! To roast them, place whole peppers over an open flame or under a broiler. Turn them often until the skin is blackened and blistered. Once cool, peel off the skin and remove the seeds. This adds a smoky, fresh taste to your pasta. Pair the pasta with a fresh green salad or grilled veggies. Garlic bread also makes a nice side. For something lighter, serve with steamed broccoli or a simple cucumber salad. These options balance the rich flavors of the pasta. Enjoy your meal! This blog post explored a delicious roasted red pepper protein pasta. We covered main ingredients like whole grain pasta, chickpeas, and Greek yogurt. Then, we walked through step-by-step instructions for cooking, blending, and combining. I shared tips for perfecting your sauce, cooking pasta al dente, and presenting your dish. We also looked at variations, storage tips, and FAQs to help you succeed. Now you have all the tools to create a tasty meal that fits your needs. Enjoy your cooking adventure!
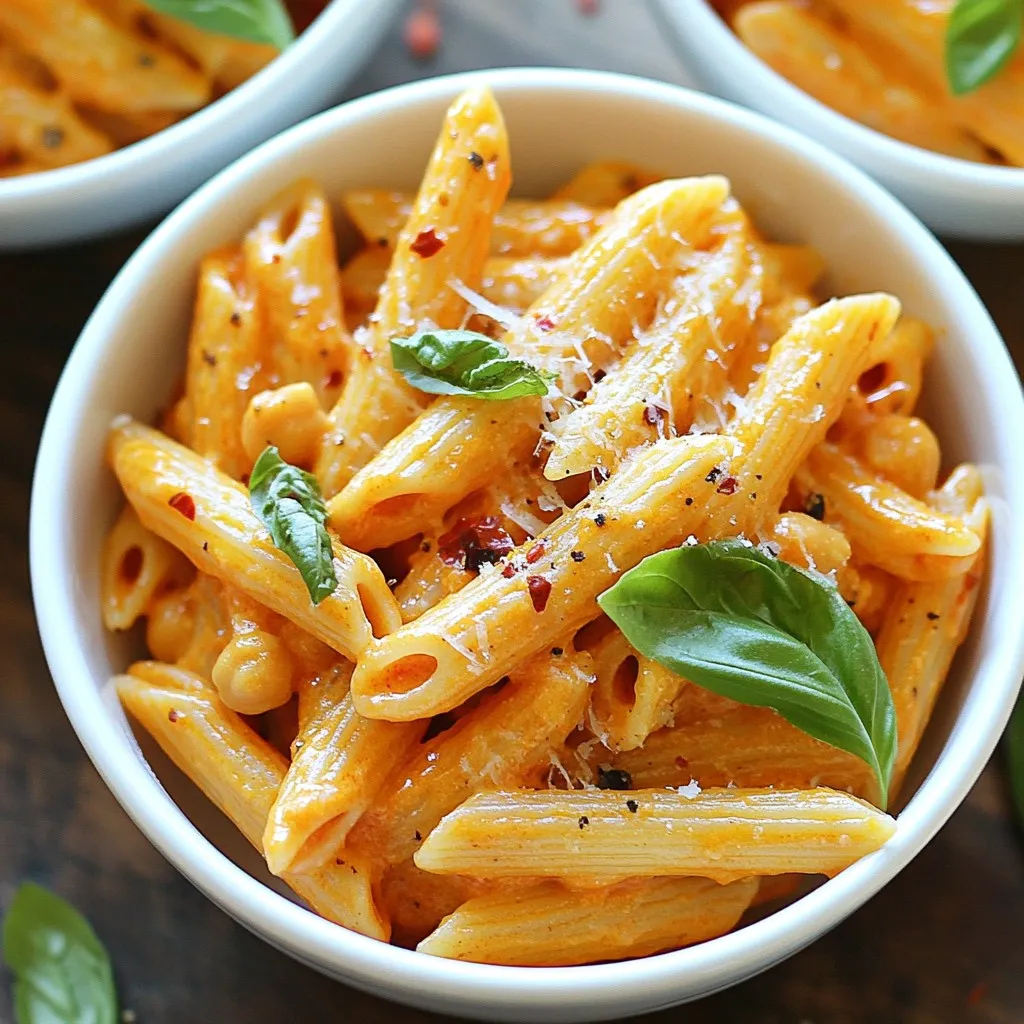
Roasted Red Pepper Protein Pasta Simple and Flavorful
Are you ready to add a burst of flavor to your dinner routine? This Roasted Red Pepper Protein Pasta is not only simple to make,
- 4 boneless, skinless chicken breasts - 2 tablespoons extra virgin olive oil - 1 tablespoon freshly squeezed lemon juice - 1 teaspoon garlic powder - 1 teaspoon onion powder - 1 teaspoon smoked paprika - 1 teaspoon dried oregano - 1 teaspoon dried thyme - 1 teaspoon kosher salt - ½ teaspoon freshly ground black pepper - Fresh parsley or cilantro for garnish To make Air Fryer Grilled Chicken, you need simple and fresh ingredients. Start with four boneless, skinless chicken breasts. They cook quickly and stay juicy. Add two tablespoons of extra virgin olive oil. This adds flavor and keeps the chicken moist. A tablespoon of freshly squeezed lemon juice brightens the taste. Next, gather your spices and seasonings. You will need garlic powder, onion powder, and smoked paprika. Each adds its unique flavor. Dried oregano and thyme bring herbal notes. Kosher salt helps enhance all the flavors, while black pepper adds a little heat. For a pretty touch, use fresh parsley or cilantro as a garnish. These herbs make your dish look vibrant and fresh. This recipe is not just easy; it also allows you to enjoy great flavors. The full recipe shows how to blend these ingredients for a juicy and flavorful meal. To make the marinade, mix olive oil and lemon juice with spices. Start with 2 tablespoons of olive oil and 1 tablespoon of lemon juice. Add 1 teaspoon each of garlic powder, onion powder, and smoked paprika. Next, include 1 teaspoon of dried oregano and dried thyme. Finish with 1 teaspoon of kosher salt and ½ teaspoon of black pepper. Whisk everything well until it blends into a smooth mixture. This marinade adds depth and flavor to our chicken. Take your chicken breasts and coat each one with the marinade. Make sure every side is covered. This helps the flavors soak in. Place the coated chicken in a bowl and cover it with plastic wrap. Refrigerate for at least 30 minutes. If you have more time, let it marinate for up to 4 hours. The longer it sits, the better it tastes. First, preheat your air fryer to 375°F (190°C) for about 5 minutes. This step ensures even cooking. Once it’s ready, arrange the chicken breasts in the basket. Lay them flat in a single layer without touching. This helps the air circulate. Cook the chicken for 12-15 minutes. Flip the breasts halfway through. Check that the internal temperature is 165°F (75°C). Your chicken should be golden-brown and juicy. After cooking, let it rest for 5 minutes. This keeps the juices locked in, making each bite tender and delicious. For an added touch, sprinkle fresh parsley or cilantro before serving. Enjoy your air fryer grilled chicken! For detailed steps, refer to the Full Recipe. For juicy chicken, I recommend marinating for at least 30 minutes. You can go up to 4 hours for deeper flavor. After cooking, let the chicken rest for 5 minutes. This step locks in moisture and keeps it tender. Set your air fryer to 375°F (190°C). Cook the chicken for 12 to 15 minutes. Flip the chicken halfway to ensure even cooking. Always check that the inside reaches 165°F (75°C). This will give you a golden-brown crust. For a great presentation, serve the chicken on a rustic wooden board. Add lemon wedges and fresh herbs for color. Pair it with sides like roasted veggies or a light salad. This makes your meal look and taste delightful. {{image_4}} To add a kick to your air fryer grilled chicken, try a spicy variant. You can easily do this by adding cayenne pepper or hot sauce to your marinade. A teaspoon of cayenne will make the chicken fiery and exciting. If you prefer hot sauce, use a tablespoon or two. Adjust based on your heat level preference. This variation brings a bold flavor that pairs well with the juicy chicken. Herbs can transform your grilled chicken. Try using fresh herbs like rosemary, basil, or cilantro in place of dried ones. Fresh herbs add brightness and depth to the flavor. If you want a different taste, opt for thyme or dill instead of oregano. Each herb brings its own unique character, making every meal special. You don’t have to stick to chicken breasts. Using thighs or drumsticks can make for a juicy meal. These cuts have more fat, which adds flavor and helps keep the chicken moist. Drumsticks are fun to eat, and thighs are tender and rich. Both options work well in the air fryer and will give you a delicious result. For the full recipe, check out the detailed instructions above. To store leftover chicken safely, let it cool first. Place it in an airtight container. You can keep it in the fridge for up to four days. This keeps the chicken fresh and safe to eat. To reheat chicken, the air fryer is best. Preheat your air fryer to 350°F (175°C). Place the chicken in the basket. Heat it for about 5 to 7 minutes. This keeps the chicken juicy and crisp. If you want to freeze chicken, wrap it tightly in plastic wrap. Place it in a freezer bag. You can store it for up to three months. When ready to use, thaw it in the fridge overnight. This way, the chicken stays safe and tasty. You can check if your chicken is cooked by using a meat thermometer. The safe internal temperature for chicken is 165°F (75°C). You can also look for visual signs. The chicken should be opaque and no longer pink in the center. Juices should run clear when you cut into it. Yes, you can marinate chicken overnight. This helps the flavors soak in well. However, do not marinate longer than 24 hours. Too long can make the chicken mushy due to the acid in the marinade. Air fryers cook chicken fast and evenly. They use hot air to give a crispy outside while keeping the inside juicy. This method uses less oil than traditional frying. You get great flavor without all the extra fat. Plus, it’s easier to clean than a grill. To clean your air fryer, unplug it and let it cool. Remove the basket and tray, then wash them with warm soapy water. Avoid abrasive cleaners. Wipe the inside with a damp cloth. Regular cleaning ensures your air fryer lasts longer and works well. You learned how to make juicy air-fried chicken with simple ingredients and spices. The marinade adds flavor, while the air fryer cooks chicken evenly and quickly. Remember to let the chicken rest for the best texture and taste. Explore variations with different spices or cuts to keep it exciting. Store leftovers properly for future meals. With these tips, you will impress friends and family with your cooking skills. Enjoy your flavorful chicken, and make it a part of your meal routine!
Air Fryer Grilled Chicken Juicy and Flavorful Meal
Looking for a quick, juicy, and flavorful meal? You’ve come to the right place! Air fryer grilled chicken is your answer for a delicious dinner
- 1 pound large shrimp, peeled and deveined - 2 ears of corn, cut into thirds - 1 pound baby potatoes, halved - 1 lemon, zested and juiced - 4 cloves garlic, finely minced - 1 tablespoon Old Bay seasoning - 2 tablespoons olive oil - Salt and freshly cracked black pepper to taste - Fresh parsley, finely chopped, for garnish Using fresh ingredients makes a big difference in this dish. Fresh shrimp tastes sweet and tender. Corn adds crunch and sweetness. Baby potatoes are creamy and filling. The lemon juice brightens flavors while the garlic adds depth. Old Bay seasoning brings a classic seafood taste. Always pick the best ingredients for the best dish. - Mixing bowl - Aluminum foil (about 12x12 inches) - Grill or baking sheet When picking foil, choose heavy-duty options. This prevents tearing when cooking. A mixing bowl is key to evenly coat the shrimp and veggies. Having a grill or baking sheet ready allows you to cook this dish with ease. With the right tools, your shrimp boil foil packets will turn out great! To start, rinse your shrimp under cold water. This helps clean them well. Peel and devein your shrimp if not done already. Next, take your corn. Cut each ear into thirds. This makes it fit nicely in the packets. Now grab your baby potatoes. Halve them so they cook evenly. When it comes to your lemon, zest it first. Use a fine grater for this. The zest gives great flavor. After that, juice the lemon. Squeeze it into a bowl to catch all the juice. Now that you have all your ingredients, it’s time to assemble. Start by cutting four sheets of aluminum foil. Each sheet should be about 12x12 inches. Lay these flat on your counter. Evenly distribute the shrimp, corn, and potatoes in the center of each foil sheet. Make sure each packet has a good mix of everything. Next, fold the edges of the foil over the filling. This creates a sealed packet. Make sure it is tight so steam does not escape. You can cook your foil packets on the grill or in the oven. If you grill, preheat it to medium-high heat, about 375°F. If you use the oven, set it to 400°F. Cook the foil packets for about 15 to 20 minutes. You’ll know they are done when the shrimp turn opaque and the potatoes feel tender. When they are ready, carefully open the packets. Be cautious of the steam. Pour everything onto a serving dish. Enjoy your meal with fresh parsley on top for color and flavor. For the complete recipe, check out the [Full Recipe]. To ensure your shrimp boil is a hit, avoid common mistakes. First, don’t overcook the shrimp. This makes them rubbery. Cook them just until they turn pink and opaque. Another mistake is not seasoning enough. Don’t skimp on salt and spices. Old Bay seasoning gives great flavor but think about adding more. For a kick, try cayenne pepper or smoked paprika. Adjust seasoning based on your taste. If you like it spicy, add more spice. If you prefer it milder, cut back on strong flavors. Want to boost the taste? Add fresh herbs like thyme or dill. They bring brightness to the dish. You can also try adding a splash of hot sauce for heat. Pair your shrimp boil with easy sides. A fresh salad can balance the richness of the shrimp. Cornbread or crusty bread is great to soak up juices. Dips are also a fun addition. A garlic butter dip is simple and tasty. You can also serve with a zesty cocktail sauce for a classic touch. For more details, check the Full Recipe. {{image_4}} You can easily make shrimp boil foil packets fit your diet. For a gluten-free option, ensure your seasoning does not contain gluten. Old Bay seasoning is gluten-free, but always check the label. For a dairy-free version, this recipe is already perfect as it contains no dairy. If you want a vegetarian or vegan version, swap the shrimp for mushrooms or firm tofu. You can use vegetable broth instead of seasoning. This change keeps the bold flavors while meeting different dietary needs. Adding regional flavors makes your shrimp boil unique. For a southern twist, use Cajun seasoning. This spice mix adds heat and depth. If you want a taste of the coast, add fresh crab or clams to the packets. Inspiration from other cuisines can also enhance your dish. For an Asian flair, try adding soy sauce and ginger. This change will give your meal a fresh, exciting taste. Feel free to mix and match these ideas. The best part of shrimp boil foil packets is their flexibility. You can make them your own! For full details, check the Full Recipe. After enjoying your shrimp boil, you may have leftovers. To keep them fresh, store the packets in the fridge. Use airtight containers or wrap them tightly in plastic wrap. Your leftovers will stay good for up to three days. If you want to keep them longer, freezing is a great option. Just place the cooled packets in freezer bags. They can last up to three months in the freezer. When you want to eat your leftovers, thaw them in the fridge overnight. Then, reheat them in the oven at 350°F for about 10-15 minutes. You can also use the microwave. Just place the mixture in a microwave-safe bowl. Heat it for 1-2 minutes or until warm. Making shrimp boil foil packets ahead of time is simple and smart. You can prepare the shrimp, corn, and potatoes a day before. Just keep them in the fridge until you're ready to cook. This saves time on busy days. For easy assembly, lay out your foil sheets and ingredients. Have bowls for each ingredient ready. This way, you can quickly grab what you need. When it's meal time, just layer the ingredients in the foil. Seal the packets and cook! By planning ahead, you can enjoy this easy and flavorful meal anytime. For the full recipe, check out the details that guide you through the cooking process step by step! For shrimp boil foil packets, I recommend using large shrimp. Sizes like 16-20 count per pound work great. These shrimp have enough meat to hold up during cooking. They also cook evenly with the veggies. Opt for fresh or frozen shrimp that is peeled and deveined. This saves time and adds to the dish's flavor. Yes, you can make shrimp boil foil packets ahead of time. Prep the packets up to 24 hours in advance. After assembling, cover them well and store them in the fridge. This way, you can just toss them on the grill or in the oven when you're ready. Just remember to adjust the cooking time if they are cold from the fridge. You can easily customize your shrimp boil to fit your taste. Here are some ideas: - Add different vegetables like bell peppers or zucchini. - Swap the Old Bay seasoning for Cajun or lemon pepper. - Mix in some sausage or crab for extra protein. - Use lime juice instead of lemon for a twist. These options let you create a shrimp boil that suits your cravings. A shrimp boil in foil packets makes cooking fun and easy. We explored tasty ingredients like fresh shrimp, corn, and potatoes. I shared tools to help you prepare and cook perfectly. Remember to avoid common mistakes and play with different flavors. You can customize it to fit any diet or taste. Whether grilling or baking, this meal is satisfying. Focus on fresh ingredients, and you’ll impress everyone at the table. Enjoy your cooking; your next gathering just got more exciting!
Savory Shrimp Boil Foil Packets Easy Flavorful Meal
Looking for an easy, tasty meal? Try my savory shrimp boil foil packets! This fun dish combines fresh shrimp, sweet corn, and tender potatoes, all
For this simple dish, you need just a few key ingredients. Here’s what you will need: - 4 boneless, skinless chicken breasts - 2 tablespoons extra virgin olive oil - 1 teaspoon dried oregano - 1 teaspoon dried basil - 1 teaspoon garlic powder - 1 teaspoon smoked paprika - Zest and juice of 1 large lemon - Sea salt and freshly cracked black pepper to taste - 1 cup cherry tomatoes, halved - 1 cup fresh spinach, packed - Fresh parsley, chopped, for garnish These ingredients come together to create a vibrant, tasty meal. The chicken absorbs the lemon and herbs well. To make your meal even better, consider these garnishes and sides: - Lemon wedges for added zest - Crusty bread to soak up juices - A fresh salad with mixed greens - Grated Parmesan cheese for a savory touch These options enhance the dish and offer variety on the plate. This recipe provides a healthy balance of protein and vegetables. Here’s a quick look at the nutrition: - Calories: About 290 per serving - Protein: Approximately 35 grams - Fat: Around 12 grams - Carbohydrates: Roughly 10 grams - Fiber: About 2 grams This meal is nutritious, filling, and perfect for any night of the week. You can enjoy Italian Baked Chicken with peace of mind, knowing it’s both tasty and good for you. If you want to follow the Full Recipe, make sure to check the detailed steps! First, I preheat my oven to 400°F (200°C). This makes sure the chicken cooks evenly. In a bowl, I whisk together some olive oil, dried oregano, dried basil, garlic powder, smoked paprika, lemon zest, and lemon juice. A dash of sea salt and pepper adds flavor. This marinade gives the chicken a fresh taste. I then arrange the chicken breasts in a baking dish. I pour the marinade over them, coating each piece well. I like to let it marinate for at least 15 minutes. For extra flavor, I sometimes let it sit longer in the fridge. Next, I scatter halved cherry tomatoes around the chicken. Their sweetness pairs well with the herbs. I place the dish in the oven and bake for about 25 minutes. I check for an internal temperature of 165°F (74°C) to know it's done. This step ensures the chicken is golden and fully cooked. Once out of the oven, I add fresh spinach on top. I return the dish to the oven for another 10 minutes. This wilts the spinach nicely while keeping its bright color. After baking, I let the chicken rest for a few moments. This helps keep it juicy when I slice it. I then sprinkle chopped parsley over the chicken for a burst of color. Serving it warm makes the dish even more inviting. Drizzling the pan juices on top adds more flavor. Don't forget a lemon wedge on the side for extra zing! To make your chicken tender, start with quality meat. Choose fresh, boneless chicken breasts. Marinating is key. Use the olive oil and lemon marinade from the Full Recipe. Let the chicken sit in the marinade for at least 15 minutes. For more flavor, marinate it in the fridge for two hours. Cooking at the right temperature matters. Bake at 400°F (200°C) until the chicken hits 165°F (74°C). Let it rest before slicing to keep the juices in. Italian baked chicken loves company. Pair it with simple sides. Roasted veggies or a fresh salad work well. You can add garlic bread for a yummy touch. The cherry tomatoes in the dish add sweetness. Fresh herbs like basil or parsley brighten the meal. And don't forget a squeeze of lemon. It enhances the flavors and gives a fresh feel. One common mistake is skipping the marinade. It adds depth to the chicken. Another mistake is overcrowding the baking dish. This can lead to uneven cooking. Always give the chicken space. Also, avoid overcooking. Check the chicken's temperature with a meat thermometer. Lastly, don't rush the resting time. Resting allows the juices to settle. This way, each bite stays juicy and flavorful. {{image_4}} You can change the herbs in this dish. For a fresh taste, try thyme or rosemary. You can also use fresh herbs instead of dried ones. If you have fresh basil, use twice the amount. Mix and match to find your favorite flavor. Don’t be afraid to experiment! If you want a change from chicken, you have options. You can use turkey breasts, which cook similarly. For a more unique flavor, try pork tenderloin. Both options absorb flavors well. Make sure to adjust cooking times based on what you choose. Always check for doneness! Making this dish vegan is simple. Swap chicken for firm tofu or tempeh. Marinate them just like the chicken. You can also use portobello mushrooms for a hearty option. These choices soak up flavors beautifully. Adjust the baking time to ensure they are cooked through. Enjoy experimenting with flavors! After making your Italian baked chicken, let it cool first. Place leftovers in an airtight container. This helps keep the chicken fresh. Store it in the fridge for up to three days. If you notice the chicken is dry, drizzle a little olive oil before sealing. This adds moisture back in for later meals. To reheat, preheat your oven to 350°F (175°C). Place the chicken on a baking tray. Cover it with foil to keep it from drying out. Heat for about 15 to 20 minutes. You can also use a microwave. Just heat in short bursts of 1 minute. Check if it's hot throughout before serving. If you want to save some for later, freezing is great! Wrap each piece of chicken in plastic wrap. Then place them in a freezer bag. Remove as much air as possible before sealing. This helps prevent freezer burn. You can freeze the chicken for up to three months. To eat, thaw it overnight in the fridge before reheating. Italian Baked Chicken takes about 50 minutes total. This includes 15 minutes of prep and 25 minutes of baking. After that, allow an extra 10 minutes for the spinach to wilt. Always check that the chicken reaches 165°F internally to ensure it’s safe to eat. Yes, you can use bone-in chicken. It may take longer to cook. Bone-in pieces often add more flavor. Adjust the baking time to about 35 to 45 minutes. Use a meat thermometer to check for doneness. You can serve Italian Baked Chicken with various sides. Some great options include: - Garlic bread - A fresh green salad - Roasted vegetables - Pasta tossed in olive oil and herbs These sides pair well with the chicken's flavors. For the full recipe, check out the Citrusy Italian Herb Baked Chicken. This dish is simple and packed with flavor. In this post, we covered the key steps to make Italian Baked Chicken. I shared main ingredients, cooking tips, and storage info. You learned how to achieve tender chicken and avoid common mistakes. Variations for different diets and serving suggestions also help you adapt the dish. Remember, cooking is a fun way to explore flavors. Enjoy creating your perfect meal!
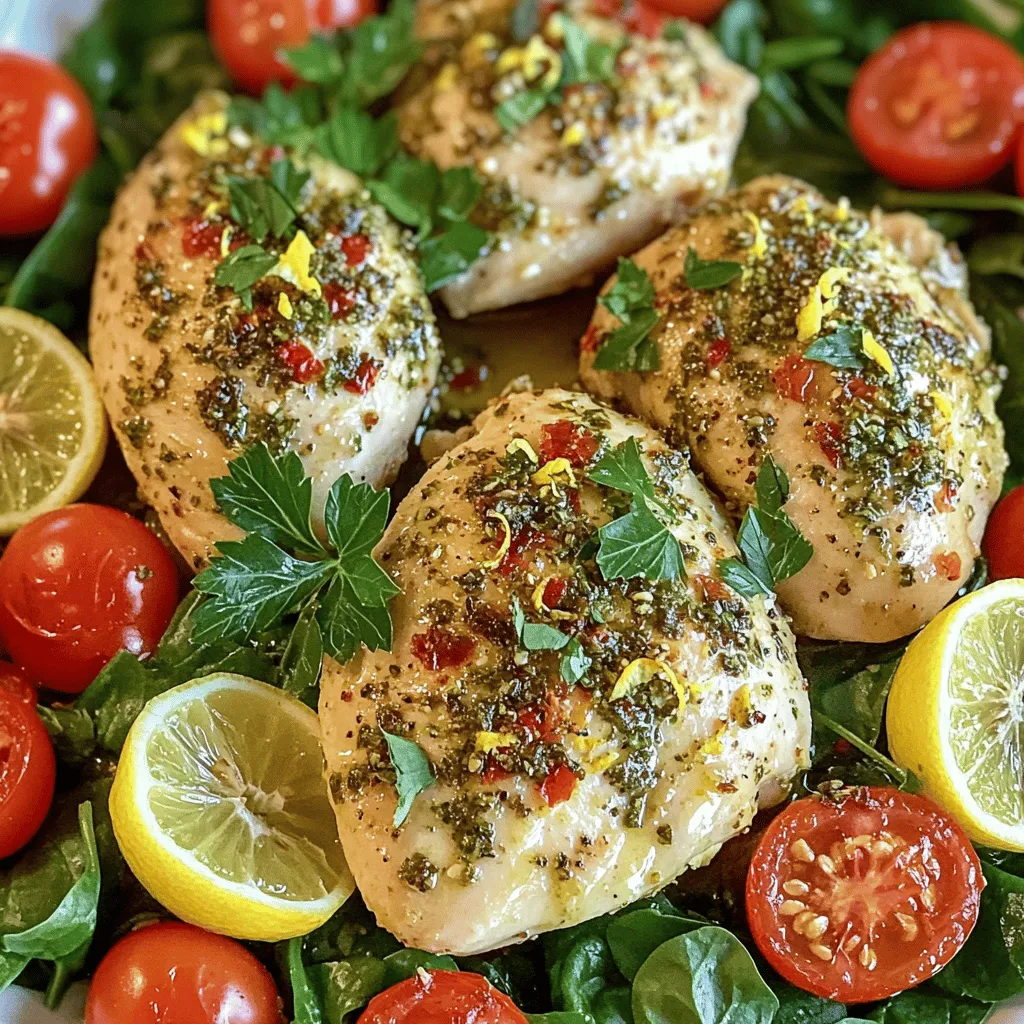
Italian Baked Chicken Simple and Flavorful Recipe
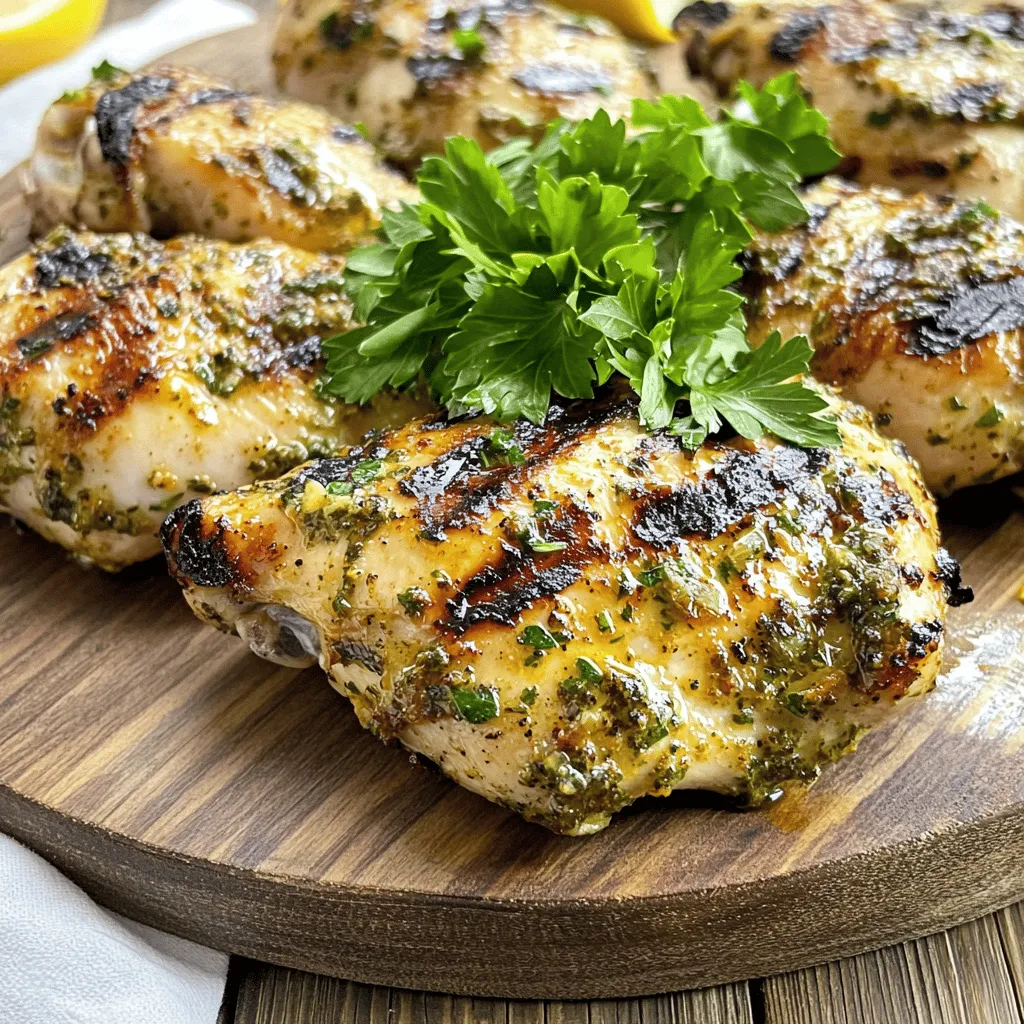
Are you ready to savor a dish that’s both simple and bursting with flavor? In this blog, I’ll share my beloved recipe for Italian Baked
To make a great tortilla española, you'll need these key ingredients: - 4 large eggs - 2 medium potatoes, peeled and thinly sliced - 1 medium onion, finely chopped - ½ cup olive oil (plus 1 tablespoon reserved) - Salt, to taste - Freshly ground black pepper, to taste Each ingredient plays a vital role in the dish. The eggs give the tortilla its rich base. Potatoes add heartiness, while onions bring sweetness. Olive oil adds flavor and helps with cooking. Salt and pepper are essential for seasoning. Once your tortilla is ready, you can make it even better with these garnishes: - Fresh parsley - Additional toppings Fresh parsley brightens up the dish and adds color. You can also try toppings like sliced olives or a sprinkle of cheese for extra flavor. These little touches make the tortilla look and taste special. For a detailed guide on how to bring it all together, check out the Full Recipe. Start by heating olive oil in a large skillet over medium heat. Use enough oil to cover the bottom. Once the oil shines, add thinly sliced potatoes and chopped onions. Season them with a pinch of salt. Cook gently for about 15-20 minutes. Stir occasionally, so they cook evenly. You want the potatoes to be soft and golden. Proper seasoning is key. It enhances the flavor and brings out the best in the dish. In a large bowl, crack the eggs and whisk them well. Make sure there are no streaks left. Add salt and freshly ground black pepper to taste. Mix it well so the seasoning spreads evenly. Once the eggs are ready, fold in the cooked potatoes and onions. Be gentle; keep some potato texture. This adds to the charm of the tortilla. Return the skillet to medium heat and add the extra tablespoon of olive oil. Once it heats up, pour the egg mixture into the skillet. Tilt the skillet so the mixture spreads evenly. Cook for about 5-7 minutes. The edges will start to set and pull away from the skillet. Gently shake the skillet to prevent sticking. To flip the tortilla, place a large plate over the skillet, then invert it. Slide the tortilla back into the skillet. Cook for another 5-7 minutes until it’s golden on both sides. This method gives you a beautiful, fluffy tortilla. For more details, refer to the [Full Recipe]. To make your Tortilla Española just right, focus on cooking times. Cook the potatoes and onions for about 15-20 minutes. They should be soft, not mushy. Use medium heat to ensure they cook evenly. Stir gently to avoid breaking the potatoes. For the eggs, cook them until just set. This keeps the tortilla fluffy and moist. If you have extra tortilla, store it in the fridge. Place it in an airtight container. It will last for up to three days. You can also wrap it in plastic wrap. When you want to reheat, use the skillet over low heat. This warms it gently and keeps the texture nice. You can also microwave it for a quicker option, but be careful not to overcook it. When serving your tortilla, it’s great warm or at room temperature. Pair it with a simple green salad or some crusty bread. This adds freshness and crunch. For a nice touch, sprinkle fresh parsley on top before serving. Cut it into wedges for easy sharing. Enjoy this delightful dish with friends or family! For more details, check the Full Recipe. {{image_4}} When making tortilla espanola, you can explore many fun twists. Let’s dive into some great options! You can add many Spanish ingredients to your tortilla. Here are a few ideas: - Chorizo: This spicy sausage adds a great kick. - Peppers: Red or green bell peppers bring sweetness and color. - Cheese: A sprinkle of manchego or queso fresco makes it creamy. - Spinach: Fresh spinach adds a healthy green touch. Each region in Spain has its own version. For example, in Galicia, they often use more onion. In the Basque Country, you might find added herbs like thyme. These regional twists make every bite unique! If you're looking to make it vegetarian, simply skip the meat. You can add more veggies like mushrooms or zucchini for flavor. For gluten-free options, tortilla espanola is already naturally gluten-free! Just ensure that any added ingredients, like chorizo or cheese, don't have gluten. These variations and adjustments let everyone enjoy this tasty dish! For the full recipe, check out the complete guide above. - Calories per serving: About 250 calories - Macronutrient breakdown: - Protein: 10g - Carbohydrates: 18g - Fat: 18g The Spanish Tortilla is not just tasty; it’s also a good source of nutrients. Each serving has a nice balance of protein, carbs, and healthy fats. This dish can fit well into a balanced diet. - Benefits of eggs: Eggs are a complete protein. They provide essential amino acids, which help build and repair tissues. They also contain vitamins A, D, and B12. These are key for good vision, strong bones, and energy. - Advantages of olive oil and potatoes: Olive oil is rich in monounsaturated fats. It can help lower bad cholesterol levels. Potatoes give you energy and fiber. They are also high in vitamins C and B6. These nutrients support your immune health and brain function. Together, these ingredients make the Tortilla Española a wholesome choice. You get a tasty meal that’s also good for you. For the full recipe, check out the Spanish Tortilla Delight 🥔. What kitchen tools do I need? To make a perfect tortilla española, you need a few simple tools: - A large skillet - A mixing bowl - A whisk or fork - A large plate for flipping - A spatula These tools help you cook the tortilla and mix the ingredients well. Can I use different vegetables? Yes, you can use different vegetables! While potatoes and onions are traditional, feel free to add: - Bell peppers - Spinach - Zucchini These veggies will add color and flavor to your dish. Just be sure to cook them until tender. What to do if the tortilla falls apart? If your tortilla falls apart, don’t worry! Here’s how to fix it: - Use a lower heat next time. - Make sure to let the edges set well before flipping. - If it breaks, you can turn it into a scramble. Just mix it up and serve! How to fix overcooked eggs? If your eggs are overcooked, they may be dry. To fix this: - Serve with a dollop of creamy sauce or aioli. - Add a splash of olive oil on top for moisture. These tips help make the dish more enjoyable. Preparing in advance You can make tortilla española ahead of time! Just follow these steps: - Cook and cool the tortilla. - Slice it into wedges. - Store it in an airtight container in the fridge. Best storage methods For best results: - Keep it in the fridge for up to three days. - Reheat in a skillet or microwave before serving. This way, you can enjoy this dish anytime! For the full recipe, check out the Spanish Tortilla Delight section. In this post, we explored how to make a delicious Tortilla Española. We covered the key ingredients like eggs, potatoes, and onions. I shared step-by-step instructions for cooking and highlighted tips for perfect texture. We also discussed variations for dietary needs and provided nutritional insights. Making this dish is fun and rewarding. You can enjoy it for any meal. With practice, you’ll impress your friends and family. Dive in and savor your homemade Tortilla Española!
Tortilla Espanola – Spanish Egg and Potato Omelet Delight
Are you ready to embark on a culinary adventure? Tortilla Española, the classic Spanish egg and potato omelet, is both simple and delightful. In this
This creamy Cajun chicken pasta is packed with flavor and easy to make. You can prepare it in just 30 minutes. The blend of Cajun spices, creamy sauce, and tender chicken will make your taste buds dance. - 2 boneless, skinless chicken breasts - 2 tablespoons Cajun seasoning - 3 tablespoons extra virgin olive oil, divided - 1 medium onion, finely chopped - 3 cloves garlic, minced - 1 bell pepper (any color), sliced - 1 cup heavy cream - 1 cup low-sodium chicken broth - 8 oz fettuccine pasta - ½ cup freshly grated Parmesan cheese - Salt and freshly ground black pepper - Fresh parsley for garnish This dish uses basic ingredients, yet each one plays a key role. The chicken gives it protein, while the Cajun seasoning adds a nice kick. The cream and cheese create a rich sauce that coats the pasta beautifully. Don't forget the fresh parsley for a pop of color and taste! You can follow the Full Recipe to see how to combine all these ingredients into a delightful meal. Fill a large pot with water and bring it to a boil. Add a good amount of salt to the water. This helps flavor the pasta. Once boiling, add the fettuccine. Cook it as per the package, usually around 8-10 minutes. After cooking, drain the pasta in a colander. Don't forget to save about ½ cup of that pasta cooking water. This water helps adjust your sauce later. Take your chicken strips and place them in a bowl. Sprinkle Cajun seasoning all over the chicken. Make sure to coat each piece well so every bite has flavor. Heat 2 tablespoons of olive oil in a large skillet over medium-high heat. Once hot, add the seasoned chicken. Cook for about 5-7 minutes. You want it golden brown and fully cooked. Then, remove the chicken from the skillet and set it aside. In the same skillet, add the last tablespoon of olive oil. Toss in the chopped onion and bell pepper. Sauté them for about 3-4 minutes. You want them soft and fragrant. Then add the minced garlic. Cook for just one more minute. Keep stirring to avoid burning the garlic. It cooks fast! Now it’s time for the sauce! Lower the heat to medium. Pour in the chicken broth and scrape the bottom of the skillet. This gets all the tasty bits into your sauce. Let it simmer for 2-3 minutes. Next, add the heavy cream. Turn the heat up a little to bring it to a gentle simmer. Gradually stir in the grated Parmesan cheese. Mix until your sauce is creamy. If it’s too thick, add a bit of the saved pasta water until it’s just right. Return your cooked chicken to the skillet. Stir it into the creamy sauce. Now, toss in the drained fettuccine pasta. Mix it all together well. Taste it and adjust the seasoning with salt and black pepper as needed. When serving, use warm plates or bowls. Spoon the creamy Cajun chicken pasta onto each plate. For a pop of color, sprinkle chopped fresh parsley on top. It makes the dish look great and adds extra flavor. Enjoy your meal! You can find the full recipe in the earlier sections. To make your sauce creamy, you can try using lighter dairy. Options like half-and-half or even Greek yogurt work well. This keeps the dish rich while cutting calories. If your sauce is too thick, use the reserved pasta water. Just add it a little at a time. This method helps you reach the right consistency. Do you want to change the spice level? You can easily make it milder. Just reduce the amount of Cajun seasoning. If you prefer more heat, add a pinch of cayenne pepper or extra seasoning. You can also try different blends of Cajun spice. Each mix has its own flavor, so feel free to experiment! Use a large skillet for cooking the chicken and sauce. A non-stick pan makes it easier to clean up, too. You may also want a good pot for boiling the pasta. If you have a garlic press, it saves time when preparing garlic. A pasta strainer is handy for draining the noodles easily. These tools will help you cook this dish smoothly. For more cooking tips, check the Full Recipe. {{image_4}} You can switch out chicken for shrimp or tofu. Both options bring a different taste and texture. Shrimp cooks quickly and adds a nice seafood flavor. Tofu can soak up all the Cajun spices, making it a great choice for vegetarians. For a dairy-free dish, use coconut cream or almond milk instead of heavy cream. These options will change the flavor slightly but still keep it creamy. You can also try cashew cream for a nutty taste. You might want to kick up the flavor with extra veggies. Try adding mushrooms, spinach, or zucchini for freshness. These ingredients pair well with the creamy sauce and add nutrients. Spices can also enhance the dish. Consider adding smoked paprika or cayenne for extra heat. Fresh herbs like thyme or cilantro can brighten the meal. Just sprinkle them on just before serving for the best impact. For a baked version, mix the pasta and sauce in a baking dish. Top it with cheese and bake until bubbly. This gives a crispy top and a warm, comforting feel. When serving, think about adding a side salad or garlic bread. A crisp salad balances the rich pasta. Garlic bread is perfect for soaking up the sauce. You can also serve it with roasted vegetables for a colorful plate. For the full recipe, check out the earlier section. Store your creamy Cajun chicken pasta in an airtight container. This keeps it fresh. It’s best to eat leftovers within 3 days. The flavors will still be good, but the sauce may thicken. To enjoy it later, add a splash of chicken broth when reheating. You can freeze this dish for up to 2 months. To do this, cool it completely first. Then, place it in a freezer-safe container. When you're ready to eat, thaw it in the fridge overnight. Reheat on low heat, adding a bit of cream or broth to restore the creamy texture. Make this pasta ahead for busy weeks. Cook a big batch and divide it into portions. Use meal prep containers for easy lunches. You can reheat them quickly in the microwave. This dish keeps well and tastes great, even after a few days. For added variety, mix in different veggies or proteins. It takes about 30 minutes to make creamy Cajun chicken pasta. This includes time for prep and cooking. You can enjoy a tasty meal without spending hours in the kitchen. Yes, you can use whole wheat or gluten-free pasta. Both options work well in this dish. Just make sure to follow the cooking times on the package. Your creamy sauce will still taste great! You can use half-and-half or coconut cream instead of heavy cream. Both options give a nice creaminess. If you want a lighter version, try using Greek yogurt mixed with a bit of milk. Yes, this dish has a kick from the Cajun seasoning. If you like less heat, cut back on the seasoning. You can also use mild Cajun spice blends for a gentler flavor. Yes, you can make the sauce ahead of time. Store it in the fridge for up to three days. When you’re ready, just reheat it on low heat and mix in the pasta and chicken. This makes meal prep easy! You can find the full recipe for creamy Cajun chicken pasta in the previous sections. Enjoy cooking! This blog post covered a creamy Cajun chicken pasta recipe. You learned about the key ingredients, step-by-step cooking methods, and tips for perfecting the dish. We also explored variations to suit your taste and storage tips to keep leftovers fresh. Remember, cooking is fun and a great way to share meals. Try experimenting with different ingredients or spice levels. Enjoy your cooking journey, and make this dish your own!
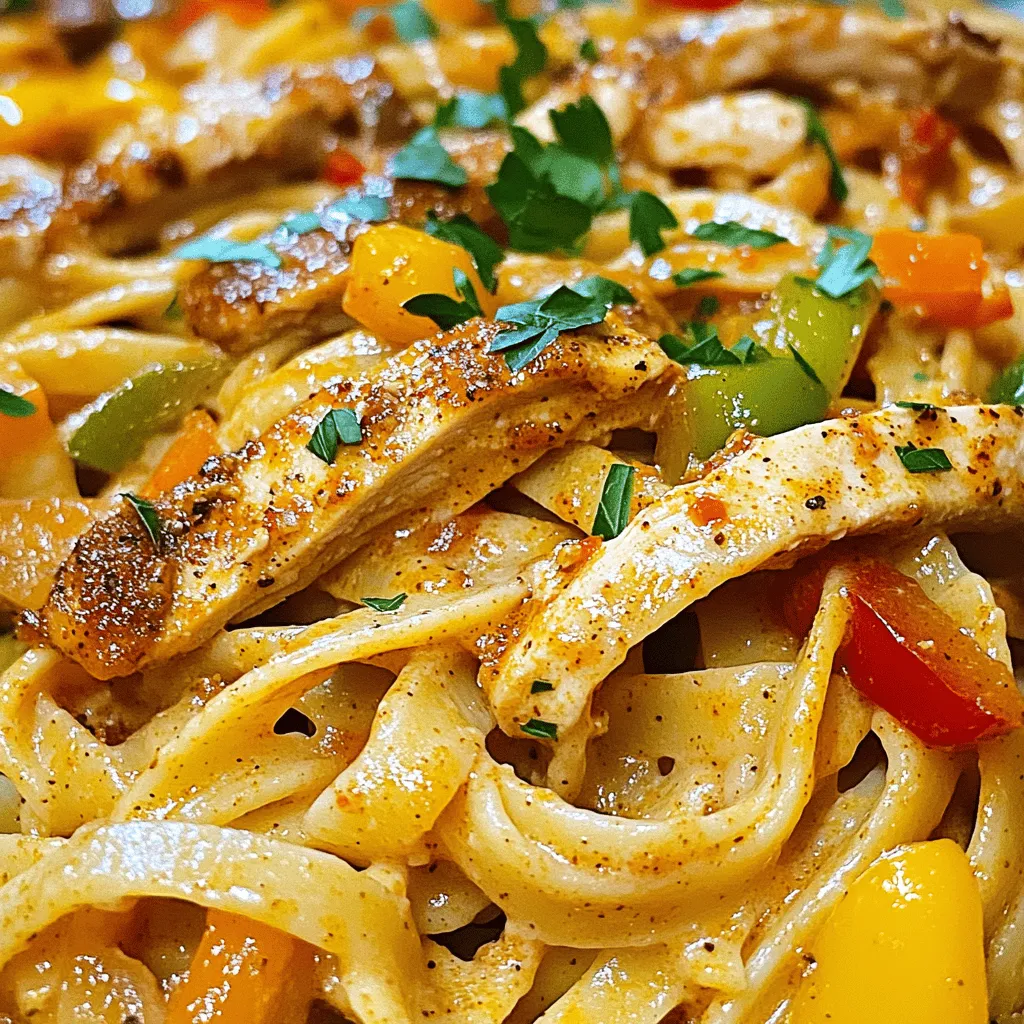
Creamy Cajun Chicken Pasta Easy and Flavorful Dish
Are you ready to experience a burst of flavor with Creamy Cajun Chicken Pasta? This easy and delicious dish is perfect for busy weeknights and