Dinner
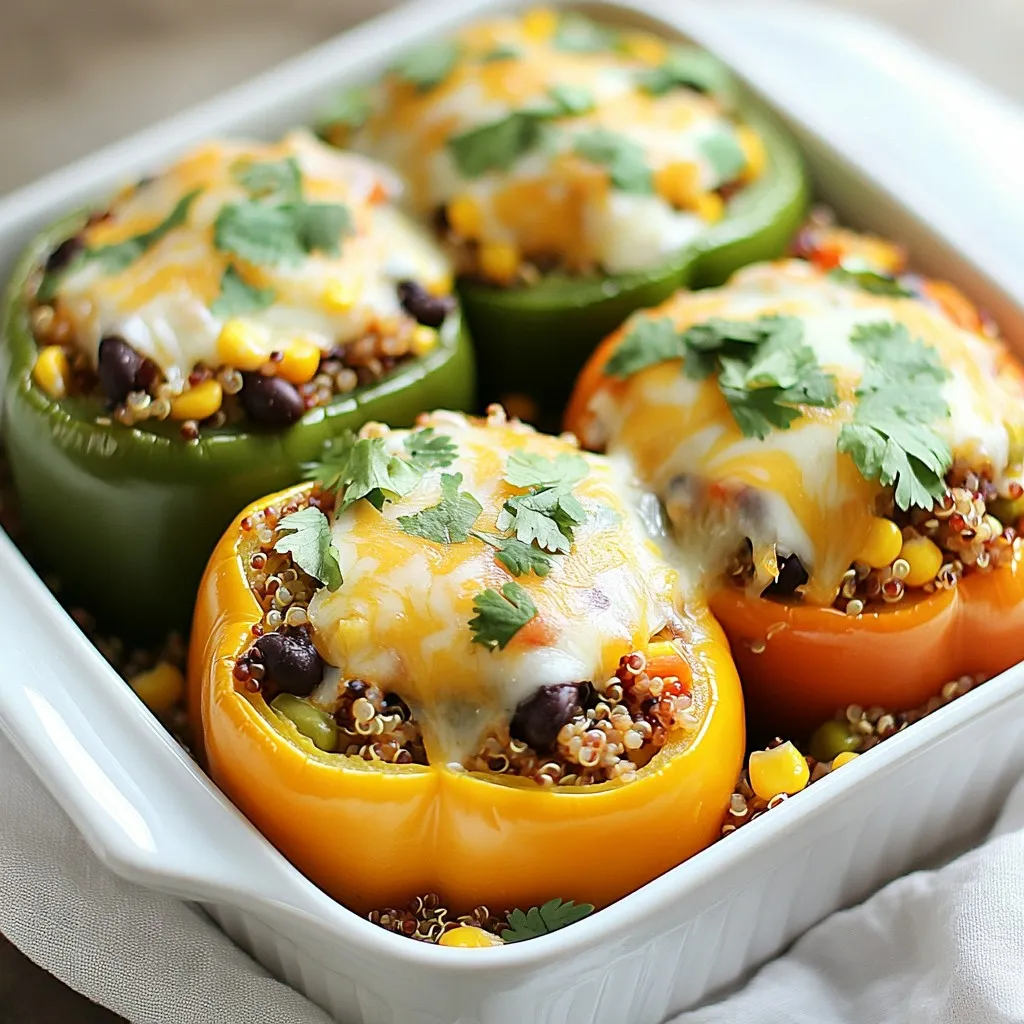
Classic Stuffed Peppers Tasty and Easy Recipe
Are you ready to enjoy a meal that’s both tasty and easy to make? Classic stuffed peppers are the perfect dish for any occasion, and
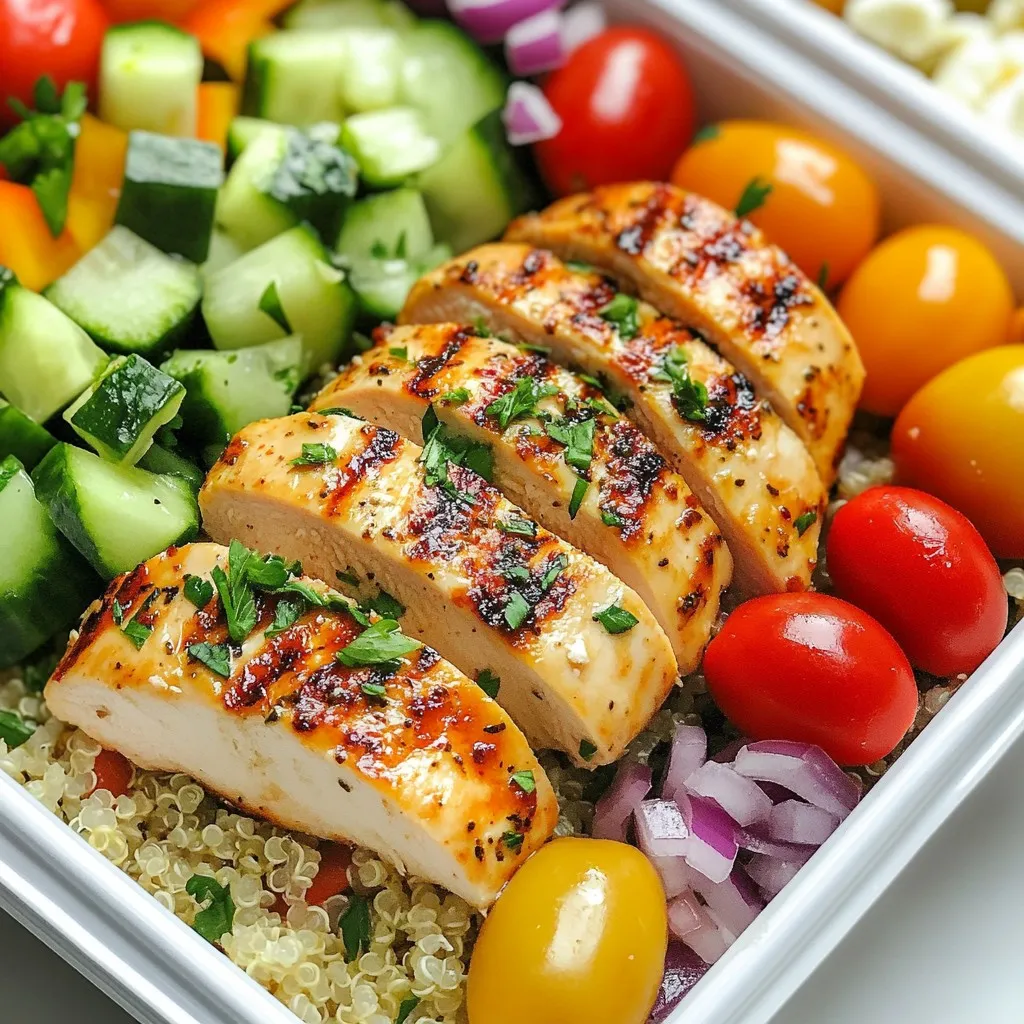
Greek Chicken Meal-Prep Bowls Easy and Healthy Recipe
Ready to simplify your meal prep? Greek Chicken Meal-Prep Bowls are your answer! These tasty bowls combine juicy grilled chicken, fluffy quinoa, and fresh veggies,
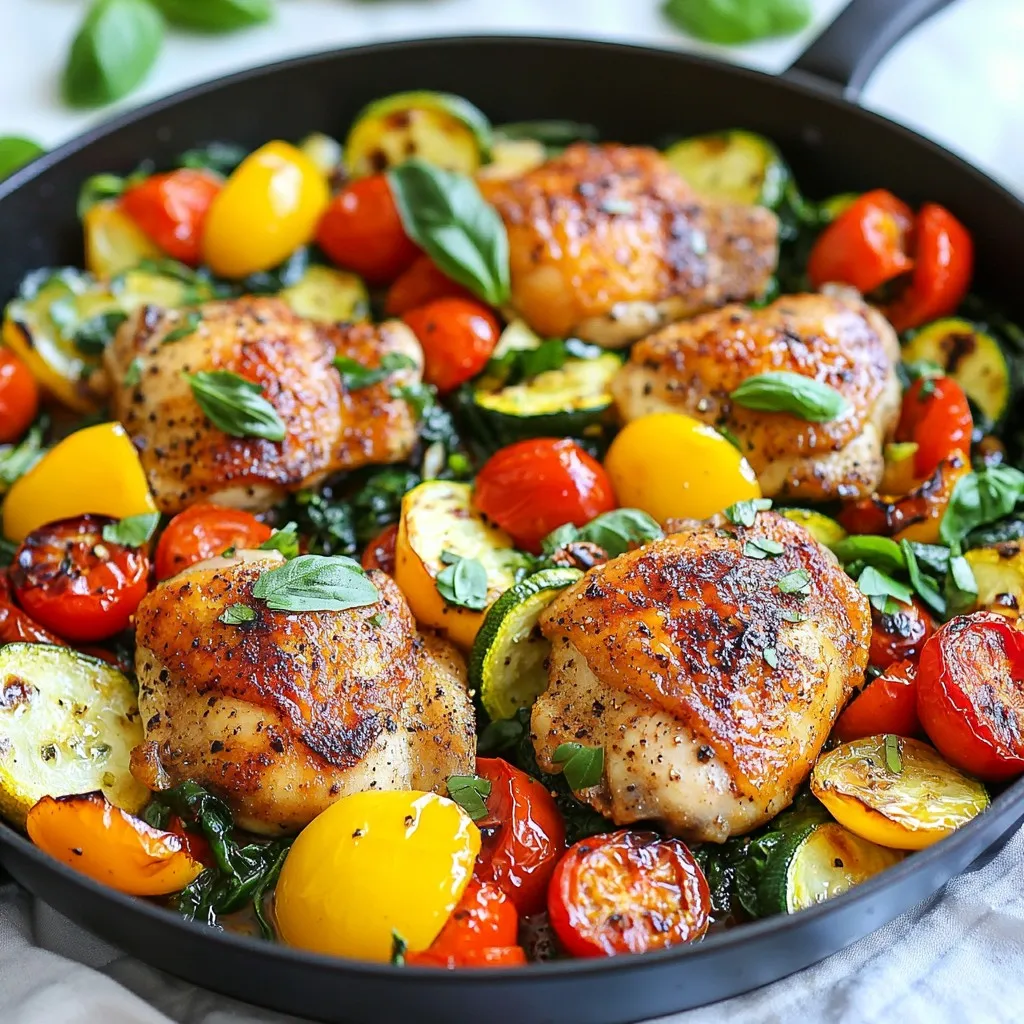
One-Skillet Chicken & Veggies Easy and Healthy Meal
If you’re looking for a quick, healthy meal, you need this One-Skillet Chicken & Veggies recipe. I’ll show you how to whip up a tasty
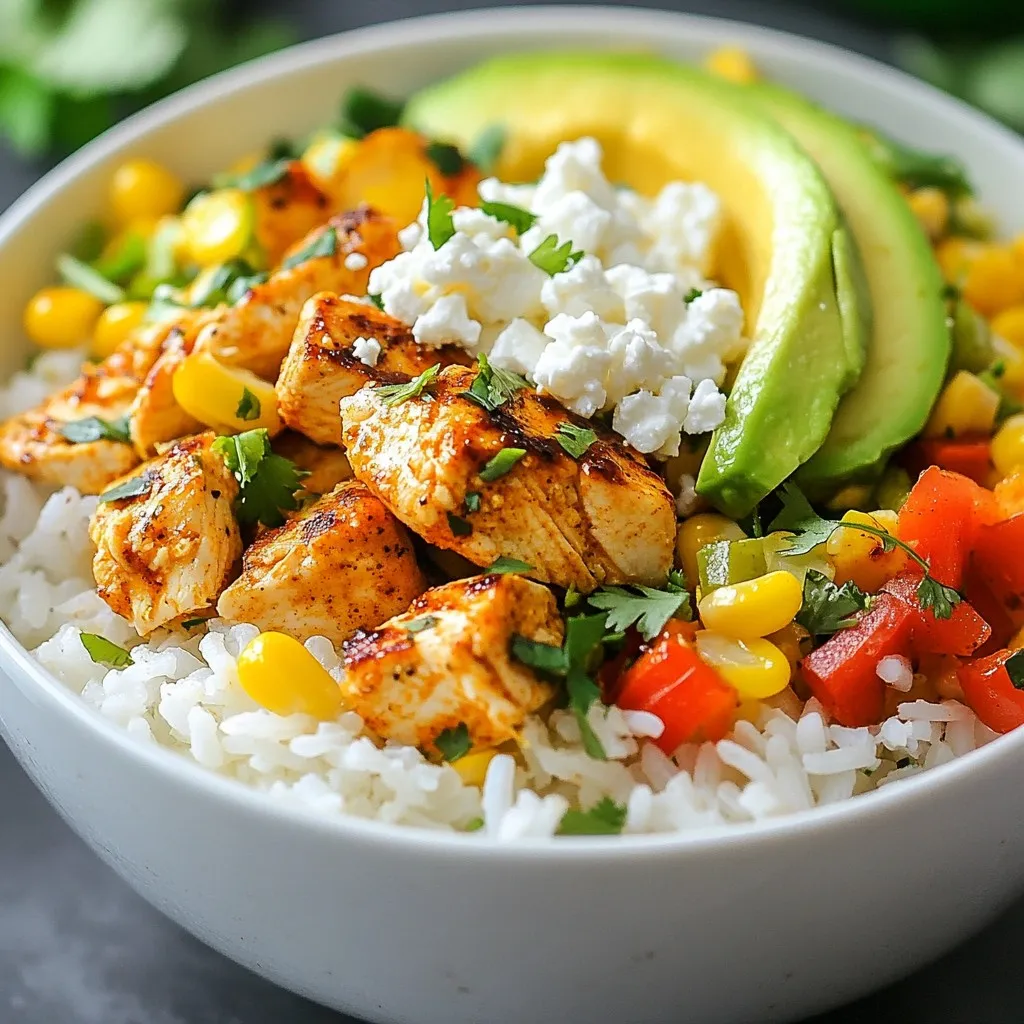
Street Corn Chicken Rice Bowl Tasty and Simple Meal
If you’re looking for a quick and flavorful meal, the Street Corn Chicken Rice Bowl is for you! Combining juicy chicken, sweet corn, and fresh
![- Fish options: - 4 white fish fillets (like tilapia or snapper) - Jerk seasoning and its components: - 2 tablespoons jerk seasoning - 2 tablespoons extra virgin olive oil - Juice of 1 lime - Sea salt, to taste - Additional toppings and accompaniments: - 1/2 cup red cabbage, finely shredded - 1 ripe avocado, sliced - 1/4 cup fresh cilantro, roughly chopped - 8 small corn tortillas - 1 cup mango salsa, for topping Jerk fish tacos stand out due to their bold flavors and fresh ingredients. You can choose fish like tilapia or snapper. These fish are mild and soak up the jerk seasoning well. Jerk seasoning adds a spicy and smoky flavor. It usually includes ingredients like allspice, thyme, and scotch bonnet peppers. This mix creates a perfect blend of heat and taste. Toppings elevate your taco experience. Shredded red cabbage adds crunch, while avocado brings creaminess. Fresh cilantro adds a burst of flavor, and mango salsa gives a sweet contrast to the spice. With these simple ingredients, you can create a vibrant dish that bursts with flavor. For a complete guide, check the Full Recipe. Marinating is key for flavor. It helps the fish soak in the spices. You need at least 30 minutes to let the fish absorb the jerk seasoning. For the best taste, I like to marinate for up to two hours. To marinate, grab a medium bowl. Add your fish fillets, olive oil, jerk seasoning, lime juice, and a pinch of sea salt. Mix it well to coat each fillet. Cover the bowl and place it in the fridge. This step gives the fish a bold and tasty kick. Before grilling, preheat your grill to medium-high heat. A hot grill helps to get nice grill marks and a great flavor. Once it’s hot, place the marinated fish on the grill. Cook each fillet for about 3-4 minutes on each side. You can check if the fish is done by poking it with a fork. It should flake easily and look opaque. After grilling, take the fish off the grill. Let it rest for a few minutes to keep it juicy. Now, it’s time to put it all together. First, warm your corn tortillas on the grill for about 30 seconds on each side. This makes them soft and tasty. Take a warm tortilla and place a piece of grilled fish on top. Then, add some shredded red cabbage for crunch. Next, place a few slices of ripe avocado on top. Finally, sprinkle fresh cilantro for a burst of flavor. For a sweet touch, spoon some mango salsa over each taco. This adds a nice contrast to the spicy fish. Serve your tacos right away with lime wedges on the side. A squeeze of lime juice makes it even tastier. Enjoy your flavorful jerk fish tacos! To grill fish just right, focus on temperature and timing. Preheat your grill to medium-high heat. This helps the fish cook evenly. You want the grill hot enough to sear the fish without sticking. Grill each fish fillet for about 3-4 minutes on each side. The fish should turn opaque and flake easily when done. Watch closely to avoid overcooking it. Overcooked fish can become dry and tough. Common grilling mistakes include not preheating the grill or flipping the fish too soon. Let the fish sit on the grill until it releases easily. This helps keep it whole and juicy. Pair jerk fish tacos with tasty sides to enhance the meal. Fresh mango salsa goes great on top. You can also serve coleslaw or rice and beans. These sides add flavor and texture. For drinks, try a cold beer or a fruity cocktail. A refreshing mojito or a piña colada works well too. The sweet and tart flavors balance the spiciness of the jerk fish. Looking for more? Check out the Full Recipe for an easy guide to make these tacos! {{image_4}} You can use many fish types for jerk fish tacos. Each type brings a unique taste. Here are some options: - Tilapia: This mild fish cooks quickly. It absorbs flavors well. Grill it for 3-4 minutes on each side. - Snapper: This fish has a firm texture and a slightly sweet taste. It’s great for grilling. Cook it the same way as tilapia. - Mahi Mahi: This fish is meaty and holds up well on the grill. Grill it for 4-5 minutes on each side. - Cod: Known for its flaky texture, cod is a good option too. It cooks fast, so check it often. Each of these fish options pairs well with jerk seasoning. Explore these choices to find your favorite! A good jerk seasoning makes all the difference. Here’s a simple homemade jerk seasoning recipe: - 1 tablespoon allspice - 1 tablespoon thyme - 1 tablespoon brown sugar - 1 teaspoon cinnamon - 1 teaspoon nutmeg - 1 teaspoon black pepper - 1 teaspoon sea salt - 1 tablespoon cayenne pepper (adjust to taste) - 2 cloves garlic, minced - 1 small onion, chopped - 2-3 green onions, chopped - Juice of 1 lime Mix all ingredients in a bowl. This mix gives your fish a perfect kick! Besides jerk seasoning, try other sauces for more flavor. A mango salsa adds sweetness and freshness. You can also use a creamy avocado sauce or a spicy aioli. Experiment with these to find what you love. For the full recipe, check out [Full Recipe]. Store leftover jerk fish in an airtight container. This keeps the fish fresh and prevents odors. You can place the fish in the fridge for up to three days. For tacos, it’s best to separate the components. Store the fish, toppings, and tortillas in separate containers. This way, the tortillas won’t get soggy. The toppings can stay fresh longer when stored correctly. To reheat fish without drying it out, use low heat. You can place the fish in a pan on the stove. Add a splash of water or broth to keep it moist. Cover the pan with a lid. Heat for about five minutes or until warm. For tortillas, warm them in a dry skillet for 30 seconds on each side. This method brings back their soft texture and flavor. You can also wrap them in a damp paper towel and microwave for 15-20 seconds. Enjoy your leftovers as if they were fresh! Jerk seasoning has a mix of bold flavors. The main ingredients usually include: - Allspice - Scotch bonnet peppers - Thyme - Garlic - Ginger - Onion - Nutmeg - Cinnamon - Brown sugar Each ingredient adds depth and warmth. The allspice brings a sweet, peppery flavor. Scotch bonnet peppers add heat. Fresh herbs like thyme give it an earthy taste. This blend makes jerk seasoning unique and tasty. Yes, you can use jerk seasoning on many proteins. It works well with: - Chicken - Pork - Shrimp - Tofu - Vegetables Marinate these proteins just like the fish. The seasoning enhances their flavors. You can grill, bake, or sauté them. Each method gives a different taste. Experiment to find your favorite! To adjust the spice level, you can modify the jerk seasoning. Here are some tips: - Less spice: Use less jerk seasoning or remove the Scotch bonnet. - More spice: Add more peppers or cayenne pepper. - Balance heat: Pair with creamy toppings like avocado or sour cream. These changes help you find the right heat for your taste buds. Traditional side dishes for jerk fish include: - Rice and peas - Fried plantains - Coleslaw - Grilled vegetables - Festival (sweet fried dough) These dishes add texture and flavor. They also balance the spice of the jerk fish. Enjoy a mix of tastes for a full meal! In this blog post, we explored how to make delicious jerk fish tacos. We covered key ingredients, from fish options to jerk seasoning and toppings. You learned the marinating and grilling techniques for perfectly cooked fish. We also discussed assembling the tacos and suggested side dishes. Finally, we shared tips for storing leftovers and reheating effectively. I hope you feel ready to enjoy this tasty dish. Experiment with different fish and spices for your perfect jerk fish taco!](https://meltedrecipes.com/wp-content/uploads/2025/06/a2aa73af-5f81-4b04-b67d-cb8d71747be5.webp)
Jerk Fish Tacos Flavorful and Simple Recipe
Get ready to spice up your dinner with a twist on a classic favorite—Jerk Fish Tacos! This easy recipe will take your taste buds on
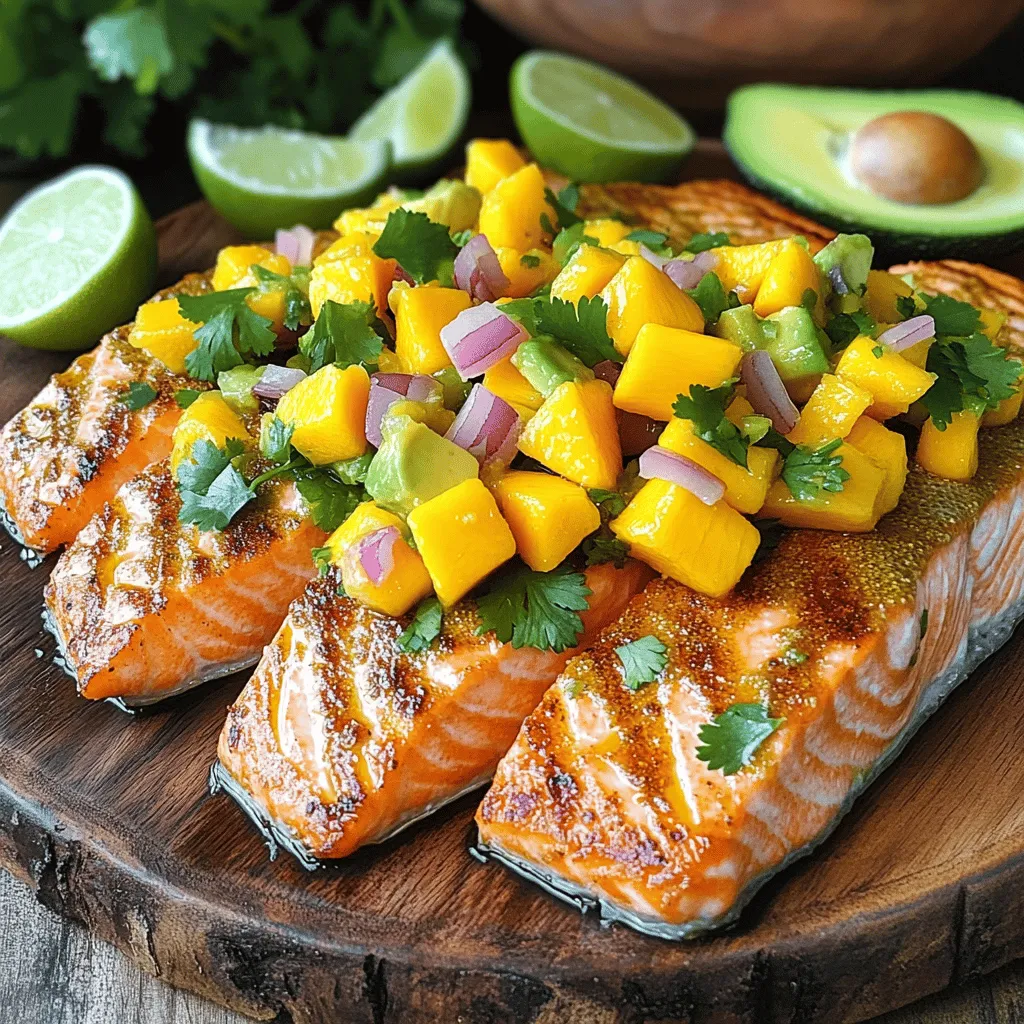
Salmon with Fresh Mango Salsa Flavorful and Healthy Dish
Are you ready to make a delightful meal that’s both tasty and healthy? This Salmon with Fresh Mango Salsa is packed with bright flavors and
![Fresh ingredients make this shrimp and avocado bowl a real delight. Here’s what you will need: - 1 pound shrimp, peeled and deveined - 2 ripe avocados, expertly diced - 1 cup cooked quinoa, preferably chilled - 1 red bell pepper, diced into small pieces - 1 cup cherry tomatoes, expertly halved - 2 tablespoons extra virgin olive oil - 1 tablespoon freshly squeezed lime juice - 1 teaspoon garlic powder - Salt and freshly ground black pepper, to taste - Fresh cilantro, roughly chopped, for garnish - Lime wedges, for serving Each ingredient plays a key role in flavor and texture. The shrimp adds protein, while the avocados bring creaminess. Quinoa provides a hearty base. The bell pepper and tomatoes add crunch and color. Olive oil and lime juice enhance the overall taste. Garlic powder gives a subtle kick. And cilantro? It adds freshness. This recipe is not just tasty; it is also packed with nutrition. You can enjoy this dish guilt-free, knowing you are eating wholesome foods. For more details, check out the Full Recipe. Preparing the Shrimp - Start by combining 1 pound of peeled and deveined shrimp with 2 tablespoons of olive oil, 1 teaspoon of garlic powder, salt, and pepper. Mix well to coat the shrimp evenly. - Next, heat a non-stick skillet over medium-high heat. Add the seasoned shrimp and cook for 2-3 minutes on each side until they turn pink and opaque. Remove from heat and set aside. Assembling the Bowl - In a large serving bowl, create a base with 1 cup of cooked quinoa. Spread it evenly across the bottom. - Layer the bowl with 2 ripe avocados, diced, 1 cup of halved cherry tomatoes, and 1 red bell pepper, diced into small pieces. Arrange these ingredients in a colorful display. - Finally, add the cooked shrimp on top of the layered vegetables, making the dish look vibrant and inviting. Final Touches - Drizzle 1 tablespoon of freshly squeezed lime juice over the bowl. This adds a zesty kick. - Garnish with fresh cilantro, roughly chopped, to enhance the aroma and flavor. - Serve with lime wedges on the side. This allows everyone to add more lime juice for an extra burst of flavor. For a detailed overview of the ingredients, check out the Full Recipe. How to choose fresh shrimp When selecting shrimp, look for a few key signs. Fresh shrimp should smell like the ocean, not fishy. Their shells should be shiny and firm. Avoid shrimp with black spots or a dull appearance. If you can, buy shrimp that is wild-caught for better flavor and sustainability. Selecting ripe avocados A ripe avocado feels slightly soft when you gently squeeze it. Look for dark green to black skin. If the avocado is too hard, it is not ripe yet. If it feels very soft, it may be overripe. Always check the stem; if it pops off easily and is green underneath, the avocado is ready to eat. Best methods for cooking shrimp The best way to cook shrimp is quickly. You can grill, sauté, or boil them. Make sure your pan is hot before adding shrimp. This helps them cook evenly and get a nice sear. Avoiding overcooked shrimp To avoid overcooked shrimp, pay close attention to their color. Cook shrimp until they turn pink and opaque. This usually takes about 2-3 minutes per side. If they curl tightly, they are likely overcooked. Remove them from heat as soon as they change color. Creative plating ideas For a stunning presentation, use a large bowl. Start with quinoa as your base. Then, layer diced avocado, cherry tomatoes, and red bell pepper neatly on top. Place the shrimp last to show off their vibrant color. A sprinkle of cilantro adds a nice touch. Pairing with sides for a complete meal Serve your shrimp and avocado bowl with a side salad or fresh fruit. A crisp green salad pairs well and adds crunch. If you want something warm, serve with roasted vegetables. This creates a balanced and colorful meal. For the full recipe, check out the Shrimp and Avocado Bowls section. {{image_4}} You can easily change the flavor of your shrimp and avocado bowls. Start by adding spices or herbs. A pinch of cumin or paprika gives a warm touch. Fresh herbs like dill or parsley add bright notes. You can also mix in garlic or onion for extra depth. Adding other vegetables can enhance taste and texture. Try corn for sweetness or cucumber for crunch. Grated carrots add color and a hint of earthiness. Each new ingredient makes the bowl unique. If shrimp isn’t your favorite, you have options! Chicken works well in this recipe. Simply grill or sauté it with the same spices. Tofu is a great vegan choice. Use firm tofu and cook it until golden. You can also use canned or pre-cooked shrimp. It saves time and still tastes great! If you need a gluten-free version, this bowl is naturally safe! All the ingredients are gluten-free. For a vegan option, swap the shrimp for chickpeas or tempeh. These plant-based proteins are filling and tasty. You can mix and match to fit your diet. Enjoy the freedom to make this dish your own! For the [Full Recipe], check back to see how these variations come together. To keep your shrimp and avocado bowls fresh, store them in airtight containers. This method prevents air from entering, which helps maintain flavor and texture. Make sure to separate the shrimp from the avocado if possible. Shrimp can last in the fridge for up to three days. However, avocados brown quickly. Use them within one day for the best taste. When reheating shrimp, do it gently. Use a skillet over low heat to warm them. This keeps the shrimp juicy and avoids drying them out. Never microwave shrimp; it can ruin the texture. To keep avocados fresh, avoid reheating them. Add fresh avocado on top after reheating the other ingredients. You can freeze shrimp for later use. Cooked shrimp freeze well and can last up to three months. However, avocados do not freeze well. To freeze, place shrimp in a single layer on a baking tray, then transfer them to a freezer bag. For best results, use shrimp and avocado bowls fresh. This ensures you enjoy the best flavors. For more details, check out the Full Recipe. It takes about 4 to 6 minutes to cook shrimp. You want them pink and firm. Cook them for 2 to 3 minutes on each side. This gives you juicy shrimp that are not overcooked. Yes, you can prep the bowls ahead. Cook the shrimp and quinoa, then chill them. Keep the shrimp and avocado separate until serving. This keeps the avocado fresh and green. If you don’t have quinoa, try brown rice or couscous. Both add a nice texture. You can also use farro or barley for a different flavor. Absolutely! Shrimp and avocado bowls work great for meal prep. They store well in the fridge for up to three days. Just remember to keep the avocado separate to avoid browning. Shrimp is high in protein and low in calories. It has omega-3 fatty acids, which are good for your heart. Avocado is packed with healthy fats, fiber, and vitamins. Together, they make a balanced meal. Check out the Full Recipe for more details! In summary, making shrimp and avocado bowls is simple. You need fresh shrimp, ripe avocados, and quinoa. Cook the shrimp lightly and layer the fresh ingredients in a bowl. Add lime for zing and cilantro for flavor. Remember to choose quality ingredients and try variations to suit your taste. With these tips, you can enjoy a tasty meal that works for any occasion. Embrace your kitchen skills and enjoy this healthy dish.](https://meltedrecipes.com/wp-content/uploads/2025/06/d37f8f7e-7867-4f17-b7bc-5b306f95faf2.webp)
Shrimp and Avocado Bowls Fresh and Flavorful Delight
Looking for a fresh meal that bursts with flavor? Shrimp and avocado bowls offer a simple, healthy option you’ll love. With just a few key
![- 4 cod fillets (approximately 6 oz each) - 1 cup panko bread crumbs - ½ cup finely grated Parmesan cheese - 1 teaspoon garlic powder - 1 teaspoon onion powder - 1 teaspoon smoked paprika - ½ teaspoon salt - ¼ teaspoon freshly ground black pepper - 2 large eggs, beaten - 2 tablespoons all-purpose flour - Cooking spray or a light mist of olive oil To make Crispy Air Fryer Cod, you need fresh cod fillets. Look for fillets that are firm and have a clean smell. Panko bread crumbs give the cod a delightful crunch. I love using finely grated Parmesan cheese for a boost of flavor. Seasoning is key in this recipe. Garlic powder brings a nice depth, while onion powder adds sweetness. Smoked paprika gives a subtle smoky taste that pairs well with fish. Don't forget salt and pepper to enhance the flavors. For the coating, you will need eggs and all-purpose flour. The flour helps the egg stick to the fish. Cooking spray or olive oil is essential for achieving that golden, crispy exterior. Follow the [Full Recipe] for specific amounts and easy steps to create this dish. You will enjoy every bite! To start, you need three shallow bowls. Place one bowl with all-purpose flour. In the second bowl, add the beaten eggs. For the last bowl, mix panko bread crumbs, Parmesan cheese, garlic powder, onion powder, smoked paprika, salt, and black pepper. Make sure you mix the dry ingredients well. This helps the spices spread evenly. Now, it's time to coat the cod. Take a fillet and dredge it in the flour. Make sure to shake off any extra flour. Next, dip the cod in the beaten eggs. Ensure it is fully coated. Move the fillet to the panko mix and roll it around. Press gently so the crumbs stick. Repeat for all the cod fillets. Preheat your air fryer to 400°F (200°C). This takes about 5 minutes and is key for crispiness. Lightly spray the air fryer basket with cooking spray or olive oil. Arrange the coated cod fillets in a single layer. Make sure not to overcrowd the basket. Spray the tops of the fillets lightly for extra crispiness. Cook the cod for 12-15 minutes, flipping halfway through. The cod should turn a lovely golden brown and be crispy. Check if the internal temperature reaches 145°F (63°C) to ensure safe eating. For the full recipe, refer to the earlier sections. To get that perfect crispy finish, you must preheat your air fryer. This step helps the cod start cooking right away, sealing in moisture and crisping up quickly. Set it to 400°F (200°C) for five minutes. Don't skip this! A light oil spray is key too. After coating your cod, mist the fillets with cooking spray or a touch of olive oil. This helps the breadcrumbs turn golden brown and crunchy. Cooking time can vary a bit based on the size of your fillets. Aim for 12 to 15 minutes. You want to flip the cod halfway through. This ensures even cooking and crispiness. It’s also important to check the doneness. The internal temperature should reach 145°F (63°C). A simple food thermometer can help you with this. When the cod flakes easily with a fork, it’s done! For a great presentation, place the crispy cod on a bed of fresh arugula or mixed greens. This adds color and freshness to your dish. Add a few lemon wedges on the side for a zesty kick. You can pair the cod with sides like roasted veggies or a light salad. A tangy tartar sauce or a dill sauce works well too. These complements enhance the flavors and make your meal even more enjoyable! You can find the full recipe [here](#). {{image_4}} You can change the flavor of your crispy air fryer cod by using different spices. Try adding a pinch of cayenne for heat or dill for a fresh taste. Lemon zest adds a bright note, making the dish shine. You can also mix in some Italian herbs like oregano or thyme. Each spice brings a new twist to the dish. If you can’t find cod or want a change, other fish work well too. Try using haddock or tilapia for a similar texture. You can also use salmon for a richer flavor. If you prefer a non-fish option, chicken breast or tofu takes the breading nicely. They can also cook well in the air fryer, giving you tasty results. For those needing gluten-free meals, swap the all-purpose flour for almond flour or a gluten-free blend. You can also use gluten-free panko crumbs. If you're watching carbs, use crushed pork rinds instead of panko. This will give you crunch without the carbs. These tweaks keep the meal healthy and delicious. For the Full Recipe, you can refer back to the main section where I detail the ingredients and steps. After cooking, let the cod cool to room temperature. To store, place the cod in an airtight container. This helps keep it fresh. You can keep it in the fridge for up to three days. If you want to save it longer, consider freezing. To reheat your cod, the air fryer works best. Set it to 375°F (190°C) and heat for about 5-7 minutes. This method keeps the outside crispy. You can also use an oven. Preheat it to 350°F (175°C) and bake the cod for about 10-12 minutes. You can freeze cooked cod for up to three months. Make sure to cool it first, then wrap it tightly in plastic wrap. Place it in a freezer bag for extra protection. When ready to eat, defrost the cod in the fridge overnight. You can also use the microwave for quick defrosting. Always check that it is fully thawed before reheating. Cook cod in the air fryer for 12-15 minutes. This time ensures the fish cooks evenly. Flip the fillets halfway through for the best result. The cod should be golden brown and crispy. To get crispy cod, follow these key tips: - Preheat your air fryer to 400°F (200°C) for five minutes. - Use panko bread crumbs for extra crunch. - Lightly spray the cod with cooking spray before cooking. - Avoid overcrowding the basket to allow proper air flow. Yes, you can cook frozen cod filets in the air fryer. Here are some tips: - Increase the cooking time to 15-18 minutes. - Do not thaw the cod; cook it straight from frozen. - Check the internal temperature to ensure it reaches 145°F (63°C). - Keep the same breading method for great flavor and texture. For a complete cooking guide, check the Full Recipe. This blog post detailed how to make crispy air fryer cod. We discussed main ingredients like cod fillets, panko, and Parmesan. You learned step-by-step instructions, including preparing the breading station and coating the cod. Tips for a perfect texture and variations were also shared. In conclusion, you can now enjoy crispy, tasty cod at home. Experiment with seasonings and sides to make each meal special. Cooking should be fun and satisfying, so dive in and enjoy!](https://meltedrecipes.com/wp-content/uploads/2025/06/27558124-6d6c-468d-b1df-cfda7be605fd.webp)
Crispy Air Fryer Cod Delightful and Healthy Dinner
Looking for a healthy dinner that’s also delicious? Let me introduce you to Crispy Air Fryer Cod. This dish features tender cod fillets, a crunchy
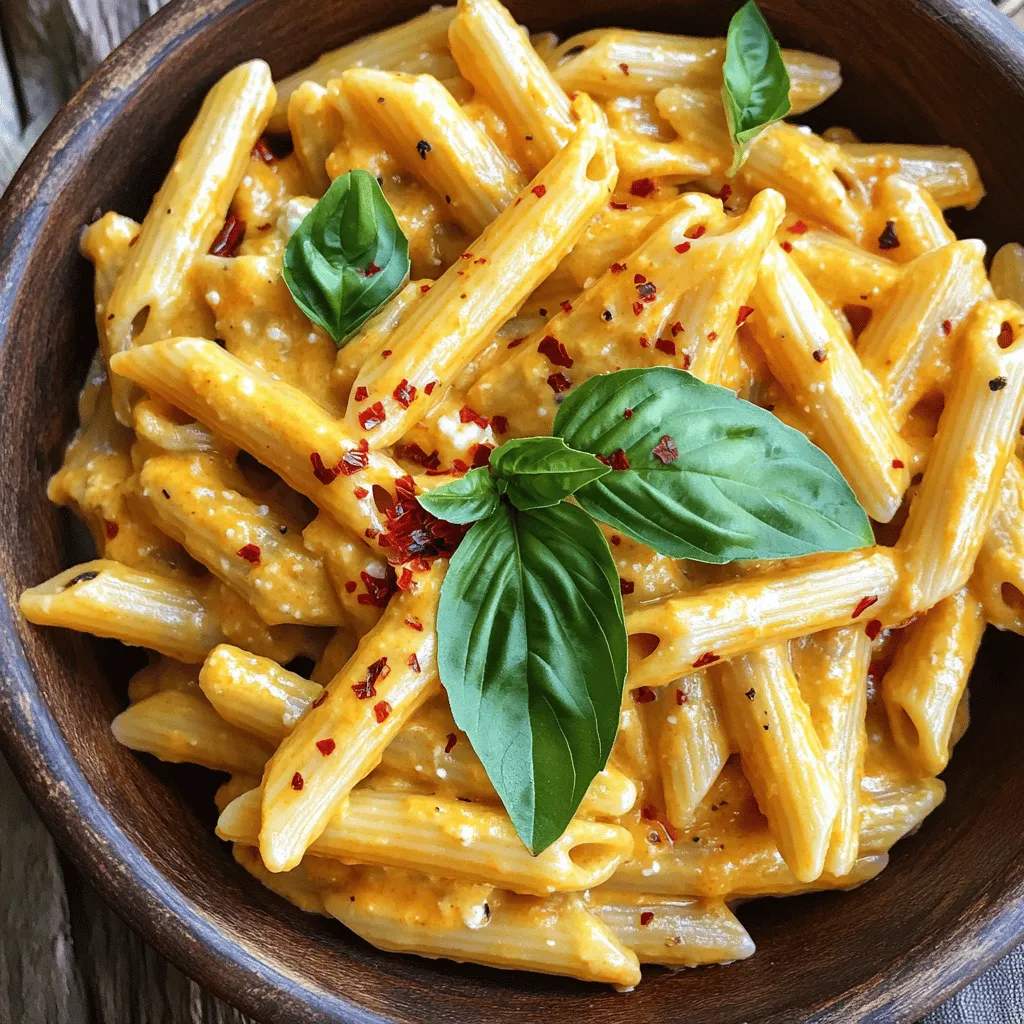
High Protein Creamy Roasted Red Pepper Pasta Delight
Looking for a delicious, high-protein meal? My High Protein Creamy Roasted Red Pepper Pasta Delight is here to impress! This dish combines creamy flavors with
![Chia Banana Bread Energy Bites are packed with nutrients. Each ingredient serves a purpose in boosting health and energy. Here’s what you need: - 2 ripe bananas, thoroughly mashed - 1 cup rolled oats - 1/2 cup almond butter (or your preferred nut butter) - 1/4 cup honey or maple syrup - 1/4 cup chia seeds - 1/2 teaspoon ground cinnamon - 1/4 teaspoon salt - 1/2 teaspoon pure vanilla extract - 1/4 cup chocolate chips (optional for a sweet touch) - 1/4 cup chopped walnuts or pecans (optional for added crunch) These ingredients are not just tasty; they also offer great nutrition. Bananas give natural sweetness and potassium. Rolled oats provide fiber for energy. Chia seeds add omega-3 fats and protein. Almond butter offers healthy fats and protein, while honey adds natural sweetness. You can mix and match some of these ingredients. Use different nut butters or sweeteners based on what you like. This flexibility keeps the recipe fresh and fun. Enjoy making these bites as a quick snack or a boost for your day! For the full recipe, be sure to check out the details above. Start by mashing the bananas in a large bowl. Add almond butter, honey, and vanilla extract. Mix these ingredients well with a fork or whisk. Your goal is a smooth and creamy consistency. This blend gives the bites their sweet taste and moist texture. Now, gently fold in the rolled oats, chia seeds, ground cinnamon, and salt. Mix until everything is well combined. Make sure there are no dry pockets left in the mixture. This step is key for even flavor in every bite. If you want to add a twist, mix in chocolate chips and chopped nuts. These ingredients bring extra flavor and crunch. Stir until they are evenly spread throughout the mixture. This is where you can make the recipe your own. Cover the bowl tightly and refrigerate for 30 minutes. This time allows the mixture to firm up. It makes it easier to shape into bites later. Don’t skip this step; it's important for the texture. Once chilled, scoop out portions of the mixture. Shape them into 1-inch balls using your hands. Consistent sizes help ensure even energy bites. Place them on a baking sheet lined with parchment paper, leaving some space between them. For added texture, you can roll some bites in chia seeds or crushed nuts. This step is optional but fun. After shaping and coating, return the baking sheet to the fridge for another 10-15 minutes. This helps the bites set completely. You can now enjoy your Chia Banana Bread Energy Bites as a quick snack or store them in an airtight container for later. For the full recipe, check the earlier section. To get the best texture for your energy bites, mixing is key. Use a fork or whisk to blend the bananas, nut butter, and sweetener until smooth. This helps create a creamy base. When you add the dry ingredients, fold them in gently. This means mixing without overdoing it. You want to see all the oats and chia seeds evenly spread throughout. This way, every bite will have a nice balance. Do you want to switch things up? You can use different nut butters if you like. Peanut butter or cashew butter work well too. For sweeteners, try agave syrup or coconut sugar. Each choice can change the flavor slightly. Feel free to experiment! Just keep the measurements similar to the original recipe for the best results. Using ripe bananas is very important for great flavor. They should be soft and speckled with brown spots. This means they are sweet and ready to use. Fresh ingredients help make your bites taste amazing. Plus, ripe bananas mash easily, making your mixing job much simpler. Always choose quality ingredients for the best outcome. For the Full Recipe, follow the instructions closely for perfect energy bites. {{image_4}} You can easily change up the flavors of your Chia Banana Bread Energy Bites. Adding dried fruits like raisins, cranberries, or apricots gives a sweet twist. You can also include spices such as nutmeg or ginger for warmth. Want a bit of crunch? Try adding sunflower seeds or pumpkin seeds. These small changes can make a big difference in taste and texture. Making your energy bites fit your diet is simple. To keep them vegan, just swap honey for maple syrup. If you need gluten-free bites, make sure your oats are certified gluten-free. You can also choose nut butters that do not contain added sugars or oils. These adjustments keep your bites healthy and still delicious. Chia Banana Bread Energy Bites work well as a snack on their own. You can also pair them with yogurt for a fun treat. For a savory twist, try them with nut dips like almond or cashew. This mix of flavors makes your snack time more exciting. Don’t forget to check out the Full Recipe for more ideas! To keep your Chia Banana Bread Energy Bites fresh, store them in an airtight container. This type of container helps prevent moisture loss and keeps the bites tasty. I recommend using glass or BPA-free plastic containers. In the refrigerator, these energy bites last up to one week. For the best taste and texture, enjoy them within this time frame. The flavors blend well, making each bite even more delicious as they sit. If you want to save some for later, freezing is a great option. Place the energy bites in a single layer on a baking sheet. Freeze them for about an hour, then transfer them to a freezer-safe bag or container. They can last up to three months in the freezer. Just remember to label the bag with the date! When you're ready to enjoy, thaw them in the fridge overnight. Enjoy this nutritious snack anytime! For the complete recipe, check out the [Full Recipe]. Chia Banana Bread Energy Bites last about one week in the fridge. Keep them in an airtight container to stay fresh. If you want them to last longer, you can freeze them. They will hold their taste and texture for about three months in the freezer. Yes, you can make these energy bites without nuts. If you want to skip nuts, use extra oats or seeds as a substitute. This keeps the texture nice while still being tasty. You can use flaxseeds instead of chia seeds. Ground flaxseeds will give you a similar texture and health benefits. Just remember to adjust the liquid in your recipe if you use whole flaxseeds, as they absorb more moisture. Absolutely! These energy bites are perfect for kids. They are packed with nutrients and taste great. You can even let your kids help make them. It’s a fun way to get them involved in healthy eating. To make these bites sweeter, add more honey or maple syrup. Start with a tablespoon at a time. Taste the mixture as you go to find the right sweetness for you. You can also use ripe bananas, which add natural sweetness. For the full recipe, check out the Chia Banana Bread Energy Bites section above. In this post, we explored how to make Chia Banana Bread Energy Bites. You learned about the simple ingredients and step-by-step instructions for preparation. I also shared tips and tricks, along with variations for different tastes. Remember, choosing ripe bananas enhances the flavor. These bites are great for snacks or packed lunches. With proper storage, they can last for weeks. Now, enjoy making your own energy bites and customize them to your liking!](https://meltedrecipes.com/wp-content/uploads/2025/06/6a29394f-3838-46fc-8b27-d75390a57e92.webp)
Chia Banana Bread Energy Bites Simple Nutrition Boost
Are you craving a simple snack that is both tasty and good for you? Look no further! Chia Banana Bread Energy Bites are here to