Dinner

For this dish, you need three medium carrots and two medium zucchinis. Slice the carrots into thin rounds. Cut the zucchinis into half-moons. This gives great texture and color. I use two tablespoons of extra virgin olive oil and one tablespoon of unsalted butter. The olive oil adds healthy fat, while the butter brings a rich flavor. This mix helps the vegetables cook evenly. To enhance taste, use two cloves of minced garlic and one teaspoon of fresh thyme leaves. If you don’t have fresh thyme, dried thyme works too. Add sea salt and freshly ground black pepper to taste. Finally, a tablespoon of freshly squeezed lemon juice brightens the dish. For a tasty finish, sprinkle freshly grated Parmesan cheese on top. You can find the full recipe to create this vibrant and simple dish. First, gather your ingredients. You will need: - 3 medium carrots, sliced into thin rounds - 2 medium zucchinis, sliced into half-moons - 2 tablespoons extra virgin olive oil - 1 tablespoon unsalted butter - 2 cloves garlic, finely minced - 1 teaspoon fresh thyme leaves (or ½ teaspoon dried thyme) - Sea salt and freshly ground black pepper to taste - 1 tablespoon freshly squeezed lemon juice - Optional: Freshly grated Parmesan cheese for garnish Wash the carrots and zucchini well. Peel the carrots if you prefer. Slice them into thin rounds. Next, cut the zucchinis into half-moons. Mince the garlic finely. This step helps release its flavor. Measure out your oil and butter, too. In a large skillet, heat the extra virgin olive oil and unsalted butter. Use medium heat until the mixture melts and shimmers. Carefully add the sliced carrots. Sauté them for about 4-5 minutes. Stir occasionally. The carrots should start to soften and show a bright color. After this, add the minced garlic and thyme to the skillet. Stir constantly for about 1 minute. This helps the garlic release its nice aroma. Be careful not to let it burn. Now, it’s time to add the zucchini slices. Gently fold them into the skillet with the carrots. Mix well to combine. Continue to sauté for an additional 5-7 minutes. The zucchini should become tender but still bright green. Once cooked, season your sautéed veggies with sea salt and freshly ground black pepper to taste. Remove the skillet from the heat. Drizzle the freshly squeezed lemon juice over the sautéed vegetable medley. Toss everything together to mix the flavors well. For a fancy touch, sprinkle freshly grated Parmesan cheese on top just before serving. For the full recipe, check out the detailed steps. To sauté carrots and zucchini well, use a large skillet. A wide pan gives vegetables room to cook evenly. Heat oil and butter together to add flavor and richness. Wait until the oil shimmers before adding veggies. Stir them often to avoid burning and to ensure they cook evenly. This technique keeps your dish bright and crunchy. When selecting carrots, look for those that are firm and smooth. Avoid any that are soft or have blemishes. For zucchini, choose ones that are small and firm. The skin should be shiny and free of dark spots. Fresh vegetables make a big difference in taste. You want your sautéed dish to shine. Present your sautéed carrots and zucchini in a shallow bowl or on a large platter. This shows off their vibrant colors beautifully. For an added touch, sprinkle freshly grated Parmesan cheese on top. A sprig of thyme or parsley makes a lovely garnish. These simple steps make your dish look as good as it tastes. For the full recipe, check back for all the details! {{image_4}} You can add more veggies to your sautéed carrots and zucchini. Bell peppers bring sweetness and color. Broccoli adds crunch and nutrition. Try snap peas for a fresh bite. Just cut them small so they cook evenly. Mix and match based on what you have. The more colors, the better! Seasonings can change the flavor of this dish. Instead of thyme, try rosemary or basil. A touch of chili flakes adds heat and excitement. Soy sauce can give it a savory twist. Lemon zest brightens up the taste. Don't be afraid to experiment with your favorite spices! Making this dish vegan is simple! Just skip the butter or use a plant-based alternative. The rest of the ingredients are vegan-friendly. For gluten-free meals, this recipe is already safe. Always check labels for any sauces you use. Enjoy this dish while meeting your dietary needs! For the full recipe, refer to the details above. To keep your sautéed carrots and zucchini fresh, cool them first. Use an airtight container. This will prevent moisture loss and keep them tasty. Place the veggies in the fridge right after they cool. They will stay crisp and flavorful. When you want to enjoy your sautéed dish again, reheat it gently. Use a skillet over low heat. Add a splash of water or olive oil to avoid sticking. Stir often until they are warm. This keeps them from getting mushy. Sautéed carrots and zucchini last about 3 to 4 days in the fridge. If you need to store them longer, freezing is a great option. Place the veggies in a freezer-safe bag. Remove as much air as you can. They can last up to 3 months in the freezer. When you are ready to eat, thaw them in the fridge overnight before reheating. For the full recipe, check out Sautéed Carrots and Zucchini Delight. The best way to sauté vegetables is to use a hot skillet. Start by heating oil and butter together. This mix adds flavor and helps prevent sticking. Once hot, add your vegetables in a single layer. Stir them often for even cooking. Aim for a bright color and slight crispness. This method keeps vegetables fresh and tasty. Yes, you can use frozen vegetables for sautéing. However, they may release extra water as they cook. This can make your dish a bit soggy. To avoid this, thaw them first and pat dry. For best results, sauté them in batches. This ensures they cook evenly and stay crisp. You can add more flavor in several ways. Try adding fresh herbs like basil or dill. A splash of lemon juice brightens the dish. You can also use spices like paprika or cumin for warmth. For a richer taste, add a sprinkle of cheese, like Parmesan, at the end. All these tips will elevate your sautéed carrots and zucchini. You can find the full recipe in the earlier sections. This blog post covered how to sauté carrots and zucchini for great flavor. We looked at key ingredients, prep steps, and cooking methods. You learned tips for freshness and serving ideas. We explored variations to fit different diets, along with storage options. Sautéing is a simple way to enjoy tasty veggies. Always feel free to mix in your favorite herbs and spices. With these basics, you can create a dish you love every time. Happy cooking!
Sautéed Carrots and Zucchini Vibrant and Simple Dish
Looking for a quick and tasty side dish? Sautéed carrots and zucchini offer bright flavors and are easy to make. You’ll find a list of
When making Zucchini Cheese Bread, having the right ingredients is key to great flavor and texture. Here’s what you will need: - 2 medium zucchinis, grated - 1 cup shredded cheese (cheddar, mozzarella, or preferred blend) - 1 cup all-purpose flour - 1 teaspoon baking powder - ½ teaspoon baking soda - ½ teaspoon salt - 2 large eggs - ½ cup Greek yogurt or sour cream - 1 tablespoon olive oil - 1 teaspoon garlic powder - 1 teaspoon dried oregano - Freshly ground black pepper to taste - Optional: ¼ cup chopped fresh herbs (parsley or chives) Grating the zucchinis is an important step. It helps to release moisture, making the bread moist and flavorful. You can use any cheese you like, but I find that a mix of cheddar and mozzarella gives the best taste. Using Greek yogurt keeps the bread light and adds a subtle tang. Don’t skip the garlic powder and oregano; they add a wonderful depth to the flavor. If you like fresh herbs, toss in some parsley or chives. They not only taste great but also make the bread look pretty! For the full recipe, follow the detailed steps to bring all these ingredients together into a delicious loaf. Enjoy the cooking process, and get ready for a tasty treat! 1. Preheat your oven to 350°F (175°C). This will help your bread rise well. Grease a loaf pan with butter or cooking spray. You can also use parchment paper for easy removal. 2. Squeeze excess moisture from grated zucchini. Take your grated zucchini, sprinkle it with a little salt, and let it rest for 10 minutes. This draws out extra moisture. After that, grab a clean kitchen towel and wring it out. You want to remove as much liquid as you can. 3. Mix wet ingredients in a bowl. In a separate bowl, whisk together 2 large eggs, ½ cup of Greek yogurt (or sour cream), and 1 tablespoon of olive oil. Blend until smooth. This mixture adds flavor and moisture to your bread. 1. Gradually mix dry ingredients into the wet mixture. In another bowl, combine 1 cup of all-purpose flour, 1 teaspoon of baking powder, ½ teaspoon of baking soda, ½ teaspoon of salt, 1 teaspoon of garlic powder, and 1 teaspoon of dried oregano. Slowly add this to your wet mix. Stir gently until just combined. Overmixing can make your bread tough. 2. Fold in zucchini and cheese. Now it's time to add your squeezed zucchini and 1 cup of shredded cheese. You can use cheddar, mozzarella, or your favorite blend. If you want, add ¼ cup of chopped fresh herbs for extra flavor. Gently fold everything until evenly mixed. 1. Pour batter into the loaf pan. Transfer your batter to the prepared loaf pan. Use a spatula to smooth the top for an even surface. 2. Bake and check for doneness. Place the loaf pan in your preheated oven. Bake for 45-50 minutes. To check if it’s done, insert a toothpick into the center. If it comes out clean, your bread is ready. Enjoy making this flavorful Zucchini Cheese Bread! For the complete instructions, refer to the Full Recipe section above. Wringing out zucchini is key. It pulls out extra water. This step helps keep the bread from being soggy. If you skip this, your bread may not rise well. After grating, sprinkle the zucchini with salt. Let it sit for about ten minutes. Then, use a clean towel to squeeze out the liquid. Avoid overmixing the batter. When you stir the wet and dry parts, mix just until they come together. Overmixing will make the bread tough. Instead, gently fold in the zucchini and cheese. This keeps your loaf nice and tender. For a lovely presentation, slice the bread thick. Serve it warm or at room temperature. You can garnish with thin slices of zucchini or fresh herbs. This adds color and flair to your dish. Pair the bread with a light salad or soup. It makes for a delightful meal or snack. To keep your bread moist, use Greek yogurt. It adds creaminess and flavor. If you have leftovers, store them with yogurt. This will help maintain moisture. Fresh herbs improve flavor too. You can add parsley or chives right into the batter. They not only taste great but also look nice. This simple step makes your bread more special. For the full recipe, check out Zucchini Cheese Bread Delight. {{image_4}} You can play with different cheeses in your zucchini cheese bread. Cheddar gives a sharp taste. Mozzarella adds a creamy texture. You can even mix them! Try using a blend of cheeses for extra richness. A mix can create a more complex flavor. Don't be afraid to experiment with what you love. If you want to switch things up, try other veggies! Grated carrots or squash work well. They add color and taste. You can also adjust the flavor with spices. For example, add some cumin for a warm twist. Or try chili powder for a bit of heat. These changes keep your bread fun and fresh! Need gluten-free options? Use gluten-free flour instead of all-purpose flour. It works great in this recipe. If you prefer a vegan version, swap eggs for flax eggs. Just mix one tablespoon of ground flaxseed with three tablespoons of water. Let it sit for a few minutes until it thickens. This keeps your zucchini cheese bread tasty for everyone! For the full recipe, check the main article. How do you store leftovers? After enjoying your Zucchini Cheese Bread, let it cool first. Wrap it tightly in plastic wrap or place it in an airtight container. This keeps it fresh for about three days in the fridge. If you want to keep it longer, consider freezing it. What are the best containers for prolonged freshness? Use glass or BPA-free plastic containers. These materials help keep moisture in while blocking air. If you don’t have a suitable container, aluminum foil works well too. Just be sure to wrap the bread tightly to prevent freezer burn. How do you freeze Zucchini Cheese Bread? Let the bread cool completely before freezing. Slice it into pieces for easy thawing later. Wrap each slice in plastic wrap, then place them in a freezer bag. Make sure to label the bag with the date. This method helps keep track of freshness. What are the thawing instructions for best results? When you're ready to enjoy your bread, take out the slices you need. Place them in the fridge overnight to thaw. If you need them quickly, you can microwave them for a few seconds. Just make sure not to heat them too long, or they will get tough. How do you reheat without losing texture? The best way to reheat Zucchini Cheese Bread is in the oven. Preheat your oven to 350°F (175°C). Place the slices on a baking sheet and cover them with foil. Heat for about 10 minutes. This method keeps the bread soft and delicious. What are the microwave vs. oven methods? The microwave is quick but can make the bread chewy. If you choose this method, heat each slice for 15-20 seconds. Check to ensure it’s warm, but don’t overdo it. For the best taste and texture, use the oven method when you have time. Can I use frozen zucchini? Yes, you can use frozen zucchini. Just make sure to thaw it first. Squeeze out as much water as you can. This keeps the bread from getting too soggy. How do I know when the bread is fully baked? Check the bread at 45 minutes. Insert a toothpick in the center. If it comes out clean, the bread is done. The top should be golden brown too. Can I add other ingredients like nuts or seeds? Absolutely! You can add nuts like walnuts or sunflower seeds. Just be sure to adjust the baking time if you add a lot. What are the calories per slice? Each slice has about 150 calories. This can vary based on the cheese you choose. Using less cheese will lower the calories. Is this recipe healthy? Yes, this recipe is healthy! It has zucchini, which is low in calories and high in nutrients. Greek yogurt adds protein, making it a smart choice. How can I make this vegan-friendly? To make it vegan, replace eggs with flax eggs. Use a vegan yogurt or applesauce instead of Greek yogurt. Choose a plant-based cheese for flavor. Tips for reducing sodium levels in the recipe You can cut down the salt in the recipe. Use low-sodium cheese. Also, skip adding extra salt when mixing the zucchini. This zucchini cheese bread recipe is simple and fun. You learned about the tasty ingredients, step-by-step prep, and baking tips. I shared various cheese options and ways to store leftovers for later use. In closing, this dish is not just tasty but also flexible. You can adapt it for different diets or flavors. Enjoy your baking and share it with friends!
Zucchini Cheese Bread Flavorful and Easy to Make
Are you ready to transform your cooking with a tasty twist? Zucchini Cheese Bread is not just flavorful; it’s super easy to whip up! Imagine
- 2 medium zucchinis, sliced lengthwise into thin strips (approximately 1/8 inch thick) - 1 cup ricotta cheese - 1 cup shredded mozzarella cheese - 1/2 cup grated Parmesan cheese - 1 large egg, lightly beaten - 1 teaspoon dried oregano - 1 teaspoon garlic powder - 1/2 teaspoon salt - 1/4 teaspoon freshly ground black pepper Zucchini is the star here. It gives a fresh taste and nice texture. I love using it because it holds up well when baked. Choose firm zucchinis for the best results. You will slice them thin to make roll-ups easy to handle. The cheese mix makes the dish rich and creamy. I use ricotta for its soft texture. Mozzarella adds stretch, while Parmesan gives a sharp bite. The egg helps bind everything together. The seasonings are simple but pack a punch. Oregano and garlic powder bring warmth and depth to the filling. - 1 cup marinara sauce I suggest using a good marinara sauce. You can go with your favorite brand. Look for one with natural ingredients. If you want, you can also make your own. Homemade sauce can add a personal touch and extra flavor. - Fresh basil - Additional cheese Garnishes elevate the dish. Fresh basil adds a pop of color and flavor. I also like to sprinkle more cheese on top before baking. This makes the roll-ups look and taste even better. If you want a rich finish, consider adding a drizzle of olive oil. Prepping the zucchinis Start by washing the zucchinis well. Use a mandoline slicer or a sharp knife to cut them lengthwise into thin strips. Aim for about 1/8 inch thick. Place these strips on a clean kitchen towel and lightly sprinkle them with salt. This step draws out moisture, helping the zucchini stay firm. Let them rest for 10 to 15 minutes. After this, use paper towels to gently pat the strips dry. Making the cheese filling In a large bowl, combine the ricotta cheese, shredded mozzarella, and grated Parmesan. Add in the beaten egg, dried oregano, garlic powder, salt, and black pepper. Mix everything well until it becomes a creamy filling. This blend will give your rolls a rich and tasty flavor. Rolling the zucchini strips Take one zucchini strip and place a generous spoonful of the cheese mixture at one end. Roll the strip tightly around the filling. If needed, use a toothpick to keep it in place. Repeat this step with all the zucchini strips. It helps to keep them snug but not too tight, so the filling doesn’t spill out. Placing roll-ups in the baking dish Spread half of the marinara sauce evenly across the bottom of your baking dish. Carefully arrange the roll-ups seam side down on top of the sauce. Drizzle the remaining marinara sauce over the top. This adds moisture and flavor during baking. Covering and initial baking Preheat your oven to 375°F (190°C). Cover the baking dish tightly with aluminum foil. Place it in the preheated oven and bake for 20 minutes. This steams the roll-ups, making them tender. Uncovering for the finish After 20 minutes, remove the foil. Continue baking for another 15 minutes. This will make the cheese bubbly and golden brown. Once done, take the dish out of the oven and let it cool for a few minutes. The roll-ups will be hot, so be careful. To make perfect Zucchini Dinner Roll Ups, avoid soggy zucchini. Start by salting the zucchini strips. Let them rest for 10-15 minutes. This helps draw out moisture. After that, pat them dry with paper towels. A dry zucchini rolls better and tastes great. Next, ensure your rolls are tight. When you place the cheese mixture at one end, roll it snugly. If the roll is loose, it may fall apart during baking. Use a toothpick if needed to hold the roll together. For flavor enhancements, spices work wonders. I suggest adding crushed red pepper for heat. Fresh herbs like thyme or parsley can bring brightness. You can also add a squeeze of lemon juice for a zesty kick. If you want more protein, try adding cooked ground turkey or chicken to the cheese mix. This adds protein and makes the dish heartier. You can also use cooked spinach for a veggie boost. When it comes to serving, pair your roll-ups with a light salad. A simple mixed greens salad goes well. You might also serve them with garlic bread for a filling meal. For presentation, arrange the roll-ups on a large platter. Drizzle extra marinara sauce over them. Add fresh basil leaves for color. This makes your dish look as good as it tastes. Enjoy your delightful and healthy meal! {{image_4}} You can get creative with fillings for your zucchini dinner roll ups. For a vegetarian option, try using a mix of roasted vegetables. Spinach, bell peppers, and mushrooms work great together. You can also add herbs like basil or parsley for more flavor. If you prefer meat-filled roll-ups, ground turkey or chicken is a tasty choice. Mix it with cheese and some spices for a hearty filling. The sauce you choose can change the whole dish. Instead of marinara, try pesto sauce. Its fresh taste pairs well with zucchini. Alfredo sauce is also a rich option that adds creaminess. For those who need dairy-free options, look for plant-based sauces. You can make a simple cashew cream or use store-bought dairy-free sauces. If you need gluten-free roll-ups, focus on the cheese. Use gluten-free cheeses like almond cheese or coconut cheese. They melt well and taste great. For sauces, check labels to avoid gluten. You can also make a homemade sauce with pureed tomatoes and herbs. This way, you control all the ingredients and ensure they are gluten-free. After you enjoy your Zucchini Dinner Roll Ups, store any leftovers in the fridge. Use an airtight container to keep them fresh. They will stay good for about three days. If you want to save them for later, freezing is a great option. Wrap each roll-up tightly in plastic wrap, then place them in a freezer bag. They can last up to three months in the freezer. When it's time to eat your leftovers, I recommend reheating in the oven. Preheat your oven to 350°F (175°C). Place the roll-ups in a baking dish and cover with foil. Heat for about 15-20 minutes until they are warm. This method helps keep the cheese gooey and the zucchini tender. You can also use a microwave for quick reheating. Just cover the dish to trap steam, and heat in short bursts. You can prepare Zucchini Dinner Roll Ups in advance. Make the filling and slice the zucchini a day before. Store the filling in the fridge and the zucchini strips in water to keep them fresh. On busy weeknights, simply roll them up and bake. This saves time while still delivering a tasty meal. You can also make a big batch and freeze them. Just bake them straight from the freezer. Enjoy a healthy meal anytime! To cut zucchini into strips, I recommend using a mandoline slicer or a sharp knife. First, wash the zucchini well. Then, slice off both ends. Set the zucchini on a cutting board and cut it lengthwise into thin strips, about 1/8 inch thick. A mandoline will give you even slices, making rolling easier. If using a knife, take your time for even strips. This helps the roll-ups cook evenly. Yes, you can make Zucchini Dinner Roll Ups ahead of time. Prepare the roll-ups but do not bake them. Place them in a baking dish, cover tightly with plastic wrap, and store in the fridge. They can stay fresh for up to 24 hours. When you're ready to cook, simply remove the wrap and bake as directed in the Full Recipe. This makes meal prep simple and stress-free. For serving, I recommend plating the Zucchini Roll Ups on a large platter. Drizzle extra marinara sauce over the top for added flavor. Garnish with fresh basil leaves for a pop of color. You can also serve them with a side salad or garlic bread. This makes the meal feel special and inviting, perfect for family dinners or gatherings. Yes, Zucchini Dinner Roll Ups are quite healthy! Zucchini is low in calories and high in vitamins. The cheeses provide protein and calcium, balancing the dish. By using fresh ingredients, you cut out processed foods. These roll-ups are a great way to enjoy veggies while satisfying your craving for comfort food. Plus, they are a fun way to sneak in more vegetables at dinner. In this blog post, we discussed how to make delicious Zucchini Dinner Roll-Ups. We covered key ingredients like zucchini, cheese, eggs, and marinara. You learned preparation steps, assembly tips, baking instructions, and how to store leftovers. The options for variations and serving suggestions make this dish fun and flexible. In closing, Zucchini Roll-Ups are a tasty way to enjoy healthy veggies. Give them a try for a quick meal that impresses. You’ll love how easy and versatile they are!
Zucchini Dinner Roll Ups Flavorful and Easy Recipe
Welcome to my kitchen! If you’re looking for a tasty, easy dinner, try these Zucchini Dinner Roll Ups. They are packed with cheese and flavor,
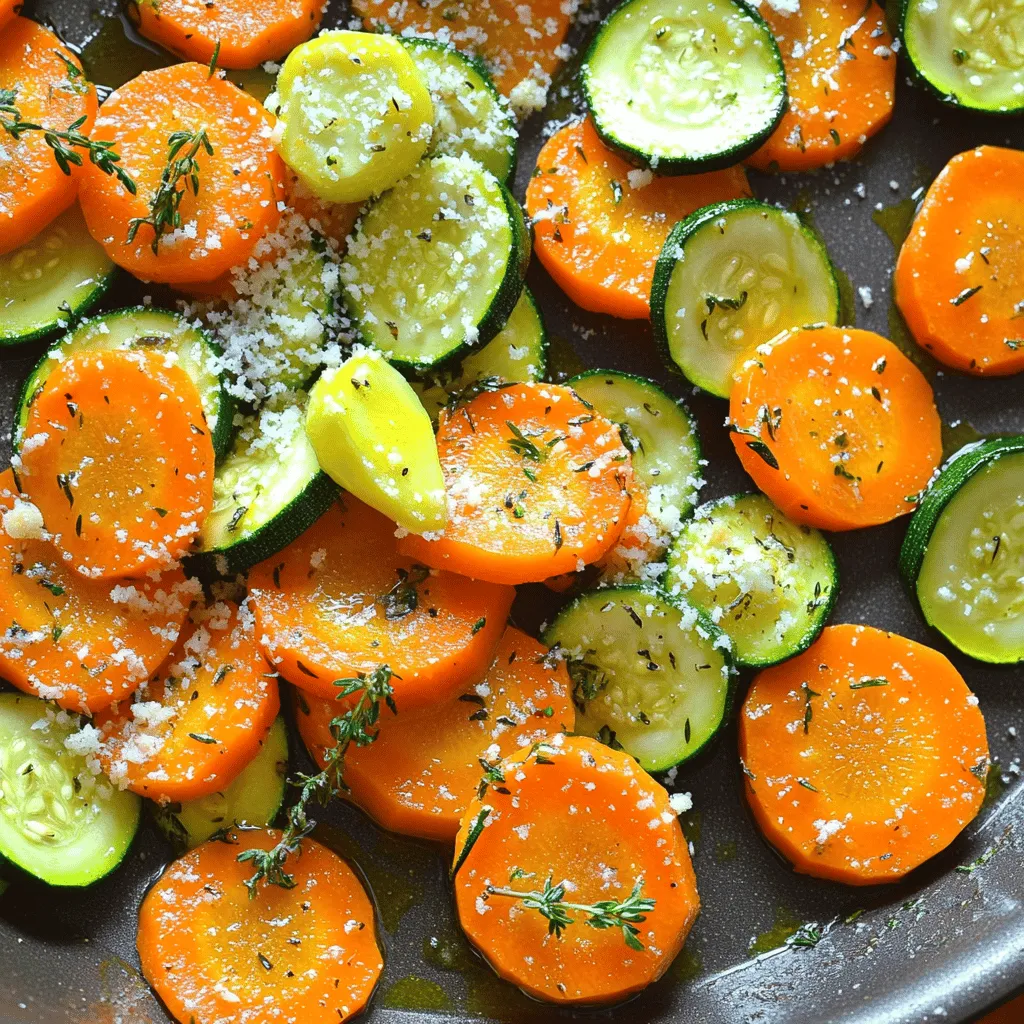
In this dish, fresh and simple ingredients shine through. Each one brings its own flavor and texture. Here’s what you need for Garlic Herb Roasted Potatoes, Carrots & Zucchini: - Potatoes: 4 medium, diced into 1-inch cubes - Carrots: 3 large, sliced into thin rounds - Zucchinis: 2 medium, chopped into half-moons - Garlic: 4 cloves, finely minced - Olive Oil: 3 tablespoons of extra virgin - Seasonings: 1 teaspoon each of dried oregano, dried thyme, and finely chopped fresh rosemary - Salt and Pepper: to taste - Garnish: Fresh parsley, finely chopped These ingredients create a colorful and tasty dish. The potatoes provide heartiness, while the carrots and zucchini add sweetness. Fresh garlic and herbs give it a delightful aroma. You can find the complete recipe in the Full Recipe section. Enjoy the fun of roasting these veggies together! Set your oven to 425°F (220°C). This is key for roasting. Combine diced potatoes, sliced carrots, and chopped zucchinis in a large bowl. Make sure they mix well for even cooking. In a separate bowl, whisk together garlic, olive oil, and seasonings. This blend adds flavor to your vegetables. Pour the herb mixture over the vegetables. Toss them well so every piece gets coated. Then, spread them out on a baking sheet. Bake for 25-30 minutes. Remember to stir halfway through. This helps them brown evenly and become tender. After roasting, sprinkle fresh parsley on top. This adds color and a bright taste just before serving. You can find more details in the [Full Recipe]. Enjoy your delicious Garlic Herb Roasted Potatoes, Carrots & Zucchini! To get the best results, I always make sure my vegetables are in a single layer on the baking sheet. This helps them roast evenly. If they are stacked or crowded, some pieces may steam instead of roast. Stir the veggies halfway through to ensure they brown nicely on all sides. Want to boost the flavor? Try adding fresh herbs like basil or dill. You can also sprinkle in a pinch of smoked paprika for a subtle kick. If you love heat, a dash of red pepper flakes works well too. Mix and match to find your favorite combo! Presentation is key for this dish. Serve the roasted vegetables in a large, shallow bowl. It looks beautiful and allows the colors to pop. Drizzle a bit of extra olive oil on top for a glossy finish. Pair these veggies with grilled chicken or fish for a complete meal. You can also serve them alongside a light salad for a refreshing contrast. Check out the Full Recipe for more tips! {{image_4}} You can mix things up with seasonal vegetables. Try adding: - Sweet potatoes for a touch of sweetness. - Bell peppers for color and crunch. - Brussels sprouts for a hearty bite. - Cauliflower for a nutty flavor. These veggies roast well and add variety. Each brings its own taste and texture, making your dish unique. Enhance your dish with different flavors. Consider these ideas: - Add Parmesan cheese for a salty kick. - Crumble feta cheese for a tangy touch. - Use fresh herbs like basil or cilantro instead of dried ones. - Experiment with spices like paprika or cumin for extra warmth. These twists can elevate your dish to new heights and keep it exciting. Making this dish vegan or gluten-free is easy. Here are some tips: - For vegan options, ensure your oil is pure and skip any cheese. - Gluten-free is simple since all vegetables are naturally gluten-free. - Use tamari instead of soy sauce if you want a savory note without gluten. These adjustments keep your meal tasty while meeting dietary needs. You can explore these variations in the full recipe to find your favorite mix! To store leftover roasted vegetables, let them cool down first. Place them in an airtight container. You can keep them in the fridge for about 3 to 4 days. This method keeps the veggies fresh and tasty. When you reheat them, use the microwave or oven. The oven can help keep them crispy. If you want to save roasted veggies for longer, freezing is a great option. To freeze, first let them cool completely. Then, spread the vegetables in a single layer on a baking sheet. Freeze them for about 1 to 2 hours. After that, transfer the veggies to a freezer-safe bag. Squeeze out as much air as you can. They will last for up to 3 months. To reheat, bake them straight from the freezer. This will give you that nice roasted texture again. The shelf life of garlic herb roasted potatoes, carrots, and zucchini varies by storage method. In the fridge, they last for about 3 to 4 days. If frozen, they can stay good for up to 3 months. Always check for any off smells or changes in texture before eating. The sooner you enjoy your leftovers, the better they will taste. For the full recipe, refer to the earlier section. Yes, you can swap vegetables in this dish. Good choices include bell peppers, sweet potatoes, or Brussels sprouts. When using different veggies, adjust cooking times. For example, bell peppers need less time, around 20 minutes. Sweet potatoes take about 30-35 minutes. Always cut your veggies to similar sizes for even cooking. To prepare this dish ahead, chop your vegetables and mix them with the herb mixture. Store them in a sealed container in the fridge for up to 24 hours. When ready to cook, spread the veggies on a baking sheet. Bake them as directed. This saves time and keeps your meal fresh. Garlic herb roasted potatoes, carrots, and zucchini fit well with many dishes. Serve them alongside grilled chicken or fish for a balanced meal. They also work nicely with a side salad or quinoa. You can even pair them with a hearty soup for a warm, filling dinner. Using fresh herbs can elevate your dish. They bring a brighter flavor. However, you will need more fresh herbs than dried. For example, use about three times the amount of fresh herbs. Fresh herbs also need different cooking times. Add them towards the end of roasting to keep their flavor vibrant. This recipe for roasted vegetables is simple and tasty. You learned how to prepare and roast potatoes, carrots, and zucchinis. Tossing them with garlic, olive oil, and herbs enhances the flavor. Following my tips ensures even cooking and a delightful presentation. You can even try different veggies or flavors, making each dish unique. With proper storage, leftovers stay fresh for later. Enjoy this healthy side dish with any meal!
Garlic Herb Roasted Potatoes, Carrots & Zucchini Dish
Looking for a simple yet delicious side dish? My Garlic Herb Roasted Potatoes, Carrots & Zucchini will be your new favorite! This recipe combines fresh
To make the best easy fried chicken, you need a few simple ingredients. Here’s what you will need: - 4 chicken thighs, skin-on and bone-in - 1 cup buttermilk - Seasonings: garlic powder, onion powder, smoked paprika, dried thyme, dried oregano - Salt and freshly cracked black pepper to taste - 1 cup all-purpose flour - Vegetable oil for frying These ingredients work together to create a crispy and flavorful dish. The buttermilk adds moisture and helps the spices stick to the chicken. The skin-on, bone-in thighs keep the meat juicy and tender. Each seasoning contributes to a rich taste that you will love. For the frying, use enough vegetable oil to fill your skillet about an inch deep. This ensures an even cook and crispy skin. You can find the full recipe [here](insert link)
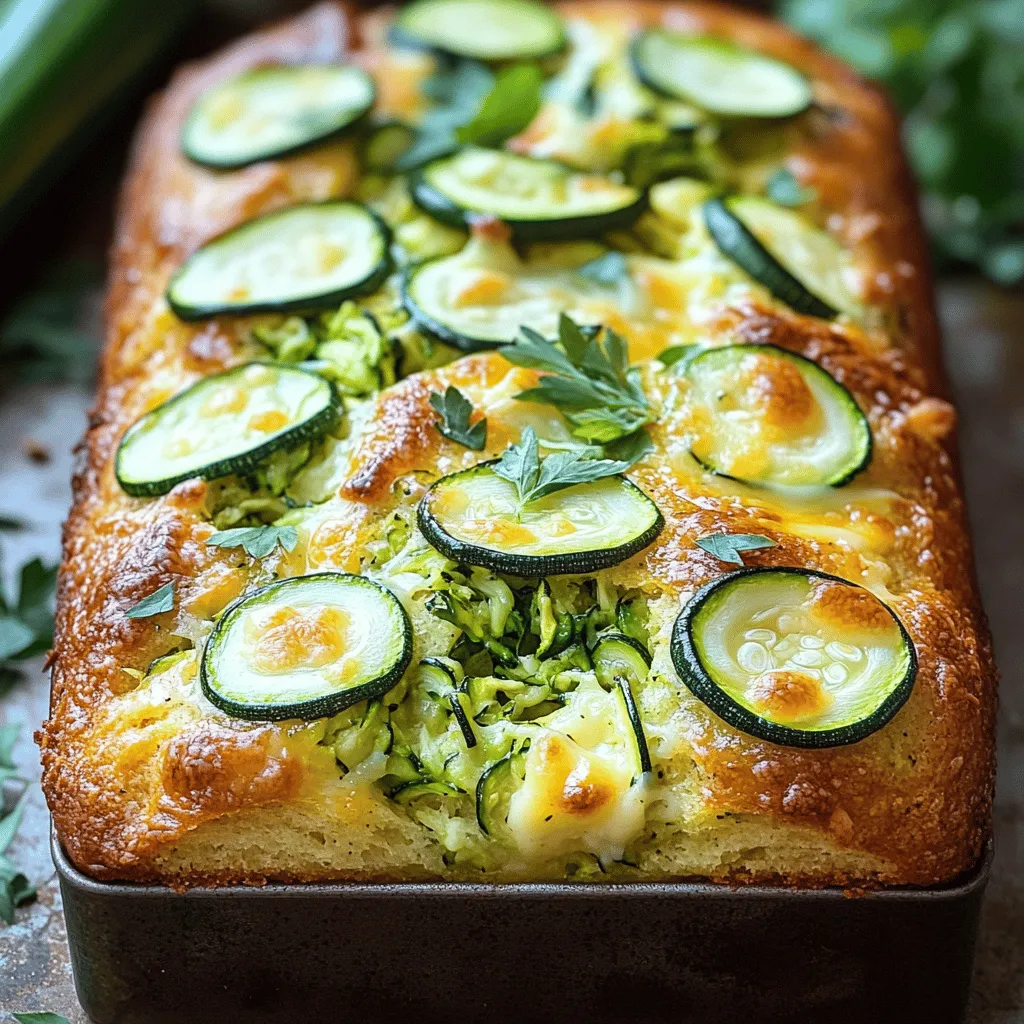
. Combine 1 cup of buttermilk, 1 tablespoon of hot sauce (optional), and the spices in a bowl. Use garlic powder, onion powder, smoked paprika, thyme, and oregano. Add a pinch of salt and black pepper to taste. Whisk until you mix everything well. This marinade adds flavor and tenderness to the chicken. Take your chicken thighs and submerge them in the marinade. Make sure they are fully covered. Cover the bowl with plastic wrap or a lid. Refrigerate for at least 2 hours. Letting the chicken sit in this mixture allows the flavors to soak in. You can marinate overnight for even more taste. Set up your dredging station. In a shallow dish, pour in 1 cup of all-purpose flour. Lightly season this flour with salt and pepper. Mix it gently to spread the seasoning. Next, pour vegetable oil into a large skillet, about 1 inch deep. Heat the oil over medium-high heat. Use a thermometer to check the temperature. You want it to reach around 350°F (175°C) for perfect frying. Now, take the marinated chicken out of the buttermilk. Let any extra liquid drip off. Dredge each thigh in the seasoned flour. Press lightly to make sure the coating sticks well. Carefully place the chicken in the hot oil, skin-side down. Do not overcrowd the pan. Fry in batches if needed. Cook for 7 to 8 minutes without moving the chicken. This helps create a nice golden brown crust. After that, gently flip the thighs over. Keep frying for another 7 to 8 minutes. Check that the internal temperature reaches 165°F (75°C). The skin should be crispy and golden. When done, remove the chicken from the skillet. Let excess oil drip off. Place the fried chicken on a cooling rack or a plate with paper towels. This helps soak up any remaining oil. For the full recipe, check out the complete guide! To get that golden crunch, marinating is key. I recommend at least two hours in the buttermilk mixture. This helps the chicken soak up all the flavors. If you can wait overnight, that’s even better! Frying temperature is also crucial. Heat your oil to 350°F (175°C). This keeps the chicken crispy and avoids sogginess. Use a thermometer to check the heat. If the oil is too cool, your chicken will soak up oil and turn greasy. For flavor, try mixing up your seasonings! Instead of just garlic and onion powder, add some cayenne for heat. You can also use smoked paprika for a deeper flavor. Fresh herbs can elevate your marinade. Try adding rosemary or basil for a fresh twist. Herbs not only add taste but also make your chicken look pretty. Fried chicken pairs well with many sides. Classic options include creamy coleslaw or fluffy biscuits. You could also serve it with mashed potatoes for a comforting meal. For presentation, place the fried chicken on a rustic wooden platter. Garnish with fresh herbs like parsley or thyme. Add lemon wedges on the side for a zesty touch. This makes your dish colorful and appealing. For the full recipe, check out my other sections! {{image_4}} To make fried chicken, you can use different cooking methods. Here’s how to do it: - Air Frying: Preheat your air fryer to 360°F (182°C). Dredge your chicken as usual. Place the chicken in a single layer in the basket. Air fry for about 25-30 minutes, flipping halfway. This method gives you a crunchy texture with less oil. - Oven-Baking: Preheat your oven to 425°F (220°C). Dredge the chicken and place it on a wire rack over a baking sheet. Bake for 35-40 minutes, or until golden brown. This method keeps it crispy without frying. Want to spice things up? Here are some fun flavor ideas: - Spicy Variations: Add different hot sauces to your marinade. You can try sriracha, buffalo sauce, or even a dash of cayenne pepper. This will give your chicken a nice kick. - Herb-Infused Alternatives: Use fresh or dried herbs like rosemary, basil, or dill in your marinade. This adds depth and flavor to your chicken. Mix and match to find your favorite combo. You don’t have to use chicken! Here are some tasty swaps: - Turkey: Use turkey thighs for a leaner option. Just make sure to adjust the cooking time. Turkey may take a bit longer to cook. - Tofu: For a plant-based choice, use firm tofu. Press it to remove excess water and cut it into thick slices. Marinate and dredge as you would chicken. Fry until golden brown for a yummy vegan dish. Feel free to check out the Full Recipe for more ideas! To store your fried chicken, let it cool first. Place it in an airtight container. This keeps moisture in and prevents the chicken from drying out. You can also wrap it tightly in foil or plastic wrap. This method works well too. Store it in the fridge for up to 3 days. When you want to reheat your chicken, the oven is best. Preheat your oven to 375°F (190°C). Place the chicken on a baking sheet. Heat for about 15 to 20 minutes. This method keeps the chicken crispy. You can also use an air fryer for a quicker option. Set it to 350°F (175°C) and heat for 8 to 10 minutes. Freezing fried chicken is a great way to save leftovers. After cooling, wrap each piece in plastic wrap. Then, place them in a freezer-safe bag or container. Make sure to remove as much air as possible. This helps prevent freezer burn. Fried chicken can last up to 3 months in the freezer. To thaw your fried chicken, move it to the fridge overnight. This slow method keeps it juicy. If you're in a hurry, you can use the microwave. Use the defrost setting for best results. After thawing, reheat it as mentioned above. Fried chicken stays fresh for different times based on storage. In the fridge, it lasts up to 3 days. If frozen, expect it to stay good for about 3 months. Always check for signs of spoilage, like off smells or changes in texture. Enjoy your crispy fried chicken from the [Full Recipe] with confidence! You should marinate chicken for at least 2 hours. This time gives the flavors a chance to soak in. If you can, marinate overnight. Longer marination makes the chicken tastier and juicier. The buttermilk breaks down proteins and keeps the meat moist. This step is key for great fried chicken. Yes, you can use skinless chicken thighs. However, this choice changes the flavor and texture. Skin adds crispiness and richness you won’t get with skinless meat. If you prefer skinless, add more seasoning to keep it flavorful. The cooking time may also be slightly shorter. The best oil for frying chicken is vegetable oil. It has a high smoke point, which is great for frying. Other good options include canola and peanut oil. Avoid oils with low smoke points like olive oil. These oils can burn and spoil the flavor of your chicken. Use a meat thermometer to check if your chicken is done. The internal temperature should reach 165°F (75°C). Insert the thermometer into the thickest part of the chicken. This ensures it cooks evenly and is safe to eat. If you don’t have a thermometer, cut into the chicken. It should be white, with no pink inside. Fried chicken pairs well with many sides. Classic choices include coleslaw, mashed potatoes, and cornbread. You can also serve it with pickles or biscuits. For drinks, sweet tea or lemonade works great. These sides and drinks balance the richness of the fried chicken. Feel free to mix and match to find your favorite combinations. For the full recipe, check out the details above! In this article, we explored how to make delicious fried chicken. We covered the key ingredients, how to prepare and marinate chicken, and tips for crispy texture. You also learned several cooking methods, variations in flavor, and storage tips. Remember, the right marinating time and frying temperature are crucial to great results. With these steps, you can enjoy tasty fried chicken any time. Try different flavors and sides to make it your own! Enjoy your cooking adventure!
Easy Fried Chicken Delightfully Crispy and Flavorful
Fried chicken is a beloved classic, but making it crispy and flavorful can seem tricky. In this blog post, I’m sharing my easy fried chicken
To make delicious honey soy chicken thighs, gather these ingredients: - 4 bone-in, skin-on chicken thighs - 1/4 cup soy sauce (low-sodium recommended for balanced flavor) - 1/4 cup honey (preferably local for added flavor) - 2 tablespoons sesame oil - 2 cloves garlic, finely minced - 1 teaspoon fresh ginger, finely grated - 1 tablespoon rice vinegar - 1/4 teaspoon red pepper flakes (optional, for a spicy kick) - 1 tablespoon sesame seeds (for garnish) - 2 green onions, thinly sliced (for garnish) When picking chicken thighs, look for these signs of freshness: - Skin should be smooth and not discolored. - Avoid any signs of bruising or tears. - The meat should feel firm to the touch. - Smell the chicken; it should have no strong odor. - If possible, buy from local farms for better quality. If you can't find an ingredient, here are some swaps: - Use coconut aminos instead of soy sauce for a soy-free option. - Maple syrup works well if you don't have honey. - For sesame oil, try olive oil or canola oil. - You can skip ginger if you’re not a fan; use more garlic instead. - For garnish, crushed nuts can replace sesame seeds. These tips and substitutions will help you make the best honey soy chicken thighs. Enjoy the process and feel free to get creative! To start, gather your ingredients. You need soy sauce, honey, sesame oil, garlic, ginger, rice vinegar, and red pepper flakes. In a mixing bowl, combine these ingredients. Whisk them until smooth. This marinade will give the chicken its sweet and savory taste. Next, take the chicken thighs. Place them in a large resealable plastic bag or a shallow dish. Pour the marinade over the chicken. Make sure each piece is well coated. Seal the bag or cover the dish. Let it marinate in the fridge for at least one hour. For a deeper flavor, let it sit overnight. Once marinated, preheat your oven to 400°F (200°C). Take the chicken out of the marinade. Allow any excess marinade to drip off. Arrange the thighs skin-side up in a greased baking dish. Bake the chicken for 35 to 40 minutes. Use a meat thermometer to check the temperature. It should reach 165°F (75°C). The skin should be crispy and golden brown. This makes for a delicious bite! While the chicken bakes, use the reserved marinade. Pour it into a small saucepan. Heat it over medium heat until it boils. Then lower the heat and let it simmer. Cook for about 5 to 7 minutes. This will thicken it into a glaze. When the chicken is done, brush some of the glaze over the top. This adds a shiny finish and extra flavor. Let the chicken rest for a few minutes. This helps the juices redistribute. Before serving, sprinkle sesame seeds and green onions on top. They add color and a nice crunch. Enjoy your meal! To get that crispy skin, start with dry chicken. Pat the skin with paper towels to remove moisture. This helps the skin crisp up when baking. Another key step is baking at a high temperature, around 400°F (200°C). High heat gives the skin a nice golden color. Make sure you don't crowd the pan. Leave space between the chicken thighs. This allows hot air to flow and crisp the skin. If you have to bake in batches, do it. Also, broiling the last few minutes can add extra crunch. Keep an eye on it to avoid burning. One common mistake is not marinating long enough. For the best flavor, marinate for at least one hour. Overnight is even better. Another mistake is flipping the chicken too soon. Let it cook without disturbance to get that crispy skin. Avoid using too much marinade when baking. This can make the chicken soggy. Instead, save some marinade to create a glaze. Lastly, always check the internal temperature. It should reach 165°F (75°C) to ensure it’s safe to eat. You’ll need a few tools to make this dish easier. A mixing bowl works great for the marinade. A whisk helps blend the ingredients well. Use a resealable plastic bag or a shallow dish for marinating. An oven-safe baking dish is key too. It should be big enough for all the chicken thighs. A meat thermometer is a must for checking doneness. Finally, a saucepan helps to heat the glaze. These tools will make cooking fun and simple. {{image_4}} You can change the flavor of your honey soy chicken thighs. Try using different sauces. For a spicy twist, add sriracha or chili paste. For a sweeter taste, mix in orange juice or maple syrup. You can also try teriyaki sauce for a richer umami flavor. Each option will give you a unique and tasty dish. Pair your chicken with sides that complement its flavor. Steamed rice is a classic choice. It soaks up all the yummy sauce. You can also serve it with stir-fried vegetables for a colorful plate. Roasted sweet potatoes add a nice sweetness. A fresh green salad brings a crisp contrast to the meal. Choose sides that balance the dish well. Both grilling and baking work great for chicken thighs. Grilling gives a smoky flavor and nice char. It cooks quickly, usually in about 20-25 minutes. Baking allows the chicken to cook evenly. It keeps the skin crispy and juicy. Baking takes a bit longer but needs less attention. Choose the method that fits your time and taste. To keep your honey soy chicken thighs fresh, let them cool first. Place them in an airtight container. Make sure to seal it tightly. You can also wrap the thighs in plastic wrap. This extra layer helps keep them juicy. Store them in the fridge for up to four days. When you are ready to enjoy leftovers, reheating is key. Preheat your oven to 350°F (175°C). Place the chicken thighs in an oven-safe dish. Add a splash of water or leftover marinade to keep them moist. Cover the dish with foil to trap the heat. Bake for about 15-20 minutes. This way, they stay flavorful and juicy. In the refrigerator, you can keep cooked chicken thighs for about four days. If you want to store them longer, freeze them. In the freezer, they can last up to three months. Just make sure to wrap them well. When you’re ready to eat, thaw them in the fridge overnight before reheating. The internal temperature for cooked chicken thighs should reach 165°F (75°C). This ensures the chicken is safe to eat and fully cooked. Use a meat thermometer to check the temperature. Insert it into the thickest part of the thigh, away from the bone. Once it hits 165°F, your chicken is ready to serve! Yes, you can use boneless chicken thighs! They will cook faster than bone-in thighs. Adjust the cooking time to about 25-30 minutes. Check for the same internal temperature of 165°F to ensure doneness. Boneless thighs are also easier to eat and are great for quick meals. For the best flavor, marinate the chicken for at least 1 hour. However, if you have time, marinate it overnight. This allows the flavors to soak in deeply. Store the chicken in the fridge while it marinates. The longer you marinate, the better the taste! For the full recipe, check out the ingredients and instructions above. You’ll love how easy and tasty these chicken thighs are! In this post, we explored how to make Honey Soy Chicken Thighs with step-by-step guidance. We covered everything from ingredient selection to cooking tips. Storing leftovers and reheating them correctly ensures great taste. Remember, marinating time and cooking methods can change the flavor. Try different marinades and side dishes for variety. Follow these tips, and you’ll enjoy delicious meals every time. Simple techniques lead to great results. Your kitchen can become a place of tasty experiments! Enjoy every bite!
Honey Soy Chicken Thighs Juicy and Flavorful Recipe
Welcome to your new go-to recipe for Honey Soy Chicken Thighs! This dish shines with a delightful blend of sweet and savory flavors. You’ll get
- 2 cups cooked shredded chicken breast - 1 cup low-fat cottage cheese - 1 cup Greek yogurt - 1 cup shredded low-fat mozzarella cheese, divided - 8 small corn tortillas - 1 tablespoon olive oil - 1 small onion, finely chopped - 2 cloves garlic, minced - 1 teaspoon ground cumin - 1 teaspoon chili powder - 1/2 teaspoon salt - 1/4 teaspoon black pepper - 1 cup fresh spinach, chopped - 1 cup low-sodium chicken broth - 1/4 cup fresh cilantro, chopped (for garnish) Gathering the right ingredients is key for great enchiladas. Start with cooked shredded chicken breast. This forms the base of your filling. You can use chicken you cooked or even rotisserie chicken for speed. Low-fat cottage cheese and Greek yogurt add creaminess and protein. They replace heavy cream and make the dish lighter. You'll also need shredded low-fat mozzarella cheese, which melts beautifully on top. For the tortillas, I suggest corn. They are gluten-free and hold up well. Next, gather your seasonings. Olive oil helps sauté the onion and garlic. Use a small onion and two cloves of garlic for flavor. Ground cumin and chili powder add warmth and depth. Don't forget salt and black pepper to taste! Finally, for a fresh touch, add chopped spinach and cilantro. The spinach adds nutrition and color. Cilantro is a great garnish that brightens up the dish. With these ingredients ready, you're set to create a delicious, high-protein meal! {{ingredient_image_2}} - Preheat oven to 375°F (190°C). - In a large skillet, heat olive oil over medium heat. - Add finely chopped onion and minced garlic. - Sauté for 3 to 4 minutes until the onion is soft and fragrant. - In a large bowl, combine shredded chicken and sautéed onion and garlic. - Add cottage cheese, Greek yogurt, ground cumin, chili powder, salt, and black pepper. - Stir until all ingredients are mixed well and look creamy. - In a small saucepan, add chicken broth and bring it to a gentle simmer. - Gradually whisk in half of the mozzarella cheese. - Stir until the cheese melts into a smooth sauce. - Warm tortillas in the microwave for 20 to 30 seconds to make them soft. - Place 2 to 3 tablespoons of the chicken filling in each tortilla. - Add a sprinkle of chopped spinach, then roll them up tightly. - Place the rolled tortillas seam-side down in a baking dish. - Pour the creamy sauce over the enchiladas, covering them completely. - Sprinkle the remaining mozzarella cheese on top. - Bake for 25 to 30 minutes until the cheese is bubbly and golden brown. - Let the enchiladas cool for a few minutes before serving. - Garnish with freshly chopped cilantro for a pop of color. - Tips for selecting the best chicken: Always go for fresh, high-quality chicken breast. Look for meat that is pink and firm. Avoid any chicken with a gray tint or unpleasant smell. For a quicker option, rotisserie chicken works great too. - How to enhance the creaminess of the sauce: Use a mix of low-fat cottage cheese and Greek yogurt. This blend gives a rich texture. If you want it even creamier, add a little more mozzarella cheese. Whisk the sauce well until it's smooth. - Best practices for rolling enchiladas: Warm the tortillas in the microwave for about 20-30 seconds. This makes them soft and easy to roll. Place 2-3 tablespoons of filling in the center and fold it tightly. Make sure the seam is down when you place them in the dish. - Avoiding soggy tortillas: To keep tortillas crisp, do not soak them in sauce before baking. Instead, pour the sauce over the top once the enchiladas are assembled. This helps them stay firm and delicious. - Pairing with sides or salads: These enchiladas taste great with a fresh salad or black beans on the side. You can also serve them with a light avocado salad for extra flavor. - Presentation tips for a visually appealing dish: Serve enchiladas in the baking dish for a rustic look. Garnish with fresh cilantro and add lime wedges on the side. This adds color and brightness to your meal. Pro Tips Warm the Tortillas: Warming the tortillas before filling makes them more pliable and easier to roll without tearing. Add More Greens: Feel free to include additional vegetables such as bell peppers or zucchini in the filling for extra nutrients and flavor. Customize the Heat: If you prefer a spicier kick, add diced jalapeños or a dash of hot sauce to the filling or sauce. Make Ahead: Assemble the enchiladas a day in advance and store them in the refrigerator, then bake them when ready to serve. {{image_4}} You can switch out chicken for turkey. Turkey gives you similar protein. If you want a plant-based option, use tofu or tempeh. Both are great choices. You can also add beans or lentils to boost nutrition. Black beans or pinto beans add fiber and protein. They make your enchiladas heartier and more filling. You can play with flavors by using different cheeses. Try pepper jack for a spicy twist. Cream cheese can make your sauce richer. You can also add spices to kick up the heat. Jalapeños or crushed red pepper work well. A sprinkle of smoked paprika can add depth. Each change will give your dish a new taste. If you need gluten-free options, use corn tortillas. They hold up well and taste great. For a dairy-free sauce, use a nut-based milk. Almond or cashew milk can replace chicken broth. You can also use dairy-free cheese to keep it creamy. These swaps keep the enchiladas tasty for everyone. To keep your enchiladas fresh, follow these guidelines: - Store leftovers in the fridge within two hours of cooking. - Use airtight containers to prevent moisture loss. - Label containers with the date to track freshness. When you want to enjoy your enchiladas again, try these methods: - Use the oven. Preheat it to 350°F (175°C) and bake for 15-20 minutes. - Cover with foil to keep them moist. - You can also microwave them. Heat on medium power for 1-2 minutes. Make sure to check that they are hot all the way through. If you want to save some enchiladas for later, follow these steps: - Wrap each enchilada tightly in plastic wrap. - Place them in a freezer-safe bag or container. - They can stay in the freezer for up to three months. To thaw, move them to the fridge overnight before reheating. Enjoy your delicious meal anytime! Can I use rotisserie chicken instead of cooked chicken breast? Yes, using rotisserie chicken is a great choice. It saves time and adds flavor. Just shred it and use it in the recipe. How do I make enchiladas spicy? To add spice, use diced jalapeños or extra chili powder. You can also try hot sauce in the filling. Adjust to your taste. What is the protein content per serving? Each serving has about 30 grams of protein. This comes from the chicken, cottage cheese, and Greek yogurt. Great for a protein boost! Can I prepare the filling in advance? Yes, you can prepare the filling a day ahead. Keep it in the fridge until you are ready to assemble. How can I make these enchiladas a meal prep option? To meal prep, assemble the enchiladas and store them in the fridge. You can bake them when you're ready to eat. What if I don't have Greek yogurt? If you don’t have Greek yogurt, use sour cream. It will give a similar creamy texture and taste. Can I skip the oven and make these on the stove? You can make them on the stove! Just heat them in a covered skillet over low heat until warm. This blog post covered a delicious enchilada recipe that is both healthy and easy to make. We explored key ingredients, step-by-step instructions, and helpful tips to ensure success. You learned how to customize flavors and variations to suit your taste. With the right storage methods and reheating tips, your enchiladas can stay fresh and tasty for longer. Enjoy making this dish for family or friends. It’s a great way to share good food and create wonderful memories.
High-Protein White Sauce Chicken Enchiladas Recipe
Are you ready to enjoy a delicious dish that fuels your body? My High-Protein White Sauce Chicken Enchiladas recipe is here to satisfy your taste
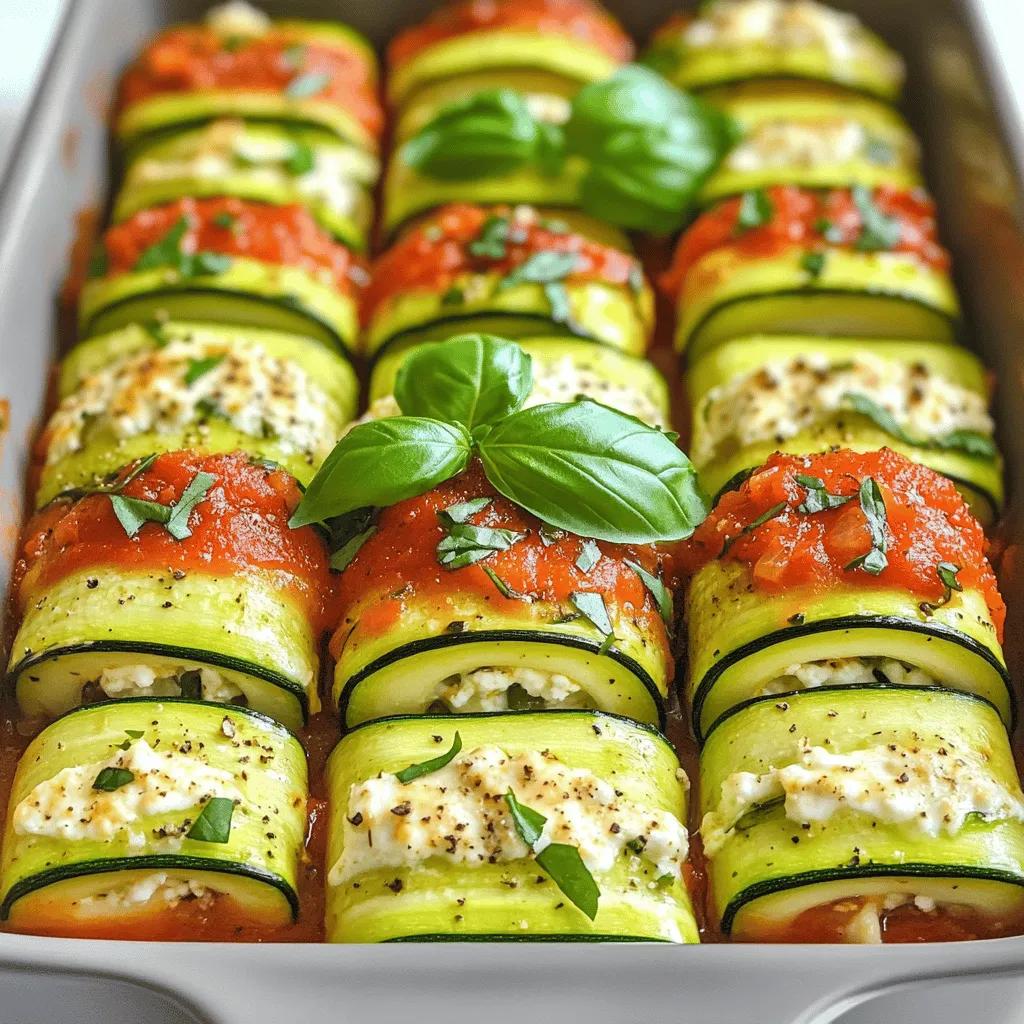
To make the best spinach stuffed chicken breasts, gather these fresh ingredients: - 4 boneless, skinless chicken breasts - 2 cups fresh spinach, finely chopped - 1 cup creamy ricotta cheese - 1/2 cup shredded mozzarella cheese - 1/4 cup freshly grated Parmesan cheese - 2 cloves garlic, minced - 1 teaspoon mixed dried Italian herbs (such as oregano, basil, and thyme) - Salt and freshly cracked pepper, to taste - 2 tablespoons extra virgin olive oil - 1 tablespoon freshly squeezed lemon juice - Toothpicks or kitchen twine, for securing the chicken Each ingredient plays a key role. The chicken breasts serve as a tasty base. Fresh spinach adds a vibrant color and healthy nutrients. Cheeses like ricotta, mozzarella, and Parmesan bring creaminess and flavor. Garlic and herbs enhance the taste profile, making each bite special. Olive oil and lemon juice add richness and brightness. Seasoning with salt and pepper ensures everything is balanced. This dish is both healthy and filling. If you want a detailed cooking guide, check out the Full Recipe. Enjoy the process and the delicious results! 1. Preheat the Oven: Start by preheating your oven to 375°F (190°C). This step is key for cooking the chicken evenly. 2. Mix the Stuffing Ingredients: In a medium bowl, mix together the chopped spinach, ricotta cheese, mozzarella, and Parmesan. Add minced garlic and Italian herbs. Don’t forget to season with salt and pepper. Mix until well combined. 3. Prepare the Chicken Breasts: Take each chicken breast and cut a pocket into the thick part. Be careful not to cut all the way through. Season both the inside and outside with salt and pepper for added flavor. 1. Sear the Chicken: Heat extra virgin olive oil in an oven-safe skillet over medium-high heat. Add the stuffed chicken breasts and sear for 3-4 minutes on each side. You want them to be golden brown. 2. Bake the Chicken: After searing, drizzle lemon juice over the chicken. Transfer the skillet to the oven. Bake for 20-25 minutes. Check that the internal temperature reaches 165°F (75°C) for safety. 1. Let the Chicken Rest: Once cooked, remove the skillet from the oven and let the chicken rest for about 5 minutes. This step helps the juices stay inside the chicken, making it juicy. 2. Presentation Tips: To impress, slice each chicken breast in half. This shows off the green spinach filling. Arrange the slices on a platter. Garnish with extra Parmesan and fresh spinach leaves for color. Follow these steps, and you’ll create a delicious Spinach Stuffed Chicken Breasts dinner. For the full recipe, check out the details above. To keep the filling inside the chicken, make a deep pocket. Use a sharp knife to cut carefully. Do not slice all the way through. After stuffing, secure the pocket with toothpicks or kitchen twine. This helps prevent any delicious filling from leaking out. For juicier chicken, do not overcook it. Use a meat thermometer to check the chicken's internal temperature. It should reach 165°F. Let the chicken rest for about five minutes after cooking. This allows the juices to settle for a tender bite. Using the right cookware makes a big difference. I suggest an oven-safe skillet for searing and baking. A heavy-bottomed pan helps distribute heat evenly. This ensures your chicken cooks well without burning. Also, keep a meat thermometer handy. It takes the guesswork out of cooking chicken. You will know when it is perfectly done. A sharp knife and a cutting board are essential for preparing the chicken and stuffing. For the full recipe, check out the detailed guide provided. {{image_4}} You can change up the cheese in this dish. Try feta for a tangy twist. Goat cheese also works well, adding a creamy texture. For a richer taste, use a blend of cheeses. You can mix ricotta with cream cheese for a smooth filling. Adding extra vegetables can boost nutrition and flavor. Chopped sun-dried tomatoes add a sweet and tangy bite. You can also include artichoke hearts for a fun texture. Fresh herbs like basil or parsley can brighten the dish. Spices can take your stuffed chicken to the next level. A pinch of red pepper flakes adds heat. Try smoked paprika for a hint of smokiness. You can also use lemon zest to bring fresh flavor. For sauces and toppings, consider a drizzle of balsamic glaze. It adds sweetness and a lovely shine. A light cream sauce can make the dish feel fancy. You can also serve it with a side of marinara for a fun twist. Explore these variations to make your spinach stuffed chicken breasts your own! For the complete recipe, check out the [Full Recipe]. Refrigeration You can keep leftovers in the fridge. Place the chicken in an airtight container. It stays fresh for up to three days. Make sure to cool it first before sealing. This prevents extra moisture, which can make it soggy. Freezing If you want to save it longer, freezing works well. Wrap each piece tightly in plastic wrap. Then, place them in a freezer-safe bag. You can freeze it for up to three months. Just remember to label it with the date. This way, you know when to use it. Microwave vs. Oven Microwaving is quick but may dry out the chicken. Use medium heat for one to two minutes, checking often. If you prefer juicier chicken, use the oven. Preheat it to 350°F (175°C). Place the chicken in a baking dish, cover it with foil, and heat for 15-20 minutes. This way, the flavors stay rich and vibrant. For more details, check the Full Recipe. How to Make Spinach Stuffed Chicken Breasts? To make spinach stuffed chicken breasts, start by mixing chopped spinach, ricotta, mozzarella, and Parmesan. Add minced garlic and Italian herbs to the mix, then season with salt and pepper. Next, cut a pocket in each chicken breast and fill them with the spinach mixture. Sear the stuffed breasts in olive oil until golden brown. Finally, bake until cooked through. For a detailed guide, check the Full Recipe. What Can I Serve with Spinach Stuffed Chicken Breasts? You can pair the chicken with a fresh salad or roasted vegetables. Mashed potatoes or rice also make great sides. For a light touch, consider a lemon vinaigrette on the salad. These accompaniments enhance the flavors of the chicken and create a balanced meal. Can I Prepare Spinach Stuffed Chicken Breasts Ahead of Time? Yes, you can prepare these stuffed chicken breasts a day ahead. Simply fill and secure the chicken, then store it in the fridge. When ready to cook, sear and bake as usual. This can save you time on busy nights while still giving you a delicious dinner. Healthy Aspects of the Dish Spinach stuffed chicken breasts are packed with nutrients. Spinach adds vitamins A, C, and K, along with iron and fiber. The chicken provides lean protein, which is vital for muscle health. Using low-fat cheese options can reduce calories while keeping flavor. Serving Sizes and Portions This recipe serves four, with each portion being one stuffed chicken breast. Each breast is filling, so you may not need much more than a side dish. If you have leftovers, they make for great lunches the next day! You learned how to make spinach stuffed chicken breasts with simple steps. We covered the ingredients, preparation, cooking processes, and tips for the best results. You can add your own twist with ingredient swaps and flavor enhancements. In conclusion, this dish is both tasty and healthy. It’s perfect for family meals or special occasions. Use the storage tips to keep leftovers fresh. Enjoy making this recipe, and share it with friends! Your cooking will impress everyone.
Spinach Stuffed Chicken Breasts Flavorful Dinner Idea
Looking for a tasty dinner idea? Spinach stuffed chicken breasts are a delicious option! This dish is not just flavorful; it’s also packed with nutrients.
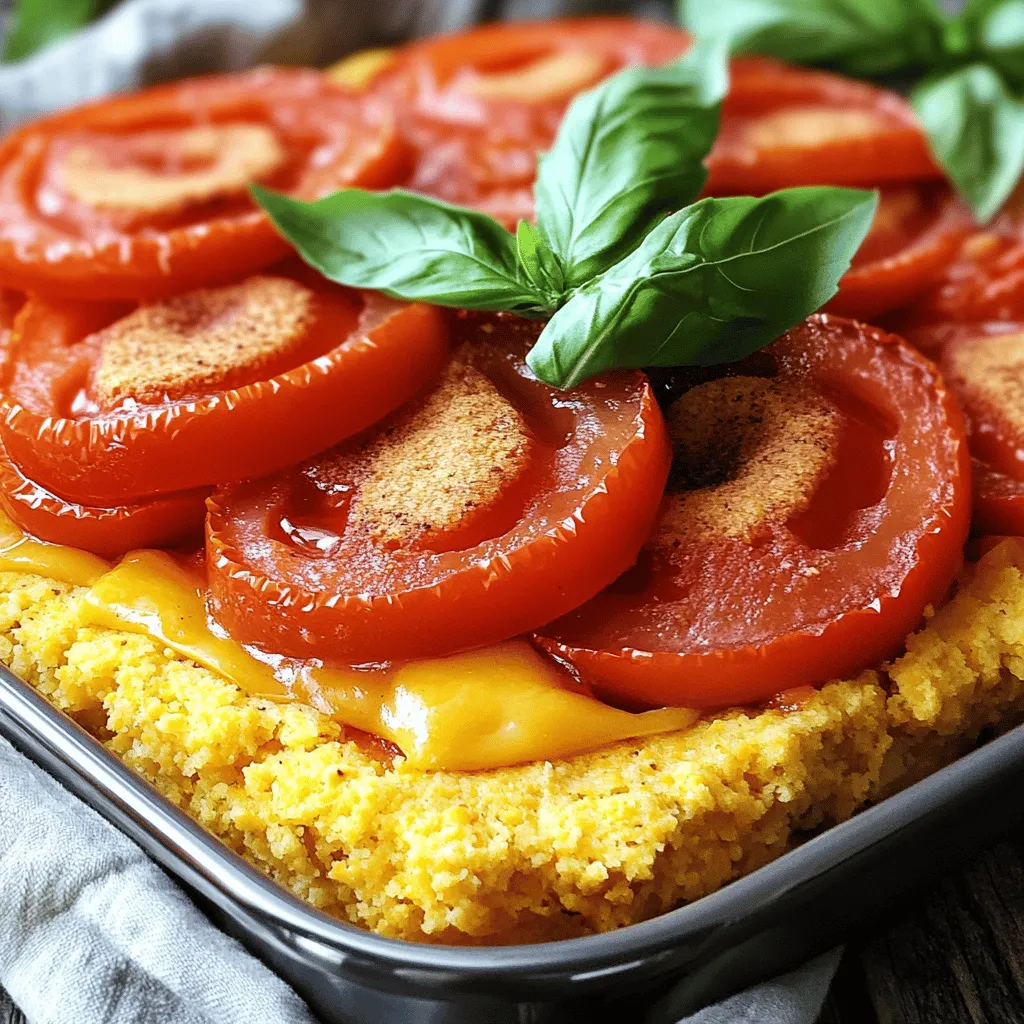
- 1 pre-made pie crust (9-inch) - 1 cup fresh corn kernels (frozen can be substituted if necessary) - 1 cup cherry tomatoes, halved - 3 large eggs - 1 cup heavy cream - 1 cup shredded Gruyère cheese - 1 tablespoon fresh basil, finely chopped (or 1 teaspoon dried basil) - 1 teaspoon garlic powder - Salt and freshly ground black pepper to taste - 1 tablespoon olive oil for sautéing - Spinach or kale for added greens - Crumbled feta or goat cheese for extra flavor - Red pepper flakes for a spicy kick - 9-inch pie dish for the crust - Medium skillet for sautéing - Large mixing bowl for the egg mixture - Whisk for blending eggs and cream - Fork for poking holes in the crust - Measuring cups and spoons for accuracy When gathering your ingredients, focus on freshness. Fresh corn and ripe cherry tomatoes make a big difference in flavor. If you can, choose local produce to enhance your dish. The tools you use also matter. A good pie dish ensures even baking. Using a whisk helps blend ingredients smoothly. All these details come together to make your Corn and Cherry Tomato Quiche a tasty comfort dish. You can find the full recipe at the beginning of the article. Enjoy cooking! First, set your oven to 375°F (190°C). Preheating warms the oven for a perfect bake. This helps the quiche rise and cook evenly. Next, take a medium skillet and add one tablespoon of olive oil. Heat it over medium heat. Once hot, add one cup of fresh corn kernels. Sauté the corn for about 3-4 minutes. You want it tender and slightly golden. Season with salt, black pepper, and garlic powder. This adds flavor to your dish. After cooking, remove the skillet from heat and set it aside. Grab a large mixing bowl. Crack three large eggs into it and pour in one cup of heavy cream. Whisk them together until they blend well. Next, add one tablespoon of finely chopped fresh basil. You can use one teaspoon of dried basil if fresh is not available. Season with salt and pepper to taste. This mixture forms the base of your quiche. Now it's time to prepare the pie crust. Carefully place the pre-made pie crust into your pie dish. Use a fork to poke several holes in the bottom. This step prevents bubbling during baking. With the pie crust ready, layer the sautéed corn evenly over the bottom. Next, add one cup of halved cherry tomatoes, spreading them out for even flavor. Pour the egg and cream mixture over the corn and tomatoes. Fill just until covered. Finally, sprinkle one cup of shredded Gruyère cheese on top. This adds a rich, cheesy finish. Place the quiche in the preheated oven. Bake for 35-40 minutes, or until the center is set and the top turns golden brown. Once done, remove it from the oven and let it cool for about 10 minutes. This resting time helps the quiche set perfectly for slicing. For the full recipe, check out the [Full Recipe]. To get the best crust, start with a pre-made pie crust. Make sure to poke holes in the bottom. This keeps it from bubbling up while baking. You can also chill the crust for 30 minutes before filling. This helps it stay crisp and flaky. Gruyère cheese brings a rich flavor to the quiche. If you want to try something different, use cheddar or feta. Both add unique tastes. A mix of cheeses can also work well, giving your quiche depth. Remember to shred your cheese for even melting. You can change the flavor by adding spices or herbs. Fresh herbs like thyme or rosemary add a nice touch. For a kick, a pinch of red pepper flakes can spice things up. Don’t forget to taste as you go. This ensures the flavors blend just right. For the sweetest flavor, use ripe cherry tomatoes. They balance nicely with the corn's sweetness. For more tips and the full recipe, check out the complete guide. {{image_4}} You can make this quiche even more colorful and tasty by adding vegetables. Spinach, bell peppers, or zucchini work great. For spinach, use about one cup, chopped. With bell peppers, one medium-sized, diced will add some crunch and flavor. Zucchini can be shredded or sliced thin. Add these before you pour in the egg mixture for a delightful twist. Herbs can change the whole flavor of this quiche. Instead of basil, you can try thyme or parsley. Both add a fresh taste. A pinch of smoked paprika gives a warm kick. You might also like to add a dash of red pepper flakes for heat. Mix and match until you find your favorite combo. Seasonal vegetables can enhance your quiche. In spring, try asparagus or peas. In summer, add zucchini or fresh herbs. Fall is great for mushrooms or roasted squash. In winter, use hearty greens like kale or Swiss chard. These veggies keep your quiche fresh and exciting all year round. For the full recipe, check out the details above! To store leftover quiche, let it cool first. Wrap the slices tightly in plastic wrap. Place the wrapped quiche in an airtight container. You can keep it in the fridge for up to three days. Make sure to label it with the date. This helps you track how long it stays fresh. To reheat quiche, preheat your oven to 350°F (175°C). Place the slices on a baking sheet. Cover them loosely with aluminum foil to keep the moisture in. Heat for about 15-20 minutes or until warm. You can also use a microwave. Heat each slice for about 30-60 seconds. This method is faster but may make the crust less crispy. If you want to freeze quiche, slice it first. Wrap each slice in plastic wrap, then in foil. This prevents freezer burn. You can freeze it for up to three months. When ready to eat, thaw it in the fridge overnight. Reheat in the oven for the best texture. This way, you can enjoy your Corn and Cherry Tomato Quiche later! Yes, you can make this quiche ahead of time. Prepare it fully and bake it. Once baked, let it cool. After cooling, wrap it well in plastic wrap or foil. Store it in the fridge for up to three days. You can also freeze it for longer storage. To freeze, wrap it tightly and store for up to three months. To serve, just reheat it in the oven. This way, you save time on busy days. Quiche pairs well with many dishes. Here are some ideas to serve: - A simple green salad with vinaigrette - Roasted or steamed vegetables - Fresh fruit, like berries or melon - A light soup, such as tomato or vegetable - Toasted bread or croissants These sides add color and balance to your meal. They make it feel complete and satisfying. To check if your quiche is done, look for a few signs. First, the edges should be set and firm. The center should be slightly jiggly but not liquid. You can also insert a knife into the center. If it comes out clean, the quiche is ready. The top should be golden brown. If it looks perfect, let it cool for a bit before slicing. This resting time helps it hold its shape. This blog post covered how to make a tasty Corn and Cherry Tomato Quiche. We looked at key ingredients, step-by-step instructions, and useful tips. You learned ways to personalize your quiche and keep it fresh. In the end, making quiche is fun and flexible. With practice, you will impress everyone with your cooking skills! Enjoy experimenting with flavors and sharing your delicious quiche with others.
Corn and Cherry Tomato Quiche Tasty Comfort Dish
Are you ready to enjoy a warm slice of Corn and Cherry Tomato Quiche? This tasty comfort dish combines sweet corn and juicy cherry tomatoes
- 4 cups ripe tomatoes, chopped - 1 tablespoon olive oil - 1 cup cornmeal - 1 cup all-purpose flour - 1 cup shredded sharp cheddar cheese - 1 teaspoon granulated sugar - 1 teaspoon sea salt - 1/2 teaspoon freshly ground black pepper - 1 teaspoon dried oregano - 1/2 teaspoon garlic powder - 1/4 cup unsalted butter, melted - 1 cup buttermilk or whole milk - Fresh basil leaves, for garnish The main ingredients for this dish are simple yet delicious. You need ripe tomatoes, which bring a bright and juicy flavor. The olive oil adds richness and helps cook the tomatoes. Cornmeal gives the cobbler its hearty texture, while all-purpose flour balances it out. Sharp cheddar cheese melts beautifully and adds depth to every bite. For the seasonings, sugar helps to enhance the sweetness of the tomatoes. Sea salt and black pepper bring out the flavors. Dried oregano and garlic powder add an aromatic touch that makes the dish sing. The melted butter provides moisture, while buttermilk or whole milk gives the batter a creamy consistency. Finally, fresh basil leaves are perfect for garnish. They add a pop of color and a fresh taste. For the full recipe, check out the details and see how you can make this savory delight! First, heat one tablespoon of olive oil in a large skillet over medium heat. Once the oil is hot, add in four cups of chopped ripe tomatoes. Stir them around for about five to seven minutes. Add one teaspoon of sugar, one teaspoon of sea salt, half a teaspoon of black pepper, one teaspoon of dried oregano, and half a teaspoon of garlic powder. These seasonings really boost the flavor. Cook until the tomatoes soften and release their juices, then take the skillet off the heat. In a mixing bowl, combine one cup of cornmeal, one cup of all-purpose flour, one tablespoon of baking powder, and half a teaspoon of baking soda. Whisk these dry ingredients together until they are well mixed. Next, fold in one cup of shredded sharp cheddar cheese. This adds a nice cheesy flavor to the batter. In another bowl, whisk together one cup of buttermilk or whole milk and a quarter cup of melted unsalted butter. This mix will add moisture. Gradually pour the wet mixture into the dry ingredients and stir carefully. Be sure not to overmix. This helps keep the cobbler light and fluffy. Grease a baking dish that is about 9x13 inches. Pour the cooked tomato mixture into the bottom of the dish, spreading it out evenly. Now, using a spoon, dollop the cornbread batter over the tomatoes. Spread it gently to cover the tomatoes as much as possible. Preheat your oven to 400°F (200°C). Place the baking dish in the oven and bake for 25 to 30 minutes. To check for doneness, insert a toothpick into the center. If it comes out clean, your cobbler is ready. Once done, let it cool for about ten minutes before serving. This will help the layers firm up nicely. You can find the Full Recipe to explore more details. To achieve the perfect sauté, start with ripe tomatoes. Cut them into bite-sized pieces. Heat the olive oil in a large skillet over medium heat. Add the tomatoes once the oil shimmers. Sauté for about 5-7 minutes. Stir gently to avoid breaking the tomatoes too much. This will help them soften and release their juices. After sautéing, let the mixture cool. Cooling helps the flavors blend and prevents the batter from cooking prematurely. To ensure a fluffy cobbler, avoid overmixing the batter. Overmixing can make it dense. Mix just until the dry and wet ingredients combine. It’s okay if there are a few lumps. Also, use ingredients at room temperature. Cold ingredients can lead to a tougher texture. When you add melted butter and milk, the warmth helps the batter rise better. This cobbler pairs well with a fresh green salad. The bright greens balance the rich flavors. Serve the cobbler warm for the best taste. It’s great on its own, but a dollop of sour cream adds a nice touch. Enjoy it with a light vinaigrette salad for a complete meal. You can find the full recipe to try this delightful dish! {{image_4}} You can change the cheese in this recipe. Try mozzarella for a milder taste. Feta brings a nice tang. You can also mix in any cheese you love. For veggies, try zucchini, bell peppers, or even corn. Fresh herbs like thyme or rosemary add great flavor too. To make a gluten-free version, swap the all-purpose flour with a gluten-free blend. Look for blends that contain brown rice flour or almond flour. These will keep the texture light and fluffy. You can also use corn flour for a more cornmeal-rich taste. If you love heat, add sliced jalapeños to the tomato mix. You can also drizzle some hot sauce on top before serving. For extra flavor, mix in spices like cayenne pepper or smoked paprika. These will give your cobbler a nice kick! To keep your cobbler fresh, store it in an airtight container. Place it in the fridge right after it cools. It will stay good for about three days. If you want to keep it longer, freeze it. To freeze the cobbler, cut it into portions. Wrap each piece tightly in plastic wrap and place it in a freezer bag. You can freeze it for up to three months. To reheat, let it thaw in the fridge overnight. Then, bake it in the oven at 350°F (175°C) until warmed through for best results. You can get creative with leftovers! Try making a breakfast casserole by adding eggs and cheese. You can also use the cobbler as a savory base for a salad. Just crumble it up and mix it with greens and your favorite dressing. A Cornmeal Cheddar Tomato Cobbler is a savory dish. It combines fresh tomatoes, cornmeal, and cheddar cheese. The dish features a soft, cornbread-like topping. You layer the topping over cooked tomatoes. This creates a warm, hearty meal. The flavors blend well together. The cheese adds a rich taste, while tomatoes provide brightness. Each bite offers a mix of textures. You can serve it as a side or a main dish. Yes, you can prepare the cobbler ahead of time. Cook the tomato mixture and store it in the fridge. Make the cornbread batter separately. You can refrigerate the batter too. When you are ready, combine them and bake. This method saves time on busy days. The cobbler stays fresh for about three days in the fridge. If your cobbler turns out too dry, add more moisture. You can drizzle extra buttermilk or milk over the top. Another option is to mix in a bit of olive oil. This helps keep the dish moist. Always check the baking time and oven temperature. Overbaking can lead to dryness. Yes, this dish is naturally vegetarian. All the main ingredients are plant-based. If you want a vegan version, swap the cheese with a plant-based option. You can also use non-dairy milk instead of buttermilk. This way, you keep the flavors without any animal products. Enjoy the same savory taste while meeting dietary needs. Cornmeal cheddar tomato cobbler is a tasty, easy dish to make. You need ripe tomatoes, cornmeal, cheddar cheese, and a few seasonings. Sauté the tomatoes, mix the batter, and bake for a warm treat. Try the tips for perfecting your dish and explore different variations. Remember to store leftovers properly so you can enjoy them later. This dish is versatile and can fit your tastes or diet needs. It's a great choice for gatherings or family meals. Enjoy sharing this simple yet delicious recipe!
Cornmeal Cheddar Tomato Cobbler Simple and Savory Dish
If you’re looking for a simple, savory dish that bursts with flavor, you’ve found it! My Cornmeal Cheddar Tomato Cobbler is a treat for your