Dinner

- 2 large boneless, skinless chicken breasts - 2 tablespoons extra virgin olive oil - 1 teaspoon garlic powder - 1 teaspoon onion powder - 1 teaspoon smoked paprika - 1 teaspoon dried oregano - 1 teaspoon dried thyme - Salt and pepper - Juice of 1 fresh lemon - Chopped fresh parsley for garnish Gather these ingredients first. Fresh ingredients will give your chicken the best taste. The olive oil helps keep the chicken moist. The spices add great flavor to each bite. Using lemon juice gives a nice zing. Fresh parsley adds a pop of color and taste. For the chicken, I love using large, boneless, and skinless breasts. They cook evenly and stay juicy. The garlic and onion powder blend well for a savory kick. Smoked paprika adds a hint of smokiness that elevates the dish. Oregano and thyme bring herbal notes that balance the flavors. Don’t forget salt and pepper to enhance everything. These simple ingredients work together to make your chicken shine. When you combine them, you create a dish that is hard to resist. For the full recipe, check out the cooking instructions that follow. This dish is easy, flavorful, and perfect for any meal. 1. Preheat the oven to 400°F (200°C). This helps cook the chicken evenly. 2. In a small bowl, mix garlic powder, onion powder, smoked paprika, oregano, thyme, salt, and pepper. This spice blend adds great flavor. 3. Take the chicken breasts and pat them dry with paper towels. This step helps the chicken get a nice sear. 4. Drizzle olive oil over the chicken breasts. Make sure they are coated well. 5. Sprinkle the spice mix on both sides of the chicken. Rub it in gently to help the flavors stick. 1. Place the seasoned chicken in a baking dish. Lay them flat and don’t overlap them. 2. Squeeze fresh lemon juice over each chicken breast. This gives a bright taste. 3. Bake the chicken for 20-25 minutes. Use a meat thermometer to check. The chicken should reach 165°F (75°C) inside. 4. After baking, take the chicken out and let it rest for 5 minutes. This helps the juices stay inside. 1. To plate the baked chicken, slice it nicely and arrange it on a plate. 2. Serve over steamed veggies or with a light salad for a healthy balance. 3. Add a lemon wedge on the side. This makes it look nice and lets guests add extra flavor. For the complete recipe, check the [Full Recipe]. Patting the chicken dry is key. This step helps the seasoning stick and prevents steaming. If the chicken is wet, it won’t get nice and crispy on the outside. For best results, bake your chicken at 400°F (200°C). This temperature seals in moisture while cooking evenly. Bake for 20-25 minutes. Always check the chicken's internal temperature. It should reach 165°F (75°C) for safety. Citrus and herbs bring amazing flavor. Fresh lemon juice elevates the dish. Try using fresh herbs like rosemary or thyme for more taste. You can also marinate the chicken ahead of time. A simple mix of olive oil, lemon juice, and garlic works great. Let it sit in the fridge for at least 30 minutes. This soaking time makes the chicken tender and flavorful. Overcooking is a common mistake. If you bake the chicken too long, it can dry out. Use a meat thermometer to check doneness. Look for an internal temperature of 165°F (75°C). If you cut the chicken and the juices run clear, it’s ready. Let the chicken rest for 5 minutes after baking. This step allows juices to settle, keeping the chicken moist. For a full, detailed recipe, refer to the [Full Recipe]. {{image_4}} You can change the taste of your baked chicken easily. Adding different spices or marinades can create a new dish each time. Try cumin for a warm flavor or chili powder for a kick. You can also add some soy sauce or honey for a sweet glaze. Mixing herbs can also make a big difference. A blend of rosemary, basil, and thyme gives your chicken a fresh taste. Experiment with your favorites. The more you try, the more fun it is! Baking is great, but you can also grill or pan-sear your chicken. Grilling gives it a smoky flavor that many love. Just remember to watch the time, so it stays juicy. Pan-searing is fast and gives a nice crust. If you're in a hurry, use an air fryer. It cooks quickly and keeps the chicken juicy. Plus, it uses less oil, which is a bonus for health. You can get creative when serving your chicken. Turn it into a salad or wrap for a quick lunch. Just slice the chicken and mix it with greens and your favorite dressing. You can also add it to pasta dishes or stir-fries. It works well with veggies and sauces. Just toss everything together for a tasty meal. For the full recipe, don't forget to check out the instructions I shared! To keep your juicy baked chicken breast fresh, store it correctly. First, let the chicken cool down. Then, place it in an airtight container. This helps keep moisture in and prevents any bad smells. Make sure to refrigerate leftovers within two hours of cooking. Always use leftovers within three to four days for the best taste. If you want to save your chicken for longer, try freezing it. Wrap the chicken tightly in plastic wrap or foil. Then, place it in a freezer-safe bag. This way, it can last up to three months. Remember to label the bags with the date! When reheating your chicken, you want to keep it juicy. One great method is to use the oven. Preheat your oven to 350°F (175°C). Place the chicken in a baking dish, and cover it with foil. This keeps the moisture in. Heat for about 15-20 minutes, or until warm. Another option is using a microwave. Place the chicken on a microwave-safe plate. Add a splash of water and cover it with a lid. Heat in short bursts of 30 seconds to avoid drying it out. You can also get creative with leftovers! Chop the chicken and toss it in salads or wraps. You can even add it to pasta dishes for a quick meal. Knowing how long your chicken stays fresh is key. In the fridge, cooked chicken lasts about three to four days. If you freeze it, it stays good for about three months. Always check for signs of spoilage. If the chicken smells sour or looks off, it's best to discard it. You want to enjoy your meal, not risk your health! For more details on making this dish, check out the Full Recipe. To make chicken breast tender, you can use a few great techniques. First, pat the chicken dry with paper towels. This helps the spices stick better. Next, use a marinade with acid, like lemon juice or vinegar. This breaks down proteins and keeps the meat juicy. You can also bake the chicken gently. Cooking it at the right temperature helps keep it moist. The best temperature to bake chicken breast is 400°F (200°C). This heat cooks the chicken evenly and keeps it juicy. Make sure to use a meat thermometer. The chicken should reach an internal temperature of 165°F (75°C) to be safe to eat. Yes, you can marinate chicken overnight! Marinating adds flavor and moisture to the meat. Use a mix of oil, acid, and spices for the best results. Just make sure not to leave it too long in acidic marinades. This can make the chicken mushy. You can serve baked chicken with many tasty sides. Steamed vegetables, like broccoli or carrots, work well. A fresh salad with greens and a tangy dressing is also a great choice. You could also serve it with rice or quinoa for a hearty meal. Mashed potatoes or roasted sweet potatoes add comfort and flavor. Baking chicken breast at 400°F takes about 20-25 minutes. The exact time may change based on the size of the chicken breasts. Use a meat thermometer to check for doneness. The chicken should reach 165°F (75°C) in the thickest part. Let it rest for 5 minutes after cooking for the best taste. For the full recipe, you can check out the main article. Baking chicken breast can be simple and rewarding. We explored the ingredients, preparation, and cooking steps to achieve juicy chicken. Use the tips and variations to add your personal touch. Proper storage ensures you enjoy leftovers without waste. Remember to keep your chicken tender and watch for doneness. With these techniques, you can serve delicious meals again and again. Stay confident in your cooking journey!
Juicy Baked Chicken Breast Flavorful and Easy Recipe
Are you tired of dry, bland chicken? Let’s fix that with my juicy baked chicken breast recipe! This easy dish bursts with flavor and impresses
For Skillet Zucchini, Corn, and Peppers, you need: - 2 medium zucchinis, sliced into half-moons - 1 cup corn kernels (fresh or frozen) - 1 red bell pepper, diced - 1 yellow bell pepper, diced - 1 small red onion, finely chopped - 2 cloves garlic, minced - 2 tablespoons olive oil - 1 teaspoon smoked paprika - 1 teaspoon dried thyme - Salt and pepper, to taste - Fresh basil leaves, for garnish I always choose fresh, high-quality veggies for the best taste. Look for firm zucchinis that have smooth skin. The bell peppers should be bright and shiny. If you can, use fresh corn; it adds a sweet crunch. For the onion and garlic, select ones that feel heavy and have no soft spots. Use extra virgin olive oil for rich flavor. If you don’t have zucchini, try yellow squash instead. You can swap bell peppers for other colors like green or orange. Canned corn works if fresh or frozen isn't available. Dried herbs can replace fresh herbs if needed. For a kick, add a pinch of red pepper flakes. Check out the Full Recipe for more tips! To make this dish, you start with a large skillet. Pour in the olive oil and heat it over medium heat. Add the chopped red onion and minced garlic. Sauté these for about three minutes until the onion looks clear. You will smell a lovely aroma. Next, add the diced red and yellow bell peppers. Cook them for four to five minutes. Stir often until they soften and their flavors mix well. Then, add the sliced zucchini. Stir gently and let it cook for five minutes. You want the zucchini to be tender but still a bit crunchy. After this, fold in the corn, smoked paprika, and dried thyme. Season with salt and pepper. Cook for another two to three minutes. This step ensures the corn heats up and the spices blend nicely. Once everything is well mixed and cooked, take the skillet off the heat. Garnish with fresh basil leaves for an extra burst of flavor. To really enhance the taste, use fresh ingredients whenever you can. Fresh zucchini, corn, and peppers will make a big difference. When you sauté the onion and garlic, don’t rush. Let them cook until they are fragrant. This builds a great base for flavor. Using smoked paprika adds a nice depth. It gives the dish a warm, smoky twist. You can adjust the amount based on your taste. If you like a bit of heat, add a pinch of red pepper flakes. - Heat oil: 1 minute - Sauté onion and garlic: 3 minutes - Cook bell peppers: 4-5 minutes - Add zucchini: 5 minutes - Stir in corn and spices: 2-3 minutes Each step is quick. The total cooking time is about 20 minutes. This makes it easy to whip up a tasty meal any night. For the full recipe, check the details above. To sauté vegetables well, heat your pan first. Use medium heat to avoid burning. Add olive oil once the pan is hot. This helps the veggies cook evenly. Start with onions and garlic for a flavorful base. Cook them until they are soft and fragrant. Then, add peppers and zucchini. Keep stirring to prevent sticking. Remember to check the texture. You want them tender but still crunchy. To boost flavor, try smoked paprika and dried thyme. These spices add warmth and depth. Season with salt and pepper as you go. Taste your dish often. Adjust the seasoning based on your preference. Fresh herbs like basil can elevate the dish even more. Add them at the end for a bright finish. A squeeze of lemon juice can also enhance the flavors. One common mistake is overcrowding the pan. If you add too many veggies, they will steam instead of sauté. This can lead to soggy vegetables. Another mistake is not using enough oil. Oil helps with cooking and adds flavor. Finally, avoid cooking too long. Overcooking can make the veggies mushy. Follow these tips to make your Skillet Zucchini, Corn, and Peppers shine. For the complete instructions, check the Full Recipe. {{image_4}} You can boost the nutrition of Skillet Zucchini, Corn, and Peppers by adding proteins. Chicken breast, shrimp, or tofu can work well here. If you choose chicken, dice it into small pieces. Sauté the chicken first until it's fully cooked. Then, follow the recipe as normal. For shrimp, add them when the veggies are almost done. Cook until they turn pink. Tofu is another great option. Just cube it and sauté until golden before adding your veggies. This dish is naturally vegetarian and can easily be made vegan. To keep it vegan, just check your ingredients. Ensure the olive oil is pure and your seasonings are vegan-friendly. If you want richness, consider adding a splash of coconut milk or a dash of nutritional yeast. These will add creaminess without dairy. You can also toss in some beans like black beans or chickpeas for extra protein. Feel free to get creative with your veggies! You can switch out the bell peppers for any color you like. Carrots, summer squash, or even broccoli make great additions. Just cut them into small pieces so they cook evenly. You can also add leafy greens like spinach or kale at the end. They wilt quickly and add great flavor. This dish is all about using what you have on hand. Don't hesitate to mix and match! For the full recipe, check out the main article. To keep your skillet zucchini, corn, and peppers fresh, store them in an airtight container. Let the dish cool down before sealing. This helps prevent moisture build-up, which can make the veggies soggy. Place the container in the fridge. It will stay good for about 3 to 4 days. When you are ready to eat the leftovers, reheat them in a skillet over medium heat. Add a splash of olive oil for extra flavor. Stir the dish gently until it is heated through. This should take about 5 minutes. You can also use the microwave. Heat in short bursts, about 30 seconds at a time, until warm. If you want to freeze the dish, let it cool completely first. Transfer it to a freezer-safe container or bag. It can last for up to 3 months in the freezer. When you are ready to eat, thaw it overnight in the fridge. Reheat as mentioned above. This way, you will enjoy the flavors just like fresh! Check out the Full Recipe for more tips. It takes about 20 minutes to make Skillet Zucchini, Corn, and Peppers. You can prep the ingredients in 10 minutes. The cooking time is around 10 minutes. This quick dish fits well into a busy day. Yes, you can make this dish ahead of time. Cook it and let it cool. Store it in an airtight container in the fridge. You can reheat it when you are ready to eat. The flavors will still be great! This dish pairs well with many sides. Consider serving it with rice or quinoa for a filling meal. A fresh salad also complements the flavors nicely. You can serve it with grilled chicken or fish for a protein boost. Yes, this recipe is gluten-free. All the ingredients used are naturally gluten-free. You can enjoy it without worry. It’s a great option for those with gluten sensitivities. This blog focused on making a tasty dish with zucchini, corn, and peppers. We covered key ingredients and their quality. You learned step-by-step instructions for cooking and timing. I provided tips to avoid common mistakes and enhance flavors. We also explored variations, storage tips, and answered FAQs. Cooking can be simple and fun. Now you can create a delicious meal that suits your taste. Enjoy making this dish and share it with your loved ones.
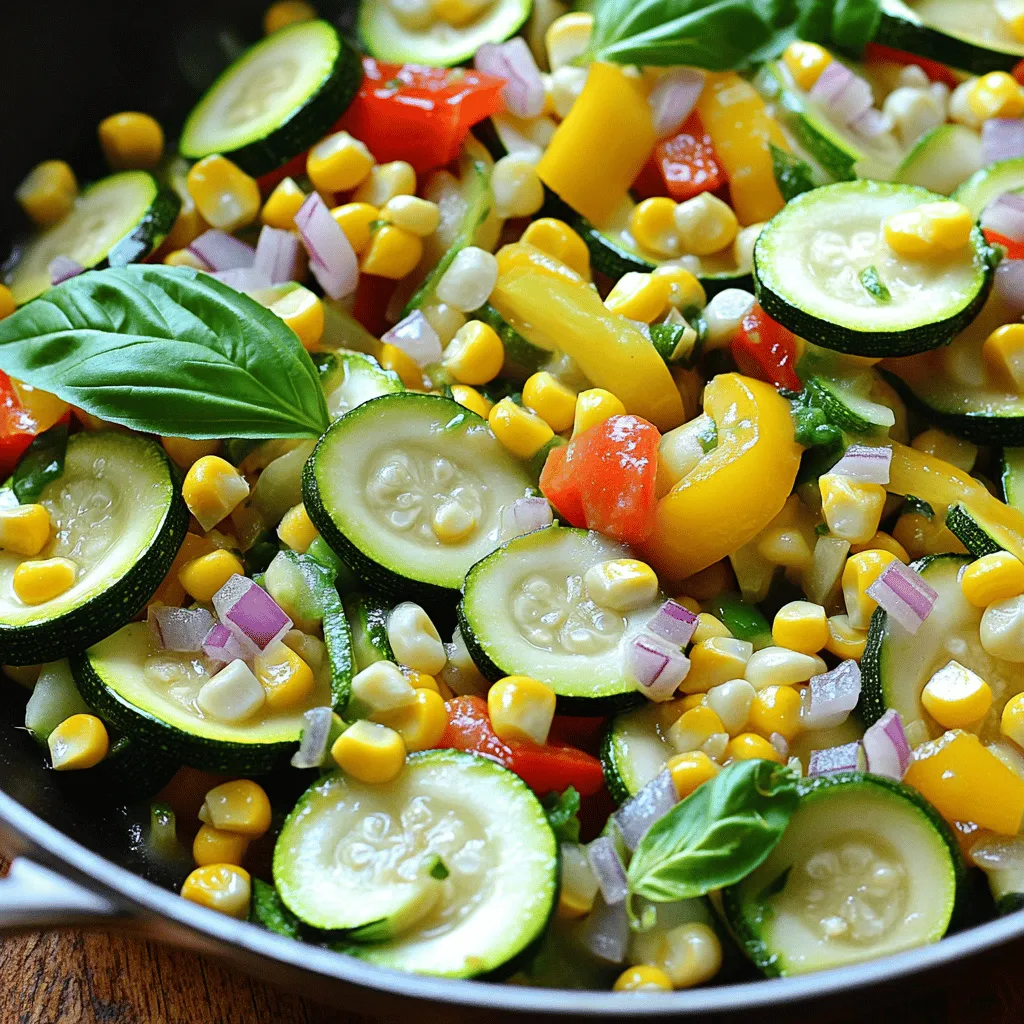
Skillet Zucchini, Corn, and Peppers Flavorful Dish
Are you ready to spice up your dinner? In this post, I’ll share a simple and tasty recipe for Skillet Zucchini, Corn, and Peppers. You’ll
- 1 lb ground beef (lean preferred) - 1 large zucchini, diced - 1 cup basmati rice - 2 cups vegetable broth - 1 small onion, finely chopped - 2 cloves garlic, minced - 1 teaspoon dried oregano - 1 teaspoon ground cumin - 1/2 teaspoon paprika - Salt and pepper to taste - 2 tablespoons olive oil - 1 cup cherry tomatoes, halved - 1/2 cup feta cheese, crumbled - Fresh parsley, roughly chopped for garnish Gathering the right ingredients is key to making this Greek Beef and Zucchini Rice Bowl truly special. The main ingredients provide a hearty base. Ground beef gives protein and flavor. Zucchini adds a fresh crunch. Basmati rice serves as a soft, fluffy canvas. Vegetable broth enhances the rice with rich taste. Flavor enhancers turn up the taste. Onions and garlic add depth. Oregano and cumin bring a warm, earthy note, while paprika adds a subtle hint of smoke. Salt and pepper balance all the flavors. Olive oil helps cook everything to perfection. Finally, garnishes give a pop of color and taste. Cherry tomatoes add sweetness and juiciness. Feta cheese gives a creamy, salty touch. Fresh parsley brightens up the bowl. For the full recipe, check out the detailed instructions. This bowl is not just a meal; it’s a celebration of flavors and textures! - Rinse basmati rice under cold running water until clear. - Toast rice in olive oil with chopped onion and minced garlic. To start, rinsing the basmati rice is key. This step removes excess starch and makes the rice fluffy. I rinse the rice until the water runs clear. This usually takes a minute or two. Once rinsed, I drain it well and set it aside. Next, I heat olive oil in a medium pot over medium heat. I add the chopped onion and sauté it for about three to four minutes. I stir until the onion becomes soft and fragrant. Then, I add minced garlic and cook it for about 30 seconds. The smell is amazing! After that, I toss in the rinsed rice. I toast it for one to two minutes while stirring. This adds a nice flavor before cooking. - Brown ground beef in skillet and season with spices. - Add diced zucchini and cherry tomatoes, sauté until tender. While the rice cooks, I heat more olive oil in a large skillet over medium-high heat. I add the ground beef and break it apart as it cooks. I brown the beef for about five to seven minutes. Once it’s brown, I season it with dried oregano, ground cumin, paprika, salt, and pepper. The spices bring out the flavor in the beef. Next, I stir in diced zucchini and halved cherry tomatoes. I sauté them for about five minutes. This helps the zucchini stay crunchy while cooking. The colors in the skillet are so vibrant and inviting! - Fluff cooked rice and divide into servings. - Top rice with beef mixture and garnishes. Once the rice is done cooking, I take a fork and fluff it gently. Then, I divide the rice into four bowls. I top each bowl with the beef and vegetable mixture. It looks delicious! For a final touch, I sprinkle crumbled feta cheese and chopped parsley over each serving. The creamy cheese and fresh parsley add a burst of flavor. This Greek Beef and Zucchini Rice Bowl is now ready to enjoy! If you want to try this recipe, check out the Full Recipe for all the details. - Rinse the basmati rice well to keep it fluffy. This step removes excess starch. - Avoid overcooking zucchini to keep its desired crunch. Cook it just until tender. - Serve with lemon wedges for a zesty kick. The bright flavor enhances the dish. - Use colorful bowls to make your meal look more inviting. A fun presentation sparks joy. - Feel free to experiment by adding olives or bell peppers. These ingredients add unique tastes. - Adjust spices based on your personal taste. Every cook has a different flavor preference. These tips will help you create a delicious Greek Beef and Zucchini Rice Bowl. For the complete recipe, check the Full Recipe section. {{image_4}} You can easily switch out some ingredients to suit your taste. For a lighter option, use ground turkey or chicken instead of beef. These meats still give great flavor but cut down on fat. If you want to try something different, substitute quinoa for basmati rice. Quinoa cooks quickly and adds a nice texture to the dish. To make this dish even more exciting, consider adding fresh herbs like dill or mint. These herbs bring a burst of freshness that pairs well with the beef and zucchini. You can also incorporate spices like cinnamon. This spice adds warmth and depth to your meal, making each bite feel special. If you're looking for a plant-based option, use vegan ground meat. It works well in this dish and keeps the flavors intact. For those who want to skip dairy, simply omit the feta cheese. Your bowl will still taste great, and it makes the dish dairy-free. For the full recipe details, check out the [Full Recipe]. After enjoying your Greek Beef and Zucchini Rice Bowl, store any leftovers right away. Place them in airtight containers. This keeps your food fresh. Store it in the refrigerator for up to three days. To enjoy your meal again, reheat it easily. You can use a microwave, which is quick. If you prefer, warm it on the stovetop. Just add a splash of broth to keep things moist. Reheat until it's hot all the way through. If you want to save some for later, freezing works well. Place portions in freezer-safe containers. This way, you can enjoy it for up to two months. When you're ready to eat, just thaw it in the fridge overnight. Enjoy your meal whenever you want! You can serve many tasty sides with this dish. Greek salad is a perfect match. It adds fresh veggies and tangy flavors. Pita bread is another great choice. You can dip it in the beef mix or use it to scoop. Both options complement the rice bowl well. Yes, you can make this dish ahead of time. It’s great for meal prep! Cook the beef and veggies, then store them in the fridge. Keep the rice separate to avoid sogginess. When ready to eat, just heat everything together. This way, you enjoy a warm, tasty meal. You can easily adjust the spice level to fit your taste. If you like more heat, add some red pepper flakes. For a milder dish, cut back on the cumin and paprika. Taste as you go to find the right balance. Cooking should be fun and suited to your preferences! The total time to make this Greek Beef and Zucchini Rice Bowl is 35 minutes. This includes 15 minutes for prep. It serves four people, making it great for family meals or meal prep. You’ll have a delicious dish ready in no time! For the full recipe, check it out in the earlier section. This blog post shared a simple recipe for a Greek Beef and Zucchini Rice Bowl. You learned about the main ingredients, flavor enhancers, and garnishes. We covered easy steps to prepare the dish and tips for cooking and presenting it well. You can adapt the recipe to your taste with various substitutions and dietary options. Enjoy making this dish! It's not just tasty but also flexible and fun to customize.
Greek Beef and Zucchini Rice Bowl Flavorful Delight
Are you ready for a tasty meal that’s easy to make? The Greek Beef and Zucchini Rice Bowl is a vibrant dish packed with flavor
- 2 medium zucchinis, sliced into half-moons - 8 oz (about 225g) mushrooms, sliced (cremini or button) - 2 tablespoons olive oil - 2 cloves of garlic, finely minced - 1 teaspoon fresh thyme leaves or ½ teaspoon dried thyme - ¼ teaspoon red pepper flakes (optional) - Salt and freshly ground black pepper to taste - 1 tablespoon balsamic vinegar - Fresh parsley for garnish The key to great sautéed zucchini with mushrooms is fresh ingredients. When choosing zucchinis, look for firm ones with smooth skin. They should feel heavy for their size. For mushrooms, select ones that are plump and free from dark spots. This helps ensure you get the best flavor and texture. Using olive oil adds richness and helps sauté the veggies evenly. Garlic gives a warm, aromatic taste. Fresh thyme adds a light herbal note. If you like heat, the red pepper flakes kick things up a notch. Balance the dish with salt and black pepper to enhance all the flavors. Balsamic vinegar adds a sweet, tangy finish that brightens the whole dish. Finally, fresh parsley serves as a beautiful garnish. It also adds a fresh flavor that makes your dish pop visually and taste-wise. For the full recipe, check out the details above. You'll love how these simple ingredients come together to create a vibrant, healthy dish. Enjoy this delightful mix of flavors in every bite! - Clean and slice zucchinis and mushrooms. - Mince garlic and chop parsley. First, you need to clean your zucchinis and mushrooms. Rinse them well under cold water to remove dirt. Slice the zucchinis into half-moons. Aim for even sizes to ensure they cook evenly. Then, slice your mushrooms thinly. You can choose cremini or button mushrooms based on your taste. Next, mince the garlic finely. This helps release its flavor. Finally, chop fresh parsley for garnish later. - Heat olive oil in skillet. - Sauté garlic until fragrant. - Add mushrooms and cook until browned. - Incorporate zucchini and seasoning. In a large skillet, heat the olive oil over medium heat. Wait until the oil shimmers but does not smoke. Once hot, add the minced garlic. Sauté for about 30 seconds until fragrant and lightly golden. Be cautious not to burn the garlic, as it can turn bitter. Next, add the sliced mushrooms. Stir them occasionally and let them cook for about 4-5 minutes until they brown nicely. This step brings out their rich flavor. Then, gently add the zucchini. Sprinkle in fresh thyme, red pepper flakes if you like heat, and a good pinch of salt and pepper. Sauté everything for an additional 4-5 minutes. You want the zucchini to be tender but still have a slight crunch. - Drizzle with balsamic vinegar. - Taste and adjust seasoning. - Transfer to serving dish and garnish. To finish, drizzle balsamic vinegar over the sautéed veggies. This adds a tangy kick that brightens the dish. Stir well to combine and let it cook for another minute. This helps meld all the flavors together. Once done, taste the dish. Adjust the seasoning if needed. Finally, transfer the sautéed zucchini and mushrooms to a serving dish. Garnish with the fresh parsley you chopped earlier. This adds color and flavor to your meal. For the full recipe, refer to the complete guide. How to select fresh vegetables When choosing zucchinis, look for firm ones with smooth skin. They should feel heavy for their size. For mushrooms, pick ones that are dry and firm. Avoid any that are slimy or bruised. Fresh herbs should have bright colors and no dark spots. Best techniques for sautéing Start with a hot skillet. This helps the veggies cook evenly. Use enough oil to coat the bottom without pooling. Add your garlic first, and watch it closely so it doesn't burn. Then, add mushrooms before the zucchini. This way, the mushrooms release moisture and get tender. Using different herbs and spices To change the taste, try fresh basil or oregano instead of thyme. You can also add a pinch of cumin or smoked paprika for warmth. A squeeze of lemon juice can brighten the dish. Adding protein options for a complete meal To make this a full meal, add cooked chicken or shrimp. You can also toss in some chickpeas or black beans for a vegetarian option. These additions give your dish extra flavor and nutrients. For the full recipe, check out the Full Recipe. {{image_4}} You can easily swap out veggies in this dish. Try bell peppers, asparagus, or spinach. These choices add color and flavor. If you want a different taste, use squash or eggplant. For vegan or gluten-free options, this recipe is already great! Just ensure you use gluten-free balsamic vinegar. You can also add plant-based cheese if you like a creamy touch. Grilling offers a smoky flavor that works well with zucchini and mushrooms. Simply toss the vegetables in olive oil and seasonings. Place them on a grill and cook until tender. Roasting adds depth to the veggies as well. To roast, preheat your oven to 425°F (220°C). Spread the zucchini and mushrooms on a baking sheet. Drizzle with olive oil and season. Roast for 20 minutes, turning halfway. This method brings out natural sweetness. Explore these options for a new twist! Check the Full Recipe for more details. To keep your sautéed zucchini with mushrooms fresh, cool it down first. Spread it out on a plate to speed up cooling. Once it's cool, transfer it to a container. I recommend using an airtight glass or plastic container. This will help keep the flavors locked in. Store it in the fridge for up to three days. If you want to save it for longer, you can freeze sautéed zucchini with mushrooms. Let the dish cool completely. Then, pack it in a freezer-safe bag or container. Remove as much air as possible before sealing. This helps prevent freezer burn. You can freeze it for up to three months. When you’re ready to enjoy it again, reheat the dish. You can do this in a skillet on medium heat. Stir it gently until it’s hot. You can also microwave it in a bowl. Heat it in short bursts, stirring in between. This will help it warm evenly. Enjoy the flavors just like when you first made it! For a full recipe, check out the full recipe section above. Can I use frozen vegetables for this recipe? Yes, you can use frozen vegetables. However, fresh zucchini and mushrooms give the best taste. Frozen veggies may release more water, which can make the dish soggy. If using frozen, cook them longer to evaporate excess moisture. How do I prevent zucchini from becoming soggy? To keep zucchini firm, avoid overcooking it. Sauté it just until tender, about 4-5 minutes. Also, use high heat and spread the zucchini in one layer in the pan. This helps it cook evenly and retain its crunch. What can I serve with sautéed zucchini and mushrooms? Sautéed zucchini and mushrooms pair well with many dishes. You can serve them over quinoa or rice for a filling meal. They also make a great side for grilled chicken or fish. For a light touch, add a sprinkle of feta or Parmesan cheese. Check the Full Recipe for more serving ideas! In this post, you learned how to make a tasty dish with zucchini and mushrooms. We talked about the ingredients, preparation steps, cooking tips, and even how to store your dish. This recipe is easy to modify, so you can make it your own. Try different herbs or cooking methods to find what you like best. Enjoy your cooking and feel proud of your creation!
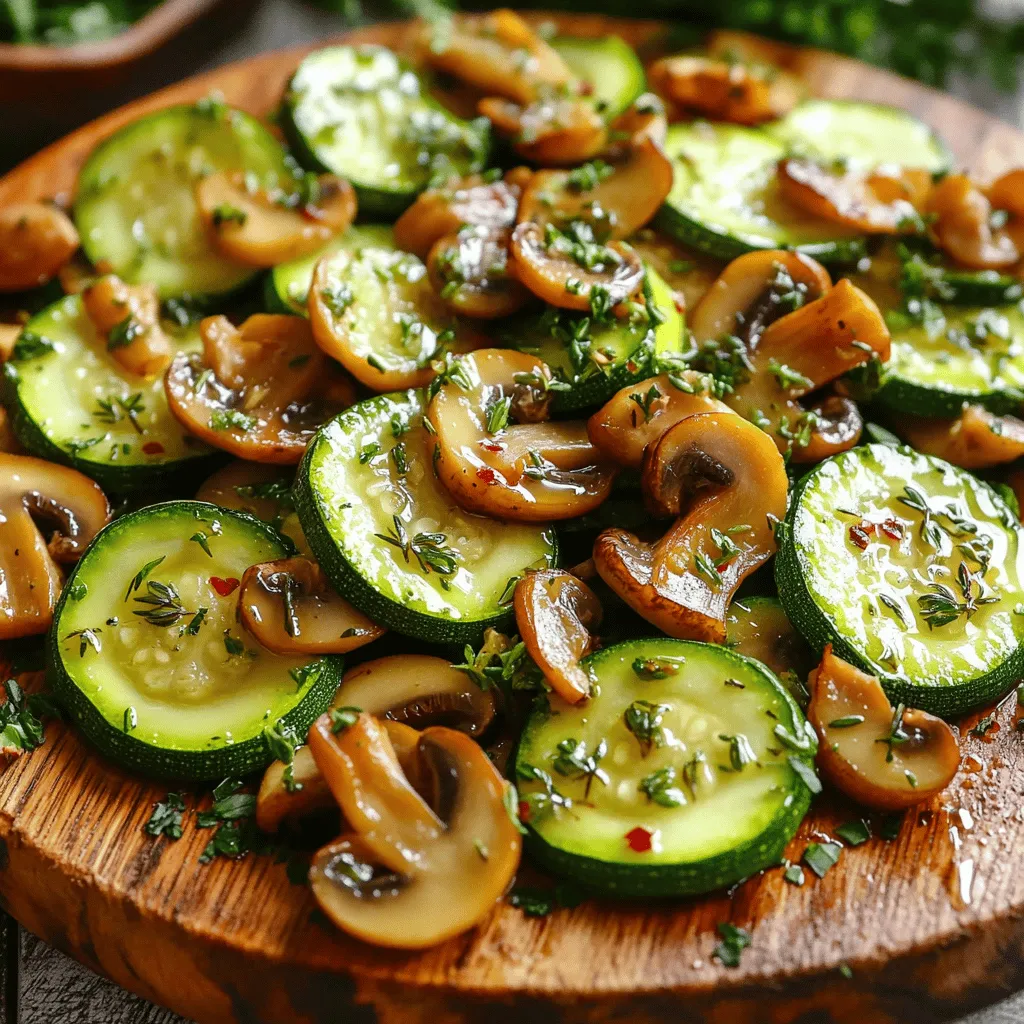
Sautéed Zucchini with Mushrooms Healthy Flavor Boost
Looking for a quick, healthy dish that bursts with flavor? Sautéed Zucchini with Mushrooms is your answer! This simple recipe celebrates fresh ingredients and vibrant
- 4 boneless, skinless chicken breasts - 1 tablespoon extra virgin olive oil - 4 cloves garlic, finely minced - 1 cup low-sodium chicken broth - 1 cup heavy cream - 1 teaspoon dried thyme - 1 teaspoon dried rosemary - Salt and freshly ground black pepper to taste - ½ cup freshly grated Parmesan cheese - Fresh parsley, finely chopped (for garnish) In this recipe, chicken breasts serve as the main star. They cook well and soak up flavors. Olive oil adds richness and helps in cooking. Garlic brings that famous flavor. Using low-sodium chicken broth keeps your dish balanced. Heavy cream provides a smooth texture and richness. Season with thyme and rosemary for depth. Salt and pepper enhance all the flavors. Parmesan cheese adds a savory touch. Finally, fresh parsley gives a bright finish. Each ingredient plays a role in making this dish shine. For the full recipe, check the Garlicky Cream-Infused Chicken Delight. Start by tenderizing the chicken breasts. Use a meat mallet to pound them to an even thickness. This helps them cook evenly. Next, season both sides with salt and freshly ground black pepper. Heat a large skillet over medium heat. Add one tablespoon of olive oil. Once hot, place the seasoned chicken breasts in the skillet. Cook for 6-7 minutes on each side. Look for a nice golden-brown crust. The chicken should reach an internal temperature of 165°F (75°C). When done, move the chicken to a plate and keep it warm. In the same skillet, add four cloves of minced garlic. Sauté the garlic for about one minute. Stir often to avoid burning. You want it to be fragrant and golden, not dark brown. Next, pour in one cup of low-sodium chicken broth. Scrape up any brown bits from the bottom of the pan. This adds flavor to your sauce. Bring the mixture to a gentle simmer for 2-3 minutes. Now, lower the heat and add one cup of heavy cream, along with one teaspoon of dried thyme and one teaspoon of dried rosemary. Let the sauce simmer for about five minutes. Stir occasionally until it thickens slightly. Gently fold in half a cup of freshly grated Parmesan cheese. Stir until the cheese melts and blends into the sauce. Taste it and adjust the seasoning with more salt and pepper if needed. Return the warm chicken breasts to the skillet. Make sure they are well-coated in the creamy garlic sauce. Let it all simmer together for another 2-3 minutes. When ready to serve, pour the creamy garlic sauce over the chicken. Garnish with finely chopped fresh parsley. This adds a pop of color and freshness. Enjoy your Garlicky Cream-Infused Chicken Delight! For the full recipe, you can refer to the earlier section. To make juicy chicken, start by tenderizing the breasts. Use a meat mallet to pound them evenly. This helps the chicken cook at the same rate. Then, season each side with salt and pepper. Cooking the chicken until it reaches an internal temperature of 165°F ensures it is safe to eat. Use a meat thermometer for accuracy. For a creamy sauce, it's important to let it simmer. After adding the cream, stir it gently. If the sauce is too thin, let it cook longer. This helps it thicken. Taste the sauce and adjust the seasoning. A pinch of salt or more pepper can enhance the flavor. Serve your creamy garlic chicken with sides like steamed veggies or pasta. These pair well with the rich sauce. For a creative touch, use a rustic plate or a wooden board. This makes the dish look appealing. A sprinkle of parsley adds color and freshness. {{image_4}} To make your creamy garlic chicken unique, try swapping some ingredients. If you want a lighter dish, use half-and-half instead of heavy cream. You can also try coconut cream for a dairy-free option. For cheese, Parmesan is great, but you can also use mozzarella or goat cheese for a different flavor. Adding veggies can boost flavor and nutrition. Spinach and mushrooms mix well in this dish. Simply sauté them with the garlic for a tasty twist. If you like spice, consider adding red pepper flakes or smoked paprika. This can give your dish a nice kick and make it more exciting. If you need a gluten-free meal, check your chicken broth to ensure it's gluten-free. Most brands are safe, but it's best to read labels. For a dairy-free version, use coconut milk, and skip the cheese. These swaps keep the creamy texture while fitting your dietary needs. Explore the Full Recipe for more ideas on how to make creamy garlic chicken a hearty delight! To store leftovers, let the chicken cool first. Place it in an airtight container. This keeps the chicken fresh and safe. You can store it in the fridge for up to three days. When you are ready to eat, reheat the chicken. I suggest using a skillet over medium heat. This helps keep the chicken moist. You can add a splash of chicken broth to the skillet. This adds flavor and helps prevent drying. Heat until warmed through, stirring the sauce to keep it creamy. Yes, you can freeze Creamy Garlic Chicken. Place it in a freezer-safe container. Make sure to label it with the date. You can keep it frozen for about two months. When you want to enjoy it again, thaw it in the fridge overnight. This helps maintain the flavor and texture. After thawing, reheat it in a skillet. Add a bit of cream or broth to restore the sauce's creamy texture. Enjoy your Garlicky Cream-Infused Chicken Delight again with this simple method! To achieve a crusty exterior on your chicken, start with even thickness. Use a meat mallet to pound the chicken breasts. Season them well with salt and pepper. Heat olive oil in your skillet until it shimmers. Cook the chicken for 6-7 minutes on each side. This will give you that golden-brown crust. Avoid overcrowding the pan, as this can cause steaming instead of searing. Yes, you can use frozen chicken breasts. However, you need to thaw them first for even cooking. The best way is to place the frozen chicken in the fridge overnight. If you're short on time, you can thaw them in cold water. Ensure you cook them longer to reach 165°F (75°C). This way, you can enjoy the creamy garlic chicken without any worries. Creamy Garlic Chicken pairs well with many sides. Here are some tasty options: - Steamed green vegetables (like broccoli or green beans) - Angel hair pasta to soak up the sauce - Mashed potatoes for a comforting touch - Rice, which complements the creamy sauce nicely These sides will enhance your meal and make it even more delightful. Enjoy exploring different combinations! This creamy garlic chicken is easy to make with simple ingredients. You first prepare the chicken, then create a rich sauce with garlic and cream. I shared tips to perfect your chicken and sauce, plus fun variations for taste. Don't forget to store leftovers properly. This dish is not only delicious but also flexible. With these tips, you can impress anyone at your table. Enjoy every bite!
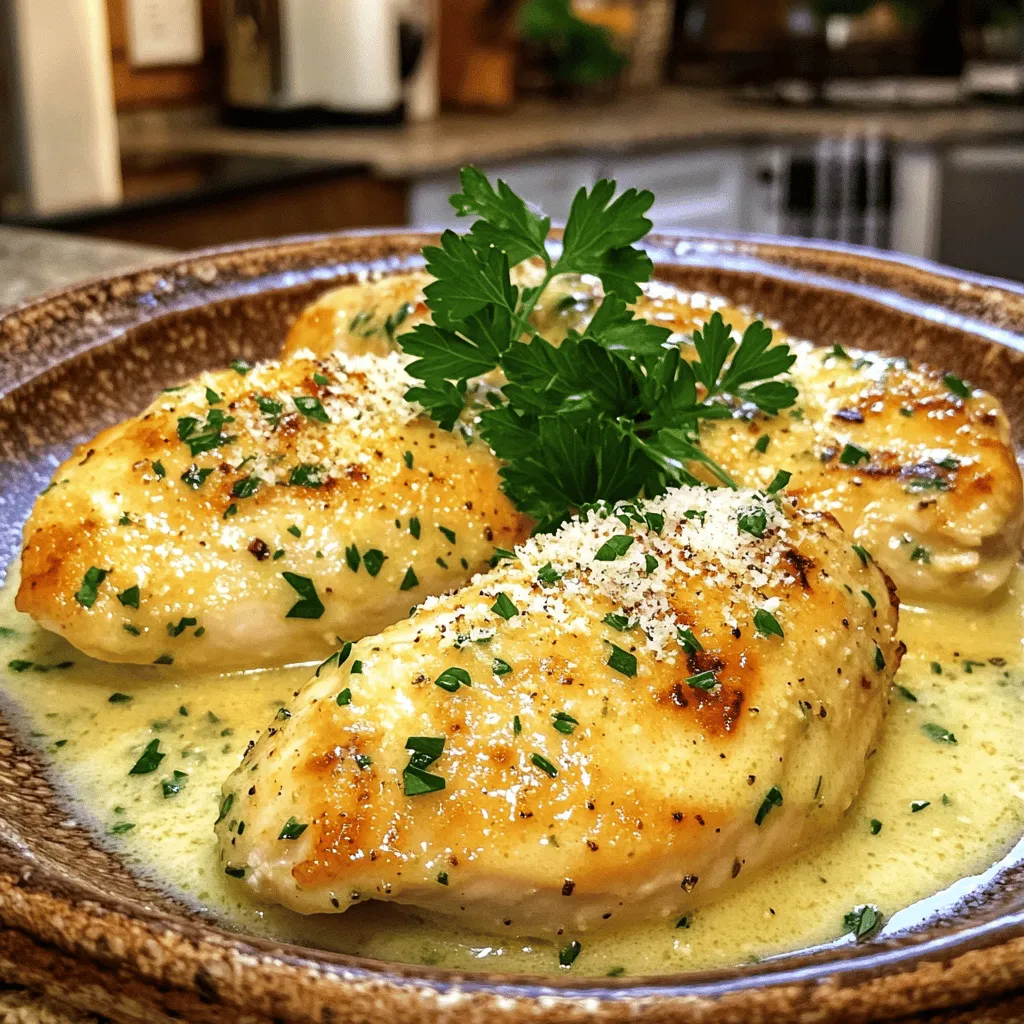
Creamy Garlic Chicken Hearty and Flavorful Delight
If you crave a dish that bursts with flavor and comfort, look no further! My Creamy Garlic Chicken is a hearty meal that impresses family
To make Zucchini Cornbread Casserole, gather these ingredients: - 2 medium zucchinis, finely grated - 1 cup sweet corn (can use fresh or frozen) - 1 cup cornmeal - 1 cup milk (dairy or plant-based) - 2 large eggs - 1 teaspoon baking powder - 1 teaspoon baking soda - 1 teaspoon salt - 1 teaspoon chili powder (optional for a spicy kick) - 1 cup shredded cheddar cheese (sharp or mild based on preference) - 1/2 cup green onions, finely chopped - 1/2 cup red bell pepper, diced into small pieces - 2 tablespoons olive oil, plus extra for greasing - Fresh cilantro for garnish (optional) When choosing zucchinis, look for firm and shiny ones. They should feel heavy for their size. Avoid zucchinis with soft spots or blemishes. Small to medium zucchinis have the best flavor. If possible, buy organic zucchinis for a fresher taste. The skin should be bright green, showing freshness. If you need dairy alternatives, try plant-based milk like almond or oat milk. For cheese, consider using vegan cheese options. Nutritional yeast can add a cheesy flavor without dairy. You can also skip cheese altogether for a lighter dish. Experiment with different flavors to suit your taste. To make zucchini cornbread casserole, start by preheating your oven to 350°F (175°C). Grease a 9x13-inch baking dish with olive oil to prevent sticking. In a large bowl, mix finely grated zucchini, sweet corn, and diced red bell pepper. Stir well to combine these fresh ingredients. In a separate bowl, whisk together cornmeal, milk, eggs, baking powder, baking soda, salt, and chili powder until smooth. Slowly pour this mixture into the zucchini and corn blend, stirring gently. Avoid over-mixing; you want a light batter. Next, fold in shredded cheddar cheese and green onions until evenly mixed. Pour the mixture into the greased baking dish. Spread it out evenly with a spatula. Drizzle 2 tablespoons of olive oil over the top to add flavor and moisture. Bake for 35-40 minutes. Look for a golden brown top and check with a toothpick. If it comes out clean, the casserole is ready. Once out of the oven, let it cool for about 10 minutes. This cooling time helps with slicing. Garnish with fresh cilantro if you wish, then cut into squares and serve warm. To get the best texture, don’t skip the cooling step. Cooling helps the casserole set, making slicing easier. Use fresh zucchini for a moist and flavorful dish. If you want a firmer texture, drain excess liquid from the grated zucchini. Use a clean towel to squeeze out moisture before mixing. Always preheat your oven to ensure even cooking. Baking at 350°F (175°C) is key for the perfect rise. If you notice the top browning too quickly, cover it loosely with foil. This step helps cook the center without burning the top. Keep an eye on the casserole during the last few minutes. Each oven is different, and you want it just right. For more precise cooking times, I recommend checking it at the 30-minute mark. Enjoy the recipes and tips in the Full Recipe for more details! To keep your casserole from being watery, start by removing excess moisture from the zucchini. After grating, place it in a clean kitchen towel. Squeeze out the extra liquid. This step is key for a firm texture. Also, avoid overmixing the batter. Stir gently when combining wet and dry ingredients. Too much mixing can add air and make it watery. To make your casserole extra tasty, consider adding herbs and spices. Fresh basil or thyme can add a nice twist. If you love heat, add more chili powder or diced jalapeños. You can also mix in some cooked bacon or sausage for a savory kick. Feel free to swap the cheese too. Feta or pepper jack can bring new flavors. Experimenting with different ingredients keeps it fun! Serve your Zucchini Cornbread Casserole warm for the best taste. It pairs well with a simple salad or grilled chicken. A dollop of sour cream or yogurt on top adds a creamy touch. You can also serve it with salsa for a zesty flavor. If you want a nice finish, a sprinkle of fresh cilantro or green onions provides a pop of color and taste. For the full recipe, check out the detailed steps above. {{image_4}} You can make this dish even more veggie-packed. Add chopped spinach or kale for extra greens. Thinly sliced mushrooms can also bring nice flavor. You can use any veggies you love or have on hand. This dish is super flexible. If you want a gluten-free version, use gluten-free cornmeal. Many brands offer great options. Just check the label. You can also try almond flour or a gluten-free baking mix. These options work well and taste great too. You can add more veggies like carrots or squash. They add flavor and color. If you want protein, try cooked beans or shredded chicken. These options make the casserole heartier. You can mix and match based on your taste. Each variation adds a unique twist to the dish. For the full recipe, check out the details above! After you make the Zucchini Cornbread Casserole, let it cool first. Once cooled, cover it well with plastic wrap or aluminum foil. This keeps the casserole fresh and moist. Store it in your fridge for up to three days. If you want to enjoy it longer, consider freezing it. To freeze the casserole, cut it into squares. Place each square in a freezer-safe bag or container. Be sure to remove as much air as possible. You can freeze it for up to three months. Label the bags with the date for easy tracking. When you’re ready to eat, thaw it overnight in the fridge. When reheating, preheat your oven to 350°F (175°C). Place the casserole squares in an oven-safe dish. Cover it with foil to keep it moist. Heat for about 15-20 minutes, or until warm. You can also use a microwave. Heat in short bursts, checking often to avoid overcooking. This way, you’ll keep all the yummy flavors intact. For the full recipe, check out the section above. Yes, you can make this dish ahead of time. Prepare the casserole and cover it tightly. Store it in the fridge for up to two days. When ready to bake, let it sit at room temperature for about 30 minutes. Then, bake it as directed. This makes it easy for busy days. Zucchini Cornbread Casserole pairs well with many foods. Here are some ideas: - A fresh garden salad with a light vinaigrette - Grilled chicken or fish for protein - A bowl of chili for a hearty meal - Sliced avocado for a creamy touch - Your favorite hot sauce for extra flavor Serving it with these sides makes for a balanced meal. To store leftovers, let the casserole cool completely. Cut it into squares and place them in an airtight container. You can keep it in the fridge for up to four days. For longer storage, freeze the squares in a single layer. Once frozen, transfer them to a freezer-safe bag. They can last for about three months. Reheat in the oven or microwave before enjoying again. For the full recipe, check out the detailed instructions provided above. In this blog post, we explored how to make a delicious zucchini cornbread casserole. We covered fresh ingredient selections and explored alternatives for dairy. You learned step-by-step cooking instructions, baking tips, and how to avoid a watery casserole. Remember, you can customize the dish with different veggies and proteins. Proper storage keeps leftovers tasty. Try making this dish in advance for easy meals later. Enjoy cooking and sharing this tasty treat!
Zucchini Cornbread Casserole Flavorful and Easy Dish
Looking for a tasty and easy dish that will impress everyone at your table? You’ve found it! This Zucchini Cornbread Casserole combines the sweet flavor
- 4 boneless, skinless chicken breasts - 6 tablespoons unsalted butter, melted - 4 cloves garlic, finely minced - 1 teaspoon dried thyme - 1 teaspoon dried rosemary - 1 teaspoon smoked paprika - Salt and freshly cracked pepper to taste - Fresh parsley, finely chopped (for garnish) - Lemon wedges (for serving) To make garlic butter baked chicken breast, you need good ingredients. Start with fresh chicken. It must be boneless and skinless. This choice ensures a tender bite. Then, melt unsalted butter. This will add rich flavor. Mince fresh garlic finely. This gives your chicken a strong garlic taste. Next, you should add herbs and spices. Dried thyme and rosemary are great choices. They add depth to the dish. Smoked paprika brings a subtle smokiness. Season with salt and freshly cracked pepper for balance. Garnishing is key for a great presentation. Use fresh parsley, finely chopped. It brightens up the dish. Serve with lemon wedges on the side. Squeezing fresh lemon juice on the chicken adds a bright flavor. For the full recipe, check the section above. This dish is easy and packed with flavor. - Preheat the oven to 400°F (200°C). - In a bowl, mix melted butter, minced garlic, thyme, rosemary, smoked paprika, salt, and pepper. Stir until smooth. - Place the chicken breasts in a baking dish. Coat each piece with the garlic butter mix. - Bake the chicken for 25-30 minutes. Check that it reaches 165°F (75°C). - Take the chicken out and let it rest for 5 minutes. This keeps it juicy. - Sprinkle fresh parsley on top and serve with lemon wedges for added zest. For the full recipe, check out the complete guide. Enjoy this juicy flavor explosion in every bite! To get juicy chicken, coat it well with the garlic butter. Make sure each piece is covered. This helps the chicken soak in all that tasty flavor. I often use a brush to spread the butter mix evenly. For the best doneness, check the internal temperature. You want 165°F (75°C) inside the chicken. This means it is cooked and safe to eat. Want to boost the taste? You can add more herbs like oregano or basil. A bit of heat from red pepper flakes can also spice things up. If you like darker meat, try chicken thighs instead. They stay juicy and add a rich flavor, too. Bone-in cuts can also work. They may take longer to cook but offer a great taste. Pair your garlic butter baked chicken with sides like rice or steamed veggies. A fresh salad also adds a nice crunch. When serving, place the chicken on a big platter. Add lemon wedges around it for a pop of color. Sprinkle some parsley on top for a beautiful finish. This makes the meal look inviting and tasty. For the complete recipe, check the [Full Recipe]. {{image_4}} You can change the taste of garlic butter baked chicken by adding new spices. Mix in some lemon zest for a fresh twist. Chili flakes add a nice kick if you enjoy heat. You can also try herbs like oregano or basil for a different flavor. Experimenting lets you find the blend that you love best. If you need a gluten-free option, this recipe is easy to adapt. Just ensure that your butter and spices are gluten-free. For a low-carb version, skip any breading and serve with veggies. If you want it dairy-free, replace the butter with olive oil or a dairy-free butter substitute. Both will keep your chicken moist and tasty. You don’t have to bake the chicken if you prefer other methods. Grilling gives a nice smoky flavor. Just marinate the chicken in the garlic butter mix and grill until cooked through. For pan-searing, use a hot skillet and cook the chicken for about 6-8 minutes on each side. You can also use a slow cooker. Just add the chicken and garlic butter mix, then cook on low for 4-5 hours. An Instant Pot is a great option too. Cook on high pressure for about 8-10 minutes, and you will have juicy chicken ready to enjoy. For the full recipe, refer back to the main article. To store leftover garlic butter baked chicken breast, let it cool first. Place the chicken in an airtight container. I recommend using glass or BPA-free plastic containers. This keeps the chicken fresh and safe. The chicken can last up to four days in the fridge. Always label the container with the date you made it. This helps you track how long it has been stored. If you want to save the chicken for later, freezing is a great option. Wrap each piece in plastic wrap and then in aluminum foil. This helps prevent freezer burn. Place the wrapped chicken in a freezer-safe bag or container. It can last up to three months in the freezer. When ready to eat, thaw the chicken in the fridge overnight. Reheat it in the oven or microwave until warm. Make sure it reaches 165°F (75°C) before serving. In the fridge, garlic butter baked chicken will stay fresh for about four days. In the freezer, it can last for up to three months. Always check for any off smells or changes in texture before eating. If you see any signs of spoilage, it’s best to discard the chicken. Enjoy your leftovers safely! How long does garlic butter baked chicken breast take to cook? This dish cooks in about 25 to 30 minutes. Preheat your oven to 400°F (200°C). The cooking time ensures that the chicken stays tender and juicy. What is the best way to measure the internal temperature of chicken? Use a meat thermometer for the best results. Insert the thermometer into the thickest part of the chicken breast. You want the temperature to reach 165°F (75°C) for safe eating. Can I use frozen chicken breasts for this recipe? Yes, you can use frozen chicken breasts. However, you should increase the cooking time to about 10 to 15 minutes. Make sure to check the internal temperature to confirm doneness. What to do if the chicken breasts are dry? If your chicken is dry, it may have cooked too long. Next time, check the temperature early. You can also try brining the chicken before cooking to add moisture. How to know if the chicken is fully cooked without a thermometer? If you don’t have a thermometer, cut into the thickest part of the chicken. The juices should run clear, and the meat should be opaque. What side dishes go well with garlic butter baked chicken breast? This chicken pairs well with rice, roasted veggies, or a fresh salad. Mashed potatoes also make a great side. Can I use the leftover garlic butter for other recipes? Absolutely! You can use leftover garlic butter in pasta, on bread, or as a drizzle over veggies. It adds great flavor to many dishes. For more details on making this delicious meal, check the Full Recipe. This blog post covered how to make garlic butter baked chicken breast. We started with the key ingredients and detailed step-by-step instructions for prep, baking, and finishing. Then, I offered tips to improve your cooking and suggested tasty variations to try. Storing and reheating leftover chicken was also discussed. I hope you feel ready to try this easy recipe. It promises great flavor and satisfaction with every bite. Enjoy your cooking adventure!
Garlic Butter Baked Chicken Breast Juicy Flavor Explosion
Are you ready for a juicy flavor explosion? This Garlic Butter Baked Chicken Breast recipe is a game-changer for your dinner table. With just a
- 4 chicken thighs, skin-on and bone-in - 2 tablespoons extra virgin olive oil - 1 teaspoon kosher salt - ½ teaspoon freshly cracked black pepper - 4 cloves garlic, finely minced - Juice and zest of 2 fresh lemons - 1 teaspoon dried thyme (or 1 tablespoon fresh thyme, finely chopped) - 1 cup low-sodium chicken broth - 1 cup cherry tomatoes, halved - 1 cup baby spinach - Fresh parsley, chopped, for garnish To make One Pan Lemon Garlic Chicken, start with the right ingredients. Chicken thighs give you juicy meat. They stay moist and have great flavor. Olive oil adds richness and helps with cooking. Seasonings boost the taste and make each bite pop. Fresh produce adds color and nutrition. - Additional vegetables - Fresh herbs for garnish You can make this dish even better by adding more veggies. Think green beans or zucchini. Fresh herbs like basil or dill can brighten the dish. They add a nice touch. - Oven-safe skillet - Measuring spoons - Cooking thermometer You will need a few tools to cook this dish. An oven-safe skillet lets you go from stovetop to oven. Measuring spoons ensure you use the right amount of each ingredient. A cooking thermometer checks the chicken's doneness. This way, you can be sure it is safe to eat. For the complete recipe, check out the Full Recipe. 1. Preheating the oven: First, set your oven to 400°F (200°C). This helps the chicken cook evenly and get that nice, crispy skin. 2. Seasoning the chicken: Take 4 chicken thighs and season both sides with 1 teaspoon of kosher salt and ½ teaspoon of black pepper. This adds great flavor to the meat. 1. Heating the skillet: In a large oven-safe skillet, heat 2 tablespoons of olive oil over medium-high heat. You want the oil hot enough that it sizzles when you add the chicken. 2. Searing chicken thighs: Place the seasoned chicken thighs skin side down into the hot skillet. Sear for about 5-7 minutes until the skin is golden brown. Then flip the chicken and cook for another 5 minutes. Once done, remove the chicken from the skillet and set it aside. 1. Adding garlic: In the same skillet, add 4 cloves of minced garlic. Sauté for about 30 seconds. Stir until the garlic is fragrant and golden, but be careful not to burn it. 2. Incorporating broth and lemon: Pour in 1 cup of chicken broth, along with the juice and zest of 2 lemons. Use a wooden spoon to mix everything well. This will create a tasty sauce and help lift the brown bits from the bottom. 1. Nestling chicken back in pan: Add the halved cherry tomatoes and 1 cup of baby spinach to the skillet. Stir gently. Then, place the seared chicken thighs back in, skin side up. This allows the skin to stay crispy. 2. Roasting in oven until done: Move the skillet to your preheated oven. Roast for 25-30 minutes. The chicken should reach an internal temperature of at least 165°F (74°C). When done, take the skillet out and let it rest for 5 minutes before serving. To get juicy chicken, start with the right temperature. Preheat your oven to 400°F (200°C). This step ensures even cooking. When you season the chicken, use kosher salt and cracked black pepper. This combination enhances the flavor. When cooking, check for doneness. Use a meat thermometer to ensure the chicken reaches at least 165°F (74°C). If you don’t have a thermometer, look for the juices. They should run clear, not pink. To boost flavor, use fresh ingredients. Fresh garlic and lemons add brightness. You can also include dried thyme or fresh herbs. Thyme pairs well with chicken. For added depth, consider using a splash of white wine in the sauce. Mixing in cherry tomatoes and spinach provides color and nutrition. These ingredients also soak up the sauce's flavor. Always taste as you go to adjust seasoning. How you serve your dish matters. Serve the chicken right from the skillet for a rustic feel. If you prefer, transfer it to a large platter. Arrange the cherry tomatoes and spinach around the chicken for a vibrant look. For garnishing, sprinkle fresh parsley on top. This adds color and freshness. You can also drizzle leftover sauce over the chicken. It enhances the dish's appeal and flavor. {{image_4}} You can change the chicken for different cuts. Chicken breasts or drumsticks work well. Both will cook nicely with the lemon garlic flavor. Also, feel free to swap vegetables. Instead of cherry tomatoes and spinach, try zucchini or bell peppers. These veggies add color and taste. Want to change the taste? Use different herbs. Rosemary or oregano can replace thyme. Each brings its own unique flavor. You can also add spices to make it spicy. A pinch of red pepper flakes or cayenne pepper adds heat without overpowering the dish. If you need gluten-free options, use gluten-free broth. This keeps the dish safe for those with gluten allergies. For dairy-free meals, skip any butter. You can still use olive oil for richness. These swaps keep the recipe just as tasty while meeting dietary needs. For the full recipe, check out One Pan Lemon Garlic Chicken. Store your One Pan Lemon Garlic Chicken in the fridge. Use an airtight container. This keeps the chicken fresh and tasty. Aim to eat leftovers within three days for the best flavor. You can reheat the chicken in two ways: microwave or oven. For the microwave, place the chicken on a plate. Cover it with a damp paper towel to keep moisture. Heat in 30-second bursts until warm. If using the oven, preheat it to 350°F (175°C). Place the chicken in a baking dish, cover with foil, and heat for about 20 minutes. This method helps retain the chicken's juiciness. To freeze, let the chicken cool completely. Place it in a freezer-safe bag. Remove as much air as possible to prevent freezer burn. You can freeze it for up to three months. To thaw, move the chicken to the fridge for a night. If you're in a hurry, use cold water in a sealed bag. Change the water every 30 minutes until it's thawed. Enjoy your delicious meal later! You can serve One Pan Lemon Garlic Chicken with many tasty sides. Here are some ideas: - Rice: Fluffy white or brown rice pairs well. It soaks up the sauce nicely. - Potatoes: Roasted or mashed potatoes are great for a hearty meal. - Vegetables: Steamed broccoli or green beans add color and nutrition. - Salads: A fresh green salad with a light dressing complements the dish well. - Grains: Quinoa or couscous can add a nice texture and flavor. When you choose sides, think about balance. Light sides work great with rich chicken. Yes, you can use boneless chicken! Just keep these tips in mind: - Cooking time adjustments: Boneless chicken cooks faster. Check it after 20 minutes in the oven. - Flavor differences: Bone-in chicken adds more flavor. Boneless may taste milder, but it will still be delicious. Feel free to experiment with boneless chicken thighs or breasts. Knowing when chicken is done is key for safety. Here’s how to tell: - Importance of internal temperature: Use a meat thermometer. The chicken should reach at least 165°F (74°C). - Signs of doneness to look for: The juices should run clear, and the meat should not be pink. Always check the thickest part of the chicken for the best results. Enjoy your meal! In this post, we explored how to make delicious One Pan Lemon Garlic Chicken. We discussed key ingredients, the searing process, and how to create a flavorful sauce. You learned tips for perfect cooking and tasty variations to try. Remember, cooking should be fun and simple. Use fresh ingredients, check for doneness, and feel free to swap items based on your taste. Enjoy your meal!
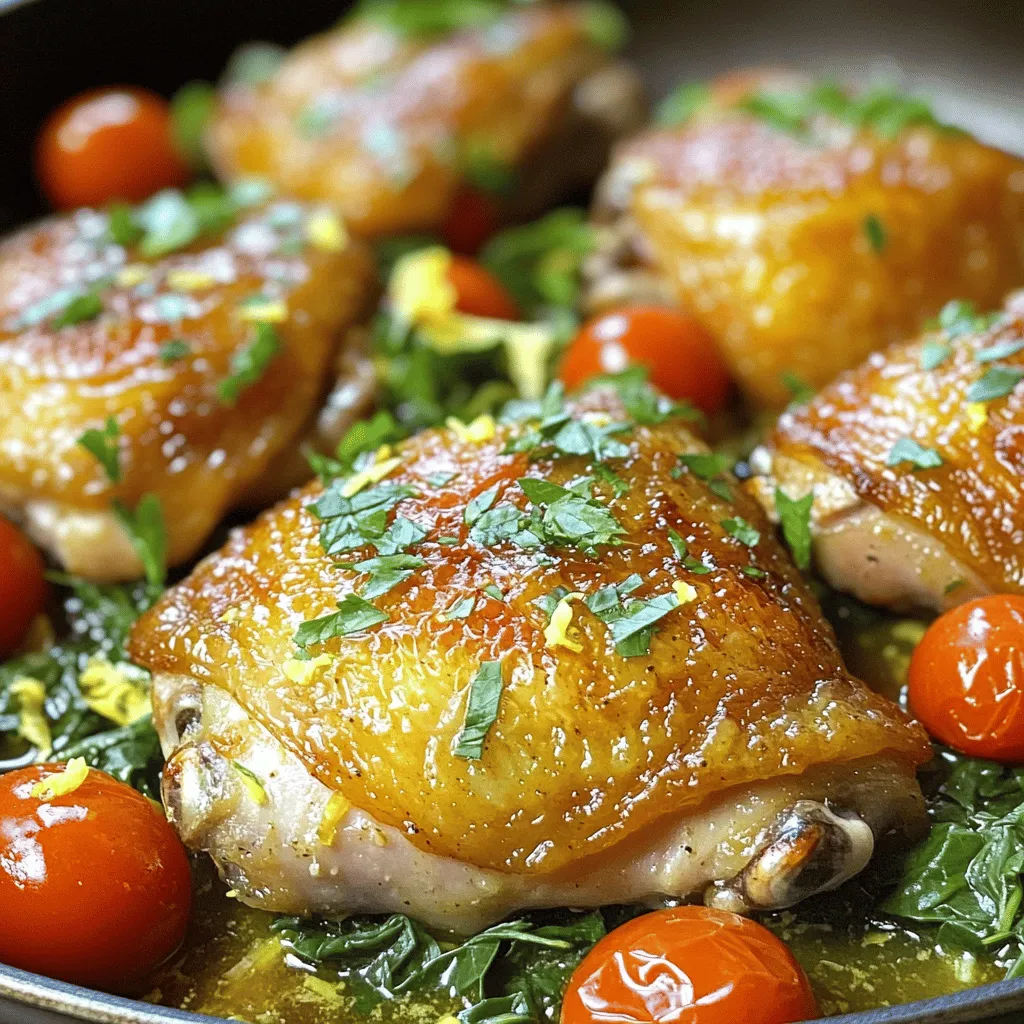
One Pan Lemon Garlic Chicken Easy Weeknight Recipe
Looking for a quick and tasty dinner? One Pan Lemon Garlic Chicken is your solution! This easy weeknight recipe packs flavors that your family will
- Zucchini: Choose firm zucchinis with smooth skin. They should feel heavy for their size. Avoid zucchinis with soft spots or blemishes. Fresh zucchinis add great flavor and texture to the dish. - Cherry tomatoes: Look for bright red, plump tomatoes. They should feel slightly soft but not mushy. Ripe cherry tomatoes burst with flavor, enhancing your zucchini pasta. - Olive oil: Use extra virgin olive oil for the best taste. It has a rich flavor that elevates the dish. Light olive oil works too, but it lacks the depth of extra virgin. - Seasoning essentials: Keep salt and black pepper handy. They enhance the flavors of the dish. Red pepper flakes add a nice kick if you like spice. - Parmesan cheese: Freshly grated Parmesan adds creaminess and flavor. Pre-grated cheese is convenient but lacks freshness. Always go for fresh when you can. - Fresh basil: Use fresh basil for a fragrant touch. If you can't find it, try parsley or spinach. They add a nice green flavor to the dish. For the complete experience, check the [Full Recipe]. To start, we need to spiralize the zucchini. Use a spiralizer or a vegetable peeler to create long, curly noodles. This step is key for the dish's texture. After spiralizing, place the noodles in a colander. Let them drain for a bit. This helps remove excess moisture. If you skip this, your pasta may turn soggy. Next, we move to the sauce. Heat a large skillet over medium heat and add the extra virgin olive oil. Once the oil is hot, add the minced garlic. Sauté it for about one minute until it smells great. Be careful not to burn it; burnt garlic tastes bitter. Now, add the halved cherry tomatoes to the skillet. If you like a bit of heat, toss in the red pepper flakes. Cook this mixture for 3-4 minutes. You want the tomatoes to soften and release their juices. This adds a rich flavor to the sauce. After the sauce is ready, it’s time to toss in the zucchini noodles. Add them to the skillet, seasoning with salt and black pepper. Gently sauté the noodles for 2-3 minutes. They should be tender but still have some crunch. Remove the skillet from the heat. Now, fold in the chopped basil. Taste your dish and adjust the seasoning if needed. If you like cheese, sprinkle the freshly grated Parmesan on top. Toss gently and let the warmth melt the cheese. Serve your dish hot. Garnish it with fresh lemon zest. A few extra basil leaves will make it look beautiful. For the full recipe, check the details above. Enjoy your fresh and flavorful zucchini pasta! To keep zucchini noodles crunchy, avoid overcooking. Sauté them for just 2-3 minutes. If you want softer noodles, add another minute but watch closely. The goal is to preserve that delightful bite. Besides basil, try adding fresh oregano or thyme. They bring a new taste to the dish. To balance the dish, use lemon zest. It brightens flavors and gives a fresh kick. Just a little zest will enhance the overall taste. For a beautiful presentation, serve the Zucchini Noodle Delight in shallow bowls. Drizzle with olive oil for shine. Add a sprinkle of extra Parmesan and some halved cherry tomatoes on top. This not only looks nice but also makes it more inviting. Garnish with lemon zest and a few basil leaves for color and freshness. Enjoy the beauty before you dig in! {{image_4}} For a vegan twist on Stanley Tucci's zucchini pasta, skip the cheese. Instead, you can use cashew cream. Blend soaked cashews with a little water until smooth. This gives a rich, creamy texture without dairy. You can also add nutritional yeast for a cheesy flavor. It’s a great source of vitamins and has a nutty taste. Try nut-based toppings like toasted pine nuts or walnuts. They add crunch and healthy fats. Adding protein can turn this dish into a hearty meal. Grilled chicken or shrimp pairs well with zucchini noodles. They add flavor and make the dish more filling. If you prefer a vegetarian option, chickpeas are a great choice. They boost protein and fiber, making the meal satisfying. You can also try tofu or tempeh. Both options soak up flavors nicely and add texture. Feel free to mix in other veggies based on what's in season. Bell peppers, spinach, or asparagus work well with zucchini. You can also customize the dish based on what you have at home. Carrots or peas can add a pop of color and extra nutrients. This flexibility allows you to create a unique dish every time. Enjoy making it your own! After you enjoy your delicious zucchini pasta, store any leftovers in the fridge. Use an airtight container to keep the flavors fresh. The dish stays good for about three days. To maintain the texture, avoid mixing the zucchini noodles with sauce until you are ready to eat. If you want to save some for later, you can freeze zucchini noodles. First, make sure they are completely dry. Place them in a single layer on a baking sheet and freeze for one hour. Once frozen, transfer them to a freezer bag. They will stay fresh for up to three months. When you're ready to eat, thaw the noodles in the fridge overnight. To reheat, add them to a hot skillet with a drizzle of olive oil. Cook them for just a couple of minutes to heat through without losing their crunch. Preparing zucchini noodles in advance is easy. You can spiralize the zucchini and store it in the fridge for up to two days. Keep the noodles in a colander to drain moisture. Store sauce separately to keep the dish fresh longer. Consider chopping extra herbs and veggies. This way, you can whip up your meal quickly. Using fresh ingredients makes all the difference in flavor and nutrition. For more details on making this dish, check the Full Recipe. Zucchini noodles last about 2 to 3 days in the fridge. Store them in an airtight container. Check for signs of spoilage. If they feel slimy or have an off smell, it's time to toss them. To keep them fresh, try to use them soon after making them. Yes, you can use regular pasta instead of zucchini. Regular pasta has a different texture and taste. It also has more carbs. Zucchini pasta is lighter and lower in calories. Zucchini noodles soak up flavors well and are great for healthy dishes. Both options are tasty, but choose based on your dietary needs. The best way to season zucchini pasta is simple. Use salt, pepper, and olive oil. Garlic adds a nice kick. Fresh herbs like basil or parsley brighten the dish. You can also use lemon juice or zest for a fresh twist. Red pepper flakes give a bit of heat if you like spicy. For a rich flavor, top with Parmesan cheese. Each of these options enhances the taste and makes the dish more enjoyable. For the full recipe, check out Zucchini Noodle Delight. In this article, we explored how to make delicious zucchini noodles. We covered choosing fresh produce, essential pantry items, and optional toppings. I shared steps for preparing, cooking, and combining your ingredients. You learned tips for texture, flavor enhancements, and plating ideas. Feel free to experiment with variations, like vegan options or added proteins. Remember to store your noodles properly for the best flavor. With these insights, you can enjoy a tasty, healthy dish any time!
Stanley Tucci’s Zucchini Pasta Fresh and Flavorful Dish
Are you ready to elevate your dinner game? Stanley Tucci’s Zucchini Pasta is a fresh and flavorful dish that you’ll want to make again and
- 1 cup frozen potstickers (choose between chicken or vegetable) - 6 cups of chicken or vegetable broth - 1 tablespoon soy sauce - 1 tablespoon sesame oil I love using frozen potstickers for this soup. They save time and taste great. You can pick chicken or vegetable potstickers based on your taste. The broth makes the soup warm and rich. Chicken broth gives a hearty flavor, while vegetable broth adds freshness. Soy sauce and sesame oil bring depth to the taste. - 1 cup bok choy, roughly chopped - 1 medium carrot, sliced thinly into rounds - 2 green onions, chopped into fine pieces - 1 teaspoon fresh ginger, grated - 2 cloves garlic, minced Adding fresh veggies makes this soup bright and healthy. Bok choy adds a nice crunch. Carrots give a sweet touch. Green onions, ginger, and garlic add a punch of flavor. Always use fresh ginger and garlic for the best taste. - Salt and pepper to taste - Fresh cilantro leaves for garnish (optional) Seasoning is key for good soup. A little salt and pepper can really enhance the flavors. If you like, add fresh cilantro for a burst of freshness. It looks pretty and tastes great too. {{ingredient_image_2}} First, you need to heat the sesame oil in a large pot over medium heat. Once hot, add minced garlic and grated ginger. Sauté them for about one minute. You want them fragrant and slightly golden. Next, carefully pour in the chicken or vegetable broth and the soy sauce. Stir well to mix everything together, then bring the mixture to a gentle boil. Now, it’s time to add some color and crunch. Add the thinly sliced carrots to the boiling broth. Cook them for about two to three minutes, until they start to soften. After that, it’s time to add the bok choy. This leafy green will wilt down nicely, adding a fresh taste to your soup. Now for the main event! Gently add the frozen potstickers right into the pot. Lower the heat to keep a gentle simmer. Let the potstickers cook for about five to seven minutes. This step ensures they heat through and become tender. Finally, taste your soup and adjust the seasoning with salt and pepper if needed. Stir in chopped green onions just before serving for a fresh finish. - Adjusting the seasoning: Always taste your soup before serving. Add more salt or soy sauce if it needs a boost. A little lime juice can also add brightness. - Ensuring potstickers are cooked through: Cook the potstickers until they are hot and tender. This usually takes about 5-7 minutes. If they float to the top, they are ready. - Presentation tips: Use deep bowls for serving. This keeps the soup hot longer. Garnish with fresh cilantro and green onions for color and flavor. - Ideal accompaniments: Serve with a side of steamed rice or a fresh salad. This adds variety to your meal. - Overcooking vegetables: Don’t let the carrots and bok choy cook for too long. They should stay slightly crisp for the best texture. - Incorrect potsticker handling: Handle frozen potstickers gently. If you drop them in too fast, they may break apart. Always add them slowly to the broth. Pro Tips Use Homemade Broth: If you have the time, make your own chicken or vegetable broth for a richer flavor that enhances the overall taste of the soup. Experiment with Vegetables: Feel free to add other vegetables like mushrooms or bell peppers to personalize the soup and increase its nutritional value. Adjust the Spice Level: If you enjoy a kick, add a pinch of red pepper flakes or a drizzle of sriracha before serving for an extra layer of flavor. Store Leftovers Properly: If you have leftovers, store them in an airtight container in the fridge for up to 3 days, but keep the potstickers separate to maintain their texture. {{image_4}} You can change the potstickers in this soup. Use homemade potstickers if you want. They taste great and add a personal touch. Store-bought potstickers save time and work well too. You can choose chicken or vegetable options based on your taste. For broth, you have options. Low-sodium broth is a good choice if you want less salt. Vegetable broth works well for a lighter soup. It adds a nice flavor without meat. Spice it up! Adding chili flakes can give a nice kick. If you like crunch, sprinkle sesame seeds on top. These add flavor and texture. You can also mix in more veggies. Sliced mushrooms or fresh spinach add great taste and color. If you follow a vegan or vegetarian diet, there are easy swaps. Choose vegetable potstickers and vegetable broth. This keeps the soup plant-based and tasty. For gluten-free options, make sure to find gluten-free potstickers. Also, check the broth label for gluten-free ingredients. To keep your Quick Potsticker Soup fresh, use airtight containers. Glass or plastic containers work well. Fill them with soup, leaving a little space at the top. This helps prevent spills. Store the soup in the fridge for up to three days. If you notice any strange smell or color, it's best to toss it out. You can reheat your soup in two ways: microwave or stovetop. For the microwave, pour the soup into a bowl. Heat it for two to three minutes, stirring halfway. For stovetop, pour the soup into a pot. Heat it over medium heat until warm. Be careful not to overheat the potstickers. If you do, they may turn soggy. Stir gently as you heat to keep them intact. If you want to save some for later, you can freeze the soup. Pour it into freezer-safe containers or bags. Leave some space at the top for expansion. Label the containers with the date. The soup can last up to three months in the freezer. To thaw, move it to the fridge overnight. You can also use the microwave for quick thawing. After thawing, reheat it on the stovetop as mentioned before. Stir well to ensure even heating. Quick Potsticker Soup is fast! It takes just 20 minutes from start to finish. You will spend 10 minutes prepping the ingredients. Then, it cooks for about 10 minutes. This makes it perfect for a busy weeknight meal. Yes, you can use fresh potstickers! They will cook faster, so check them often. Add them to the soup after the carrots have softened. Fresh potstickers give a nice texture. Just be careful not to overcook them. You can pair this soup with simple sides. Try steamed rice or a fresh salad. Spring rolls also make a great match. For drinks, serve hot tea or a light soda. These options help make your meal complete and fun. This blog post covered how to make Quick Potsticker Soup, from main ingredients to serving suggestions. We explored using frozen potstickers, various vegetables, and simple seasonings. I shared tips to perfect the flavors and avoid common mistakes. Remember, you can easily adjust ingredients for different diets. Enjoy experimenting with flavors and additions! With these steps, a warm bowl of soup is within your reach. Embrace this quick recipe for a delicious meal you can share or savor alone.
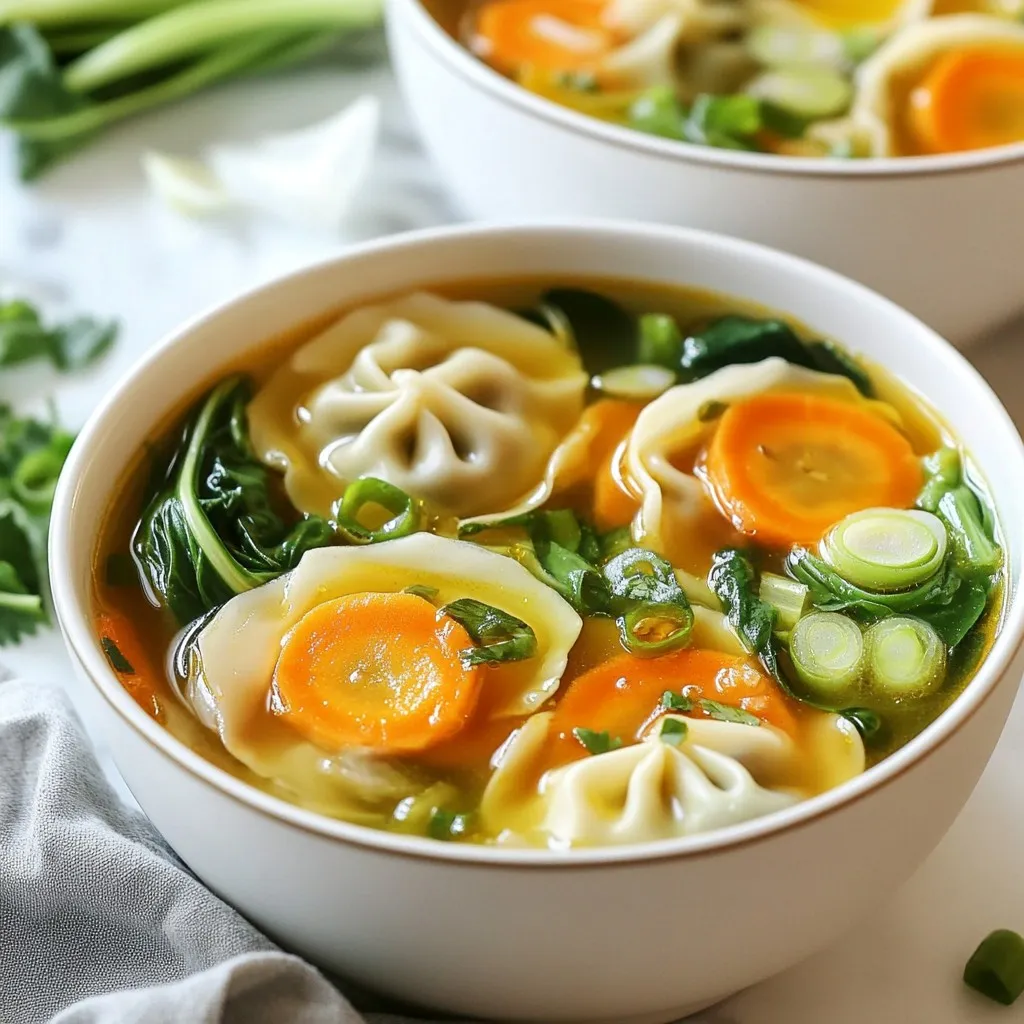
Quick Potsticker Soup Flavorful and Easy Recipe
Are you craving a warm, comforting soup that’s quick and easy to make? My Quick Potsticker Soup is your new go-to dish! With just a