Dinner

- Whole chicken (4-5 pounds) - Apple cider (2 cups) - Salt (¼ cup) - Brown sugar (¼ cup) - Garlic (3 cloves, minced) - Fresh herbs (rosemary, thyme) - Whole black peppercorns (1 tablespoon) - Lemon (1, sliced) - Onion (1, quartered) The heart of this dish lies in its simple yet flavorful ingredients. The whole chicken, between 4 to 5 pounds, is the star. The apple cider adds a sweet and tangy taste. Salt is crucial for brining, as it helps the chicken hold moisture. I love adding brown sugar to balance the saltiness. Garlic brings in a rich aroma, while fresh herbs like rosemary and thyme add depth. Whole black peppercorns bring a subtle spice. Slicing a lemon and quartering an onion helps infuse the chicken with fresh flavors while roasting. Each ingredient plays an important role in creating a juicy and flavorful dish. If you want to explore the full recipe, check out the details above. To start, I combine the apple cider, salt, brown sugar, minced garlic, chopped rosemary, chopped thyme, and whole black peppercorns in a large pot. This mix brings out a rich flavor. Next, I heat the mixture over medium heat. I stir it until the salt and sugar dissolve completely. Once they dissolve, I remove the pot from the heat and let the brine cool to room temperature. After the brine has cooled, I carefully submerge the whole chicken in the mixture. I use a large container or a resealable plastic bag. It is important that the chicken is fully covered by the brine. Then, I seal the bag tightly. I place it in the refrigerator to marinate for at least 4 hours. For the best flavor, I recommend letting it sit overnight. When I’m ready to cook, I preheat my oven to 425°F (220°C). After brining, I take the chicken out. I gently pat it dry with paper towels to remove excess moisture. I discard the brine responsibly. I then rub olive oil all over the chicken. This helps create crispy skin while it cooks. Next, I stuff the cavity of the chicken with lemon slices and onion quarters. Their flavors will infuse into the meat while it roasts. I place the chicken breast side up in a roasting pan. To help it cook evenly, I tie the legs together with kitchen twine. I roast the chicken for about 1 hour and 15 minutes. I check the internal temperature in the thickest part of the breast. It should reach 165°F (75°C). Halfway through, I baste the chicken with its own juices. Once it’s perfectly roasted, I remove the chicken from the oven. I let it rest on a cutting board for 15-20 minutes before carving. This resting time keeps the chicken moist and full of flavor. For serving, I enjoy it with roasted vegetables or fresh greens. I often garnish it with extra sprigs of rosemary or thyme. This dish is truly a feast! For the complete recipe, check the Full Recipe. For the best flavor, brine the chicken for at least four hours. If you have time, overnight works even better. This longer soak helps the chicken absorb all the delicious flavors. To ensure even brine coverage, use a large container or a resealable bag. Make sure the chicken is fully submerged. If needed, weigh it down with a plate. This simple step boosts the flavor throughout the meat. Basting the chicken is key to a juicy roast. Halfway through roasting, use a spoon to drizzle the chicken with its own juices. This keeps the skin crispy and the meat moist. After cooking, let the chicken rest for 15-20 minutes. Resting lets the juices redistribute. This step is crucial for a tender bite. Enhance the flavor by adding more herbs. Try using sage or parsley alongside the rosemary and thyme. These herbs add depth and aroma. To balance flavors, consider the cider's sweetness. You can add a bit of tart apple or a splash of vinegar to cut the sweetness. This balance ensures a well-rounded taste in every bite. For the full recipe, refer to the detailed instructions. {{image_4}} You can change the brine for new tastes. Try using different liquids like herbal tea or beer. Each option adds a unique flavor to the chicken. For fruits, think about adding sliced oranges or pears to the brine. These fruits give a sweet and tangy twist. You can also mix spices like cinnamon or cloves for a warm touch. This will add depth and interest to your cider brined roast chicken. Want to try a different way to cook your chicken? Use a slow cooker. This method keeps the chicken juicy and tender. Just add the brined chicken to the slow cooker with some broth and cook on low for 6-8 hours. Another option is grilling. It gives the chicken a nice smoky flavor. Just be sure to watch the heat. You want the chicken cooked through but not dry. Both methods can create a delicious meal. Pair your roast chicken with tasty sides. Roasted vegetables like carrots and Brussels sprouts work well. You can also serve it over a bed of creamy mashed potatoes. For a fresh touch, add a salad with mixed greens and a light vinaigrette. Sauces can enhance the meal too. A simple apple chutney or a tangy barbecue sauce adds great flavor. You can also try a garlic aioli for a creamy dip. These sides and sauces make the meal special. For the full recipe, refer back to the main sections above. For leftover cider brined roast chicken, store it in an airtight container. This keeps it fresh and prevents drying. Place the container in the fridge. Your leftovers will last about three to four days. If you plan to eat them later, consider freezing instead. To reheat without drying out, use your oven or a skillet. Preheat your oven to 350°F (175°C). Place the chicken in a baking dish and cover it with foil. This keeps moisture in. Heat for about 20 minutes, or until warm. If using a skillet, add a bit of broth or water. This adds moisture and flavor while reheating. You can freeze brined chicken for up to three months. Wrap it tightly in plastic wrap, then place it in a freezer bag. To thaw, move the chicken to the fridge for a day. This slow thawing keeps it juicy and tasty. Avoid thawing in the microwave as it may cook unevenly. For more details, check out the Full Recipe for cider brined roast chicken. Yes, you can brine the chicken overnight. Brining overnight gives the chicken more flavor and moisture. The salt and sugar work together to break down the meat. This process helps keep the chicken juicy. If you have time, brining for longer makes a big difference. For brining, use non-alcoholic apple cider. Look for fresh, pure cider without added sugars or flavors. A sweeter cider works well, as it balances the salt. You can choose local brands for better taste. These ciders enhance the chicken’s flavor. To check if the chicken is done, use a meat thermometer. Insert it into the thickest part of the breast. The temperature should reach 165°F (75°C). This ensures the chicken is safe to eat. If you do not have a thermometer, make sure the juices run clear when you cut into the chicken. This method helps confirm that it is fully cooked. For a detailed guide on how to prepare this delicious dish, refer to the [Full Recipe]. Brining and roasting chicken transforms your meal into something special. We covered key ingredients, step-by-step instructions, and valuable tips. You now know how to prepare the perfect brine, roast the chicken, and enhance flavors. By exploring variations and storage options, you ensure great meals even on busy days. Remember, the right brining methods can elevate your dish. Use this knowledge to create delicious, juicy chicken every time. Enjoy your cooking journey and share it with others!
Cider Brined Roast Chicken Juicy and Flavorful Dish
Looking for a delicious and easy way to spice up your dinner? Cider Brined Roast Chicken is your answer! This juicy and flavorful dish enhances
- 2 cups sweetcorn kernels (fresh or frozen) - 1 medium onion, finely diced - 2 cloves garlic, minced - 1 medium potato, peeled and diced into small cubes Sweetcorn is the star of this chowder. Its sweet, juicy flavor makes the dish special. I use fresh sweetcorn when in season, but frozen works well too. Onions and garlic add depth. They create a lovely base that warms your kitchen. Potatoes give the chowder a creamy texture and help it feel hearty. - 3 cups vegetable broth (low-sodium preferred) - 1 cup creamy coconut milk For broth, I recommend a low-sodium vegetable broth. It keeps the flavor bright without being too salty. Coconut milk adds creaminess and a hint of sweetness. This combination helps make the chowder rich and satisfying. - 1 teaspoon smoked paprika - 1 teaspoon ground cumin - Salt and freshly cracked black pepper, to taste Smoked paprika brings a warm, smoky note to the chowder. Ground cumin adds earthiness and depth. You can adjust the salt and pepper to your taste. These spices enhance the sweetcorn and make each bite flavorful. For the Full Recipe, check below for all the steps to create this delightful dish. 1. Sautéing the aromatics: Start by heating olive oil in a large pot over medium heat. Once the oil shines, add the diced onion. Cook for about 5 minutes, stirring often, until the onion is soft and clear. Then, mix in the minced garlic. Cook for another 1-2 minutes until the garlic smells amazing but does not brown. 2. Cooking the potatoes: Next, add the diced potatoes into the pot. Pour in the vegetable broth, then raise the heat to high. Bring this mix to a boil. Once boiling, lower the heat to let it simmer for about 10-15 minutes. You want the potatoes to be soft enough to pierce with a fork. 3. Incorporating sweetcorn and spices: After the potatoes are ready, stir in the sweetcorn kernels. Add the smoked paprika and ground cumin. Let this simmer for another 5 minutes. This will help all the flavors blend well together. 4. Blending for desired texture: Now it’s time to make the chowder creamy. Use an immersion blender to puree about half of the chowder right in the pot. You want to keep some sweetcorn and potato chunks for texture. If you don’t have one, carefully pour half the chowder into a regular blender, blend until smooth, and then return it to the pot. 5. Adding coconut milk: Pour in the creamy coconut milk, stirring well to mix everything together. Season with salt and freshly cracked black pepper to your taste. Heat it on low until everything is warm. 6. Garnishing before serving: Finally, ladle the hot chowder into bowls. Top it off with freshly chopped cilantro or parsley. This adds a nice touch of color and flavor. Enjoy every spoonful of this creamy comfort meal! For the full recipe, check out the details above. Using fresh sweetcorn gives a bright flavor. If fresh corn isn't available, frozen corn works well too. Frozen corn can be easier to store and still retains its sweetness. To get the best texture, blend half the chowder while leaving some corn and potato chunks. This mix of smooth and chunky makes each bite enjoyable. Chowder pairs great with crusty bread or warm flatbreads. These sides soak up the creamy goodness. For presentation, serve in rustic bowls. Top each bowl with a sprig of cilantro or parsley. It adds color and freshness. You can also sprinkle some smoked paprika on top for a pop of flavor. You can prep the veggies ahead of time. Chop the onion and potato the night before. Store them in the fridge to save time. A kitchen gadget like an immersion blender can help too. It blends the chowder right in the pot. This saves on cleanup and makes blending easier. For the full recipe, check out the [Full Recipe]. {{image_4}} You can easily make this chowder fit your needs. If you want dairy-free options beyond coconut milk, use almond milk or cashew cream. These choices maintain a creamy texture without the dairy. Adding proteins can make your chowder heartier. I love adding cooked chicken for extra flavor. Beans also work well if you want a vegetarian option. Black beans or white beans can bring a nice twist to this dish. To spice things up, consider adding chili flakes or curry powder. Chili flakes provide heat, while curry powder adds a warm, earthy flavor. You can adjust these spices to suit your taste. You can also swap out some veggies. Try adding bell peppers, zucchini, or carrots. These will bring color and nutrition to your chowder. Each adds its own unique twist to the overall flavor. Want to explore new styles? Try a Mexican-style sweetcorn chowder. Add diced jalapeños and top it with avocado and lime. This gives a fresh, zesty kick. For a New England-style twist, you can add clams. This version is rich and savory. Serve it with oyster crackers for a classic touch. Explore these variations to make the chowder your own! You can find the full recipe [here]. To store leftover chowder, let it cool down first. Once cooled, transfer it to an airtight container. Glass or plastic containers work well. Make sure the lid seals tightly to keep the chowder fresh. Place the container in the fridge. It can stay there for up to three days. If you want to keep your chowder longer, freezing is a great option. Pour the cooled chowder into freezer-safe containers. Leave some space at the top for expansion. You can also use freezer bags. Just squeeze out the excess air before sealing. When you’re ready to eat, thaw the chowder overnight in the fridge. To reheat, warm it on the stove over low heat, stirring often. In the fridge, your sweetcorn chowder lasts about three days. If frozen, it can stay good for up to three months. Just remember that the texture may change a bit after freezing. Enjoy your chowder at its best by following these storage tips! For the full recipe, check the earlier section. Can I make sweetcorn chowder without coconut milk? Yes, you can make chowder without coconut milk. Use regular milk or cream instead. You can also try almond milk or cashew cream for a nutty flavor. Each option will change the taste a bit, but it will still be delicious. How can I thicken the chowder? To thicken chowder, you can add more potatoes. Blend some of the chowder to create a creamier texture. You can also use cornstarch mixed with water. This will help thicken it without changing the flavor too much. Is this recipe gluten-free? Yes, this sweetcorn chowder is gluten-free. All the ingredients are safe for those with gluten issues. Just make sure your vegetable broth is also gluten-free. Can I make a vegan version? Absolutely! This recipe is already vegan if you use vegetable broth and skip any non-vegan toppings. Just stick to the coconut milk and you are all set. Can I use a slow cooker for this recipe? Yes, you can use a slow cooker! Sauté the onion and garlic first, then add all ingredients to the slow cooker. Cook on low for 6-8 hours or on high for 3-4 hours. Blend afterward for a creamy texture. How do I enhance the flavors further? To boost flavors, add herbs like thyme or basil. A squeeze of lemon juice can brighten the taste. You can also add a dash of hot sauce for a spicy kick. This blog post covered the key ingredients and steps to make a delicious sweetcorn chowder. We explored essential items like sweetcorn, aromatics, and tasty spices. I shared tips for perfecting texture and flavor along with serving ideas. Variations offered ways to change the recipe based on your taste. Lastly, I included storage tips to keep your chowder fresh. Remember, cooking should be fun! Enjoy creating your own chowder masterpiece.
Sweetcorn Chowder Simple and Creamy Comfort Meal
Are you ready to enjoy a warm bowl of Sweetcorn Chowder? This simple and creamy comfort meal is perfect for any day. With tasty sweetcorn,
To start, choose your bread wisely. I love using hearty sourdough. It gives a nice crunch. Whole wheat also works well and adds fiber. Next, think about cheese. Sharp cheddar is my go-to. It melts wonderfully and packs flavor. Feta adds a nice tang, while mozzarella creates that gooey texture we all love. Now, let’s explore some fun add-ins. Pesto adds a burst of herbal flavor. Sun-dried tomatoes bring a sweet, chewy bite. You can also try some fresh basil leaves for a pop of color. For seasonings, I recommend garlic powder. A dash of black pepper raises the flavor to a new level. What should you serve with your grilled cheese? A simple side salad complements it well. Tomato soup is a classic pairing. You can also dip your sandwich in marinara sauce for a gourmet touch. It’s an easy way to elevate your meal. For the complete recipe, check out the Full Recipe section. Start by gathering your ingredients. You want to have them ready for quick assembly. For this recipe, you will need: - 4 slices of hearty sourdough bread - 2 tablespoons unsalted butter, softened - 1 tablespoon vibrant pesto - 1 cup sharp cheddar cheese, freshly shredded - 1/2 cup creamy feta cheese, crumbled - 1/4 cup sun-dried tomatoes, finely chopped - 1/4 teaspoon garlic powder - 1/4 teaspoon freshly ground black pepper - Several fresh basil leaves Next, butter the bread. Spread softened butter on one side of each slice. Make sure you cover it well. This helps create a perfect crust when grilling. For cooking, I recommend using a non-stick skillet. Preheat it over medium heat. This ensures a nice, even cook. Place two slices of bread in the skillet, buttered side down. Spread pesto on the unbuttered side of each slice. Add the cheese mixture on top. Layer the sun-dried tomatoes and the rest of the cheese. Finish with the other two slices of bread, buttered side up. Cook each sandwich for about 3 to 4 minutes on each side. You want them golden brown and the cheese melted. Keep an eye on them. Adjust heat if needed to avoid burning. Once grilled, remove the sandwiches from the skillet. Let them rest for a minute. This helps the cheese set, making them easier to cut. Slice the sandwiches in half diagonally for a beautiful presentation. Garnish with fresh basil leaves to add color and flavor. Serve on a rustic wooden platter for a gourmet touch. Enjoy your ultimate gourmet grilled cheese sandwich! For detailed cooking steps, check the Full Recipe. To get the best grilled cheese, use medium heat on your stove. This heat helps the bread crisp up while the cheese melts well. If your stovetop runs hot, lower the heat slightly. After grilling, let the sandwich rest for a minute. This helps the cheese set and makes slicing easier. One big mistake is overloading your sandwich with too many ingredients. Too much can make it soggy and hard to grill. Stick with two to three main ingredients. Also, choose the right cheese and bread. Not all cheeses melt well. Sharp cheddar or mozzarella are great picks. For bread, use something sturdy like sourdough or whole wheat. Add herbs and spices for a gourmet twist. Try mixing in dried oregano or fresh basil. This adds a delightful taste. You can also experiment with flavored butters. Mixing garlic or herbs into butter gives your sandwich an extra layer of flavor. For a unique touch, try pesto butter. It pairs well with the cheese and adds a nice zing. For the full recipe, check out the Ultimate Gourmet Grilled Cheese Sandwich. {{image_4}} Grilled cheese sandwiches are fun to make and eat. You can change them up in many ways. Here are some tasty ideas. - Margherita-style grilled cheese: Use fresh mozzarella, tomatoes, and basil. This combo gives a fresh taste. - Spicy grilled cheese with pepper jack: Add pepper jack cheese for a kick. Pair it with jalapeños for extra heat. - Sweet and savory grilled cheese: Try apple and brie. The sweetness of the apple pairs well with the creamy brie. - International twists: Combine pesto and mozzarella for an Italian twist. Or make a French toast style, using eggy bread for a sweet touch. - Plant-based cheese and bread choices: Use vegan cheese and whole grain bread for a healthy option. There are many tasty brands to choose from. - Creative veggies to include: Add spinach, tomatoes, or even avocado for added nutrition. These ingredients make your sandwich colorful and delicious. These ideas show how easy it is to make your grilled cheese unique. You can explore flavors and create your own twist. For more inspiration, check the Full Recipe for the ultimate gourmet grilled cheese sandwich! To keep your leftover grilled cheese fresh, wrap each sandwich in plastic wrap or aluminum foil. This helps to trap moisture and keep the bread soft. Place the wrapped sandwiches in an airtight container in your fridge. For freezing, lay the sandwiches flat in a freezer bag. Remove as much air as possible before sealing. You should eat refrigerated grilled cheese within 3 to 5 days. If you freeze them, they can last up to 2 months. Look for signs of spoilage, like mold or an off smell. If the bread feels too dry or hard, it's best to throw it away. When reheating, use the oven for the best results. Preheat it to 350°F (175°C) and place the sandwich on a baking sheet. Heat for about 10-15 minutes until warm and crispy. You can use a microwave, too, but this can make the bread soggy. If you must, place a paper towel under the sandwich to absorb moisture and heat it for short bursts. You can use olive oil, avocado oil, or even coconut oil. These oils add flavor and crispness. You can also try margarine or vegan butter. They work well in place of regular butter. This way, you can still enjoy a tasty sandwich with less saturated fat. Sharp cheddar cheese tops my list. It melts great and has a strong taste. Gouda and mozzarella are also good choices. They add creaminess and stretchiness that many love. For something unique, try fontina or brie. Each cheese brings its own flavor and texture. Absolutely! You can add ingredients to make it your own. Try adding sautéed mushrooms or spinach for a veggie boost. You could also use different cheeses for variety. If you like spice, add jalapeños or hot sauce. The options are endless! Keep your heat at medium-low. This helps the bread brown evenly without burning. Use enough butter or oil to coat the bread well. Let the sandwich cook slowly. Flip it carefully, and let it rest before slicing. This keeps the cheese from spilling out. It can be, depending on the ingredients. Whole grain bread and low-fat cheese make it better. Adding veggies boosts nutrition too. If you worry about fat, use less cheese or oil. Enjoy it in moderation, and pair with a salad for balance. Yes, you can! Mayonnaise adds a rich flavor and helps with browning. It spreads easily on bread. However, it has a higher fat content than butter. Use less to keep it lighter. Experiment and see what you like best! For more ideas, check the Full Recipe. In this blog post, I covered all you need for a great grilled cheese sandwich. From selecting the best bread and cheese to tasty add-ins and side pairings, I helped you understand each step. I shared tips for cooking and storing leftovers, plus answers to common questions. Remember, making a perfect grilled cheese is all about creativity. Don't be afraid to experiment! Enjoy your cooking adventure and impress your family and friends with your grilled cheese skills.
Grilled Cheese Sandwich Simple and Flavorful Recipe
Grilled cheese sandwiches are a timeless favorite, beloved for their gooey goodness and simple charm. In this post, I’ll show you how to craft a
- 1 pound ground turkey or chicken - 8 ounces whole wheat or gluten-free lasagna noodles, broken into irregular pieces - 1 cup ricotta cheese, preferably part-skim - 1 cup shredded mozzarella cheese, plus more for topping The main ingredients make this soup hearty and filling. Ground turkey or chicken adds protein and flavor. Whole wheat or gluten-free lasagna noodles give it that classic lasagna feel. The ricotta and mozzarella cheeses create a creamy texture that comforts the soul. - 1 can (15 oz) crushed tomatoes - 1 tablespoon extra virgin olive oil - 1 medium onion, diced finely - 3 cloves garlic, minced - 2 teaspoons dried basil - 1 teaspoon dried oregano - 1/2 teaspoon red pepper flakes (optional for heat) - Salt and freshly cracked black pepper to taste These seasonings are key to making your soup taste great. Crushed tomatoes add sweetness and depth. Olive oil gives richness, while onion and garlic provide a strong base of flavor. Dried basil and oregano add that Italian touch. If you like spice, add red pepper flakes for heat. Always taste and adjust the salt and pepper to your liking. {{ingredient_image_2}} 1. In a large pot, heat 1 tablespoon of extra virgin olive oil over medium heat. 2. Add 1 medium onion, diced finely. Sauté for 3-4 minutes until it becomes soft and clear. 3. Now, add 3 cloves of minced garlic. Cook for 1 minute, stirring well so it doesn’t burn. 4. Next, add 1 pound of ground turkey or chicken to the pot. Break it apart with a spoon. 5. Brown the meat for about 5-7 minutes until it turns brown and loses its pink color. 6. Season the meat with salt and freshly cracked black pepper to taste. 1. Pour in 1 can of crushed tomatoes and 4 cups of chicken or vegetable broth. 2. Add 2 teaspoons of dried basil and 1 teaspoon of dried oregano. 3. If you like heat, include 1/2 teaspoon of red pepper flakes. 4. Raise the heat to bring the mixture to a quick boil. 5. Once it boils, lower the heat and let it simmer uncovered for about 10 minutes. 1. After simmering, add 8 ounces of broken lasagna noodles to the pot. 2. Cook for 10-12 minutes, stirring now and then until the noodles are al dente. 3. Once the noodles are ready, stir in 1 cup of ricotta cheese until it blends smoothly. 4. Serve in warm bowls and top with 1 cup of shredded mozzarella cheese. 5. Finish with fresh basil leaves for a tasty touch. - Importance of seasoning meat: Always season the meat early. This adds great flavor. I recommend using salt and freshly cracked black pepper. Add them while the turkey or chicken cooks. This way, the spices blend into the meat and enhance the taste. - Tips for al dente noodles: To achieve the perfect texture, add the broken lasagna noodles after simmering. Cook them for 10-12 minutes. Keep stirring occasionally to prevent sticking. You want them tender but still firm. Test a piece to ensure they have a nice bite. - Toppings and garnishes: For added flavor, top each bowl with shredded mozzarella cheese. Fresh basil leaves also bring a burst of color. A drizzle of olive oil elevates the dish to a gourmet level. - Pairing ideas for sides: I love serving this soup with crusty bread for dipping. A simple green salad on the side balances the meal well. You can also pair it with garlic bread for a comforting touch. Pro Tips Use Lean Meat: Opt for lean ground turkey or chicken to keep the soup healthy without sacrificing flavor. Layering Flavors: Let the soup simmer longer if you have time; this enhances the depth of flavor from the spices and tomatoes. Cheese Variations: Feel free to mix different types of cheese, like using ricotta with cottage cheese for a lighter version. Garnishing Tips: Fresh basil not only adds flavor but also a vibrant color; consider adding a drizzle of balsamic glaze for extra flair! {{image_4}} You can make this lasagna soup even more packed with protein. One way is to use different protein sources. You can swap ground turkey or chicken for ground beef or pork. If you're looking for a meatless option, try using black beans or lentils. Both add protein and a nice texture. Another tip is to replace the pasta. Instead of traditional noodles, you can use high-protein pasta made from chickpeas or lentils. These options give you a boost of protein and fiber while keeping the soup hearty. If you're gluten-free, don't worry! You can adapt this recipe easily. Use gluten-free lasagna noodles instead. Many brands offer tasty options that work well in soups. For those who avoid dairy, you can still enjoy this dish. Instead of ricotta and mozzarella, use cashew cheese or nutritional yeast. Both add flavor without dairy. You can also try using almond or coconut milk in place of broth for a creamy base. These substitutions keep the soup delicious and satisfying for all diets. To store your lasagna soup, let it cool first. Then, place it in an airtight container. This keeps it fresh and tasty. You can store it in the fridge for up to three days. If you want to enjoy it later, make sure to reheat it gently. Freezing your soup is easy! Portion it into freezer-safe containers. Leave a little space at the top. This helps with expansion when it freezes. You can freeze the soup for up to three months. When you’re ready to eat, thaw it overnight in the fridge. Reheat it gently on the stove or in the microwave. This way, you keep all the great flavors and textures. You can use many meats or plant-based options instead of ground turkey. Here are some ideas: - Ground chicken - Ground beef - Ground pork - Crumbled tempeh - Lentils (cooked and mashed) Each choice adds a unique flavor. Ground beef gives a richer taste, while lentils make it hearty and healthy. Yes, you can easily make this soup vegetarian. Here are some tips: - Replace ground turkey with crumbled tempeh or lentils. - Use vegetable broth instead of chicken broth. - Add more veggies like spinach, zucchini, or mushrooms for extra flavor and nutrition. This way, you keep the soup filling and delicious, even without meat. Adjusting the spice level is simple. Here’s how: - For mild flavor, skip red pepper flakes. - To add some heat, start with a small amount and taste as you go. - Add fresh jalapeños or hot sauce if you want more kick. These small changes let you customize the soup to your taste. This blog post covered how to make a delicious protein-packed lasagna soup. We discussed essential ingredients like ground turkey, whole wheat noodles, and cheese. I shared step-by-step instructions to build great flavor. You learned tips for optimal taste and variations for special diets. Remember to store leftovers properly to keep your soup fresh. You can also adjust the spice level to suit your taste. Enjoy experimenting with this recipe and making it your own!
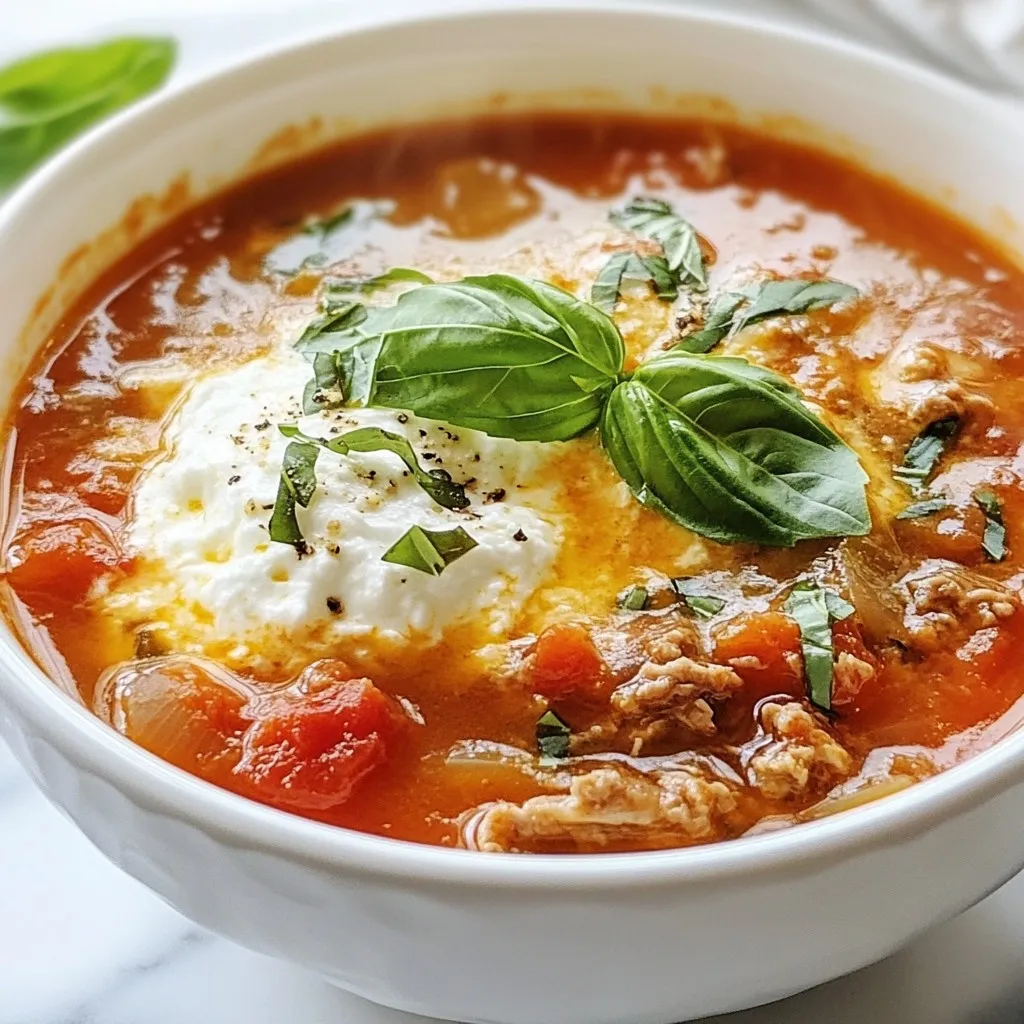
Protein-Packed Lasagna Soup Hearty and Easy Recipe
Are you craving a warm, filling dish that’s both hearty and healthy? My Protein-Packed Lasagna Soup is the answer! This easy recipe combines the best
To make Crack Burgers, you need some key ingredients. These will give your burgers that amazing flavor and texture. Here’s what you will need: - 1 lb ground beef (80/20) - 1/2 tablespoon garlic powder - 1/2 tablespoon onion powder - 1 tablespoon Worcestershire sauce - 1 tablespoon Dijon mustard - 1 tablespoon soy sauce - Salt and freshly ground black pepper, to taste - 4 slices of sharp cheddar cheese - 4 hamburger buns - 1 cup lettuce, shredded - 1 ripe tomato, sliced - 1/2 cup dill pickles, sliced - Ketchup and mustard, for serving Using 80/20 ground beef is perfect. It gives just the right amount of fat. You want juicy burgers, not dry ones. The garlic and onion powder add nice flavors. Worcestershire sauce and soy sauce add depth too. You can customize your Crack Burgers with optional toppings. Here are some tasty ideas: - Avocado slices - Crispy bacon strips - Sautéed mushrooms - Grilled onions - Spicy jalapeños - Barbecue sauce Feel free to mix and match! You can create a burger that fits your taste. Having the right tools makes cooking easier. Here are some must-haves for making Crack Burgers: - Large mixing bowl - Grill or skillet - Spatula - Meat thermometer - Burger press (optional) These tools help ensure your burgers cook evenly and turn out great. A meat thermometer is useful for checking doneness. {{ingredient_image_2}} To make the patties, start with 1 pound of ground beef. I use 80/20 beef for the best taste and texture. In a large bowl, mix this beef with half a tablespoon of garlic powder and onion powder. Add one tablespoon of Worcestershire sauce, Dijon mustard, and soy sauce. Season with salt and black pepper. Use your hands to mix gently. Be careful not to overwork the meat. This helps keep the patties tender. Next, divide the mixture into four equal parts. Shape each part into a patty. Make a small indent in the center with your thumb. This step helps the burger cook evenly and keeps it from puffing up. You can cook your Crack Burgers on a grill or in a pan. If you choose to grill, preheat it to medium-high heat. For pan-frying, heat your skillet until it’s hot. Add the patties once ready. Cook them for about 3 to 4 minutes on one side. You want a nice sear to form. After that, flip the patties. Place a slice of sharp cheddar cheese on each patty. Cook for another 3 to 4 minutes. The cheese should melt nicely, and the patties should reach your desired doneness. While the patties cook, toast your burger buns. Place them cut-side down on the grill or skillet for the last minute of cooking. Toast until they are golden brown. Now, it’s time to assemble! On the bottom half of each bun, spread ketchup and mustard. Place the cheesy patty on top. Then add shredded lettuce, a slice of tomato, and a few pickle slices. Finally, place the top half of the bun on your burger. Press down gently to hold everything together. Serve your Crack Burgers warm and enjoy! For the best Crack Burgers, focus on size and thickness. Make each patty about 1/2 inch thick. This helps them cook evenly and stay juicy. Use your hands to shape them gently. Overworking the meat can lead to tough burgers. Aim for 4 equal portions from the ground beef. Seasoning is key to flavor. Use garlic powder and onion powder for a savory kick. A tablespoon of Worcestershire sauce adds depth. Don't forget Dijon mustard and soy sauce for added zest. Always taste your meat mixture before shaping patties. Adjust seasoning with salt and black pepper to match your taste. Cooking burgers correctly enhances flavor and texture. The USDA suggests cooking ground beef to 160°F for safety. For a medium burger, aim for 140°F. Use a meat thermometer for accuracy. Cooking times vary; usually, 3-4 minutes per side works well. Remember, melted cheese adds a rich finish. Enjoy experimenting with different doneness levels to find your favorite! Pro Tips Choose the Right Beef: For juicy and flavorful burgers, opt for ground beef with a fat content of at least 20%. This ensures a richer taste and prevents the patties from drying out during cooking. Form Patties Carefully: Avoid overworking the meat when mixing ingredients. Gently combine the mixture to keep the patties tender and juicy. Pressing a thumb indentation in the center helps prevent puffing while cooking. Don’t Rush the Cooking: Allow the patties to sear properly on each side for a flavorful crust. Resist the urge to flip them too early; this will enhance the overall texture and taste. Customize Your Toppings: Feel free to get creative with toppings! Adding avocado, crispy bacon, or sautéed mushrooms can take your Crack Burgers to the next level. {{image_4}} You can change up your Crack Burgers by adding fun flavors. Here are some ideas: - BBQ Crack Burger: Mix BBQ sauce into the beef. Top with onion rings for crunch. - Mushroom Swiss Burger: Sauté mushrooms in butter. Add Swiss cheese on top for a rich taste. - Spicy Jalapeño Burger: Mix diced jalapeños into the meat. Add pepper jack cheese for heat. - Mediterranean Burger: Use feta cheese and olives. Top with tzatziki sauce for a fresh twist. If you have dietary needs, you can swap ingredients easily. Here are some options: - Lean Meat: Use ground turkey or chicken for a healthier burger. - Gluten-Free Buns: Choose gluten-free buns or lettuce wraps instead of regular buns. - Dairy-Free Cheese: Try vegan cheese if you're lactose intolerant. - Plant-Based Patties: Use a plant-based burger for a meat-free meal. Pair your Crack Burgers with tasty sides. Here are some suggestions: - Sweet Potato Fries: Crispy and sweet, they add a nice contrast. - Coleslaw: A crunchy slaw can balance the burger's richness. - Onion Rings: Golden and crispy, they are always a hit. - Salad: A fresh salad can add lightness to your meal. These variations and sides can make your Crack Burger experience fun and tasty! After enjoying your Crack Burgers, you might have some leftovers. Store them in an airtight container. This keeps the burgers fresh for up to three days in the fridge. Make sure to separate the patties from the buns and toppings. This helps keep everything from getting soggy. When it’s time to eat your leftovers, reheating is key. Use the oven for the best taste. Preheat it to 350°F (175°C). Place the patties on a baking sheet. Cover them with foil to keep moisture in, and heat for about 10 minutes. If you want the buns warm, place them in the oven for the last few minutes. This method keeps the burgers juicy and tasty. If you want to save your Crack Burgers for later, freezing is a great option. Wrap each patty tightly in plastic wrap. Then, place them in a freezer bag. Make sure to squeeze out as much air as possible. You can freeze the patties for up to three months. When you're ready to eat, thaw them in the fridge overnight before reheating. This way, you can enjoy your delicious burgers anytime! A Crack Burger stands out because of its bold flavors and juicy texture. The mix of beef, Worcestershire sauce, and Dijon mustard makes each bite exciting. The secret is in the blend of ingredients. You want them to complement each other. The sharp cheddar cheese adds a creamy richness that makes you crave more. This combination makes them hard to resist, hence the name "Crack Burger." Yes, you can use ground turkey! It will give a lighter taste. However, turkey is leaner than beef. This means it may not be as juicy. To avoid dry patties, add some olive oil or a splash of chicken broth. This keeps the burgers moist and flavorful. Season your turkey mix just like the beef for the best taste. To add heat to your Crack Burgers, try several options. You can mix in chopped jalapeños or a dash of hot sauce into the meat. Another great idea is to sprinkle cayenne pepper into the patty mix. For an extra kick, top your burger with spicy pickles or pepper jack cheese. These small changes can make your burger pack a punch! We explored how to make delicious Crack Burgers, from key ingredients to cooking methods. We covered tips for shaping patties and enhancing flavor. Several tasty variations and side dishes were shared to elevate your meal. Lastly, I shared smart storage tips to keep leftovers fresh. Remember, the right blend of ingredients and techniques makes these burgers special. Enjoy creating your own version, and share the joy with others!
Crack Burgers That Will Satisfy Your Hunger
Crack burgers are not just a meal; they’re a flavor explosion that will blow your taste buds away. If you’re hungry and ready to cook,
To make a tasty honey-glazed corn casserole, gather these key ingredients: - 2 cups fresh or frozen corn kernels - 1 cup heavy cream - 1/2 cup honey - 3 large eggs - 1 cup grated cheddar cheese - 1 cup crushed cornflakes - 1/4 cup unsalted butter, melted - 1 teaspoon baking powder - Salt and pepper to taste These ingredients blend perfectly to create a sweet and savory dish. The corn provides a natural sweetness. The heavy cream adds richness, while the eggs help bind everything together. Honey gives it a unique flavor, and cheddar cheese adds a nice savory touch. For even more flavor, consider adding: - Fresh chives for garnish Fresh chives bring a hint of onion flavor. They also add a pop of color, making your dish look even better. You can mix other spices too, like garlic powder or paprika, to give it a personal twist. You'll need a few tools to make this dish: - A large mixing bowl - A whisk for blending - A 9-inch baking dish - An oven for baking These tools make the process simple and quick. A whisk helps mix the ingredients well. The baking dish is perfect for even cooking, ensuring your casserole turns out great each time. Start by preheating your oven to 350°F (175°C). This step warms up your oven and makes sure your casserole cooks evenly. While the oven heats, get your baking dish ready. Grease a 9-inch dish with some butter or cooking spray. This helps the casserole come out easily after baking. In a large bowl, combine 2 cups of corn kernels, 1 cup of heavy cream, 1/2 cup of honey, and 3 large eggs. Use a whisk to mix well until it is smooth. This blend creates a rich and sweet base for your casserole. Next, add 1 cup of grated cheddar cheese, 1/4 cup of melted butter, and 1 teaspoon of baking powder. Season with salt and pepper to taste. Mix these ingredients together until they are fully combined. Now it's time to fold in 1 cup of crushed cornflakes. Gently stir so you don’t break them apart. This gives the casserole a nice crunch. Pour the mixture into your greased baking dish. Spread it out evenly to help it cook well. Place the dish in the preheated oven and bake for 35-40 minutes. You want the top to turn golden brown. To check if it’s done, insert a toothpick in the center. If it comes out clean, your casserole is ready. Let it rest for about 5 minutes before serving. This allows flavors to settle. For a nice touch, sprinkle fresh chives on top before serving. Enjoy your delicious Honey-Glazed Corn Casserole! For the full recipe, check the section above. To make your honey-glazed corn casserole creamy, start with heavy cream. This ingredient adds richness. Mix it well with corn and eggs. Avoid overmixing when you add the cornflakes. This keeps your texture light and fluffy. One common mistake is not measuring the honey correctly. Too much honey can make your casserole too sweet. Another mistake is not letting it rest after baking. Letting it cool helps the flavors mix well. Also, be careful with the baking time. Overbaking can dry it out. Serve your casserole warm for the best taste. You can add fresh chives on top for a nice look. Pair it with grilled chicken or a fresh salad. This adds balance and makes a great meal. For a fun twist, try adding diced jalapeños for a kick. You can find the Full Recipe for more details. {{image_4}} You can swap heavy cream with milk or almond milk. This change reduces fat but keeps flavor. For cheese, try a dairy-free option like cashew cheese. It adds creaminess without dairy if needed. If you want to change the honey, use maple syrup or agave nectar. Both options give sweetness with a different taste. You can also use brown sugar for a richer flavor. Adjust the amount based on your taste. Want to boost nutrition? Toss in some diced bell peppers or spinach. These veggies add color and flavor. For protein, mix in cooked chicken or black beans. This adds heartiness and makes the dish even better. For the complete recipe, check the Full Recipe. After enjoying your honey-glazed corn casserole, let it cool to room temperature. Then, transfer the leftovers to an airtight container. You can store it in the fridge for up to three days. If you need to store it longer, freezing is a great option. To reheat your casserole, preheat your oven to 350°F (175°C). Place the casserole in an oven-safe dish. Cover it with foil to keep it moist. Heat for about 20 minutes or until it is warm all the way through. You can also use the microwave, but the oven keeps the texture better. If you want to freeze your honey-glazed corn casserole, wrap it tightly in plastic wrap before placing it in a freezer bag. It can last up to two months in the freezer. When you’re ready to eat, thaw it in the fridge overnight. Then, reheat it using the oven for the best taste. For the full recipe, check the earlier section. Yes, you can make Honey-Glazed Corn Casserole ahead of time. Prepare the casserole and cover it. Store it in the fridge for up to 24 hours. This dish tastes great when baked fresh, but you can save time by prepping in advance. When ready to bake, just remove it from the fridge. Let it sit for about 30 minutes to warm up before baking. This way, you get a nice, even bake. Honey-Glazed Corn Casserole pairs well with many dishes. Some great options include: - Grilled chicken or pork - Beef brisket or ribs - A fresh green salad - Roasted vegetables - Mashed potatoes These sides balance the sweet and savory flavors of the casserole. You can mix and match based on your meal theme or occasion. To tell if your casserole is done, look for a few signs. First, the top should be a golden brown color. Second, insert a toothpick into the center. If it comes out clean, your casserole is ready. You might also notice a slight puffing around the edges. These signs show that the eggs have set and the dish is cooked through. Enjoy the delicious results! This blog post shared everything you need for a delicious Honey-Glazed Corn Casserole. You learned about the key and optional ingredients, plus essential cooking tools. We covered step-by-step instructions to ensure perfect baking every time, along with tips to avoid common mistakes. I also shared tasty variations and storage tips to keep your dish fresh. In the end, this casserole is easy to make and sure to impress. Enjoy experimenting with flavors and serving it to your loved ones!
Honey-Glazed Corn Casserole Simple and Tasty Treat
Looking for a simple yet delicious dish to impress your family? You’ve found it! My Honey-Glazed Corn Casserole is a treat that combines sweet and
- 1 pound smoked sausage - 4 medium potatoes - 1 cup carrots - 1 cup celery - 1 medium onion - 4 cups chicken broth - 1 cup heavy cream This chowder needs solid, hearty ingredients. I like using smoked sausage for a rich taste. You can slice it into half-inch rounds for even cooking. The potatoes add creaminess and bulk. I prefer medium potatoes, peeled and cubed. Carrots and celery give a bright crunch. The onion adds sweetness and depth. Chicken broth forms the base, while heavy cream brings it all together. - 1 teaspoon garlic powder - 1 teaspoon dried thyme - Salt and freshly ground black pepper - 2 tablespoons extra virgin olive oil Seasonings make a big difference in flavor. Garlic powder and thyme add warmth. Always taste and adjust salt and pepper, too. I use extra virgin olive oil to sauté the vegetables. It gives a nice base flavor and helps the chowder taste fresh. - Fresh parsley Garnish adds a pop of color and freshness. I like to chop fresh parsley and sprinkle it on top just before serving. It looks nice and adds a hint of herbal flavor. For a full recipe, check the details on Creamy Sausage and Potato Chowder. - Heat 2 tablespoons of olive oil in a large pot over medium heat. - Once the oil is hot, add 1 pound of sliced smoked sausage. Brown the sausage for about 5-7 minutes. Cook until it is nice and caramelized on both sides. - Use a slotted spoon to remove the sausage from the pot. Set it aside on a plate for later. - In the same pot, add 1 medium finely chopped onion, 1 cup of diced carrots, and 1 cup of chopped celery. - Cook the vegetables for about 5 minutes. Stir often until the onions turn translucent and the veggies soften. - Now, add 4 medium peeled and cubed potatoes to the pot. Stir to combine with the sautéed vegetables. - Pour in 4 cups of chicken broth. Season it with 1 teaspoon of garlic powder, 1 teaspoon of dried thyme, salt, and pepper to taste. - Increase the heat and bring the mixture to a rapid boil. - Once the chowder boils, reduce the heat to low. Cover the pot and let it simmer for 15-20 minutes. This will make the potatoes fork-tender. - After the potatoes are tender, add the reserved sausage back into the chowder along with 1 cup of heavy cream. - Allow the chowder to simmer for another 5-10 minutes. Stir occasionally to prevent sticking. Taste it and adjust seasoning as needed. This creamy sausage and potato chowder is a comfort food dream! For the full recipe, check the section above. To make your chowder creamy, you can adjust the amount of heavy cream. If you want a lighter chowder, use less cream. For a richer taste, add more. You can also thicken your chowder using cornstarch or flour. Mix a tablespoon of cornstarch with cold water. Stir this mixture into the chowder. Let it cook for a few minutes to thicken. If using flour, make a roux by cooking it with butter before adding it to the chowder. This adds depth and a smooth texture. To boost flavor, consider adding spices and herbs. A pinch of smoked paprika gives a nice kick. Fresh thyme or rosemary can brighten the dish. You can also add a sprinkle of red pepper flakes for heat. For added richness, stir in some cheese. Cheddar or Gruyère melts well and complements the sausage perfectly. This makes your chowder even more delicious. Pair your creamy sausage and potato chowder with bread for a full meal. A crusty bread roll is perfect for dipping. You can also serve it with a simple green salad. This adds freshness and crunch. If you want more sides, try roasted vegetables. They bring extra color and flavor to your table. Enjoy your chowder hot, garnished with chopped parsley for a bright touch. For the full recipe, check out the Creamy Sausage and Potato Chowder! {{image_4}} You can easily change the sausage in your chowder. Using turkey sausage makes it lighter. It still brings great flavor. You can also swap out vegetables based on what you have. Try adding corn, bell peppers, or green beans for a new twist. If you need gluten-free options, use gluten-free broth. You can also use cornstarch to thicken instead of flour. For dairy-free alternatives, swap heavy cream with coconut milk. This will keep your chowder rich and creamy without dairy. Want to add some flair? Try making an Italian-style chowder. Add Italian herbs like basil and oregano. This gives your dish a fresh taste. For a Mexican flavor, add diced tomatoes and chili powder. This will spice things up and create a whole new experience. For the full recipe, check the section above. To keep your creamy sausage and potato chowder fresh, store it properly. First, let the chowder cool down to room temperature. Then, transfer it to an airtight container. - Refrigeration guidelines: You can store it in the fridge for up to 3 days. Make sure to seal it well to avoid any smells from other foods. - Freezing instructions: If you want to freeze it, pour the cooled chowder into freezer-safe bags or containers. It will stay good for about 3 months in the freezer. Just remember to leave some space at the top, as liquids expand when frozen. When you are ready to enjoy your chowder again, reheating it right is key. - Best methods for reheating: The best way to reheat is on the stove over low heat. Stir it often to avoid sticking. If you prefer, you can microwave it in short bursts, stirring in between. - Maintaining flavor and texture: Add a splash of cream or broth when reheating. This keeps the chowder creamy and helps restore its original flavor. Always taste and adjust the seasoning if needed. You can store this chowder in the fridge for up to three days. Keep it in an airtight container. For longer storage, you can freeze it for up to three months. Just make sure to cool it first before freezing. When ready to eat, thaw it overnight in the fridge. Yes, you can make this chowder ahead of time. Cook it fully, let it cool, and store it in the fridge. When you are ready to serve, simply reheat it on the stove. This allows the flavors to blend well and makes it even tastier. This chowder pairs well with several sides. Here are some ideas: - Crusty bread rolls - Garlic bread - A fresh garden salad - Steamed vegetables You can easily adjust the spice level. If you like it spicy, add red pepper flakes or hot sauce. For a milder flavor, skip these ingredients. You can also use a milder sausage to keep it soft. This post covered a hearty Creamy Sausage and Potato Chowder. You learned about its fresh ingredients, cooking steps, and tips for flavor and texture. I shared ways to adapt recipes for different diets and tastes, ensuring anyone can enjoy this dish. Remember, cooking is about creativity and fun. Feel free to experiment with flavors or pairings. Make this chowder your own. Enjoy the warmth and comfort it brings. Your meals can be both satisfying and enjoyable!
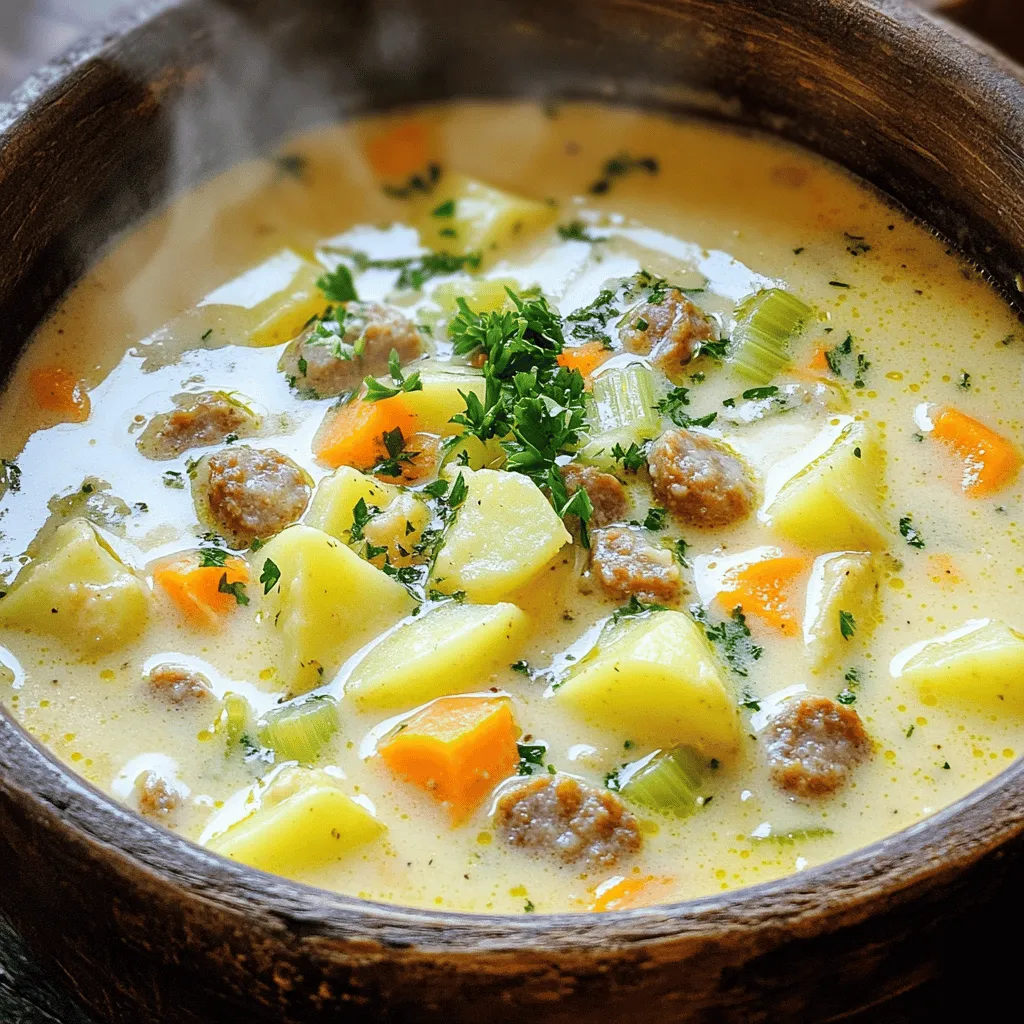
Creamy Sausage and Potato Chowder Comforting Meal
Are you craving a warm, hearty meal that hits the spot? Look no further! My Creamy Sausage and Potato Chowder combines rich flavors and simple
To make this tasty dish, you need: - 300g pasta (penne or rigatoni) - 200g feta cheese, cubed - 400g cherry tomatoes, halved - 1 red onion, diced - 3 garlic cloves, minced - 3 tablespoons olive oil - 1 teaspoon dried oregano - ½ teaspoon red pepper flakes (optional, for heat) - Salt and pepper, to taste - ½ cup fresh basil leaves, torn - 100g shredded mozzarella cheese You will need a few key items to cook this dish: - Large pot for boiling pasta - Mixing bowl for combining ingredients - Baking dish for the oven - Wooden spoon or spatula for mixing These tools help make cooking easier and more fun! If you need to change some ingredients, here are some ideas: - Pasta: You can use any pasta shape you like. - Feta: Try goat cheese or ricotta for a different taste. - Tomatoes: Canned tomatoes work too, but fresh is best. - Onion: Shallots or green onions can replace red onion. - Herbs: Use Italian seasoning if you don't have oregano. - Cheese: Swap mozzarella with a cheese you enjoy, like cheddar. These swaps keep the dish tasty while using what you have at home! {{ingredient_image_2}} First, gather all your ingredients. You need 300g of pasta, like penne or rigatoni. Next, cut 400g of cherry tomatoes in half. Dice 1 red onion and chop 3 cloves of garlic. Measure out 3 tablespoons of olive oil, 1 teaspoon of dried oregano, and ½ teaspoon of red pepper flakes if you want heat. Don't forget salt and pepper for taste. Lastly, have 200g of cubed feta cheese, 100g of shredded mozzarella, and ½ cup of fresh basil leaves ready. Preheat your oven to 200°C (400°F) now. Boil water in a large pot. Add a pinch of salt to the water. Once it boils, add your pasta. Cook it according to the package instructions until it's al dente. This usually takes about 8-10 minutes. When it's done, drain the pasta in a colander. Set it aside while you mix the sauce. In a large mixing bowl, combine the halved tomatoes, diced onion, and chopped garlic. Pour in the olive oil, add oregano, red pepper flakes, salt, and pepper. Mix everything until the tomatoes are well coated. Next, add the drained pasta to this mixture and stir gently. Now, spread half of this pasta mix into a baking dish. Sprinkle half of the feta cheese on top. Layer the rest of the pasta mixture over it, followed by the remaining feta. Finally, top it all with the shredded mozzarella cheese. Bake in your preheated oven for 25-30 minutes. You want the cheese to become golden and bubbly. When it's ready, take it out and sprinkle fresh basil on top for extra flavor. Enjoy your meal hot from the oven! To make your feta tomato pasta bake just right, follow these tips. Use the best quality feta you can find. It adds great flavor. Make sure your pasta is al dente. This keeps it firm while baking. Mix the ingredients well to coat everything. This ensures each bite is tasty. Serve the pasta bake hot from the oven. It looks great in individual bowls. Add a sprinkle of fresh basil on top. A drizzle of olive oil adds a nice touch. For extra flavor, serve with crusty bread. It’s perfect for sopping up any sauce. You can also pair it with a simple salad. This adds freshness to your meal. Avoid overcooking the pasta. If it’s too soft, it will get mushy in the oven. Don’t skip the olive oil. It helps everything blend nicely. Make sure to season well with salt and pepper. Taste the mix before baking. Lastly, don’t forget the basil at the end. It brightens the dish and makes it pop! Pro Tips Choose the Right Pasta: Opt for sturdier pastas like Penne or Rigatoni that hold up well when baked. Fresh vs. Dried Herbs: While dried oregano works well, using fresh herbs enhances the flavor even more. Customize Your Veggies: Feel free to add other vegetables like bell peppers or spinach for added nutrition and flavor. Make Ahead: Prepare the dish ahead of time and store it in the fridge; bake it just before serving for a quick meal. {{image_4}} You can easily change this recipe to fit your diet. If you want a gluten-free option, use gluten-free pasta. For a vegan twist, swap feta for a plant-based cheese. You can also skip the cheese altogether for a lighter dish. If you need a low-carb version, try zucchini noodles instead of pasta. To add more depth to the dish, consider using fresh herbs. Basil is great, but try thyme or parsley for a new taste. You can also mix in sun-dried tomatoes for sweetness. If you love spice, add more red pepper flakes or a chopped jalapeño. A squeeze of lemon juice just before serving can brighten the flavors too. Feel free to get creative with your ingredients. Instead of cherry tomatoes, use diced bell peppers or spinach. You can also try adding cooked chicken or shrimp for extra protein. Swap out the mozzarella for a different cheese like cheddar or gouda if you prefer. These changes keep the dish fresh and fun while still being simple to make! After you finish your delicious feta tomato pasta bake, let it cool. Transfer any leftovers to an airtight container. You can keep it in the fridge for about 3 to 5 days. Make sure to label your container with the date. This way, you know when to eat it. To reheat your pasta bake, preheat your oven to 180°C (350°F). Place your pasta bake in an oven-safe dish. Cover it with foil to keep it moist. Heat it for about 15 to 20 minutes. If you want a crispy top, remove the foil for the last 5 minutes. You can also use a microwave. Heat it in short bursts, stirring in between. This helps it heat evenly. Want to save some for later? You can freeze the pasta bake! First, let it cool completely. Then, wrap it tightly in plastic wrap and foil. You can also use a freezer-safe container. It will stay good for about 2 to 3 months. When you’re ready to eat, let it thaw in the fridge overnight. Then, reheat it in the oven for the best taste. To make feta tomato pasta bake, start by preheating your oven to 200°C (400°F). Cook 300g of pasta until it's al dente. Drain the pasta and set it aside. In a large bowl, mix 400g of halved cherry tomatoes, one diced red onion, three minced garlic cloves, three tablespoons of olive oil, one teaspoon of dried oregano, and season with salt and pepper. Stir until the tomatoes are coated. Add the cooked pasta and mix gently. Layer half of the pasta mix in a baking dish, then sprinkle half of 200g of cubed feta cheese. Add the rest of the pasta and top with the remaining feta. Finish with 100g of shredded mozzarella cheese. Bake for 25-30 minutes until golden and bubbly. Top with fresh basil before serving. Yes, you can use different types of cheese. Feta gives a tangy taste, but you could swap it for goat cheese or cream cheese. Mozzarella adds creaminess, but cheddar works well too. Just pick a cheese you enjoy. Mixing cheeses can also create a great flavor blend. The pasta bake can be stored in the fridge for up to three days. Make sure it cools down first before you cover it. You can reheat it in the oven or microwave. If you want to keep it longer, freeze it for up to two months. Just make sure to use a freezer-safe container. In this article, we explored the essential ingredients needed for the feta tomato pasta bake. I shared step-by-step instructions to make it perfectly. You learned tips to avoid common mistakes and ways to mix it up with variations. Storing advice ensures your leftovers stay fresh and tasty. Enjoy this dish knowing you can adapt it to suit your taste. Now, you have all the tools to make a delicious meal. Happy cooking!
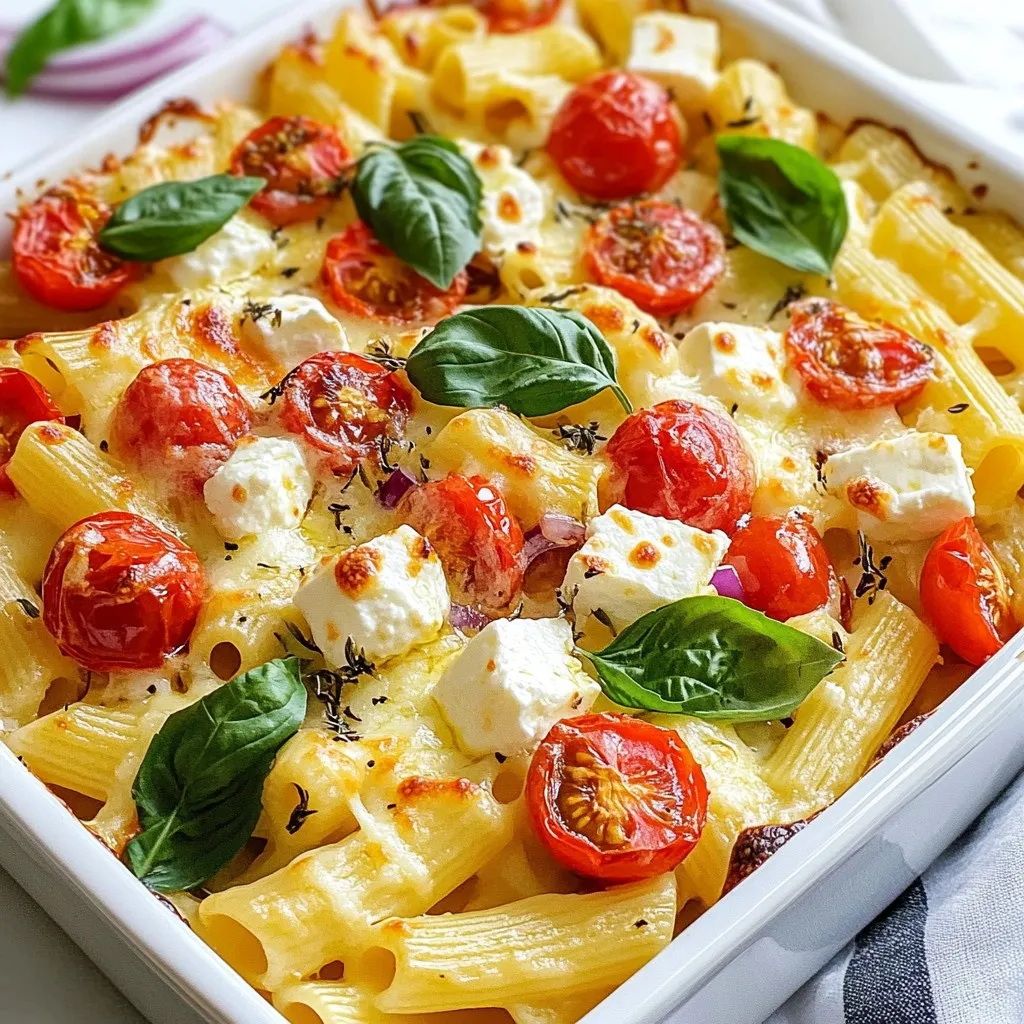
Viral Feta Tomato Pasta Bake Simple Flavorful Recipe
Have you heard about the Viral Feta Tomato Pasta Bake? This creamy, cheesy dish took the internet by storm, and for good reason. It’s simple,
- 4 boneless, skinless chicken breasts - 1 cup baby potatoes, halved - 2 cups broccoli florets - 1 cup cherry tomatoes, whole - 4 tablespoons unsalted butter, melted - 4 cloves garlic, finely minced - 1 teaspoon dried thyme - 1 teaspoon dried rosemary - 1 teaspoon paprika - Salt and pepper to taste - Fresh parsley, finely chopped (for garnish) Choose fresh, high-quality chicken. Look for chicken breasts that are pink and firm. Fresh veggies add flavor and crunch. Select bright green broccoli and firm potatoes. For garlic, use whole cloves and mince them yourself. This gives a stronger flavor. Use unsalted butter to control salt levels. Fresh herbs work best, but dried will do in a pinch. You can swap chicken breasts for thighs if you prefer dark meat. Sweet potatoes can replace baby potatoes for a different taste. If you dislike broccoli, try green beans or zucchini. Cherry tomatoes can be replaced with bell peppers for a sweeter flavor. Use olive oil instead of butter for a lighter option. If you need to avoid garlic, try shallots for a milder taste. {{ingredient_image_2}} 1. Start by preheating your oven to 400°F (200°C). This step is vital for a good roast. 2. In a small bowl, mix together the melted butter, minced garlic, thyme, rosemary, paprika, salt, and pepper. This mix makes a tasty garlic butter sauce. 3. Grab a large baking sheet. Place the chicken breasts in the middle. Leave space around them for veggies. 4. Pour half of the garlic butter sauce over the chicken. Make sure it covers the chicken well. 5. Next, add the halved baby potatoes, broccoli florets, and whole cherry tomatoes around the chicken. This adds color and flavor. 6. Drizzle the rest of the garlic butter sauce over the veggies. This helps them soak up all the tasty flavors. 1. Slide the baking sheet into your preheated oven. Roast for 25-30 minutes. 2. Check that the chicken is fully cooked. It should reach an internal temperature of 165°F (75°C). 3. The veggies should be tender and slightly caramelized. This gives them a great taste and texture. 4. Once done, take the baking sheet out of the oven. Let it rest for 5 minutes. This helps the chicken stay juicy. 5. Before serving, sprinkle fresh parsley on top. It adds a nice color and a fresh taste. - Use a meat thermometer to check the chicken's internal temperature. A reading of 165°F (75°C) means it's safe to eat. - Look for clear juices when you cut into the chicken. If the juices run pink, it needs more time. - For veggies, they should be soft but still a bit crisp. If they look brown, they are perfectly roasted. To boost flavor, use fresh garlic. Fresh garlic gives a strong taste. You can also add lemon juice for a zesty kick. A squeeze of lemon brightens up the dish. If you want more herbs, consider fresh thyme or rosemary. They add a lovely aroma. For a spicy twist, add a pinch of red pepper flakes. For tender chicken, start with even-sized breasts. This helps them cook evenly. Brining the chicken in salt water for 30 minutes helps too. It makes the meat juicy and flavorful. Use a meat thermometer to check doneness. Aim for 165°F (75°C) for safe eating. Let the chicken rest after cooking. This keeps it moist and tasty. This dish is great on its own, but you can add more. Consider serving it with rice or quinoa. These grains soak up the garlic butter sauce well. You can also add a salad on the side for freshness. Mix greens, cucumber, and a light vinaigrette. This adds crunch and balance to the meal. Pro Tips Resting the Chicken: Allow the chicken to rest for at least 5 minutes after baking. This step is crucial for keeping the meat juicy and tender. Choosing Veggies: Feel free to mix and match your vegetables! Carrots, bell peppers, or zucchini can be great alternatives to add variety and color to your dish. Butter Substitutions: If you’re looking for a healthier option, consider using olive oil instead of butter. It will still provide great flavor and help with roasting. Flavor Enhancements: For an extra flavor boost, marinate the chicken in the garlic butter sauce for at least 30 minutes before cooking. This allows the herbs to penetrate the meat deeply. {{image_4}} You can swap out vegetables in this dish. Try using carrots, bell peppers, or zucchini. Each brings a new taste and texture. For example, carrots add sweetness, while bell peppers add crunch. You can also use asparagus for a fresh, spring flavor. Just make sure to cut them into similar sizes for even cooking. Chicken is great, but other proteins work too. You can use turkey breasts or even shrimp. If you choose shrimp, remember they cook faster. Cook shrimp for about 10-15 minutes. For a vegetarian option, use firm tofu. Just press it to remove excess water and cut it into cubes. Coat it well in the garlic butter sauce for extra flavor. Get creative with seasoning! If you want a spicy kick, add chili powder or cayenne pepper. For an Italian twist, use oregano and basil. You can even try a curry blend for a unique flavor. Mix and match spices to find your favorite combination. The garlic butter sauce is versatile, so let your taste buds guide you! After your meal, let the leftovers cool for about 30 minutes. Place the chicken and veggies in an airtight container. This keeps them fresh. Store them in the fridge for up to 3 days. When ready to eat, you can enjoy them cold or warm them up. To freeze, first, let the dish cool completely. Then, pack the chicken and veggies in a freezer-safe bag. Remove as much air as possible to prevent freezer burn. You can freeze this meal for up to 3 months. When you want to eat it, thaw it overnight in the fridge before reheating. To reheat, place the chicken and veggies on a baking sheet. Preheat your oven to 350°F (175°C). Warm them for about 15-20 minutes, or until they are hot throughout. You can also use a microwave. Heat in 1-minute intervals, stirring in between, until they are warm. This keeps the chicken juicy and the veggies nice. You can serve this dish with many sides. Rice or quinoa are great choices. They soak up the garlic butter sauce nicely. A simple salad goes well too, adding fresh crunch. You might also enjoy garlic bread for a fun twist. It will complement the chicken's flavor perfectly. Yes, you can use bone-in chicken. Bone-in chicken adds flavor and keeps the meat juicy. Just adjust the cooking time. It may need an extra 10-15 minutes to cook through. Always check the internal temperature. It should reach 165°F (75°C) for safety. You can make this dish healthier in a few ways. Swap out the butter for olive oil. This reduces saturated fat while adding healthy fats. Use more vegetables, like carrots or bell peppers. You can also choose skinless chicken thighs for more flavor with less fat. This recipe for Sheet Pan Garlic Butter Chicken offers simple steps and tasty results. I shared key tips on choosing quality ingredients, cooking methods, and creative variations. You can make this dish fit your taste and needs by adjusting flavor and protein choices. Remember to store leftovers safely and follow reheating tips for the best flavor. With these insights, you can enjoy a satisfying meal every time. Happy cooking!
Sheet Pan Garlic Butter Chicken & Veggies Delight
Are you ready to impress your family with a meal that’s easy and tasty? Let me introduce you to my Sheet Pan Garlic Butter Chicken
To make my Easiest Canned Tomatoes Recipe, you need: - 2 cans (14.5 oz each) of diced tomatoes, undrained - 2 tablespoons extra virgin olive oil - 4 cloves of garlic, finely minced - 1 teaspoon dried basil - 1 teaspoon dried oregano - ½ teaspoon granulated sugar - Salt and freshly cracked black pepper to taste - Fresh basil leaves, torn, for garnish These ingredients form the base of a rich sauce. The canned tomatoes provide sweetness, while garlic adds a great aroma. While canned tomatoes are great, fresh ingredients can boost flavor. I suggest adding: - A small onion, finely chopped - 1 bell pepper, diced - A pinch of red pepper flakes for heat These fresh ingredients enhance the dish. They add texture and freshness, making the sauce even better. Feel free to play with flavors! You can try: - A splash of balsamic vinegar for tang - A teaspoon of Italian seasoning for extra herby notes - A sprinkle of Parmesan cheese for richness These add-ins let you customize the sauce to match your taste. Cooking should be fun, so don’t be afraid to experiment! For the full recipe, check the instructions above. 1. Start by gathering your ingredients. You need two cans of diced tomatoes and some garlic. 2. Measure out two tablespoons of olive oil. Make sure to have your spices ready too. 3. Mince four cloves of garlic finely. This step is key for flavor. 1. Heat the olive oil in a medium pot on medium heat. Let it warm for one minute. 2. Add the minced garlic and sauté for about one minute. Stir often so it does not burn. 3. Pour in the canned tomatoes with their juice. This juice adds a rich taste. 4. Sprinkle in the dried basil, oregano, and sugar. Stir well until combined. 5. Season with salt and freshly cracked pepper. Let the mix simmer for two to three minutes. 6. Lower the heat and let it cook uncovered for 15 to 20 minutes. Stir it to avoid sticking. 1. Once cooked, take the pot off the heat. Let the sauce cool for a few minutes. 2. Taste the sauce and adjust the seasonings. You can add more salt, pepper, or herbs. 3. Serve the sauce hot over pasta or polenta. Garnish with torn fresh basil leaves for added flavor. This recipe is quick and gives your meal a burst of flavor. Enjoy it with some crusty bread! To boost flavor, always use fresh garlic. Fresh herbs like basil and oregano add depth. If you want a kick, try red pepper flakes. A splash of balsamic vinegar can also brighten the sauce. Simmer longer for a richer taste. Taste often to adjust salt and pepper. Store any leftover sauce in an airtight container. This keeps it fresh for up to five days. To freeze, use freezer bags or safe containers. This way, you can enjoy it later. Just make sure to label the bags with the date. Avoid using low-quality canned tomatoes. They can ruin the flavor. Don’t skip the simmering step; it helps blend the tastes. Watch the garlic closely to prevent burning. Too much salt can overpower the dish, so add it gradually. {{image_4}} You can easily boost your sauce by adding proteins. Ground beef, turkey, or sausage work well. Brown the meat in the pot before adding garlic. This adds depth and flavor. For a heartier meal, try adding chickpeas or lentils. Both pack protein and fiber for a filling dish. For a vegetarian twist, skip the meat and go for beans. Cannellini or black beans add a nice texture. Tofu is another great option; just cube it and add it with the canned tomatoes. This will make your dish rich and satisfying while keeping it plant-based. If you like heat, you can spice things up! Add crushed red pepper flakes or diced jalapeños to the pot. Start with a small amount, then taste as you go. You can always add more for extra kick. A dash of hot sauce can also elevate the flavor. For more ideas on how to customize this dish, check out the Full Recipe. After enjoying your dish, store any leftover sauce in an airtight container. Let the sauce cool down first. Once it’s cool, seal it tightly. Place it in the fridge. It will stay good for about 3 to 5 days. When you’re ready to eat the sauce again, heat it gently. Use a small pot on low heat. Stir often to avoid burning. You can add a splash of water or olive oil if it seems too thick. Heat until it’s warm throughout, and then enjoy! Freezing is a great option if you want to save the sauce for later. Pour the cooled sauce into freezer-safe bags or containers. Leave some space at the top, as liquids expand when frozen. Seal tightly and label with the date. It can last up to 3 months in the freezer. When you’re ready to use it, thaw it in the fridge overnight. Reheat it as mentioned above. This method helps you enjoy the Easiest Canned Tomatoes Delight anytime! Yes, you can use fresh tomatoes. Peel and dice about 6-8 medium tomatoes. Cooking time may change, as fresh tomatoes need longer to break down. Canned tomatoes are often easier. They come pre-peeled and diced, making them a quick choice for any dish. The sauce lasts about 4-5 days in the fridge. Make sure to store it in an airtight container. If you want it to last longer, consider freezing it. This way, you can enjoy it later without losing flavor. You can serve this sauce with many dishes. It works great with pasta, polenta, or rice. Try adding it to pizza or as a base for ratatouille. For a tasty side, serve with crusty bread to soak up the sauce. Check out the Full Recipe for more ideas. In this post, I shared an easy way to make canned tomatoes. You learned about key ingredients, like fresh produce and spices. I provided steps to prepare and cook your sauce. I also included tips to improve flavor and store leftovers. Remember, this recipe is flexible. You can add proteins or spice it up as you like. Enjoy making your sauce and feel proud of your creation!
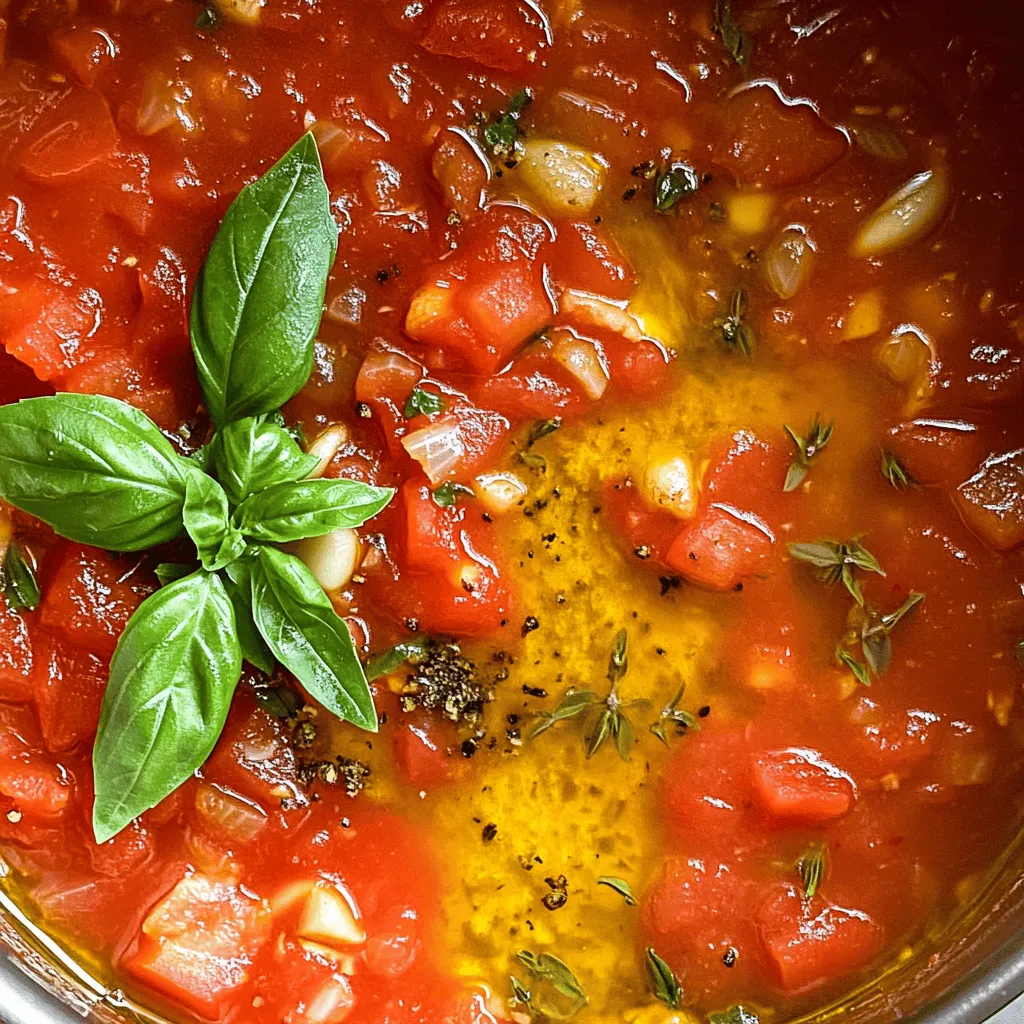
Easiest Canned Tomatoes Recipe Quick and Flavorful Dish
Ready to transform your canned tomatoes into a quick and tasty dish? This Easy Canned Tomatoes Recipe will make your meals pop with flavor! Whether