Dinner

When making Slow Cooker Chicken Noodle Soup, you need fresh, simple ingredients. Each one adds flavor and warmth to the dish. Here’s what you will need: - 1 pound boneless, skinless chicken breasts - 4 cups low-sodium chicken broth - 2 cups water - 1 medium onion, diced - 3 cloves garlic, minced - 3 medium carrots, sliced - 2 stalks celery, sliced - 2 teaspoons dried thyme - 1 teaspoon dried oregano - 1 bay leaf - Salt and pepper to taste - 4 ounces egg noodles - 1 cup frozen peas - Fresh parsley, chopped (for garnish) Each ingredient plays a crucial role. The chicken provides protein, while the broth builds a savory base. Onions and garlic create a fragrant foundation. Carrots and celery add natural sweetness and crunch. Thyme and oregano bring in herbal notes, enhancing the soup’s warmth. The noodles make it hearty, and peas add a pop of color and sweetness. You can find the full recipe to guide you through the cooking process. Enjoy crafting this comforting dish! To make this soup, start by layering the ingredients. Place the chicken breasts at the bottom of the slow cooker. This gives a solid base for the soup. Next, pour in 4 cups of low-sodium chicken broth and 2 cups of water. Make sure the chicken is fully covered. Now, add the diced onion, minced garlic, sliced carrots, and sliced celery. Spread them evenly over the liquids. This layering adds great flavor. Then, sprinkle in the dried thyme, dried oregano, a bay leaf, and a good pinch of salt and pepper. For cooking, you have two options: low heat or high heat. If you choose low heat, cook for 6-8 hours. For high heat, cook for 4-5 hours. The chicken should be tender enough to shred easily. When it’s almost done, add the egg noodles and frozen peas. It’s best to add these 20-30 minutes before you finish cooking. This way, the noodles cook perfectly without getting mushy. Once the chicken is cooked, remove it from the slow cooker. Use two forks to shred the chicken into bite-sized pieces. Then, return the shredded chicken to the soup. Stir it in well. Before serving, taste the soup. You might need to adjust the seasoning with more salt and pepper. Don’t forget to remove the bay leaf! For a fresh touch, sprinkle chopped parsley on top. This adds color and brightness to your comforting dish. Suggested Seasoning Adjustments To boost flavor, think about adding a splash of lemon juice. It brightens the soup. You can also mix in a teaspoon of smoked paprika for depth. If you love spice, a pinch of cayenne adds a nice kick. Taste your soup before serving. Adjust with more salt or pepper if needed. Adding Fresh Herbs Fresh herbs make a big difference. Try adding thyme or dill right at the end. Chopped parsley adds color and freshness. You can also add fresh basil for a unique twist. Just remember to add them just before serving to keep their flavor bright. Benefits of Slow Cooking Slow cooking lets flavors blend nicely. It makes tough cuts of meat tender. You don’t need to stand by the stove. Just set it and forget it. Plus, it fills your home with a cozy aroma. Common Mistakes to Avoid Avoid lifting the lid too often. Each time you do, heat escapes. This can extend cooking time. Also, be careful not to overfill your slow cooker. Leave some space for steam. Lastly, always check your slow cooker’s manual for specific cooking times. Ideal Accompaniments Serve your soup with crusty bread for a filling meal. A fresh green salad pairs well too. If you want more flavor, try a sprinkle of grated cheese on top. This makes each bite even better. Presentation Tips When serving, use deep bowls for a hearty look. Ladle in the soup and then add a sprinkle of parsley. This adds a nice splash of green. You can also offer lemon wedges on the side. This allows guests to add a zing if they wish. {{image_4}} You can switch the chicken for other proteins. Try turkey for a lighter dish. If you prefer beef, use stew meat. For a fun twist, add shrimp in the last hour of cooking. Each protein brings its own taste, making the soup unique. If you want a meatless option, use chickpeas or lentils. Both add protein and heartiness. Replace chicken broth with vegetable broth for flavor. You can also add more veggies. Consider mushrooms, zucchini, or bell peppers. These choices keep the soup rich and filling. To spice things up, add red pepper flakes or cayenne. This gives a nice kick without being too spicy. You can also try fresh herbs like dill or basil for a fresh taste. Experimenting with flavors can make your soup special. For a creamy version, stir in some heavy cream or coconut milk at the end. This adds a rich texture and taste. If you like the traditional style, stick to the original recipe. Both versions are delicious in their own way. For more ideas, check out the Full Recipe for additional tips and variations. - Best Containers for Storing Soup: Use airtight containers. Glass containers work well since they won't stain. If you use plastic, ensure it is BPA-free. - Refrigeration and Freezing Tips: Store leftover soup in the fridge for up to four days. For longer storage, freeze the soup. Cool it to room temperature before freezing. Use freezer-safe bags or containers for easy storage. Leave some space at the top, as soup expands when frozen. - Recommended Methods: To reheat, use a pot on the stove. Stir the soup often for even heating. You can also use the microwave. Heat in a microwave-safe bowl, stirring every minute for the best results. - Keeping Noodles from Getting Soggy: If you freeze the soup, add the noodles fresh when reheating. This keeps them firm. If you have leftovers with noodles, add a splash of broth when reheating. This helps maintain their texture. How to make Slow Cooker Chicken Noodle Soup gluten-free? To make this soup gluten-free, use gluten-free noodles. You can find many brands that offer tasty options. Also, ensure the chicken broth is labeled gluten-free. This keeps your soup safe and delicious. Can I add other vegetables? Absolutely! You can add vegetables like corn, green beans, or bell peppers. Just chop them small so they cook well. Feel free to mix and match based on what you like. How long does Slow Cooker Chicken Noodle Soup last in the fridge? This soup can last in the fridge for about 3-4 days. Store it in an airtight container for best results. Reheat it on the stove or in the microwave until hot. What type of chicken works best? Boneless, skinless chicken breasts work best for this recipe. They cook evenly and shred easily. You can also use thighs for a richer flavor, but the cooking time may vary. Can I use fresh instead of frozen peas? Yes, you can use fresh peas! Just add them in the last few minutes of cooking. This way, they stay bright and tender. Is it necessary to sauté vegetables first? No, it’s not necessary to sauté the vegetables. Adding them raw allows them to cook slowly and soak up flavors. This saves time and makes it easier. How do I know when the chicken is cooked through? The chicken is cooked when it reaches 165°F. You can check this with a meat thermometer. If you don't have one, look for the chicken to be white and no longer pink inside. In this blog post, we covered making Slow Cooker Chicken Noodle Soup. We discussed the key ingredients, step-by-step instructions, and cooking times. You learned tips for enhancing flavors and ways to customize your soup. We also explored storage methods and answered common questions. This soup is easy to make and tasty. With the right tools and tips, you can enjoy a warm bowl every time. Try it today and enjoy!
Slow Cooker Chicken Noodle Soup Comforting Deliciousness
When you crave comfort, nothing beats a bowl of Slow Cooker Chicken Noodle Soup. This easy recipe lets your slow cooker do the work while
Crock Pot goulash is a warm, filling meal. It combines ground beef, pasta, and lots of flavor. The slow cooker makes it easy to prepare. You can throw in your ingredients and let the pot do the work. This dish is perfect for busy days or family gatherings. - 1 pound ground beef - 1 medium onion, finely chopped - 2 cloves garlic, minced - 1 bell pepper, diced (any color you prefer) - 1 can (15 oz) diced tomatoes (with juice) - 1 can (15 oz) tomato sauce - 2 cups beef broth - 1 cup elbow macaroni (uncooked) - 2 teaspoons Italian seasoning - 1 teaspoon paprika - Salt and pepper to taste - 1 cup shredded cheddar cheese (for topping) - Fresh parsley, chopped (for garnish) These ingredients come together to create a hearty dish. The ground beef gives it a rich flavor. The pasta soaks up all the tasty broth. You can make it your own by adding more spices or veggies. Don't forget the cheese on top! It melts and adds creaminess. The fresh parsley adds a nice touch too. This goulash is sure to please everyone at your table. Check out the Full Recipe to explore all the cooking steps and tips! Start by heating a large skillet over medium heat. Add 1 pound of ground beef to the skillet. When the meat begins to brown, add in a medium onion, finely chopped, and 2 cloves of minced garlic. Cook this mix until the beef is fully browned and the onion is soft. This should take about 5 to 7 minutes. If there is too much fat, drain it off. This step keeps your goulash tasty and healthy. Once the beef is ready, carefully transfer it to the crock pot. Next, add a diced bell pepper, one can of diced tomatoes (juice included), and one can of tomato sauce. Pour in 2 cups of beef broth to give it a rich flavor. Stir everything together. This helps ensure that each bite is packed with flavor. Then, add 1 cup of uncooked elbow macaroni, 2 teaspoons of Italian seasoning, 1 teaspoon of paprika, salt, and pepper to taste. Mix well so that the pasta gets coated with the sauce. You can choose to cook your goulash on low heat for 6 to 8 hours or on high heat for 3 to 4 hours. Both methods work well, but low heat makes the flavors blend better. When the cooking time is almost up, gently stir the goulash. This step helps integrate all the ingredients fully. After stirring, sprinkle the top with 1 cup of shredded cheddar cheese. Cover it again and let it sit for 5 to 10 minutes. This allows the cheese to melt smoothly. Serve hot and enjoy your hearty dish! To make your goulash burst with flavor, choose your seasonings wisely. Use Italian seasoning and paprika for warmth and depth. You can also try adding a dash of Worcestershire sauce for extra richness. When cooking, remember to brown the beef first. This step creates a nice crust that adds great flavor. Also, let it simmer gently. Slow cooking allows the tastes to blend beautifully. Getting the pasta just right is key. Add it to the crock pot during the last 30 minutes of cooking. This timing helps it soak up the sauce without becoming mushy. If you notice the pasta absorbing too much liquid, add a splash of beef broth or water. This keeps everything nice and creamy. Stir it gently to avoid breaking the pasta. For side dishes, consider a simple green salad or warm bread. These pair well with the rich goulash. When serving, use bowls that are large enough for a hearty portion. A cup of goulash is great for an adult, while kids may enjoy half that. Top each bowl with shredded cheese and parsley for a pop of color. This makes your dish look as good as it tastes. Don't forget to check out the Full Recipe for more details! {{image_4}} You can change the meat in this recipe. Ground turkey or chicken works well. These options keep the meal lighter but still tasty. If you want a vegetarian version, try using lentils or beans. These swaps help create a dish that fits your diet. Cheese adds a nice finish to goulash. You can use shredded cheddar, mozzarella, or even pepper jack for a kick. If you need dairy-free options, try vegan cheese. Nutritional yeast is another great choice for a cheesy taste without dairy. You can make goulash in an Instant Pot too. Cook the beef and onion first, then add the rest. Set it to high pressure for about 10 minutes. If you prefer baking, transfer the mix to a baking dish. Cover it and bake at 350°F for about 30 minutes. These methods give you more choices for your meal. You can store leftover Crock Pot Goulash in the fridge for up to three days. Make sure to cool it down first. Use an airtight container to keep it fresh. When you are ready to eat, reheat the goulash on the stove. Use low heat to avoid burning. Stir it often for even warmth. You can also microwave it in a bowl. Heat for one minute, then check if it’s hot enough. To freeze Crock Pot Goulash, let it cool completely first. Then, pour it into freezer-safe bags or containers. Press out as much air as you can before sealing. Label the bags with the date. You can freeze it for up to three months. When you’re ready to eat, take it out and thaw in the fridge overnight. You can also use the microwave for quick thawing. After thawing, reheat it on the stove or microwave. Stir it well to warm it evenly. Enjoy your tasty meal again! For the full recipe, check out the instructions provided earlier. You can boost flavor in many ways. Try adding: - Bay leaves for depth. - Worcestershire sauce for umami. - Red wine for richness. - Hot sauce for a kick. These extras bring new tastes to your goulash. Yes, you can easily make it vegetarian! Swap the ground beef for: - Lentils for protein. - Beans for heartiness. - Mushrooms for a meaty texture. Use vegetable broth instead of beef broth. This keeps your dish rich and tasty. To keep pasta firm, try these tips: - Add pasta during the last hour of cooking. - Stir gently to avoid breakage. - Use less broth if you like it thicker. These steps help your pasta stay just right. Yes, goulash often tastes better the next day. Letting it sit allows flavors to blend. Store it in the fridge overnight. Reheat gently on the stove or in the microwave. You can find the full recipe here for more details. This article covered how to make a simple and tasty Crock Pot goulash. We explored the main ingredients, step-by-step cooking instructions, and helpful tips. You learned about ingredient swaps and variations to suit your tastes. I shared storage tips to keep your leftovers fresh and answered common questions. Crock Pot goulash is a flexible dish. You can adjust it to fit your style. I hope you try this recipe, experiment, and enjoy every bite!
Crock Pot Goulash Savory and Hearty Family Meal
Looking for a warm, hearty meal that your whole family will love? You’ve found it! This Crock Pot Goulash recipe combines ground beef, colorful veggies,
- 1 lb sirloin steak, diced - 4 medium potatoes, peeled and diced - 1 medium onion, finely chopped - 3 cloves garlic, minced - 3 medium carrots, sliced - 4 cups beef broth - 1 cup fresh green beans, chopped - Extra virgin olive oil, dried thyme, smoked paprika - Salt and freshly ground black pepper - Fresh parsley for garnish The ingredients for Easy Steak & Potato Soup are simple yet flavorful. The sirloin steak is the star of the dish. It adds rich taste and protein. You will want to choose a good cut. The potatoes bring a comforting texture. They soak up the broth’s flavor, making each bite special. Onions and garlic add a nice depth. Sautéing them first helps release their natural sweetness. Carrots add color and sweetness. They also give a crunchy bite. Green beans contribute a fresh taste and vibrant color. For the broth, you can use homemade or store-bought beef broth. It adds warmth and depth. Extra virgin olive oil helps to cook the vegetables. Dried thyme and smoked paprika give the soup a tasty twist. Finally, don’t forget salt and black pepper. They brighten the flavors of the soup. Fresh parsley adds a nice touch at the end. It not only looks good but also adds a fresh flavor. This recipe is straightforward. You can find the full recipe in the article. Enjoy making this hearty dish! - Heat olive oil in a pot over medium heat. - Add diced sirloin steak. Cook until browned, about 5-7 minutes. Browning the steak builds a great flavor base. This step is key for a tasty soup. Make sure every piece gets some color. It adds depth to the dish. - Remove the steak and set aside on a plate. - In the same pot, add chopped onion, minced garlic, and sliced carrots. Sauté the veggies for 3-4 minutes. The onions should turn soft and fragrant. This helps enhance the flavors. The carrots will also begin to soften, adding sweetness to the soup. - Add diced potatoes, beef broth, dried thyme, and smoked paprika. - Bring the mixture to a boil, then lower the heat to simmer. Let it simmer for about 15 minutes. You want the potatoes tender when you poke them with a fork. This is where the magic happens. The flavors meld together beautifully. - Stir in chopped green beans and reserved steak. - Taste and adjust seasoning with salt and pepper if needed. Let it simmer for an extra 5 minutes. This ensures everything is heated through. The soup is now ready to be enjoyed. You can even find the full recipe to guide you through the process. Browning steak is key for great flavor. It adds rich, deep notes to your soup. To do this, heat your pot well before adding the olive oil. When you add the steak, let it cook without stirring for a few minutes. This helps it brown nicely. Season the steak with salt and pepper before cooking. You can also add garlic powder or onion powder for extra flavor. To cook potatoes to tenderness, cut them into even 1-inch cubes. This helps them cook evenly. Add them to the pot after the onions and garlic have softened. Cook them for about 15 minutes, or until they are fork-tender. For veggies like carrots and green beans, keep an eye on them. They should be tender but not mushy. Add them to the soup in stages to ensure they stay crisp. Garnish your soup with fresh parsley. This adds a nice pop of color and fresh flavor. To serve, ladle the soup into deep bowls. Pair it with crusty bread or warm rolls. This makes for a cozy meal. Enjoy the hearty soup with friends or family. It’s perfect for any day! For the complete recipe, check the Full Recipe section. {{image_4}} You can switch up the beef cut for your soup. Use flank steak or chuck roast if you prefer. Both cuts work well and add great flavor. If you want to mix it up, try adding vegetables like peas or corn. These add a nice pop of color and taste! For those who need gluten-free options, use gluten-free beef broth. Check labels to ensure no gluten sneaks in. You can also choose low-sodium broth. This helps control salt intake while keeping the soup tasty. Want to spice things up? Try adding cumin or rosemary for a new twist. These spices bring out rich flavors. If you like creamy soup, stir in some heavy cream. This adds a smooth texture and makes the soup even more comforting. For the full recipe, check out the detailed steps to make this delicious soup! To keep your soup fresh, store it in the fridge. Use airtight containers for best results. Glass or plastic containers work well. Allow the soup to cool first. This helps avoid condensation inside the container. Store the soup for up to three days. If you want to save some for later, freezing is a great option. Ladle the cooled soup into freezer-safe bags. Remove as much air as possible before sealing. This keeps the soup from getting freezer burn. When ready to eat, thaw it in the fridge overnight. This keeps the flavor intact. For reheating, use the stovetop or microwave. If using the stovetop, heat over low to medium heat. Stir often to avoid sticking. In the microwave, heat in short bursts. Stop to stir every minute to help it warm evenly. To keep the texture nice, avoid boiling the soup. Yes, you can use frozen vegetables. They are handy and save time. Here are some benefits: - They are pre-washed and cut. - They keep nutrients well. - They save you from waste. Just add them during the last 10 minutes of cooking. That way, they warm up nicely without getting mushy. The best way to thicken soup is by using simple methods. Here are a few: - Mash some potatoes: Take a little soup and mash it. Stir it back in. - Add cornstarch: Mix cornstarch with cold water and stir it in. - Use flour: Make a roux by cooking flour in butter, then add it. These methods add body without changing the flavor too much. This soup lasts up to 3-4 days in the fridge. Store it in an airtight container to keep it fresh. If you want to save it longer, freeze it. It can last for about 3 months in the freezer. Just make sure to cool it first before storing. Yes, you can make this soup in a slow cooker! Here’s how: - Brown the steak first: This step adds flavor. - Add all ingredients: Place everything in the slow cooker. - Cook on low: Let it cook for 6-8 hours or on high for 3-4 hours. This method is great for busy days, and the flavors will meld beautifully. For more details, check the Full Recipe. This soup is quick to make and tasty, using simple ingredients. You start with sirloin steak, potatoes, and fresh veggies. Cooking them right gives rich flavors, and spices enhance them further. You can change ingredients for a twist or modify for dietary needs. For storage, proper methods keep leftovers fresh. Enjoy your warm bowl of soup, knowing that you've created something delicious!
Easy Steak & Potato Soup Hearty and Simple Recipe
If you’re craving a warm, filling meal, look no further than this Easy Steak & Potato Soup recipe! With tender sirloin, hearty potatoes, and fresh
- 1 lb chicken sausage, sliced into half-moons - 1 cup orzo pasta - 4 cups chicken broth (preferably low-sodium) - 1 cup heavy cream - 1 cup baby spinach, roughly chopped - 1 cup cherry tomatoes, halved - 1 small onion, finely diced - 2 cloves garlic, minced - 1 teaspoon Italian seasoning blend - 2 tablespoons olive oil - Salt and black pepper to taste - Fresh basil leaves for garnish In this recipe, I like to keep things simple and fresh. The chicken sausage provides great flavor and protein. The orzo pasta is a fun twist that cooks quickly. You’ll love how it absorbs the chicken broth. For the veggies, baby spinach and cherry tomatoes add color and nutrients. The onion and garlic give a nice base flavor. I always use fresh garlic for the best taste. The Italian seasoning ties all the flavors together. Don’t forget the heavy cream! It makes the dish creamy and rich. I find that using low-sodium chicken broth helps balance the creaminess. You can garnish with fresh basil for a pop of color and taste. This dish is not just easy to make; it’s also packed with flavor. Get your ingredients ready, and you’ll see how simple it is to whip up this delicious meal! {{ingredient_image_2}} 1. Heat 2 tablespoons of olive oil in a large skillet over medium heat. 2. Add 1 small diced onion to the skillet. Sauté it for 3-4 minutes. The onion should be soft and fragrant. 3. Then, add 2 minced garlic cloves and 1 pound of sliced chicken sausage. Cook for 5-6 minutes. Stir often until the sausage is browned. 1. Stir in 1 cup of orzo pasta. Next, pour in 4 cups of low-sodium chicken broth. 2. Add 1 teaspoon of Italian seasoning. Increase the heat until the mixture boils. 3. Once boiling, reduce the heat to low and cover. Let it simmer for 10-12 minutes. Stir occasionally to prevent sticking. The orzo should be tender and absorb most of the broth. 1. Pour in 1 cup of heavy cream. Gently fold in 1 cup of chopped baby spinach and 1 cup of halved cherry tomatoes. 2. Cook for an additional 2-3 minutes. The spinach should wilt and the tomatoes should warm up. 3. Season with salt and freshly cracked black pepper to taste. Stir everything well to mix the flavors. 4. Serve the orzo skillet right away. Add fresh basil leaves on top for a burst of color and flavor. - Heat olive oil in a large skillet over medium heat. - Sauté onion until soft and clear, about 3-4 minutes. - Add garlic and sausage, cooking until browned, about 6 minutes. - Stir often to prevent burning. - Keep the heat steady; too high can burn ingredients. - Add a pinch of red pepper flakes for heat. - Stir in grated Parmesan for a cheesy kick. - Garnish with fresh basil for bright flavor. - Consider fresh herbs like parsley or chives for extra taste. - If orzo is mushy, reduce cooking time next time. - If too dry, add more broth or cream slowly. - For creaminess, mix in more cream or cheese if needed. - Taste and adjust salt and pepper to your liking. Pro Tips Use Quality Sausage: Select high-quality chicken sausage for the best flavor. Look for options made with fresh herbs and spices for added depth. Customize the Veggies: Feel free to add other vegetables like bell peppers or zucchini for extra nutrition and color. Just ensure they are chopped into bite-sized pieces for even cooking. Perfect Creaminess: For a lighter version, substitute half of the heavy cream with low-fat milk or a non-dairy alternative. This will still give you a creamy texture without all the calories. Leftover Storage: Store any leftovers in an airtight container in the fridge for up to 3 days. Reheat gently on the stove with a splash of broth to prevent drying out. {{image_4}} You can mix things up with your protein choice. Turkey sausage works great if you want a leaner option. For a vegetarian twist, try using plant-based sausage or even chickpeas. They add protein and flavor. Switching the pasta can also change the dish. Try using whole wheat or gluten-free orzo. You can even substitute with rice or quinoa if you prefer. Each option gives a new texture and taste. Seasonal vegetables can take this dish to a new level. In spring, add fresh peas or asparagus. In summer, zucchini or bell peppers shine. Fall brings squash or kale, while winter can use root veggies like carrots or sweet potatoes. They all add color and nutrition. Adjusting flavors for the seasons can enhance your meal. Use fresh herbs like basil in summer. In winter, try rosemary or thyme to warm up the dish. A splash of lemon in spring can brighten the flavors, too. If you need a gluten-free option, look for gluten-free orzo. Many brands offer varieties made from rice or corn. They cook similarly and taste great in this recipe. For a dairy-free version, substitute the heavy cream with coconut milk or a nut-based cream. These alternatives keep the dish creamy while catering to dietary needs. You can still enjoy a rich flavor without the dairy. To store leftovers, place the orzo skillet in an airtight container. Let it cool before sealing. Store it in the fridge for up to three days. For longer storage, freeze it in a freezer-safe container. It can last up to three months in the freezer. When reheating, the best method is to use the stove. Pour the orzo into a skillet over low heat. Add a splash of chicken broth or cream to keep it moist. Stir often until it's heated through. You can also use the microwave. Heat in short bursts, stirring in between, to avoid dryness. In the fridge, the orzo skillet lasts about three days. In the freezer, it can last around three months. Look for signs of spoilage, like off smells or mold. If it smells bad or looks weird, throw it away. Always trust your senses to keep your food safe. To make Creamy Chicken Sausage Orzo Skillet healthier, you can: - Use turkey sausage instead of chicken sausage for fewer calories. - Swap heavy cream for Greek yogurt or a low-fat cream alternative. - Add more vegetables, like zucchini or bell peppers, to boost nutrients. - Use whole grain orzo for added fiber. These changes help lower calories and increase health benefits without losing flavor. You still get a creamy dish while enjoying better nutrition. Yes, you can meal prep Creamy Chicken Sausage Orzo Skillet. Here are some best practices: - Cook the dish fully and let it cool before storing. - Divide it into airtight containers for easy serving. - Store in the fridge for up to 4 days or freeze for up to 3 months. - Reheat in the microwave or on the stove with a splash of broth to keep it creamy. Meal prepping makes weeknight dinners quick and easy. For side dishes, consider these options: - A simple green salad with vinaigrette for crunch. - Garlic bread for a comforting touch. - Steamed broccoli or asparagus for a fresh flavor. - Roasted vegetables for extra nutrients. These sides complement the creamy dish and round out your meal nicely. This blog post covered a tasty Creamy Chicken Sausage Orzo Skillet. We explored key ingredients, step-by-step instructions, and helpful tips. You can experiment with various proteins and seasonal veggies to match your preferences. Storing leftovers and reheating properly helps keep the dish fresh. With these insights, you can create a dish your family will love. Enjoy the cooking process and feel free to get creative!
Creamy Chicken Sausage Orzo Skillet Simple Recipe
If you crave a quick and tasty dinner, try my creamy chicken sausage orzo skillet! This easy dish combines tender orzo, savory chicken sausage, and
To make this easy baked potato soup, gather these main ingredients: - 4 large russet potatoes, thoroughly scrubbed and diced - 1 cup shredded sharp cheddar cheese, plus extra for topping - 4 cups vegetable broth, low-sodium preferred - 1 cup milk (or a dairy-free alternative) such as almond or oat milk - 1/2 cup sour cream (or plain yogurt for a lighter option) - 4 green onions, chopped, with extra for garnish - 1 teaspoon garlic powder - 1 teaspoon onion powder - Salt and freshly ground black pepper to taste - 2 tablespoons olive oil You can add fun toppings to your soup for extra flavor. Consider trying: - Crumbled bacon bits - Additional cheese - Fresh chives If you want to switch things up, here are some ideas: - Use Yukon gold potatoes for a sweeter taste. - Swap vegetable broth with chicken broth for a richer flavor. - Try goat cheese instead of cheddar for a tangy twist. - Use Greek yogurt in place of sour cream for added protein. This easy baked potato soup is full of flavor and comfort. Check out the Full Recipe for more details! Start by preheating your oven to 400°F (200°C). Take your large russet potatoes and scrub them well. Use a fork to poke several holes in each potato. This lets steam escape while they bake. Place the potatoes directly on the oven rack. Bake them for about 45 minutes. You want them soft and easy to pierce with a fork. Once the potatoes are baked, carefully take them out of the oven. Let them cool for a few minutes. Cut each potato in half and scoop the insides into a large soup pot. Be careful to leave the skins behind. Now, pour in the vegetable broth. Stir gently and bring the mixture to a gentle boil over medium heat. Next, stir in the milk, sour cream, garlic powder, onion powder, and half of the cheddar cheese. Mix everything well until it's creamy and smooth. If you have an immersion blender, use it to blend the soup to your preferred texture. If not, pour the mixture in batches into a regular blender. Remember to let steam escape while blending. Add in the chopped green onions and stir well. Season with salt and black pepper to taste. Let the soup simmer on low for 5-10 minutes. This allows the flavors to meld beautifully. Now, you’re ready to serve and enjoy your easy baked potato soup! Don't forget the full recipe for more details. To make your baked potato soup creamy, use whole milk or cream. If you want a lighter touch, go for almond or oat milk. Adding sour cream gives a rich taste, too. For extra creaminess, blend the soup well. You can use an immersion blender for smoothness or a regular blender for a chunkier texture. One common mistake is using too much broth. Start with less and add more if needed. Make sure to bake your potatoes fully. They should be soft. If they’re not, the soup will not have that smooth texture. Stir often while heating; this helps avoid sticking and burning. Presentation makes your soup look even better. Use rustic bowls for serving. Top each bowl with extra cheese and green onions for color. You can add crumbled bacon bits or fresh chives for a nice touch. Pair it with warm, crusty bread for a complete meal. For more details, check the Full Recipe. {{image_4}} You can easily make this soup dairy-free. Substitute the milk with almond or oat milk. For the creamy texture, use dairy-free sour cream or plain yogurt. This change keeps the soup rich but makes it friendly for those with dairy issues. To boost flavor, consider adding herbs like thyme or rosemary. A sprinkle of smoked paprika gives a nice depth. If you like heat, add a few dashes of hot sauce or some cayenne pepper. Crumbled bacon bits on top add a crunchy, savory touch. If you want a low-carb option, replace russet potatoes with cauliflower. Steam the cauliflower until soft, then blend it into the soup. This keeps the creamy texture while cutting carbs. You can also reduce the milk for an even thicker soup. These variations help you enjoy a delicious soup while meeting your dietary needs. You can find the full recipe above to start your cooking journey! After enjoying your baked potato soup, let it cool down. Pour any leftovers into an airtight container. Make sure to seal it well. Store the soup in the fridge for up to five days. This soup tastes even better the next day! If you want to save some for later, freezing is a great option. Allow the soup to cool completely before you freeze it. Use freezer-safe containers or bags. Leave some space at the top for expansion. The soup will keep for up to three months. To reheat your soup, take it out of the fridge or freezer. If frozen, let it thaw overnight in the fridge. Pour the soup into a pot and heat it on low. Stir it often until it’s hot. You can also use a microwave. Just heat it in short bursts, stirring in between. Add extra toppings before serving for a fresh taste. For the full recipe, check out the details above. Baked potato soup can last about 3 to 5 days in the fridge. Make sure to store it in an airtight container. To keep it fresh, let it cool before sealing. If you want to enjoy it later, you can freeze it for up to 3 months. Yes, russet potatoes are perfect for this soup. They are starchy and give a creamy texture. Their skin adds flavor too. Just remember to scrub them well before baking. Using russets will enhance the taste of your soup. You can pair baked potato soup with many delicious sides. Here are some great options: - Crusty bread for dipping - A fresh green salad for crunch - Grilled cheese sandwiches for warmth - Toppings like bacon bits or cheese for extra flavor These sides will make your meal even more enjoyable. For the detailed recipe, check the Full Recipe section. This blog post covered the essential ingredients and steps for making baked potato soup. I shared tips for creaminess and ways to avoid common mistakes. We also explored tasty variations and how to store leftovers properly. In the end, you can enjoy a warm bowl of soup tailored to your tastes. Try adding new flavors or making it dairy-free. With these tips, you will make the perfect baked potato soup every time. Enjoy!
Easy Baked Potato Soup Simple and Creamy Delight
Looking for a warm and cozy meal? My Easy Baked Potato Soup is a simple and creamy delight! This recipe turns ordinary potatoes into a
- 2 pounds beef chuck roast - 1 tablespoon olive oil - 1 large onion, thinly sliced - 4 cloves garlic, finely minced - 4 cups beef broth - 2 tablespoons soy sauce - 1 tablespoon Worcestershire sauce - 1 tablespoon dried thyme - 1 teaspoon freshly ground black pepper - 1 teaspoon salt - 8 hoagie rolls or French baguettes - 1 cup provolone cheese, sliced - Fresh parsley, chopped (optional) For this Crockpot French Dip, I love using a beef chuck roast. It’s perfect because it becomes tender as it cooks. The olive oil helps to sear the meat, giving it a rich flavor. Slicing the onion and garlic adds sweetness and depth. Next, I recommend using beef broth, which you can make at home or buy. The soy sauce and Worcestershire sauce add umami. Dried thyme gives an earthy taste that complements the beef. Don’t forget the black pepper and salt! For the sandwiches, hoagie rolls or French baguettes work best. They hold the beef and broth well. Provolone cheese melts beautifully on top, adding creaminess. If you want, sprinkle some fresh parsley on your sandwiches for color. These ingredients are simple but pack a lot of flavor. You can find the full recipe to guide you through the cooking steps. Enjoy making this savory meal! First, you need to sear the beef chuck roast. Heat a large skillet over medium-high heat and add one tablespoon of olive oil. When the oil is hot, place the beef in the skillet. Sear each side for about 4 to 5 minutes. Look for a deep, golden-brown crust. This step adds flavor and texture. Once done, take the beef out and set it aside. Next, prepare the crockpot. In the bottom, layer your sliced onion and finely minced garlic. This mix creates a tasty base for the beef. The onion and garlic will infuse the meat with flavor as it cooks. Now, let's mix the broth and seasonings. In a bowl, whisk together 4 cups of beef broth, 2 tablespoons of soy sauce, 1 tablespoon of Worcestershire sauce, 1 tablespoon of dried thyme, 1 teaspoon of black pepper, and 1 teaspoon of salt. Make sure it's well combined. This rich mix will give the beef a savory taste. After mixing, carefully set the seared beef roast on top of the onion and garlic in the crockpot. Pour the broth mixture over the roast. Try to cover the meat as much as possible with the broth. Cover the crockpot with its lid. You can set it to low for 8 to 10 hours or high for 4 to 5 hours. The roast is ready when it is fork-tender. This means you can easily shred it with a fork. After cooking, remove the roast from the crockpot. Let it rest for a few minutes. Then, use two forks to shred the beef into thick strands. This step makes the beef perfect for the sandwiches. For the full recipe, please check the appropriate section. To achieve tender beef in your Crockpot French Dip, start with a good cut. I recommend using beef chuck roast. This cut has fat and connective tissue, which break down during cooking. Searing the beef before adding it to the crockpot adds deep flavor. Cook it until it has a nice brown crust. For the best seasoning, don’t skip the broth mix. Combine beef broth, soy sauce, Worcestershire sauce, thyme, pepper, and salt. This mix gives your beef a rich taste. Taste your broth before adding it to the pot. You can adjust the seasoning to fit your taste. When it's time to serve, make your sandwiches look great. Slice hoagie rolls or French baguettes open and fill them with the beef. Add slices of provolone cheese on top. I love to melt the cheese under a broiler for a few minutes. This makes it bubbly and golden. For a fun touch, serve the sandwiches with small bowls of the warm broth for dipping. This adds flavor and keeps your meal fun. You can also add sides like crispy fries or a fresh salad to round out your meal. {{image_4}} You can easily boost the taste of your Crockpot French Dip. Adding different types of cheese makes a big difference. Provolone is great, but try Swiss or mozzarella for new flavors. Each cheese brings a unique taste that pairs well with the beef. Incorporating additional herbs or spices can also enhance the flavor. Try adding rosemary or oregano for a twist. A little garlic powder or crushed red pepper can add a kick. Mix and match to find what you love best. If you need gluten-free options for the bread, it’s simple! Look for gluten-free hoagie rolls or baguettes. Many brands offer tasty choices that work well in this recipe. For those watching sodium, use low-sodium broth. You can find this at most stores. This helps keep the dish hearty without too much salt. You can also make your own broth at home, which is a great way to control the salt level. Feel free to check out the Full Recipe to see how these changes fit in! After you enjoy your Crockpot French Dip, store any leftovers right away. Let the beef and broth cool to room temperature first. Then, use airtight containers to keep them fresh. Glass containers work well because they do not retain odors. Label each container with the date. You can keep the leftovers in the fridge for up to four days. To freeze the beef and broth, start by shredding the meat. Place the shredded beef into a freezer-safe bag. Pour the broth over it, leaving some space for expansion. Seal the bag tightly, removing excess air. You can freeze this mixture for up to three months. When you are ready to eat, take the bag out of the freezer. Thaw it in the fridge overnight. For reheating, place the beef and broth into a pot over medium heat. Stir often until it is hot again. You can also microwave it in a safe container, stirring every minute until warm. Enjoy your meal again! How long can I keep leftovers? You can keep leftovers in the fridge for about three to four days. Store them in a tight container. This keeps the meat moist and tasty. Can I use a different cut of beef? Yes, you can use other cuts like brisket or round. Just remember that cooking time may change. Always aim for cuts that have some fat for flavor. What can I serve with Crockpot French Dip sandwiches? These sandwiches pair well with chips, fries, or a simple salad. You can also serve them with a side of pickles for added crunch. Can I make it ahead of time? Absolutely! You can prepare the beef a day in advance. Just reheat it gently on the stove or in the crockpot. What to do if the beef is too dry? If your beef turns out dry, add more broth back into the pot. Let it simmer for a few minutes. This helps rehydrate the meat, making it juicy again. Fixing overly salty broth If the broth is too salty, add a potato. Let it cook for about 15 minutes. The potato absorbs some salt, helping balance the flavors. In this blog post, you learned how to make a delicious Crockpot French Dip sandwich. We covered every step, from selecting the right ingredients to cooking and serving tips. Remember to choose a good cut of beef and follow the timing for perfect results. Try different variations to keep it fresh. Store leftovers properly for best taste. With these tips, you can enjoy great meals anytime. Happy cooking!
Crockpot French Dip Savory and Easy Meal Solution
Looking for an easy and savory dinner idea? You’ll love this Crockpot French Dip recipe! With tender beef and rich broth, it’s perfect for busy
To make the best Crock Pot potato soup, gather these simple ingredients: - 6 medium russet potatoes, peeled and diced into bite-sized cubes - 1 large onion, finely chopped - 2 medium carrots, peeled and diced - 2 celery stalks, diced - 4 cups vegetable broth (homemade or store-bought) - 1 cup milk (whole, low-fat, or a non-dairy alternative such as almond or oat milk) - 1 cup shredded sharp cheddar cheese (plus additional for serving) - 2 cloves garlic, minced - 1 teaspoon dried thyme - 1 teaspoon smoked paprika - Salt and pepper, to taste - ¼ cup fresh chives, chopped (for garnish) You can swap ingredients based on what you have. For example, if you lack russet potatoes, use Yukon Gold. If you prefer a creamier soup, replace milk with heavy cream. For a vegan soup, skip the cheese and milk and try coconut milk instead. You can also use vegetable stock instead of broth for a lighter taste. Choose firm potatoes that have smooth skin. Avoid any with spots or wrinkles. For onions, look for ones that are heavy for their size. They should feel firm and not soft. When buying carrots, select bright-colored ones that are crisp. Celery should snap easily when bent. Fresh vegetables make your soup taste better. Start by peeling and dicing the potatoes into bite-sized cubes. Use six medium russet potatoes for the best flavor. Next, finely chop one large onion. Dice two medium carrots and two celery stalks. Place all these vegetables in your crock pot. Make sure they are well mixed. Now, pour in four cups of vegetable broth. This adds depth to your soup. Stir in two cloves of minced garlic, one teaspoon of dried thyme, and one teaspoon of smoked paprika. These ingredients bring out the flavors. Finally, season with salt and pepper to taste. Cover your crock pot with its lid. Set it to cook on low for about six to seven hours. If you're in a hurry, you can cook it on high for three to four hours. Check the potatoes for tenderness. They should be easily pierced with a fork. Once the cooking time is up, take a potato masher and gently mash the soup. This creates a creamy texture but leaves some chunks for a nice bite. Stir in one cup of milk and one cup of shredded cheddar cheese. Let it cook for an extra 30 minutes on low. This allows the cheese to melt and blend into the soup. Taste it and adjust the salt or pepper as needed. For the full recipe, check out the Cozy Comfort Crock Pot Potato Soup section. Enjoy your warm, creamy soup! To make your soup shine, use the right seasonings. Salt and pepper are a must. They bring out the taste of the potatoes. I love adding thyme and smoked paprika for depth. Thyme gives a fresh note, while smoked paprika adds warmth. You can also try adding a bay leaf while it cooks. Just remember to remove it before serving. Fresh herbs like chives or parsley will brighten the dish at the end. Using the right tools makes cooking easier. You need a good crock pot to cook the soup slowly. A potato masher is key for that creamy texture. I recommend a sharp knife for chopping veggies and a cutting board for safety. A ladle helps serve the soup without spilling. Keep everything handy to make the process smooth and fun. Avoid overcooking your soup. Cooking too long can turn the potatoes mushy. Check the doneness after the minimum cooking time. Another mistake is not seasoning enough. Taste your soup at the end, and adjust if needed. Lastly, don’t forget to stir in the milk and cheese at the end. This keeps the soup rich and creamy. For the full recipe, check the Cozy Comfort Crock Pot Potato Soup details. {{image_4}} Adding protein makes your soup heartier and more filling. You can use cooked bacon, shredded chicken, or even beans. If you choose bacon, cook it first and crumble it before adding. For chicken, use rotisserie chicken for ease. If you prefer beans, canned white beans work well. Stir in your choice about halfway through cooking. This way, the flavors mix nicely. You can easily make this soup dairy-free or vegan. Instead of milk, use almond or oat milk. Skip the cheese, or try a vegan cheese that melts well. You can also add nutritional yeast for a cheesy flavor without dairy. These swaps keep your soup creamy while fitting your diet. If you like a kick, add some heat! You can mix in diced jalapeños or a dash of cayenne pepper. For a smoky flavor, try adding chipotle peppers in adobo sauce. Fresh herbs like cilantro or parsley can brighten things up too. Experiment with spices like cumin or curry powder to create a unique twist. Each variation can change the whole vibe of your soup. For the full recipe and more tips, check out Cozy Comfort Crock Pot Potato Soup. After enjoying your soup, let it cool down. Then, transfer it to an airtight container. Make sure to seal it tightly to keep it fresh. Store the container in the fridge. Properly stored, your soup can last for about three to four days. When you want to eat it again, simply reheat it on the stove or in the microwave. You can also freeze leftover potato soup. Use freezer-safe containers or heavy-duty freezer bags. Leave some space at the top to allow for expansion. Your soup can freeze well for up to three months. When you’re ready to enjoy it, take it out of the freezer. Thaw it overnight in the fridge for best results. Reheat it in a pot on low heat, stirring often. You may need to add a splash of milk to restore its creamy texture. When reheating your leftovers, serve them with a fresh twist. Top each bowl with extra cheddar cheese and a sprinkle of chives. A dollop of sour cream or a drizzle of olive oil can also add great flavor. Pair the soup with crusty bread or a simple salad for a complete meal. These additions make your leftovers feel special and delicious! For the full recipe, check out the Cozy Comfort Crock Pot Potato Soup! Cooking potato soup in a crockpot takes about 6 to 7 hours on low or 3 to 4 hours on high. This slow cooking method helps the flavors blend well. The potatoes will become tender and creamy. Check the soup after the suggested times. You want the potatoes to be soft enough to mash with a fork. Yes, you can use other types of potatoes in this recipe. While russet potatoes work best for a creamy texture, Yukon Gold or red potatoes are great options too. They can add a different flavor and texture to the soup. Just make sure to cut them into similar sizes for even cooking. You can serve many things with Crock Pot Potato Soup. Here are some great options: - A slice of crusty bread or warm rolls - A simple green salad with vinaigrette - Grilled cheese sandwiches for a classic pairing - Crispy bacon bits or croutons for crunch - Fresh herbs like chives or parsley for garnish These sides will enhance your meal and make it even more comforting. For the full recipe, check out the cozy comfort Crock Pot Potato Soup. This blog post shared easy steps to make delicious Crock Pot Potato Soup. We covered key ingredients, cooking times, and how to achieve that creamy texture. I highlighted flavor tips, storage methods, and ways to vary the recipe. Remember, you can add protein, make it vegan, or turn up the heat. With these tips, you can create a tasty meal any time. Enjoy your cooking journey and share your soup success with others!
Crock Pot Potato Soup Rich and Creamy Comfort Food
Are you ready to dive into a bowl of warm, rich, and creamy potato soup? In this post, we’ll explore how to make the best
You need some simple items to make this dish. Here’s what you'll need: - 1 lb (450g) boneless, skinless chicken breasts - 1 (10.5 oz) can cream of mushroom soup - 1 (10 oz) can diced tomatoes with green chilies - 1 cup chicken broth (plus extra if needed) - 1 medium onion, finely chopped - 2 cloves garlic, minced - 1 teaspoon Italian seasoning - 1/2 teaspoon black pepper - 8 oz (225g) spaghetti, broken in half - 1 cup grated mozzarella cheese - 1/2 cup grated Parmesan cheese - Salt, to taste - Fresh parsley, chopped (for garnish) These ingredients blend well to create a rich flavor. You can find most of them in your kitchen. The spices bring life to your meal. Italian seasoning adds a warm aroma. Black pepper gives a gentle kick. Salt enhances all the flavors. Each ingredient plays a role in making your chicken spaghetti taste great. Garnishes make your dish look nice and taste better. You can use fresh parsley to add color. A drizzle of olive oil gives a shine. You may also sprinkle extra cheese on top for more flavor. These small touches make a big difference in how your meal looks and tastes. For the full recipe, check the details above. Enjoy making this dish! Start by placing the boneless, skinless chicken breasts in the CrockPot. Spread them evenly at the bottom. This helps the chicken cook well and soak up flavors. Make sure to use fresh chicken for the best taste. Avoid any chicken that looks discolored or smells off. In a large bowl, combine the cream of mushroom soup, diced tomatoes, and chicken broth. Add the chopped onion, minced garlic, Italian seasoning, black pepper, and salt. Stir until everything blends well. This sauce will give the chicken a rich flavor. It also helps the spaghetti cook nicely. Pour the sauce mixture over the chicken. Make sure the chicken is well coated. Secure the lid on the CrockPot. Set it to cook on low for 6-8 hours or on high for 3-4 hours. This slow cooking time lets all the flavors mix. About 30 minutes before serving, break the spaghetti in half and add it to the pot. Stir gently and add more broth if needed. When the spaghetti is cooked, shred the chicken with two forks. Mix it well with the sauce and spaghetti. Finally, sprinkle the mozzarella and Parmesan cheeses on top. Let it sit for 10 minutes to melt. Garnish with fresh parsley before serving. Enjoy your meal! To get the best flavor in your CrockPot chicken spaghetti, use fresh ingredients. Fresh garlic and onion add great taste. I like to sauté them briefly before mixing them in. This step enhances their flavors. Don’t skip the Italian seasoning; it brings warmth and depth. If you want more heat, add crushed red pepper flakes. The canned tomatoes with chilies also add a nice kick. For a rich flavor, try adding a splash of white wine. If your sauce is too thick, don’t worry! Just add more chicken broth. Start with a little and stir it in. This helps the spaghetti cook well. If you want a creamier sauce, mix in some cream cheese or sour cream. This option makes the dish richer. Always check the sauce before serving. It should be smooth but not watery. The right thickness makes the dish comforting and delicious. For the best results, cook on low heat for 6-8 hours. This slow cooking time allows flavors to meld. If you are short on time, you can cook on high for 3-4 hours. Just remember, cooking it longer makes the chicken more tender. Keep an eye on the spaghetti. Add it about 30 minutes before serving. This timing ensures it cooks perfectly without getting mushy. Enjoy the process; it’s simple and rewarding! {{image_4}} You can easily boost the health of your dish by adding veggies. I love using bell peppers, spinach, or zucchini. Chop them up and toss them into the CrockPot with the chicken. This adds color and nutrients. Plus, it makes your meal even more filling. Just remember to adjust the cooking time if you add a lot. Slightly longer cooking helps the veggies soften. If you want to change it up, use turkey or cooked sausage instead of chicken. Shredded rotisserie chicken also works well. It saves time and still tastes great. You could even try shrimp for a seafood twist. Just make sure to adjust cooking times based on what protein you choose. Shrimp cooks faster, so add it later in the process. To make this dish gluten-free, swap regular spaghetti for gluten-free pasta. This option works well and maintains the tasty flavor. For dairy-free needs, use vegan cheese or skip the cheese entirely. You can still create a creamy texture with coconut milk or a cashew cream. These swaps keep the meal enjoyable and safe for everyone. If you need the Full Recipe, you can find it above. After enjoying your meal, let the leftovers cool down. This helps keep them fresh. Store the chicken spaghetti in an airtight container. Make sure to seal it tightly. You can keep it in the fridge for up to three days. This way, you can enjoy it again soon. To reheat, use a microwave or a stovetop. If using the microwave, place your portion in a bowl. Heat it for 1-2 minutes. Stir halfway through to ensure even warming. On the stovetop, add your pasta to a pan. Use low heat and add a splash of chicken broth to keep it moist. Stir gently until heated through. If you want to save for later, freezing is a great option. Allow the chicken spaghetti to cool completely. Then, pour it into a freezer-safe container. Leave some space at the top for expansion. You can freeze it for up to three months. When ready to eat, thaw in the fridge overnight and reheat as needed. Enjoy your easy meal anytime! Yes, you can use frozen chicken. Just adjust the cooking time. If using frozen, cook on high for 4-5 hours. This gives the chicken more time to cook fully. Make sure the chicken reaches 165°F to be safe. Check the chicken's internal temperature with a meat thermometer. It should be at least 165°F. You can also shred the chicken with a fork. If it falls apart easily, it is done. Chicken spaghetti pairs well with a salad or garlic bread. You can also serve it with steamed vegetables. Choosing a light side helps balance the meal. You can find the Full Recipe in the article. It includes all the details for making this tasty dish. This blog post covered how to make easy CrockPot chicken spaghetti. You learned about the key ingredients, spices, and ways to make it your own. Step-by-step instructions guided you through the cooking process. I shared tips on flavor and sauce texture. We discussed storage methods and answered common questions. Remember, cooking is fun and can be simple. Enjoy your meal creations and share them with loved ones. Happy cooking!
Easy CrockPot Chicken Spaghetti Flavorful and Simple
If you’re looking for a meal that’s both tasty and easy, you’ve come to the right place. My Easy CrockPot Chicken Spaghetti is perfect for
- 3-4 lb beef chuck roast - 4 cloves garlic, minced - 1 large onion, quartered - 4 medium carrots, chopped - 3 medium potatoes, diced - 2 cups low-sodium beef broth - 2 tablespoons Worcestershire sauce - 2 teaspoons dried thyme - 2 teaspoons dried rosemary - 1 teaspoon salt - 1 teaspoon black pepper - 2 tablespoons olive oil - 1 bay leaf Drying the meat before cooking is very important. It helps the roast sear well. Searing adds a nice crust and locks in flavors. To sear, heat olive oil in a skillet. Once hot, place the roast in the pan. Cook each side for about 3 to 4 minutes. You want it brown and golden, not burnt. After searing, let it rest for a few minutes. This step makes the meat juicy. For the vegetables, chop them into bite-sized pieces. This helps them cook evenly in the crock pot. The garlic and onion should be minced and quartered, respectively. This helps their flavors spread throughout the dish. The Full Recipe gives you a clear guide on how to combine these ingredients into a delicious meal. First, pat the beef chuck roast dry with paper towels. This helps create a nice crust. Next, sprinkle salt and black pepper all over the roast. This seasoning adds great flavor. Now, heat olive oil in a large skillet over medium-high heat. When it shimmers, place the roast in the skillet. Sear each side for 3-4 minutes. You want a nice brown color. Once done, take the roast out and set it aside on a plate. In the same skillet, add minced garlic and quartered onion. Cook them for 2-3 minutes, stirring often. This step makes the onions soft and fragrant. Layer chopped carrots and diced potatoes at the bottom of the crock pot. This creates a tasty bed for the roast. Place the seared roast on top of the vegetables. Now, pour the sautéed garlic and onions over the roast. This allows the flavors to mix while cooking. In a separate bowl, mix low-sodium beef broth, Worcestershire sauce, dried thyme, and dried rosemary. Stir until blended. Pour this mixture over the roast in the crock pot. Finally, add the bay leaf on top. This little herb adds a wonderful depth of flavor. Cover the crock pot with the lid. If you have time, set it to low for 8-10 hours. This slow cook makes the meat super tender. If you're short on time, use the high setting for 4-6 hours. The meat should be fork-tender and easy to shred. For best results, check the roast near the end of cooking. This way, you ensure it stays juicy and tender. Resting the meat is key for a juicy roast. After cooking, let the roast sit for 10-15 minutes. This helps the juices spread evenly. If you skip this step, the juices will run out when you slice it. Next, adjusting seasoning is important. Taste the broth and meat before serving. You might need a pinch more salt or pepper. Everyone's taste is different, so make it your own. Arranging the roast and veggies well makes the dish pop. Slice the roast neatly and place it on a platter. Surround it with the soft carrots and potatoes. This creates a beautiful display. For a nice touch, garnish with fresh herbs. Sprinkle some chopped parsley or rosemary on top. This adds color and a fresh aroma that will impress your family. One common mistake is skipping the seasoning. Always season the roast well before cooking. This step makes a big difference in flavor. Another mistake is not allowing the meat to rest. Cutting into the roast too soon leads to dry meat. Always wait a bit to let those juices settle. {{image_4}} You can use different cuts of meat for a crock pot roast. While beef chuck roast is popular, you might try brisket or round roast. Brisket gives a nice flavor and stays tender. Round roast is leaner but can still be tasty. Each cut has its own charm. Adjust the cooking time for each type to get the best results. Seasonal vegetables can add color and flavor. Instead of carrots, try parsnips or sweet potatoes. You can also use turnips or butternut squash for a twist. Don't forget greens like green beans or Brussels sprouts. Fresh herbs like parsley or thyme can brighten up your dish. They add a fresh taste that makes each bite special. Experiment with sauces and marinades to boost flavor. A splash of balsamic vinegar or red wine can make a big difference. Try adding soy sauce or barbecue sauce for a different flavor profile. You can also use mustard or honey for a sweet and tangy taste. Each addition brings its own unique twist to your meal. When storing leftovers, cool them quickly. Leave the meat and veggies at room temperature for no more than two hours. After that, place them in shallow containers. This helps them cool fast. Store your crock pot roast in the refrigerator for up to four days. For longer storage, use your freezer. You can keep it frozen for up to three months. To reheat your crock pot roast, the oven works best. Preheat it to 325°F. Place the meat in a baking dish and add a splash of broth. Cover it with foil to keep it moist. Heat for about 30 minutes or until warm. If you're in a hurry, use the microwave. Heat in short bursts, stirring in between. This helps keep the flavor and texture nice. To freeze your roast for meal prep, cut it into portions. Place the portions in freezer bags or airtight containers. Remove as much air as you can to prevent freezer burn. Label each bag with the date. For thawing, move it to the fridge overnight. This keeps it safe and tasty. You can also thaw it in cold water if you need it faster. You should cook a crock pot roast for 8-10 hours on low and 4-6 hours on high. Cooking on low gives you tender, flavorful meat. On high, the roast will also be tasty, but it may not be as tender. Either way, check for doneness by using a fork. If the meat shreds easily, it is ready to serve. No, you should not put frozen meat in a crockpot. Cooking frozen meat can lead to food safety issues. The meat may not reach a safe temperature fast enough. Always thaw meat first. You can do this in the fridge overnight or use the microwave for a quick thaw. Crock pot roast pairs well with a variety of sides. Here are some ideas: - Mashed potatoes - Steamed green beans - Roasted Brussels sprouts - Creamy coleslaw - Fresh salad These sides balance the hearty flavors of the roast and make the meal feel complete. Yes, this recipe can be healthy. A beef chuck roast provides protein and iron. You can make it healthier by using less oil and salt. Swap in more vegetables like zucchini or bell peppers. Consider using leaner cuts of meat for less fat. Always adjust the recipe to fit your dietary needs. You can find the Full Recipe for a Savory Herb Infused Crock Pot Roast. It includes all the ingredients and steps you need to make this delicious dish. Look for it online or in your favorite cookbook for more details. This blog post guides you through making a delicious crock pot roast. We covered key ingredients, seasoning, and step-by-step instructions. I shared tips for achieving the perfect roast and common mistakes to avoid. You can also explore different variations and storage tips for leftovers. Cooking isn't just about food; it's an act of love and care. Enjoy the process, and happy cooking!
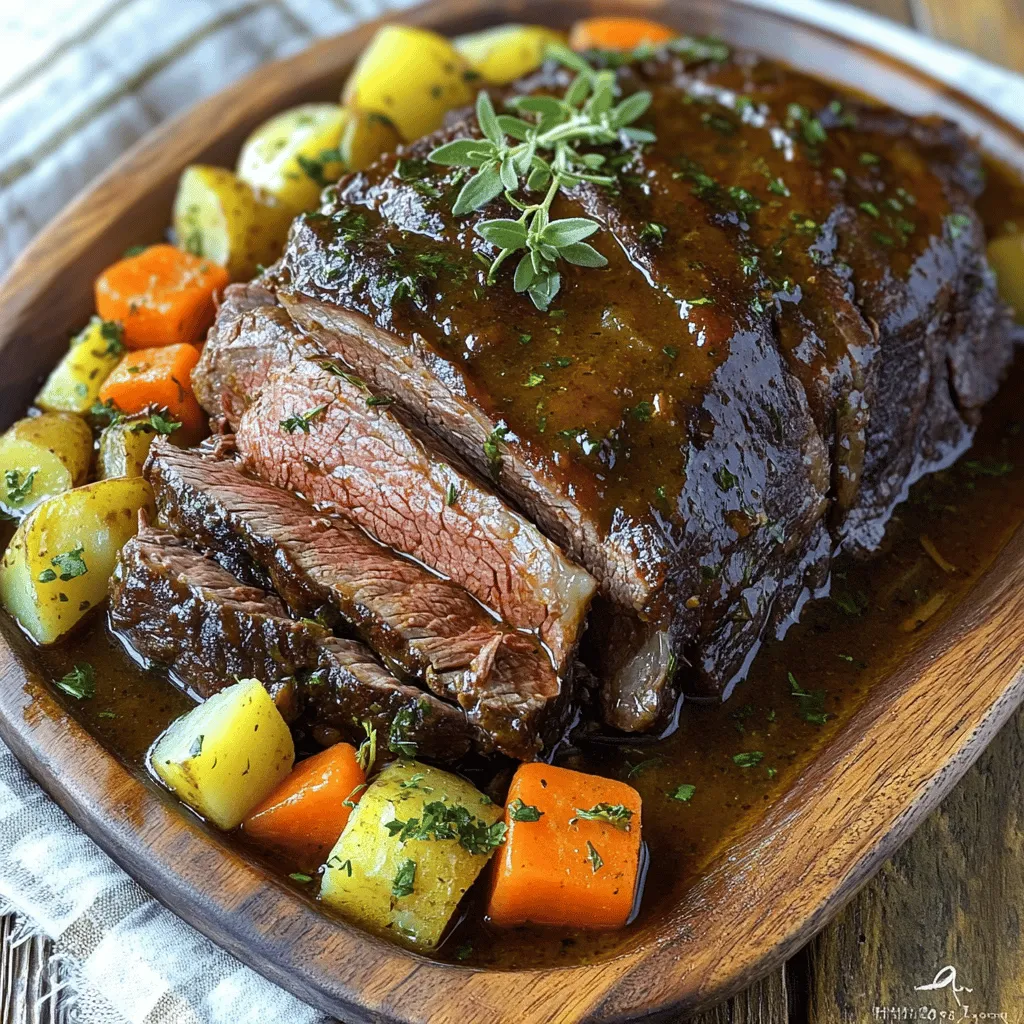
Crock Pot Roast Savory and Simple Family Meal
Looking for a hearty family meal that’s easy to make? You’re in the right place! This Crock Pot Roast is savory, simple, and perfect for
Here’s what you need for the Summer Veggies Skillet: - 1 medium zucchini, sliced into half-moons - 1 medium yellow squash, sliced into half-moons - 1 bell pepper (red or yellow), diced into bite-sized pieces - 1 cup cherry tomatoes, halved - 1 cup fresh corn kernels (approx. from 2 ears of corn) - 1 small red onion, finely diced - 2 cloves garlic, minced - 1 teaspoon dried oregano - 1 teaspoon smoked paprika - 2 tablespoons olive oil - Salt and freshly ground black pepper to taste - Fresh basil leaves, for garnish Using fresh, seasonal ingredients makes this dish shine. Summer vegetables are at their peak flavor and texture. They are vibrant, colorful, and full of nutrients. When you choose seasonal produce, you support local farmers and enjoy better taste. These fresh veggies also help reduce your carbon footprint. Eating what is in season means you get the best of nature's bounty. You can easily swap ingredients to fit your diet. If you are lactose intolerant, this dish is already dairy-free. For gluten-free needs, this recipe is a great option. You can replace zucchini with eggplant or use different bell peppers. If you want a protein boost, add chickpeas or tofu. For a spicy kick, toss in some jalapeños or chili flakes. These swaps keep the dish tasty while meeting your dietary needs. Making a summer veggies skillet is simple and fun. You start by heating oil. Then, you add the onion and garlic. After that, you mix in all the colorful veggies. The key is to cook them until they are just tender. This dish is quick and perfect for any meal. 1. Heat the Oil: In a large skillet, heat 2 tablespoons of olive oil over medium heat. Wait until it shimmers. 2. Sauté the Onion: Add 1 small red onion, finely diced. Cook for about 3-4 minutes. The onion should be soft and clear. 3. Add Garlic: Stir in 2 cloves of minced garlic. Cook for 1 minute. Watch it closely so it does not burn. 4. Cook the Veggies: Add 1 medium zucchini and 1 medium yellow squash, both sliced into half-moons. Also, add 1 diced bell pepper. Sauté for 5-7 minutes until they soften and shine. 5. Mix in Corn and Tomatoes: Add 1 cup of fresh corn kernels and 1 cup of halved cherry tomatoes. Sprinkle in 1 teaspoon of dried oregano, 1 teaspoon of smoked paprika, salt, and black pepper. 6. Finish Cooking: Stir gently for 3-5 minutes. All veggies should be tender and mixed well. 7. Garnish and Serve: Remove from heat. Add fresh basil leaves for color and flavor before serving. - For Crunchier Veggies: Reduce the cooking time by 1-2 minutes when sautéing. This keeps them crisp. - For Softer Veggies: If you like softer textures, cook an extra 1-2 minutes. Keep stirring to avoid burning. - High Heat Cooking: If you raise the heat, watch closely. It can cook faster, but you risk burning the garlic and onions. This recipe is a great way to enjoy summer's bounty. For the full recipe, check the earlier section. To create a tasty Summer Veggies Skillet, mix different veggies. The mix of zucchini, yellow squash, bell pepper, corn, and tomatoes gives a bright splash of color and flavor. Add garlic for warmth and onion for sweetness. Season with oregano and smoked paprika for depth. Try adding a splash of lemon juice at the end for brightness. This small change can make a big difference. Cooking time affects texture. Start by sautéing onion and garlic until soft. This step builds a strong base. Add zucchini and squash next, as they cook faster. Stir them well to keep them from sticking. When you add tomatoes and corn, keep a close eye. You want them tender but still fresh. For a crisp bite, try to avoid overcooking any veggie. One common mistake is overcrowding the skillet. If you add too many veggies at once, they will steam instead of sauté. This makes them mushy. Cook in batches if needed. Another mistake is not seasoning enough. Taste as you go. Adjust salt and pepper to your liking. Lastly, don’t skip the fresh basil at the end. It adds a bright finish to the dish. You can find the full recipe [here](#). {{image_4}} You can easily swap some veggies for others. Try using eggplant or asparagus instead of zucchini. If you want more color, go for rainbow carrots or purple bell peppers. You can even add leafy greens like spinach or kale for extra nutrition. Remember, the goal is to use fresh, seasonal produce. To make the dish more filling, add proteins. You can stir in cooked chicken or shrimp. For a vegetarian option, try chickpeas or tofu. Just make sure to cook the protein before adding it to the skillet. This way, everything heats evenly, and you get a balanced meal. You can switch up the flavors to match different cuisines. For a Mediterranean twist, add feta cheese and olives. If you want an Asian flair, toss in soy sauce and sesame oil. Try adding cumin and chili powder for a Mexican vibe. Each of these additions makes the dish unique and fun to explore. For the full recipe, check the Summer Veggies Skillet Delight. After you make the Summer Veggies Skillet, it’s key to store it right. First, let the dish cool down. Once cool, transfer it to an airtight container. This keeps the veggies fresh. Store the container in the fridge for up to 3 days. To enjoy the dish at its best, eat it within this time. When you are ready to eat your leftovers, reheating is simple. You can use the microwave or stovetop. For the microwave, place your serving in a bowl and cover it. Heat for about 1-2 minutes. Stir halfway through to ensure even warming. On the stovetop, heat in a skillet over medium heat. Stir often until hot, which should take about 5 minutes. Freezing your Summer Veggies Skillet is also an option if you have extra. Use a freezer-safe container for best results. Make sure to leave some space at the top, as food expands when frozen. It can last for up to 2 months in the freezer. To thaw, place it in the fridge overnight. You can also use the microwave for quicker thawing. After thawing, reheat it like mentioned above. Enjoy your delicious dish again! You can prep the Summer Veggies Skillet in advance. First, chop all the veggies. Store them in airtight containers in the fridge. You can also mix the spices ahead. When you are ready to cook, just heat olive oil in your skillet. Add the prepped veggies and spices. This saves time on busy days. Yes, you can use frozen vegetables. They make cooking quick and easy. Just remember that frozen veggies may need a bit more time to cook. Also, they might release more water. Drain excess liquid during cooking. This keeps the dish from getting soggy. Fresh herbs really brighten up summer vegetables. I love using basil, thyme, and parsley. Oregano adds a nice touch too. You can also try dill or cilantro for a fresh twist. Adding herbs at the end of cooking keeps their flavor strong. This blog post covered the main elements for making a great Summer Veggies Skillet. We looked at important ingredients, cooking steps, and tips to enhance flavor. You learned how to adjust for dietary needs and common mistakes to avoid. With these insights, you can create a tasty dish that fits your needs. By using fresh veggies and exploring variations, you’ll make meals exciting. Enjoy cooking and sharing your delicious creations!
Savory Summer Veggies Skillet Flavorful and Easy Dish
Are you ready to savor summer’s freshest flavors? My Savory Summer Veggies Skillet is a simple, delicious dish that makes the most of seasonal produce.