Dinner

- 8 oz spaghetti, uncooked - 1 cup cooked chicken, shredded (preferably rotisserie for added flavor) - 1 cup cream cheese, softened to room temperature - 1 cup sour cream - 1 cup sharp cheddar cheese, shredded - 1 cup mozzarella cheese, shredded - 1 cup diced tomatoes, well-drained (canned or fresh) - 1/2 cup green onions, finely chopped - 1 teaspoon garlic powder - 1 teaspoon onion powder - 1 teaspoon smoked paprika - 1/2 teaspoon freshly ground black pepper - Salt, to taste - 1/2 cup breadcrumbs (panko for extra crunch recommended) First, preheat your oven to 350°F (175°C). This makes sure your dish bakes evenly. Next, fill a large pot with salted water and bring it to a boil. Add the spaghetti and cook it until al dente. This means it should be firm to the bite. After cooking, drain the spaghetti and set it aside. In a large mixing bowl, combine the shredded chicken, cream cheese, sour cream, cheddar cheese, mozzarella cheese, diced tomatoes, and green onions. Add the garlic powder, onion powder, smoked paprika, black pepper, and salt. Make sure your cream cheese is soft. This helps everything mix smoothly. Stir until all ingredients are well blended and creamy. Now, gently fold the cooked spaghetti into the creamy mixture. Make sure every strand gets coated in the rich sauce. Lightly grease a 9x13 inch baking dish. Pour the spaghetti mixture into the dish and spread it evenly. In a small bowl, mix the breadcrumbs with a drizzle of olive oil. This helps them get a nice golden crust. Sprinkle the breadcrumb mixture over the top of the spaghetti bake. Finally, place the dish in the oven and bake for 25-30 minutes. Look for a golden, bubbling top to know it's done. {{ingredient_image_2}} To make a smooth sauce, use softened cream cheese. This helps it blend well. Mix the cream cheese, sour cream, and cheeses until creamy. I recommend using rotisserie chicken. It adds flavor and saves time. Look for chicken that is juicy and well-cooked. You can prepare this dish in advance. Cook the spaghetti and mix the creamy sauce. Store them separately in the fridge. When you're ready to bake, combine them and add the topping. For reheating, cover the dish with foil. This keeps it moist and warms it evenly. Serve this dish with a side salad or garlic bread. Both complement the creamy spaghetti bake well. For drinks, iced tea or a light white wine works great. These beverages enhance the meal's comfort and flavor. You can easily switch out the protein in this dish. Instead of chicken, try using ground turkey or even crumbled tofu for a vegetarian option. Both add great flavor and texture. For the cheese, mix things up! Instead of sharp cheddar, use pepper jack for a kick or gouda for a rich taste. Mozzarella pairs well with any cheese. To make a lower-carb version, use zucchini noodles or spaghetti squash instead of regular pasta. These options keep the dish light yet tasty. You can also swap the cream cheese and sour cream for their reduced-fat versions. They still give a creamy texture without the extra calories. If you love heat, add diced jalapeños or crushed red pepper flakes to the creamy mix. This will give your dish a spicy kick that works well with the creamy sauce. You can also drizzle some hot sauce on top before serving. This extra heat will elevate your Southern Creamy Spaghetti Bake to a whole new level! Pro Tips Use Rotisserie Chicken: For added flavor and convenience, opt for rotisserie chicken. It enhances the dish's overall taste and saves time on cooking. Perfect Pasta Texture: Cook the spaghetti until al dente, as it will continue to cook while baking. This prevents the noodles from becoming mushy. Breadcrumb Topping: Mix your breadcrumbs with melted butter or olive oil to create a crunchy topping. This will give your dish a delightful texture contrast. Garnish for Presentation: Before serving, sprinkle extra chopped green onions and a dash of smoked paprika on top for a pop of color and a burst of flavor. {{image_4}} After enjoying your Southern creamy spaghetti bake, cool it down properly. Let it sit at room temperature for about 30 minutes. This helps reduce moisture. Next, place it in airtight containers. Glass or plastic containers work well for storage. Make sure to seal them tight. This keeps the dish fresh for your next meal. You can freeze this dish before or after baking. If freezing before baking, assemble it in a freezer-safe dish. Cover it tightly with plastic wrap and foil. This keeps out air and moisture. If you freeze it after baking, let it cool completely first. Then, wrap it well and store it in the freezer. To thaw, place it in the fridge overnight. You can reheat it in the oven at 350°F (175°C) until hot. In the fridge, this spaghetti bake lasts about 3 to 5 days. Be sure to check for signs of spoilage. Look for off smells or changes in color. If the cheese appears slimy or has mold, it’s time to toss it. Always trust your senses when it comes to food safety. Yes, you can easily skip the chicken. Here are some tasty alternatives: - Ground turkey: A leaner option with great flavor. - Cooked sausage: Adds a nice spice and richness. - Tofu or tempeh: Great choices for a vegetarian dish. - Mushrooms: They provide a hearty texture and umami taste. These options keep the dish hearty and satisfying. To make this dish gluten-free, simply choose gluten-free pasta. Here are a few options: - Rice noodles: They are light and cook fast. - Quinoa pasta: Offers a nutty flavor and good protein. - Zucchini noodles: A fresh, low-carb twist that adds veggies. These alternatives work well with the creamy sauce and flavors. If you need a substitute for cream cheese, try these dairy-free options: - Cashew cream: Blend soaked cashews until smooth for a rich texture. - Silken tofu: It blends well and has a mild taste. - Coconut yogurt: Adds creaminess with a hint of coconut flavor. These options will keep your dish creamy and delicious. To check if the spaghetti bake is ready, look for these signs: - Golden top: The breadcrumbs should be browned and crispy. - Bubbling edges: You should see the sauce bubbling around the edges. - Firm center: Gently shake the dish; it should not jiggle. These signs mean your bake is perfectly cooked. Absolutely! Here are some easy ways to add heat: - Chili flakes: Sprinkle them on top before baking for a kick. - Sliced jalapeños: Mix them in with the creamy mixture. - Hot sauce: Add a few drops to the sauce for depth. These additions will spice up your Southern Creamy Spaghetti Bake wonderfully. This blog post showed you how to make a creamy spaghetti bake that's easy and tasty. You learned about the key ingredients, seasonings, and steps to follow. We also shared tips for perfect texture and smart serving ideas. Remember, there are many ways to change the recipe to fit your needs. You can try new proteins or make it spicy. With proper storage, your leftovers can last for days. Enjoy this dish at home for a satisfying meal anytime. Happy cooking!
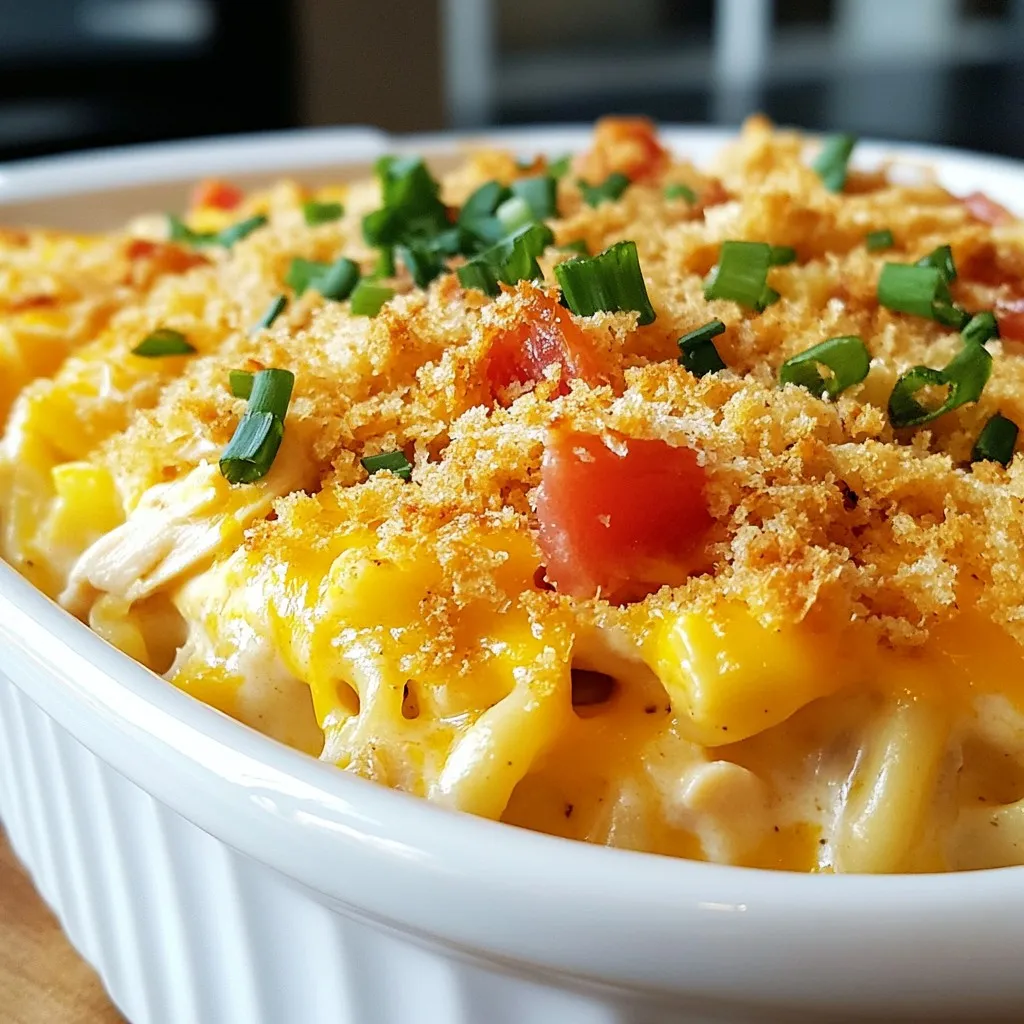
Southern Creamy Spaghetti Bake Delightful and Easy Dish
If you’re craving comfort food that’s both creamy and fulfilling, you’ve come to the right place! My Southern Creamy Spaghetti Bake combines tender pasta, savory
- Puff pastry - Onions - Olive oil - Balsamic vinegar - Thyme - Gruyère cheese - Eggs - Heavy cream - Seasoning Gathering the right ingredients is key to a great tart. Start with one sheet of puff pastry. This will be the base, giving the tart a light and flaky texture. Next, you'll need three large onions. Thinly slice them to ensure even cooking. The sweetness of the onions adds depth to your dish. For cooking, use two tablespoons of olive oil. This will help caramelize the onions and add flavor. Add a tablespoon of balsamic vinegar to enhance the sweetness. It gives a nice tang that balances the rich cheese. For flavor, include one teaspoon of thyme leaves. Fresh or dried will work well, but fresh has a brighter taste. For the cheesy goodness, you’ll need one cup of grated Gruyère cheese. This cheese melts beautifully and brings a nutty flavor to the tart. You’ll also need two large eggs and one cup of heavy cream for the filling. This mix will bind everything together and create a creamy texture. Don’t forget to season with salt and pepper to taste. Finally, for a pop of color, use fresh parsley. Finely chop it to garnish the tart before serving. With these ingredients, you will create a delicious Caramelized Onion Gruyère Tart that is savory and sure to impress! Thaw your puff pastry in the fridge for a few hours. When you’re ready, roll it out on a floured surface. Aim for about 1/8 inch thick. This helps it fit into the tart pan. Press the pastry gently into the pan. Make sure it covers the sides and corners. Use a fork to prick the bottom. This keeps it from puffing up during baking. Heat olive oil in a large skillet over medium heat. Add the sliced onions when the oil is warm. Stir the onions often for about 15-20 minutes. You want them soft and golden brown. This step is key. Constant stirring ensures even cooking. If you skip this, the onions may burn. Once they are caramelized, add balsamic vinegar and thyme. Cook for another 2-3 minutes. Season with salt and pepper, then take off the heat. In a bowl, whisk two large eggs with one cup of heavy cream. Mix until it is smooth. Now, add one cup of grated Gruyère cheese. Stir well to combine. This mixture brings richness to your tart. Spread the cooled caramelized onions over the puff pastry. Make sure to cover the base evenly. Next, pour the egg and cheese mixture over the onions. This helps bind everything together. Ensure that the filling is evenly distributed. This way, every slice has the same great flavor. Preheat your oven to 400°F (200°C). Place the tart in the oven and bake for 25-30 minutes. Keep an eye on it. The filling should be set, and the pastry must be golden brown. To check for doneness, gently shake the tart. If it jiggles slightly, it’s ready. Let it cool for a few minutes before serving. Garnish with fresh parsley for a nice touch. To avoid burnt onions, use a medium heat setting. High heat can scorch the onions fast. Stir them every few minutes. This helps them cook evenly. Patience is key! Caramelizing takes about 15-20 minutes. The longer you cook them, the sweeter they become. For the best flavor, add balsamic vinegar after the onions turn golden. This will enhance their sweetness and add depth to the taste. Fresh thyme brings a nice herby note. You can also use dried thyme if that’s all you have. Pair your tart with a fresh salad or roasted veggies. A light white wine complements the flavors well. Consider serving it with a crisp Sauvignon Blanc. When presenting the tart, slice it into wedges. Use a sharp knife for clean cuts. Garnish each piece with chopped parsley for a pop of color. It makes the dish look more appealing and fresh. You can add extra herbs, like rosemary or oregano, for more flavor. A pinch of nutmeg can add warmth. For optional toppings, try crumbled bacon or sautéed mushrooms. These add texture and richness to every bite. You might also sprinkle some extra Gruyère cheese on top before baking for a cheesy crust. {{image_4}} You can use other cheeses in this tart. Cheddar adds sharpness, while fontina gives a creamy texture. If you're looking for a vegan option, try cashew cheese or a store-bought vegan cheese. These alternatives melt well and can provide unique flavors. Feel free to add more vegetables to your tart. Spinach or mushrooms can add depth. For these, cook them briefly before adding them to the tart. Adjust cooking times as needed, so everything blends well. If you add vegetables, make sure they are not too watery. This keeps the tart from getting soggy. You can switch up the crust in this recipe. Use a shortcrust pastry for a different texture. If you're avoiding gluten, look for gluten-free puff pastry. These options provide a delightful twist while still being easy to prepare. To store leftovers in the fridge, let the tart cool first. Then, cover it with plastic wrap or foil. This keeps it fresh for up to three days. When you are ready to eat, preheat your oven to 350°F (175°C). Place the tart on a baking sheet and heat for about 15 minutes. This will warm it through and keep the crust crispy. You can freeze the tart both before and after baking. If you freeze it before baking, wrap it tightly in plastic wrap and foil. It can last for up to three months. When ready to bake, remove the wrap, and bake it straight from the freezer. Just add a few extra minutes to the bake time. If you freeze it after baking, let it cool completely. Then, wrap it tightly to avoid freezer burn. To thaw, place the tart in the fridge overnight. Then, reheat it in the oven at 350°F (175°C) for about 20 minutes. Enjoy your delicious tart just like the day you made it! Yes, you can make this tart ahead of time. Here’s how: - Prepare the onions: You can caramelize the onions a day before. Store them in an airtight container in the fridge. - Assemble the tart: You can assemble the tart a few hours in advance. Just cover it with plastic wrap and keep it in the fridge. - Bake when ready: Bake the tart just before serving for the best taste and texture. You can tell the tart is done by checking these signs: - Color: The pastry should be golden brown. - Filling: The filling should be set, not jiggly. - Smell: There will be a rich, savory aroma. A good rule of thumb is to bake it for 25-30 minutes at 400°F (200°C). You can serve your tart with these tasty sides: - Salad: A fresh green salad works well. - Soup: Pair it with a light soup, like tomato or butternut squash. - Wine: A crisp white wine compliments the flavors nicely. These pairings make for a satisfying meal! This blog post covered all you need to make a delicious tart. We looked at each ingredient and its role. You learned step-by-step instructions for caramelizing onions and baking the tart. The tips helped improve your cooking skills. I shared variations for personal tastes and smart storage ideas. Now, you can impress your friends with a unique dish! Enjoy experimenting with flavors and sharing your tasty tart.
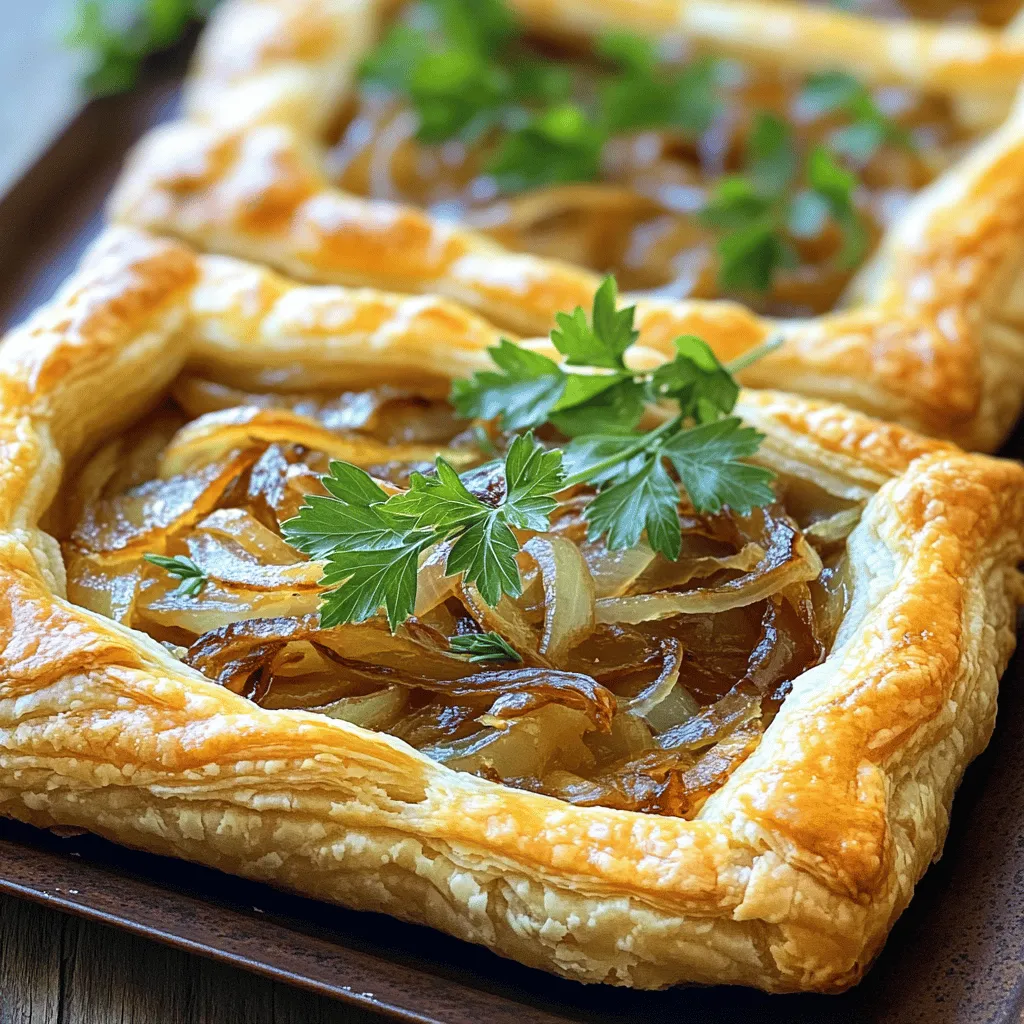
Caramelized Onion Gruyere Tart Savory and Simple Treat
If you’re looking for a dish that’s both savory and simple, you’ve found it! This Caramelized Onion Gruyère Tart is a crowd-pleaser that combines rich
- 1 tablespoon olive oil - 1 medium onion, diced - 3 cloves garlic, minced - 2 cups cooked chicken breast, shredded - 4 cups chicken broth (low-sodium recommended) - 1 cup heavy cream - 1 teaspoon dried oregano - 1 teaspoon dried basil - 1/2 teaspoon red pepper flakes (optional for heat) - 8 lasagna noodles, broken into smaller pieces - 1 cup ricotta cheese - 1 1/2 cups shredded mozzarella cheese - 1/2 cup grated Parmesan cheese - Salt and pepper, to taste - Fresh parsley, finely chopped for garnish For the best flavor, I suggest using high-quality chicken broth. A low-sodium option is great, as it lets you control the salt. Look for fresh herbs like oregano and basil; they add a bright taste. Use real parmesan cheese, not the powdered kind, for a richer flavor. If you don’t have heavy cream, try using half-and-half or whole milk. For a lighter option, you can use plain Greek yogurt instead of ricotta. If you want to avoid gluten, you can swap the lasagna noodles for gluten-free pasta. Don't have fresh parsley? Try dried parsley, or skip it entirely. {{ingredient_image_2}} To make White Chicken Lasagna Soup, you need to gather your ingredients first. This soup takes about 35 minutes from start to finish. It serves six people, so it’s perfect for a family meal. 1. Sauté the Vegetables: In a large pot, heat one tablespoon of olive oil over medium heat. Add one diced medium onion and cook it for about five minutes. Wait until the onion is soft and clear. Then, add three minced garlic cloves and cook for one more minute. 2. Add Chicken and Broth: Stir in two cups of shredded cooked chicken. Then, pour in four cups of chicken broth. Add one teaspoon of dried oregano, one teaspoon of dried basil, and half a teaspoon of red pepper flakes if you like some heat. Bring this mix to a gentle simmer. 3. Incorporate the Cream: Slowly add one cup of heavy cream into the pot. Let it simmer for about five minutes. This step helps create a rich and creamy base for your soup. 4. Cook the Lasagna Noodles: Break eight lasagna noodles into smaller pieces. Add them to the soup and cook according to the package instructions, which is usually around 10 to 12 minutes. Stir often to keep them from sticking together. 5. Add the Cheeses: Once the noodles are tender, turn the heat down. Mix in one cup of ricotta cheese, one and a half cups of shredded mozzarella cheese, and half a cup of grated Parmesan cheese. Stir until everything melts together. Taste the soup and season with salt and pepper as needed. 6. Garnish and Serve: Spoon the soup into bowls. Sprinkle fresh chopped parsley on top for color and freshness. - Always sauté the onion and garlic first to enhance their flavors. - Stir the soup often while the noodles cook to avoid sticking. - Taste your soup before serving. Adjust the salt and pepper for the best flavor. - For a special touch, serve with extra mozzarella or a drizzle of olive oil on top. To make your White Chicken Lasagna Soup creamier, use heavy cream as the base. This gives a rich taste. You can also add more cheese. Ricotta and mozzarella both melt well and add creaminess. Stir these in after the noodles cook. Let them melt fully for a smooth texture. If you want extra flavor, a touch of cream cheese can enhance the creaminess too. Pair this soup with crusty bread. A slice of garlic bread works wonders. You can also serve a fresh salad on the side. A simple green salad with a light vinaigrette will balance the soup’s richness. For drinks, a light white wine or sparkling water adds a nice touch. If you like, top the soup with extra mozzarella or Parmesan for a delicious finish. One common mistake is not sautéing the garlic long enough. This can lead to raw flavors in the soup. Avoid overcooking the lasagna noodles, too. They should be al dente, not mushy. Also, don’t skip seasoning. Taste your soup before serving and adjust salt and pepper as needed. Lastly, let the soup simmer gently. This ensures all the flavors blend well. Pro Tips Use Rotisserie Chicken: To save time, use store-bought rotisserie chicken for a quick and flavorful option. Customize Your Spices: Feel free to adjust the herbs and spices to your taste; adding thyme or Italian seasoning can enhance the flavor. Make it Ahead: This soup can be made in advance and stored in the fridge. Just reheat gently and stir in a splash of cream before serving. Serve with Toppings: Top with extra cheese, crushed red pepper, or a dollop of pesto for added flavor and texture. {{image_4}} You can make a vegetarian version of this soup. Swap the chicken for mushrooms or zucchini. Both add great texture and flavor. Use vegetable broth instead of chicken broth. You can also add more veggies like spinach or bell peppers. This keeps the soup hearty and satisfying. For a gluten-free meal, use gluten-free lasagna noodles. They work just as well in this soup. Ensure the chicken broth is gluten-free, too. Many brands offer gluten-free options. This way, you still get the creamy goodness without the gluten. If you love spice, add a little more red pepper flakes. You can also use diced jalapeños for a different heat. Try adding fresh herbs like cilantro or basil for a unique twist. A splash of lemon juice brightens the flavors and adds a fresh touch. Each option enhances your soup experience. To keep your white chicken lasagna soup fresh, let it cool first. Use an airtight container to store it in the fridge. This soup can last for about 3 to 4 days. If you want to enjoy it later, freezing is a great option. When you’re ready to eat, take the soup out of the fridge. Pour it into a pot and heat it over medium heat. Stir it often to make sure it warms evenly. You can also use the microwave. Heat in short bursts, stirring in between. This helps prevent hot spots. If you want to freeze the soup, pour it into a freezer-safe container. Leave some space at the top for expansion. Label the container with the date. The soup can stay good in the freezer for up to 3 months. When you’re ready to eat it, thaw it in the fridge overnight before reheating. Yes, you can use rotisserie chicken. It saves time and adds flavor. Just shred the meat and add it to the pot. This makes the soup even quicker to prepare. The spices from the chicken enhance the taste of the soup. To make this soup dairy-free, swap heavy cream with coconut milk. You can also use dairy-free cheese. Look for options like cashew or almond cheese. These choices keep the soup creamy and rich. Don't forget to check labels for hidden dairy ingredients. Yes, you can make this soup in advance. Just store it in an airtight container in the fridge. It keeps well for up to three days. When ready to serve, heat it on the stove. If it thickens, add more broth or water to adjust. This blog post covered all you need for a tasty white chicken lasagna soup. We explored key ingredients, cooking steps, and useful tips to enhance your dish. You learned how to adapt the soup for different diets and keep leftovers fresh. In the end, this soup is versatile and simple to make. With the right ingredients and techniques, you can create a comforting meal. Enjoy your cooking and happy eating!
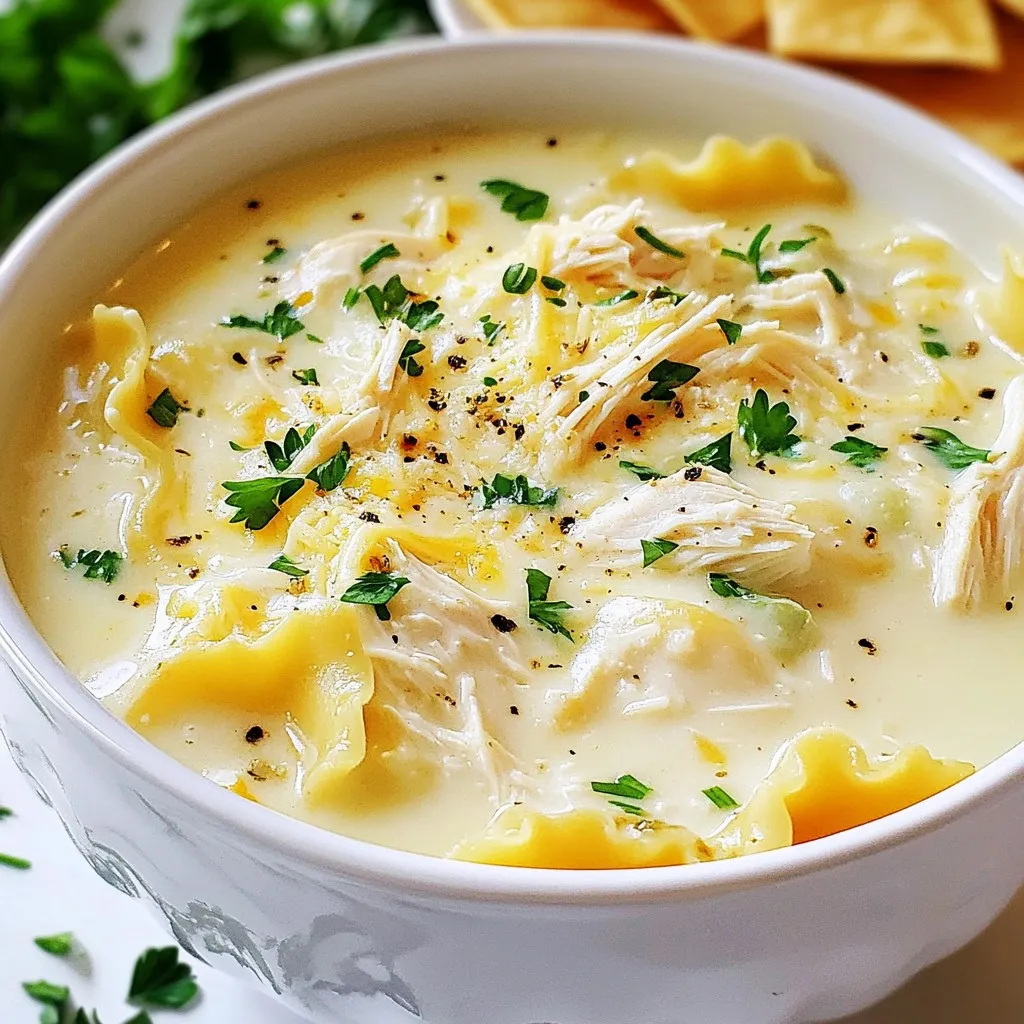
White Chicken Lasagna Soup Creamy and Flavorful Meal
If you love cozy meals that warm the heart, you must try my White Chicken Lasagna Soup. This creamy and flavorful dish is a mix
- 2 boneless, skinless chicken breasts, diced into bite-sized pieces - 8 ounces penne pasta - 1 tablespoon olive oil - 1 packet (1 ounce) ranch dressing mix - 1 cup heavy cream - ½ cup freshly grated Parmesan cheese - 1 cup cherry tomatoes, halved - 1 cup baby spinach leaves - 1 teaspoon garlic powder - Salt and fresh ground pepper to taste - Fresh parsley, finely chopped (for garnish) Chicken Ranch Pasta is rich and tasty. You will love how simple it is. The main ingredients start with chicken and pasta. I use penne pasta because its shape holds the sauce well. Dicing the chicken into small pieces helps it cook evenly. The ranch dressing mix adds a unique flavor. Heavy cream makes it rich and creamy. Using freshly grated Parmesan cheese gives the dish a nice depth of flavor. Next, we add some vegetables to make it colorful. Cherry tomatoes bring sweetness and brightness. Baby spinach adds a fresh touch. For seasoning, I use garlic powder, salt, and pepper. These enhance the overall taste. Finally, I garnish with fresh parsley. It adds a pop of color and freshness. This dish is not only easy to make but also fun to eat! {{ingredient_image_2}} To cook the penne pasta, start by bringing a large pot of salted water to a rolling boil. This helps to season the pasta as it cooks. Add 8 ounces of penne pasta to the boiling water. Cook it according to the package instructions for about 9 to 11 minutes. You want the pasta to be al dente, which means it should be firm to the bite. To check, taste a piece a minute or two before the time is up. Once it's done, drain the pasta in a colander, but save a small cup of the pasta water. This water can help adjust the sauce later. For the chicken, heat 1 tablespoon of olive oil in a large skillet over medium heat. This is important for getting a nice sear on the chicken. When the oil shimmers, add 2 diced chicken breasts. Season them with salt, pepper, and 1 teaspoon of garlic powder. Cook the chicken for about 5 to 7 minutes. Stir occasionally so it cooks evenly. Make sure the chicken reaches a safe internal temperature of 165°F (75°C) before serving. This keeps the chicken juicy and safe to eat. Now it’s time to make the creamy ranch sauce. In the skillet with the cooked chicken, sprinkle in 1 packet of ranch dressing mix. Then pour in 1 cup of heavy cream. Stir everything well to combine. Let the mixture simmer gently for about 2 to 3 minutes. This helps the flavors meld together. If you want a thicker sauce, you can let it cook for a bit longer. The goal is to create a rich, creamy base for the pasta. To get that creamy texture just right, start with the pasta water. Save a cup of it when you drain the penne. If your sauce is too thick, add a splash of this water. It helps to loosen the sauce without losing flavor. For a smooth sauce, stir your heavy cream slowly into the ranch mix. This prevents lumps. Keep the heat low when mixing to maintain the creaminess. A gentle simmer allows the flavors to blend without curdling. You can boost flavor with spices. Try adding a pinch of cayenne for heat or smoked paprika for depth. Fresh herbs like basil or chives add a bright note. These simple tweaks make a big difference. When it comes to pairing, think about sides. A crisp green salad or garlic bread complements this dish well. The freshness of the salad balances the creaminess of the pasta. Presentation matters. Serve the pasta in individual bowls for a nice touch. Drizzle extra ranch dressing on top for flair, and add a sprinkle of parsley for color. A dash of cracked black pepper gives it a gourmet feel. For sides, consider roasted vegetables or a light coleslaw. These add a nice crunch and flavor contrast to the creamy pasta. Enjoy your meal with a glass of chilled white wine for the perfect finish. Pro Tips Use Fresh Ingredients: Freshly grated Parmesan and ripe cherry tomatoes will elevate the flavor of your dish significantly. Opt for the best quality ingredients you can find. Adjust the Creaminess: If you prefer a lighter dish, substitute half of the heavy cream with chicken broth. This will maintain flavor while reducing calories. Customize the Vegetables: Feel free to add or substitute other vegetables like zucchini, bell peppers, or peas for added color and nutrition. Make Ahead: This dish can be made ahead and stored in the fridge for up to two days. When reheating, add a splash of water or milk to loosen the sauce. {{image_4}} You can swap chicken for other proteins. Shrimp works great here. Just sauté it until pink and cooked through. Turkey is another tasty choice. It adds a nice flavor. For a vegetarian option, use beans or tofu. Tofu absorbs sauce well and adds protein. Beans like black beans or chickpeas are filling and add texture. You don't have to stick to penne pasta. Fusilli or rotini can add fun shapes. These types hold sauce well. For gluten-free needs, try rice or quinoa pasta. They cook differently, so check the package for times. To make a lighter version, use half and half instead of heavy cream. It will still taste creamy. You can also add fun flavors. Try spices like smoked paprika or red pepper flakes. Mixing in different cheeses, like cheddar or mozzarella, can change the taste too. Each tweak makes the dish your own. To keep Chicken Ranch Pasta fresh, place it in an airtight container. Make sure to cool it down to room temperature first. This helps avoid condensation, which makes the pasta soggy. Store it in the fridge for up to three days. When you want to enjoy your leftovers, use the stovetop for best results. Place the pasta in a skillet over low heat. Add a splash of water or cream to keep it creamy. Stir often until it's warmed through. You can also use a microwave, but do it in short bursts. Stir in between to avoid hot spots. If you want to freeze Chicken Ranch Pasta, let it cool completely. Then, place it in a freezer-safe container. Leave some space at the top, as the pasta will expand. You can freeze it for up to two months. To thaw, move the container to the fridge overnight. When ready to eat, reheat it on the stovetop or microwave as mentioned earlier. This method keeps the dish tasty and enjoyable. Yes, you can make Chicken Ranch Pasta in advance. Here are some tips for prepping ahead: - Cook the Pasta: You can cook the pasta and store it separately. This keeps it from becoming mushy. - Prepare the Sauce: Make the creamy ranch sauce and store it in the fridge. Just reheat it before serving. - Cook the Chicken: You can sauté the chicken ahead of time. Store it in an airtight container in the fridge. - Mix Before Serving: Combine everything just before you eat. This keeps the dish fresh and tasty. To add some heat to your Chicken Ranch Pasta, try these suggestions: - Red Pepper Flakes: Sprinkle in some red pepper flakes when cooking the chicken. - Hot Sauce: Drizzle hot sauce into the creamy ranch sauce for an extra kick. - Spicy Ranch Mix: Look for a spicy ranch dressing mix at the store. - Jalapeños: Add diced jalapeños for a fresh and spicy flavor. If you need a substitute for ranch dressing mix, consider these homemade alternatives: - Dried Herbs: Mix equal parts of dried dill, parsley, and chives. - Greek Yogurt: Use Greek yogurt with garlic powder, onion powder, and lemon juice. - Seasoning Blend: Combine garlic powder, onion powder, salt, and black pepper for a quick mix. - Other Dressings: You can also try other creamy dressings, like blue cheese or Caesar, for a twist. In this post, we explored the tasty Chicken Ranch Pasta. We covered main ingredients, cooking techniques, and storage tips. You can swap proteins and pasta types for variety. Remember to adjust the creamy sauce to your liking. With these steps, you can create a dish everyone will love. Enjoy your cooking, and don't hesitate to experiment! Each twist adds a personal touch. Happy eating!
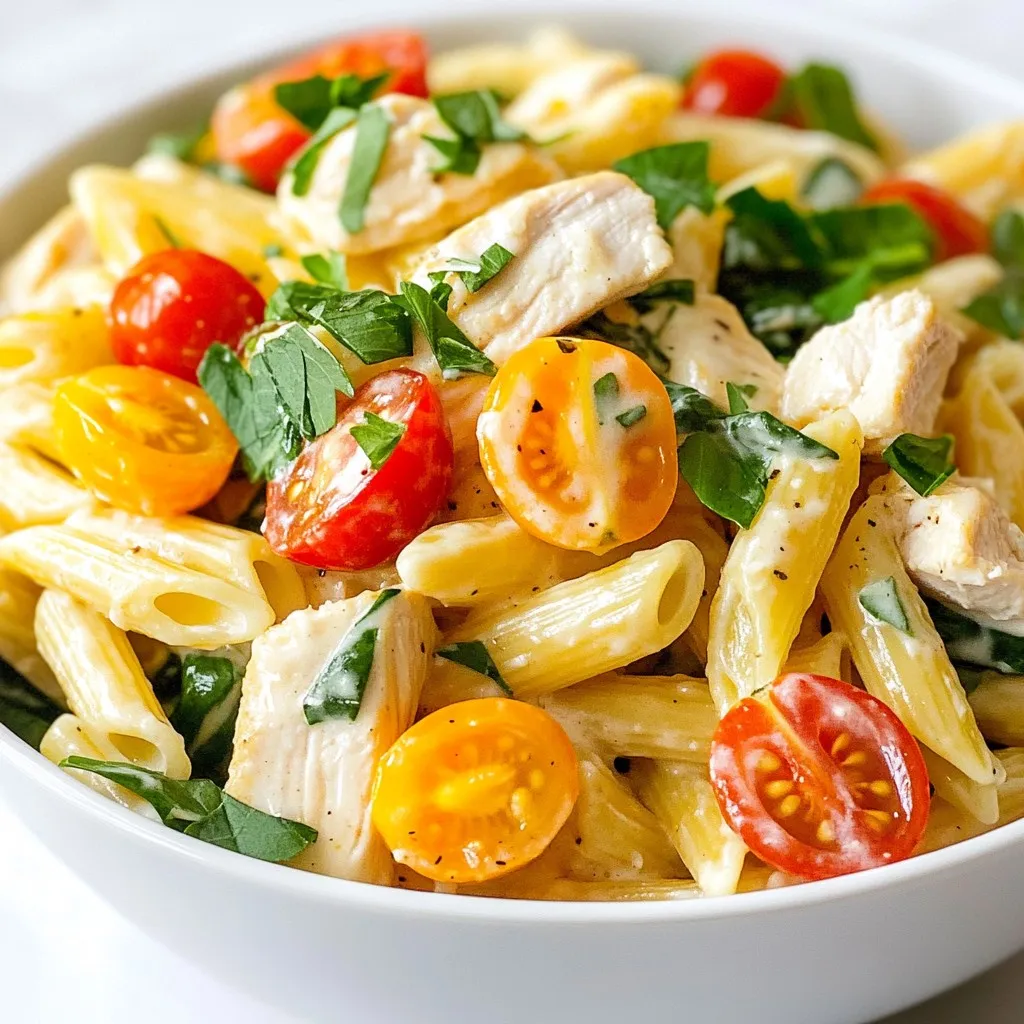
Chicken Ranch Pasta Creamy and Flavorful Delight
If you’re looking for a pasta dish packed with flavor and creaminess, you’ll love Chicken Ranch Pasta! This easy recipe combines tender chicken, zesty ranch
- 2 large bell peppers, diced into bite-sized pieces - 1 cup onion, finely chopped - 3 cloves garlic, minced - 1 pound ground beef or turkey - 1 (15 oz) can of diced tomatoes, with juices - 4 cups beef or vegetable broth - 1 cup uncooked rice - Salt and freshly ground black pepper to taste The main ingredients are key to a tasty Cheesy Stuffed Pepper Soup. Bell peppers add color and crunch. Ground meat gives it a hearty base. Rice makes the soup filling and comforting. Using broth instead of water adds deep flavor. - 1 cup corn kernels - 1 ½ cups shredded cheese (cheddar or mozzarella) You can add corn for sweetness and texture. The cheese is the star of the soup! It melts into a creamy goodness that makes each spoonful rich and satisfying. You can mix different cheeses for a fun twist. - 1 teaspoon Italian seasoning - 1 teaspoon smoked paprika - Fresh parsley or cilantro, finely chopped Seasoning makes the soup sing! Italian seasoning gives it warmth. Smoked paprika adds a hint of smokiness. For garnish, fresh herbs not only look pretty but also brighten up the dish. They add freshness that balances the cheese and meat. Sautéing Onions and Garlic Start by heating a tablespoon of oil in a large pot over medium heat. Add the finely chopped onion. Sauté it for about five minutes. You want the onion to turn translucent and fragrant. Next, add three cloves of minced garlic. Stir this for about one minute to bring out its flavor. Adding Bell Peppers Now, it’s time for the bell peppers. You can use any color you like. Dice two large bell peppers into bite-sized pieces. Add these to the pot with the onions and garlic. Cook for three to four minutes until the peppers soften a bit. Stir occasionally to make sure they cook evenly. Browning Ground Meat Raise the heat to medium-high. Add one pound of ground beef or turkey to the pot. Use a spatula to break it up as it cooks. Brown the meat for about five to seven minutes. Make sure it cooks all the way through and is no longer pink. Incorporating Tomatoes and Broth Once the meat is browned, it’s time to add more flavor. Stir in one can of diced tomatoes, including its juices. Next, add four cups of beef or vegetable broth. This will give the soup a nice base. Adding Rice and Seasonings Now, throw in one cup of uncooked rice. Also, add one teaspoon each of Italian seasoning and smoked paprika. Season with salt and freshly ground black pepper to taste. Increase the heat and bring the mixture to a boil. Stirring in Corn and Cheese After boiling, reduce the heat to low. Cover the pot and let it simmer for about 20 minutes. This will allow the rice to cook. After 20 minutes, stir in one cup of corn kernels and one and a half cups of shredded cheese. Mix until the cheese is melted and everything is well combined. Adjusting Seasoning and Serving Taste the soup and adjust the seasoning if needed. Serve the soup hot in bowls, and add a sprinkle of fresh parsley or cilantro on top for color and flavor. Enjoy your tasty cheesy stuffed pepper soup! When picking peppers, think about color and taste. - Green Peppers: These are less sweet and have a grassy flavor. - Red Peppers: They are ripe, sweet, and add a rich taste. - Yellow and Orange Peppers: These are also sweet and juicy. Choose any color you like; each will bring a unique flavor to your soup. Cooking rice well makes your soup even better. Use these tips: - Rinse the Rice: This removes excess starch, helping it cook evenly. - Water Ratio: Use a 2:1 ratio of water to rice. For brown rice, use 2.5:1. - Don’t Overcook: Keep an eye on the rice; it should be tender but not mushy. Perfect rice gives your soup a nice, hearty feel. Spices can elevate your soup's taste. Here are a few to try: - Cumin: Adds warmth and earthiness. - Chili Powder: Gives a nice kick and depth. - Oregano: Brightens the flavor with a hint of herbal zest. Feel free to mix and match spices to find your favorite blend! {{image_4}} If you want a meatless version of this soup, use beans. Black beans or kidney beans work well. You can use one can of beans, drained and rinsed. This will give you protein and a filling texture. Just add the beans when you add the corn. Mix well and let them heat through. Want to add some heat? Try adding jalapeños or hot sauce. Chopped jalapeños can spice up the soup nicely. Start with one pepper and add more if you like it hotter. If you prefer hot sauce, add a few dashes while cooking. This will make your cheesy stuffed pepper soup bold and exciting. Experiment with different cheese blends for unique flavors. Cheddar gives a sharp taste, while mozzarella adds creaminess. You can mix cheeses too! Try adding pepper jack for a kick. Just use 1½ cups of cheese in total. Stir it into the soup until it melts. The cheese makes it rich and delicious! To store leftovers of cheesy stuffed pepper soup, let it cool first. Transfer the soup to an airtight container. It will last in the fridge for about 3 to 4 days. When you want to enjoy it again, just take it out and prepare to reheat. If you want to freeze the soup, it's best to do this in single servings. Use freezer-safe containers or bags. Leave some space at the top for expansion. The soup can stay fresh in the freezer for up to 3 months. Label the containers with the date to keep track. When it’s time to reheat, there are a few options. You can use the stove or microwave. If using the stove, heat it on low and stir often to prevent sticking. If using the microwave, cover the bowl to keep moisture in. Heat in short bursts, stirring in between, until it’s hot all the way through. Ensure it’s steaming before you serve it. Yes, you can make this soup ahead. This soup tastes even better the next day. To prep, cook the soup fully and let it cool. Store it in an airtight container in your fridge. It will last for about three to four days. If you wish to keep it longer, you can freeze it. Just make sure to leave some space in the container for expansion. To thicken the soup, you have a few options. You can add more rice, which will soak up some liquid. Another way is to mix in a cornstarch slurry. For this, mix equal parts cornstarch and cold water. Stir it into the hot soup until it thickens. You could also let the soup simmer longer, allowing some liquid to evaporate. Yes, you can use cooked rice. If you choose this, add it at the end of cooking. This keeps the rice from getting mushy. Reduce the broth by about one cup since cooked rice won’t absorb as much liquid. Stir it in just before serving. This way, the flavors meld well without overcooking the rice. In this post, you learned how to make a tasty soup with simple ingredients. We covered the main components like bell peppers, ground meat, rice, and broth. You also discovered flavor-boosting tips and easy variations, like meatless and spicy options. With these steps, your soup will be delicious and satisfying. Enjoy experimenting in your kitchen and share this recipe with friends!
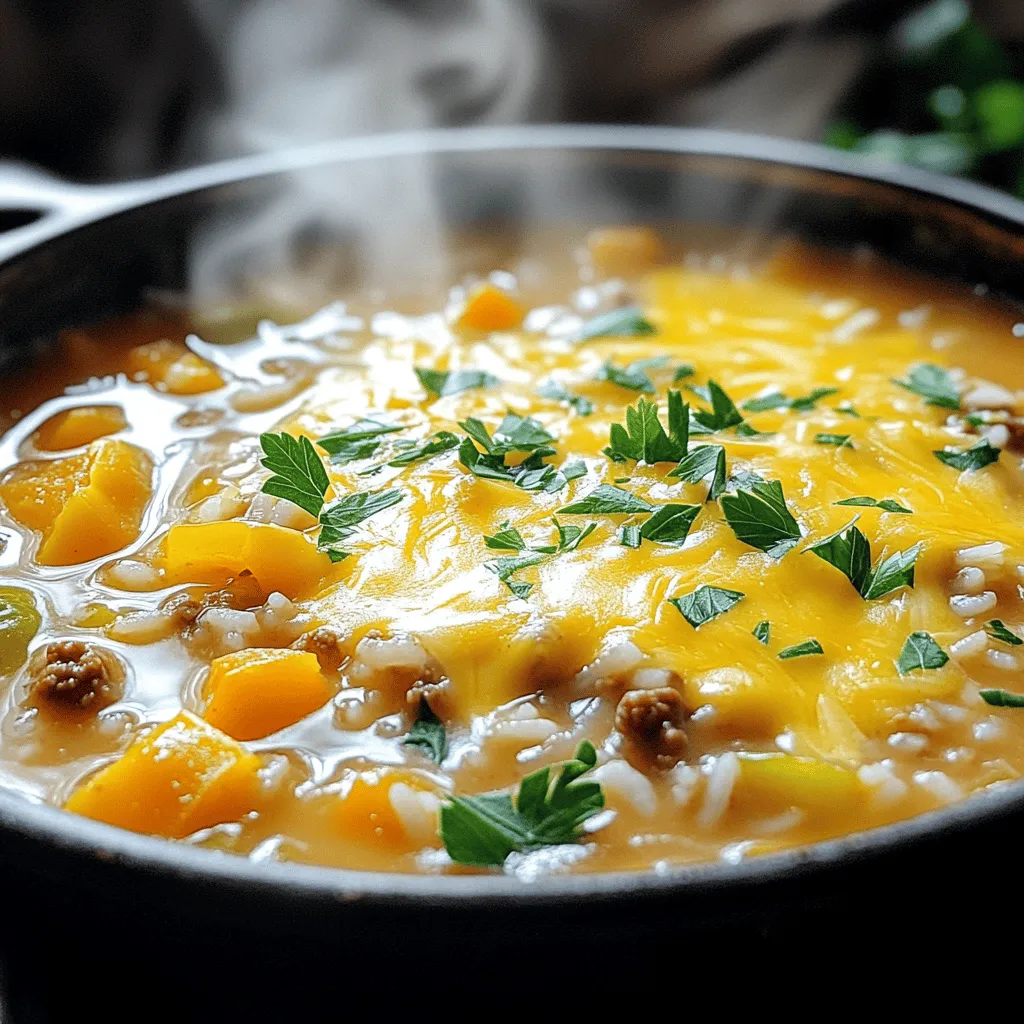
Cheesy Stuffed Pepper Soup Flavorful and Easy Recipe
If you’re craving a warm, hearty meal that’s both simple and delicious, try my Cheesy Stuffed Pepper Soup! This recipe is packed with colorful bell
- 1.5 lbs boneless, skinless chicken thighs, cut into bite-sized pieces - 1 can (13.5 oz) coconut milk - 1 cup plain yogurt - 2 tablespoons korma curry paste - 1 tablespoon ground turmeric - 2 teaspoons garam masala - 1 teaspoon ground cumin - 1 teaspoon ground coriander - 1 teaspoon chili powder (optional) - 1 large onion, finely chopped - 3 cloves garlic, minced - 1 tablespoon fresh ginger, grated - 2 tablespoons tomato paste - Salt to taste I love using boneless, skinless chicken thighs. They stay tender and juicy during cooking. Coconut milk and yogurt mix to create a creamy sauce. The korma curry paste adds a rich flavor. You can adjust the spice level by using more or less curry paste. - Fresh cilantro, chopped - Toasted almonds or cashews Fresh cilantro brightens the dish. Toasted nuts add a nice crunch. You can sprinkle these on top just before serving. - Cooked basmati rice Basmati rice is the perfect base for this dish. It soaks up the sauce and balances the flavors. You can also serve it with warm naan or a side salad for extra texture. Start by adding one large, finely chopped onion into your slow cooker. Then, add three minced garlic cloves and one tablespoon of grated fresh ginger. Mix these ingredients well. This will create a strong, tasty base for your dish. Next, take 1.5 pounds of boneless, skinless chicken thighs. Cut them into bite-sized pieces. Carefully add the chicken on top of the onion mix. Make sure to spread the pieces evenly. This helps the chicken cook well and soak up all the flavors. Now, grab a separate bowl. In this bowl, mix one can of coconut milk, one cup of plain yogurt, and two tablespoons of tomato paste. Add two tablespoons of korma curry paste, one tablespoon of ground turmeric, two teaspoons of garam masala, one teaspoon of ground cumin, and one teaspoon of ground coriander. If you like it spicy, add one teaspoon of chili powder. Stir until the mixture is smooth and mixed well. Pour the creamy sauce over the chicken in the slow cooker. Use a spatula to gently stir. Make sure each piece of chicken is well coated with the sauce. This step is key for rich flavor in every bite. Cover the slow cooker with its lid. You can cook on low for 6-8 hours or set it to high for 3-4 hours. Both options will make the chicken tender and flavorful. After cooking, check the sauce. If it is too thin, remove the lid and cook on high for an extra 30 minutes. This lets some moisture escape. Taste the sauce and add salt if needed. This step ensures your dish is just right before serving. - Ideal cooking times: Cook your chicken korma on low for 6-8 hours. If you're short on time, set your slow cooker to high for 3-4 hours. - Signs of perfectly cooked chicken: Look for tender chicken that easily pulls apart with a fork. The sauce should be thick and creamy, with no raw flavors. - Suggestions for added spices and flavors: You can boost the flavor by adding a pinch of cinnamon or a dash of cardamom. Fresh chili peppers can add heat. Adjust the korma curry paste based on your spice preference. - Serving suggestions for an elegant presentation: Serve the korma in individual bowls. Top each serving with fresh cilantro and a sprinkle of toasted almonds or cashews. A wedge of lime adds a pop of color and flavor. Pair it with fluffy basmati rice for a complete meal. {{image_4}} If you want a vegetarian twist on Chicken Korma, you can use tofu or chickpeas. Both options soak up the flavors well. You can also try using hearty vegetables like cauliflower or potatoes. These ingredients provide a satisfying texture. Just ensure you adjust the cooking time to avoid overcooking. Adjusting the spice in your korma is easy. If you like it mild, use less korma curry paste. You can also skip the chili powder. For a hotter dish, add more curry paste or a pinch of cayenne. Taste as you go so you get the heat just right for you. If you need alternatives for yogurt or coconut milk, there are great options. For yogurt, try using cashew cream or almond yogurt. These add creaminess without dairy. If you want a coconut milk swap, use almond milk or soy milk. Just remember, these swaps might change the korma’s flavor a bit, but they can still be tasty! After you've enjoyed your chicken korma, store any leftovers in the fridge. Use an airtight container to keep the flavors fresh. Make sure to cool the dish to room temperature before sealing it. This helps to prevent any condensation, which can lead to sogginess. Aim to eat your leftovers within three to four days for the best taste. If you want to save some korma for later, freezing is a great option. First, let the dish cool completely. Then, transfer it to a freezer-safe container or a heavy-duty freezer bag. Press out as much air as you can to avoid freezer burn. When you’re ready to eat, thaw it overnight in the fridge. Reheat it gently on the stove or in the microwave until it's hot throughout. Properly stored chicken korma can last in the fridge for up to four days. If frozen, it will stay good for about three months. After this time, the quality might drop, and it may not taste as fresh. Always check for any signs of spoilage before eating. Enjoy your korma at its best! Chicken Korma is a rich, creamy dish with roots in India. It has a mix of spices that give it a warm, inviting flavor. The main ingredients include chicken, yogurt, and coconut milk. This dish balances savory and sweet notes, making it popular worldwide. It often features spices like turmeric, cumin, and garam masala, which add depth and warmth to the dish. Korma's history is tied to Mughal cuisine, known for its use of nuts and cream. Yes, you can! If you don’t have a slow cooker, you can use a stovetop pot. Cook the chicken over medium heat for about 30 to 40 minutes. Start by sautéing the onion, garlic, and ginger in oil. Then add the chicken and sauce mixture. Let it simmer until the chicken is tender. You can also use an Instant Pot. Just cook it on high pressure for 10 minutes. This way, you still get a delicious Chicken Korma. To change the spiciness, you can adjust the amount of korma curry paste. Start with a small amount and taste as you go. You can also add chili powder for extra heat. If your dish gets too spicy, add more coconut milk or yogurt to tone it down. Remember, you can always add more heat, but it’s hard to take it away once it’s in! Serve Chicken Korma over a bed of fluffy basmati rice. This pairs well with the creamy sauce. You can also offer naan bread for a fun twist. For added texture, top with fresh cilantro and toasted almonds or cashews. You might also add a wedge of lime for a burst of freshness. This makes your dish look elegant and taste even better! You now have all the tools to make a delicious Chicken Korma. This dish starts with tender chicken thighs and a creamy sauce made from coconut milk and yogurt. By mixing in korma curry paste and spices, you'll create rich flavors. Don’t forget the garnishes like cilantro and nuts for extra flair. Cooking tips, variations, and storage info help you adapt the recipe to your needs. Whether you keep it classic or try vegetarian options, you can enjoy this meal anytime. Happy cooking!
Slow Cooker Chicken Korma Flavorful and Simple Dish
Looking for a tasty meal that’s easy to make? Slow Cooker Chicken Korma is your answer! With rich flavors from coconut milk and korma paste,
- 4 boneless, skinless chicken breasts - 1 cup fresh basil pesto - 1 cup cherry tomatoes, halved - 1/2 cup mozzarella cheese, shredded - 1/4 cup grated Parmesan cheese - 2 tablespoons olive oil - Salt and pepper to taste - Fresh basil leaves for garnish To make a great pesto chicken, choose fresh ingredients. The chicken breasts should be boneless and skinless for quick cooking. The basil pesto gives a rich flavor. I love using fresh pesto, but store-bought is fine too. Cherry tomatoes add a bright pop of color and taste. Mozzarella cheese melts well and becomes gooey. Parmesan cheese adds a nice salty touch. Olive oil keeps the chicken moist during cooking. Don't forget to season with salt and pepper. Finally, fresh basil leaves look pretty and enhance the dish's flavor. {{ingredient_image_2}} - Preheat the oven to 375°F (190°C). - Season chicken with salt and pepper. To start, I always preheat my oven first. This step helps the chicken cook evenly. While the oven warms, I season the chicken breasts. I use salt and pepper on both sides. This simple seasoning adds great flavor. - Heat olive oil in a skillet. - Sear chicken breasts for 3-4 minutes on each side. Next, I heat olive oil in a skillet over medium heat. I wait until the oil shimmers before adding the chicken. Searing the chicken creates a nice golden crust. I cook each side for about 3-4 minutes. This locks in moisture and flavor. - Transfer seared chicken to a baking dish. - Spread pesto and add cherry tomatoes, cheese. After searing, I move the chicken to a baking dish. I spread a generous layer of basil pesto on top. Then, I add halved cherry tomatoes. I press them gently so their juices mix with the pesto. Finally, I sprinkle shredded mozzarella and Parmesan cheese over everything. - Cover with aluminum foil and bake. - Remove foil to brown cheese and finish baking. Now it’s time to bake! I cover the dish with aluminum foil to keep it moist. I bake it for 20 minutes. After that, I remove the foil. This lets the cheese brown nicely. I bake for another 10-15 minutes until the chicken is fully cooked. The ideal internal temperature is 165°F (75°C). To get that perfect golden crust on your chicken, use medium heat. Sear the chicken for 3-4 minutes on each side. This browning step adds flavor and a nice look. Always make sure the chicken is cooked through. It should reach 165°F (75°C) inside. Use a meat thermometer for accuracy. If you don't have one, cut into the thickest part. The juices should run clear, not pink. Serve the pesto chicken directly from the baking dish for a rustic feel. This keeps it warm and ready to eat. To make it look fancy, garnish with fresh basil leaves. You can also drizzle more pesto on top for added flavor. This will impress your guests and make the dish pop with color. Pro Tips Rest the Chicken: Allow the chicken to rest for a few minutes after baking. This helps the juices redistribute, ensuring moist and tender meat. Customize Your Pesto: Experiment with different types of pesto, such as sun-dried tomato or arugula pesto, for a unique flavor profile. Use Fresh Ingredients: Fresh basil and ripe cherry tomatoes will elevate the flavor of this dish. Opt for high-quality ingredients for the best results. Cheese Variations: Feel free to mix and match cheeses. Adding a bit of goat cheese or feta can introduce a wonderful tangy flavor to the dish. {{image_4}} You can mix up this recipe by using different cheeses. Instead of mozzarella, try gouda or feta. Both will add unique flavors to your dish. You can also use cream cheese for a creamy twist. When it comes to veggies, the cherry tomatoes shine. However, you can add bell peppers or zucchini for more color. Spinach or arugula can also give a fresh kick. Don't be afraid to experiment with what you have on hand! To boost flavor, add spices or herbs. A pinch of red pepper flakes adds heat. Dried oregano or thyme will give depth. Fresh herbs like parsley or cilantro can brighten the dish. Choosing between homemade and store-bought pesto is key. Homemade pesto packs a punch, but store-bought is quick and easy. If you choose store-bought, look for brands with good ingredients. This choice can still lead to a tasty meal! Store leftover pesto chicken in an airtight container. Make sure the chicken cools down before sealing it. Place it in the fridge within two hours of cooking. This keeps the meal fresh and safe. You can enjoy the leftovers for up to 3 days. To freeze pesto chicken, first, let it cool completely. Cut the chicken into portions for easy use. Wrap each piece in plastic wrap, then place them in a freezer-safe bag. Squeeze out excess air to prevent freezer burn. This will keep your pesto chicken fresh for up to 3 months. When you’re ready to eat, take the chicken out of the freezer. Thaw it in the fridge overnight. To reheat, place it in the oven at 375°F (190°C) until hot. This usually takes about 20 minutes. Enjoy your meal! It takes about 45 minutes to cook pesto chicken. First, you prep the dish in 15 minutes. Then, bake it for 30 minutes. This time helps the chicken get fully cooked and the cheese melt nicely. Yes, you can use frozen chicken breasts. However, make sure to thaw them first. This ensures they cook evenly. You can thaw them overnight in your fridge or use the microwave. The best way to reheat pesto chicken is in the oven. Preheat it to 350°F (175°C). Place the chicken in a baking dish and cover it with foil. Heat for about 15-20 minutes until it’s warm throughout. Yes, you can make this dish in advance. Prepare the chicken and assemble it with pesto and cheese. Cover and refrigerate it for up to 24 hours. Just bake it when you’re ready to eat! Pesto chicken pairs well with many sides. Here are some ideas: - Simple green salad - Garlic bread - Roasted vegetables - Pasta with olive oil and lemon - Quinoa or rice dishes These sides complement the flavors of the chicken and make a complete meal! Pesto chicken is a tasty dish that’s easy to make. We covered the key ingredients, step-by-step cooking, and tips to perfect it. Remember, searing the chicken adds flavor, and fresh basil makes it pop. You can mix things up with different cheeses and vegetables or try homemade pesto. Store leftovers well, and enjoy them for days. With these tips, you’ll impress everyone at the table. Cooking can be fun and simple, so dive in and enjoy every bite.
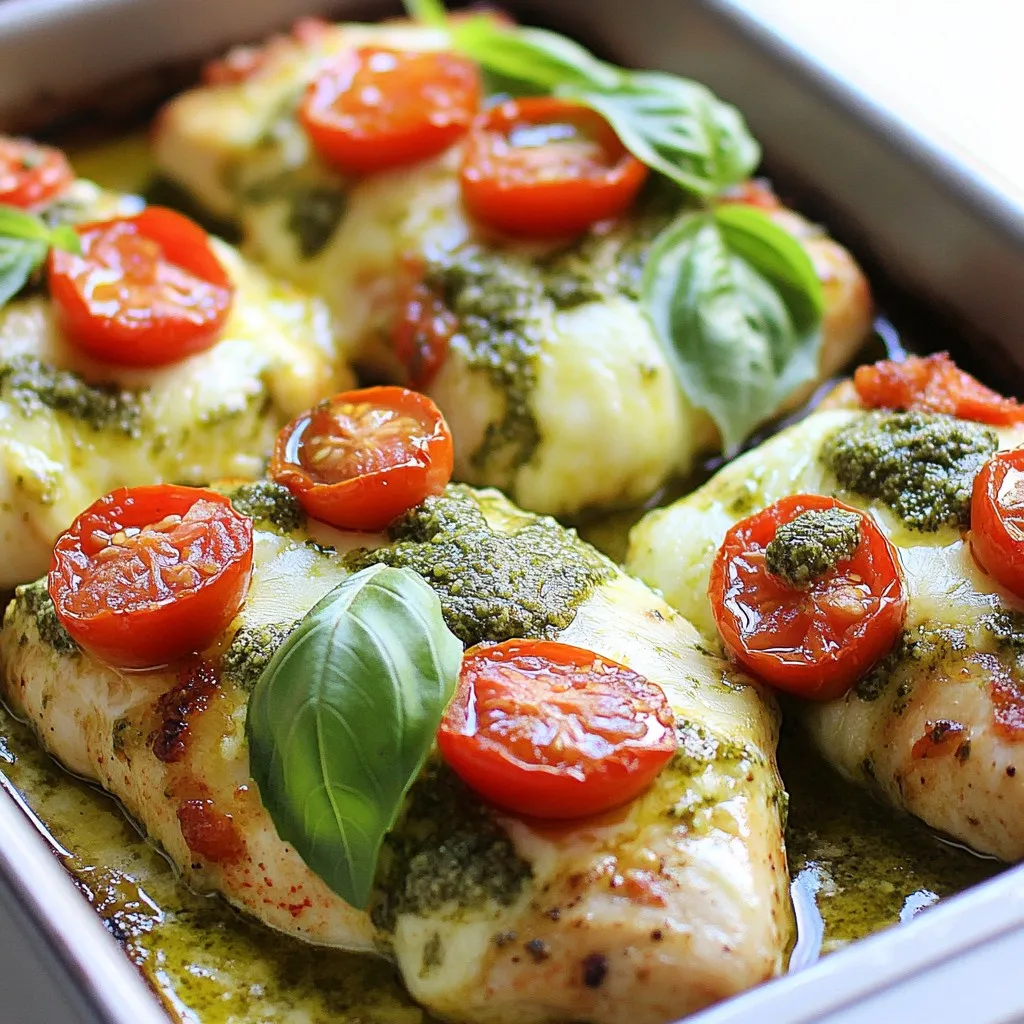
Ingredient Pesto Chicken Quick and Tasty Recipe
Are you ready to whip up a meal that’s quick and tasty? My Ingredient Pesto Chicken recipe is just what you need. With juicy chicken,
You will need the following items to make Slow Cooker Chicken Gnocchi Soup: - 1 lb boneless, skinless chicken breasts - 4 cups chicken broth - 2 cups carrots, diced into small pieces - 1 cup celery, finely diced - 1 medium onion, chopped - 3 cloves garlic, minced - 1 teaspoon dried thyme - 1 teaspoon dried rosemary - 1 teaspoon Italian seasoning - Salt and freshly ground pepper to taste - 1 cup heavy cream (or substitute with coconut cream for a lighter option) - 1 package (16 oz) potato gnocchi - 2 cups fresh spinach, chopped - 2 tablespoons fresh parsley, chopped (for a vibrant garnish) You can easily change some ingredients in this soup: - Chicken: Swap chicken breasts for thighs for more flavor. - Broth: Use vegetable broth for a meat-free option. - Cream: Coconut cream works well for a dairy-free soup. - Spinach: Kale or Swiss chard can replace spinach for added texture. - Herbs: Fresh herbs can enhance the flavor. Use what you have! Each ingredient adds to the soup's health and flavor: - Chicken: A great source of lean protein, keeping you full. - Carrots: Packed with vitamins and add a sweet flavor. - Celery: Adds crunch and has hydration benefits. - Garlic: Good for your heart and boosts flavor. - Spinach: Rich in iron and vitamins, it gives color and nutrition. - Heavy cream: Makes the soup rich and filling, but you can lighten it up! Using these fresh ingredients makes this dish not just tasty but also good for you. Enjoy every bowl! To start, grab your slow cooker. Place 1 pound of boneless, skinless chicken breasts at the bottom. This will be the base for our soup. Spread the chicken out evenly. This helps it cook well. Next, add the veggies. Dice 2 cups of carrots into small pieces. Finely dice 1 cup of celery. Chop 1 medium onion. Layer these over the chicken. This colorful mix adds flavor and texture. Now, carefully pour 4 cups of chicken broth over the chicken and veggies. Make sure everything is submerged. This broth will bring warmth and richness. Add 3 cloves of minced garlic for a nice kick. Sprinkle in 1 teaspoon each of dried thyme, rosemary, and Italian seasoning. Don’t forget to add salt and pepper to taste. Stir gently to mix the flavors. Cover the slow cooker with the lid. Set it to cook on low for 6-8 hours or on high for 4 hours. The chicken should be tender and ready to shred when done. Once cooking time is up, carefully remove the chicken with tongs. Place it on a cutting board. Use two forks to shred the chicken, then return it to the pot. Now, add 16 ounces of potato gnocchi and 1 cup of heavy cream. Stir well to combine. Increase the heat to high and let it cook for another 30 minutes. The gnocchi will float to the top when they are cooked. In the last 10 minutes, fold in 2 cups of chopped spinach. Stir until the spinach wilts and turns bright green. Taste the soup and adjust the seasoning if needed. Enjoy this flavorful comfort dish! To make your soup creamier, use heavy cream. You can also add a little more cream than the recipe states. If you want a lighter option, coconut cream works well too. It adds a nice flavor and helps thicken the soup. Stir in the cream slowly to avoid lumps. You can change the flavors to suit your taste. If you like it spicy, add red pepper flakes. For a more herbal taste, increase the thyme and rosemary. Don't forget to taste as you go. You can add more salt or pepper based on your choice. Fresh herbs like basil or dill can give a fresh twist too. Avoid cooking the chicken too long. It can become dry and tough. Instead of stirring too much, let the ingredients cook together. This helps the flavors blend. Don't skip the spinach; it adds color and nutrients. Lastly, use a good quality broth. It makes a big difference in taste! {{image_4}} If you want a lighter soup, substitute heavy cream with coconut cream. This swap reduces fat but keeps the rich taste. You could also use low-fat milk or almond milk for a different flavor. Try using more veggies, like zucchini or bell peppers, for extra nutrients. These options help make the soup healthier and just as tasty. Feel free to add any vegetables you love! Consider adding peas, green beans, or even kale. This will boost the soup's flavor and texture. If you want more protein, add white beans or chickpeas. They blend well with gnocchi and bring extra fiber. You could even toss in some cooked sausage or turkey for a heartier meal. For a gluten-free version, ensure you use gluten-free gnocchi. Many brands offer this option, so check your local store. You can also use sweet potato gnocchi for a twist. This keeps the flavor but makes the dish suitable for gluten-free diets. Always check labels on broths and seasonings to avoid gluten. Storing leftovers is easy. First, let the soup cool down. Then, pour it into airtight containers. Make sure to leave some space at the top. This allows the soup to expand when frozen. You can store it in the fridge for up to three days. To reheat, pour the soup into a pot. Heat it on medium-low until warm. Stir it often to keep it from sticking. You can also use the microwave. Heat it in a microwave-safe bowl. Cover it with a paper towel and heat in 1-minute intervals. Stir between each interval until hot. Freezing is a great option for later meals. Once the soup is cooled, pour it into freezer-safe bags. Lay the bags flat in the freezer. This saves space and makes it easier to thaw. The soup can last up to three months in the freezer. To use, thaw it overnight in the fridge. Then, reheat as mentioned above. Yes, you can use frozen chicken. Just add an hour to the cooking time. This will ensure the chicken cooks through and is tender. Keep an eye on the soup. If it looks watery, you may need to cook it longer. Frozen chicken works well, but fresh chicken gives the best taste. You can store leftovers in the fridge for up to three days. Be sure to use an airtight container. This keeps the soup fresh and tasty. When you're ready to eat, just reheat it on the stove or in the microwave. Yes, you can make this soup on the stovetop. Use a large pot and cook on medium heat. Start by sautéing the onions and garlic for flavor. Then, add chicken, broth, and veggies. Let it simmer for about 30 minutes. Cook the gnocchi separately, then add them in. This method is quicker but still gives great taste. This article covered all you need to make a great slow cooker soup. We discussed key ingredients, their benefits, and how to layer them. I gave you step-by-step instructions for perfect cooking. Then, I shared tips for creaminess and flavor adjustments. We explored health-conscious variations, storage methods, and common questions. In summary, you now have all the tools to create your own delicious soup! Enjoy your cooking adventure!
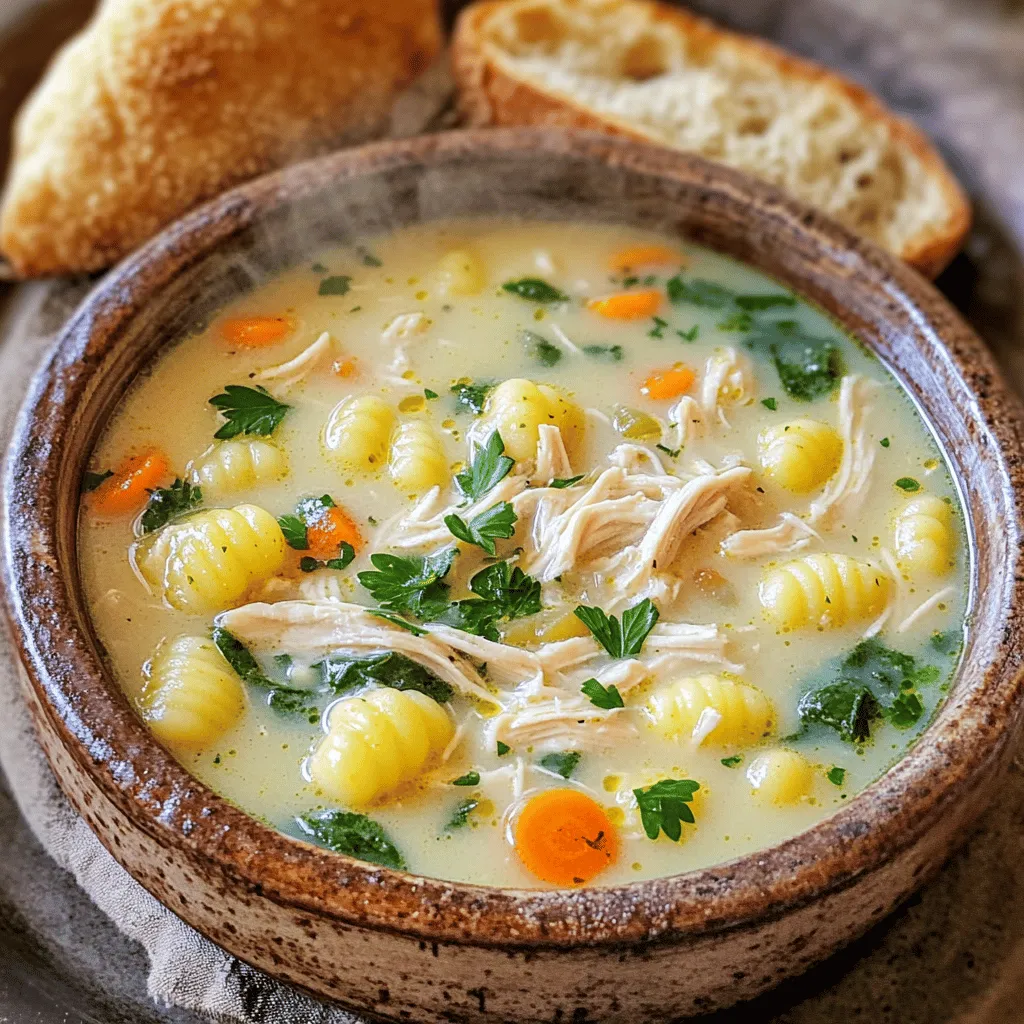
Slow Cooker Chicken Gnocchi Soup Flavorful Comfort Dish
Warm up with my Slow Cooker Chicken Gnocchi Soup! This dish mixes tender chicken, soft gnocchi, and fresh veggies for pure comfort. It’s easy to
To make this Honey Garlic Butter Chicken Mac & Cheese, you’ll need: - 2 cups elbow macaroni - 1 lb boneless, skinless chicken breasts, diced into bite-sized pieces - 3 tablespoons unsalted butter - 4 cloves garlic, minced finely - 1/4 cup honey (preferably local for extra flavor) - 1 cup low-sodium chicken broth - 2 cups sharp cheddar cheese, shredded - 1/2 cup cream cheese, softened at room temperature - Salt and black pepper to taste - 1 teaspoon smoked paprika for a hint of warmth - 1/4 cup green onions, finely sliced (for garnish) These ingredients come together to create a creamy, savory dish. The elbow macaroni offers a great base, while the chicken adds protein. The honey and garlic bring a sweet and savory balance. Sharp cheddar cheese makes it rich, and cream cheese adds extra creaminess. Don't forget the green onions for a fresh touch! {{ingredient_image_2}} - Boil salted water in a large pot. - Add elbow macaroni and cook until al dente, about 8-10 minutes. - Drain the pasta and set aside, making sure it does not stick. - In a skillet, melt 1 tablespoon of butter over medium heat. - Add diced chicken and season with salt, pepper, and smoked paprika. - Sauté the chicken for 5-7 minutes until golden and fully cooked. - Remove the chicken and set it aside on a plate. - In the same skillet, add 2 tablespoons of butter and let it melt. - Toss in minced garlic and sauté for about 1 minute until fragrant. - Pour in honey and chicken broth, bringing the mixture to a gentle simmer. - Cook for 2-3 minutes to meld the flavors. - Lower the heat and add cooked macaroni and chicken back into the skillet. - Fold in softened cream cheese and shredded cheddar cheese. - Stir until everything is mixed well and the cheese is melted. - Taste the mac and cheese and adjust seasoning with salt and pepper. - If you want it creamier, add a splash of chicken broth. - Transfer the mac and cheese to bowls or a serving dish. - Garnish with finely sliced green onions for a fresh touch. - Serve it hot and enjoy the cheesy goodness! How to prevent clumping To keep your mac and cheese creamy, stir well. Make sure the cheese melts evenly. This avoids clumping in the sauce. If it clumps, add a splash of chicken broth. This helps to loosen it. Recommended cheese types For great flavor, use sharp cheddar cheese. It adds a nice bite. You can mix in some mozzarella for creaminess. Gouda also works well for a smoky taste. Gradually adding cheese When you add cheese, do it slowly. This allows it to melt better. Stir constantly while adding cheese. This creates a smooth and creamy sauce. Using room temperature cream cheese Make sure your cream cheese is soft. Let it sit out for a bit before use. Soft cream cheese mixes in easily. This helps your mac and cheese stay creamy. Overcooking the pasta Don’t cook the pasta too long. Follow the package time for al dente texture. Overcooked pasta becomes mushy. You want it to hold its shape in the dish. Skipping the seasoning Always season your dish well. Add salt and pepper to taste. You can also use smoked paprika for warmth. Proper seasoning makes your mac and cheese pop with flavor. Pro Tips Use Local Honey: Opt for local honey as it not only enhances the flavor but may also provide local health benefits. Perfectly Cooked Pasta: Make sure to cook the elbow macaroni just until al dente to avoid mushy pasta once it's combined with the sauce. Cheese Choices: Feel free to mix different types of cheese like gouda or mozzarella for a unique flavor profile. Leftover Chicken: This recipe is a great way to use up leftover rotisserie chicken; just skip the cooking step for the chicken. {{image_4}} You can make Honey Garlic Butter Chicken Mac & Cheese even better! Try adding vegetables. Spinach adds nice color and nutrients. Broccoli gives crunch and taste. These veggies cook well with pasta and chicken. You can also switch up proteins. Bacon adds a smoky flavor. Shrimp brings a sweet taste. Just cook them before mixing in. These add-ins make the dish more fun and tasty. Cheese plays a big role in this dish. While sharp cheddar is great, you can try mozzarella. It melts wonderfully and gives a creamy texture. Gouda is another good choice. It adds a rich, nutty flavor that pairs well with the honey garlic sauce. Combining different cheeses can create unique flavors. Mix cheddar with mozzarella for a gooey texture. Or blend gouda with a touch of blue cheese for a bold taste. The cheese choices can change the whole dish. You can cook this dish in different ways. An Instant Pot makes it quick and easy. Just sauté the chicken, then add the other ingredients. Seal the pot and cook on high for a short time. Another option is to bake it. After mixing everything, transfer it to a baking dish. Top with extra cheese and bake until bubbly and golden. This method gives a nice crust on top. Both cooking styles give you a delicious meal! To keep your Honey Garlic Butter Chicken Mac & Cheese fresh, use proper containers. Glass or BPA-free plastic containers work best. Make sure they are airtight to keep moisture out. Store your leftovers in the fridge within two hours of cooking for safety. This dish will stay fresh for 3 to 5 days. To reheat your mac and cheese, the best method is using the stove. Place the dish in a saucepan over low heat. Add a splash of chicken broth or milk to help keep it creamy. Stir often until it is heated through. You can also use a microwave, but be careful not to overheat. Heat in short bursts, stirring in between. If you want to freeze your mac and cheese, let it cool completely first. Then, place it in a freezer-safe container. Wrap tightly in plastic wrap to avoid freezer burn. You can freeze it for up to three months. When you’re ready to eat, thaw it in the fridge overnight. Reheat as described above for the best results. You can use tofu, turkey, or pork. Each option adds a unique taste. If you like seafood, shrimp works well too. Just cook it until done. Adjust cooking times as needed for each protein. Yes, whole wheat pasta is a great choice. It adds more fiber and nutrients. The taste will be slightly nuttier, but it pairs well with the sauce. Make sure to cook it until it's just right. Follow the package instructions for best results. Absolutely! Replace the chicken with mushrooms or chickpeas. You can also use vegetable broth instead of chicken broth. This keeps the flavors rich and tasty. The cheese will still give you that creamy feel you love. Add a splash of soy sauce or a squeeze of lemon juice. This will add depth to the sauce. You could also mix in some chili flakes for heat. Taste as you go to find your perfect balance. The key is to use enough sauce. If it looks dry, add more chicken broth or cream. Stir well to mix in the sauce evenly. You want a creamy, rich texture with every bite! You now have a complete guide to making creamy honey garlic mac and cheese. We explored the key ingredients, detailed cooking steps, and shared tips to avoid common mistakes. You can add your favorite extras or try different cheeses to make it your own. Remember to store leftovers properly for the best taste later. Enjoy your cooking adventure!
Honey Garlic Butter Chicken Mac & Cheese Delight
Get ready to taste the magic of Honey Garlic Butter Chicken Mac & Cheese Delight! This creamy dish combines tender chicken, rich cheese, and sweet
- Ground turkey or beef options: You can use either ground turkey or beef for this soup. Both add rich flavor. I often choose turkey for a lighter dish, but beef gives a hearty taste. - Types of bell peppers to use: I like to use large bell peppers in various colors. Green, red, yellow, or orange all work well. Each type adds its own unique taste and sweetness to the soup. - Suggested cheese varieties: For cheese, I recommend cheddar or mozzarella. Cheddar gives a sharp flavor, while mozzarella melts nicely. You can even mix both for a delightful blend! These ingredients come together to create a warm, filling dish that feels like a hug in a bowl. Start by heating a large pot over medium heat. Add 1 pound of ground turkey or beef. Cook it for about 5 to 7 minutes. Use a spoon to break the meat into small pieces as it cooks. When the meat is brown, drain any extra fat from the pot. This step makes your soup lighter and tastier. Next, add a small onion, finely diced, and 2 minced garlic cloves to the pot. Sauté for 3 to 4 minutes. You want the onion to turn soft and clear. This brings out the sweet flavor of the onion. The garlic will add a nice aroma to your soup, making it more inviting. Once the onions and garlic are ready, stir in 4 large diced bell peppers. You can use any color you like. Cook these for another 5 minutes. This softens the peppers a bit, adding flavor to the mix. After that, pour in 1 can of undrained diced tomatoes and 4 cups of vegetable broth. Stir everything together until well mixed. Now it’s time to make the soup rich in flavor. Add 1 cup of cooked rice, 1 tablespoon of Italian seasoning, and 1 teaspoon of smoked paprika. Season with salt and freshly ground black pepper to taste. Bring the soup to a gentle boil. Once it starts bubbling, reduce the heat to low. Let it simmer for about 20 minutes. This allows all the flavors to blend nicely. In the last few minutes, stir in half of the 1 cup of shredded cheese until it melts. This makes your soup creamy and delicious. Taste it and adjust the seasoning if needed. Serve it hot, topped with the rest of the cheese and a sprinkle of chopped parsley for a pop of color. Enjoy your hearty stuffed bell pepper soup! To make your stuffed bell pepper soup taste great, use fresh herbs. I love adding basil or oregano for a nice boost. You can also try using different types of cheese. Cheddar or mozzarella both melt well and add flavor. For a smoky touch, use smoked paprika. It brings a nice depth to the soup. If you want a thicker soup, let it simmer longer. This helps the flavors blend better. Start with the 20 minutes in the recipe, then taste it. If you want it thicker, keep it on low heat for an extra 10 minutes. If your soup seems too thick, add a little more broth. You can change some ingredients based on your needs. For a lower-calorie option, use lean ground turkey. If you prefer beef, go for lean ground beef. For a vegetarian soup, swap the meat for more veggies or beans. Quinoa can replace rice if you want a gluten-free option. Feel free to experiment! {{image_4}} You can easily make this soup vegetarian or vegan. Instead of meat, use lentils or beans. Both add protein and a great texture. You can use black beans, kidney beans, or chickpeas. Replace the broth with vegetable broth for a vegan option. For a creamy touch, add some coconut milk. This adds richness without any dairy. Feel free to toss in more veggies! Carrots, zucchini, and corn blend well in this soup. You can also use spinach or kale for some greens. Just chop them up and add them to the pot when you cook the bell peppers. The more veggies, the more nutrients and flavor! To spice things up, add some heat! You can use diced jalapeños or a splash of hot sauce. Another option is to sprinkle in some red pepper flakes. If you like it really hot, try using a spicy sausage instead of turkey or beef. Adjust the spice to fit your taste. Enjoy the warmth with every spoonful! To store your stuffed bell pepper soup, let it cool first. Use an airtight container. This helps keep the flavors fresh. Place the soup in the fridge if you plan to eat it within three days. For longer storage, freezing is a great option. When you're ready to reheat, pour the soup into a pot. Heat it on medium until warm. Stir often to avoid sticking. You can also use a microwave. Heat it in a microwave-safe bowl for about 2-3 minutes. Stop to stir halfway through to ensure even heating. If you want to freeze the soup, use freezer-safe containers. Leave some space at the top for expansion. The soup can last up to three months in the freezer. When you're ready to eat it, thaw it in the fridge overnight. Reheat as mentioned before for the best taste. Yes, you can make this soup ahead of time. It tastes even better the next day. To do this, prepare the soup as directed and let it cool. Store it in an airtight container in the fridge. This soup stays fresh for about three to four days. When you’re ready to eat, just reheat it on the stove or in the microwave. This soup pairs well with many sides. Try serving it with crusty bread for dipping. A fresh salad also works well to balance the meal. You can even serve it with a side of garlic bread for extra flavor. If you like cheese, sprinkle some on top for a tasty finish. To make this soup healthier, you can use lean ground turkey or chicken instead of beef. You can also add more vegetables, like zucchini or spinach, for extra nutrients. Using brown rice instead of white rice adds fiber. Lastly, you can cut the cheese in half or use a low-fat option for fewer calories. Stuffed Bell Pepper Soup is easy to make and full of flavor. We explored key ingredients like ground turkey, bell peppers, and various cheeses. I shared simple steps to prepare and cook the soup. Tips for flavor and adjustments ensure your dish meets everyone’s tastes. Finally, try out variations for different diets, store leftovers properly, and reheating tips help for later meals. With these ideas, you can create a delicious and healthy soup that suits your needs. Enjoy cooking and share it with others!
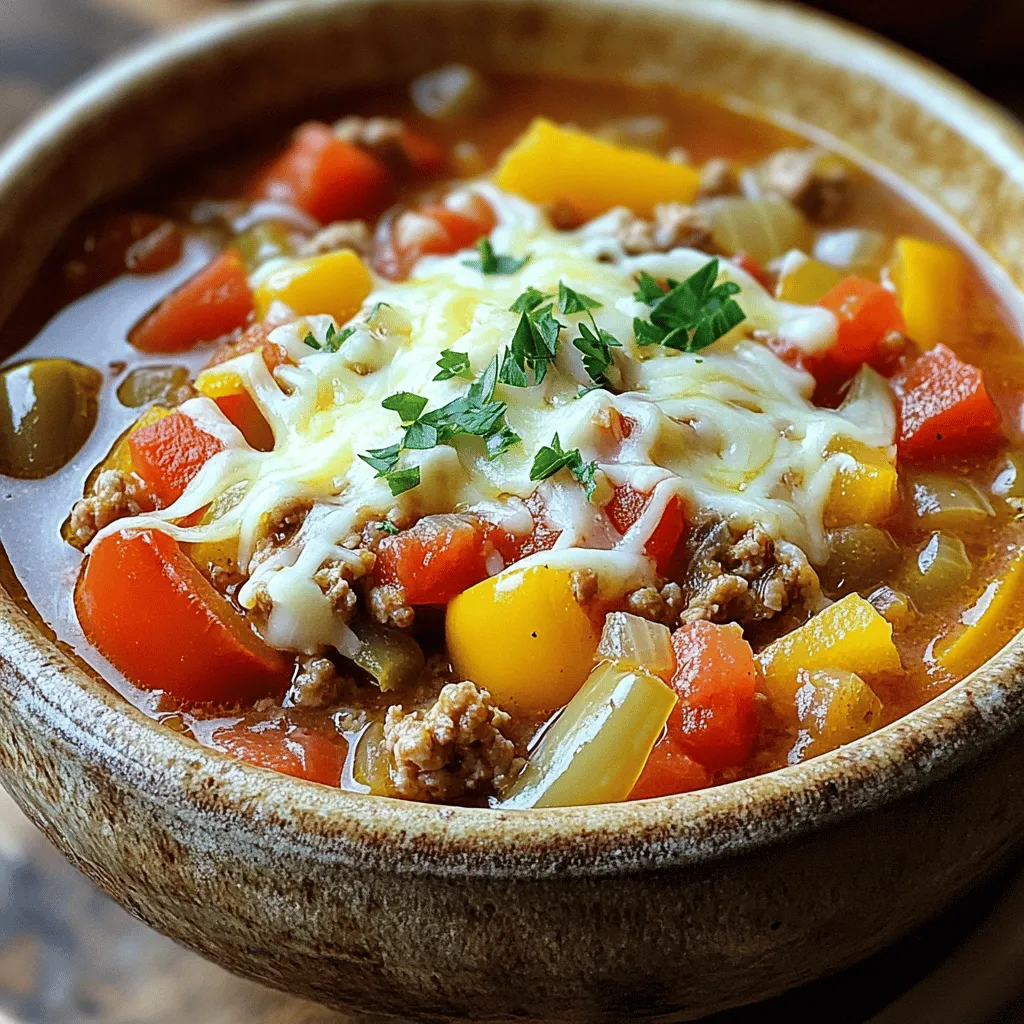
Stuffed Bell Pepper Soup Flavorful Comfort Dish
Looking for a warm, tasty dish that feels like a hug in a bowl? Stuffed Bell Pepper Soup is your answer! Packed with savory flavors