Dinner

- 1 pound sirloin steak, cut into 1-inch cubes - 4 tablespoons unsalted butter - 5 cloves garlic, minced - 1 teaspoon fresh rosemary, finely chopped - 1 teaspoon fresh thyme, finely chopped - Salt and freshly ground black pepper, to taste - 2 tablespoons olive oil - Fresh parsley, chopped, for garnish To make garlic butter steak bites, you need key ingredients that add flavor and richness. The sirloin steak offers a tender, juicy base. Using unsalted butter gives you control over the salt level. Fresh garlic creates a bold taste that complements the beef. Herbs like rosemary and thyme bring freshness. They add a nice aroma and depth to your dish. Don’t forget salt and black pepper to enhance all the flavors. For cooking, olive oil helps with searing. It creates a nice crust on the steak. Finally, freshly chopped parsley makes the dish pop with color and flavor when sprinkled on top. Gather these ingredients before you start cooking. They will come together to create a delicious meal in no time! Start by patting the sirloin steak cubes dry with paper towels. This helps remove moisture. A dry steak gives a nice golden crust. Next, season the steak with salt and freshly ground black pepper on all sides. Be generous with the seasoning. This will enhance the flavor of the beef. Heat a large skillet over medium-high heat. Pour in the olive oil and let it shimmer. This tells you the oil is hot enough to cook. Now, add the seasoned steak cubes to the skillet in a single layer. Make sure there’s space between each piece. If the skillet is small, cook in batches. Sear the steak for about 2-3 minutes on each side. Look for a rich brown color. This usually takes about 3-4 minutes total for medium-rare, which is around 130°F. Once the steak bites are nicely browned, lower the heat to medium. Move the steak to one side of the skillet. This creates space in the center. Add butter, minced garlic, chopped rosemary, and thyme to that empty area. Let the butter melt and the garlic cook for about 1 minute. Stir occasionally until the garlic smells great and turns slightly golden. Now, use a spatula to toss the steak bites in the garlic butter mixture. Make sure each piece gets coated well. Let everything cook for another minute. This combines the flavors perfectly. After that, remove the skillet from the heat. Transfer the garlic butter steak bites to a serving platter. Sprinkle with fresh chopped parsley for color. Serve them warm for the best taste. To sear steak bites well, start by drying them. Patting the steak cubes with paper towels removes moisture. This helps form a nice crust. A dry surface gives a great sear. If your skillet is small, cook in batches. This way, each piece gets enough heat. Seasoning makes a huge difference. Salt and pepper are key. You can adjust these to your taste. For doneness, medium-rare is best at around 130°F. This takes about 3-4 minutes of cooking. Use a meat thermometer for accuracy. For a fun look, serve steak bites on a wooden board. Add a small bowl of garlic butter for dipping. This adds a nice touch. Brighten the plate with a side salad or colorful veggies. This creates a feast for the eyes and the stomach! {{image_4}} If you cannot find sirloin steak, don't worry! You have great options. Here are some tasty substitutes: - Ribeye steak: Rich flavor and tender texture. - Tenderloin: Very tender and lean. - Flank steak: A bit chewier but full of flavor. - Skirt steak: Juicy and perfect for quick cooking. Each cut has its own charm, so choose what you like best! Want to switch things up? You can easily add different herbs or spices. Try these ideas: - Fresh parsley for a bright flavor. - Oregano for a hint of earthiness. - Paprika for a touch of smokiness. - Red pepper flakes for some heat. You can also incorporate other ingredients like mushrooms or onions. Just sauté them with the garlic for extra flavor. Pairing your garlic butter steak bites with the right side dishes can elevate your meal. Here are some ideas: - Creamy mashed potatoes for comfort. - Roasted vegetables for a healthy touch. - A fresh salad for crunch and color. For special occasions, you can transform this dish by serving it on skewers. Add colorful veggies for a fun presentation! To store leftovers, let the steak bites cool first. Place them in an airtight container. Use parchment paper between layers if stacking. This keeps them fresh for up to three days in the fridge. When you're ready to eat, the flavor will still be great. To reheat steak bites, the best method is using a skillet. Heat the skillet over medium heat. Add a little olive oil or butter to the pan. Once hot, place the steak bites in the skillet. Sear for 2-3 minutes until warmed through. You can also use the microwave, but this may make the steak chewy. You can freeze steak bites for later use. Place them in a freezer-safe bag or container. Remove all the air to prevent freezer burn. They can last up to three months in the freezer. When you're ready to eat, thaw them overnight in the fridge. Reheat them in a skillet for the best taste. To keep your steak bites tender, start with good meat. Use sirloin steak, as it has a nice balance of fat and flavor. Always pat the steak dry before cooking. This helps create a great crust. Season the steak well with salt and pepper. Cook at high heat for a short time. Aim for medium-rare, which is about 130°F. This keeps the meat juicy and soft. Yes, you can use frozen steak. Just make sure to thaw it fully first. Thaw in the fridge overnight for best results. Pat it dry before you season it. If the steak is too wet, it won’t sear well. Follow the same cooking steps, and you’ll still get tasty bites. Great sides for garlic butter steak bites include: - Roasted vegetables - Mashed potatoes - A fresh green salad - Garlic bread - Steamed broccoli These pair well with the rich flavors of the steak. In this post, we explored how to make delicious garlic butter steak bites. We covered key ingredients like sirloin, butter, garlic, and herbs. You learned step-by-step instructions for preparing and cooking the steak. We shared useful tips for achieving the perfect sear and enhancing flavors. Finally, we discussed variations and storage methods. Remember, cooking is fun and creative. You can always add your twist on this recipe to make it your own. Enjoy your meal and happy cooking!
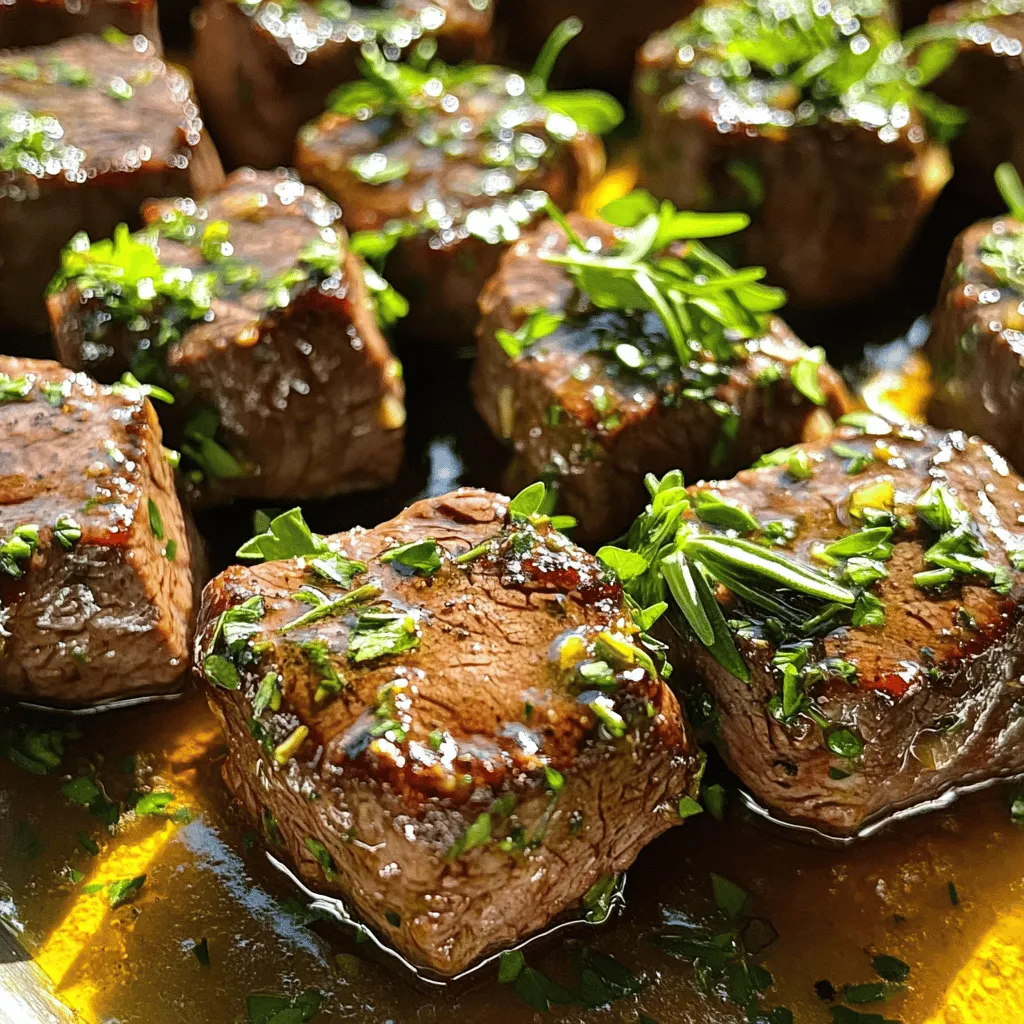
Garlic Butter Steak Bites Tasty and Easy Recipe
If you crave a quick and tasty meal, you’ll love these Garlic Butter Steak Bites! This easy recipe packs a punch with juicy sirloin, rich
- 250g pasta (penne, fusilli, or spaghetti) - 200g feta cheese, cut into small cubes - 400g cherry tomatoes, halved - 3 cloves garlic, finely minced - 2 tablespoons extra virgin olive oil - 1 teaspoon dried oregano - 1/2 teaspoon red pepper flakes (adjust to your spice preference) - Fresh basil leaves, torn, for garnish - Salt and freshly ground black pepper, to taste - 1/2 cup reserved pasta water For this recipe, I focus on three main ingredients: the pasta, feta cheese, and cherry tomatoes. You can use penne, fusilli, or spaghetti. Each type cooks well and holds the sauce nicely. The feta cheese brings a creamy texture and classic flavor. I like to cut it into small cubes so it melts just right. The cherry tomatoes are juicy and sweet. Halving them helps them burst and release their juices during cooking. The garlic adds depth to the dish. It gives a nice aroma and flavor. I also include a few seasonings. The oregano adds a warm, earthy taste. Red pepper flakes can spice up your dish, but adjust the amount based on your taste. For garnishing, I recommend fresh basil. It adds color and a nice aroma. Always season with salt and black pepper to enhance all the flavors. These ingredients create a simple yet flavorful dish that is sure to impress! 1. Start by bringing a large pot of salted water to a rolling boil. This step is key for flavor. 2. Once the water is boiling, add 250g of your favorite pasta. You can choose penne, fusilli, or spaghetti. 3. Cook the pasta according to the package directions. Aim for an al dente texture, which means the pasta is firm but not hard. 4. Before draining, reserve 1/2 cup of the pasta water. This water is starchy and will help your sauce later. 5. Drain the pasta in a colander and set it aside. 1. In a large skillet set over medium heat, add 2 tablespoons of extra virgin olive oil. Let it heat until it shimmers. 2. Add 3 cloves of finely minced garlic to the skillet. Sauté for about 1 minute. You want to smell the garlic without burning it. 3. Now, introduce 400g of halved cherry tomatoes to the skillet. They will add sweetness and color. 4. Sprinkle in 1 teaspoon of dried oregano and 1/2 teaspoon of red pepper flakes. Adjust spice to your liking. 5. Cook this mix for 5-7 minutes. Stir occasionally until the tomatoes soften and burst, releasing their juices. 6. Season your sauce with salt and freshly ground black pepper to taste. 1. Gently fold in 200g of cubed feta cheese into the skillet. This cheese adds a creamy texture. 2. Next, transfer the drained pasta into the skillet with the sauce. 3. Slowly pour in the reserved pasta water, stirring continuously. This helps coat all the pasta with the sauce. 4. Adjust the amount of pasta water based on how creamy you want your sauce. Keep stirring until everything is well mixed. How to prevent overcooking pasta: To avoid overcooking, follow the package directions. Check the pasta a minute early. It should be firm but not hard. When draining, keep 1/2 cup of pasta water. This helps later. Ideal garlic sautéing time: Sauté the garlic for about 1 minute. You want it fragrant but not brown. If it burns, the taste will be bitter. Keep an eye on it. Adjusting creaminess with reserved pasta water: Add the reserved pasta water slowly. This helps make the sauce creamy. If you want it thicker, use less water. For a lighter sauce, add more. Seasoning adjustments for flavor enhancement: Taste your sauce before serving. You might need more salt or pepper. If it tastes flat, try adding a pinch of salt. Fresh basil also brightens the flavor. Recommended herbs and spices: Fresh basil is the best choice for this dish. You can also sprinkle some dried oregano on top. If you like heat, add a few more red pepper flakes. Visual presentation ideas: Serve the pasta in deep bowls. Drizzle extra virgin olive oil on top. Add cracked black pepper for a nice touch. A few extra basil leaves make it look fresh and inviting. {{image_4}} If you want gluten-free pasta, try using rice or quinoa pasta. These options work very well. You can also use chickpea pasta for more protein. For vegan cheese, look for brands that mimic feta. Many use nuts or tofu. This way, you can enjoy the dish without dairy. You can add vegetables to your pasta for extra taste. Spinach is a great choice; it wilts nicely. Bell peppers add a nice crunch and sweetness. You can also include protein for a heartier meal. Grilled chicken or shrimp makes it more filling. Just cook them separately and mix them in! For a Mediterranean twist, add olives and capers. This adds a briny flavor that pairs well. If you like spice, try adding jalapeños or a hot sauce. This gives the dish a fun kick. Get creative and make the dish your own! To store leftover Feta Tomato Pasta, let it cool to room temperature first. Place it in an airtight container. This helps keep the pasta fresh. You should eat it within three days for the best taste. - Use glass or plastic containers with tight lids. - Avoid using metal containers, as they can react with the sauce. When you are ready to enjoy your leftovers, reheating is key. The best methods are using a microwave or a skillet. Both options can help keep the pasta's texture. - For the microwave, use medium heat. Heat for 1–2 minutes, stirring halfway. - For a skillet, add a splash of water or olive oil. Heat on low, stirring often, for about 5 minutes. You can freeze Feta Tomato Pasta! It stays well for up to three months. Just make sure to cool it first, then pack it in a freezer-safe container. - To thaw, move it to the fridge overnight. - Reheat in a skillet or microwave as described above. Add a little extra water if needed to bring back the creaminess. For Feta Tomato Pasta, I recommend using: - Penne - Fusilli - Spaghetti These shapes hold sauce well. They help create a creamy dish that sticks to each bite. Penne adds a nice chew, while fusilli captures sauce in its spirals. Spaghetti offers a classic feel. Any of these options will work great! Yes, you can use different cheeses! Here are some options: - Goat cheese - Ricotta - Cream cheese Goat cheese adds a tangy flavor. Ricotta makes the dish extra creamy. Cream cheese gives a rich texture. Each cheese changes the taste. Be creative and mix it to match your mood! Want more heat? Here are some tips: - Add more red pepper flakes - Include fresh chili peppers - Use spicy olive oil Start with a small amount and taste as you go. You can always add more! This way, you control the spice level. Enjoy your spicy twist! Feta Tomato Pasta is easy and fun to make. You can use various pasta shapes and fresh ingredients to create a flavorful dish. Remember to cook pasta to al dente and adjust your sauce for creaminess. Don't shy away from adding your favorite veggies or proteins for a twist. Storing leftovers is simple, too. Use proper containers for refrigeration or freezing. With these tips and tricks, you can enjoy a delicious meal anytime. Try these ideas and make your Feta Tomato Pasta your own. Happy cooking!
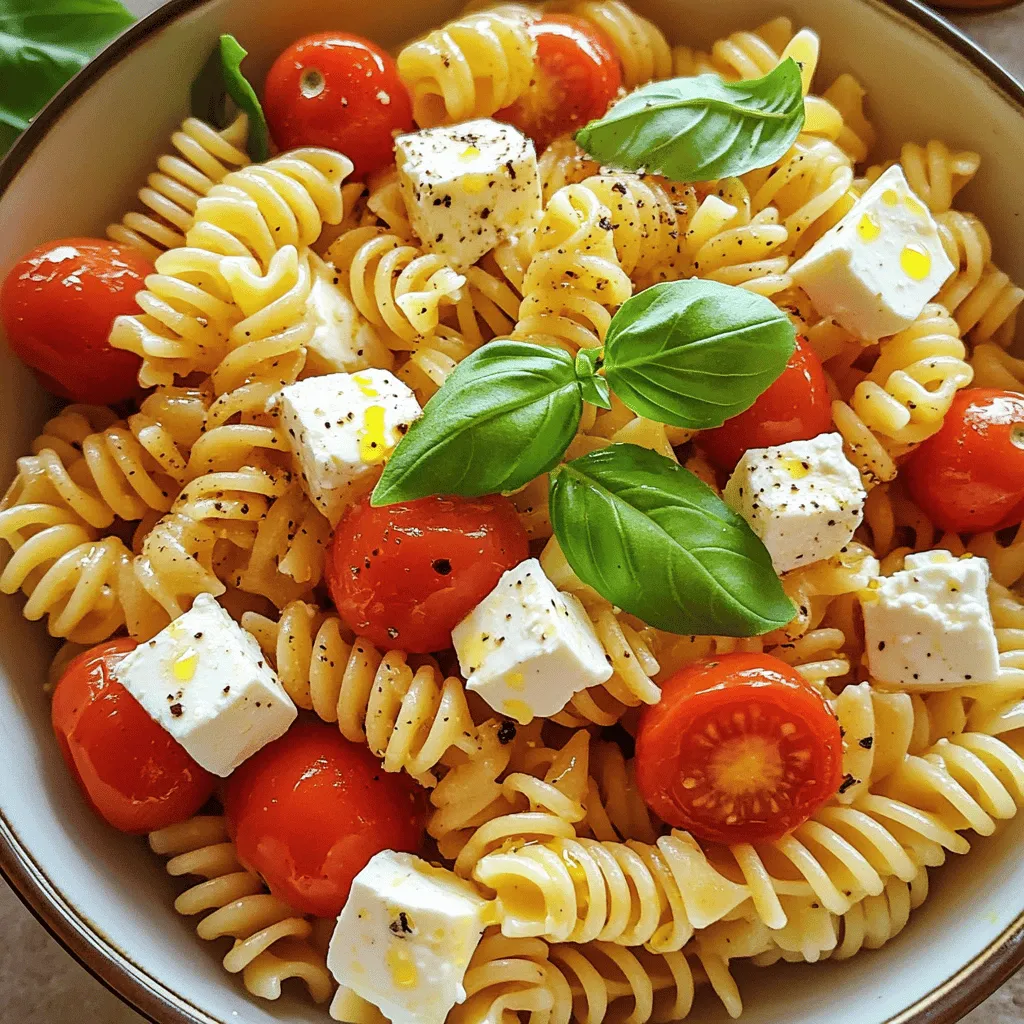
Feta Tomato Pasta Simple and Flavorful Recipe
Looking for a quick, tasty meal that impresses? Feta Tomato Pasta is your answer! This simple recipe combines creamy feta, fresh cherry tomatoes, and your
- Chicken thighs: Use 1.5 lbs of boneless, skinless chicken thighs. They stay juicy and tender. - Yogurt and spices: One cup of plain yogurt helps tenderize the chicken. Combine it with 2 tablespoons of garam masala, 2 teaspoons of turmeric powder, 2 teaspoons of ground cumin, 2 teaspoons of ground coriander, 1 teaspoon of paprika, and 1 teaspoon of salt. - Onion, garlic, and ginger: One large onion adds sweetness. Use 3 cloves of minced garlic and 1-inch grated ginger for depth of flavor. - Crushed tomatoes: One can (14 oz) of crushed tomatoes adds richness and acidity. It balances the spices perfectly. - Coconut milk: One cup of coconut milk brings creaminess. It makes the dish smooth and rich. - Garnish options: Fresh cilantro, roughly chopped, adds a pop of color and freshness. You can also use a squeeze of lime for extra zing. - In a bowl, whisk together the yogurt and spices. - Add garam masala, turmeric, cumin, coriander, paprika, and salt. - Mix until it forms a smooth paste. - Cut the chicken thighs into bite-sized pieces. - Coat the chicken pieces well in the yogurt mixture. - Cover the bowl and let it marinate in the fridge for at least 30 minutes. - For a better flavor, marinate overnight if you can. - Set your Instant Pot to 'Sauté' mode. - When it says “Hot,” pour in the olive oil. - Add the chopped onion and sauté for about 3-4 minutes. - Stir the onion until it becomes translucent. - Then, add minced garlic and grated ginger. - Cook for another minute until it smells great. - Next, pour in the crushed tomatoes and stir well. - Let it cook for about 2 minutes to soften the tomatoes. - Now, add the marinated chicken with all the marinade. - Mix everything to coat the chicken in the sauce. - Pour in the coconut milk and gently stir it all together. - Seal the Instant Pot lid and set the valve to 'Sealing.' - Switch to 'Manual' mode and set the timer for 10 minutes. - Once it’s done, do a quick pressure release by turning the valve to ‘Venting.’ - Open the lid when the pressure is fully released. - Stir the chicken tikka masala and taste it. - You can add more salt if needed. For the best taste, marinating the chicken is key. I suggest marinating for at least 30 minutes. If you have more time, let it sit overnight. This step allows the spices to soak in deeply. Adjusting the spice level is easy. If you prefer a milder dish, cut back on the garam masala and paprika. You can also add a bit of sugar to balance the heat. For a spicier kick, try adding more paprika or some chili flakes. Understanding your Instant Pot settings makes cooking simple. Start with 'Sauté' mode to cook the onions, garlic, and ginger. This step builds flavor before adding other ingredients. When ready to cook, switch to 'Manual' mode. Set the timer for 10 minutes. Make sure the valve is on 'Sealing.' This keeps the steam inside, cooking the chicken evenly. After cooking, perform a quick pressure release. This means turning the valve to 'Venting' right after the timer ends. Once the pressure is gone, open the lid carefully. This will give you a perfect Chicken Tikka Masala every time. {{image_4}} If you want a dairy-free dish, you can use coconut cream instead of yogurt. Coconut cream gives a rich, creamy texture. You can also try cashew cream, made by blending soaked cashews with water. Another option is to use almond milk mixed with a bit of cornstarch for thickness. Each substitute keeps your dish creamy and adds a unique flavor. Adding veggies boosts nutrition and flavor. Consider adding spinach, peas, or bell peppers. You can throw in cauliflower or carrots for extra crunch. Make sure to cut them small so they cook through. Add these vegetables after the chicken is done cooking for best results. This keeps them vibrant and fresh while soaking up the sauce. You can switch out chicken thighs for other proteins. Try chicken breast for a leaner option. If you want a different flavor, use shrimp or tofu. Both cook quickly and absorb the spices well. For a heartier meal, beef or lamb can also work, but adjust the cooking time. Each protein gives a new twist to this classic dish. To keep your chicken tikka masala fresh, store leftovers in an airtight container. Place the container in the fridge. This dish stays good for about 3 to 4 days. If you want to enjoy it later, let it cool down before sealing. This helps keep the flavor and texture nice. Freezing chicken tikka masala is easy. First, let it cool completely. Then, transfer it to a freezer-safe container. You can also use freezer bags. Make sure to remove as much air as possible. This helps prevent freezer burn. It will stay fresh for up to 3 months in the freezer. When you’re ready to eat, thaw it in the fridge overnight. To reheat, you can use the stove or microwave. If using the stove, heat it on low and stir often. If using the microwave, cover it to keep the moisture in. Enjoy that warm, comforting meal! It takes about 10 minutes to cook chicken in an Instant Pot. You set the timer for this amount after sealing the lid. The Instant Pot works fast because it builds pressure. This pressure cooks the chicken evenly and keeps it moist. For tender chicken, make sure to cut it into small pieces. This helps it cook more evenly. Once the timer goes off, you need to let the pressure release. This adds a few extra minutes. In total, from start to finish, it takes about 30 minutes to make Chicken Tikka Masala. Yes, you can use frozen chicken for this recipe. The Instant Pot can cook frozen chicken safely. However, you need to adjust the cooking time. Increase it to about 15-20 minutes. Remember to add extra liquid if using frozen chicken. This ensures even cooking. Also, make sure to separate the pieces as soon as possible. This helps them cook well. You can serve Chicken Tikka Masala with several tasty sides. Here are some great options: - Steamed basmati rice - Warm naan bread - Roasted vegetables - A fresh salad with cucumbers and tomatoes - Raita, a yogurt-based side, to cool the dish These sides work well to soak up the creamy sauce. Enjoy your meal with a mix of flavors and textures! You learned how to make Chicken Tikka Masala step-by-step. We explored key ingredients, like chicken thighs, yogurt, and spices. You saw tips for flavor and how to use the Instant Pot correctly. Remember, you can customize it with veggies or different proteins. Storing leftovers is easy, too. Now, you can enjoy this tasty dish any time. Cooking should be fun and satisfying. Enjoy your Chicken Tikka Masala journey!
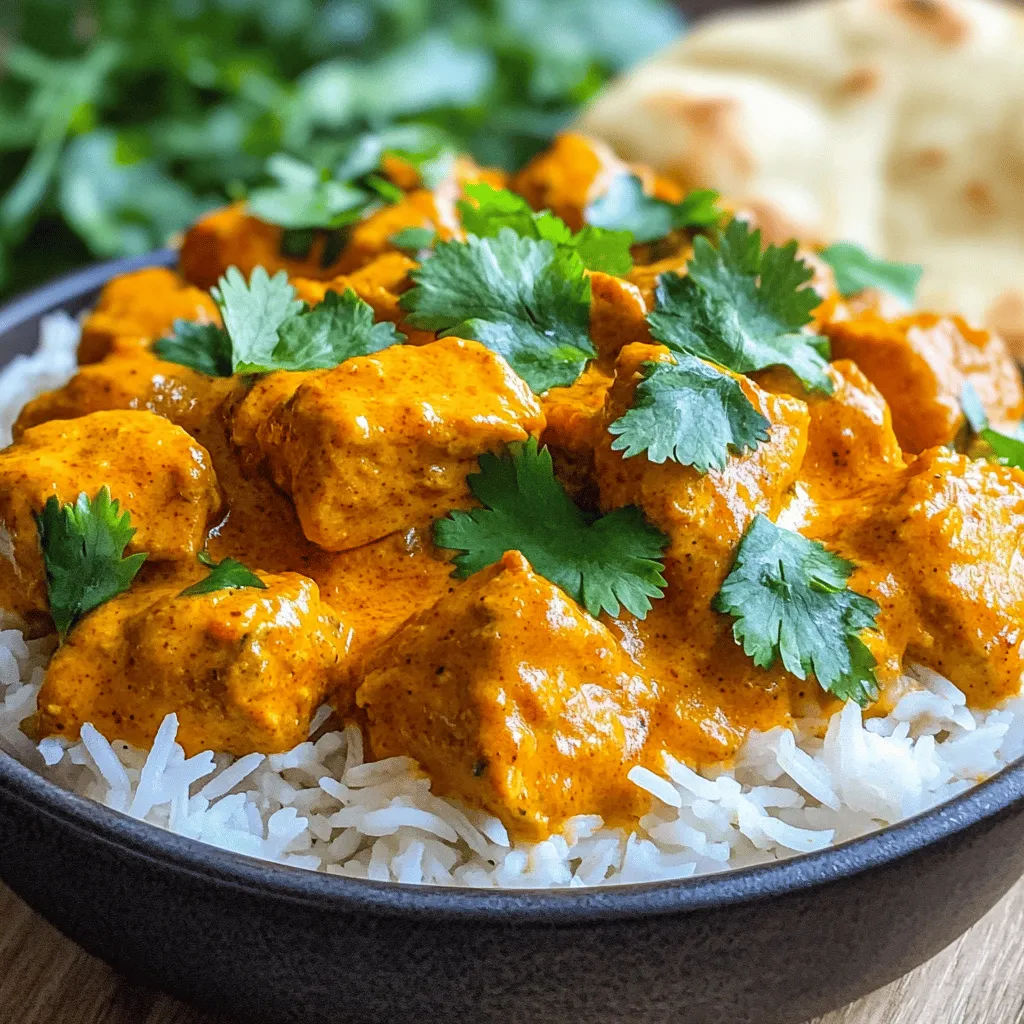
Instant Pot Chicken Tikka Masala Flavorful and Easy Meal
If you’re craving a warm, hearty dish that’s both flavorful and easy to make, you’ll love this Instant Pot Chicken Tikka Masala! This recipe turns
- 1 lb chicken breast, diced into bite-sized pieces - 2 large eggs, beaten until smooth - 1 cup mixed vegetables (peas, carrots, and corn) Protein is key in this recipe. The diced chicken breast is lean and cooks quickly. It gives your meal a solid base of protein. Eggs add richness and texture. They also help bind the rice together. Mixed vegetables bring color and nutrients. They make your dish tasty and healthy. - 3 tablespoons soy sauce (adjust to taste) - 2 tablespoons sesame oil (for a nutty flavor) - 2 cloves garlic, minced - 1 teaspoon ginger, freshly grated Flavor is crucial for great fried rice. Soy sauce gives saltiness and depth. Sesame oil adds a warm, nutty taste that enhances the dish. Garlic and ginger bring freshness and zest. They make your kitchen smell amazing while cooking. - Sesame seeds for garnish - 3 green onions, finely chopped (separate the white and green parts) Garnishes can elevate your meal. Sesame seeds add a nice crunch and visual appeal. Green onions add freshness and a pop of color. You can sprinkle them on top for a beautiful finish. This makes your chicken fried rice look and taste even better. {{ingredient_image_2}} First, I heat olive oil in a large skillet over medium-high heat. The oil should shimmer when it's hot. Next, I add the diced chicken breast to the skillet. I season it with salt and pepper for good flavor. I cook the chicken for about 5 to 7 minutes. I stir it often until it turns golden brown and is fully cooked. Once done, I take the chicken out and set it aside on a plate. Now, I focus on the garlic and ginger. They add a lot of flavor to the dish. I pour sesame oil into the same skillet I just used. I let it heat for a moment. Then, I add minced garlic and freshly grated ginger. I cook them for about 30 seconds. It’s important to watch them closely so they don’t burn. The smell is amazing! Next, it’s time to scramble the eggs. I push the garlic and ginger to one side of the skillet. I pour the beaten eggs into the empty space. I gently scramble them until they are fully cooked. Then, I mix the eggs with the garlic and ginger. After that, I toss in the mixed vegetables. I stir-fry everything for about 2 to 3 minutes. This helps the vegetables heat and soften a bit. Now, I add the cooked jasmine rice and the chicken back into the skillet. I pour soy sauce over the top. Using a spatula, I mix all the ingredients well. I stir-fry for another 3 to 5 minutes. This ensures everything is heated through. Finally, I add chopped green onions to the mix. I save some green tops for garnish later. I taste the dish and adjust the seasoning if needed. Now, it's ready to serve! Using day-old rice makes a big difference. Fresh rice is too sticky for fried rice. Day-old rice dries out a bit, which helps it fry well. This keeps each grain separate. When you cook it, the rice will take on the flavors better. To cook perfect fried rice, use high heat. A large skillet or wok works best. Heat your oil until it shimmers. Then, add your ingredients in stages. Start with protein, then add aromatics, and finally the rice. This method helps each part cook evenly. Balancing the soy sauce flavor is key. Use three tablespoons to start, but taste as you go. If it’s too salty, add a touch of sugar. This helps balance the flavors. You can also add a splash of lime juice for brightness. For spiciness, add red pepper flakes or sriracha. Start with a small amount and increase to your taste. You can also try adding a bit of curry powder or sesame oil for a different twist. For leftovers, store in an airtight container. This keeps the rice fresh and prevents drying out. It’s best eaten within three days. To reheat, use the microwave or a skillet. If using the microwave, add a splash of water. This helps steam the rice so it doesn’t dry out. Stir occasionally to heat evenly. If using a skillet, add a little oil to prevent sticking. This ensures your fried rice stays delicious! Pro Tips Use Day-Old Rice: Using day-old jasmine rice helps achieve the perfect texture, preventing the dish from becoming mushy. High Heat Cooking: Stir-frying on high heat allows the ingredients to cook quickly, preserving their flavors and preventing sogginess. Customize Your Veggies: Feel free to swap in your favorite vegetables, such as bell peppers or broccoli, to suit your taste! Garnish for Flavor: Don't skip the sesame seeds and reserved green onion tops; they add a delightful crunch and fresh flavor to the dish. {{image_4}} You can switch up proteins in your chicken fried rice. Try beef, shrimp, or tofu. Each choice adds its own flavor. - Beef: Use thin slices of flank steak. Cook for about 3-5 minutes until browned. - Shrimp: Use peeled shrimp. Cook until pink, about 2-3 minutes. - Tofu: Use firm or extra-firm tofu. Cube it and pan-fry until golden, about 5-7 minutes. Adjust cooking times based on the protein. Chicken takes longer than shrimp but less than tofu. Seasonal vegetables can add fun to your fried rice. Choose what’s fresh and colorful. - Spring: Add asparagus or snap peas. - Summer: Use zucchini or bell peppers. - Fall: Try pumpkin or butternut squash. - Winter: Consider broccoli or Brussels sprouts. Increase your veggie intake by adding more. Aim for half your plate to be veggies. You can make a vegan version of chicken fried rice. Replace chicken and eggs with plant-based foods. - Chicken: Use chickpeas or lentils for protein. - Eggs: Replace eggs with scrambled tofu. Mix it with turmeric for color. Check the protein content in your vegan meals. Ensure you meet your daily needs with these swaps. To keep your protein chicken fried rice fresh, store leftovers in airtight containers. Divide the rice into smaller portions for easy access. This makes it simple to grab a quick meal. Place the containers in the fridge. They will stay good for up to four days. You can freeze protein chicken fried rice for later. Let it cool completely before placing it in a freezer-safe container. Squeeze out any air to prevent freezer burn. It can last for up to three months in the freezer. When ready to eat, thaw it in the fridge overnight. Reheat it in a skillet over medium heat until hot, stirring often. In the fridge, your chicken fried rice will last about four days. In the freezer, it lasts up to three months. Look for signs of spoilage like an off smell or discoloration. If you see these signs, it’s best to toss the dish. Always trust your senses to keep your meals safe. Yes, you can use other types of rice. Here are some good options for fried rice: - Long-grain rice: It stays fluffy and separate. - Basmati rice: It adds a nice aroma and flavor. - Brown rice: It adds fiber and a nutty taste. - Cauliflower rice: A low-carb choice that’s very popular. Day-old rice is best because it has less moisture. Fresh rice can become mushy. To add heat to your chicken fried rice, try these ideas: - Add chili flakes or powder while cooking. - Mix in sliced fresh chilies for a kick. - Drizzle with sriracha sauce before serving. - Use spicy soy sauce for an extra zing. You can adjust the heat to match your taste. Yes, this recipe is great for meal prep. Here are some benefits: - You can make it in advance and store it. - It reheats well, keeping its flavor and texture. - It saves time for busy weeknights. - You can portion it out for easy lunches. Meal prepping helps you eat healthier and saves money. In this article, we covered key ingredients, step-by-step instructions, and helpful tips for making delicious chicken fried rice. You learned how to choose protein, enhance flavors, and adjust textures. Remember to store leftovers properly and explore variations like tofu or shrimp. With these insights, you can whip up a tasty dish for any occasion. Enjoy experimenting in the kitchen and delighting your taste buds!
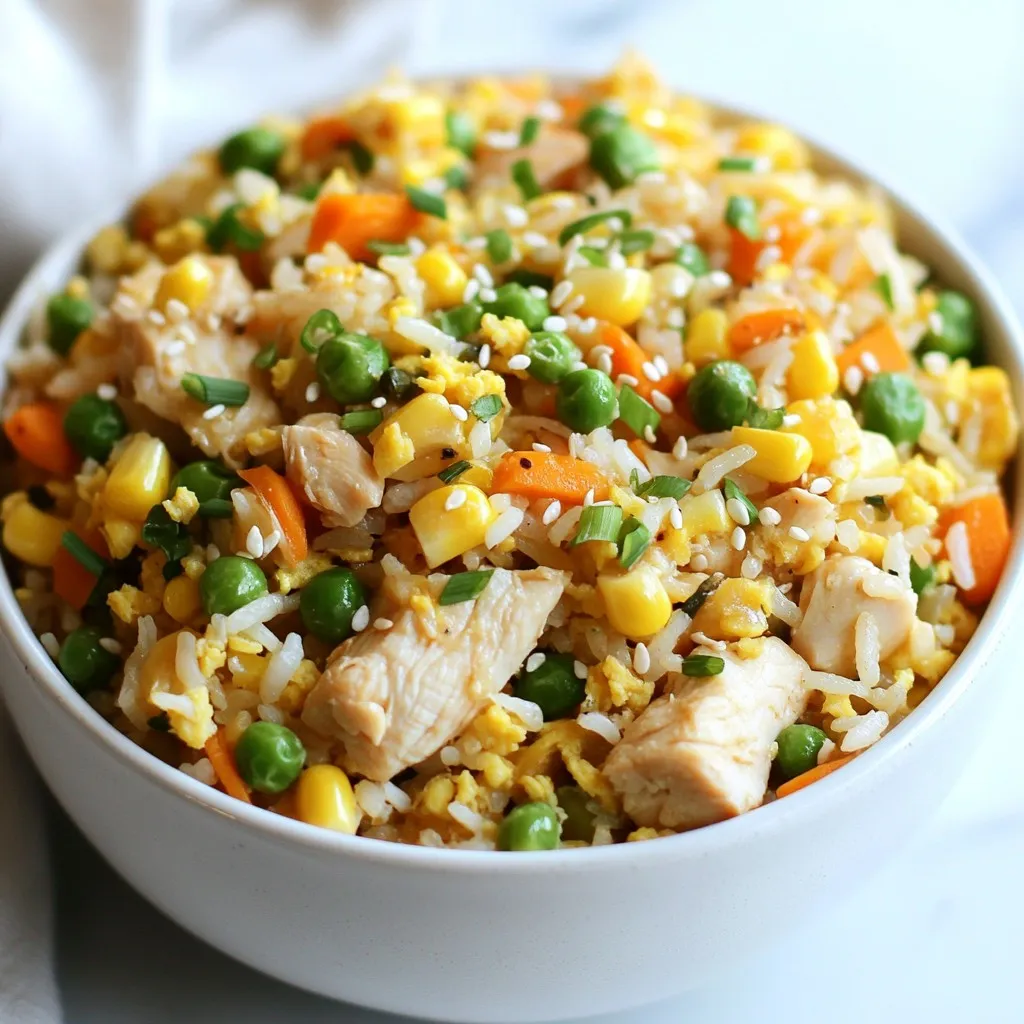
Protein Chicken Fried Rice Quick and Flavorful Meal
Looking for a quick and tasty meal? Protein Chicken Fried Rice packs a punch of flavor and nutrition, all in one bowl! With simple ingredients
- 1 pound shrimp, peeled and deveined - 1 tablespoon extra virgin olive oil - 1 teaspoon chili powder - 1 teaspoon ground cumin - 1/2 teaspoon garlic powder - 1/2 teaspoon sea salt - 1/4 teaspoon freshly cracked black pepper - 8 small corn tortillas - 1 cup shredded red cabbage - 1 ripe avocado, sliced - Fresh cilantro leaves, for garnish - 1/2 cup thick Greek yogurt - 1 tablespoon mayonnaise - 1 tablespoon fresh lime juice - Zest from 1 lime - Sea salt, to taste Use fresh shrimp for the best flavor. Look for shrimp that are firm and smell like the ocean. Choose high-quality olive oil. It enhances the taste of the shrimp. For the lime crema, thick Greek yogurt gives a creamy texture. Use fresh limes for juice and zest for a bright flavor. Always try to buy organic produce when possible for better taste and health. To start, gather your shrimp in a mixing bowl. Add one tablespoon of extra virgin olive oil. Then, sprinkle in one teaspoon each of chili powder and ground cumin. Next, add half a teaspoon of garlic powder, sea salt, and a quarter teaspoon of freshly cracked black pepper. Mix everything well so each shrimp gets coated in those tasty spices. Let them marinate for about 10 minutes. This makes the shrimp juicy and flavorful. Now, heat a non-stick skillet over medium heat. Once it’s hot, add the marinated shrimp in a single layer. Cook them for 2-3 minutes on each side. You’ll know they’re done when they turn pink and opaque. A little char is great too! Once cooked, take them off the heat and set them aside. In a small bowl, combine half a cup of thick Greek yogurt and one tablespoon of mayonnaise. Next, add one tablespoon of fresh lime juice and the zest from one lime. Mix everything together until it’s smooth. Taste it and add a pinch of sea salt if you want. This lime crema is creamy and tangy, perfect for the tacos. For soft tortillas, warm them up. You can use a dry skillet on low heat or microwave them for a few seconds. The goal is to make them warm and easy to fold. This step helps keep your tacos from tearing. Lay out the warm tortillas on a clean surface. In each tortilla, place a generous amount of the cooked shrimp. Then, add a handful of shredded red cabbage. Next, add slices of ripe avocado. Finish it off with a drizzle of the lime crema. To make the tacos pop, sprinkle fresh cilantro leaves on top. This adds color and flavor. Serve the tacos on a bright platter with lime wedges for extra zest. If you have taco holders, use them to keep the tacos upright and inviting. Enjoy the bright flavors and textures in every bite! To get great shrimp, start with fresh or thawed shrimp. Peel and devein them carefully. Marinating is key. Use olive oil and spices to coat the shrimp well. Let them sit for 15 minutes. When cooking, use medium heat. This helps the shrimp cook evenly. Cook for 2-3 minutes on each side. Look for a pink color and slight char. This means they are done and tender. For a smooth and creamy lime crema, use thick Greek yogurt. Mix it with mayonnaise for extra richness. Add fresh lime juice and zest for flavor. The zest really brightens it up. Whisk until it's smooth. If you want it even creamier, add a touch more yogurt or mayo. Taste it before serving. Adjust the salt to your liking for the best flavor. Corn tortillas are my favorite for shrimp tacos. They have a great texture and flavor. Look for small, soft ones. You can warm them in a skillet or microwave. If you want a twist, try flour tortillas. They are softer and can hold more filling. Either option works well. Warmed tortillas make it easier to fold and enjoy your tacos. {{image_4}} To spice up your shrimp tacos, add some heat. You can mix in diced jalapeños or use a spicier chili powder. If you love sizzle, consider using chipotle powder for a smoky kick. This will enhance the flavor and create a wonderful depth. Adjust the spice based on your taste. If you want a vegetarian version of lime crema, swap Greek yogurt with silken tofu. Blend the tofu with lime juice and zest for a smooth texture. Add a pinch of salt to taste. This gives you a creamy base without dairy. It’s a great way to keep the flavor while being plant-based. Toppings can elevate your shrimp tacos. Try adding diced tomatoes for freshness. Pickled red onions give a tangy bite. Fresh corn adds sweetness and crunch. For a unique twist, consider crumbled feta cheese for a salty flavor. You can mix and match toppings to find your favorite combination. Enjoy the fun of creating your perfect taco! You can store leftover shrimp tacos in the fridge. Place them in an airtight container. They will stay fresh for about two days. When you reheat them, the shrimp might lose some texture. To keep them tasty, reheat in a skillet over medium heat. If you have extra shrimp, you can freeze them. First, cook the shrimp as directed. Let them cool completely. Then, place them in a freezer-safe bag. Remove as much air as possible. They will last for about three months in the freezer. When ready to eat, thaw them in the fridge overnight before reheating. Store lime crema in a sealed container in the fridge. It stays fresh for about one week. If it thickens, just stir in a little water or lime juice. For longer storage, you can freeze it in ice cube trays. Once frozen, transfer the cubes to a zip-top bag. This way, you will have small portions ready to use later. You can tell shrimp are cooked when they turn pink and opaque. They should curl into a "C" shape. If they look gray or translucent, they need more time. Cooking shrimp takes about 2-3 minutes per side over medium heat. The shrimp will also be slightly charred when done. Yes, you can use frozen shrimp. Just make sure to thaw them first. You can do this by placing them in the fridge overnight or running them under cold water. Pat them dry before marinating. This way, they will soak up the flavors better. If you don't have Greek yogurt, you can use sour cream. It adds a nice tang and creaminess. You can also use buttermilk for a lighter version. Just remember, these substitutes will change the flavor slightly, but they will still taste great. To make shrimp tacos ahead, prepare the shrimp and lime crema first. You can store them in the fridge until you're ready to eat. Warm the tortillas just before serving to keep them soft. Assemble the tacos right before serving for the best taste. We explored the key ingredients for tasty shrimp tacos and lime crema. You learned how to marinate and cook shrimp perfectly. We also covered how to prepare warm tortillas and assemble the tacos. I shared tips for texture and variations, like spicy options. Lastly, you now know how to store leftovers and keep things fresh. Enjoy making these shrimp tacos. They are simple yet full of flavor. Your next meal can be quick, fun, and delicious.
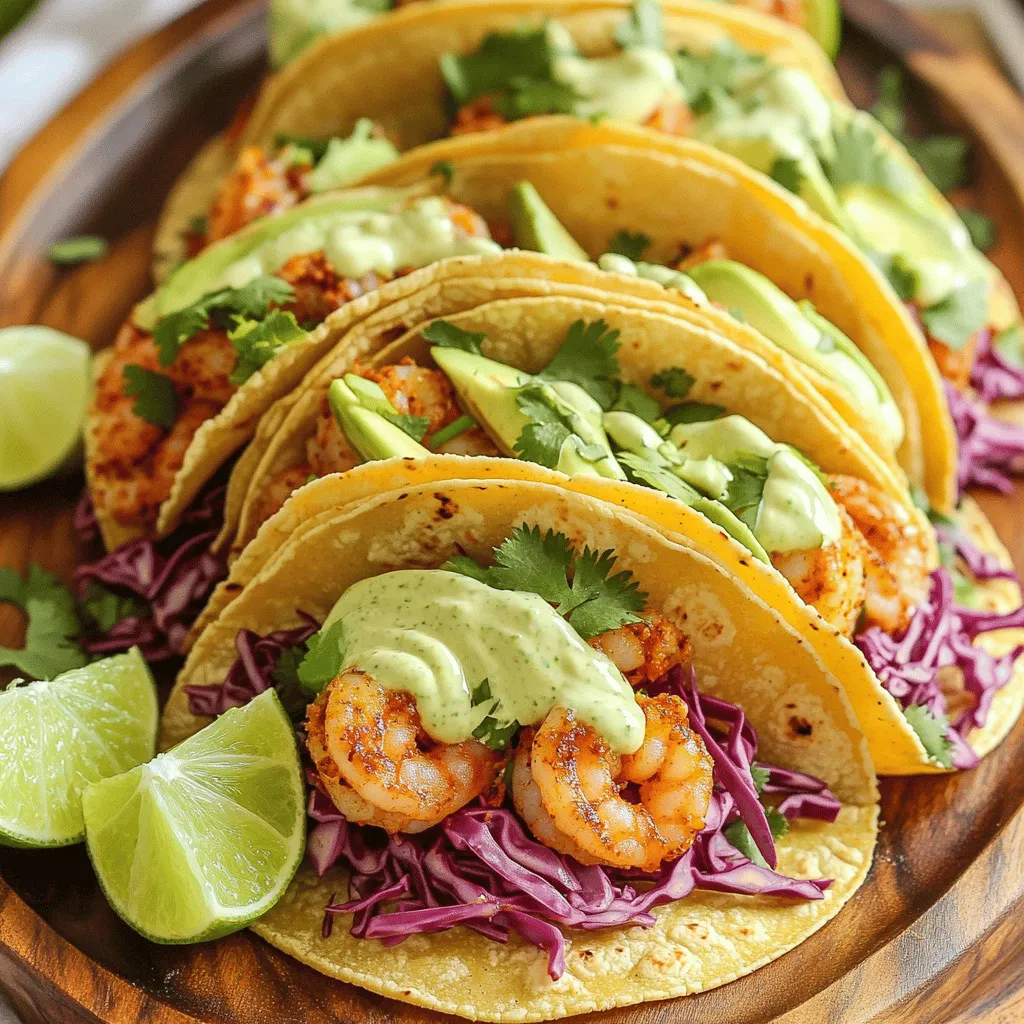
Mouthwatering Shrimp Tacos with Lime Crema Recipe
Are you ready to spice up your dinner routine? These shrimp tacos with lime crema are quick, tasty, and perfect for any taco night! Imagine
For a tasty Slow Cooker Chicken Jambalaya, you will need: - 1.5 lbs boneless, skinless chicken thighs, cut into bite-sized pieces - 1 medium onion, finely diced - 1 green bell pepper, finely diced - 1 red bell pepper, finely diced - 3 cloves garlic, minced - 1 can (14.5 oz) diced tomatoes, undrained - 1 cup low-sodium chicken broth - 2 cups uncooked long-grain rice - 1 tablespoon Cajun seasoning - 1 teaspoon dried oregano - 1/2 teaspoon cayenne pepper (adjust according to heat preference) - Salt and black pepper, to taste - 1 cup frozen peas The chicken thighs bring a rich flavor. The diced peppers and onion add sweetness. Garlic gives depth, while tomatoes keep things moist. Rice absorbs all the lovely juices, making each bite hearty. To make your dish even better, consider these garnishes: - 4 green onions, thinly sliced (for garnish) - Fresh parsley, chopped (for garnish) You can also add more ingredients. Try sliced sausage or cooked shrimp for extra protein. Add more veggies like zucchini or corn for color and crunch. Spices are key to great jambalaya. The Cajun seasoning gives warmth and depth. Dried oregano adds a mild, herby taste. Cayenne pepper lets you control the heat level. Be sure to taste as you cook. Adjust the salt and pepper to make the dish perfect for you. If you love spice, feel free to add more cayenne! This way, you make the jambalaya your own. Start by cutting 1.5 lbs of boneless, skinless chicken thighs into bite-sized pieces. This makes them easy to eat and cook. Next, finely dice one medium onion, one green bell pepper, and one red bell pepper. The colors add a nice touch and flavor. Mince three cloves of garlic to give your dish a rich aroma. In your slow cooker, mix the chicken, onion, and both bell peppers. Add the minced garlic next. Pour in one can of undrained diced tomatoes and one cup of low-sodium chicken broth. This keeps the dish moist and flavorful. Then, stir in two cups of uncooked long-grain rice. For spice, add one tablespoon of Cajun seasoning, one teaspoon of dried oregano, and half a teaspoon of cayenne pepper. Adjust the cayenne based on how spicy you like it. Season with salt and black pepper to taste. Stir everything well to blend the flavors. Cover your slow cooker with a lid. Set it to low heat for about six hours. If you need it done quicker, set it to high heat for around three hours. Near the end, taste the jambalaya. Adjust the seasoning if needed. About 15 minutes before serving, add one cup of frozen peas to the cooker. This adds color and texture. Once the chicken is cooked and the rice has absorbed all the liquid, turn off the slow cooker. Let it sit for a few minutes to enhance the flavors. To make your jambalaya burst with flavor, start with good ingredients. Use fresh vegetables like onion and bell peppers. They add depth and sweetness. The Cajun seasoning is key; it gives the dish its signature taste. You can adjust the cayenne pepper for more heat. If you want a smoky flavor, consider adding a bit of smoked paprika. Always check the seasoning before serving. A little salt can brighten up the dish. One common mistake is cooking the rice for too long. This can make it mushy. Stick to the cooking times in the recipe. Another mistake is not tasting as you go. Always taste your dish to adjust flavors. Be careful with salt; the broth may add enough. Adding peas too early can make them lose their color. Stir them in just before serving for a pop of green. If you have a large group, you can easily scale this recipe. Double the ingredients, but keep the cooking time the same. The slow cooker can handle larger amounts. Just make sure not to overfill it. Leave some space at the top for steam. You can also serve jambalaya with sides like cornbread or salad to round out the meal. {{image_4}} You can easily swap chicken for shrimp or sausage. If using shrimp, add them in the last 15 minutes. This keeps the shrimp tender and juicy. For sausage, slice it up and add it with the chicken. Andouille sausage gives a nice kick. You can mix and match proteins to suit your taste. To make a vegetarian or vegan jambalaya, skip the chicken. Use vegetable broth instead of chicken broth. Add more veggies, like zucchini or mushrooms, for depth. You can also add beans for protein. Try chickpeas or black beans for a hearty touch. To adjust the heat, play with the cayenne pepper. Add less for a milder dish. If you want more heat, add a bit more. You can also include hot sauce when serving. This lets everyone customize their heat level. Don’t forget fresh herbs for flavor without extra spice! Keep your leftover jambalaya in an airtight container. This keeps the meal fresh. Make sure it cools down to room temperature first. Store it in the fridge for up to three days. If you want to keep it longer, consider freezing it. When you're ready to eat, take out your jambalaya. You can reheat it in a pot over medium heat. Stir it often. Add a splash of chicken broth if it seems too dry. You can also use a microwave. Heat it in a microwave-safe bowl for about two to three minutes. Stir halfway through to heat evenly. To freeze your jambalaya, let it cool completely. Then, place it in a freezer-safe container. You can also use freezer bags for easy storage. Remove as much air as possible before sealing. This helps prevent freezer burn. Jambalaya can last up to three months in the freezer. When you’re ready to eat, thaw it in the fridge overnight before reheating. Yes, you can use brown rice. It will take longer to cook. Brown rice needs about 1.5 times more liquid than white rice. If you switch to brown rice, add more chicken broth. Also, increase the cooking time to about 7 to 8 hours on low or 4 to 5 hours on high. The texture will be nuttier and chewier, which some people love. To adjust spice, start with less cayenne pepper. You can always add more later. If you want it milder, skip the cayenne. For extra heat, add more Cajun seasoning. You can also toss in hot sauce when serving. Taste your jambalaya before serving to find the heat just right for you. Jambalaya is hearty, so keep sides light. A simple green salad works well. You can also serve crusty bread to soak up the juice. Cornbread adds a nice sweet touch. For something unique, try serving with coleslaw for crunch. Each side will complement the flavors of your jambalaya perfectly. In summary, we covered the main ingredients, steps, and tips for making slow cooker chicken jambalaya. You learned how to prep the chicken and veggies, combine them, and cook them right. We also explored variations to fit your taste and how to store leftovers well. Remember, cooking can be fun and flexible. Experiment with different proteins and spices. Enjoy making this dish and sharing it with others!
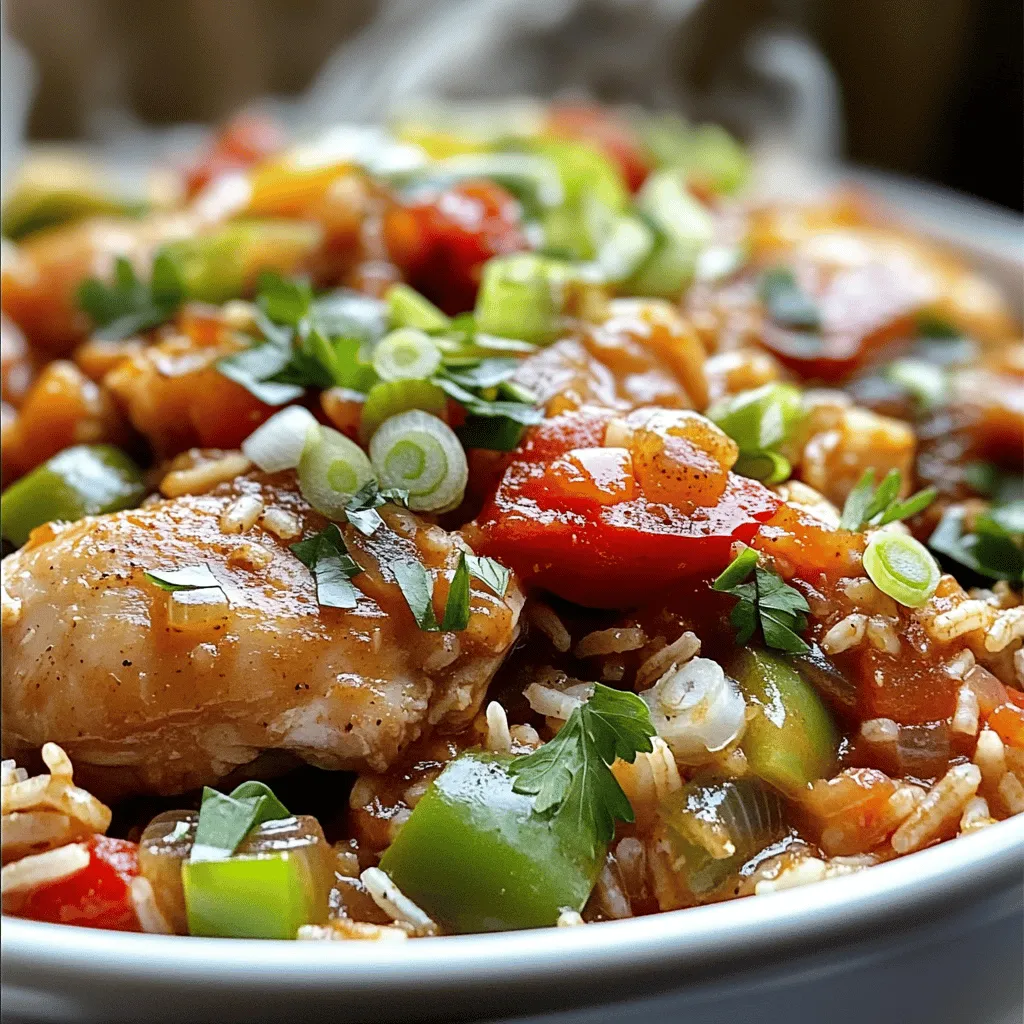
Slow Cooker Chicken Jambalaya Flavorful and Easy Meal
Looking for a meal that’s both flavorful and easy? Try my Slow Cooker Chicken Jambalaya! This dish brings together tender chicken, seasoned veggies, and rice,
To make Million Dollar Chicken Casserole, gather these ingredients: - 2 cups cooked chicken, shredded - 1 cup cooked rice (white or brown) - 1 cup cream of chicken soup (homemade or store-bought) - 1 cup sour cream - 1 cup shredded cheddar cheese (sharp or mild) - 1 cup frozen mixed vegetables (peas, corn, and carrots) - 1 teaspoon garlic powder - 1 teaspoon onion powder - 1 teaspoon smoked paprika - Salt and pepper, to taste - 1 cup crushed buttery crackers (like Ritz) - 2 tablespoons melted butter You can swap some ingredients for different flavors or dietary needs. Here are some ideas: - Chicken: Use turkey or rotisserie chicken. - Rice: Quinoa or cauliflower rice works well. - Cream of Chicken Soup: Try a homemade version or use cream of mushroom. - Sour Cream: Greek yogurt can substitute for a tangy twist. - Cheddar Cheese: Mozzarella or pepper jack can add a unique taste. - Mixed Vegetables: Fresh veggies like bell peppers or broccoli are tasty options. - Crackers: Use gluten-free crackers for a gluten-free dish. The right seasonings make this casserole shine. Here’s what to use: - Garlic Powder: Adds depth and a savory note. - Onion Powder: Enhances the overall flavor profile. - Smoked Paprika: Provides a warm, smoky taste. - Salt and Pepper: Season to your liking for balance. Feel free to adjust these seasonings based on your taste. Enjoy mixing and matching! First, heat your oven to 350°F (175°C). This step is key for even cooking. While the oven warms up, grab a 9x13-inch baking dish and grease it lightly. This helps prevent sticking. In a big bowl, combine 2 cups of shredded chicken and 1 cup of cooked rice. Add 1 cup of cream of chicken soup and 1 cup of sour cream. Mix these until they blend well and look creamy. Then, toss in 1 cup of frozen mixed vegetables, 1 teaspoon of garlic powder, 1 teaspoon of onion powder, and 1 teaspoon of smoked paprika. Don’t forget to add salt and pepper to taste! Stir well until everything is mixed evenly. Pour the creamy mixture into the greased baking dish. Spread it out flat so it cooks evenly. In another bowl, mix 1 cup of crushed buttery crackers with 2 tablespoons of melted butter. Toss gently until the crumbs are moistened. Now, sprinkle this mixture over the chicken filling. This gives a tasty crunch on top. Bake in the oven for 25-30 minutes. Look for bubbling edges and a golden top. After baking, take the casserole out and let it cool for about 5-10 minutes. This wait helps the flavors blend. Serve it warm right from the dish. For a fresh touch, add some chopped parsley or green onions on top before you dig in. Enjoy every bite! To make your Million Dollar Chicken Casserole super creamy, use fresh ingredients. I like to mix homemade cream of chicken soup with sour cream. This blend gives a rich texture. If you use store-bought soup, choose a brand with less sodium. It helps keep the flavor fresh. Always combine the soup and sour cream first. This way, you avoid lumps in your filling. Stir until the mixture is smooth and well-blended. A crunchy topping is key for this dish. I recommend using buttery crackers like Ritz. For the best crunch, crush them just before you use them. Mix the crushed crackers with melted butter. This adds flavor and ensures they crisp up nicely. Spread the topping evenly over the casserole. Make sure to cover all the filling. This way, every bite has that delightful crunch. To save time, prep ahead! You can cook the chicken and rice the day before. Store them in the fridge. Also, chop any veggies and measure out your ingredients in advance. When you're ready to cook, just mix everything in one bowl. This makes the cooking process quick and easy. If you want, you can even assemble the casserole a few hours ahead. Just cover it and keep it in the fridge until you're ready to bake. {{image_4}} You can switch out the chicken for turkey. It tastes great and makes the dish lighter. If you want a vegetarian version, use cooked lentils or chickpeas. Both options pack in protein and flavor. You can also try tofu for a different twist. Just make sure it’s well-seasoned. Feel free to mix in different veggies. You can use broccoli, bell peppers, or green beans. These add color and crunch. Spinach or kale can also work well. Frozen or fresh, both options are perfect. Just chop them small for even cooking. Cheese is key to a tasty casserole. While cheddar is classic, you can explore other types. Try mozzarella for a stretchier texture. Pepper jack adds a fun kick with its spice. For a rich taste, use gouda or fontina. Mixing cheeses can create a unique flavor profile. Just remember to keep some for the topping! Store your Million Dollar Chicken Casserole in an airtight container. Let the casserole cool down first. Once cooled, cover it tightly. This keeps it fresh for up to three days in the fridge. For best taste, try to eat it within two days. When you are ready to enjoy your leftovers, preheat your oven to 350°F (175°C). Place the casserole in a baking dish. Cover it with foil to keep moisture in. Heat for about 20-25 minutes. If you want a crunchy top again, remove the foil for the last five minutes. You can also use a microwave for quick reheating. Heat in a microwave-safe dish for about 2-3 minutes. Stir halfway through to ensure even warmth. If you want to save some casserole for later, freezing is a great option. First, let the casserole cool completely. Then, cut it into portions for easy thawing. Wrap each piece tightly in plastic wrap, then place them in a freezer-safe bag. You can freeze it for up to three months. To thaw, move it to the fridge overnight. Reheat as mentioned above, and enjoy your delicious meal! Yes, you can prepare this casserole ahead of time. Mix all the ingredients in the baking dish, then cover it tightly. Store it in the fridge for up to two days. When you're ready to bake, just remove it from the fridge and let it sit for 30 minutes. This helps it cook evenly. Then, bake it as normal. Million Dollar Chicken Casserole is great on its own, but some sides really enhance the meal. Here are a few ideas: - A simple green salad with vinaigrette - Steamed broccoli or green beans - Garlic bread for a nice crunch - Mashed potatoes for extra comfort Yes, you can make some easy swaps. Use low-fat sour cream and cream of chicken soup. You can also add more veggies like spinach or kale. For a lighter version, replace the chicken with shredded rotisserie chicken. This keeps the flavor and cuts down on fat. In this blog post, we covered all you need to know to make a delicious chicken casserole. We explored the key ingredients and helpful substitutes. You learned how to prepare, mix, and bake your dish step by step. I shared tips for the best texture and shortcuts for busy cooks. Plus, the variations allow you to customize your meal. Don't forget proper storage to enjoy leftovers later. With these insights, you're ready to create a tasty, comforting dish everyone will love. Enjoy every bite of your cooking journey!
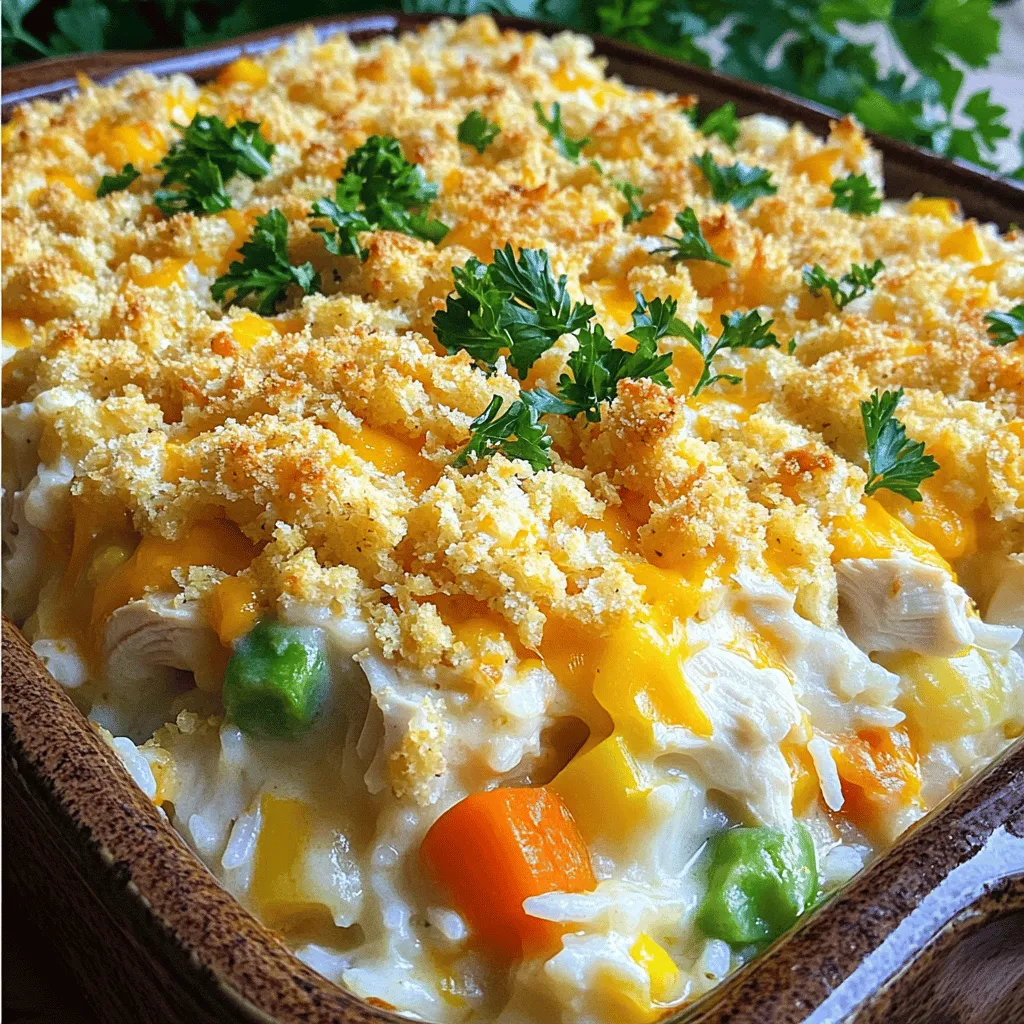
Million Dollar Chicken Casserole Delightful and Hearty
If you’re searching for a dish that’s both delightful and hearty, look no further than Million Dollar Chicken Casserole. This comforting meal is simple to
- 2 packs instant ramen noodles - 4 cups vegetable broth - 4 cloves garlic, finely minced - 1 tablespoon fresh ginger, grated - 2 tablespoons soy sauce - 2 teaspoons chili paste (adjust for desired spiciness) - 1 tablespoon sesame oil - 1 cup fresh spinach or bok choy - 1 carrot, peeled and julienned - 2 green onions, sliced - 1 soft-boiled egg (optional, for added richness) - Sesame seeds, for garnish Gather these simple ingredients before you start cooking. Instant ramen noodles provide a quick base. The vegetable broth brings depth and warmth. Garlic and ginger add a punch of flavor that you will love. Soy sauce and chili paste create a savory and spicy balance. Fresh vegetables not only add color but also nutrients. You can add a soft-boiled egg for creaminess and richness. Lastly, sesame seeds give a nice crunch on top. This dish is quick, easy, and full of flavor. You can find all these items at your local grocery store. Enjoy cooking! First, heat 1 tablespoon of sesame oil in a large pot over medium heat. When the oil is hot, add 4 cloves of minced garlic and 1 tablespoon of grated ginger. Sauté them for about 1 to 2 minutes. You want them to smell great but not brown. Next, pour in 4 cups of vegetable broth, stirring well. Raise the heat until the broth simmers gently. Once it simmers, add 2 tablespoons of soy sauce and 2 teaspoons of chili paste. Adjust the chili paste based on how spicy you like it. Now, open the two packs of instant ramen noodles. Add them to the bubbling broth. Cook for about 3 to 4 minutes, following the package directions. Make sure the noodles become tender but still firm. In the last minute of cooking, add 1 cup of fresh spinach or bok choy and 1 peeled, julienned carrot. Stir gently so the greens wilt and look bright. Finally, ladle the ramen mixture into two bowls. Make sure each bowl has a good mix of noodles and veggies. If you like, slice a soft-boiled egg in half and place it on top for extra creaminess. Finish by sprinkling chopped green onions and sesame seeds on top for a nice crunch and pretty look. To customize the chili paste, start with less than two teaspoons. You can add more as you taste. If you want a mild dish, try using just soy sauce and ginger. Instead of chili paste, consider using a splash of sweet chili sauce for a hint of heat without the burn. For a soft-boiled egg, bring water to a boil. Gently lower the egg in using a spoon. Boil for six to seven minutes, then cool it in ice water. This method gives you a creamy yolk. Keep an eye on the time for the best result. To elevate the taste, add mushrooms or bok choy to your ramen. You can also stir in a spoonful of miso paste for depth. Homemade broth will give you richer flavor than store-bought. Simmer vegetable scraps for a simple broth that tastes great. {{image_4}} You can make TikTok Spicy Garlic Ramen even better by adding protein. Here are a few great options: - Tofu: Use firm tofu for a plant-based choice. Just cube and pan-fry it until golden. - Chicken: Add cooked chicken for a heartier meal. Shred or dice it before mixing in. - Shrimp: Cook shrimp right in the broth for a quick, tasty addition. They only take a few minutes! Each protein changes the dish's flavor and texture, so pick what you love! Feel free to swap out the veggies based on what you have. Here are some ideas: - Mushrooms: They add a nice umami flavor. Slice and sauté them with garlic. - Bell Peppers: These add sweetness and color. Slice them thin for quick cooking. - Zucchini: Spiralize or julienne for a fun twist. They cook fast and add crunch. You can also change up the veggies with the seasons. Fresh peas in spring or squash in the fall can keep things interesting! If you need gluten-free ramen, you can still enjoy this dish. Here’s how: - Gluten-Free Noodles: Many brands offer rice noodles or gluten-free ramen. Check your local store! - Adjusting Broth: Make sure your broth is gluten-free. Use tamari instead of soy sauce for a safe swap. These options ensure everyone can enjoy a bowl of this flavorful ramen! To store leftovers, let the ramen cool first. Place it in an airtight container. This keeps it fresh and safe. You can store it in the fridge for up to three days. When you want to eat it, just reheat on the stove. To maintain flavor and texture, add a splash of broth or water when reheating. This keeps the noodles from drying out. Stir well to mix everything evenly. You can freeze this ramen, but it works best without the noodles. First, cool the broth and veggies completely. Pour them into a freezer-safe bag or container. Remove as much air as possible before sealing. When you want to eat it, thaw the broth overnight in the fridge. For reheating, heat it in a pot over medium heat. Cook fresh noodles separately and add them in. This keeps the noodles from getting mushy. The maximum storage time for this ramen in the fridge is three days. If you freeze it, you can keep it for up to three months. Make sure to label the bag or container with the date. This way, you know when to use it. TikTok Spicy Garlic Ramen is a trendy, easy dish that went viral online. It features instant ramen noodles, fresh garlic, and a spicy broth. Many home cooks share their unique twists on this recipe. The combination of flavors makes it a favorite for quick meals. Yes! You can easily make this recipe vegetarian. Simply use vegetable broth instead of chicken broth. For protein, add tofu or tempeh. You can also swap out the soft-boiled egg for additional veggies, like mushrooms or bell peppers. To enhance the broth flavor, use homemade vegetable broth if possible. You can also add a tablespoon of miso paste for depth. For more umami, try adding a splash of cooking wine or a bit of dried mushrooms. These small changes make a big difference. You can serve this ramen with a side of spring rolls or dumplings. A simple salad with sesame dressing also pairs well. If you want something crunchy, try crispy wontons or tempura vegetables. These sides add variety to your meal. Yes, you can use different noodles! Udon or soba noodles work well. Rice noodles are a good gluten-free option. Just make sure to adjust the cooking time based on the type of noodles you choose. Enjoy experimenting with different textures. This blog post covered how to make a tasty ramen dish. We explored the key ingredients, from instant noodles to fresh vegetables. I shared step-by-step instructions for cooking and plating. We looked at tips for adjusting spice levels and achieving the perfect soft-boiled egg. You can enhance your ramen with different proteins and seasonal veggies. Get creative and make this recipe your own. Ramen is fun and flexible, making it easy to suit your tastes. Enjoy your cooking!
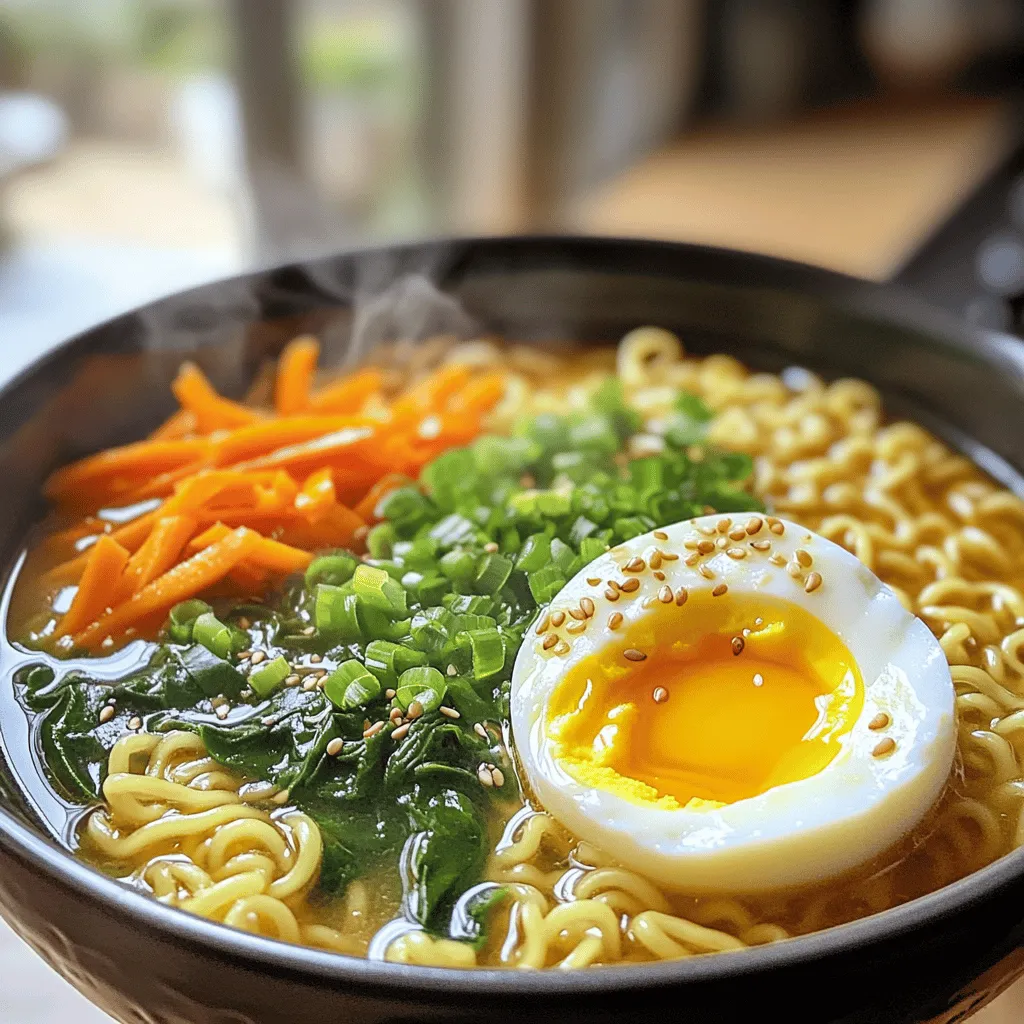
TikTok Spicy Garlic Ramen Simple and Flavorful Dish
Are you ready to spice up your dinner plans? TikTok Spicy Garlic Ramen is a simple yet delicious dish that brings the heat and flavor
- Feta cheese details: You need 1 block (200g) of feta cheese. Feta adds a creamy texture and rich flavor. It melts well and combines with other ingredients to make a delicious sauce. - Cherry tomatoes and their role: Use 3 cups of cherry tomatoes. These tomatoes burst while baking, creating a sweet, juicy sauce. Their freshness balances the salty feta and enhances the overall taste. - Additional seasonings and toppings: You will need 3 cloves of minced garlic, ½ teaspoon of red pepper flakes, and 1 tablespoon of extra virgin olive oil. Add salt and freshly cracked black pepper to taste. Fresh basil leaves will garnish your dish, giving a fragrant touch. Grated Parmesan cheese is optional for serving, adding more flavor if desired. Start by setting your oven to 400°F (200°C). This heat helps the feta and tomatoes cook just right. While the oven warms up, take a medium baking dish. Place the block of feta cheese in the center. Next, spread the cherry tomatoes all around the feta. Add minced garlic on top for extra flavor. Bake your dish for about 30 minutes. Look for the feta to get soft and creamy. The tomatoes should burst open, making a tasty sauce. This step is key. The flavors mix and get better as they bake together. While the feta and tomatoes bake, boil a big pot of salted water. Add your pasta and cook it until it’s al dente. This means it will be firm but not hard. Remember to save about ½ cup of the pasta water before you drain it. This water helps later on. After baking, take the dish out of the oven. Use a fork or spoon to mash the feta and burst tomatoes. This creates a smooth sauce. Now, add the drained pasta right into the dish. Mix everything well so the pasta gets coated in the sauce. If it seems too thick, add some of that reserved pasta water. Stir until you get the right consistency. To make this dish your own, feel free to adjust the spices. You can add more red pepper flakes for a spicy kick. If you prefer a milder taste, use less. Fresh herbs like thyme or oregano can also enhance the flavor. Try adding a squeeze of lemon juice before serving for a bright finish. This pasta dish pairs well with various toppings. You can add roasted vegetables, olives, or sun-dried tomatoes. A sprinkle of toasted pine nuts gives a nice crunch. For side dishes, serve with garlic bread or a fresh salad to balance the meal. A crisp green salad adds freshness and contrasts with the creamy pasta. You only need a few essential tools to make this recipe. A baking dish is crucial for roasting the feta and tomatoes. Use a pot for boiling the pasta. A colander helps drain the pasta easily. A fork or spoon is handy for mixing everything. If you want to save time, a garlic press can make mincing garlic quicker. {{image_4}} You can change the cheese in this recipe. Try goat cheese for a tangy taste. Cream cheese adds a creamy twist. Use mozzarella for a milder flavor. If you want a different base, swap cherry tomatoes for grape tomatoes. You can also use canned tomatoes if fresh ones are not available. They’ll still create a tasty sauce. To make this dish vegan or dairy-free, replace feta with a plant-based cheese. You can also make your own cashew cheese at home. Just blend soaked cashews with lemon juice and nutritional yeast. For gluten-free options, use gluten-free pasta. There are many kinds, like rice or chickpea pasta. They cook well and taste great. Adding vegetables boosts nutrition. Try spinach, zucchini, or bell peppers. Toss them in with the tomatoes before baking. You can also add proteins like chicken or shrimp. Cook them separately and mix them in with the pasta. This makes the dish heartier and more filling. To store leftovers, let the pasta cool first. Place it in an airtight container. This keeps it fresh and safe to eat. You can store it in the fridge for up to three days. After that, the taste and texture may change. The shelf life of stored pasta mainly depends on its ingredients. Since this dish has feta and tomatoes, check for any signs of spoilage. If the pasta looks or smells off, it is best to toss it. For the best taste, reheat your pasta on the stove. Add a splash of water or olive oil to help revive the dish. Heat it gently over low heat, stirring often. This keeps the sauce creamy and avoids burning. If you prefer the microwave, use a microwave-safe bowl. Cover it with a damp paper towel to keep moisture in. Heat in short bursts, stirring after each. This method helps maintain the pasta's texture. You can prepare the feta and tomatoes in advance. Just layer them in a baking dish. Drizzle the olive oil and season them, then cover with plastic wrap. Store it in the fridge for up to one day. Cook the pasta just before baking. For best storage, keep the dish covered. This prevents any strong smells from the fridge. When ready to bake, let it sit at room temperature for a few minutes before cooking. Baked Feta Pasta took off on social media. It became a viral hit on platforms like TikTok and Instagram. People love how easy it is to make. The creamy feta and sweet tomatoes create a perfect blend. The flavor profile is rich and comforting. It offers a balance of savory and slightly sweet notes. This dish appeals to a wide range of taste buds. It is also visually appealing, making it great for sharing. Yes, you can switch up the pasta. Options like spaghetti, farfalle, or even gluten-free pasta work well. Just follow the cooking time on the package for al dente results. Different shapes add fun to the dish. For example, fusilli holds sauce well, while penne is easy to scoop. Feel free to experiment with whatever pasta you have on hand. Baked Feta Pasta is great for meal prep. You can make a big batch and store it for later. It’s easy to portion out into containers for lunches or dinners. However, consider that the dish may lose some texture when reheated. Ideal serving sizes are about one to one and a half cups per meal. This keeps it satisfying without being too heavy. This blog post explored the delicious Baked Feta Pasta. We covered key ingredients, like feta cheese and cherry tomatoes, and shared simple steps for baking and cooking pasta. I offered tips to enhance flavors and served ideas to improve your meal. Whether you try variations or store leftovers, this dish is both flexible and fun. I hope you enjoy making it as much as I do. Happy cooking!
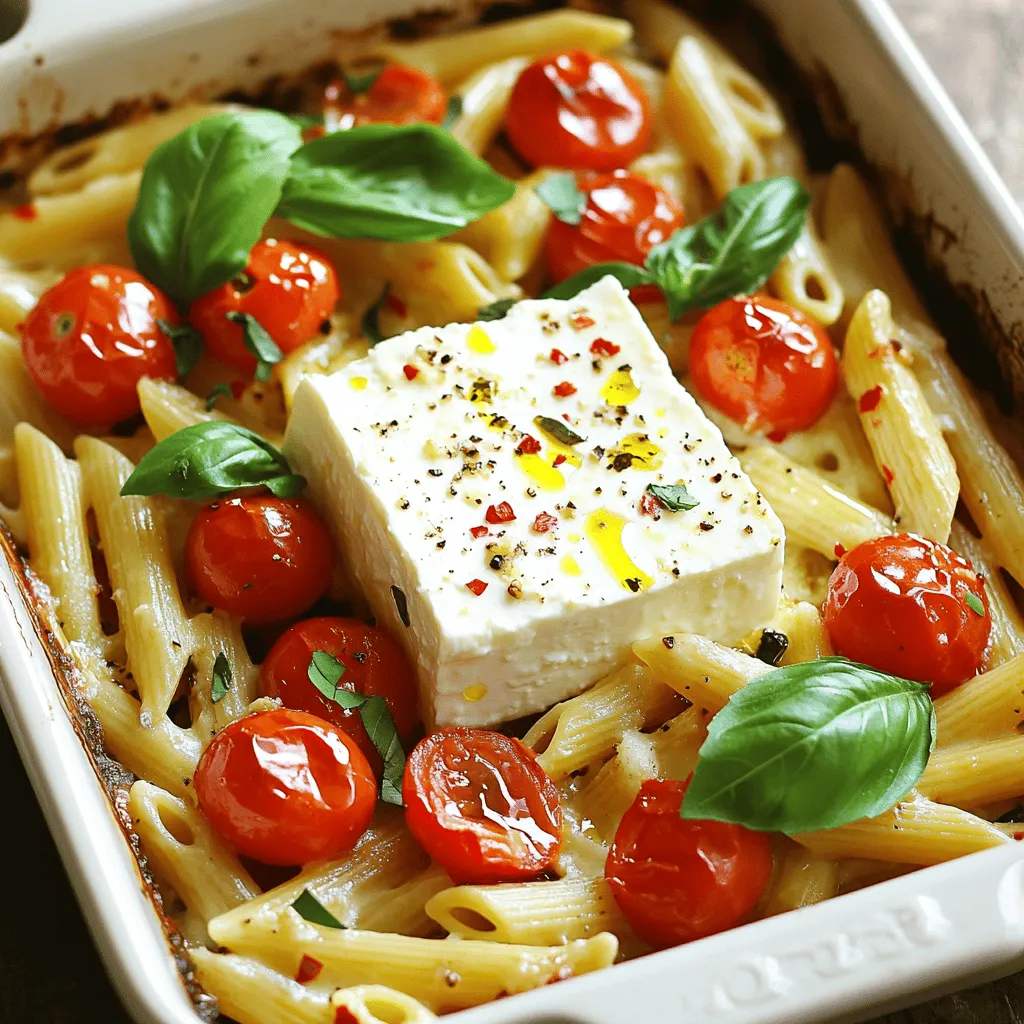
Viral Baked Feta Pasta Simple and Tasty Recipe
Baked feta pasta took the internet by storm, and it’s not hard to see why! This simple dish brings together creamy feta, juicy tomatoes, and
To make loaded potato soup, you will need these key ingredients: - 4 large russet potatoes, peeled and diced into 1-inch pieces - 1 medium onion, finely chopped - 3 cloves garlic, minced - 4 cups chicken or vegetable broth - 1 cup heavy cream - 1 cup sharp cheddar cheese, shredded - 1/2 cup sour cream - 4 slices turkey bacon, cooked until crispy and crumbled (optional) - 1/4 cup green onions, chopped (for garnish) - 1 teaspoon salt - 1/2 teaspoon black pepper - 1 teaspoon smoked paprika - 1 tablespoon olive oil These ingredients create a rich and hearty soup that warms you up on cold days. If you want a vegetarian version, here are some easy swaps: - Omit the turkey bacon. - Use vegetable broth instead of chicken broth. - You could add mushrooms or extra veggies for more flavor. These changes keep the soup delicious while making it vegetarian-friendly. Garnishing makes your soup look great and adds flavor. Here are some ideas: - Top with extra shredded cheddar cheese. - Add more crumbled bacon for crunch. - Sprinkle chopped green onions for freshness. - Drizzle with a bit of extra cream for richness. These garnishes make your loaded potato soup an eye-catching dish. {{ingredient_image_2}} Start by heating the olive oil in a large pot over medium heat. Once hot, add the finely chopped onion. Stir it often for about five minutes. You want it to become soft and clear. Next, add the minced garlic and stir for one more minute. Be careful not to burn it. The smell of garlic will fill your kitchen, and it’s delightful! Now it’s time for the potatoes! Add your diced russet potatoes to the pot along with the broth. Sprinkle in the salt, black pepper, and smoked paprika. This will add a lovely flavor. Turn up the heat until it starts to boil. After that, reduce the heat to low. Let it simmer for about 15 to 20 minutes. Check if the potatoes are fork-tender. You want them soft enough to mash easily. Once the potatoes are cooked, it’s time to blend. You can use an immersion blender to puree about half of the soup. This keeps some chunks for texture. If you don’t have an immersion blender, carefully transfer half the soup to a regular blender. Blend it until smooth, then pour it back into the pot. This gives the soup a nice creamy feel while keeping some potato pieces. Now your base is ready for the next steps! To get a creamy soup, blending is key. I like to blend half the soup. This keeps some potato chunks for texture. Use an immersion blender for convenience. If you don’t have one, transfer half to a regular blender. Just be careful with hot liquids. You can add the heavy cream slowly. This helps to avoid curdling. Stir gently. Let the soup heat up but do not boil it after adding cream. This keeps it smooth and rich. For deeper flavor, I always use smoked paprika. It adds warmth and a hint of smokiness. Don't forget the salt and pepper; they bring out the taste of the potatoes. If you want a richer taste, try adding more cheese. Sharp cheddar gives a nice, bold kick. Fresh herbs like chives or parsley can also brighten the dish. They add a fresh note that balances the creaminess. A large pot is a must for this soup. It gives you enough space to cook without splashes. An immersion blender saves time and clean-up. A standard blender works too, but it takes longer. For easy sautéing, use a wooden spoon. It helps mix everything without scratching your pot. You’ll also need measuring cups and spoons for accuracy. These tools help ensure your loaded potato soup comes out perfect every time. Pro Tips Use a Variety of Potatoes: Different potato types can add unique flavors and textures to your soup. Consider mixing russets with Yukon Golds for creaminess. Adjust the Thickness: If you prefer a thicker soup, blend more of the potato mixture. For a thinner consistency, add extra broth or cream. Flavor Boosting: Enhance the flavor by adding herbs such as thyme or rosemary during the simmering process for a fragrant touch. Garnish Creatively: Elevate your presentation by using a variety of toppings like crispy onions, fresh herbs, or a dollop of flavored sour cream. {{image_4}} You can make a dairy-free version of this soup. Start by swapping heavy cream with coconut milk. Use a non-dairy cheese for a cheesy flavor. You can also add nutritional yeast for a cheesy taste without dairy. For the sour cream, try cashew cream or a dairy-free yogurt. This way, everyone can enjoy a warm bowl of soup. Want to add some heat? Use jalapeños or red pepper flakes to spice things up. You can also stir in hot sauce while cooking for a kick. If you love smoky flavors, add chipotle peppers in adobo sauce. They will give your soup a rich, deep taste. For an even bolder twist, garnish with spicy salsa or pepper jack cheese. Adding more veggies makes this soup healthy and colorful. Carrots and celery work great in the base. Add them along with the onions and garlic. You can also toss in some spinach or kale at the end. They wilt quickly and add nutrients. For a burst of flavor, try adding roasted corn or diced bell peppers. These ingredients make the soup more filling and tasty. Storing your loaded potato soup is easy. First, let the soup cool to room temperature. Next, pour it into an airtight container. Seal the container tightly. You can keep the soup in the fridge for up to four days. If you have added bacon, store it in a separate container. This helps keep the bacon crispy. Freezing loaded potato soup is a great way to save it for later. Start by letting the soup cool completely. Then, use freezer-safe containers or bags. Pour in the soup, leaving some space at the top for expansion. Seal the containers tightly. Label them with the date. You can freeze the soup for up to three months. When you are ready to eat it, thaw it overnight in the fridge. Reheating your loaded potato soup is simple. For the best taste, use the stove. Pour the soup into a pot and heat it over low to medium heat. Stir it often to prevent sticking. You can also add a splash of broth or cream if it seems thick. If you prefer the microwave, use a microwave-safe bowl. Heat in short bursts, stirring in between. This helps the soup heat evenly. Enjoy your warm, creamy delight! Yes, you can make loaded potato soup ahead of time. It tastes even better the next day! To do this, follow the recipe up to the point of adding cream and cheese. Let the soup cool to room temperature, then store it in an airtight container in the fridge. When you’re ready to serve, heat it on the stove. Stir in the cream and cheese just before serving for that creamy goodness. Here are some common mistakes to avoid when making loaded potato soup: - Not cooking the onions enough: Cook them until they are soft and sweet for the best flavor. - Overcooking the potatoes: They should be fork-tender, but not mushy. Check them often. - Skipping the blending step: Blending gives the soup a nice texture. Don’t skip it! - Adding cheese too fast: Stir it in slowly to ensure it melts evenly and doesn’t clump. To make loaded potato soup gluten-free, use gluten-free broth. Most chicken or vegetable broths are gluten-free, but check the label to be sure. Also, make sure any bacon or toppings you use are gluten-free. With these simple swaps, you can enjoy this creamy delight without worry. You now have a clear path to making loaded potato soup. We covered ingredients, from detailed lists to vegetarian swaps. You learned how to prepare, cook, and customize your soup. Tips and tricks for creaminess and flavor enhancement help you shine in the kitchen. We even explored variations, storage, and common FAQs to ease your cooking journey. Enjoy your delicious dish, and don’t shy away from making it your own! Happy cooking!
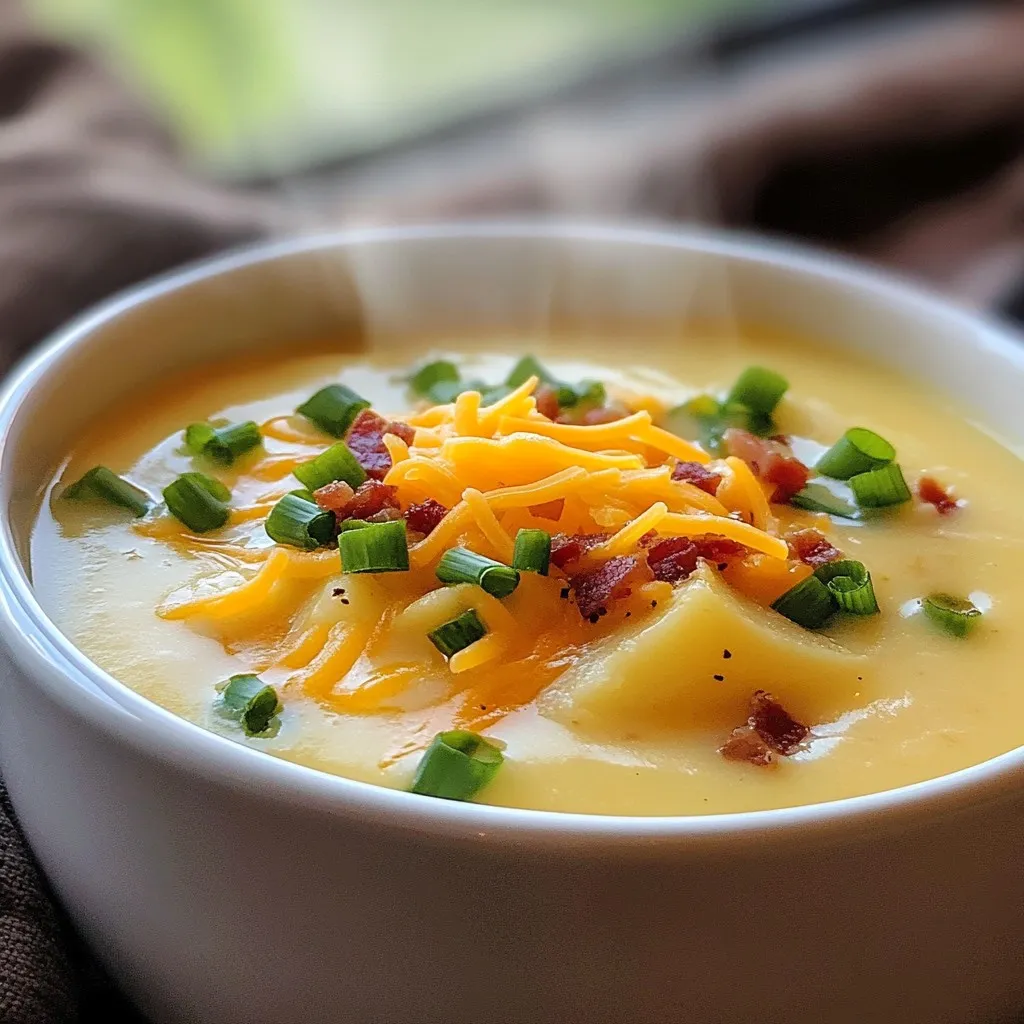
Loaded Potato Soup Creamy and Comforting Delight
Looking for a cozy meal that warms your soul? Let’s dive into my Loaded Potato Soup! This creamy, comforting delight is perfect for chilly days