Dinner
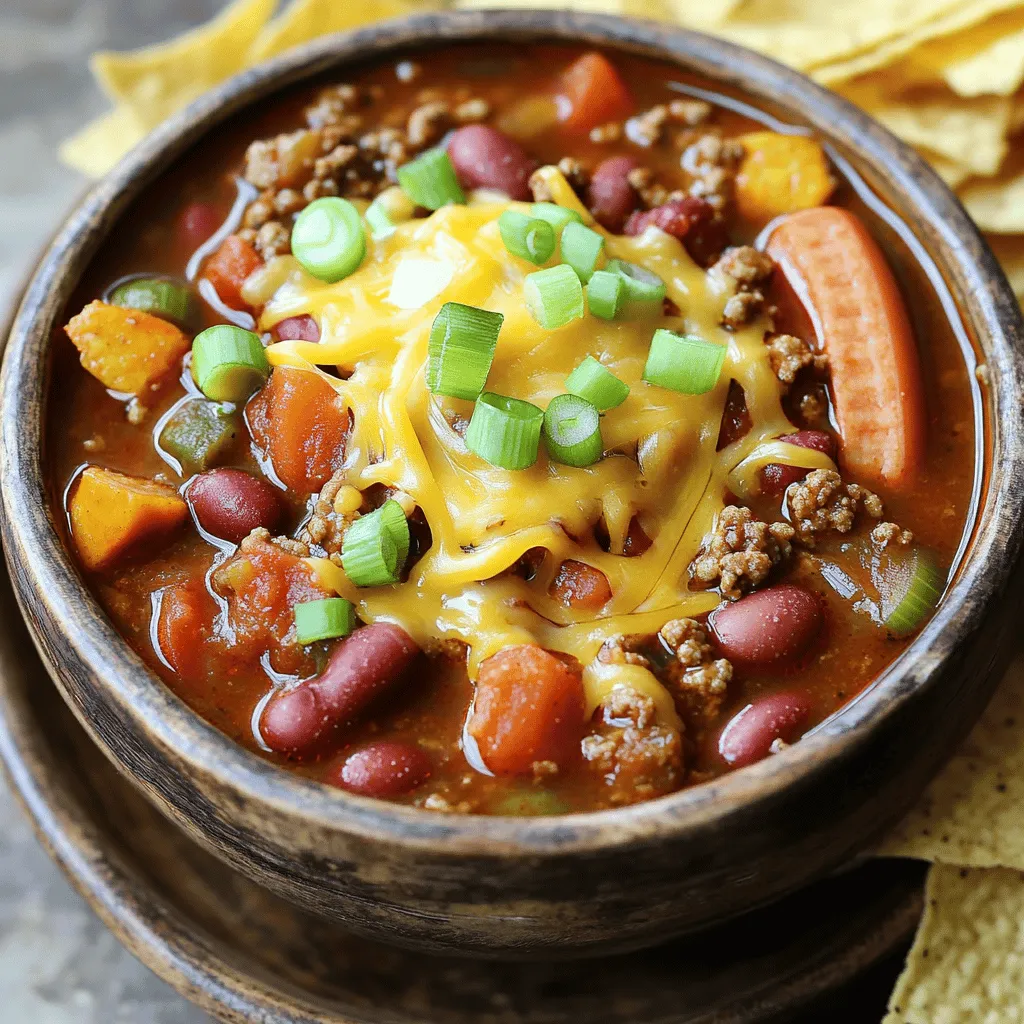
Rich Hot Dog Chili Hearty and Flavorful Recipe
Looking for a dish that’s both hearty and easy to make? This Rich Hot Dog Chili recipe hits the spot! With simple ingredients like beef
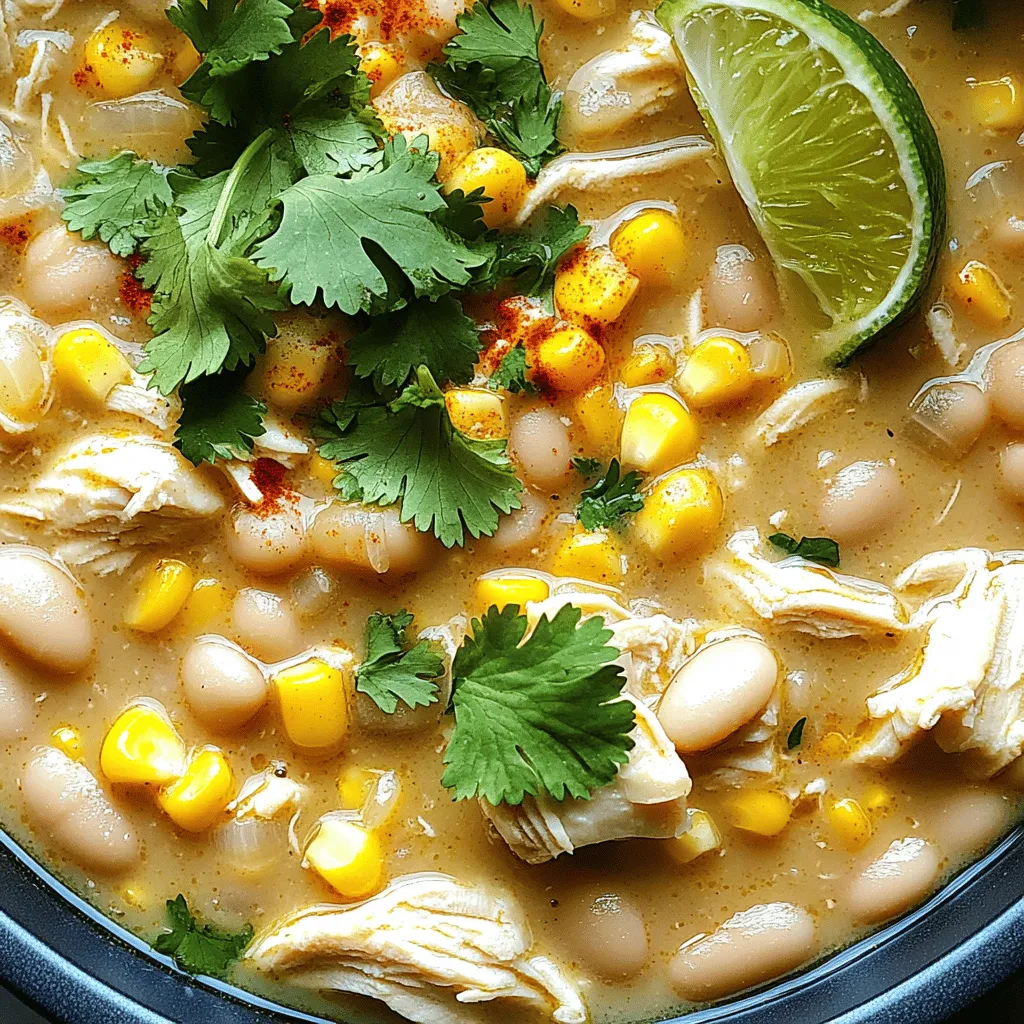
Creamy White Chicken Chili Flavorful and Simple Recipe
Looking for a comforting meal that’s easy to whip up? My Creamy White Chicken Chili recipe hits the spot! It’s packed with flavor, quick to
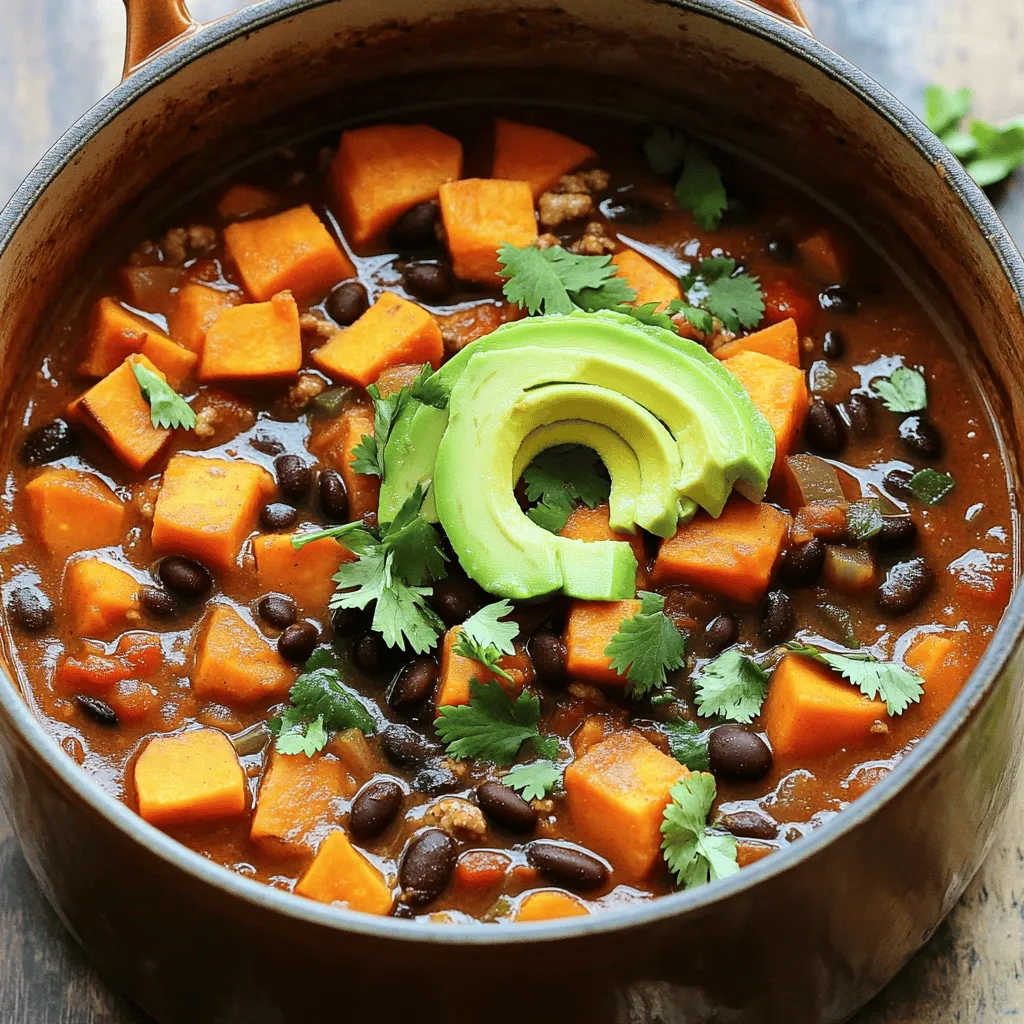
Healthy Sweet Potato Turkey Chili Flavorful and Easy
Looking for a cozy meal that’s packed with flavor? Try my Healthy Sweet Potato Turkey Chili! It’s not just tasty; it’s also easy to make
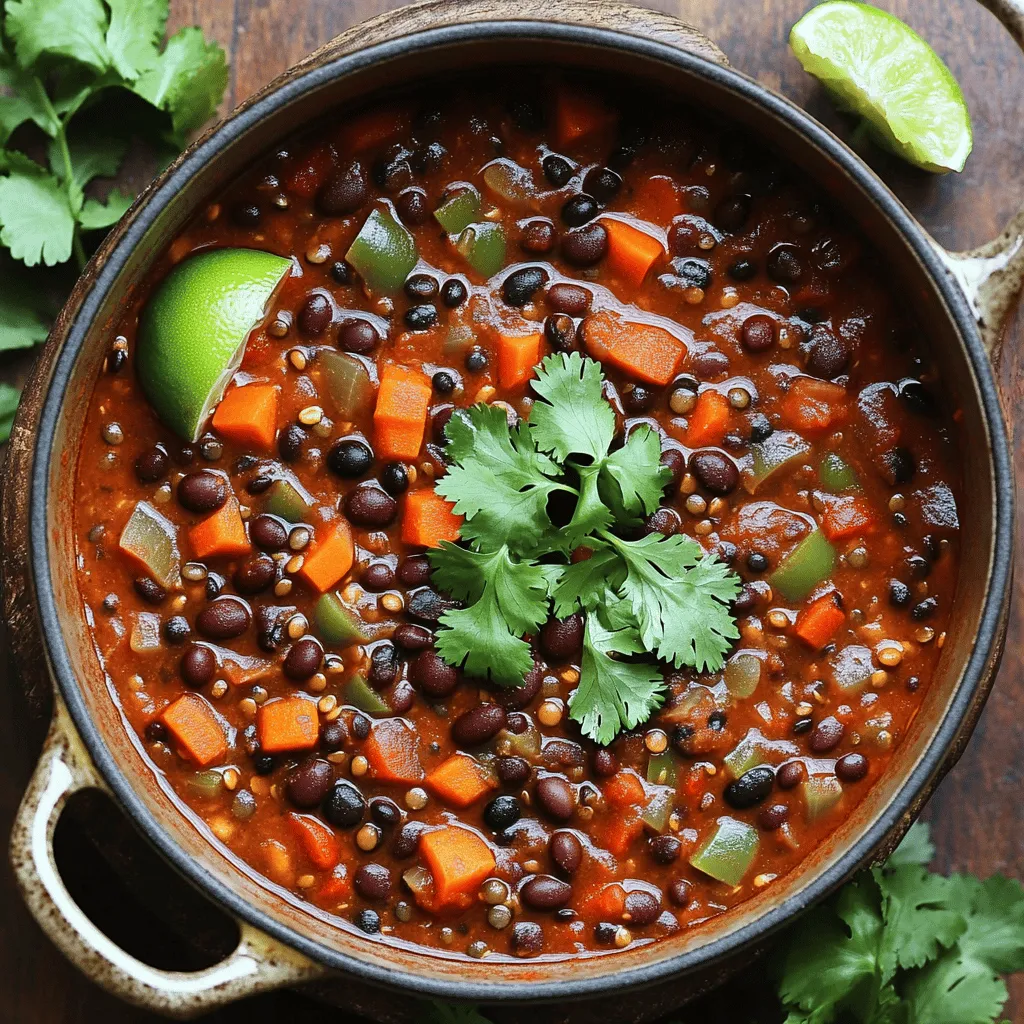
Vegan Black Bean & Lentil Chili Easy Weeknight Meal
Are you looking for an easy, hearty meal that’s both delicious and plant-based? My Vegan Black Bean & Lentil Chili is just what you need!
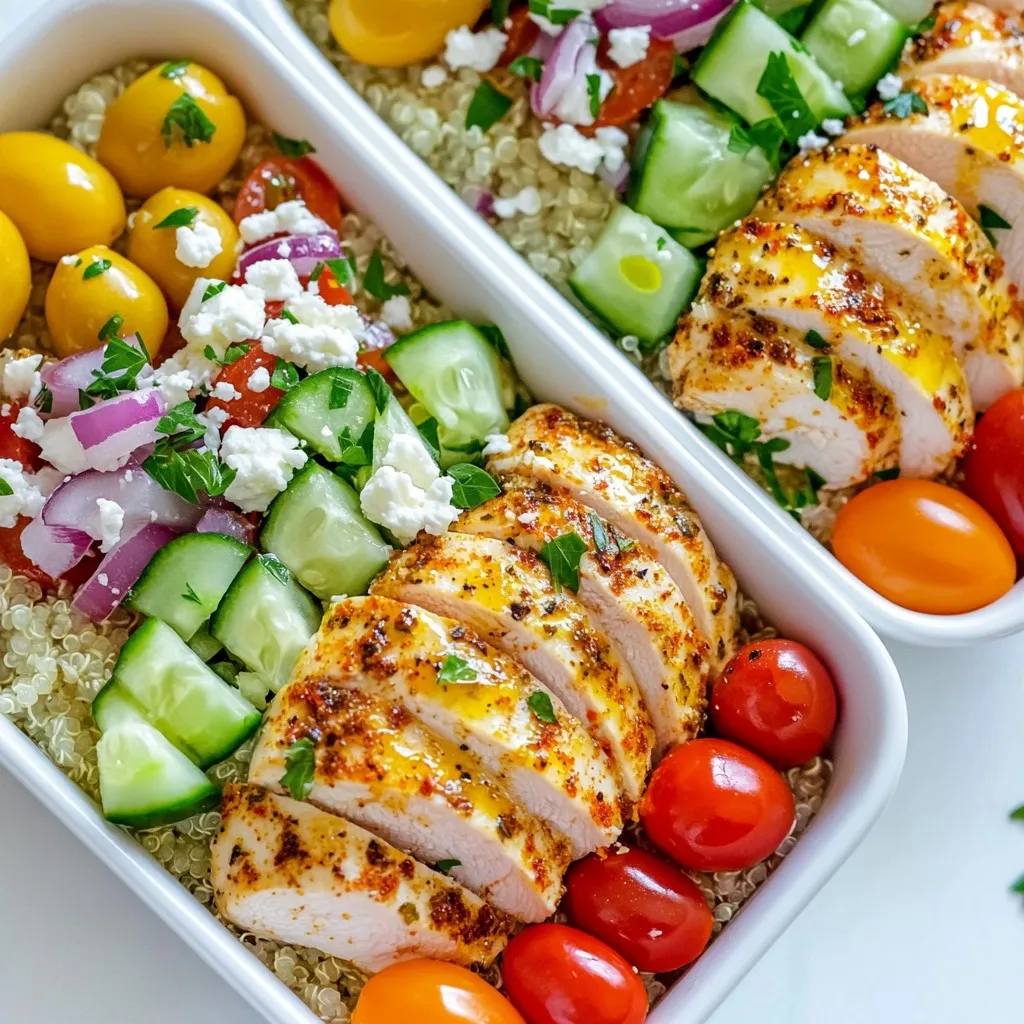
Greek Chicken Meal Prep Bowls Simple and Tasty Recipe
Are you ready to enjoy a tasty, healthy meal without the fuss? My Greek Chicken Meal Prep Bowls are simple to make and packed with

One-Pot Broccoli Cheddar Orzo Easy Dinner Recipe
Looking for an easy dinner that tastes great and saves you time? This One-Pot Broccoli Cheddar Orzo is your answer! In just a few steps,

Minute Creamy Tortellini Soup Quick and Easy Delight
Welcome to your new favorite dish: Minute Creamy Tortellini Soup! In just a few simple steps, you can create a warm, creamy delight perfect for
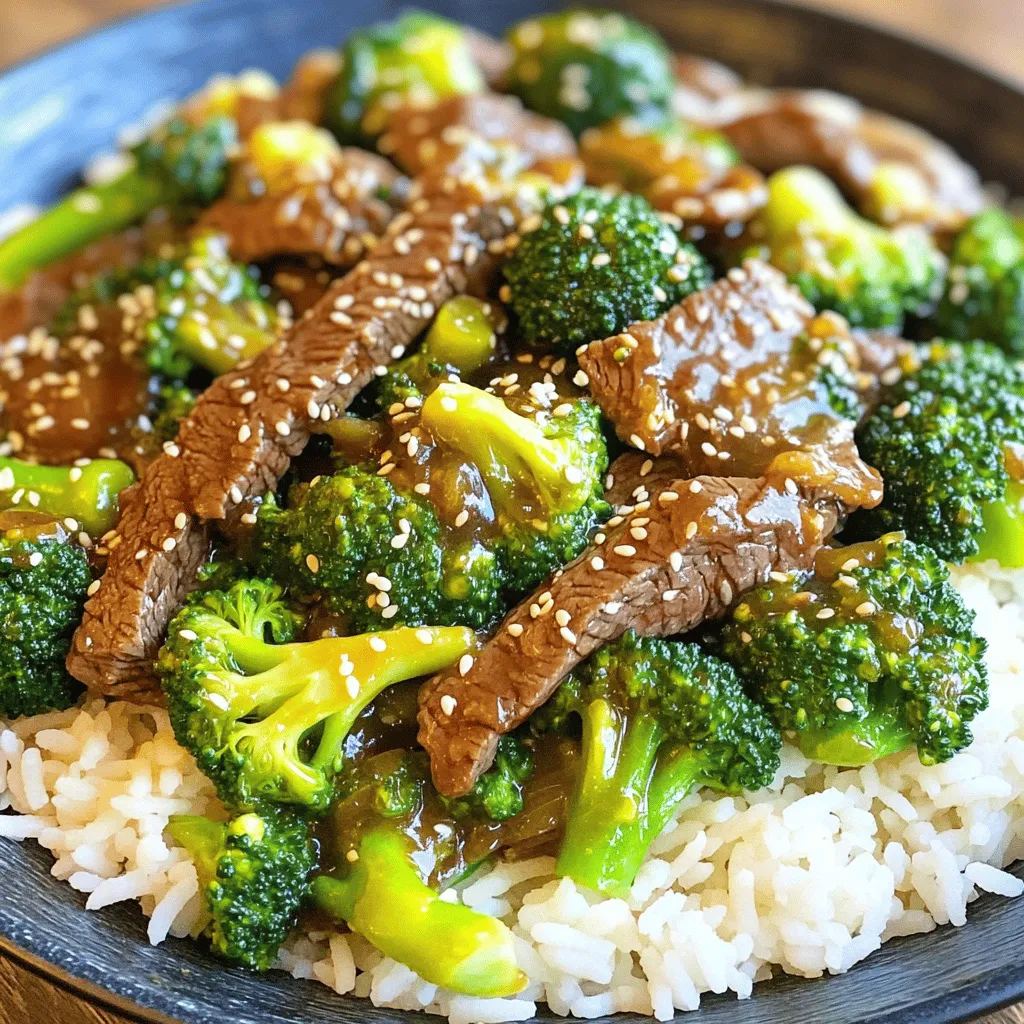
One-Pan Beef & Broccoli Quick and Easy Meal Guide
Looking for a quick, tasty meal? My One-Pan Beef & Broccoli will delight your taste buds and save you time! With juicy flank steak and
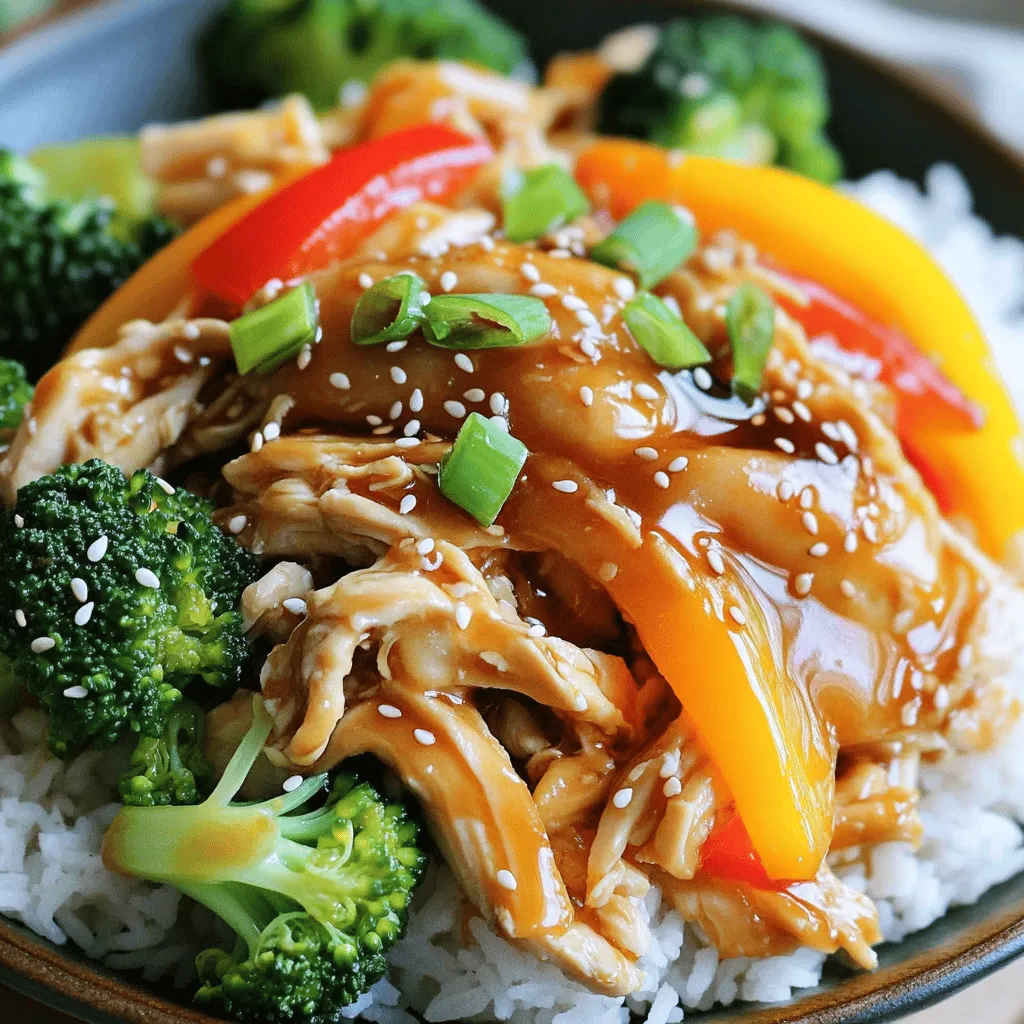
Slow Cooker Honey Garlic Chicken Flavorful Delight
If you’re looking for a meal that is easy, tasty, and a crowd-pleaser, you’re in the right place! This Slow Cooker Honey Garlic Chicken is
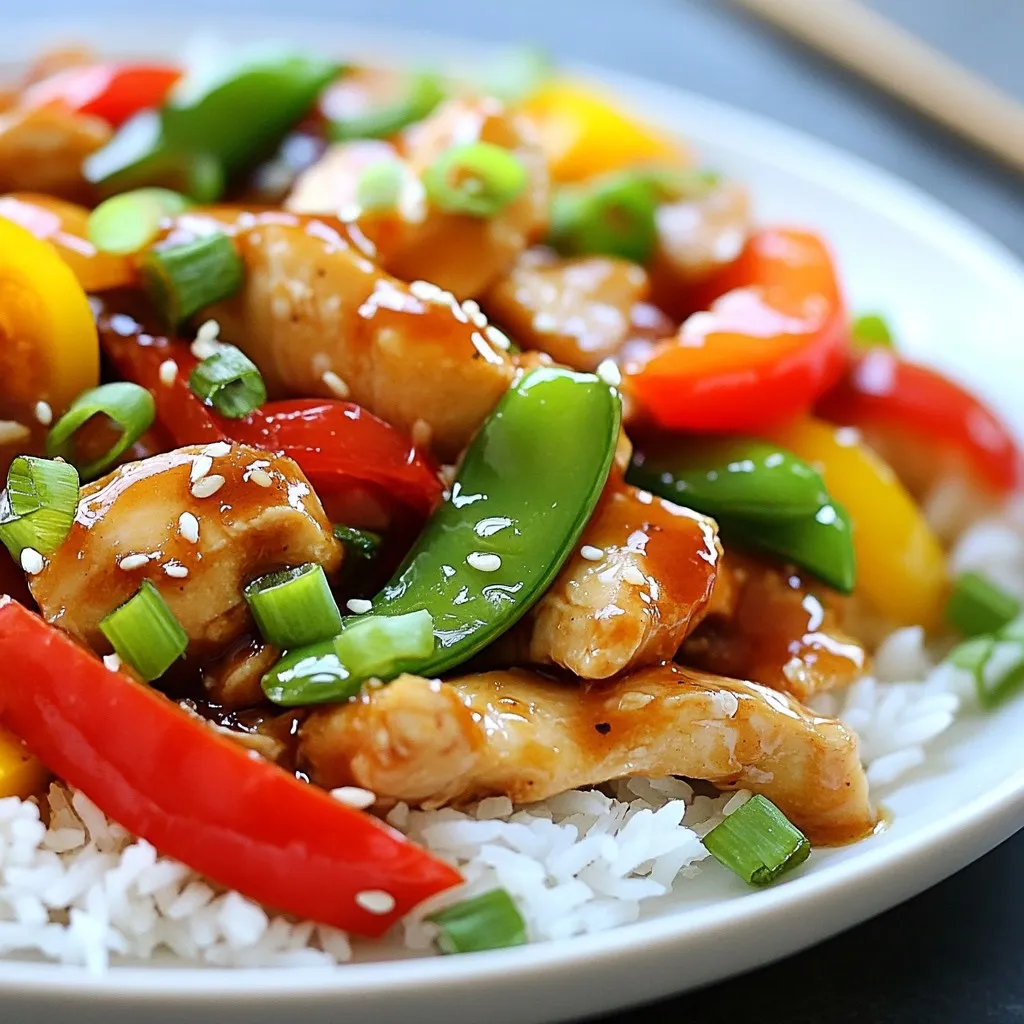
Quick Chicken Stir-Fry Flavorful and Easy Meal Idea
Looking for a quick and tasty dinner idea? This Quick Chicken Stir-Fry is just what you need! With juicy chicken, colorful bell peppers, and crisp