Dinner

- 1 cup orzo pasta - 4 cups vegetable broth - 3 cloves garlic, finely minced - 1 cup heavy cream - 1 cup freshly grated Parmesan cheese - 1 cup fresh spinach, roughly chopped I love using orzo pasta in this dish. It's small, cute, and cooks quickly. You will boil it in vegetable broth. This adds a nice flavor. Garlic is key for that rich taste. Mince it finely to get the best aroma. Heavy cream makes the dish creamy and rich. Don’t forget the freshly grated Parmesan cheese. It gives a lovely cheesy flavor. Spinach adds color and nutrients. - ½ teaspoon freshly cracked black pepper - ½ teaspoon sea salt - ¼ teaspoon red pepper flakes (optional) - Fresh parsley, finely chopped Seasoning is important. Black pepper and sea salt enhance the flavors. Red pepper flakes add a bit of heat, but use them if you like spice. Finally, fresh parsley brightens the dish when you sprinkle it on top. 1. Pour 4 cups of vegetable broth into a medium saucepan. 2. Heat it over medium-high heat until it boils gently. 3. Add 1 cup of orzo pasta to the boiling broth. 4. Cook the orzo according to the package instructions, about 8-10 minutes. 5. Stir occasionally to keep it from sticking. 6. Once cooked, drain any extra broth if needed. 1. In a large skillet, heat 1 tablespoon of olive oil over medium heat. 2. Add 3 cloves of finely minced garlic to the skillet. 3. Sauté the garlic for 2-3 minutes until it smells great. 4. Make sure to stir it often to avoid burning. 5. Lower the heat and pour in 1 cup of heavy cream. 6. Let the mixture simmer for a few minutes, stirring sometimes. 7. Gradually mix in 1 cup of freshly grated Parmesan cheese. 8. Keep stirring until the cheese melts and the sauce is creamy. 1. Transfer the cooked orzo to the skillet with the creamy sauce. 2. Stir well so the orzo is fully coated in the sauce. 3. Season with ½ teaspoon of freshly cracked black pepper and ½ teaspoon of sea salt. 4. If you want some heat, add ¼ teaspoon of red pepper flakes. 5. Fold in 1 cup of roughly chopped fresh spinach. 6. Cook for an additional 2 minutes until the spinach wilts. 7. Taste your orzo and adjust the seasoning for the best flavor. 8. Let it rest for a minute before serving. - How to prevent orzo from sticking: Stir the orzo often while it cooks. This helps keep the pasta from clumping. Adding a splash of olive oil to the boiling broth can also help. - Ensuring the sauce is creamy: Use heavy cream for the best texture. Gradually add the Parmesan cheese while stirring. This keeps the sauce smooth and prevents lumps. Make sure to cook over low heat when you add the cream. This way, it won’t curdle. - Best presentation tips: Serve the creamy orzo in a shallow bowl. This shows off its lovely texture. Garnish with fresh parsley and an extra sprinkle of Parmesan. A drizzle of olive oil adds a nice touch, too. - Pairing ideas for the dish: Creamy garlic Parmesan orzo pairs well with grilled chicken or roasted vegetables. A fresh salad on the side adds crunch and balance. For a wine choice, a light white wine, like Pinot Grigio, complements this dish well. {{image_4}} You can make Creamy Garlic Parmesan Orzo even better by adding some fun extras. Here are a few options: - Protein options: - Cooked chicken adds heartiness. - Shrimp brings a nice touch of seafood. - Crispy bacon gives a smoky flavor. - Vegetables: - Mushrooms add a meaty texture. - Peas offer a sweet pop. - Roasted bell peppers bring color and taste. Feel free to mix and match! These add-ins make the dish your own. To boost flavor, think about adding herbs and spices. Here are some ideas: - Herbs and spices to consider: - Fresh basil adds a sweet, aromatic touch. - Thyme gives a lovely earthy flavor. - A dash of lemon zest brightens the dish. - Alternative cheeses: - Creamy goat cheese gives a tangy bite. - Fontina melts beautifully for a rich taste. - Feta adds a salty kick. These options can change the dish's profile and keep it exciting. Explore different flavors to find your favorite combination! To keep your creamy garlic Parmesan orzo fresh, let it cool to room temperature. Place it in a container with a tight lid. Glass or BPA-free plastic containers work best. If you have a lot, divide it into smaller portions. This way, you can enjoy it one meal at a time. When it’s time to eat the leftovers, reheat the orzo on the stove. Add a splash of vegetable broth or cream to restore its creaminess. Heat it over low to medium heat, stirring often. You want it warm, not hot. This helps keep the texture just right. The creamy orzo will last in the fridge for about three days. If it sits longer than that, it may not taste good. Always check for any strange smells or colors before eating. Can I use whole wheat orzo? Yes, you can use whole wheat orzo. It has a nuttier flavor and more fiber. The cooking time may be slightly longer, so check the package. Is this dish suitable for meal prep? Absolutely! Creamy garlic Parmesan orzo stores well. Just keep it in an airtight container in the fridge. Reheat it gently on low heat. How can I make it vegan? To make it vegan, use plant-based cream and skip the cheese. Nutritional yeast can add a cheesy flavor. Can I substitute heavy cream with something lighter? Yes, you can use half-and-half or coconut cream. These options will keep the dish creamy but lighter. What can I use if I don’t have Parmesan cheese? If you lack Parmesan cheese, try Pecorino Romano or a dairy-free cheese. Nutritional yeast also works well for a cheesy flavor. This blog post covered a delicious creamy orzo pasta. We explored the key ingredients, like orzo, garlic, and spinach. You learned how to prepare this dish in easy steps. We shared tips for a perfect cook and creative serving ideas. You can also customize the recipe with proteins and veggies. In closing, this dish is simple to make and offers many variations. Enjoy cooking and tasting your creamy orzo dish!
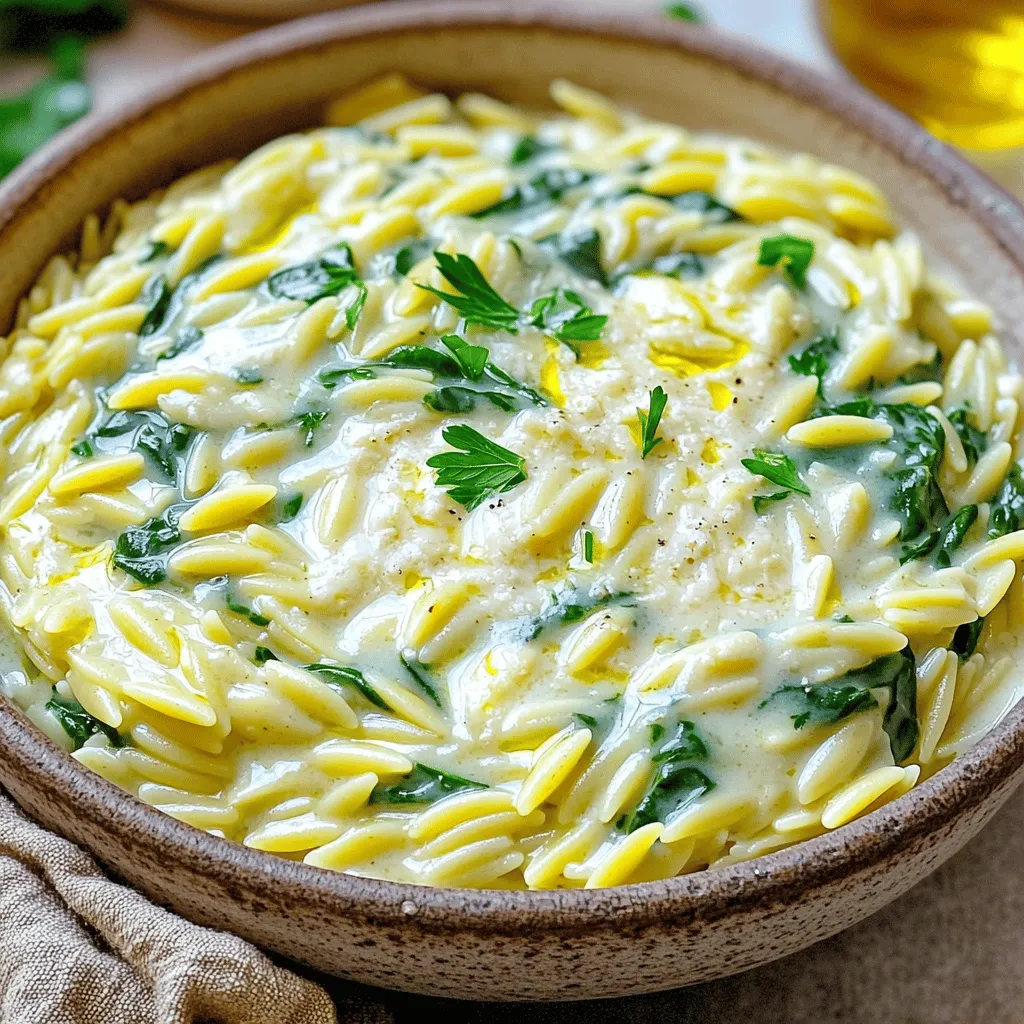
Creamy Garlic Parmesan Orzo Delightful and Easy Dish
Welcome to the creamy delight of Garlic Parmesan Orzo! This dish is simple yet bursting with flavor. With just a few key ingredients, you’ll have
- 4 boneless, skinless chicken breasts - 3 cups fresh spinach, rinsed and patted dry - 1 cup cherry tomatoes, halved - 1/2 cup sun-dried tomatoes, coarsely chopped - 2 tablespoons extra virgin olive oil - 1 teaspoon Italian seasoning blend - Sea salt and freshly cracked black pepper to taste - 1 teaspoon garlic powder - 1 cup heavy cream - 1/2 cup finely grated Parmesan cheese When cooking One-Pan Tuscan Chicken, the right ingredients make all the difference. The chicken breasts serve as the main star, bringing protein and heartiness to the dish. Fresh spinach adds a bright, green touch, while cherry and sun-dried tomatoes provide sweetness and tang. For seasoning, I always use extra virgin olive oil. It adds depth and richness to the dish. The Italian seasoning blend brings herbs together, creating a warm flavor. Don't forget salt and pepper; they elevate the taste. Garlic powder adds a lovely aroma, making this dish even more appetizing. The sauce is where the magic happens. Heavy cream gives the dish its creamy texture, while Parmesan cheese adds a nutty, savory note. Together, these ingredients create a sauce that clings to the chicken and vegetables, making every bite delightful. Gather these ingredients, and you are ready to start your culinary adventure! Drizzle 2 tablespoons of extra virgin olive oil over 4 boneless, skinless chicken breasts. Season both sides with 1 teaspoon of Italian seasoning blend, sea salt, and freshly cracked black pepper. Make sure the chicken is coated well. This step adds flavor and helps the chicken stay juicy. Heat a large skillet over medium-high heat. Once hot, add the seasoned chicken breasts. Cook for about 6-7 minutes on each side. The chicken should be golden brown and reach an internal temperature of 165°F (75°C). When done, carefully remove the chicken from the skillet and set it aside on a plate. In the same skillet, add 3 cups of fresh spinach. Sauté for 1-2 minutes until it wilts. Next, add 1 cup of halved cherry tomatoes and 1/2 cup of chopped sun-dried tomatoes. Cook for another 2-3 minutes until the tomatoes soften and become juicy. This step adds vibrant color and flavor to the dish. Lower the heat to medium. Pour in 1 cup of heavy cream. Sprinkle in 1 teaspoon of garlic powder and add 1/2 cup of finely grated Parmesan cheese. Stir well to mix everything. Let this simmer for about 3-4 minutes, stirring occasionally until the sauce thickens slightly. The creamy sauce is the heart of this dish. Gently return the browned chicken breasts to the skillet. Position them in the creamy sauce. Let the chicken simmer for another 2-3 minutes. This reheats the chicken and allows it to soak up some of the sauce's flavor. Once ready, transfer the chicken to serving plates. Garnish with torn fresh basil leaves for added color and aroma. For a nice touch, serve the Tuscan chicken over a bed of cooked pasta or polenta. Spoon the creamy sauce and vegetables on top. A sprinkle of extra Parmesan cheese and a drizzle of olive oil can elevate the dish even more. - Importance of seasoning: Seasoning makes your chicken shine. I use sea salt and cracked black pepper to enhance the flavors. Italian seasoning brings warmth and depth. Make sure you coat your chicken evenly with these spices. - Achieving perfect chicken doneness: Cook your chicken until it reaches 165°F (75°C). This ensures it's safe and juicy. Use a meat thermometer to check the thickest part. Allow it to rest for a few minutes before slicing. This keeps the juices inside. - Storing leftovers and reheating: For leftovers, place the chicken and sauce in an airtight container. It stays fresh in the fridge for about three days. When reheating, use low heat on the stove. This helps avoid dryness and keeps it creamy. - Caloric content and macronutrients: Each serving of One-Pan Tuscan Chicken has about 450 calories. It's rich in protein, with around 35 grams per serving. The heavy cream adds fat, while spinach and tomatoes provide fiber and vitamins. This dish is balanced and satisfying. {{image_4}} You can easily change the veggies and proteins in One-Pan Tuscan Chicken. If you want, try using zucchini or bell peppers instead of spinach. They add great color and flavor. For protein, turkey or even tofu works well. Just make sure to adjust cooking times for different proteins. To make this dish gluten-free, simply check that your chicken broth is gluten-free. If you want it dairy-free, swap the heavy cream with coconut milk. You can also use nutritional yeast instead of Parmesan cheese for a cheesy flavor without dairy. Want to spice things up? You can add crushed red pepper flakes for heat. Fresh herbs like thyme or oregano can also bring a new taste to the sauce. Experiment with a squeeze of lemon juice for brightness. Each change can create a unique twist on this classic dish. To keep your One-Pan Tuscan Chicken fresh, store it in an airtight container. Place it in the fridge within two hours of cooking. This helps maintain safety and flavor. Enjoy your leftovers within three days for the best taste. If you want to avoid sogginess, separate the chicken from the sauce before storing. Freezing is a great option for longer storage. To freeze, let the chicken cool completely. Place the chicken and sauce in a freezer-safe container. Use plastic wrap or foil to wrap it tightly. This prevents freezer burn. You can freeze it for up to three months. When ready to eat, thaw it overnight in the fridge or use the microwave for a quicker option. Reheat your Tuscan Chicken using gentle heat. The best method is on the stove. Place it in a skillet over low heat. Stir occasionally until warmed through. Adding a splash of cream or broth can help keep it moist. If using a microwave, cover it loosely and heat in short bursts. This helps avoid drying out the chicken. Enjoy your tasty meal! You can use several options for a lighter sauce. Some popular replacements include: - Half-and-half - Coconut cream - Greek yogurt (thinned with a little milk) - Silken tofu blended until smooth These options give you a creamy texture with fewer calories. Each choice adds a unique flavor, too. For instance, coconut cream gives a tropical touch. Greek yogurt adds protein and tang. To ensure your chicken is safe to eat, check its internal temperature. Use a meat thermometer for best results. Insert it into the thickest part of the chicken. The temperature should read 165°F (75°C). If you don’t have a thermometer, cut the chicken in the thickest part. The juices should run clear, and the meat must be white, not pink. Yes, you can prepare One-Pan Tuscan Chicken ahead of time. Cook and cool the chicken and sauce, then store them separately in airtight containers. In the fridge, they last up to 3 days. When ready to eat, reheat gently on the stove. This helps keep the chicken moist and flavorful. This blog post gave you a clear path to a tasty chicken dish. We covered the best ingredients, steps to cook, and ways to store. You learned how to perfect your chicken and make a creamy sauce. Remember, you can swap ingredients for your taste or dietary needs. Whether you follow my tips or try your own twist, cooking this meal can be fun. Enjoy sharing your delicious creation with family and friends. You have all you need to impress them!
One-Pan Tuscan Chicken Flavorful Dinner Delight
Are you craving a dinner that’s both easy and packed with flavor? Look no further! My One-Pan Tuscan Chicken combines juicy chicken breasts with fresh
- 1 pound ground turkey or beef - 1 tablespoon olive oil - 1 medium onion, diced - 2 cloves garlic, minced - 1 bell pepper, diced (choose your favorite color) - 2 medium tomatoes, diced - 1 cup corn kernels (can be fresh or frozen) - 2 cups vegetable or chicken broth - 2 tablespoons chili powder - 1 tablespoon ground cumin - 1 teaspoon smoked paprika - Salt and black pepper to taste - 1 tablespoon apple cider vinegar - Fresh cilantro, chopped (for garnish) I love using ground turkey in my chili, but beef works too. Both give great flavor. Olive oil helps to sauté the onions, garlic, and bell pepper. The mix of these gives a nice base. I always choose fresh veggies when I can, like diced tomatoes and corn. They add color and texture. The spices are the heart of this dish. Chili powder, cumin, and smoked paprika give warmth. Salt and black pepper round out the taste. I add apple cider vinegar at the end to brighten the flavors. It really makes a difference! - Shredded cheese - Sliced avocado - Sour cream - Fresh cilantro Toppings can take your no beans chili to the next level. I often add shredded cheese for creaminess. Sliced avocado adds a nice, cool touch. A dollop of sour cream brings richness. Finally, fresh cilantro gives a burst of flavor and color. Feel free to mix and match these toppings to create your perfect bowl of chili! 1. Heat 1 tablespoon of olive oil in a large pot over medium heat. 2. Add 1 medium diced onion and sauté until it turns soft and fragrant. This takes about 3-4 minutes. 3. Next, stir in 2 minced garlic cloves and 1 diced bell pepper. Cook for another 2-3 minutes until the pepper softens. 4. Increase the heat to medium-high. Carefully add 1 pound of ground turkey or beef. Break the meat into smaller pieces with a spatula while it cooks. Stir often until it browns, about 5-7 minutes. 1. Once the meat is browned, add 2 diced tomatoes, 1 cup of corn kernels, and 2 cups of broth to the pot. Mix everything well. 2. Bring the mixture to a gentle simmer. 3. Add 2 tablespoons of chili powder, 1 tablespoon of ground cumin, and 1 teaspoon of smoked paprika. Season with salt and black pepper. Stir well to blend the spices into the chili. 4. Lower the heat and let the chili simmer uncovered for 20-25 minutes. Stir occasionally to avoid sticking. 1. Before serving, drizzle in 1 tablespoon of apple cider vinegar. This adds a nice balance to the flavors. 2. Taste the chili and adjust the seasonings. Add more salt, pepper, or spices if needed. This chili is simple to make and very satisfying. Enjoy your hearty bowl! To get the best texture in your No Beans Chili, focus on browning the meat well. Brown it until it has a nice color. This step adds depth to the flavor. Stir it often to avoid burning. To keep your chili from sticking to the pot, always use enough broth. This keeps the chili moist. Stir occasionally as it simmers. If you notice it thickening too much, add a splash of broth. This will help ensure it stays smooth. For spice adjustments, start with the suggested amounts. If you like heat, add more chili powder or cumin. You can also stir in some cayenne for extra kick. Taste as you go to find your perfect blend. Marinating meat is a great way to boost flavor. You can use the spices in the recipe as a marinade. Let the meat sit for at least 30 minutes before cooking. This will make the meat taste amazing. To impress with your chili, serve it in deep bowls. Top with shredded cheese and fresh avocado. The bright green cilantro adds color and taste. This makes your chili look and taste great. For pairing, cornbread is a classic side. You can also serve it with tortilla chips for crunch. A simple green salad offers freshness. These sides balance the rich flavors of the chili. {{image_4}} You can use many proteins in this chili. Ground turkey and beef are popular choices. If you want to keep it lighter, try ground chicken. For a plant-based option, use lentils or crumbled tofu. When you change the meat, you may need to adjust the spices. For turkey, a bit more cumin works well. For beef, smoked paprika adds depth. Each protein brings its own flavor to the dish. Want some heat? Add jalapeños or crushed red pepper. You can also experiment with different peppers. Try poblano, serrano, or even chipotle for a smoky kick. Adding veggies can change the taste too. Consider zucchini, carrots, or even sweet potatoes. Each veggie adds unique flavor and texture. You can mix and match to find your favorite combo. Using a slow cooker is easy. Just brown the meat first, then add all the ingredients. Let it cook on low for 6 to 8 hours. This method allows flavors to blend beautifully. If you’re short on time, the Instant Pot works wonders. Brown the meat using the sauté function, then add all other ingredients. Cook on high pressure for about 15 minutes. Quick and tasty! To store your No Beans Chili, follow these simple steps: - Refrigerating Leftovers: Let the chili cool down to room temperature. Then, place it in an airtight container. It will stay fresh for up to 4 days in the fridge. When you’re ready to eat, just take it out and reheat. - Freezing for Future Meals: If you want to save some chili for later, freezing works great! First, let it cool completely. Then, portion it into freezer-safe bags or containers. Make sure to squeeze out excess air. It can last up to 3 months in the freezer. Label each bag with the date so you know when to use it. When it’s time to enjoy your chili again, here’s how to reheat it: - Best Methods for Reheating: The best way to reheat chili is on the stove. Pour the chili into a pot and heat it over medium heat. Stir often to heat it evenly. You can also use a microwave if you’re in a hurry. Just cover it loosely and heat in short bursts, stirring in between. - Recommendations for Maintaining Texture: To keep the chili thick and tasty, avoid boiling it. Heat it gently. If it seems too thick after freezing, add a splash of broth or water while reheating. This helps restore its creamy texture. Yes! You can swap the meat with plant-based options. Use lentils or mushrooms for texture. You can also add more veggies like zucchini or carrots. These will add flavor and nutrients. Just make sure to adjust the spices to balance the flavors. The best chili is thick but not too dry. If you want it thicker, let it simmer longer. You can also mash some of the beans or corn to help thicken it. If it gets too thick, add a bit of broth. Stir well and check until it feels right. No Beans Chili lasts about 3 to 4 days in the fridge. Look for changes in color or smell to check for spoilage. If it looks or smells off, throw it away. Always store it in an airtight container for best results. Yes, you can add beans if you like! Black beans or kidney beans work well. Just rinse them and stir them in during the last 10 minutes of cooking. This will not change the core recipe much. Enjoy your chili just the way you like it! In this blog post, we explored how to make delicious No Beans Chili. We covered the main ingredients like ground turkey, veggies, and spices. We detailed the step-by-step process, from sautéing onions to simmering the chili. I shared tips for perfect texture and flavor, plus ways to store your chili. Finally, we discussed variations, allowing for personal touches. With these insights, you can create your own unique No Beans Chili. Enjoy a hearty meal that suits your taste, and have fun customizing it. Happy cooking!
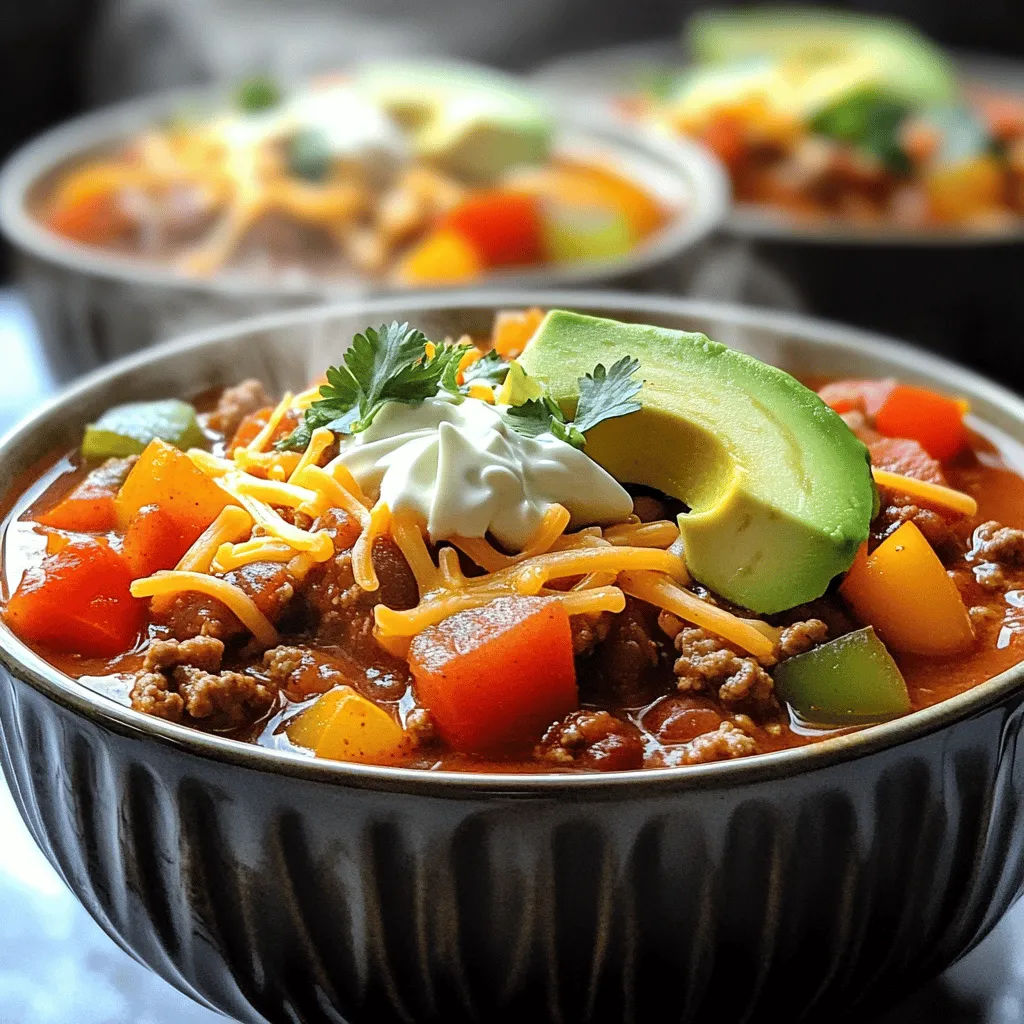
No Beans Chili Flavorful Comfort Food Recipe
If you’re looking for a hearty dish that warms you from the inside out, try my No Beans Chili. This crowd-pleaser packs all the rich
To make One Pan Honey Garlic Shrimp Rice, you need a few key items. Here’s the complete list of ingredients: - 1 lb large shrimp, peeled and deveined - 1 cup jasmine rice - 2 cups vegetable broth - 2 tablespoons honey - 3 cloves garlic, minced - 2 tablespoons soy sauce - 1 tablespoon sesame oil - 1 cup peas (fresh or frozen) - 1 red bell pepper, diced - 3 green onions, sliced (white and green parts separated) - Salt and pepper to taste - Fresh cilantro for garnish (optional) Each ingredient adds its own flavor. The shrimp gives protein. The jasmine rice absorbs all the yummy tastes. Honey adds sweetness, while garlic gives a nice kick. The soy sauce and sesame oil create a savory base. Peas and bell pepper add color and nutrition. Green onions and cilantro bring freshness to the dish. This balanced mix makes a tasty meal! {{ingredient_image_2}} - Heating sesame oil: Start by heating 1 tablespoon of sesame oil in a large skillet over medium heat. Wait until the oil looks shiny and hot. - Sautéing garlic: Next, add 3 cloves of minced garlic. Stir it for about 30 seconds. You want it to smell good and turn golden. - Adding bell pepper: Now, toss in 1 diced red bell pepper. Cook for about 2-3 minutes. Stir it often until it gets soft but still crunchy. - Cooking shrimp: Add 1 pound of large shrimp to the skillet. Cook for 2-3 minutes until they turn pink and opaque. Season with salt and pepper to taste. - Making honey soy sauce: In a small bowl, mix 2 tablespoons of honey and 2 tablespoons of soy sauce. Whisk them together until smooth. - Adding rice and broth: Pour the honey-soy mix over the shrimp and veggies. Then add 1 cup of jasmine rice and 2 cups of vegetable broth. Stir well to combine everything. - Cooking time and temperature: Increase the heat until the mixture starts to boil. Once boiling, reduce the heat to low. Cover the skillet with a lid and let it simmer for 15-20 minutes. - Incorporating peas: In the last 5 minutes, gently fold in 1 cup of peas. Let them warm through as the rice cooks. - Garnishing with green onions and cilantro: Once done, take the skillet off the heat. Sprinkle with sliced green onions and fresh cilantro, if you like. This adds a pop of color and flavor. - To ensure shrimp are cooked properly, watch their color. They turn pink and opaque when done. - For the best flavor, season with salt and pepper. Start with a pinch, then taste and adjust. - For a rustic look, serve the dish straight from the skillet. It adds charm and makes cleanup easy. - Pair this dish with a light salad or some crusty bread. A crisp white wine also works great. - Store leftovers in an airtight container for up to three days. Keep it in the fridge. - To reheat, use a skillet over medium heat. Add a splash of broth to keep it moist. Stir until heated through. Pro Tips Fresh Shrimp Selection: Always opt for fresh shrimp if possible, as they have a better texture and flavor compared to frozen. If using frozen, ensure they are fully thawed before cooking. Perfect Rice Cooking: Rinse the jasmine rice under cold water before cooking to remove excess starch. This helps achieve a fluffier texture once cooked. Adjusting Sweetness: If you prefer a sweeter dish, feel free to add more honey to taste. Just make sure to balance with additional soy sauce to maintain the savory notes. Custom Veggie Additions: Feel free to customize the vegetables based on your preference or seasonality. Broccoli, carrots, or snap peas would also work beautifully in this dish. {{image_4}} You can switch out shrimp for other proteins. Chicken works great in this dish. Just cut it into small pieces. Tofu is also a great choice for a vegetarian option. It soaks up the sauce well. For rice, try brown rice or quinoa. Brown rice adds a nutty flavor and is healthy. Quinoa is gluten-free and cooks faster than brown rice. Each option gives a new twist to the dish. Want to change the flavor? Add spices like red pepper flakes or ginger. Fresh herbs like basil or mint can also brighten the dish. You can make it sweeter by adding more honey. If you prefer less sweetness, cut back on the honey and soy sauce. Don't forget to taste as you cook! Adjust salt and pepper to suit your taste. Each change can make your meal unique. Use seasonal veggies to change things up. In summer, add zucchini or corn for a fresh taste. In fall, consider adding pumpkin or butternut squash. These veggies can enhance the flavor and feel of the dish. For holidays, you can add flavors like maple syrup or even cranberries. These additions can give a festive touch. Adjusting your ingredients with the seasons keeps the meal fun and exciting. You can store One Pan Honey Garlic Shrimp Rice in the fridge. Keep it in an airtight container. It stays fresh for about three days. Make sure it cools down before sealing. This way, you avoid extra moisture, which can make the rice mushy. To freeze leftovers, first let the dish cool completely. Then, pack it into freezer-safe bags or containers. Press out as much air as you can before sealing. This helps prevent freezer burn. You can freeze it for up to three months. Label the bags with the date. This way, you know when to use them. When you’re ready to eat, reheat the dish gently. If possible, use a skillet on low heat. Add a splash of water or broth to keep it moist. Stir it often to heat evenly. You can also use the microwave. Just cover the bowl and heat in short bursts. Stir between each burst. This keeps the shrimp and rice tasty and not dry. This dish takes about 30 minutes in total. You will spend 10 minutes preparing the ingredients. The cooking time is around 20 minutes. This quick meal fits well into a busy day. Yes, you can use frozen shrimp. Just make sure to thaw them first. The best way is to put them in cold water for 15-20 minutes. Drain them before cooking. This will help them cook evenly in the pan. If you want a kick, add red pepper flakes. You can also use sriracha or chili sauce. Try adding a diced jalapeño for fresh heat. Mix it in with the vegetables for a nice blend. You can make this dish gluten-free. Just switch regular soy sauce with gluten-free soy sauce. There are many brands available at most stores. Always check the label to be sure. Yes, you can prep ingredients ahead of time. Chop the veggies and store them in the fridge. You can also marinate the shrimp with honey and soy sauce. This will save time on cooking day. Just cook everything when you are ready to eat. You learned how to make a tasty One Pan Honey Garlic Shrimp Rice using simple steps. Remember, the key is to cook shrimp right and mix flavors well. Feel free to swap in your favorite proteins or grains. You can also add spices to kick up the heat. Store leftovers properly to enjoy later. This dish is not only quick but also versatile, making it perfect for busy days. Now, enjoy cooking and sharing this delicious meal with others!
One Pan Honey Garlic Shrimp Rice Quick and Tasty Meal
Are you craving a quick and tasty meal that’s easy to make? Look no further! This One Pan Honey Garlic Shrimp Rice combines sweet honey
- 1 lb ground beef - 1 cup pinto beans, soaked overnight and drained - 2 cups green chiles, roasted and chopped - 1 medium onion, finely diced - 2 cloves garlic, minced - 4 cups beef broth - 1 can (14 oz) diced tomatoes, undrained - Shredded cheese - Diced avocado - Sour cream - Fresh cilantro - 1 teaspoon ground cumin - 1 teaspoon chili powder - Salt and freshly ground black pepper Gather these ingredients before you start cooking. The ground beef gives the soup a hearty base. Pinto beans add a creamy texture and a boost of fiber. The green chiles bring a nice kick. Use mild chiles if you prefer less heat. Diced tomatoes add sweetness and moisture. Onions and garlic bring depth to the flavor. Beef broth ties it all together, making your soup rich and savory. For toppings, shredded cheese adds creaminess, while diced avocado offers a fresh touch. Sour cream can cool the heat, and cilantro gives a burst of flavor. Feel free to mix and match these toppings. Adjust the spices to your taste. Cumin and chili powder give warmth and earthiness, while salt and pepper enhance all the flavors. With these ingredients ready, you will create a comforting bowl of Pinto Bean Green Chile Beef Soup. - Soaking pinto beans: Start by soaking 1 cup of pinto beans overnight. This helps them cook faster and makes them soft. The next day, drain the beans and set them aside. - Roasting and chopping green chiles: Next, you will need 2 cups of green chiles. If you want a mild soup, choose mild chiles. For a spicier kick, go for the hot ones. Roast them on a grill or stovetop until the skin blisters. Once cooled, chop them into small pieces. - Sautéing onions and garlic: In a large pot, heat 2 tablespoons of olive oil over medium heat. Add 1 medium diced onion and 2 minced garlic cloves. Sauté them for about 3-4 minutes. You want the onion to turn soft and fragrant. - Browning ground beef: Now, turn the heat to medium-high. Add 1 pound of ground beef to the pot. Use a wooden spoon to break it apart. Cook until the beef is brown and no longer pink, about 5-7 minutes. If there is extra fat, drain it away. - Combining ingredients and simmering: Stir in your roasted green chiles, soaked pinto beans, 1 teaspoon of ground cumin, 1 teaspoon of chili powder, 1 can of diced tomatoes (with juice), and 4 cups of beef broth. Mix everything well. Increase the heat to bring the soup to a gentle boil. When it boils, lower the heat and let it simmer uncovered for about 45 minutes. This helps the beans soften and the flavors blend. - Tasting and seasoning: After simmering, taste the soup. Add salt and freshly ground black pepper to make it just right for you. - Serving instructions: When the beans are tender and the soup looks rich, take it off the heat. Ladle the soup into bowls. For a nice touch, garnish with fresh cilantro. You can also add toppings like shredded cheese, diced avocado, or sour cream. Serve with warm bread for a cozy meal! To make your soup shine, pick the right green chiles. You can choose between mild or hot. If you like heat, go for hot chiles. If you want a gentle kick, choose mild. This choice shapes the overall taste. When browning the beef, start with a hot pot. This helps the meat caramelize well. Stir the beef often to break it apart. This gets a nice brown color and adds flavor. For sautéing vegetables, use medium heat. This allows the onions and garlic to soften without burning. Cook them until they are clear and fragrant. This step builds the soup's base flavor. To prevent beans from sticking, stir often. As the soup simmers, the beans can settle to the bottom. Keep an eye on it and give it a gentle mix. This helps the beans cook evenly. When serving, ladle the soup into bowls. This makes it look inviting. Pair it with warm bread or crispy chips for dipping. The crunch adds a fun texture. For garnish, sprinkle fresh cilantro on top. You can also add shredded cheese or diced avocado. These toppings not only look great but add flavor. A dollop of sour cream can make it even creamier. {{image_4}} For a vegetarian option, swap ground beef for a plant-based meat substitute. You can also use extra beans or lentils for protein. This keeps the soup hearty and filling. To make it gluten-free, ensure that your beef broth is labeled as gluten-free. Many brands offer options that fit this need. You can easily change the flavors of your soup. Try adding spices like smoked paprika or cayenne for extra heat. For a unique twist, mix in fresh herbs such as oregano or thyme. Don’t forget about the vegetables! Adding chopped bell peppers or corn can boost both flavor and nutrition. To give your soup a Southwest flair, toss in some diced jalapeños or a splash of lime juice. You can also use chipotle peppers for a smoky touch. If you want to enhance the Mexican flavors, consider adding fresh cilantro and a sprinkle of queso fresco. These additions make the dish even more vibrant and tasty. To store leftover soup, let it cool first. Pour the soup into an airtight container. Seal it tightly and place it in the fridge. This soup stays fresh for up to three days. When ready to eat, check for any off smells or changes in color. If it seems fine, you’re good to go! Freezing the soup is easy. First, cool it completely. Then, use freezer-safe containers or bags. Leave some space at the top for expansion. Label each container with the date. The soup can freeze well for up to three months. When you're ready to eat, just take it out and thaw it in the fridge overnight. For reheating, you have a few good options. The stove is my favorite. Pour the soup into a pot and heat it over medium-low heat. Stir often until it’s hot. You can also use the microwave. Place the soup in a microwave-safe bowl and cover it with a paper towel. Heat it in short bursts, stirring in between. This keeps the texture nice and avoids hot spots. Enjoy the flavors as they come back to life! Yes, you can use canned pinto beans. They save time and are easy to use. Just rinse them well before adding to the soup. This will help remove excess salt and keep flavors fresh. If you don’t have green chiles, use bell peppers or jalapeños. You can also use canned green chilies if you have them. These options will still give your soup a nice flavor. To spice up your soup, add more green chiles. You can also sprinkle in cayenne pepper or hot sauce. Adjust it slowly to find the heat level you like best. This soup goes great with warm crusty bread or tortilla chips. You might also enjoy it with a fresh salad or cornbread. These sides add texture and balance to your meal. The soup lasts about three to four days in the fridge. Just keep it in an airtight container. For longer storage, consider freezing it for up to three months. This blog post guides you through making a hearty Pinto Bean Green Chile Beef Soup. You learned about the key ingredients, cooking steps, and tips to enhance flavor. My final thought? Experiment with toppings and variations. This soup fits any taste. Try it your way, whether vegetarian or spiced up. Enjoy the rich flavors and comforting warmth of this dish. Store and reheat leftovers for even more delicious meals. Get ready to impress your family and friends with this easy recipe!
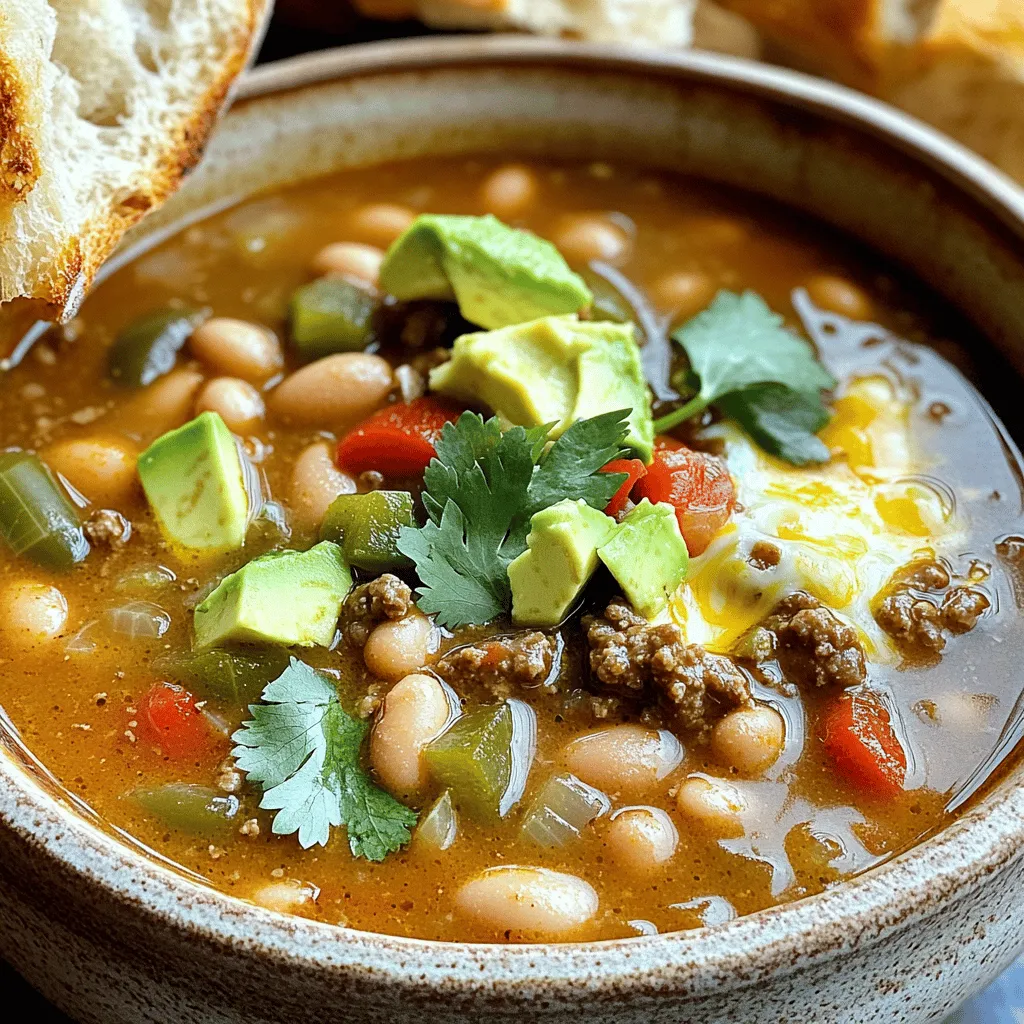
Pinto Bean Green Chile Beef Soup Simple Comfort Dish
Looking for a warm and hearty dish that comforts the soul? My Pinto Bean Green Chile Beef Soup is just what you need! This simple
- 1 lb ground turkey - 1/2 cup breadcrumbs - 1/4 cup grated Parmesan cheese - 1 large egg - 2 cloves garlic, minced - 1 tsp onion powder - 1 tsp salt - 1/2 tsp black pepper - 1/4 tsp red pepper flakes (optional) - 1 cup pumpkin puree - 1 cup chicken broth - 1/4 cup heavy cream - 1 tbsp fresh sage, chopped (or 1 tsp dried sage) - 1 tbsp olive oil When making turkey meatballs in pumpkin sage sauce, these ingredients are key. Each one builds flavor and texture. Ground turkey gives a lean base. Breadcrumbs keep the meatballs tender. Parmesan adds a nice saltiness. - Red pepper flakes can add some heat. - Use dried sage if fresh isn’t available. These optional ingredients let you customize the dish. You can choose how spicy or herbal you want it. - Try using garlic powder for extra flavor. - Italian seasoning can enhance the taste. - Fresh herbs like thyme or rosemary also work well. These seasonings can bring new life to your turkey meatballs. I love how a simple change can make a dish feel fresh. Mixing in different spices opens up new flavor profiles. First, grab a big bowl. Add 1 pound of ground turkey. Then, mix in 1/2 cup of breadcrumbs and 1/4 cup of grated Parmesan cheese. Crack 1 large egg into the bowl. Toss in 2 cloves of minced garlic, 1 teaspoon of onion powder, 1 teaspoon of salt, and 1/2 teaspoon of black pepper. If you like spice, add 1/4 teaspoon of red pepper flakes. Use your hands or a spoon and mix gently. Be careful not to overmix. This keeps your meatballs tender. Now, preheat your oven to 400°F (200°C). While it warms up, scoop out some of the turkey mixture. Roll it into balls about 1 inch wide. Place them on a baking sheet lined with parchment paper. Make sure they have space in between. You should make about 24 meatballs. Once the oven is hot, bake them for 20 to 25 minutes. They should turn golden brown and reach an internal temperature of 165°F (74°C). While the meatballs bake, let's make the sauce. In a large skillet, heat 1 tablespoon of olive oil over medium heat. Add 1 cup of pumpkin puree, 1 cup of chicken broth, and 1/4 cup of heavy cream. Stir everything until it blends well. Bring the mix to a gentle simmer. After that, stir in 1 tablespoon of chopped fresh sage. If you don't have fresh sage, use 1 teaspoon of dried. Let the sauce cook for about 5 minutes. Stir it occasionally until it thickens slightly. When the meatballs are done, take them out of the oven. Carefully move them into the skillet with the sauce. Gently swirl the meatballs in the sauce. Let them simmer together for 5 more minutes. This helps the meatballs soak up those tasty flavors. Now, it’s time to serve your dish. Place the warm turkey meatballs on a plate. Sprinkle some extra grated Parmesan cheese on top. You can also add fresh sage leaves for a nice touch. Enjoy your meal! - Use fresh ingredients for the best flavor. Fresh garlic and sage shine in this dish. - Mix the meatball ingredients gently. Overmixing can make them tough. - Form uniform meatballs, about 1 inch wide. This helps them cook evenly. - Bake until golden brown. This adds flavor and texture to the meatballs. - Add a pinch of nutmeg for warmth. Nutmeg pairs well with pumpkin and sage. - Stir in a splash of balsamic vinegar. This will add a nice tang to the sauce. - For a spicy kick, include more red pepper flakes. Adjust to your taste preference. - Serve meatballs in a shallow bowl. This lets the sauce shine and looks nice. - Garnish with extra Parmesan. A sprinkle of cheese adds color and flavor. - Add fresh sage leaves on top. This not only looks great but boosts the herbal taste. {{image_4}} You can easily make turkey meatballs gluten-free. Instead of regular breadcrumbs, use gluten-free breadcrumbs. Many stores offer these options. You can also use ground oats or almond flour. These choices keep the texture light and tasty. To make this dish dairy-free, swap out the Parmesan cheese. Nutritional yeast adds a cheesy flavor without dairy. For the heavy cream, use coconut cream or a dairy-free cream alternative. These swaps keep the sauce creamy and delicious. If you want a different protein, consider using ground chicken or lean beef. Both work well in this recipe. For a vegetarian option, use lentils or chickpeas. Mash them lightly and combine with the spices. This way, you can enjoy the same flavors in a meat-free dish. After you enjoy your turkey meatballs in pumpkin sage sauce, store leftovers in the fridge. Place them in an airtight container. This helps keep them fresh. They will last about 3 to 4 days. If you want to enjoy them later, check that they cool down first before sealing the container. This way, moisture does not build up. You can freeze turkey meatballs too! To do this, let them cool completely. Then, place them in a freezer-safe bag or container. Make sure to remove as much air as possible. This helps prevent freezer burn. They can stay frozen for up to 3 months. When you are ready to eat, defrost in the fridge overnight. To reheat turkey meatballs, you have a few options. The oven is a great choice. Preheat it to 350°F (175°C). Place the meatballs in a baking dish and cover with foil. Heat for about 15 to 20 minutes. You can also use the microwave. Heat them in a microwave-safe dish for 1 to 2 minutes. Make sure to check that they are hot all the way through. Enjoy! Yes, you can use ground turkey breast. It has less fat than regular ground turkey. This option makes the meatballs leaner. Just keep in mind, they may be a bit drier. Adding a little more cream or sauce can help with moisture. To thicken the sauce, you can simmer it longer. Let it cook until it reduces. Another option is to mix a little cornstarch with water and stir it in. This quick method thickens the sauce nicely without changing the flavor. Several sides match well with these meatballs. Consider serving them with: - Mashed potatoes - Rice - Quinoa - Fresh green salad - Roasted vegetables These options balance the rich sauce and add texture to your meal. Leftovers can last in the fridge for about 3 to 4 days. Store them in an airtight container. If you want to keep them longer, consider freezing them. They can last for up to 3 months in the freezer. Just thaw and reheat when ready to enjoy! This post covered all you need to create delicious turkey meatballs in pumpkin sage sauce. We discussed the key ingredients, step-by-step instructions, and tips for the best results. Variations for diets like gluten-free and dairy-free were also included. Plus, we explored storage info and answered your most common questions. With these insights, you can impress anyone at your next meal. Enjoy cooking and make it your own!
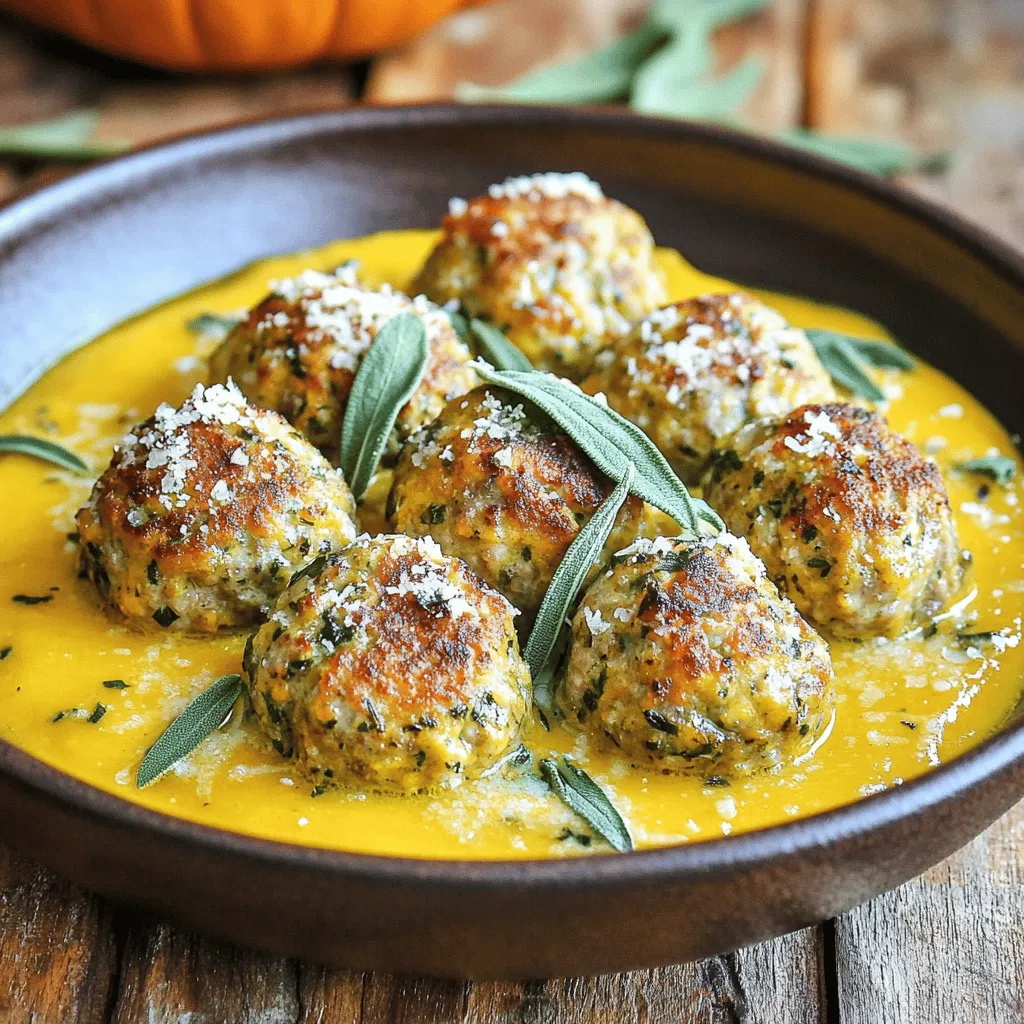
Turkey Meatballs in Pumpkin Sage Sauce Delightfully Easy
Get ready to make a flavorful dish that’s both simple and satisfying! My Turkey Meatballs in Pumpkin Sage Sauce combines juicy turkey with creamy pumpkin
- 2 lbs ripe tomatoes, halved - 1 medium onion, quartered - 4 cloves garlic, unpeeled - 3 tablespoons olive oil - 1 teaspoon salt - 1/2 teaspoon freshly ground black pepper - 1 teaspoon dried oregano - 4 cups vegetable broth - 1 cup fresh basil leaves, tightly packed - 1 tablespoon balsamic vinegar - Additional fresh basil leaves for garnish - Optional: Crusty bread for serving The key elements in this roasted tomato basil soup make it rich and tasty. First, the ripe tomatoes bring sweetness and flavor. For the best taste, choose tomatoes that are juicy and firm. The onion adds depth, while unpeeled garlic gives a nice, mellow flavor when roasted. Olive oil adds richness, and salt and pepper balance the taste. The dried oregano adds a hint of earthiness. Vegetable broth gives the soup its base. Fresh basil leaves bring a bright flavor and aroma. Balsamic vinegar adds a touch of sweetness and tang. Lastly, crusty bread is perfect for dipping. - Alternative tomatoes for roasting: You can use roma or heirloom tomatoes for a different taste. - Fresh vs. dried herbs: Fresh herbs enhance flavor. You can use dried if fresh is not available. - Options for vegetable broth: Homemade broth works great. Store-bought is fine too. Choosing the right ingredients can change the flavor profile of your soup. Don't hesitate to try different kinds of tomatoes or herbs to find what you like best! First, set your oven to 400°F (200°C). This high heat helps to roast the tomatoes perfectly. Next, grab a large baking sheet. It should be big enough to hold all your veggies without crowding them. Now, arrange the halved tomatoes, quartered onion, and unpeeled garlic cloves on the baking sheet. Make sure they are in a single layer for even roasting. Drizzle 3 tablespoons of olive oil over the vegetables. Then, sprinkle 1 teaspoon of salt, 1/2 teaspoon of black pepper, and 1 teaspoon of dried oregano on top. Toss everything gently with your hands. Place the baking sheet in the oven and roast for about 30 to 35 minutes. The tomatoes will soften and get a bit charred, bringing out their sweet flavor. Once roasted, take the baking sheet out of the oven. Let it cool for a few minutes. Carefully peel the garlic cloves. Add the roasted tomatoes, onions, and garlic to a blender. Pour in 4 cups of vegetable broth. Blend it all on high until you get a smooth texture. Now, in a medium pot over medium heat, combine the blended mix with 1 cup of fresh basil leaves and 1 tablespoon of balsamic vinegar. Stir well to mix everything together. Let the soup simmer for about 10 minutes. This helps the flavors blend nicely. After simmering, taste the soup. Adjust the seasoning if you think it needs more salt or black pepper. Enjoy your delicious roasted tomato basil soup! To get the best flavor in your soup, roasting is key. Here are some tips: - Optimal caramelization: Spread the tomatoes and onion evenly on the baking sheet. This helps them cook uniformly. The edges should brown slightly to bring out sweetness. - Checking doneness: Look for soft tomatoes that collapse easily. The skin should show some char. A fork should pierce through with little resistance. The right blender makes a big difference in your soup's texture. - Immersion blender vs. regular blender: An immersion blender is easy to use in the pot. It saves time and fewer dishes. A regular blender gives a smoother finish but requires transferring hot soup. - Avoiding lumps in the soup: Blend until completely smooth. If using a regular blender, blend in small batches. This prevents overflow and ensures even mixing. Pairing your soup with the right sides enhances the meal. - Best accompaniments: Crusty bread is a classic choice. It’s perfect for dipping. A fresh salad adds a nice crunch and balance to the meal. - Garnishing ideas for presentation: Top your soup with fresh basil leaves. A drizzle of olive oil can add richness. Consider a sprinkle of black pepper for a nice touch. {{image_4}} To make a creamy version of this soup, add cream or a dairy-free alternative. Heavy cream gives a rich taste, while coconut milk or cashew cream works well for dairy-free. Start by blending the soup first. After blending, pour in about one cup of cream. Stir it in and let the soup warm up. This will make it smooth and rich, perfect for a cozy meal. If you crave heat, try adding chili peppers or spices. You can use fresh jalapeños or crushed red pepper flakes. Add them to the veggies before roasting. This way, the heat blends with the sweetness of the tomatoes. Adjust the roasting time if you add whole chili peppers. You may want to roast them a bit longer to soften fully. This version packs a flavorful punch. This soup is easy to make vegan and gluten-free. The main recipe is already vegan. Use vegetable broth and avoid any dairy. For gluten-free options, serve the soup with gluten-free bread or crackers. Just check labels to ensure they are certified gluten-free. Enjoy this tasty soup without worry, no matter your diet! To store leftover roasted tomato basil soup, use airtight containers. Glass or plastic containers work well. Let the soup cool before sealing. Place it in the fridge. It stays fresh for about 3 to 5 days. If you want to freeze the soup, use freezer-safe bags or containers. Leave some space at the top for expansion. Freeze it within two hours of cooking for best results. To reheat, thaw overnight in the fridge. Heat it on the stove over low heat until warm. Stir well to bring back the creamy texture. For freshness, store the soup in the fridge. Check for signs of spoilage before eating. Look for off smells or mold. If you see any, throw it away. For frozen soup, use it within three months for best flavor. To thicken your soup, you have a few great options. First, you can cook it longer. This helps the water evaporate and intensifies the flavor. Another method is to add some chopped potatoes or carrots while blending. They blend well and add body to the soup. Lastly, consider adding a bit of cornstarch mixed with water. Stir it in during the simmering step for a smooth finish. Yes, you can use canned tomatoes. They are a great alternative and save time. Use about 2 cans of diced tomatoes for this recipe. Drain excess liquid to avoid a watery soup. Canned tomatoes often have great flavor, but fresh tomatoes add a special touch. If you have fresh ones, use them when in season for the best taste. Making this soup takes about 50 minutes. You will spend around 15 minutes preparing the ingredients. Roasting the vegetables takes about 30 to 35 minutes. After blending, you will simmer the soup for 10 minutes. This simple timing makes it easy to plan your meal. Yes, Roasted Tomato Basil Soup is healthy. Tomatoes are rich in vitamins C and K. They also contain antioxidants like lycopene, which helps fight cancer. Basil adds more vitamins and minerals, plus it has anti-inflammatory properties. The olive oil provides healthy fats. Overall, this soup is a nutritious choice for any meal. In this blog post, we explored how to make a delightful Roasted Tomato Basil Soup. We covered the key ingredients, including tomatoes, garlic, and herbs. I shared tips for roasting and blending to achieve the best texture. You can also try variations, like creamy or spicy versions. Don't forget about storing leftovers or freezing for later. With the right techniques and ingredients, you can create a delicious dish that warms your soul. Enjoy every comforting bowl!
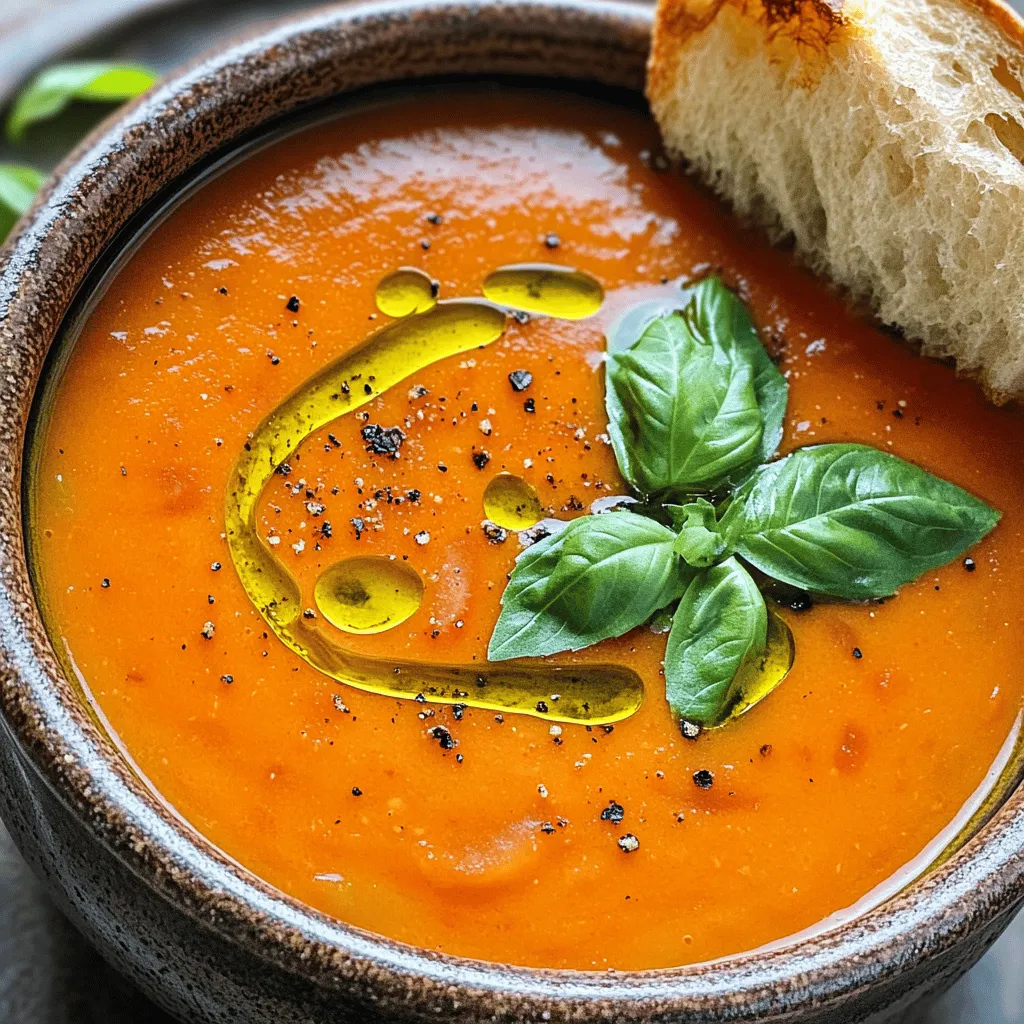
Roasted Tomato Basil Soup Flavorful and Simple Recipe
Are you ready to turn fresh, juicy tomatoes into a comforting bowl of Roasted Tomato Basil Soup? This easy and flavorful recipe will wow your
- 1 lb (450g) ground beef - 4 medium potatoes, thinly sliced - 1 onion, finely chopped - 2 cups frozen mixed vegetables (like carrots, peas, and corn) - 1 can (10.5 oz or 300g) cream of mushroom soup - 1 cup beef broth - 1 teaspoon garlic powder - 1 teaspoon paprika - Salt and black pepper to taste - 2 cups shredded cheddar cheese - Fresh parsley, chopped, for garnish When making Hobo Ground Beef & Potato Casserole, focus on using quality ingredients. The ground beef gives a rich flavor. Choose fresh potatoes for the best texture. Thin slices cook evenly, blending well with the beef. Onions add a nice sweetness, enhancing the overall taste. Frozen mixed vegetables save time and add color. Using cream of mushroom soup makes the dish creamy. Beef broth adds depth to the flavor. Garlic powder and paprika spice things up. Adjust salt and pepper to your liking for a perfect taste. For a cheesy finish, add shredded cheddar on top. Fresh parsley gives a pop of color and freshness. This dish is easy to make and great for family meals. Enjoy the savory twist this casserole brings to your table! 1. Preheat Oven: Set your oven to 350°F (175°C). This helps cook the casserole evenly. 2. Prepare Ingredients: Gather all your ingredients. Slice the potatoes thinly and chop the onion finely. This will speed up cooking. 1. Brown the Beef and Onions: In a large skillet over medium heat, add the ground beef and chopped onion. Cook until the beef is browned and the onion turns soft, about 5-7 minutes. Use a slotted spoon to drain any excess fat. 2. Add Vegetables and Seasonings: Mix in the frozen vegetables, garlic powder, paprika, salt, and pepper. Sauté for 5 more minutes. This helps the flavors blend and thaws the veggies. 1. Layering the Potatoes: In a greased 9x13 inch baking dish, place half of the sliced potatoes evenly at the bottom. Lightly season with salt and pepper. 2. Pouring the Soup Mixture: Spread the beef and vegetable mix over the first potato layer. Then pour half of the creamy soup mixture over the beef. Sprinkle half of the cheese on top. 3. Baking Instructions: Add the remaining potato slices as the next layer, season with salt and pepper, and pour the rest of the soup mixture over them. Cover the dish tightly with aluminum foil. Bake for 45 minutes. Remove the foil, add the rest of the cheese, and bake uncovered for another 15 minutes. The cheese should be melted and bubbly, and the potatoes tender. How to Prevent Sticking To stop your casserole from sticking, use a greased baking dish. I recommend using a bit of butter or cooking spray. Make sure to grease the bottom and sides well. This simple step helps your casserole come out easily. Ensuring Even Cooking Cut your potatoes thinly and uniformly. This way, they cook at the same rate. Layer them evenly in the dish, too. Stir the beef and vegetable mix often while cooking. This helps all flavors blend well. Alternative Seasonings If you want to change the flavor, try different seasonings. Italian herbs like oregano and basil work well. You can also use chili powder for a little kick. Experiment with what you have on hand! Cheese Variations Cheddar cheese is great, but don’t stop there! Try adding Monterey Jack or mozzarella for a creamier texture. You can even mix multiple cheeses for a richer taste. Just sprinkle them on top before the final baking stage. Best Side Dishes This casserole pairs well with a fresh salad. A simple green salad with light dressing can balance the flavors. You can also serve it with crusty bread for a heartier meal. Presentation Ideas Serve the casserole in individual bowls for a homey touch. Add a sprinkle of fresh parsley on top for color. This small detail makes it look fancy without much effort! {{image_4}} You can switch up the meat in this dish. Ground turkey is a great choice. It is lean and has a mild taste. This change makes the casserole lighter but just as tasty. You can use the same amount as ground beef. If you want a vegetarian version, skip the meat entirely. Instead, add more veggies to fill the dish. Try using mushrooms, bell peppers, and zucchini. These ingredients bring flavor and texture without meat. Seasonal vegetables can enhance your casserole. In spring, use fresh asparagus or peas. In the fall, add sweet potatoes or squash. These swaps can bring new flavors and colors to your dish. You can also swap ingredients based on what you have. If you don't have mixed veggies, use broccoli, green beans, or corn. Just make sure to chop them into small pieces for even cooking. If you want to try different creamy bases, there are options. You can use cream of chicken or cream of celery soup. These will change the flavor but keep the dish creamy. For a homemade creamy mixture, blend sour cream with milk and a bit of flour. This gives you a nice base that you can control. You can adjust the taste to your liking, making it more unique. - How to Store Leftover Casserole After enjoying your Hobo Ground Beef & Potato Casserole, let it cool. Once cooled, cover it tightly with plastic wrap or foil. You can also place it in an airtight container. This keeps it fresh and safe. - Best Practices for Reheating To reheat, place the casserole in the oven at 350°F (175°C). Cover it with foil to keep it moist. Heat for about 20-25 minutes, or until warm. If you want a crispy top, remove the foil for the last 5 minutes. - Freezing Unbaked Casserole To freeze an unbaked casserole, assemble it in a freezer-safe dish. Cover it tightly with plastic wrap and foil. This helps prevent freezer burn. You can freeze it for up to 3 months. - Freezing Baked Casserole If you have leftovers from a baked casserole, let it cool first. Then, slice it into portions. Place each portion in a freezer-safe container. This makes it easy to grab a meal later. You can freeze it for up to 3 months too. - How Long It Lasts in the Fridge Your leftover casserole can last in the fridge for about 3-4 days. Make sure it stays covered to keep it fresh. - Freezer Storage Time In the freezer, your casserole can stay good for up to 3 months. Just remember to label it with the date, so you know when to use it. How can I make it spicier? To add spice, you can mix in diced jalapeños or a few dashes of hot sauce. You can also use spicy sausage instead of ground beef. Another idea is to add red pepper flakes when cooking the beef. These options will give your casserole a nice kick! Can I use fresh vegetables instead of frozen? Yes, you can use fresh vegetables! Just chop them up and sauté them with the beef and onions. Fresh veggies may need a bit more time to cook, so add them early in the process. This will keep the flavors bright and fresh. Can I halve the recipe? Absolutely! To halve the recipe, just use half the amount of each ingredient. This works well if you want to make a smaller dish. Adjust your baking time, as a smaller casserole may cook faster. How to cook for larger gatherings? To serve more people, simply double the recipe. Use a larger baking dish to fit all the ingredients. You may need to increase the baking time, so check for doneness. This dish is great for feeding a crowd! Can I make this in a slow cooker? Yes! To make this in a slow cooker, layer all the ingredients as you would in the oven. Cook on low for 6-8 hours or on high for 3-4 hours. This method makes the casserole very tender and flavorful. How to modify for oven-free cooking? If you don’t have an oven, you can use a stovetop method. Cook the beef and veggies in a large skillet. Layer the potatoes in the skillet, add the soup mixture, and cover. Cook on low heat until the potatoes are soft, about 30-40 minutes. This article covered all you need to know for a great casserole. We discussed key ingredients, step-by-step cooking, and helpful tips. I shared variations to fit your diet and guide on storing leftovers. With these insights, you can feel confident when making this dish. Remember, cooking is fun, so make it your own and enjoy!
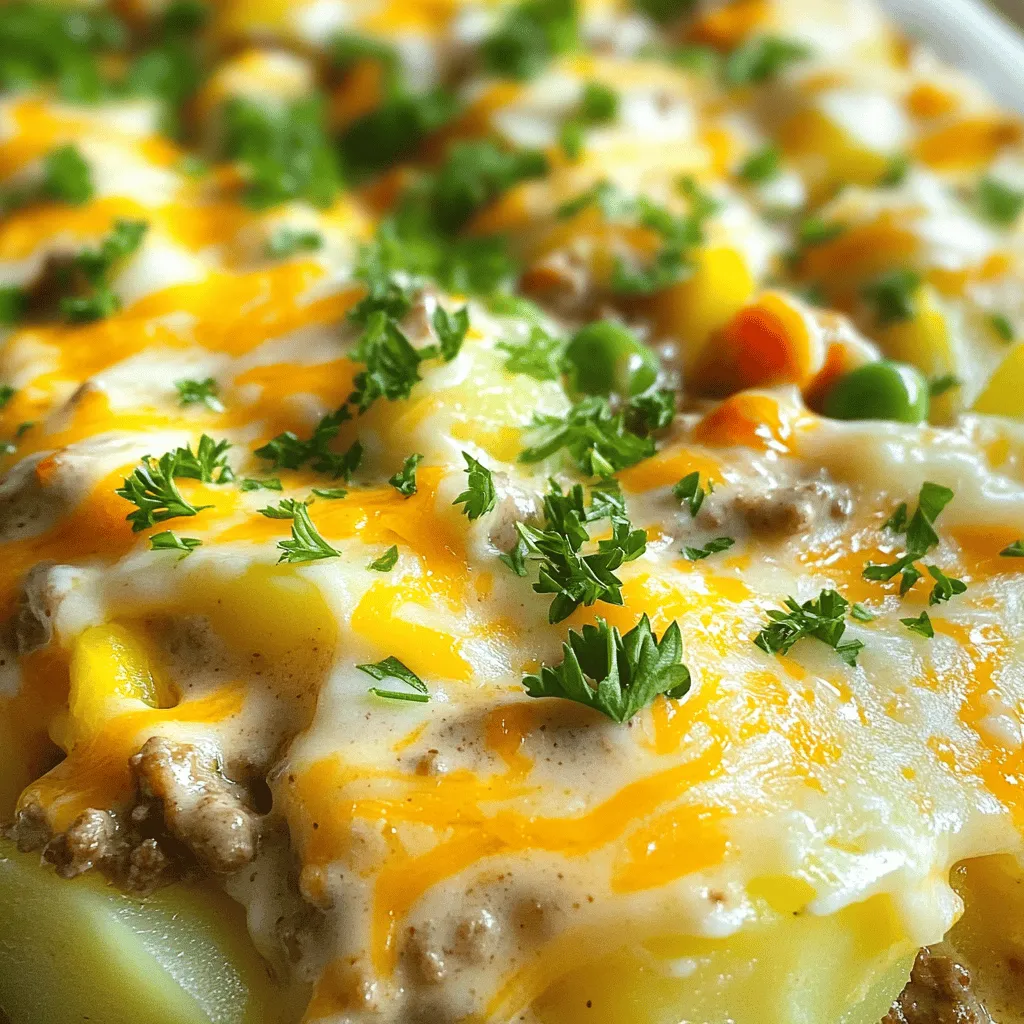
Hobo Ground Beef & Potato Casserole Savory Twist
Looking for a hearty, budget-friendly meal? Try my Hobo Ground Beef & Potato Casserole! This dish combines simple ingredients like ground beef, potatoes, and mixed
- 2 lbs boneless, skinless chicken thighs - 4 medium carrots, peeled and sliced into rounds - 3 medium potatoes, peeled and diced into 1-inch cubes - 1 cup butternut squash, peeled and cubed - 1 medium onion, finely chopped - 3 cloves garlic, minced - 4 cups low-sodium chicken broth - 1 teaspoon dried thyme - 1 teaspoon dried rosemary - 1 teaspoon smoked paprika - 1 bay leaf - Salt and pepper to taste - 2 tablespoons olive oil - 1 tablespoon apple cider vinegar - Fresh parsley, chopped, for garnish Gathering these ingredients is the first step to making a great stew. The chicken thighs are key for a tender bite. They soak up flavors well and stay juicy during cooking. I love using fresh veggies like carrots and potatoes. They add sweetness and heartiness to the dish. Butternut squash brings a lovely creaminess. It melts nicely into the stew, making it rich. Onions and garlic add depth, making the smell amazing as you cook. For broth, I prefer low-sodium chicken broth. It lets you control the saltiness better. The herbs—thyme and rosemary—bring a warm, earthy taste. Smoked paprika adds a hint of smokiness that really rounds out the flavor. Don't forget the apple cider vinegar! It adds a nice tang to balance the sweetness from the veggies. Finally, fresh parsley makes it pop with color and freshness when you serve. With this list, you are all set to create a cozy, comforting meal that warms you from the inside out. {{ingredient_image_2}} First, we start with the aromatics. Heat 2 tablespoons of olive oil in a large skillet over medium-high heat. Once hot, add 1 medium onion, finely chopped, and 3 cloves of minced garlic. Sauté these for about 3 to 4 minutes. You want the onion to turn translucent and fragrant. While the aromatics cook, prepare the chicken. In a bowl, take 2 lbs of boneless, skinless chicken thighs, cut into bite-sized chunks. Season the chicken with salt, pepper, 1 teaspoon of smoked paprika, 1 teaspoon of dried thyme, and 1 teaspoon of dried rosemary. When the onions are ready, add the seasoned chicken to the skillet. Sear the chicken on all sides for 5 to 7 minutes until it is lightly browned. This step really boosts the stew's flavor. Now, it’s time to layer the ingredients in the crockpot. Start by adding a layer of 4 medium carrots, peeled and sliced into rounds. Next, add 3 medium potatoes, peeled and diced into 1-inch cubes, followed by 1 cup of cubed butternut squash. Make sure the vegetables are spread evenly in the pot. Next, combine the chicken and aromatics. Place the seared chicken and the sautéed onion and garlic mixture on top of the layered vegetables in the crockpot. Now we add the liquid. Pour in 4 cups of low-sodium chicken broth and drizzle 1 tablespoon of apple cider vinegar over everything. Toss in 1 bay leaf for extra flavor. Cover the crockpot with its lid. Cook on low for 6 to 7 hours or on high for 4 hours. The stew is ready when the chicken is tender and the vegetables are cooked through. Before serving, carefully remove the bay leaf. Taste the stew and adjust the seasoning with more salt and pepper if needed. This step is key to enhancing the flavors. Serve the warm stew in bowls and garnish each serving with freshly chopped parsley for a vibrant finish. Enjoy your cozy fall chicken stew! To make your stew shine, use the right seasonings. I recommend smoked paprika for a warm, smoky note. Dried thyme and rosemary add earthiness. Don't forget salt and pepper! These enhance all the flavors. To ensure your chicken and vegetables are tender, avoid overcooking. Use fresh ingredients for the best taste. Cut the chicken into small chunks. This helps it cook evenly. For veggies, choose firm ones like carrots and potatoes. Crockpots are great for slow cooking. To get the best results, layer your ingredients. Start with hard vegetables like carrots and potatoes. Then, add the chicken and soft vegetables. This way, everything cooks perfectly. Also, avoid lifting the lid while it cooks. Every time you open it, you lose heat. Keep it closed to let the flavors meld. This hearty stew pairs well with crusty bread or fluffy rice. Both soak up the rich broth nicely. You can also serve it with a simple salad for freshness. For drinks, try a light white wine or warm apple cider. Both complement the stew's flavors. Enjoy your meal with family or friends for a cozy fall experience! Pro Tips Brown the Chicken: For a deeper flavor, make sure to sear the chicken until it's golden brown. This step adds a rich depth to the stew. Cut Evenly: Ensure your vegetables are cut into uniform sizes to promote even cooking and a pleasing presentation. Flavor Boost: Add a splash of white wine or a tablespoon of Dijon mustard for an extra layer of flavor in the broth. Storage Tips: This stew stores well. Refrigerate leftovers in an airtight container for up to 3 days, and it can be frozen for up to a month. {{image_4}} You can easily swap out chicken for turkey. Turkey thighs work well and add a nice flavor. If you prefer a vegetarian option, use chickpeas or lentils. Both add protein and texture. When it comes to veggies, feel free to get creative. You can use sweet potatoes instead of regular potatoes. Turnips or parsnips also make great choices. They provide unique tastes and a seasonal feel. To boost flavor, try adding spices like cumin or coriander. Fresh herbs like thyme or dill can also work wonders. You can even add a pinch of cayenne for heat. Using different broths can change the stew's taste too. Vegetable broth gives a lighter flavor, while beef broth adds richness. You could also use homemade stock for a fresh touch. For gluten-free options, ensure you choose gluten-free broth. Most broths are safe, but check the label. You can also thicken the stew with cornstarch instead of flour. If you're on a low-sodium diet, use salt-free broth. You can add fresh lemon juice to enhance flavors without extra salt. For paleo diets, skip the potatoes and add more veggies like zucchini or mushrooms. After you make your cozy fall chicken stew, let it cool to room temperature. Then, store it in the fridge. Use a glass or plastic container with a tight lid. This keeps the stew fresh and tasty. Your stew will last in the fridge for about three to four days. If you want to keep it longer, consider freezing it. For freezing, choose safe, freezer-friendly containers. Use airtight containers or freezer bags. Make sure to remove as much air as possible. This helps prevent freezer burn. Label your containers with the date and contents for easy tracking. When you are ready to enjoy leftovers, reheating is key. You can use the microwave or stove. For the microwave, place the stew in a bowl. Heat it for about 2-3 minutes, stirring halfway through. On the stove, pour the stew into a pot. Heat it over medium heat. Stir often until it's warm. For the best taste and texture, eat leftovers within three days. If they sit longer, the flavor may fade. Always check for any off smells before reheating. To freeze your chicken stew, do it within two days of cooking. This keeps the best flavor and texture. Portion it into smaller servings. This way, you can thaw only what you need later. For freezing, let the stew cool completely. Then, transfer it to your freezer container. When you are ready to use it, thaw the stew overnight in the fridge. This ensures even thawing. You can also use cold water for a quicker method. Just place the sealed bag in cold water for about an hour. After thawing, reheat on the stove or microwave before serving. Cooking this stew takes about 6-7 hours on low or 4 hours on high. The longer you cook it, the more flavors blend. The chicken should be tender, and the veggies soft. Yes, making this stew ahead of time is great! You can cook a large batch and store it. This helps the flavors develop even more. Plus, it saves you time during busy days. Just keep it in the fridge for up to three days or freeze it for longer storage. This chicken stew pairs well with many sides. Some popular choices include crusty bread, rice, or a fresh salad. You can also enjoy it with cornbread for extra comfort. Each option adds a nice touch to the hearty stew. In summary, we covered everything for making Crockpot Cozy Fall Chicken Stew. You learned the key ingredients, step-by-step cooking instructions, and helpful tips for the best flavor. We also explored variations and storage techniques to keep your stew fresh. This dish is hearty and perfect for fall. Enjoying it with bread or rice makes it even better. I hope you feel ready to create this cozy meal in your kitchen. Happy cooking!
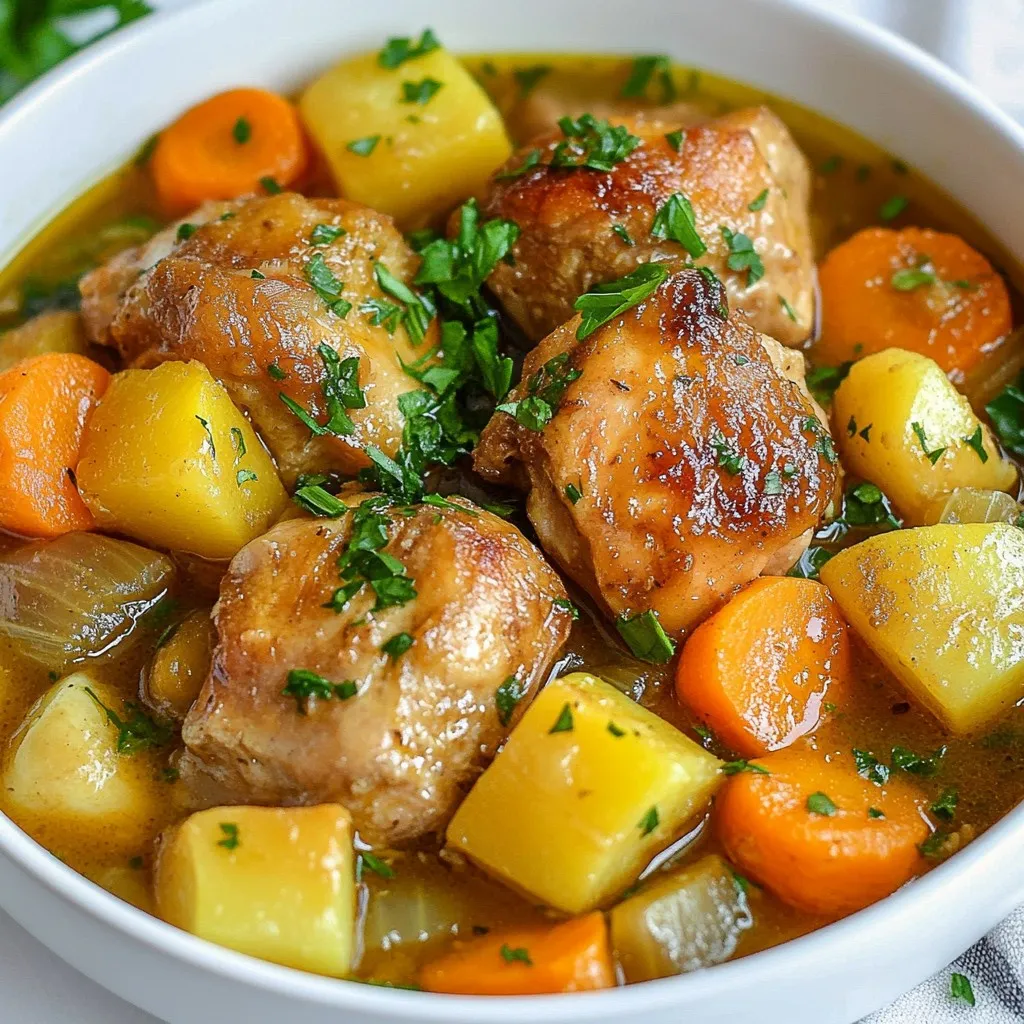
Crockpot Cozy Fall Chicken Stew Hearty and Comforting
As the leaves turn and the air gets crisp, there’s nothing quite like a warm bowl of Crockpot Cozy Fall Chicken Stew. This hearty dish
- 12 oz spaghetti - 1 lb ground beef - 1 medium onion, diced - 2 cloves garlic, minced - 1 bell pepper, diced - 1 can (14 oz) diced tomatoes - 1 cup beef broth - 1 cup frozen corn - 1 can (15 oz) black beans, rinsed and drained - 2 tablespoons taco seasoning - 1 teaspoon smoked paprika - Salt and pepper to taste - 2 tablespoons olive oil - Shredded cheddar cheese for topping - Fresh cilantro for garnish The key to a great dish lies in the ingredients. You start with spaghetti as the base. It cooks right in the pot, soaking up all the flavors. Then, you need ground beef for a hearty protein. It gives the meal depth and richness. Next, add a medium onion and garlic. They provide a wonderful aroma and flavor. A bell pepper adds color and sweetness. Use any color you prefer; they all work well. Don't forget the diced tomatoes. They add moisture and tang. The beef broth enhances the meaty flavor and helps the spaghetti cook. Frozen corn gives a touch of sweetness and texture. For the beans, use black beans. They are nutritious and filling. Taco seasoning and smoked paprika bring warmth and spice. Adjust salt and pepper to your taste. Finally, drizzle in olive oil to keep everything moist. Top with shredded cheddar cheese for creaminess. Finish with fresh cilantro for a bright touch. Each ingredient plays a role in making this dish easy and flavorful! Start by heating olive oil in a large pot over medium heat. Once the oil is hot, add the diced onion. Sauté the onion for about three to four minutes. You want it soft and see-through. Next, stir in the minced garlic and diced bell pepper. Cook for another two minutes. This will make your kitchen smell great! Now it’s time to add the ground beef. Break it apart with a spoon as you add it to the pot. Cook the beef for about five to seven minutes. Stir it often until it turns brown and is no longer pink. If there's a lot of fat, drain it from the pot to keep things light. Once the beef is browned, sprinkle in the taco seasoning and smoked paprika. Don’t forget to add salt and pepper to taste. Mix it all well so the spices coat the meat. Cook for one more minute. This step adds a lot of flavor! Next, pour in the canned diced tomatoes, beef broth, frozen corn, and black beans. Then add the uncooked spaghetti. Make sure to stir everything well. Check that the spaghetti is fully submerged in the liquid. This helps it cook evenly. Bring the mixture to a rolling boil. Once it's boiling, reduce the heat to a gentle simmer. Cover the pot and let it simmer for about 12 to 15 minutes. Stir occasionally to prevent sticking. You’ll know it’s done when the spaghetti is tender. After cooking, take the pot off the heat. Let the dish rest for a few minutes to thicken up. For a cheesy finish, stir in half of the shredded cheddar cheese until it melts. This will give your cowboy spaghetti a creamy touch! To boost the taste of One-Pot Cowboy Spaghetti, add spices like cumin or chili powder. A pinch of cayenne will give it a kick. You can also mix in fresh herbs like oregano or thyme for more depth. After cooking, let the dish rest for a few minutes. This resting time helps all the flavors meld together, making each bite even better. When sautéing, keep the heat medium to avoid burning the onion and garlic. Stir often to cook them evenly. For perfect pasta texture, cook the spaghetti until it is al dente. This means it should be soft but still firm to the bite. Remember, the pasta will continue to cook a bit after you remove it from heat. Top your Cowboy Spaghetti with shredded cheddar cheese for creaminess. Fresh cilantro adds color and a burst of flavor. You can serve it with cornbread or a side salad for a complete meal. For a fun cowboy theme, consider adding cowboy beans or grilled corn on the cob. {{image_4}} You can easily switch the ground beef for ground turkey or chicken. Both options are leaner but still tasty. If you want a vegetarian dish, use lentils or mushrooms. They add great texture and flavor. If you're looking for a healthier choice, try whole wheat spaghetti. It gives more fiber and a nutty taste. For gluten-free options, use gluten-free spaghetti or any short pasta. Bowtie or penne works well in this dish, too, and is fun to eat. Feel free to add more veggies! Zucchini, spinach, or carrots can boost nutrition and flavor. You can also use seasonal produce like bell peppers in summer or squash in fall. This way, you can change it up and keep meals fresh and exciting. To store leftovers, let the spaghetti cool first. Then, transfer it to an airtight container. This helps keep it fresh. You can store it in the fridge for up to 3 days. After that, it might lose its taste and texture. To freeze One-Pot Cowboy Spaghetti, use a freezer-safe container. Make sure to leave some space at the top, as it will expand. The dish can stay good in the freezer for up to 3 months. When you’re ready to eat it, thaw it overnight in the fridge. You can reheat the spaghetti in two ways: the microwave or the stovetop. For the microwave, place it in a bowl and cover it. Heat in 1-minute bursts until hot. On the stovetop, gently warm it in a pan over low heat. Add a splash of beef broth or water to keep it moist. Stir often to prevent sticking. One-Pot Cowboy Spaghetti takes about 30 minutes to cook. You spend 10 minutes prepping the ingredients. Cooking takes about 20 minutes. This quick meal fits into a busy schedule. Yes, you can make this dish ahead of time. Cook the spaghetti and let it cool. Store it in an airtight container in the fridge for up to three days. To reheat, add a splash of broth to keep it moist. You can use ground turkey or chicken for a leaner choice. For a vegetarian option, try lentils or black beans. Both options keep the dish hearty and satisfying. To add heat, include diced jalapeños or crushed red pepper flakes. You can also use a spicier taco seasoning. Start with a little, then taste and adjust as needed. Yes, you can add more vegetables! Try zucchini, spinach, or mushrooms. Just chop them small and add them with the garlic and bell pepper. This adds flavor and nutrition. This blog post covered a tasty One-Pot Cowboy Spaghetti recipe. We explored the ingredients, cooking methods, tips, and storage info. You learned how to create a dish full of flavor and fun. Try different meats and veggies to make it your own. Remember to let it rest for better taste. Enjoy making this dish and impressing your friends. Cooking can be a joy, and this meal is an easy way to start. Now, grab your ingredients and get cooking!
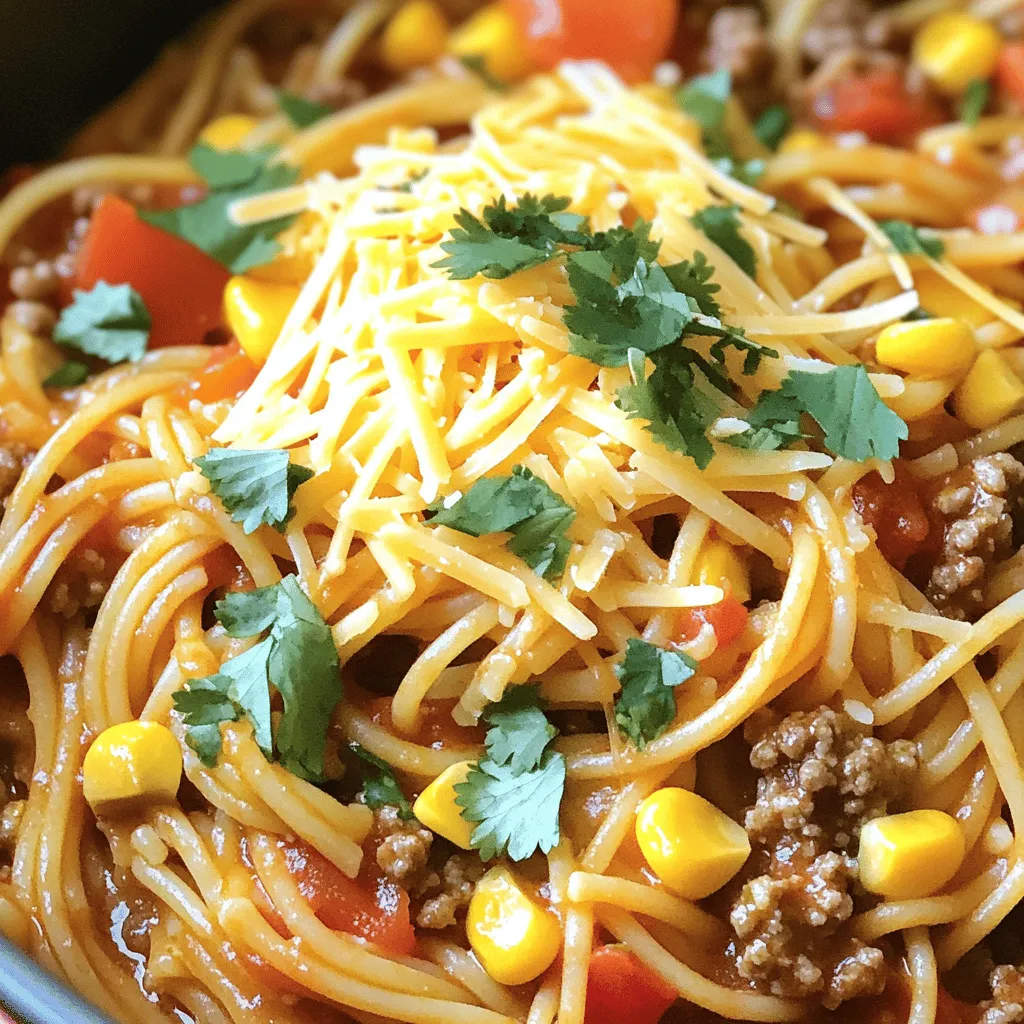
One-Pot Cowboy Spaghetti Easy and Flavorful Meal
Craving a hearty, easy meal? Look no further! One-Pot Cowboy Spaghetti is packed with flavor and can be made in just one pot. With simple