Desserts

- 2 ¾ cups all-purpose flour - 1 teaspoon baking powder - ½ teaspoon baking soda - ¼ teaspoon salt - 1 cup unsalted butter, softened to room temperature - 1 cup granulated sugar - ½ cup powdered sugar - 1 large egg - 2 teaspoons pure vanilla extract - 1 teaspoon pure almond extract - ½ cup assorted holiday sprinkles - Extra granulated sugar for rolling Gathering the right ingredients is key to making great cookies. I use all-purpose flour for a soft texture. Baking powder and baking soda help them rise just right. A little salt brings out the sweet flavors. For the fats, I prefer unsalted butter. It gives the cookies a rich taste. I blend granulated sugar and powdered sugar for the perfect balance of sweetness. The egg binds everything together, making the dough smooth. Vanilla and almond extracts add depth to the flavor. The holiday sprinkles make these cookies festive and fun. Don’t forget the extra sugar for rolling. It gives the cookies a nice crunch on the outside. With all these ingredients, your kitchen will smell amazing! First, set your oven to 350°F (175°C). While it heats, prepare your baking sheets. Line two sheets with parchment paper. This step helps prevent the cookies from sticking. In a small bowl, mix the dry ingredients. Combine 2 ¾ cups of all-purpose flour, 1 teaspoon of baking powder, ½ teaspoon of baking soda, and ¼ teaspoon of salt. Use a whisk to blend everything well. Set this bowl aside for later. In a large bowl, cream the butter and sugars. Use an electric mixer to beat 1 cup of softened unsalted butter, 1 cup of granulated sugar, and ½ cup of powdered sugar. Mix until it looks light and fluffy. This takes about 3-4 minutes. Next, add the wet ingredients to the butter-sugar mix. Crack in 1 large egg and pour in 2 teaspoons of vanilla extract and 1 teaspoon of almond extract. Mix until everything is well combined and smooth. Now, it's time to add the dry mix. Gradually pour the dry ingredients into the wet mixture. Mix on low speed until just combined. Be careful not to overmix. This keeps the cookies tender. It's time for the fun part! Gently fold in ½ cup of assorted holiday sprinkles. Use a spatula to mix them in evenly. This step adds color and joy to your cookies! Using a tablespoon, scoop out portions of dough. Roll each portion into a ball with your hands. Then, roll each ball in extra granulated sugar before placing them on the prepared sheets. Leave about 2 inches between each cookie. Place the baking sheets in the oven. Bake for 10-12 minutes. Look for lightly golden edges. This means your cookies are ready to come out. After baking, remove the cookies from the oven. Let them cool on the sheets for about 5 minutes. Then, transfer them to wire racks. Let them cool completely before enjoying. To avoid common baking mistakes, start by measuring ingredients correctly. Use a scale for precision. Make sure your butter is at room temperature for easy mixing. When creaming butter and sugars, mix until light and fluffy. This step helps cookies rise well. Always preheat your oven to the right temperature. This ensures even baking. The texture of cookies comes from several factors. First, the type of flour matters. All-purpose flour gives good results. Second, the amount of butter affects softness. Too much butter can make cookies greasy. Third, avoid overmixing the dough. Mix just until combined to keep cookies tender. Lastly, baking time is key. Take cookies out when the edges are lightly golden. For a fun display, drizzle icing on your cooled cookies. Mix powdered sugar with a splash of milk for a simple icing. Use a spoon to drizzle it on top. Arrange cookies on a colorful platter. Scatter extra holiday sprinkles around them for a festive look. This makes the cookies even more inviting for guests. {{image_4}} You can make these cookies even more fun by changing the flavors. Here are some ideas to try: - Chocolate Chips: Add about 1 cup of chocolate chips to the dough. This gives a sweet, rich flavor. - Citrus Zest: Grate some lemon or orange peel into the mix. This adds a bright, fresh taste. - Nut Flavors: Try adding chopped nuts like pecans or walnuts. They give a nice crunch and flavor. - Spices: Mix in a pinch of cinnamon or nutmeg for a warm, cozy flavor. These spices work great for the holidays. Decorating these cookies can be a blast! Here are some ideas to make them festive: - Icing: Drizzle a simple icing made from powdered sugar and milk. Use festive colors like red and green. - Sprinkles: Use different holiday sprinkles. You can find stars, snowflakes, or even candy canes. - Edible Glitter: Add some edible glitter for a shiny finish. It makes them look magical. - Marshmallows: Top cookies with mini marshmallows for a fun twist. They add a soft texture and sweetness. You can also change these cookies to fit your diet. Here are some options: - Gluten-Free: Use gluten-free flour instead of all-purpose flour. This keeps the cookies tasty and safe for those with gluten issues. - Vegan: Replace the egg with a flax egg or applesauce. Use vegan butter instead of regular butter. This makes the cookies vegan-friendly. - Lower Sugar: You can cut back on the sugar if you want a less sweet treat. Just reduce the granulated sugar by a little. These variations make the holiday sprinkle sugar cookies perfect for everyone! To keep your holiday sprinkle sugar cookies fresh, store them in an airtight container. Place parchment paper between layers to prevent sticking. Keep the container in a cool, dry place. Avoid direct sunlight, as it can dry out the cookies. This method helps maintain their soft texture and flavor. You can freeze these cookies for future joy. First, let the cookies cool completely. Then, place them in a single layer on a baking sheet and freeze for about an hour. Once frozen, transfer them to a freezer-safe bag or container. Label the bag with the date. They can last up to three months in the freezer. When stored correctly, these cookies can last about one week at room temperature. If you freeze them, they will stay fresh for up to three months. This allows you to enjoy them during the busy holiday season or any time you crave a sweet treat. These cookies shine because of the colorful holiday sprinkles. They add joy and fun to each bite. The sprinkles make the cookies look festive and bright. This extra touch makes them perfect for any holiday gathering. Plus, the sprinkles can add a slight crunch, enhancing the texture. Absolutely! You can use any sprinkles you like. Try chocolate, rainbow, or even themed sprinkles for different holidays. Each type will give the cookies a new look and taste. Feel free to mix and match for a fun twist. Look for lightly golden edges on your cookies. The centers may still look soft, and that's okay! They will firm up as they cool. If you notice the edges turning brown, it's time to take them out. Overbaking will make them too hard. Yes, making the dough ahead is a great idea! You can store it in the fridge for up to three days. Just wrap it tightly in plastic wrap. If you want to keep it longer, freeze the dough for up to three months. Thaw it overnight in the fridge before baking. This way, you can enjoy fresh cookies whenever you want! You have all the tools to bake delicious sugar cookies. This guide covered ingredients, easy steps, and helpful tips. You learned how to mix, shape, and bake. I shared ways to customize flavors and decorate for any occasion. Proper storage keeps your cookies fresh longer. Follow these steps, and you’ll bake cookies everyone loves. Remember, practice makes perfect. Enjoy your baking journey and share your treats with friends and family!
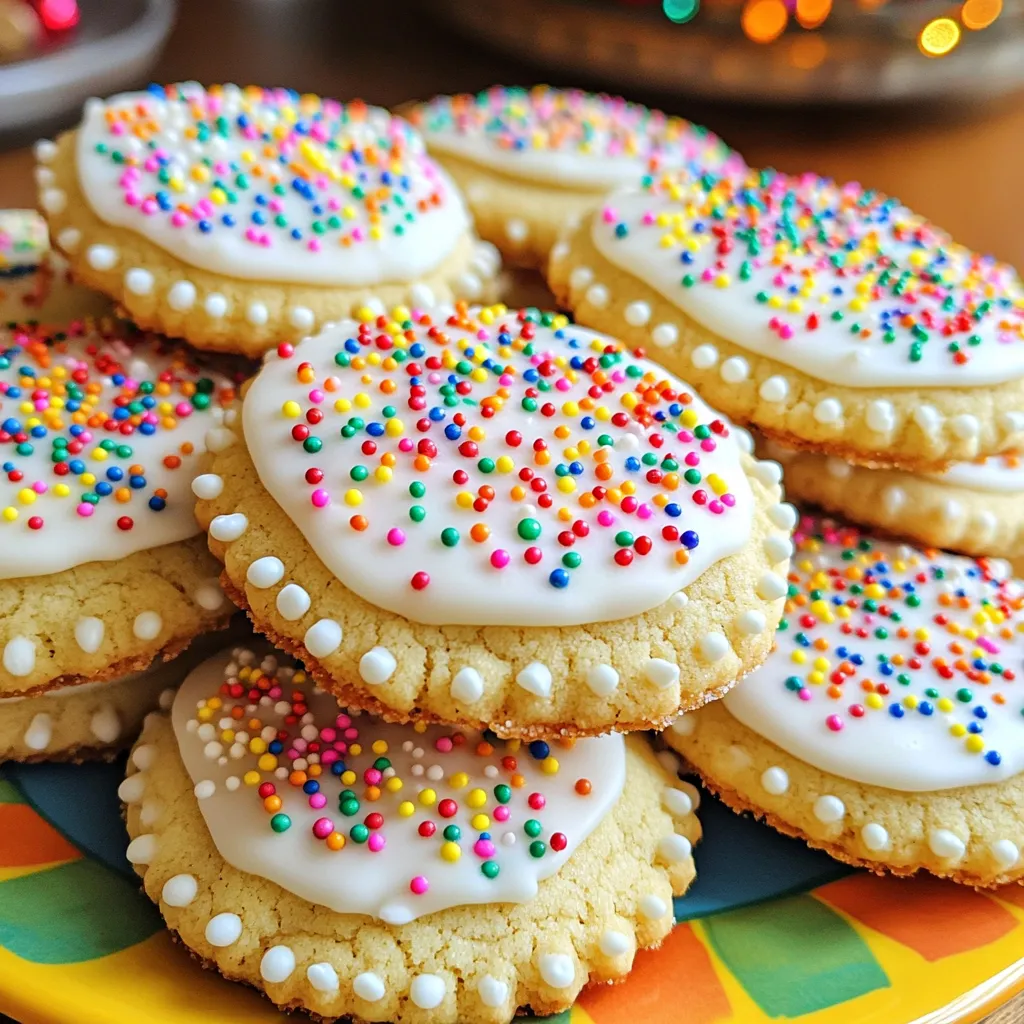
Holiday Sprinkle Sugar Cookies Festive and Fun Treat
Get ready to make the holidays sweeter with my Holiday Sprinkle Sugar Cookies! These festive treats are easy to bake and fun to share. You’ll
- 2 cups rolled oats - 1 cup almond butter (or nut/seed butter) - 1/2 cup honey or maple syrup These main ingredients form a solid base for your oat bars. Rolled oats bring a hearty texture. Almond butter adds creaminess and healthy fats. Honey or maple syrup sweetens the mix naturally. - 1 cup dried cranberries - 1 cup white chocolate chips - 1/2 cup sliced almonds (or nuts of your choice) Mix-ins provide flavor and crunch. Dried cranberries add a sweet-tart kick. White chocolate chips melt softly, making each bite delightful. Sliced almonds introduce a nice crunch, but any nuts will work too. - 1 teaspoon vanilla extract - A pinch of salt Flavor enhancements elevate the taste. Vanilla extract brings warmth and depth. A pinch of salt balances the sweetness, making the bars even tastier. These simple additions make a big difference! Combining the base ingredients Start by grabbing a large mixing bowl. Add 2 cups of rolled oats, 1 cup of almond butter, and 1/2 cup of honey or maple syrup. Use a spatula or wooden spoon to mix these ingredients well. You want them to blend into a smooth, sticky mixture. Folding in the mix-ins Now it’s time to add some fun! Fold in 1 cup of dried cranberries, 1 cup of white chocolate chips, 1/2 cup of sliced almonds, 1 teaspoon of vanilla extract, and a pinch of salt. Mix gently until everything is evenly spread throughout the oat base. Every bite should have a little bit of each flavor. Preparing the baking dish Next, get a 9x9 inch square baking dish. Line it with parchment paper. Let some paper hang over the edges. This extra paper will make it easy to lift out the bars later. Transferring mixture to the dish Carefully take your oat mixture and pour it into the prepared dish. Use the back of a spatula or your hands to spread it out evenly. Firmly packing and smoothing out Press the mixture down firmly. This step is important. Make sure it is packed tightly and smooth on top. A good press helps your bars hold together better. Refrigeration time Now, cover the dish and place it in the refrigerator. Chill for at least 2 hours. This helps the bars set and become firm. Removing and slicing the bars After the chill time, lift the bars out using the overhanging parchment paper. Place them on a cutting board. Use a sharp knife to cut them into squares or rectangles. Enjoy your delicious creation! - Adjusting sweetness: You can choose honey or maple syrup for your bars. Honey gives a rich flavor, while maple syrup adds a nice twist. Try both to see which you like best. - Choosing the right nut butter: Almond butter works great, but feel free to use peanut butter or sunflower seed butter. Each will change the taste a bit, so experiment. - Best practices for pressing the mixture: Always press the mixture firmly into the dish. This helps the bars hold their shape when cut. Use a spatula or your hands to make it smooth. - Presentation ideas for special occasions: Place the bars on a nice platter. Add a sprinkle of dried cranberries on top, or drizzle with melted white chocolate. It makes them look fancy! - Pairing with beverages: These bars go well with tea or coffee. Try serving them with a glass of almond milk for a tasty treat. - Not packing the mixture tightly: If you don't pack the mixture well, the bars will crumble when you cut them. Press down firmly! - Skipping the refrigeration step: Chilling the bars is key. Without it, they won’t hold together. Be patient and let them chill for at least two hours. {{image_4}} You might want nut-free options for your No-Bake White Chocolate Cranberry Oat Bars. Seed butters work great here. Try sunflower seed butter or pumpkin seed butter. They give a nice flavor without nuts. For additives, you can swap sliced almonds with seeds. Chia seeds or pumpkin seeds add crunch. They also boost nutrition. You can even leave out the nuts or seeds. The bars will still taste yummy! You can change the flavors of your bars easily. Using different dried fruits adds variety. Try raisins, apricots, or even dried cherries. Each fruit brings its own taste and texture. Adding spices or citrus zest can make a big difference too. A dash of cinnamon or nutmeg adds warmth. Zest from oranges or lemons brings brightness. These small changes can make your bars special! If you love chocolate, consider a twist. Dark chocolate is a great option. Instead of white chocolate chips, use dark ones. They add richness and a deeper flavor. You can also add cocoa powder to your mix. Just a few tablespoons makes the bars chocolatey. This twist is perfect for those who love chocolate! To keep your No-Bake White Chocolate Cranberry Oat Bars fresh, follow these tips: - Store bars in an airtight container. - Use parchment paper to separate layers. - Keep the container in a cool, dark place. I recommend using glass containers or sturdy plastic ones. They help maintain the bars' shape and flavor. When stored in the refrigerator, these bars last about one week. You’ll know they have gone bad if you see mold or if they smell off. Always check before you enjoy! Freezing your oat bars is easy. Here’s how: 1. Wrap each bar tightly in plastic wrap. 2. Place the wrapped bars in a freezer bag or container. 3. Label with the date for reference. To thaw, take a bar out and leave it in the fridge overnight. This keeps the texture just right. Enjoy your treats later! Yes, you can use gluten-free oats. Just make sure they are labeled gluten-free. This swap keeps your bars safe for those with gluten allergies. The texture and flavor will remain the same. Enjoy your delicious treat without worry! You can use any nut or seed butter. Peanut butter, cashew butter, or sunflower seed butter work well. Each option gives a different flavor, so choose what you like best. The bars will still taste great, no matter the butter you pick! The bars need to chill for at least 2 hours. This time helps them firm up and hold their shape. If you want them extra firm, you can chill them longer. Just be patient; the wait is worth it for that perfect bite! Absolutely! Feel free to add nuts, seeds, or other dried fruits. Just remember to keep the total amount the same. This keeps the balance of flavors and texture right. Get creative and enjoy the fun of personalizing your bars! The bars are ready when they are firm to the touch. If they feel soft, give them more time in the fridge. Once they hold their shape, they are perfect for slicing. Then you can enjoy your tasty creation! Store any leftover bars in an airtight container. Keep them in the refrigerator to stay fresh. They will last up to a week this way. Enjoy them as a quick snack or a sweet treat anytime! These delicious bars use rolled oats, nut butter, and sweeteners as the base. Mix-ins like cranberries and white chocolate add flavor and texture. Remember to pack them tightly before chilling in the fridge. You can customize these bars by using different nuts or sweeteners. Don't skip the refrigeration step; it ensures the bars stay firm. With a few tips, you can avoid common mistakes and enjoy tasty, healthy snacks anytime. Happy making!
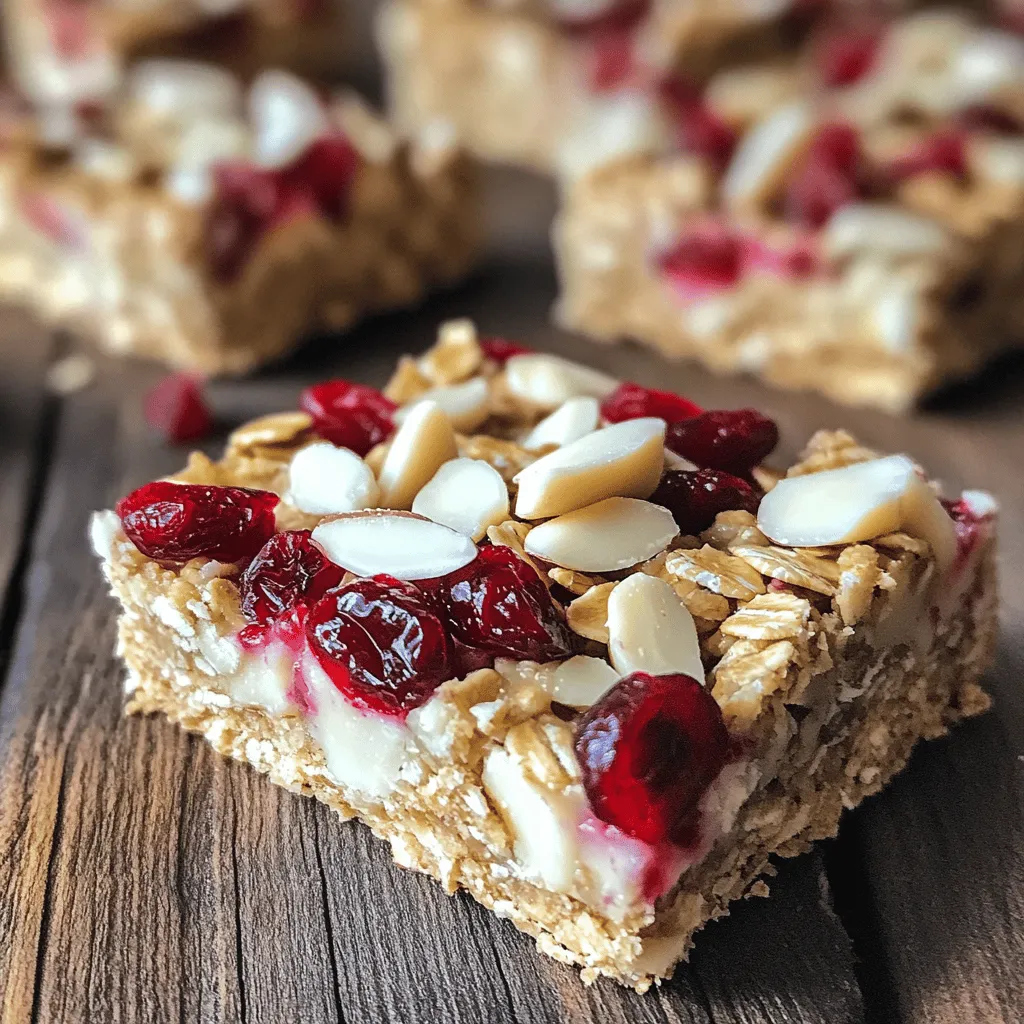
No-Bake White Chocolate Cranberry Oat Bars Delight
Looking for a sweet treat that’s both easy and delicious? These No-Bake White Chocolate Cranberry Oat Bars are the answer! Packed with wholesome oats, creamy
To make these tasty treats, gather the following ingredients: - 1 cup all-purpose flour - 1/2 teaspoon baking soda - 1/4 teaspoon salt - 1/2 cup unsalted butter, softened - 1/3 cup brown sugar, packed - 1/4 cup granulated sugar - 1 teaspoon vanilla extract - 1 large egg - 1/2 teaspoon ground cinnamon - 1/2 cup apple, peeled and finely chopped - 8 oz cream cheese, softened - 1/2 cup powdered sugar - 1/4 cup sour cream - 1/2 teaspoon vanilla extract (for cheesecake) - 1/2 cup caramel sauce (plus extra for drizzling) You can add some extra fun with these optional ingredients: - Chopped nuts, like pecans or walnuts - Extra spices, such as nutmeg or allspice - Chocolate chips for a sweet twist - Different fruits like pears or peaches Make sure you have the right tools to help you: - A standard muffin tin - Mixing bowls (one large and one medium) - Electric mixer for easy blending - Measuring cups and spoons for accuracy - A spoon or spatula for folding ingredients - An oven for baking the cookie cups First, preheat your oven to 350°F (175°C). Grease a muffin tin well to stop sticking. In a bowl, mix 1 cup of flour, 1/2 teaspoon of baking soda, 1/4 teaspoon of salt, and 1/2 teaspoon of ground cinnamon. This will be your dry mix. In another bowl, cream 1/2 cup of softened butter, 1/3 cup of packed brown sugar, and 1/4 cup of granulated sugar for about 2-3 minutes. It should look light and fluffy. Next, add 1 large egg and 1 teaspoon of vanilla extract to the butter mix. Stir well. Now, gently fold the dry mix into the wet mix. Be careful not to overmix. Finally, fold in 1/2 cup of finely chopped apple. In a separate bowl, beat 8 oz of softened cream cheese with 1/2 cup of powdered sugar until creamy. Then, add 1/4 cup of sour cream and another 1/2 teaspoon of vanilla extract. Mix until it’s smooth and silky. This filling will be rich and tasty. Take a tablespoon of cookie dough and press it into the bottom and sides of each muffin cup. Make sure to form a cup shape. Bake in the oven for 10-12 minutes until the edges are golden brown. Once done, let them cool completely in the tin. After cooling, spoon the cheesecake filling into each cookie cup. Drizzle some 1/2 cup of caramel sauce on top. You can add more caramel for a sweet touch. For fun, sprinkle some chopped apples or cinnamon on top for flair. Enjoy your delightful treats! To get the best cookie cup texture, focus on mixing. First, cream the butter and sugars well. This step adds air, making your cups light. After adding the egg and vanilla, mix just until combined. Overmixing can make them tough. When you scoop the dough, press it firmly into the muffin tin. This makes a nice cup shape. Bake until the edges turn golden brown. Let them cool in the tin to keep their shape. For a smooth cheesecake filling, start with softened cream cheese. Use an electric mixer to beat it with powdered sugar. Beat until creamy and smooth, which helps avoid lumps. Adding sour cream makes the filling rich and soft. Remember to mix well after adding the vanilla. This step ensures a silky texture that pairs well with the cookie cups. Serve your cookie cups on a nice plate. Drizzle extra caramel sauce over the top for a sweet touch. Adding a sprinkle of chopped apples gives a nice crunch. For added flavor, dust with ground cinnamon. These little details make your dessert look stunning and taste even better. Enjoy them warm or chilled; both ways are delicious! {{image_4}} You can switch out apples for other fruits. Try pears for a soft texture or berries for a tart twist. Chopped peaches or cherries also bring a sweet freshness. Make sure to adjust the sugar levels if you use tart fruits. This keeps your cheesecake filling balanced and tasty. Not all caramel sauces are the same. You might use salted caramel for a sweet and salty mix. Dark caramel adds depth with a rich flavor. If you want a lighter touch, try butterscotch sauce instead. Each sauce can change the whole vibe of your cookie cups. Spices can bring new life to your cookie cups. Adding nutmeg or ginger gives warmth and a cozy feel. You can also use almond extract for a unique twist. Vanilla is classic, but a splash of maple can add fun. Experiment and find the blend that makes you smile! To keep your Caramel Apple Cheesecake Cookie Cups fresh, store them in an airtight container. Line the container with parchment paper to absorb any excess moisture. This method helps maintain their soft texture and prevents sogginess. In the refrigerator, these cookie cups last about 3 to 4 days. Make sure to keep them sealed well. The flavors deepen as they sit, making each bite even more delightful. If you want to save some for later, freezing is a great option. Place the cookie cups in a single layer on a baking sheet. Freeze them for 1-2 hours until firm. Once frozen, transfer them to a freezer-safe bag or container. They can stay good for up to 2 months. When ready to eat, thaw them in the fridge overnight. Enjoy the deliciousness when you crave a sweet treat! Yes, you can! To make gluten-free cookie cups, use a gluten-free flour blend. This works well in most recipes. Just ensure the blend has a good mix of starches and proteins. Check that all other ingredients are also gluten-free. This way, everyone can enjoy these tasty treats. To prevent sticking, grease the muffin tin well. I recommend using butter or cooking spray. You can also line the muffin cups with paper liners for easy removal. Let the cookie cups cool a bit before taking them out. This will help them firm up and keep their shape. Absolutely! You can make the cheesecake filling a day in advance. Store it in an airtight container in the fridge. When you are ready, spoon it into the cooled cookie cups. This saves time and makes assembly easier. To reheat cookie cups, use an oven set to 350°F (175°C). Place them on a baking sheet for about 5-7 minutes. This warms them without making them soggy. You can drizzle more caramel sauce on top after reheating for extra flavor. This article guides you through making Caramel Apple Cheesecake Cookie Cups. We discussed the needed ingredients, tools, and steps to create these treats. You learned tips for a great texture and serving ideas to make them shine. We also explored fun variations and storage tips to keep them fresh. Remember, these cookie cups are easy to customize. Enjoy sharing them with friends and family, or savor them all for yourself! Happy baking!
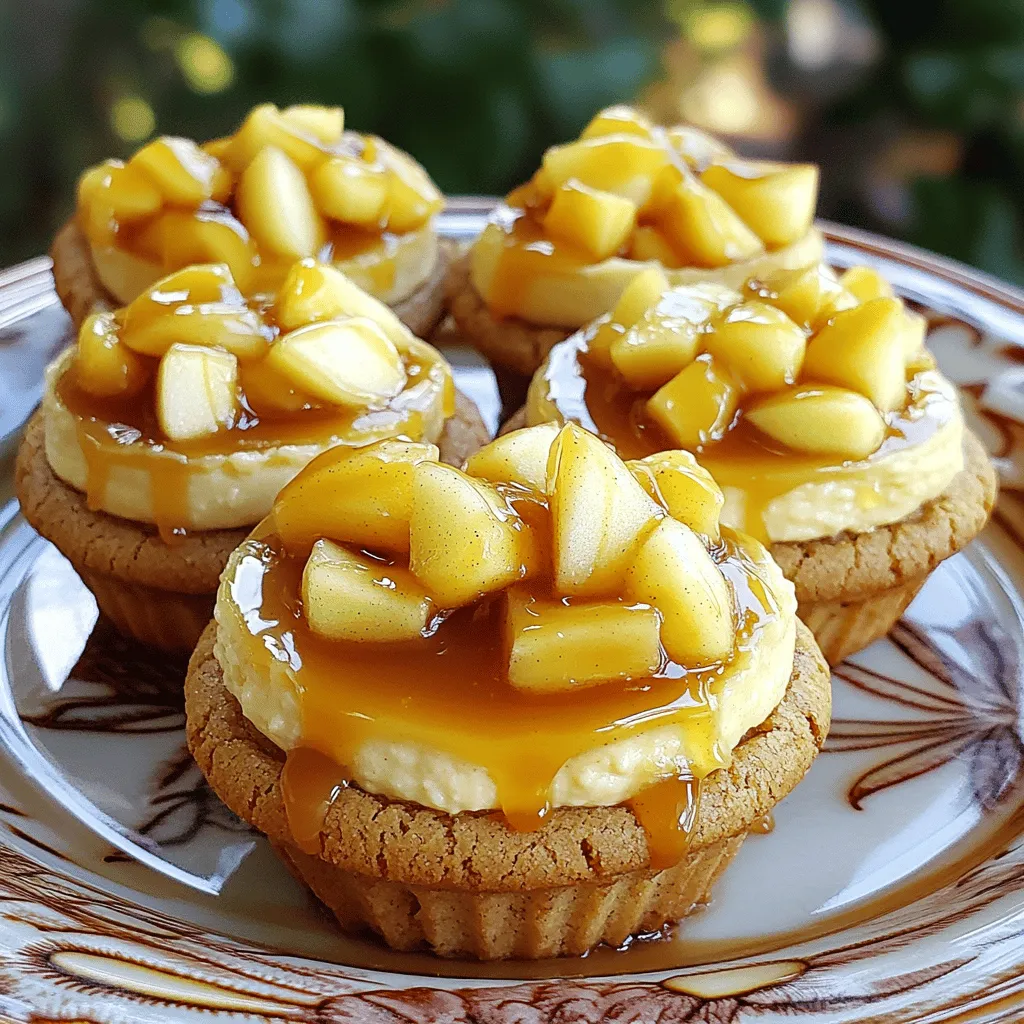
Caramel Apple Cheesecake Cookie Cups Delightful Treat
Get ready to indulge in a sweet treat that combines your favorite flavors! My Caramel Apple Cheesecake Cookie Cups are the perfect blend of creamy
The key to making warm chocolate crinkle cookies lies in the perfect blend of ingredients. Here’s what you need: - 1 cup all-purpose flour - 1/2 cup unsweetened cocoa powder - 1/2 teaspoon baking powder - 1/4 teaspoon fine sea salt - 1/2 cup granulated sugar - 1/2 cup packed brown sugar - 1/4 cup vegetable oil - 2 large eggs - 1 teaspoon pure vanilla extract - 1/2 cup powdered sugar for rolling and coating Each of these ingredients plays a vital role. The flour provides structure. The cocoa adds rich flavor. Baking powder helps the cookies rise. Sea salt boosts sweetness. Granulated and brown sugars create that lovely sweetness and texture. Oil gives moisture, while eggs bind everything. Vanilla brings a warm aroma. Finally, powdered sugar makes that signature crinkle texture. Feel free to get creative! You can swap in dark chocolate for a richer taste or mix in chocolate chips for extra gooeyness. Whatever you choose, these ingredients set the stage for a delightful cookie experience. 1. Preheating the oven and preparing the baking sheet Start by preheating your oven to 350°F (175°C). Grab a baking sheet and line it with parchment paper. This step keeps the cookies from sticking and helps them bake evenly. 2. Sifting dry ingredients together In a medium bowl, sift together 1 cup of all-purpose flour, 1/2 cup of unsweetened cocoa powder, 1/2 teaspoon of baking powder, and 1/4 teaspoon of fine sea salt. Sifting adds air and prevents lumps in your dry mix. 3. Mixing the wet ingredients In a large bowl, combine 1/2 cup of granulated sugar, 1/2 cup of packed brown sugar, and 1/4 cup of vegetable oil. Whisk until smooth. This helps dissolve the sugar into the oil for a better blend. 1. Incorporating eggs and vanilla into the mixture Add 2 large eggs, one at a time, to the sugar mix. Whisk well after each egg. This ensures a smoother batter. Then, stir in 1 teaspoon of pure vanilla extract until mixed. 2. Gradually adding dry ingredients to wet Slowly add the sifted dry ingredients to the wet mixture. Mix just until combined. Your dough should feel thick and slightly sticky, but don’t over-mix it. 3. Chilling the dough Cover the bowl with plastic wrap and chill the dough for about 30 minutes. Chilling makes the dough easier to handle and helps the cookies keep their shape. 1. Forming the cookie balls After chilling, use a tablespoon or small scoop to portion out the dough. Roll each piece into a smooth ball with your hands. 2. Coating with powdered sugar Roll each dough ball in 1/2 cup of powdered sugar. Make sure they are fully coated. This sugar will create the lovely crinkle effect while baking. 3. Baking and cooling process Place the sugar-coated cookie balls on the baking sheet, spacing them about 2 inches apart. Bake for 10-12 minutes. The edges should be set, and the tops will show beautiful cracks. Cool on the sheet for 5 minutes, then transfer to a wire rack to cool completely. To get that perfect crinkle, the dough’s thickness matters. If the dough is too thin, the cookies won't rise well. Aim for a dough that is thick and slightly sticky. This helps form those lovely cracks as they bake. When rolling your cookies, use clean hands to make smooth balls. Try to keep them even in size. This ensures they bake uniformly. Keep an eye on your oven temperature. Preheat to 350°F (175°C) for the best results. Bake the cookies for 10-12 minutes. The edges should be set, while the tops look crinkled and soft. For serving, present these cookies warm on a nice platter. Dust them with a bit of extra powdered sugar for charm. You can also pair them with a scoop of creamy vanilla ice cream. It adds a rich touch to the warm chocolate. For drinks, serve with hot chocolate or coffee. The flavors mix well and create a delightful experience. Enjoy sharing these treats with friends and family! {{image_4}} You can switch up the chocolate in these cookies. Using dark chocolate gives a richer taste. It also adds depth to the flavor. Milk chocolate, on the other hand, makes these cookies sweeter and creamier. You can also add chocolate chips or chunks to the dough. This makes each bite even more delightful. The melted chocolate pieces create a gooey center that is hard to resist. I suggest using a mix of both dark and milk chocolate. This offers the best of both worlds. If you need gluten-free cookies, swap the all-purpose flour for a gluten-free blend. Make sure it has a substitute for the binding agents to keep cookies soft. For vegan options, replace the eggs with flaxseed meal. Mix one tablespoon of flaxseed meal with three tablespoons of water. Let it sit for a few minutes to thicken. You can also use coconut oil or applesauce instead of vegetable oil. These changes keep the cookies rich and soft without losing flavor. To keep your warm chocolate crinkle cookies fresh, store them in an airtight container. This helps lock in moisture. Place parchment paper between layers of cookies to avoid sticking. They stay best at room temperature for up to a week. If you want to keep them longer, freezing is a great option. For freezing, wrap each cookie in plastic wrap. Then, place them in a freezer bag. You can freeze them for up to three months. Just make sure to label the bag with the date. This way, you’ll know when to eat them! When you want that fresh-baked taste, reheating is key. Preheat your oven to 300°F (150°C). Place the cookies on a baking sheet and heat for about 5 minutes. This warms them gently and keeps them soft. If you need a quick option, use the microwave. Heat one cookie for about 10 seconds. Check if it’s warm enough. Be careful not to overheat, as it can dry them out. Enjoy your cookies warm for the best experience! Warm chocolate crinkle cookies last about one week when stored in an airtight container. They stay soft and tasty. For best results, keep them at room temperature. If you want to keep them fresh for longer, you can freeze them. Yes, you can freeze the cookie dough. Just scoop the dough into balls and freeze them on a baking sheet. Once frozen, transfer them to a freezer bag. They will stay good for up to three months. When ready to bake, just add a couple of extra minutes to the bake time. The secret to a chewy texture lies in the dough. Make sure not to over-mix when combining wet and dry ingredients. Chilling the dough also helps keep the cookies thick, which adds to the chewiness. Baking just until the edges are set will keep the center soft. To prevent cookies from spreading too much, ensure the dough is cold before baking. Space the cookie balls about two inches apart on the baking sheet. You can also try adding a bit more flour if your dough seems too sticky. In this blog post, we explored how to make delicious chocolate crinkle cookies. We covered ingredients, baking steps, and helpful tips. You learned ways to customize your cookies and how to store them for freshness. Remember, thickness and technique can make your cookies perfect. Enjoy these sweet treats with friends or family! Happy baking!
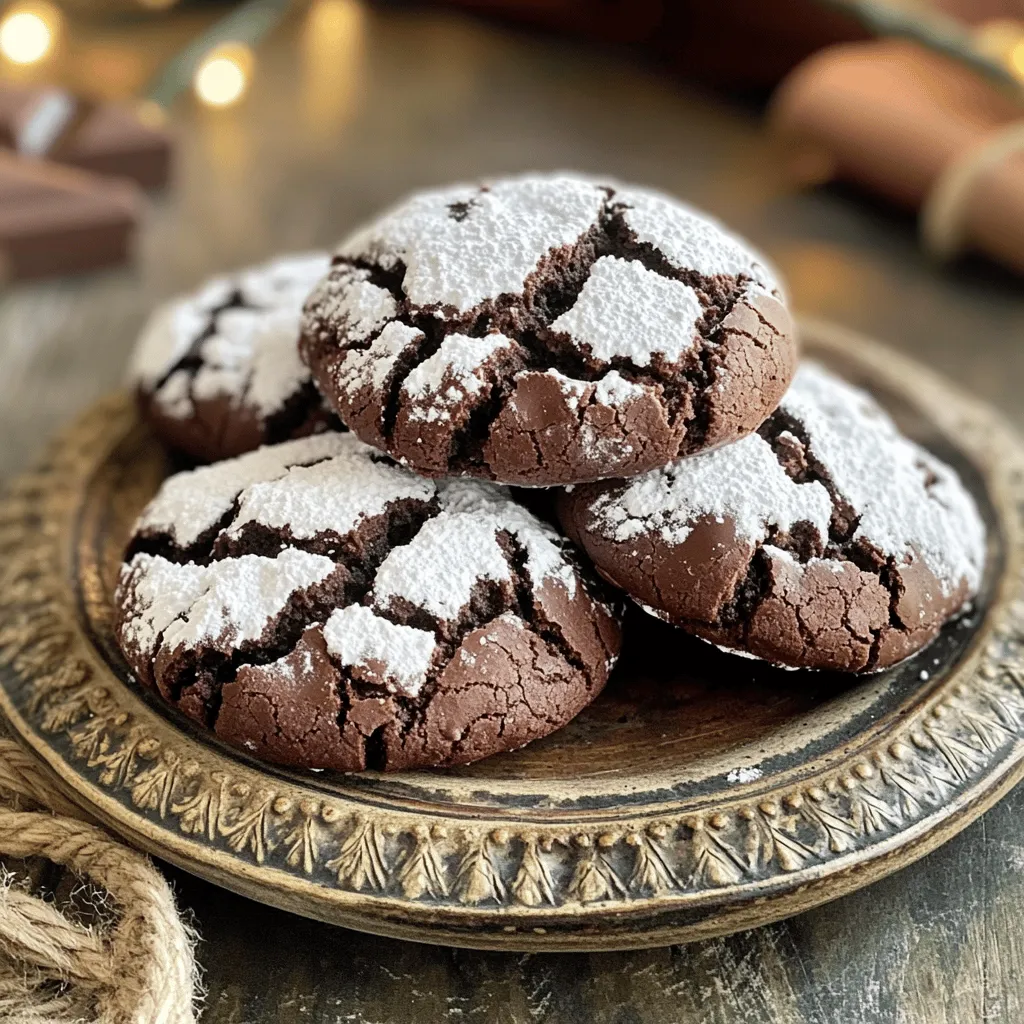
Warm Chocolate Crinkle Cookies Rich and Soft Delight
Are you ready to indulge in warm chocolate crinkle cookies? These treats are rich, soft, and perfect for any occasion. With a simple list of
- 1 ½ cups graham cracker crumbs - ½ cup unsalted butter, melted - 2 cups cream cheese, softened to room temperature - 1 cup powdered sugar - 1 cup eggnog (store-bought or homemade) - 1 teaspoon pure vanilla extract - 1 teaspoon ground nutmeg (plus extra for garnish) - 1 teaspoon ground cinnamon - Whipped cream, for topping To make these no-bake eggnog cheesecake bars, gather all your ingredients first. The graham cracker crumbs form the base, giving a lovely crunch. The melted butter helps hold the crust together. You need cream cheese, which gives the filling its rich and creamy texture. Powdered sugar adds sweetness, while eggnog brings that festive flavor. Add pure vanilla extract for depth. Ground nutmeg and ground cinnamon bring warmth and spice. Finally, whipped cream is perfect for topping each bar. This mix of ingredients is simple but makes a big impact. You can use store-bought eggnog or make your own for a personal touch. Each ingredient plays a key role, so make sure you have them all ready. This ensures your bars turn out perfect and delicious. Start by mixing 1 ½ cups of graham cracker crumbs with ½ cup of melted butter. Stir until the crumbs absorb the butter. This mixture should feel like wet sand. Next, press the crumb mix firmly into the bottom of a 9x9-inch baking dish. Use your hands or a flat bottomed glass for an even layer. Chill the dish in the fridge for 15 minutes. This helps the crust hold together. In a large bowl, beat 2 cups of softened cream cheese until it is smooth and creamy. This step is key for a nice texture. Slowly add in 1 cup of powdered sugar while mixing. Keep stirring until it is well combined. Next, blend in 1 cup of eggnog. Don’t forget to add 1 teaspoon of pure vanilla extract, 1 teaspoon of ground nutmeg, and 1 teaspoon of ground cinnamon. Mix everything for 2-3 minutes until it’s light and fluffy. Now, pour the creamy filling over the chilled crust. Use a spatula to smooth the top for an even look. Cover the dish with plastic wrap. Place it in the refrigerator for at least 4 hours, or overnight if you can wait. This helps the bars set nicely. When they are firm, use the edges of the parchment paper to lift the cheesecake out. Cut into 16 equal bars. Enjoy every delicious bite topped with whipped cream and a sprinkle of nutmeg! To get the right texture, start with softened cream cheese. Cold cream cheese can make lumps in your filling. Let it sit at room temperature for about 30 minutes before mixing. This step is key for a creamy cheesecake. Mix your ingredients well for a smooth texture. Use an electric mixer on medium speed. Start slowly and increase the speed as you mix. This way, the ingredients blend evenly without any lumps. Garnishing is fun and can make your bars look fancy. Top each bar with a generous swirl of whipped cream. You can also sprinkle a little extra nutmeg on top for a festive look. Consider using holiday-themed decorations. Place a sprig of fresh mint or holly on each bar. This adds color and a touch of holiday spirit. You can even arrange the bars on a pretty platter for serving. If you want to lower the sweetness, cut back on the powdered sugar. Start with ¾ cup and taste as you mix. You can always add more if needed. Try adding different spices for unique flavors. Instead of nutmeg, use ground ginger or allspice. These spices can give your cheesecake bars a new twist that keeps things exciting! {{image_4}} You can make your eggnog cheesecake bars even more fun! Try using different flavored eggnogs. Pumpkin spice or even vanilla can add a new twist. You can also add chocolate or caramel layers. This will make your dessert richer and more exciting. Just swirl in some melted chocolate or caramel on top of the filling before chilling. If you need gluten-free options, swap the graham cracker crumbs for gluten-free crumbs. You can find these at most stores now. For those who want dairy-free, use dairy-free cream cheese. Many brands offer great taste and texture. Just make sure to check the package for the best results. Pair your cheesecake bars with drinks like hot cocoa or spiced cider. These drinks bring out the holiday spirit. You can also serve them with other festive desserts. Consider cookies or mini pies to create a dessert spread. This will make your holiday table look amazing! To keep your no-bake eggnog cheesecake bars fresh, store them in the fridge. First, make sure the bars are fully set. Then, cover them tightly with plastic wrap. This will prevent them from drying out. You can also use an airtight container. The bars will last up to a week in the refrigerator. However, they taste best within the first few days. Yes, you can freeze the cheesecake bars! To freeze, cut the bars into pieces first. Wrap each piece in plastic wrap. Then, place them in a freezer-safe container. They can be frozen for up to three months. When you are ready to enjoy them, take the bars out of the freezer. Place them in the fridge to thaw overnight. This helps keep their creamy texture. You can also thaw them at room temperature for about two hours. Serve them chilled, and enjoy the festive flavor! The cheesecake bars will be firm to the touch. They should not jiggle when you shake them. If you press gently, they should hold their shape. A good test is to insert a toothpick in the center. If it comes out clean, they are ready. Yes, you can use homemade eggnog. Just make sure it is thick and creamy. If your eggnog is thinner, you may want to reduce the amount slightly. This keeps the filling from becoming too runny. Homemade eggnog can add a fresh and unique flavor. You can make these bars a day or two in advance. Just store them in the fridge, covered with plastic wrap. They taste even better after sitting for a while. If you want to keep them longer, you can freeze them. Just let them thaw in the fridge before serving. This blog post covered the tasty eggnog cheesecake bars, detailing ingredients and steps. You learned how to make the crust and the creamy filling. We shared tips for texture and presentation. You also found variations to match your taste and dietary needs. Finally, we discussed storage and prepping tips. Enjoy making these festive treats. They are simple and perfect for any gathering!
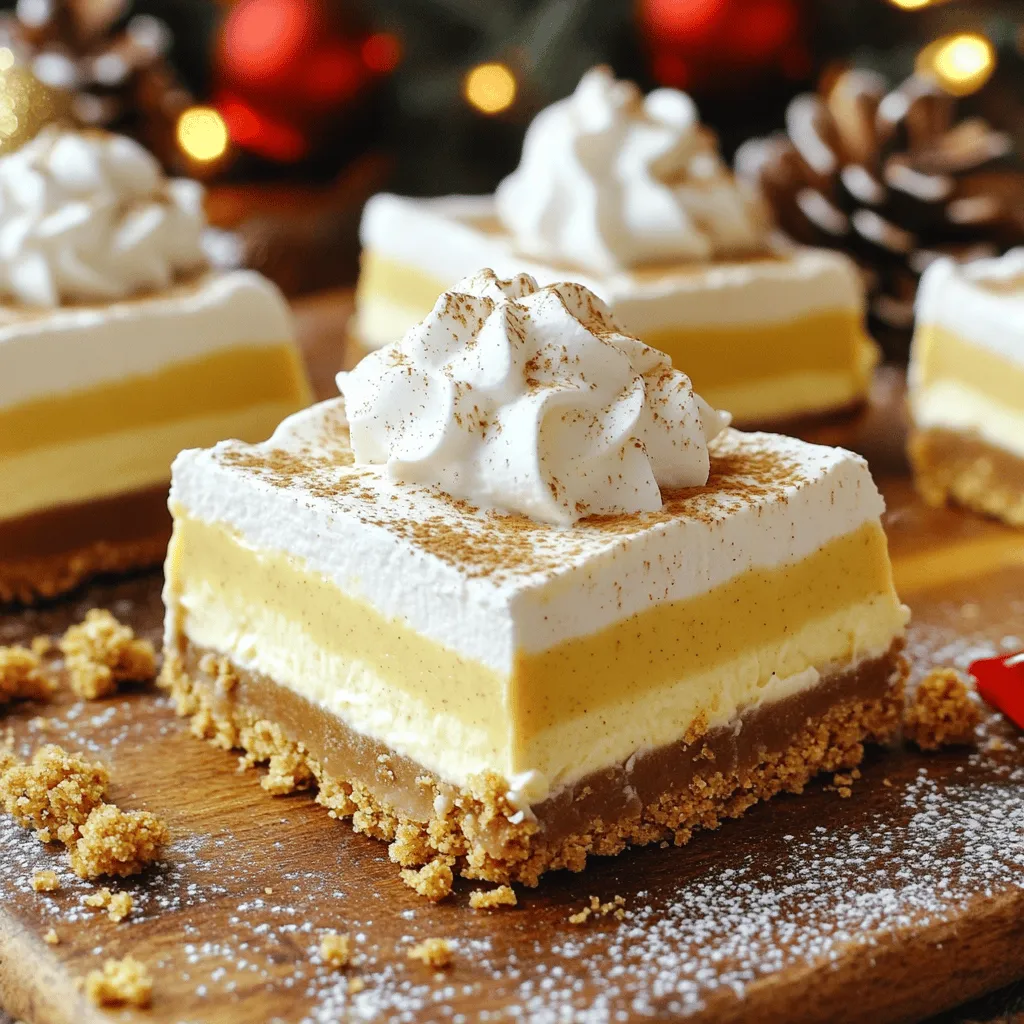
No-Bake Eggnog Cheesecake Bars Easy and Creamy Treat
Get ready to delight your taste buds with my No-Bake Eggnog Cheesecake Bars! This easy recipe combines creamy cheesecake flavors with festive eggnog, making it
To make Bakery-Style Peppermint Chocolate Cupcakes, you need fresh ingredients that bring out great flavor. Here’s the list of what you need: - 1 ¾ cups all-purpose flour - ¾ cup unsweetened cocoa powder - 2 cups granulated sugar - 1 ½ teaspoons baking powder - 1 ½ teaspoons baking soda - 1 teaspoon salt - 2 large eggs, at room temperature - 1 cup whole milk, at room temperature - ½ cup vegetable oil - 2 teaspoons pure vanilla extract - 1 cup boiling water - 1 teaspoon peppermint extract - 1 cup semi-sweet or dark chocolate chips - 12 candy canes, crushed (for garnish) Each item plays a key role in your cupcakes. The all-purpose flour gives structure, while cocoa powder adds rich chocolate taste. Sugar sweetens and helps with texture. Baking powder and baking soda make your cupcakes rise. Salt enhances flavors and balances sweetness. Using room temperature eggs and milk helps the batter mix smoothly. The vegetable oil keeps the cupcakes moist, and vanilla extract gives a lovely aroma. Boiling water thins the batter, making it perfectly light. Peppermint extract adds that holiday spirit while chocolate chips give a tasty surprise. The crushed candy canes on top not only look festive but add a nice crunch. Make sure to gather these ingredients before you start baking. You’ll love how they come together to create delicious, bakery-style cupcakes! 1. Preheat your oven to 350°F (175°C). This step is key for even baking. 2. Line a standard cupcake pan with paper liners. This keeps your cupcakes from sticking. 3. In a large bowl, mix together the all-purpose flour, cocoa powder, sugar, baking powder, baking soda, and salt. 4. Sift this mix. Sifting helps remove lumps and combines the ingredients well. 5. Add the eggs, whole milk, vegetable oil, and vanilla extract. Beat at medium speed for about 2 minutes. It should look smooth and creamy. 6. Carefully stir in the boiling water. The batter will be thin, but that’s fine. 1. Gently fold in the peppermint extract and chocolate chips. This adds fun flavor and texture. 2. Fill each cupcake liner about ⅔ full with the batter. This gives room for the cupcakes to rise. 3. Bake for 18-20 minutes. Insert a toothpick into a cupcake; it should come out clean. 4. Remove the cupcakes from the oven and let them cool in the pan for 10 minutes. Then, move them to a wire rack to cool completely. 1. For the frosting, prepare a fluffy vanilla or peppermint buttercream. This adds sweetness and creaminess. 2. Pipe a generous swirl of frosting onto each cooled cupcake. Use a piping bag to make it look pretty. 3. Top with crushed candy canes. This adds a festive touch and extra crunch. Using room temperature ingredients is key. When eggs and milk warm up, they mix better. This helps the cupcakes rise and gives them a nice texture. Sifting your dry ingredients makes a big difference. It breaks up lumps and adds air. This step helps the cupcakes stay light and fluffy. For flour, measuring correctly is a must. Use a spoon to scoop flour into your measuring cup. Avoid packing it down. This way, your cupcakes won’t turn out too dense. A piping bag is your best friend for frosting. Fill it with your buttercream and twist the top to keep it closed. Squeeze gently to control the flow of frosting. Choosing the right tip makes your cupcakes look special. A star tip creates pretty swirls, while a round tip gives a classic look. Experiment with different tips to find your favorite style. You can try different peppermint extracts. Look for options like peppermint oil for a stronger flavor. Just remember, a little goes a long way! Adding more chocolate chips is a simple way to boost richness. Extra chips melt into the batter and create delicious pockets of chocolate. This makes each bite even better. {{image_4}} You can switch up the flavor of your peppermint chocolate cupcakes easily. - Dark chocolate version: Use dark cocoa powder instead of unsweetened cocoa. This gives a richer taste. You can also add dark chocolate chips for extra depth. - Vanilla peppermint cupcakes: Replace cocoa powder with extra flour. Add a bit more peppermint extract to keep the flavor strong. Top these with vanilla frosting for a sweet twist. You can also adjust the recipe for different diets. - Gluten-free options: Substitute all-purpose flour with a gluten-free blend. Make sure it has a good binding agent, like xanthan gum, for the best results. - Dairy-free alternatives for frosting: Use coconut cream or a dairy-free butter substitute. This way, you can enjoy the same fluffy texture without dairy. These cupcakes fit perfectly for different events. - Holiday-themed decorations: Use red and green sprinkles or edible glitter. This makes the cupcakes fun and festive for the holidays. - Special occasion adaptations: For birthdays, add colorful frosting and fun toppers. You can also use seasonal flavors like eggnog or pumpkin spice during fall and winter. These variations let you enjoy this recipe all year round! To keep your peppermint chocolate cupcakes fresh, store them in an airtight container. This will help keep them moist. You can place them at room temperature for up to three days. Make sure they are away from direct sunlight and heat. If you live in a warm area, consider refrigerating them. This will help preserve their taste and texture. When storing cupcakes in the fridge, keep them in a container to avoid drying out. They can last about a week in the refrigerator. It's important to note that refrigeration may change the texture slightly. Freezing is a great way to save your cupcakes for later. To freeze, first let them cool completely. Then, wrap each cupcake in plastic wrap. Place them in a freezer-safe bag or container. This keeps them fresh for up to three months. When you're ready to eat them, take the cupcakes out and let them thaw at room temperature. If you're in a hurry, you can use the microwave for a few seconds. Just be careful not to overheat them. This way, your cupcakes will taste just as good as when they were fresh! Yes, you can make these cupcakes in advance. Bake them a day or two before your event. Just store them in an airtight container at room temperature. This keeps them fresh and tasty. You can frost them right before serving for the best look and taste. To know if your cupcakes are done, use a toothpick. Insert it into the center of a cupcake. If it comes out clean, they are ready. If it has wet batter on it, bake for a few more minutes. It usually takes 18 to 20 minutes in the oven. Absolutely! You can use any frosting you like. Vanilla buttercream works great. Peppermint frosting adds extra flavor. Cream cheese frosting is also a delicious option. Get creative and choose your favorite! To crush candy canes, place them in a zip-top bag. Use a rolling pin to smash them into small pieces. You can also use a food processor for a finer crush. Just be careful not to turn them into powder. You don't need to refrigerate cupcakes with frosting if you eat them within a few days. Just keep them in a cool, dry place. If you plan to keep them longer, it’s best to refrigerate them. Just let them come back to room temperature before serving. These cupcakes are easy to make and full of flavor. We covered all ingredients, steps, and tips for perfect results. Keep your ingredients at room temperature and sift for lightness. Consider flavor variations and dietary needs to make these treats your own. Store them properly to enjoy later. With these simple guidelines, you'll have delightfully tasty cupcakes ready for any occasion.
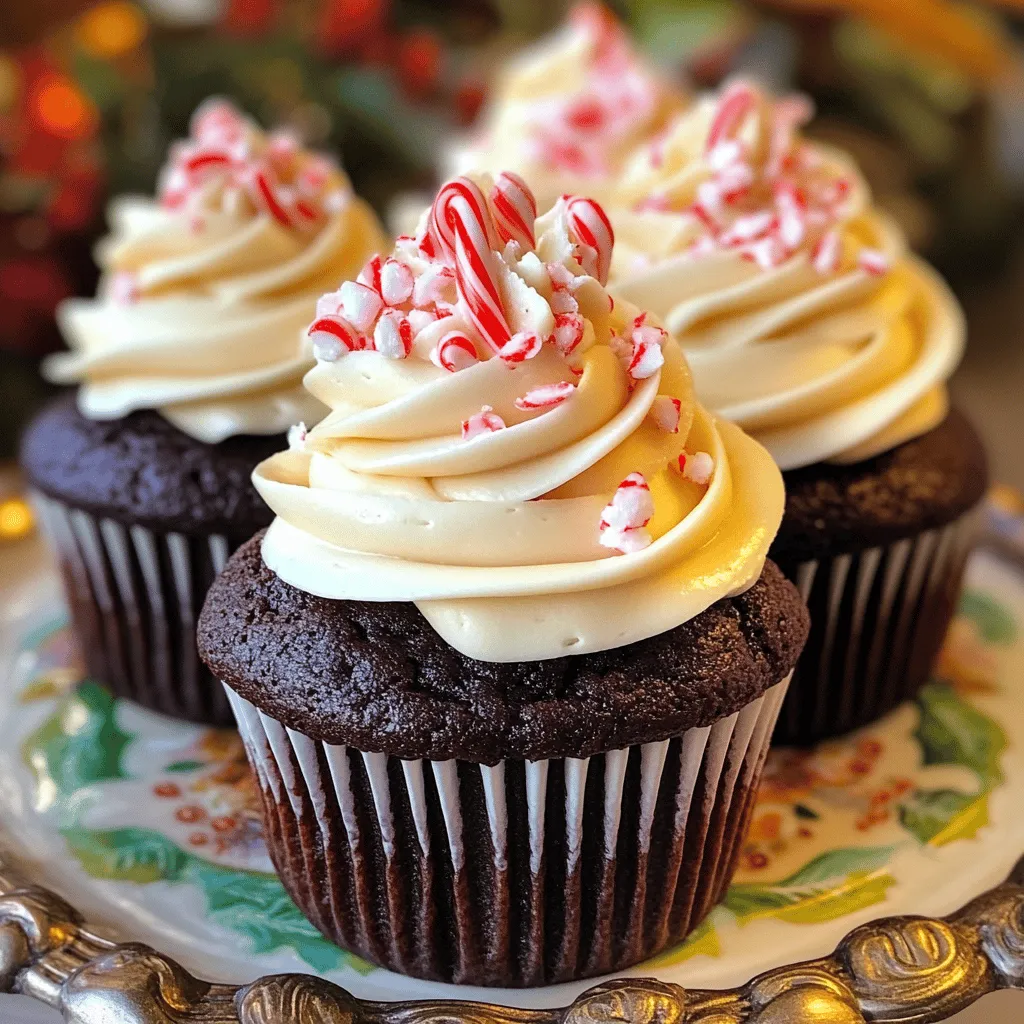
Bakery-Style Peppermint Chocolate Cupcakes Delight
Get ready to indulge in the magic of Bakery-Style Peppermint Chocolate Cupcakes! These treats blend rich chocolate flavor with a cool peppermint twist, making them
- 2 cups all-purpose flour - 1 ½ teaspoons baking powder - 1 teaspoon baking soda - 1 teaspoon ground cinnamon - ½ teaspoon ground nutmeg - ½ teaspoon salt In this recipe, we start with dry ingredients. They give the cake structure and flavor. The flour is your base. Baking powder and baking soda help it rise. Cinnamon and nutmeg add warmth and spice. Salt enhances all these flavors. - ½ cup unsalted butter, softened to room temperature - 1 cup granulated sugar - 2 large eggs, at room temperature - 1 teaspoon pure vanilla extract - 1 cup sour cream, at room temperature Next, we look at the wet ingredients. Butter adds rich flavor and moisture. Sugar sweetens the cake. Eggs bind everything together and add richness. The vanilla extract brings a lovely aroma. Sour cream keeps the cake tender and moist. - 2 medium apples, peeled, cored, and diced (approximately 2 cups) - ½ cup chopped walnuts or pecans (optional) - Streusel topping ingredients Now for the fun part—add-ins and toppings! Apples bring natural sweetness and moisture. I love using walnuts or pecans for crunch, but this is optional. The streusel topping adds a sweet, crumbly layer. It makes every bite special. - Preheat oven to 350°F (175°C). - Grease and flour a 9x13 inch baking pan or use parchment paper. To start, you need to preheat your oven to 350°F (175°C). This temperature is perfect for baking. Greasing and flouring your baking pan helps the cake release easily after baking. You can also use parchment paper for easy cleanup. - Whisk together all dry ingredients in a medium bowl. - Set aside the mixture. In a medium bowl, whisk together the dry ingredients. This includes the flour, baking powder, baking soda, ground cinnamon, ground nutmeg, and salt. Mixing these dry ingredients well is key, as it ensures your cake has a balanced flavor. - Cream softened butter and granulated sugar until light and fluffy. - Incorporate eggs one at a time and mix in vanilla extract. Next, take a large bowl and cream the softened butter with granulated sugar. Use an electric mixer for this step. Mix until the mixture becomes light and fluffy, which takes about 3 to 4 minutes. Now, add the eggs one by one. Make sure each egg is mixed in well before adding the next. Finally, stir in the vanilla extract. - Alternate adding the flour mixture and sour cream. - Fold in diced apples and nuts. Now it's time to combine the wet and dry mixtures. Alternate adding the flour mixture and sour cream to the creamed butter and sugar. Start and end with the flour. Mix just until combined; be careful not to overmix. Then, gently fold in the diced apples and nuts if you're using them. This step adds great texture and flavor. - Layer half the batter in the pan, sprinkle with half of the streusel, spread remaining batter, and top with remaining streusel. In your prepared pan, pour in half of the batter and spread it evenly. Next, sprinkle half of the streusel mixture over the batter. Carefully spread the remaining batter on top of this streusel layer. Finish by sprinkling the rest of the streusel on top. This creates a delicious, crumbly topping. - Bake for 35-40 minutes and cool before serving. Bake your cake in the preheated oven for 35 to 40 minutes. You can check for doneness by inserting a toothpick into the center. If it comes out clean, your cake is ready. Once baked, let it cool in the pan for about 10 minutes. After that, transfer it to a wire rack to cool completely. Now, you can cut it into squares and enjoy your Apple Spice Coffee Cake! To keep your cake moist, use room temperature ingredients. This includes butter, eggs, and sour cream. Room temperature items blend better, helping the cake rise. Mixing techniques matter too. Alternate adding dry and wet ingredients. Start and end with dry ingredients. This method helps prevent overmixing. Overmixing can make your cake dense and tough. For the streusel topping, aim for a crumbly texture. Mix brown sugar, flour, and cinnamon well. Then, add melted butter. Use a fork to combine until crumbly. If it feels too wet, add a bit more flour. Adjust the sweetness based on your taste. If you like it sweeter, add more brown sugar. For less sweetness, cut back on sugar. For a lovely finish, dust the cooled cake with powdered sugar. This simple touch makes your cake look fancy. Pair each slice with whipped cream or vanilla ice cream. The creaminess balances the spices in the cake. You'll find this makes every bite even better! {{image_4}} You can switch apples for other fruits. Pears work well in this recipe. They bring a sweet and juicy taste. You can also use ripe peaches. Their soft texture adds a nice touch. If you want a mix, try adding berries. Blueberries or raspberries bring a fresh burst of flavor. They blend nicely with the spices. You can create a fruit medley that everyone will love. If you need gluten-free options, use gluten-free flour. It’s a great substitute for all-purpose flour. Just make sure to check the blend. Some blends work better than others. For vegan options, swap the butter with coconut oil or vegan butter. You can replace eggs with flaxseed meal or applesauce. This way, everyone can enjoy the cake. Spice up the flavor by adding more spices. Try ground ginger or ground cloves for warmth. These spices pair well with apples and make the cake richer. You can also mix in chocolate chips for a sweet twist. They melt and create pockets of chocolate goodness. Caramel bits are another fun addition. They give a deliciously sweet surprise in every bite. Store your Apple Spice Coffee Cake at room temperature. Use a cake dome or a plastic wrap to cover it. This helps keep it fresh for about three days. If you want to keep it longer, place it in the fridge. Just remember to wrap it well to stop it from drying out. For long-term storage, you can freeze the cake. Cut it into squares and place them in an airtight container. You can also wrap each piece in plastic wrap before putting them in the container. This way, it stays fresh for up to three months. When you're ready to eat it, simply thaw it in the fridge overnight. To reheat, put the slice in the microwave for about 20 seconds. This warms it up nicely without drying it out. This coffee cake tastes best fresh but lasts well. If stored correctly, it can stay good for about three days at room temperature and up to a week in the fridge. Watch for signs of spoilage. If you see mold or the cake smells off, it's best to throw it away. Enjoying it while it’s fresh will give you the best taste! To make your coffee cake moist, add sour cream or yogurt. These ingredients add creaminess and keep the cake soft. You can also try using applesauce for extra moisture. Be sure to use eggs at room temperature, as they help blend better. Mixing the batter gently prevents air from making it dry. Yes, you can use self-rising flour. Just omit the baking powder and baking soda. Self-rising flour has these leavening agents already mixed in. This option can simplify your process and still give you a great rise in your cake. This cake pairs wonderfully with whipped cream or vanilla ice cream. A sprinkle of powdered sugar on top adds a nice touch. You could also serve it with a hot cup of coffee or tea. This adds to the cozy feel of enjoying a slice. To check if your coffee cake is done, insert a toothpick into the center. If it comes out clean, your cake is ready. The edges should look golden brown too. If the toothpick has batter on it, give your cake a few more minutes. This recipe for Apple Spice Coffee Cake stands out with its rich flavors and moist texture. We discussed the essential dry and wet ingredients and the perfect mixing steps. I shared tips for making it extra moist and ideas for variations to suit your taste. Don't forget to store any leftovers properly to enjoy this treat later. Whether you serve it warm with ice cream or dusted with powdered sugar, this cake will surely delight. Enjoy your baking journey and the tasty rewards that follow.
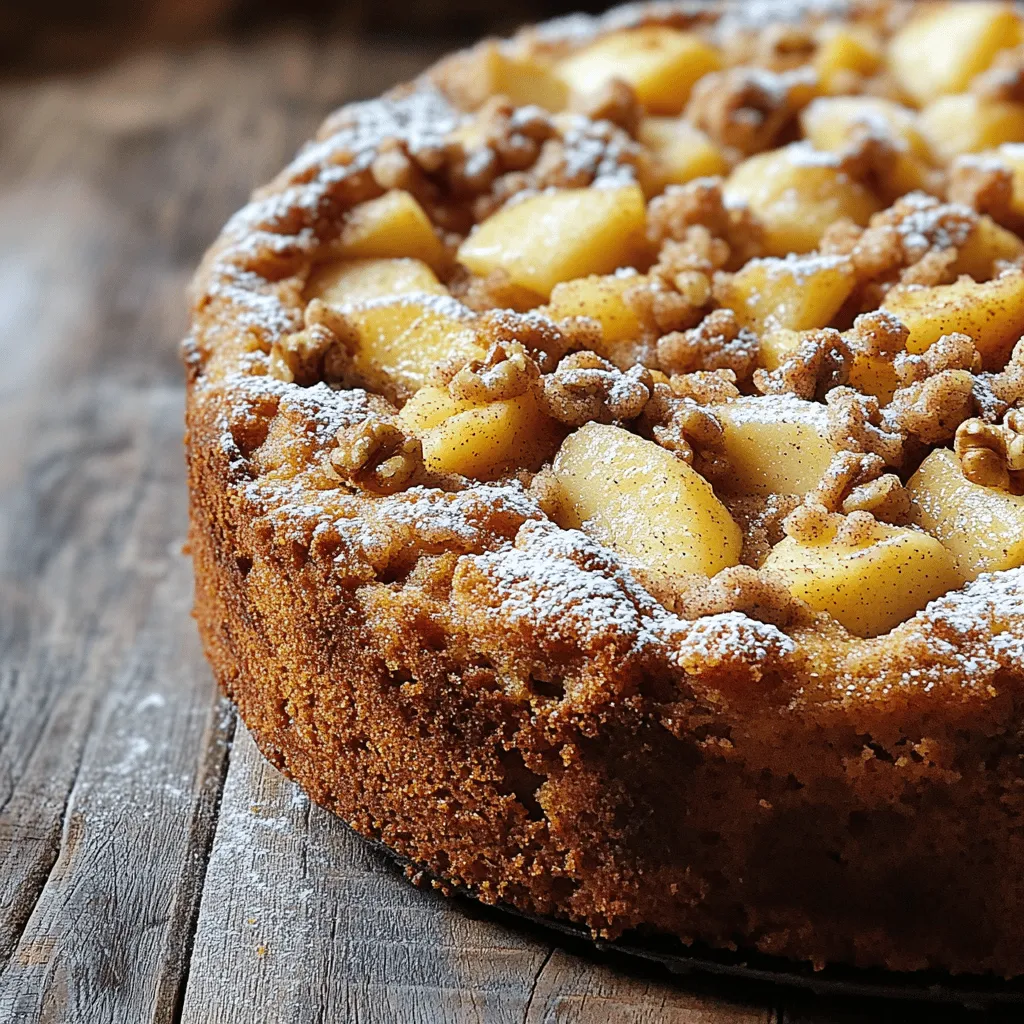
Apple Spice Coffee Cake with Streusel Delight
Are you ready to bake a delightful treat that fills your kitchen with warm spices? My Apple Spice Coffee Cake with Streusel combines tender apples,
- Cream cheese - Heavy whipping cream - Caramel sauce - Toasted pecans - Crushed graham crackers - Unsalted butter - Additional caramel sauce - Extra chopped pecans - Sea salt For the main ingredients, cream cheese gives a rich base. Heavy whipping cream adds fluffiness. Caramel sauce brings sweetness and depth. Toasted pecans add a nice crunch and nutty flavor. For the crust, crushed graham crackers provide a buttery crunch. Unsalted butter helps bind it all together, creating a sturdy base. You can elevate your dessert with optional garnishes. A drizzle of caramel sauce makes it look fancy. Extra chopped pecans add texture. A sprinkle of sea salt balances sweetness and enhances flavor. These ingredients create a dessert that is both delicious and visually appealing. Enjoy the process and have fun while mixing and layering these components! - Mix 1 cup of crushed graham crackers with 4 tablespoons of melted unsalted butter. - Stir until all crumbs are well coated with butter. - Press this mixture firmly into the bottom of serving cups or jars. - Chill the cups in the refrigerator while you make the cheesecake filling. - In a large bowl, beat 16 ounces of softened cream cheese until smooth. - This will take about 2-3 minutes with an electric mixer. - Gradually add in 1 cup of powdered sugar and 1 teaspoon of vanilla extract. - Mix until the filling is creamy and free of lumps. - In a separate bowl, whip 1 cup of heavy cream until soft peaks form. - This should take about 3-4 minutes at medium speed. - Gently fold the whipped cream into the cream cheese mixture. - Drizzle in 1 cup of caramel sauce and add a pinch of sea salt, then mix gently. - Spoon the creamy mixture into the chilled crusts. - Smooth the tops with a spatula for an even finish. - Generously drizzle more caramel sauce on top and sprinkle with 1 cup of chopped toasted pecans. - Chill the cheesecake cups for at least 4 hours, or until firm. - Before serving, garnish with extra pecans and a drizzle of caramel sauce. - For a beautiful display, arrange the cups on a platter with extra pecans and caramel. Using cream cheese at room temperature is crucial. Cold cream cheese makes mixing hard. It can lead to lumps. Soft cream cheese blends smoothly with other ingredients. This creates a creamy filling. Whipping the heavy cream until soft peaks form is key. Soft peaks mean the cream holds some shape. If you whip it too much, it can become grainy. Mix at medium speed for about 3–4 minutes. Be gentle when folding it into the cream cheese. This keeps your filling light and fluffy. For caramel sauce, I recommend using a rich, homemade version. Store-bought sauce can work too, but make sure it’s high quality. It should have a deep, sweet flavor. You can also try salted caramel for a tasty twist. Toasting pecans adds more flavor and crunch. Spread them on a baking sheet. Bake at 350°F for about 8-10 minutes. Watch them closely; they can burn quickly. Toasting brings out their nutty taste. For serving, you can arrange the cheesecake cups on a pretty platter. Scatter extra chopped pecans around the cups for a nice look. Drizzle caramel sauce on the platter too. This adds a gourmet touch. Use garnishes to make your dessert pop. You can add extra pecans on top. A light sprinkle of sea salt can also enhance the flavor. These small details make your cheesecake cups look extra special. {{image_4}} You can easily switch up the flavors in your No-Bake Caramel Pecan Cheesecake Cups. For a mocha twist, add chocolate chips to the cheesecake filling. The chocolate adds richness and depth to each bite. If you prefer a different nut, try using almonds or walnuts instead of pecans. Each nut brings its own unique taste and crunch. If you need gluten-free options, use crushed gluten-free cookies for the crust. This change keeps the dessert tasty without losing any flavor. For a dairy-free version, swap out the cream cheese for a dairy-free cream cheese alternative. You can also use coconut cream in place of heavy cream. These swaps make the dessert accessible to more dietary needs. To elevate your cheesecake cups, pair them with different sauces. A drizzle of chocolate sauce or berry compote can add a fun twist. Fresh fruit toppings, like sliced strawberries or blueberries, also brighten the dessert. If you want a creamy touch, serve the cups with a scoop of ice cream. The mix of textures and flavors creates a delightful experience. To keep your no-bake caramel pecan cheesecake cups fresh, store them in the refrigerator. Place them in an airtight container to prevent any odors from seeping in. This method helps maintain their creamy texture and rich flavor. If you don’t have a container, you can cover the cups tightly with plastic wrap. These cheesecake cups stay fresh for about 3 to 5 days in the fridge. If you want to enjoy them later, you can freeze the cheesecake cups. Just make sure to wrap them well in plastic wrap and then place them in a freezer-safe bag. To thaw, move them to the fridge for several hours or overnight. This way, they retain their delightful taste! You can use crushed cookies or nuts instead of graham crackers. Try digestive biscuits for a similar taste. Almond flour mixed with melted butter also works well for a gluten-free option. The cheesecake cups need to chill for at least four hours. This time allows the filling to firm up and become creamy. You can chill them overnight for the best results. Yes, you can use a sugar substitute like stevia or erythritol. Make sure it measures cup for cup like sugar. Keep in mind that the taste may vary slightly from the original recipe. These cheesecake cups are best served cold. If you have leftovers, keep them in the fridge. When serving, add more caramel sauce and pecans for freshness. Absolutely! You can make these cheesecake cups a day or two in advance. Just store them in the fridge until you are ready to serve for a hassle-free dessert. In this post, we explored how to make delicious no-bake caramel pecan cheesecake cups. We covered ingredients, step-by-step instructions, tips for perfecting flavors, and storage info. You can enjoy different flavors or dietary variations too. These cheesecake cups are easy to make and sure to impress. Try them at your next gathering or treat yourself tonight!
No-Bake Caramel Pecan Cheesecake Cups Delight
Indulge in a sweet escape with my No-Bake Caramel Pecan Cheesecake Cups! These easy cups blend creamy cheesecake with rich caramel and crunchy pecans, perfect
- 2 cups all-purpose flour - 1 tablespoon baking powder - ½ teaspoon salt - 1 teaspoon ground cinnamon - ¼ teaspoon ground nutmeg - ½ cup granulated sugar - 2 large eggs - ½ cup whole milk - 1 teaspoon pure vanilla extract - 1 large Granny Smith apple, peeled and finely diced - 1 cup apple cider - Oil for frying (vegetable or canola) The base of these donuts starts with all-purpose flour. This helps give them a nice structure. Baking powder gives them lift. Salt enhances the sweetness. The spices, like cinnamon and nutmeg, add warmth and depth. Granulated sugar gives sweetness to the batter. The eggs help bind all the ingredients together. Whole milk adds creaminess to the mix, while vanilla gives flavor. I love using Granny Smith apples. They are tart and crisp, perfect for these donuts. Apple cider adds extra apple flavor and moisture. Finally, you'll need oil for frying. This ensures a crispy outside and soft inside. - 1 cup powdered sugar - 2 tablespoons whole milk - ½ teaspoon pure vanilla extract The glaze is simple yet tasty. Powdered sugar is the star. It gives the glaze that smooth finish. Whole milk thins the glaze for easy dipping. Vanilla extract adds that lovely flavor that ties everything together. With these ingredients, you're all set to make delicious apple fritter donuts! To start, we need to mix the dry ingredients. In a medium bowl, combine: - 2 cups all-purpose flour - 1 tablespoon baking powder - ½ teaspoon salt - 1 teaspoon ground cinnamon - ¼ teaspoon ground nutmeg - ½ cup granulated sugar Whisk these together until they blend well. Set this aside for later. Next, let’s combine the wet ingredients. In another bowl, crack 2 large eggs. Whisk in ½ cup whole milk and 1 teaspoon pure vanilla extract until the mixture is smooth. Now, we need to fold in the apples and apple cider. Gradually add the dry mixture to the wet mixture. Stir gently with a spatula. Be careful not to overmix. This keeps the donuts light and fluffy. Then fold in 1 large finely diced apple and 1 cup apple cider. Make sure everything is evenly mixed. Now, it’s time to fry. First, heat oil in a deep pot or fryer to about 350°F (175°C). Use a cooking thermometer to check the temperature. Once the oil is hot, scoop about 2-3 tablespoons of batter using a tablespoon. Gently drop the batter into the oil. Fry only a few at a time to avoid overcrowding. This helps them cook evenly. Fry the donuts for 2-3 minutes on each side. Look for a lovely golden brown color. Adjust the heat as needed to keep the oil at the right temperature. When done, use a slotted spoon to take the donuts out of the oil. Place them on paper towels to drain excess oil. While the donuts cool, let’s make the glaze. In a small bowl, whisk together: - 1 cup powdered sugar - 2 tablespoons whole milk - ½ teaspoon pure vanilla extract Mix until you achieve a smooth consistency with no lumps. Now, dip each warm donut into the glaze. Let any extra glaze drip back into the bowl. Place the glazed donuts on a wire rack to cool and set. Allow them to sit for a few minutes. This helps the glaze firm up, making them extra tasty. To make great apple fritter donuts, avoid overmixing the batter. Overmixing can lead to dense donuts that are not fluffy. Mix until just combined. You want a light, airy texture. Next, pay close attention to the frying temperature. Heat the oil to about 350°F (175°C). If it’s too hot, the donuts will burn outside and stay raw inside. If it’s too low, they will soak up too much oil. Use a cooking thermometer for the best results. For the perfect glaze, aim for a silky smooth consistency. Start with one cup of powdered sugar. Add two tablespoons of whole milk and half a teaspoon of vanilla extract. Whisk until there are no lumps. If it’s too thick, add a bit more milk. If it’s too thin, add more sugar. You can also try alternative glazing methods. A light drizzle of caramel or a chocolate glaze can add a fun twist. Experiment to find your favorite! When serving, arrange the donuts in a nice pattern on a plate. A decorative plate adds charm to your dish. You can also sprinkle a little extra ground cinnamon on top for a sweet touch. To enhance the look, garnish with fresh apple slices. They add color and a refreshing taste to the warm donuts. This makes your dish not just tasty, but also beautiful! {{image_4}} You can easily switch up the taste of your apple fritter donuts. Adding nuts or raisins can give them a nice crunch. Walnuts or pecans work best. Just chop them small and mix them in with the batter. This adds a new layer of flavor. Another fun idea is to use different apple varieties. While Granny Smith apples are tart and crisp, you could try Honeycrisp for a sweeter taste. You can even mix apples for a range of flavors. Each apple brings its unique twist to your donuts! If you want to play with flavors, try making a chocolate or maple glaze. For chocolate, melt some chocolate chips and mix them with a little milk. This creates a rich, sweet topping. A maple glaze is easy too! Just mix in some maple syrup with the powdered sugar and milk. You can also drizzle caramel sauce on top of your donuts. This adds a lovely sweetness and a sticky texture. It’s perfect for those who love caramel! For those who want a healthier option, you can bake instead of fry. Preheat your oven to 350°F (175°C). Spoon the batter onto a baking sheet lined with parchment paper. Bake for about 15-20 minutes until golden. This method cuts down on oil and makes them lighter. If you’re vegan, you can swap eggs and dairy. Use flaxseed meal mixed with water for eggs. For milk, almond or oat milk works great. These swaps keep the flavor while making the recipe suitable for everyone. Store your apple fritter donuts at room temperature. They taste best fresh and warm. If you have leftovers, place them in an airtight container. This helps keep them soft for a day or two. Avoid refrigerating them. The cold air will dry them out. To maintain freshness, you can wrap each donut in plastic wrap. This way, they stay moist and tasty. If you want to serve them later, just warm them up in the oven for a few minutes. You can freeze apple fritter donuts, too! To do this, let them cool completely first. Then, place them in a single layer on a baking sheet. Freeze them for about an hour. Once frozen, transfer the donuts to a freezer bag. Make sure to squeeze out as much air as you can. To reheat, take them out and let them thaw at room temperature. For a warm treat, pop them in the oven at 350°F (175°C) for about 10 minutes. This keeps them soft and delightful. For the glaze, it’s best to freeze the donuts without it. You can glaze them after reheating. This way, the glaze stays fresh and shiny. To check the oil's heat, use a cooking thermometer. Aim for 350°F (175°C). If you don't have a thermometer, drop a small amount of batter into the oil. If it bubbles and rises, the oil is ready. Yes, you can prepare some parts in advance. Mix the dry ingredients and store them in an airtight container. You can also chop the apples ahead of time. Keep them in a bowl of water with a bit of lemon juice to prevent browning. Store the batter in the fridge for up to a day. Fry them fresh when you are ready. You can use gluten-free flour blends as a substitute. Look for a blend that has xanthan gum in it. Adjust the amount of apple cider as needed, since gluten-free flours can absorb more liquid. Now you have a clear path to make delicious apple fritter donuts. You learned about the key ingredients, steps for frying, and tips for texture and glaze. You can also explore fun variations and smart storage methods. Don’t be afraid to get creative with flavors or glazes. These donuts can be a fun treat for any occasion. Enjoy your baking journey and share your tasty results! You’ll impress everyone with your homemade treats.
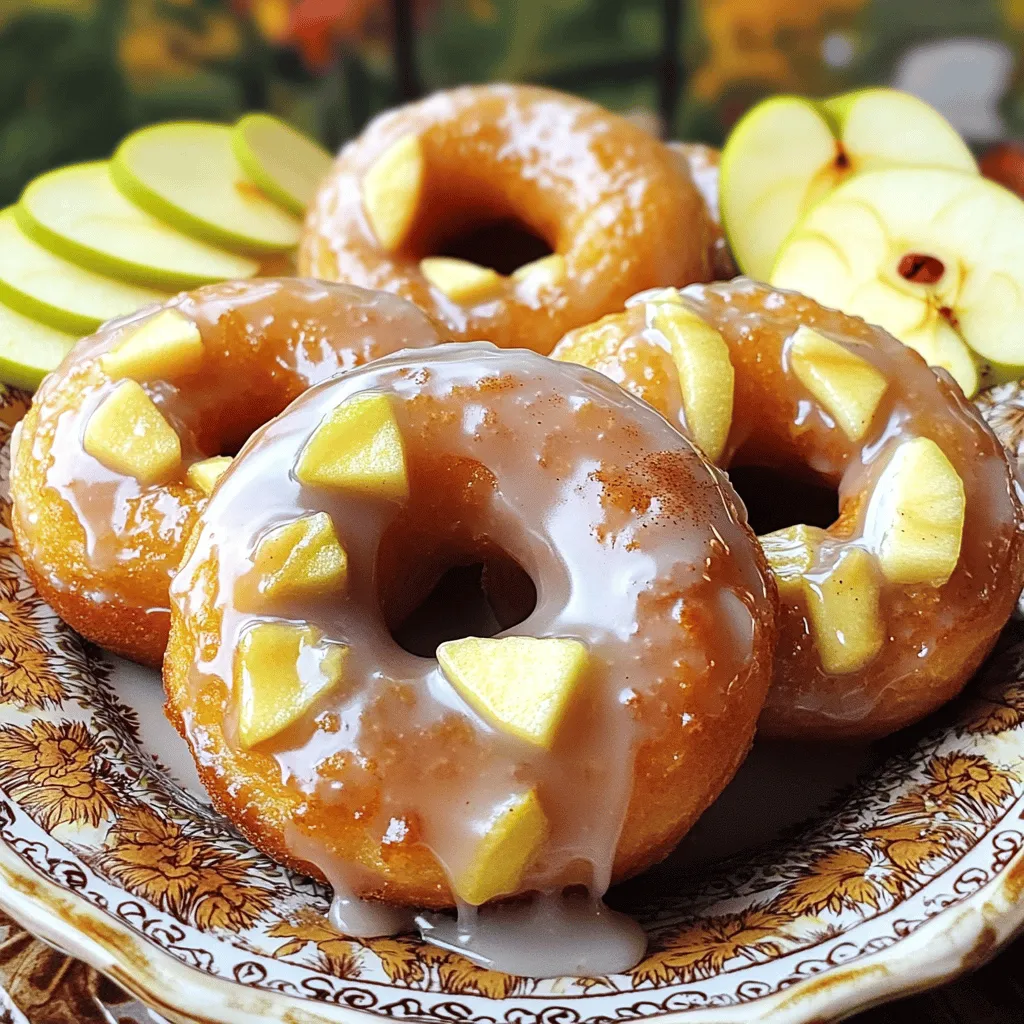
Irresistible Apple Fritter Donuts with Glaze Recipe
Are you ready to dive into the world of donuts? Today, I’m sharing my irresistible recipe for Apple Fritter Donuts with Glaze. These treats are
To make these tasty granola bars, gather these main ingredients: - 1 ½ cups rolled oats - ½ cup pumpkin puree - ½ cup almond butter (or any nut/seed butter of your choice) - ¼ cup honey or maple syrup - 1 teaspoon vanilla extract - 1 teaspoon pumpkin pie spice - ¼ teaspoon salt These ingredients create a chewy and flavorful base for your bars. The oats give a nice texture. Pumpkin puree adds moisture and a lovely fall flavor. Almond butter binds everything together while providing healthy fats. You can customize your granola bars with some fun add-ins: - ½ cup chopped nuts (such as walnuts or pecans) - ½ cup dried cranberries or raisins - ¼ cup chocolate chips (optional for extra sweetness) Try different nuts or fruits based on what you like. You can even add seeds for a crunch. If you want a sweeter treat, toss in chocolate chips. They melt slightly and create a rich flavor. If you have dietary needs, here are some good substitutes: - Use sunflower seed butter instead of almond butter for nut-free bars. - Swap honey for agave syrup or maple syrup for a vegan option. - Replace rolled oats with gluten-free oats if you need them gluten-free. These swaps keep your bars tasty while meeting your needs. Always check labels to ensure your substitutes fit your diet. Start by gathering your ingredients. In a large bowl, add: - 1 ½ cups rolled oats - ½ cup pumpkin puree - ½ cup almond butter - ¼ cup honey or maple syrup - 1 teaspoon vanilla extract - 1 teaspoon pumpkin pie spice - ¼ teaspoon salt Using a spatula, mix these items together well. You want everything to blend into a sticky mass. This mixture gives your bars that rich pumpkin flavor and helps them stick together. Next, you will fold in the fun stuff. Add: - ½ cup chopped nuts (like walnuts or pecans) - ½ cup dried cranberries or raisins - ¼ cup chocolate chips (if you like extra sweetness) Gently mix these ingredients in. This step adds crunch and sweetness. Make sure the nuts and fruits are evenly spread throughout the mixture. Now, it’s time to prepare your baking dish. Grab an 8x8-inch dish and line it with parchment paper. Leave some paper hanging over the sides. This helps you lift the bars out later. Pour your granola mix into the dish. Use a spatula or your hands to press it down firmly. You want a smooth, even layer. This step is key to getting nice, firm bars. Place the dish in the fridge for at least 2 hours. This helps the bars set up nicely. Once they’re firm, lift the parchment paper to remove the block of granola. Transfer it to a cutting board. Slice into bars or squares, depending on how big you want them. Enjoy your delicious no bake pumpkin spice granola bars! To get the best texture for your bars, use a mix of ingredients. Rolled oats give a nice chewiness, while pumpkin puree adds moisture. Make sure to mix well until everything sticks together. Press the mixture firmly into the dish to help it hold its shape. If the bars feel too crumbly, add a bit more almond butter or honey. This will help bind everything better. Store your granola bars in an airtight container. Keep them in a cool, dry place. This helps maintain their freshness. You can also keep them in the fridge if you like a cooler snack. For longer storage, wrap them in parchment paper before placing them in a container. This keeps them from sticking together. For a fun presentation, arrange your bars on a wooden board. Sprinkle some pumpkin pie spice on top for a pop of flavor. Add a few dried cranberries for color. You can serve them with yogurt or alongside a warm cup of tea. This adds a cozy touch and enhances the fall vibe. {{image_4}} You can switch almond butter with other nut butters. Try peanut butter for a classic taste. Cashew butter adds a creamy touch. Sunflower seed butter is great for nut allergies. Each option brings its own flavor and texture to the bars. If you want a healthier choice, try using agave syrup. Coconut nectar is another option that adds depth. You can also use mashed bananas for natural sweetness. These swaps keep your granola bars tasty and nutritious. Pumpkin spice is delicious, but don’t stop there. Add cinnamon for a warm kick. Try cocoa powder for a chocolatey twist. You can even mix in dried fruits like apples or apricots. Each variation can create a new favorite snack. To store your leftover granola bars, wrap them tightly in plastic wrap or foil. You can also place them in an airtight container. This keeps them fresh and helps prevent them from drying out. Store the bars in a cool, dry place like your pantry or kitchen shelf. If you want to keep the granola bars longer, freezing is a great option. First, cut the bars into pieces. Next, wrap each piece in plastic wrap. Then, place them in a freezer bag or container. Label the bag with the date. You can freeze them for up to three months. When you are ready to enjoy them, just thaw them in the fridge overnight. When stored properly, these granola bars can last about one week at room temperature. If you keep them in the fridge, they can stay fresh for up to two weeks. Remember, the fresher they are, the tastier they will be! Yes, you can easily make these granola bars vegan. Just swap honey for maple syrup. Almond butter is already vegan, but you can use any nut or seed butter. This change keeps the bars yummy and plant-based. For nut allergies, use sunflower seed butter or soy nut butter. If you can't have oats, try puffed rice or quinoa flakes. You can also switch dried cranberries for seeds or any safe fruit. Just keep the same ratios to maintain texture. I love serving these bars on a wooden board. You can add a sprinkle of pumpkin pie spice on top. A dollop of yogurt or a warm cup of tea makes a great pair. They are perfect for breakfast or a snack. These granola bars stay fresh for about one week at room temperature. If you store them in the fridge, they can last up to two weeks. For longer storage, freeze them. They will keep well for up to three months in the freezer. No bake pumpkin spice granola bars are easy to make and delicious. I covered important ingredients, step-by-step instructions, and helpful tips. You can customize the recipe with different add-ins to fit your taste. These bars store well and freeze easily. Remember, you can adjust ingredients for dietary needs. Have fun experimenting with flavors and presentations. Enjoy your tasty treats!
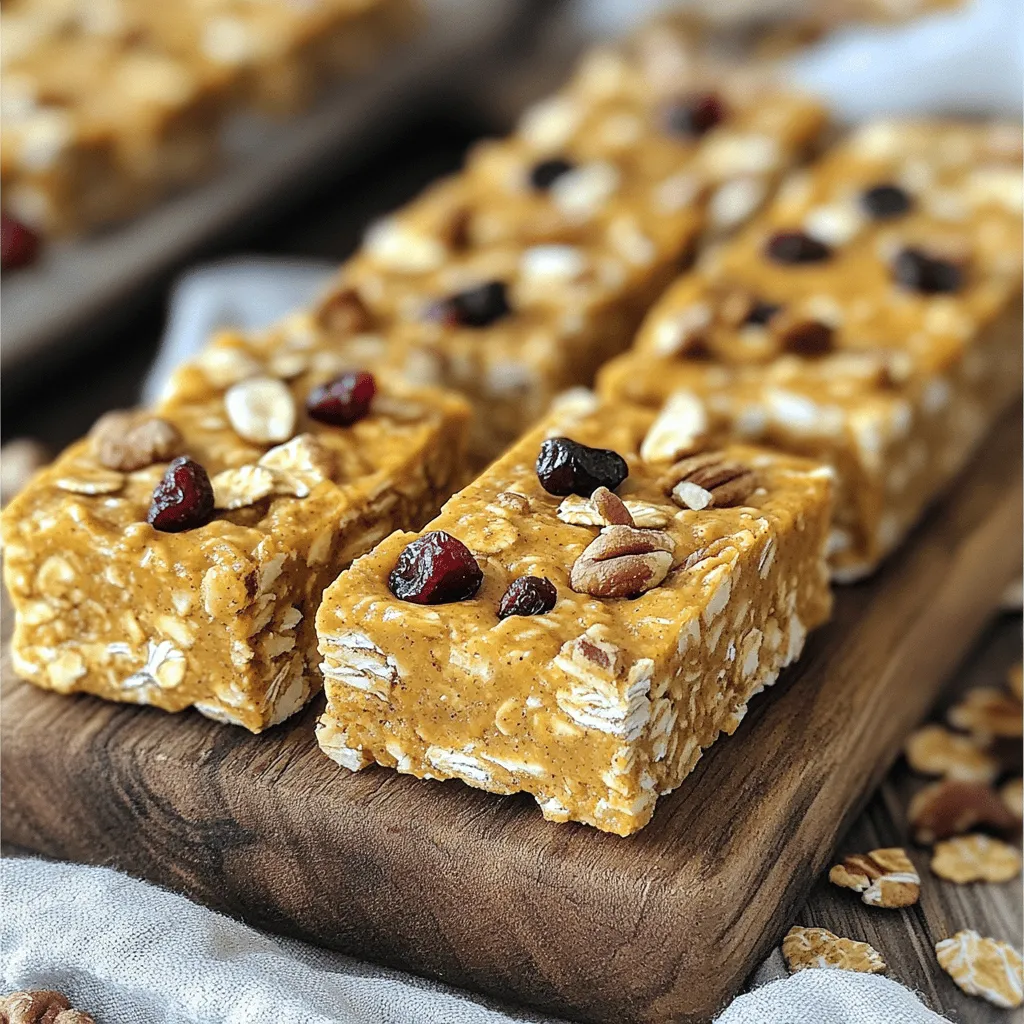
No Bake Pumpkin Spice Granola Bars Tasty and Simple
Looking for a tasty, no-bake treat? You’ll love these No Bake Pumpkin Spice Granola Bars! They are easy to make and perfect for snacking. In