Desserts

For these delicious apple streusel muffins, gather these main ingredients: - 2 cups all-purpose flour - 1 cup granulated sugar - 1 tablespoon baking powder - 1 teaspoon baking soda - 1/2 teaspoon salt - 1 teaspoon ground cinnamon - 1/2 cup unsalted butter, melted - 1 cup buttermilk (or 1 cup milk + 1 tablespoon vinegar) - 2 large eggs - 2 cups peeled and diced apples (like Granny Smith or Honeycrisp) - 1 teaspoon pure vanilla extract To make the crunchy streusel topping, you will need: - 1/2 cup all-purpose flour - 1/2 cup rolled oats - 1/3 cup packed brown sugar - 1/2 teaspoon ground cinnamon - 1/4 cup unsalted butter, softened You can make some easy swaps if you need: - Use whole wheat flour instead of all-purpose for a hearty texture. - Swap brown sugar with coconut sugar for a different sweetness. - Replace buttermilk with yogurt for a thicker batter. - Add nuts like walnuts or pecans for extra crunch. - Use other fruits like pears or berries for a fun twist. Start by preheating your oven to 375°F (190°C). This step is key for even baking. While the oven warms up, get your muffin tin ready. You can use paper liners or lightly grease each cup with butter. This helps the muffins come out easily. In a large bowl, combine 2 cups of all-purpose flour, 1 cup of granulated sugar, 1 tablespoon of baking powder, 1 teaspoon of baking soda, 1/2 teaspoon of salt, and 1 teaspoon of ground cinnamon. Use a whisk to mix these ingredients well. This step makes sure the leavening agents and spices blend evenly. In another bowl, melt 1/2 cup of unsalted butter. Then, add 1 cup of buttermilk, 2 large eggs, and 1 teaspoon of pure vanilla extract. Whisk these together until smooth. This mixture adds moisture and flavor to your muffins. Now, pour the wet mixture into the bowl with the dry ingredients. Stir gently with a spatula until just combined. Don’t worry about lumps; a few are okay. Then, fold in 2 cups of peeled and diced apples. This adds sweetness and texture to each bite. For the streusel topping, mix 1/2 cup of all-purpose flour, 1/2 cup of rolled oats, 1/3 cup of packed brown sugar, and 1/2 teaspoon of ground cinnamon in a medium bowl. Add 1/4 cup of softened butter. Use your fingers or a fork to mix until it looks crumbly, like coarse sand. Scoop the batter into the muffin tin, filling each cup about 2/3 full. This space lets the muffins rise nicely. Generously sprinkle the streusel topping over each one for a crunchy finish. Place the tin in the oven and bake for 18 to 20 minutes. Check doneness with a toothpick; it should come out clean or with a few crumbs. Once baked, let the muffins cool in the pan for 5 minutes. After that, transfer them to a wire rack to cool completely. This step keeps them fluffy and light. Enjoy the sweet smell as they cool! To get that perfect muffin texture, start with room temperature ingredients. Use room temp eggs and buttermilk. This helps the batter mix better. When you mix the wet and dry ingredients, do it gently. You want to keep some air in the batter for fluffiness. Muffins should rise high and be soft inside. Overmixing is a common mistake. It makes muffins dense and tough. When you combine wet and dry ingredients, mix just until you see no dry flour. A few lumps are okay. They will bake out, leaving you with tender muffins. Remember, less is more when it comes to mixing! Apples add flavor and moisture. Choose tart apples like Granny Smith for a nice contrast. Sweet apples like Honeycrisp work great too. You can mix different types for more depth. Make sure to peel and dice them evenly. This helps them cook well in the muffins. {{image_4}} You can add nuts for extra crunch and flavor. Walnuts or pecans work well. Just chop them finely and stir them into the batter with the apples. For spices, try adding nutmeg or ginger. They add warmth and depth to the muffins. Start with 1/4 teaspoon of each spice, then adjust to taste. While apples shine in these muffins, other fruits can be fun too. Pears add a sweet touch, while berries bring a tart bite. If using berries, fresh or frozen work well. Cut the pears into small pieces like the apples. This keeps the texture nice. Mix and match fruits for unique flavors. You can make these muffins gluten-free easily. Use a 1:1 gluten-free flour blend instead of regular flour. For dairy-free muffins, replace buttermilk with plant-based milk and vinegar. Almond milk or oat milk are great choices. Make sure to check the labels for gluten and dairy content if allergies are a concern. This way, everyone can enjoy the muffins. To keep your muffins fresh, let them cool completely. Place them in an airtight container. You can store them at room temperature for up to three days. If you want to keep them longer, use the fridge. Just wrap them in plastic wrap before placing them in a container. This keeps them moist and soft. For longer storage, freeze the muffins. Wrap each muffin tightly in plastic wrap or aluminum foil. Then, place them in a freezer bag. Label the bag with the date. They can stay fresh for about three months. When ready to eat, let them thaw in the fridge overnight or on the counter for a few hours. To enjoy your muffins warm, preheat your oven to 350°F (175°C). Place the muffins on a baking sheet. Heat them for about 5 to 10 minutes. You can also use the microwave. Heat each muffin for about 15 to 30 seconds. Enjoy them warm to bring back that fresh-baked taste! Yes, you can use frozen apples. Just thaw and drain them first. Frozen apples may have more moisture, so you might want to reduce the buttermilk slightly. To make muffins moist, focus on the right ingredients and mixing. Use buttermilk and do not overmix the batter. Adding apples also helps keep them juicy. You can easily substitute buttermilk with milk and vinegar. Just mix 1 cup of milk with 1 tablespoon of vinegar. Let it sit for a few minutes to thicken. Apple muffins can last 3 to 5 days at room temperature. Just store them in an airtight container. For longer storage, consider freezing them. You can prepare the batter ahead of time. Just cover it and store it in the fridge for up to 24 hours. Stir it gently before filling the muffin tin. You learned about the key ingredients for apple muffins and how to make them. We covered baking steps and discussed tips for perfect texture. You can also try fun variations and learn how to store leftovers. Baking apple muffins is simple and rewarding. With these tips in mind, you can enjoy warm, delicious muffins anytime. Happy baking!
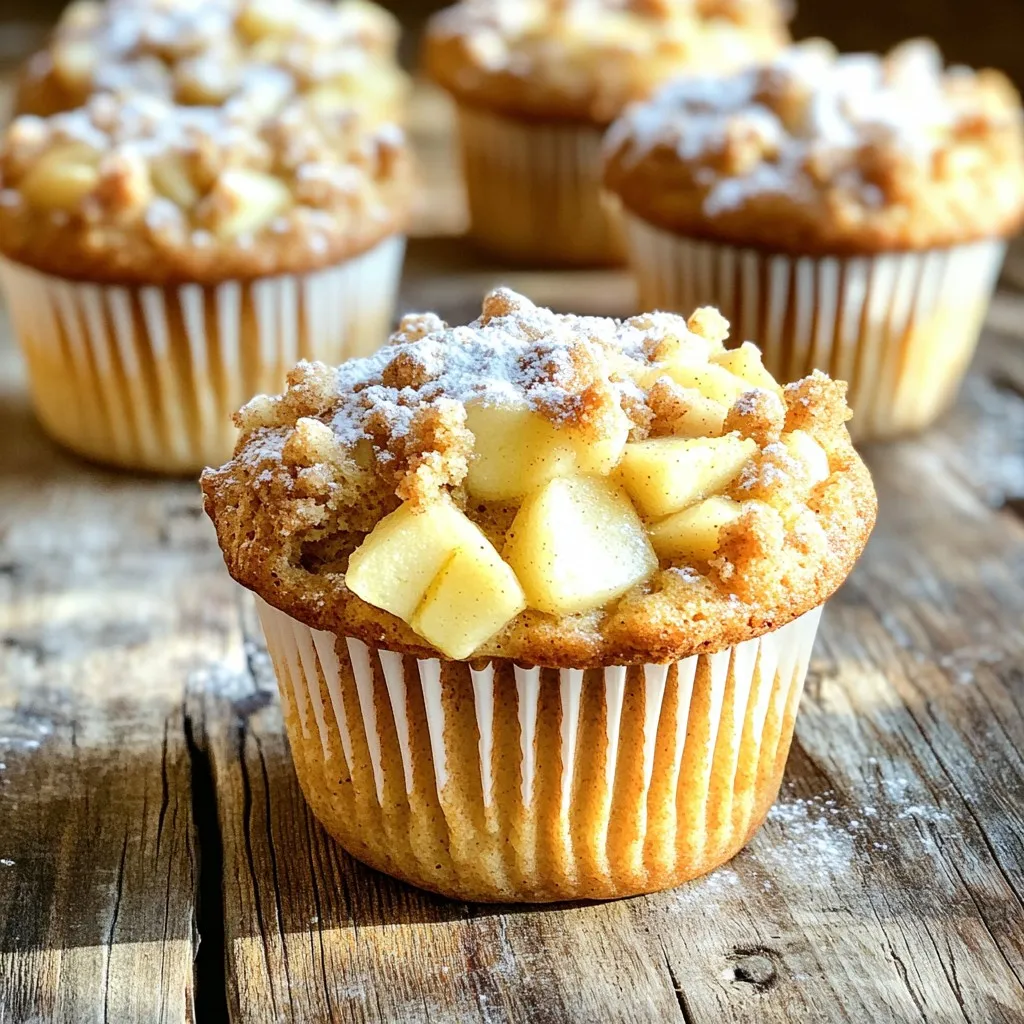
Delicious Bakery Style Apple Streusel Muffins Recipe
Are you ready to bake some scrumptious Bakery Style Apple Streusel Muffins? With a warm, fluffy center and a crunchy streusel topping, these treats taste
To make these cookies, you need a few key ingredients: - 1 cup rolled oats - 1 cup all-purpose flour - 1/2 teaspoon baking soda - 1/2 teaspoon salt - 1 tablespoon ground cinnamon - 1/2 teaspoon ground ginger - 1/4 teaspoon ground cardamom - 1/4 teaspoon ground cloves - 1/2 cup unsalted butter, softened - 1/2 cup packed brown sugar - 1/4 cup granulated sugar - 1 large egg - 1 teaspoon pure vanilla extract - 1 cup semi-sweet or dark chocolate chips These ingredients blend to create cookies with rich, warm flavors. You can add nuts to enhance texture and flavor. Consider these options: - 1/2 cup chopped walnuts - 1/2 cup chopped pecans Nuts add crunch and depth. You can skip them if you prefer a softer cookie. Some ingredients can be swapped based on your needs: - Use gluten-free flour instead of all-purpose flour for a gluten-free option. - Substitute coconut oil or vegan butter for a dairy-free version. - Replace the egg with a flax egg (1 tablespoon ground flaxseed mixed with 2.5 tablespoons water) for a vegan alternative. These changes let everyone enjoy these delightful cookies! Start by preheating your oven to 350°F (175°C). This ensures even baking. Next, line a large baking sheet with parchment paper to prevent the cookies from sticking. This step is key for easy cleanup. In a medium bowl, combine the rolled oats, all-purpose flour, baking soda, salt, ground cinnamon, ground ginger, ground cardamom, and ground cloves. Use a whisk to mix these dry ingredients well. This blend gives the cookies their unique chai flavor. In a large bowl, beat the softened butter with packed brown sugar and granulated sugar. Use a hand mixer or stand mixer on medium speed for about 2-3 minutes. The mixture should become light and fluffy. This step adds air and makes the cookies tender. Next, add one large egg and pure vanilla extract to the butter-sugar mix. Beat until smooth and fully mixed. Gradually stir in the dry ingredients using a spatula or wooden spoon. Mix gently until just combined to keep the cookies soft. Now, fold in the chocolate chips and chopped walnuts or pecans if you choose. Make sure they are evenly spread throughout the dough. This adds a nice crunch and extra flavor to each bite. Using a tablespoon or cookie scoop, drop rounded balls of dough on the prepared baking sheet. Space them about 2 inches apart. Bake for 10-12 minutes until the edges are golden brown and the centers remain slightly soft. After baking, let the cookies cool on the baking sheet for 5 minutes. Then, move them to a wire rack to cool completely. Enjoy the aroma! To keep your cookies soft, remember a few key tips. First, do not over-bake them. Remove the cookies when the edges turn golden brown but the centers look soft. This helps maintain their chewy texture. Also, let them cool on the sheet for just 5 minutes. This little time allows them to firm up without drying out. Finally, store them in an airtight container to trap moisture. Baking time is crucial for chewy cookies. Aim for 10 to 12 minutes in a preheated oven at 350°F. Check around the 10-minute mark. The edges should be golden, while the centers remain soft. If you want a bit more chewiness, take them out just before they look done. The cookies continue to bake on the sheet, thanks to residual heat. Avoid common pitfalls when making these cookies. First, do not skip the eggs, as they add moisture and help bind the dough. Second, resist the urge to over-mix the dough; this can lead to tough cookies. Lastly, ensure your oven is preheated. An oven that is not hot enough can cause cookies to spread too much. Stick to these tips, and your cookies will be delightful! {{image_4}} You can make chai-spiced oatmeal cookies without chocolate chips. Just skip the chocolate. The spices shine through even more. The cookies will still be soft and delicious. Try adding a little extra cinnamon or nutmeg for warmth. You can even dip them in icing for a sweet touch. For a gluten-free option, swap all-purpose flour for a gluten-free blend. Look for one that works in baking. You can also use almond flour or coconut flour. Just remember, these flours act differently. You may need to add a bit more liquid. Keep an eye on the cookie dough; it should be thick but not crumbly. Adding dried fruits, like raisins or cranberries, adds flavor and chew. Chopped nuts, such as almonds or pecans, give a nice crunch. Mix and match based on what you like. Just keep the total amount of add-ins similar to the chocolate chips. This way, the cookies bake evenly and taste great. To keep your chai-spiced oatmeal chocolate chip cookies fresh, store them in an airtight container. This helps maintain their soft texture and flavor. Place parchment paper between layers to avoid sticking. Keep the container in a cool, dry place, away from sunlight. This simple method keeps cookies tasty for days. You can freeze the cookie dough for future baking. After mixing the dough, scoop it into balls and place them on a baking sheet. Freeze until solid, then transfer the balls to a freezer-safe bag. When you're ready to bake, simply preheat your oven and bake the frozen dough for a few extra minutes. This way, you can enjoy warm cookies anytime! Baked cookies can last up to a week when stored properly. If you keep them in an airtight container, they stay soft and delicious. You can also freeze baked cookies for up to three months. Just thaw them at room temperature before enjoying. Knowing these tips helps you savor your cookies longer! You can tell your cookies are done when the edges turn golden brown. The centers should remain soft and look slightly underbaked. This helps keep them chewy. If you want a firmer cookie, bake a minute longer. Yes, you can use quick oats. However, rolled oats give a better texture. Quick oats may make the cookies softer. If you prefer chewy cookies, stick with rolled oats for the best outcome. You can use coconut oil or a plant-based butter. Both options work well in this recipe. Just ensure they are softened before mixing. This helps achieve the right texture in your cookies. Absolutely! These cookies make a lovely gift. They look great on a platter and taste amazing. You can package them in a nice box or jar for a thoughtful present. To boost the chai flavor, add more spices like ginger or cardamom. You can also steep chai tea bags in warm milk and use that in place of the egg. This adds depth and makes the cookies even more aromatic. You learned how to make delicious chai-spiced oatmeal chocolate chip cookies. We covered the key ingredients and helpful tips to ensure perfect cookies every time. Variations allow you to customize them to your taste. Remember to store your cookies well or freeze dough for later. Baking cookies is fun and rewarding. Enjoy your sweet treats!
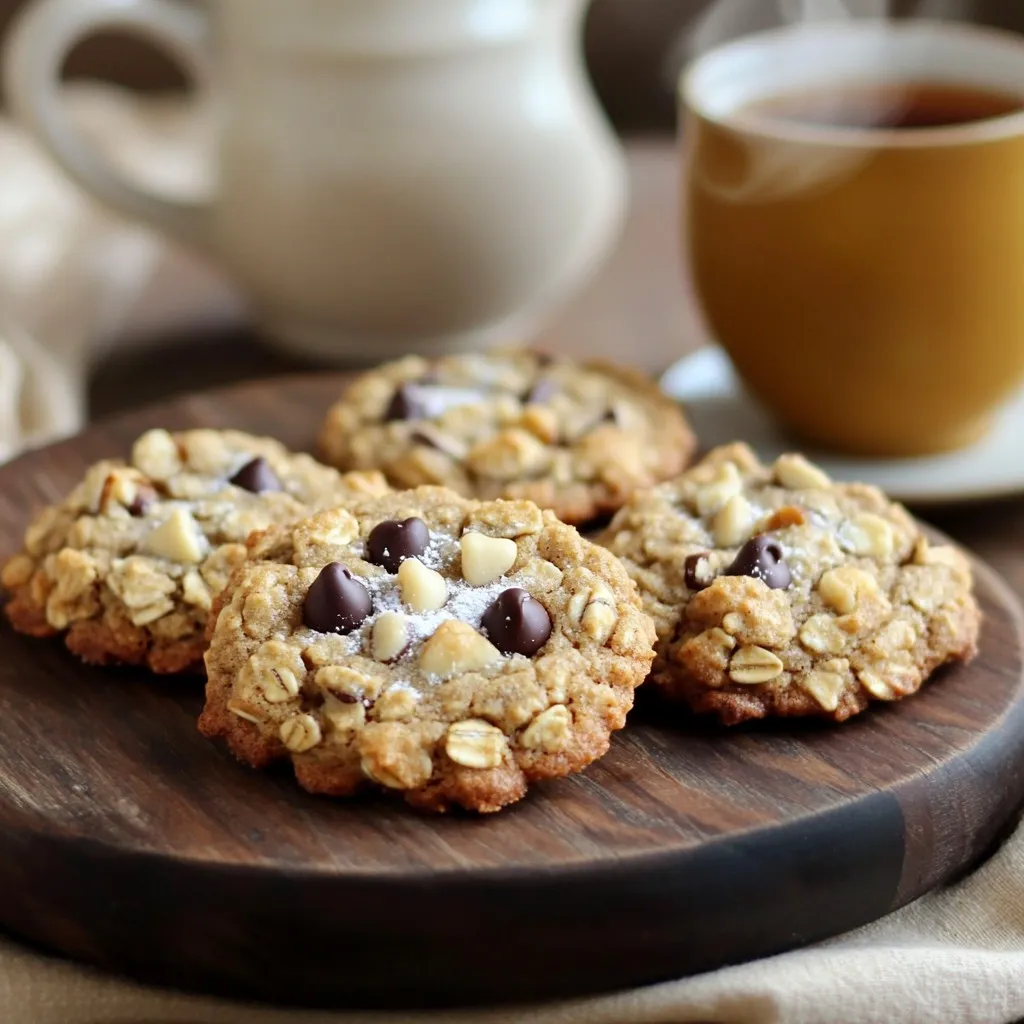
Chai-Spiced Oatmeal Chocolate Chip Cookies Delight
Craving a warm and cozy treat? These Chai-Spiced Oatmeal Chocolate Chip Cookies are the perfect answer! With rich flavors and a hint of spice, each
To make a Bakery-Style Lemon Poppy Seed Loaf, you need fresh ingredients. Here’s the list: - 1 ½ cups all-purpose flour - 1 teaspoon baking powder - ½ teaspoon baking soda - ¼ teaspoon salt - ½ cup unsalted butter, softened - 1 cup granulated sugar - 2 large eggs - 1 tablespoon fresh lemon zest - ¼ cup freshly squeezed lemon juice - 1 teaspoon pure vanilla extract - ¼ cup poppy seeds - ½ cup buttermilk Each element plays a key role. The all-purpose flour provides structure. Baking powder and baking soda give the loaf lift. Butter adds richness and flavor. Granulated sugar contributes sweetness and moisture. Eggs bind the ingredients and add lightness. Fresh lemon zest and juice bring that zesty kick. Vanilla extract adds a lovely aroma. Poppy seeds add a delightful crunch. Finally, buttermilk ensures a tender crumb. Using fresh ingredients makes a big difference. The zest and juice should come from real lemons. This gives the loaf a bright, tangy flavor. Prepare each item before you start. This will make mixing easier and faster. Start by preheating your oven to 350°F (175°C). This helps the loaf bake evenly. Next, grab a 9x5-inch loaf pan. Lightly grease it and line the bottom with parchment paper. This makes it easy to take out the loaf once it’s baked. In a medium bowl, take the all-purpose flour, baking powder, baking soda, and salt. Use a whisk to mix them well. This step ensures that the leavening agents distribute evenly throughout the loaf. Set this bowl aside for later. Now, use a large bowl to cream together the softened unsalted butter and granulated sugar. An electric mixer works best for this. Mix on medium speed for 3-4 minutes. You want it to be light and fluffy. This step is key for a soft loaf. Add the eggs one at a time to the butter and sugar mix. Make sure to beat well after each addition. Next, stir in the fresh lemon zest, lemon juice, and pure vanilla extract. Mix until everything is well blended. The lemon flavors will really shine through. Now it’s time to mix the dry ingredients into the wet mixture. Do this gradually. Start with some flour, mix it in, then add a bit of buttermilk. Repeat this until you have used all the flour and buttermilk. A few lumps are okay—don’t overmix! Gently fold in the poppy seeds using a spatula. This gives the loaf its unique texture. Pour the batter into your prepared loaf pan. Smooth the top to help it bake evenly. Bake it in the preheated oven for 55-65 minutes. Check for doneness with a toothpick. It should come out clean. If the top browns too fast, cover it loosely with aluminum foil. Once done, take the loaf out of the oven. Let it cool in the pan for 10 minutes. Then, transfer it to a wire rack to cool completely. For a special touch, drizzle a lemon glaze on top. Mix powdered sugar with fresh lemon juice for the glaze. Add some extra poppy seeds and a lemon slice for decoration. To get that soft and moist texture, use room-temperature butter and eggs. This helps them mix better. Cream the butter and sugar until light and fluffy. It should look pale and airy. Don’t overmix the batter; stop as soon as the dry and wet ingredients combine. This keeps the loaf tender. A few lumps are okay. One common mistake is not measuring ingredients correctly. Use dry measuring cups for flour and sugar. Sift your flour if the recipe calls for it. When baking, preheat your oven to 350°F (175°C). This ensures even baking. If the top browns too fast, cover it with foil. Lastly, let the loaf cool before slicing. This keeps it from crumbling. A simple glaze adds a zesty touch. Mix powdered sugar with fresh lemon juice until smooth. Drizzle the glaze over the cooled loaf. For extra flair, sprinkle more poppy seeds on top. You can also add a slice of lemon for decoration. This adds a bright look and taste. {{image_4}} You can customize your lemon poppy seed loaf with simple swaps. Here are some ideas: - Flour: Use whole wheat flour for a heartier loaf. - Butter: Substitute with coconut oil for a dairy-free option. - Sugar: Replace granulated sugar with brown sugar for a richer taste. - Eggs: Use flax eggs (1 tablespoon ground flaxseed + 2.5 tablespoons water) for a vegan version. - Milk: Almond milk or oat milk can replace buttermilk easily. Want to jazz up your loaf? Here are some fun mix-ins: - Nuts: Chopped walnuts or almonds add crunch. - Berries: Fresh blueberries or raspberries can bring a fruity twist. - Herbs: A touch of fresh thyme or rosemary pairs well with lemon. - Spices: Add cinnamon or ginger for warmth. - Extracts: Swap vanilla with almond extract for a unique flavor. Making this loaf gluten-free is easy. Just follow these tips: - Flour: Use a gluten-free all-purpose flour blend. Check it contains xanthan gum. - Baking Powder: Ensure it's gluten-free. Some brands have gluten. - Baking Time: Gluten-free bread may bake faster. Check for doneness early. - Texture: Adding a tablespoon of psyllium husk can help with moisture and texture. To keep your loaf fresh, store it in an airtight container. This helps lock in the moisture. You can also wrap it in plastic wrap or foil. Keep the loaf at room temperature for up to three days. If you want to keep it longer, freezing is a great option. To freeze your lemon poppy seed loaf, let it cool completely first. Wrap it tightly in plastic wrap, then place it in a freezer bag. Label it with the date. It can last up to three months in the freezer. When you're ready to enjoy it, just thaw it overnight in the fridge. To reheat the loaf, slice a piece and place it in the microwave. Heat it for about 15-20 seconds. This warms it nicely without drying it out. If you prefer, you can also reheat it in a toaster oven at 350°F for about 5-10 minutes. Enjoy your warm slice with a cup of tea or coffee! Yes, you can use other citrus fruits. Oranges, limes, or grapefruits can work well. Just remember to adjust the zest and juice amounts to match the fruit's flavor. For a fun twist, try mixing citrus fruits for added depth. Check the loaf at about 55 minutes. Insert a toothpick in the center. If it comes out clean, your loaf is ready. If it has wet batter, bake longer, checking every few minutes. The top should be golden brown and spring back when touched. You can make a simple buttermilk substitute. Mix one cup of milk with one tablespoon of vinegar or lemon juice. Let it sit for five minutes. This will give you a similar tangy flavor. You can also use plain yogurt or sour cream thinned with a little milk. To avoid a dry loaf, do not overmix the batter. Mix just until combined. Use fresh ingredients, especially your buttermilk. If your loaf is browning too fast, cover it with foil. Finally, let the loaf cool properly to keep it moist and tender. In this post, I shared a simple lemon poppy seed loaf recipe, covering key ingredients and baking steps. You learned how to mix, bake, and store this tasty treat. I also shared tips to ensure great flavor and texture. Remember, you can make variations using different flavors or gluten-free options. Try this loaf yourself; it’s bright, fresh, and perfect for any occasion. Enjoy baking and share your results!
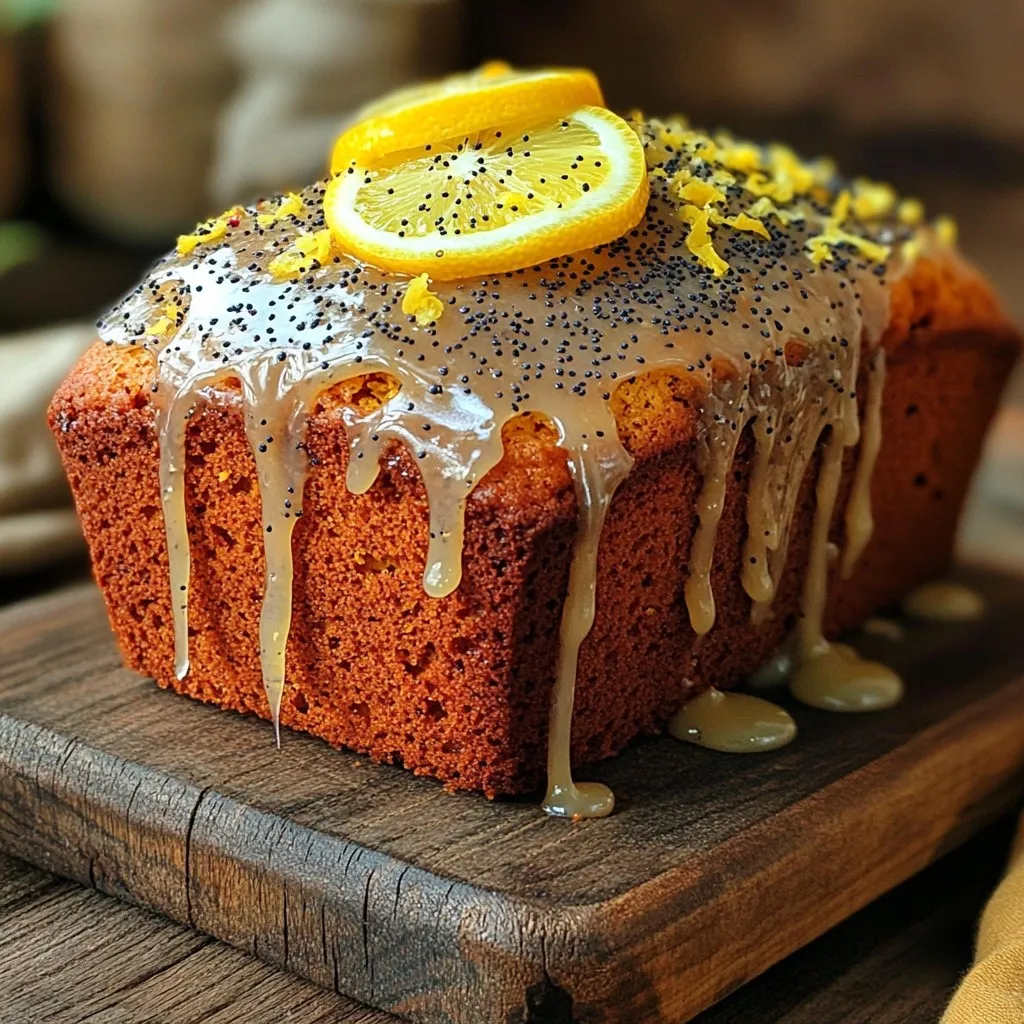
Bakery-Style Lemon Poppy Seed Loaf Fresh and Zesty
Delight your taste buds with this Bakery-Style Lemon Poppy Seed Loaf! This cake bursts with fresh lemon flavor and has a perfect texture. You’ll find
To make Brown Sugar Pecan Pie Blondies, you need a few simple ingredients. Here’s the list: - 1 cup unsalted butter, melted - 1 cup packed brown sugar - 1/2 cup granulated sugar - 2 large eggs, at room temperature - 1 teaspoon pure vanilla extract - 2 cups all-purpose flour, sifted - 1 teaspoon baking powder - 1/2 teaspoon fine sea salt - 1 cup pecans, roughly chopped - 1/2 cup semi-sweet chocolate chips (optional, but recommended) These ingredients create a rich and tasty treat. The melted butter gives the blondies a soft texture. Brown sugar adds a deep, sweet flavor. The pecans provide a nice crunch. If you like chocolate, add the chocolate chips for extra indulgence. Each bite offers a delightful mix of sweet and nutty flavors. - Preheat your oven to 350°F (175°C). - Grease a 9x13 inch baking pan with butter or cooking spray. This step helps prevent sticking. - In a large bowl, combine melted butter with brown sugar and granulated sugar. - Mix until smooth. - Add two large eggs one at a time, mixing well after each. - Stir in 1 teaspoon of pure vanilla extract for extra flavor. - In a separate bowl, whisk together 2 cups of sifted all-purpose flour, 1 teaspoon of baking powder, and 1/2 teaspoon of fine sea salt. - This step ensures the baking powder mixes well. - Gradually add the dry mixture to the wet ingredients. - Fold gently until just combined. - A few lumps are okay. - Carefully fold in 1 cup of roughly chopped pecans. - You can also add 1/2 cup of semi-sweet chocolate chips if desired. - Pour the batter into your greased pan. - Use a spatula to spread the batter evenly. - Bake for 25-30 minutes. - They are done when golden brown and a toothpick comes out clean. - Let the blondies cool in the pan for at least 15 minutes. - This cooling time makes cutting easier. - To serve, cut into squares and enjoy! To make the best blondies, avoid overmixing. When you combine wet and dry ingredients, mix just until you see no flour. Some lumps are okay. This keeps your blondies soft and chewy. If you mix too much, your blondies turn tough. Aim for a smooth blend but still keep that lovely texture. For a beautiful presentation, dust your blondies with powdered sugar. It adds a nice touch and makes them look fancy. You can also serve them warm with a scoop of vanilla ice cream. The cold ice cream melts a bit on the warm blondies. It creates a delicious mix of flavors. Whipped cream is another great option to add creaminess. One big mistake is overbaking. If you leave blondies in the oven too long, they can dry out. Watch for a golden brown top and use a toothpick to check. If it comes out clean, they’re done. Another mistake is using the wrong pan size. A 9x13 inch pan is best for even baking. If your pan is too small, they will spill over. If it’s too big, they may bake too fast. Stick to the right size for perfect results. {{image_4}} You can change the nuts in your blondies. Try walnuts or almonds for a new taste. You can also add different types of chocolate. Dark chocolate or white chocolate can bring fun flavors. If you want to reduce sugar, use coconut sugar. It gives a rich taste like brown sugar. For a twist, add spices like cinnamon or nutmeg. Just a pinch can elevate the flavor. You might also try adding zest from oranges or lemons. This will give your blondies a fresh and fruity touch. If you want a healthier treat, use whole wheat flour instead of all-purpose flour. It adds fiber and nutrients. You can also reduce the sugar content. Try cutting the granulated sugar in half. This way, you still enjoy sweetness without all the sugar. To keep your brown sugar pecan pie blondies fresh, store them in an airtight container. You can use a glass or plastic container with a tight lid. Line the bottom with parchment paper for extra protection. Avoid stacking the blondies directly on top of each other to prevent squishing. If you want to keep them soft, add a slice of bread to the container. The bread helps keep the blondies moist. If you want to freeze your blondies, first let them cool completely. Cut them into squares and wrap each piece in plastic wrap. Place the wrapped blondies in a freezer-safe bag or container. They can last up to three months in the freezer. When you're ready to eat them, thaw them in the fridge overnight or at room temperature for a few hours. You can warm them in the oven for a few minutes for a fresh-baked taste. At room temperature, these blondies can last about 3-5 days when stored properly. If you put them in the fridge, they stay good for up to a week. Just remember that refrigeration can dry them out a bit. To combat this, always store them in an airtight container. Enjoy your blondies while they are soft and tasty! Yes, you can make these blondies gluten-free. To do this, use a gluten-free all-purpose flour blend. These blends often replace regular flour with a mix of rice flour, potato starch, and tapioca flour. This swap keeps the texture light and chewy. Be sure to check that your other ingredients, like baking powder, are also gluten-free. Absolutely! If you want to swap pecans, you have many options. Walnuts or almonds work great. They add a nice crunch and flavor. For a nut-free version, consider using sunflower seeds or pumpkin seeds. These options still give you that satisfying texture without the nuts. To check if your blondies are done, use a toothpick. Insert it into the center of the blondies. If it comes out clean or with a few moist crumbs, they are ready. If the toothpick has wet batter, bake them a few more minutes. Keep an eye on them so they don't overbake. If your blondies turn out dry, you can fix them. Try adding a drizzle of melted butter or a splash of milk. This can help bring moisture back. To prevent dry blondies next time, avoid overmixing the batter. Also, check your oven temperature. An oven that’s too hot can lead to dry treats. You now have a complete guide to making delicious blondies from scratch. We covered ingredients, step-by-step instructions, and some helpful tips. Remember to mix carefully and avoid overbaking for the best texture. You can also try variations to suit your taste or dietary needs. Store your blondies well, and they will last longer. Enjoy your baking journey and delight in every bite of your homemade treats!
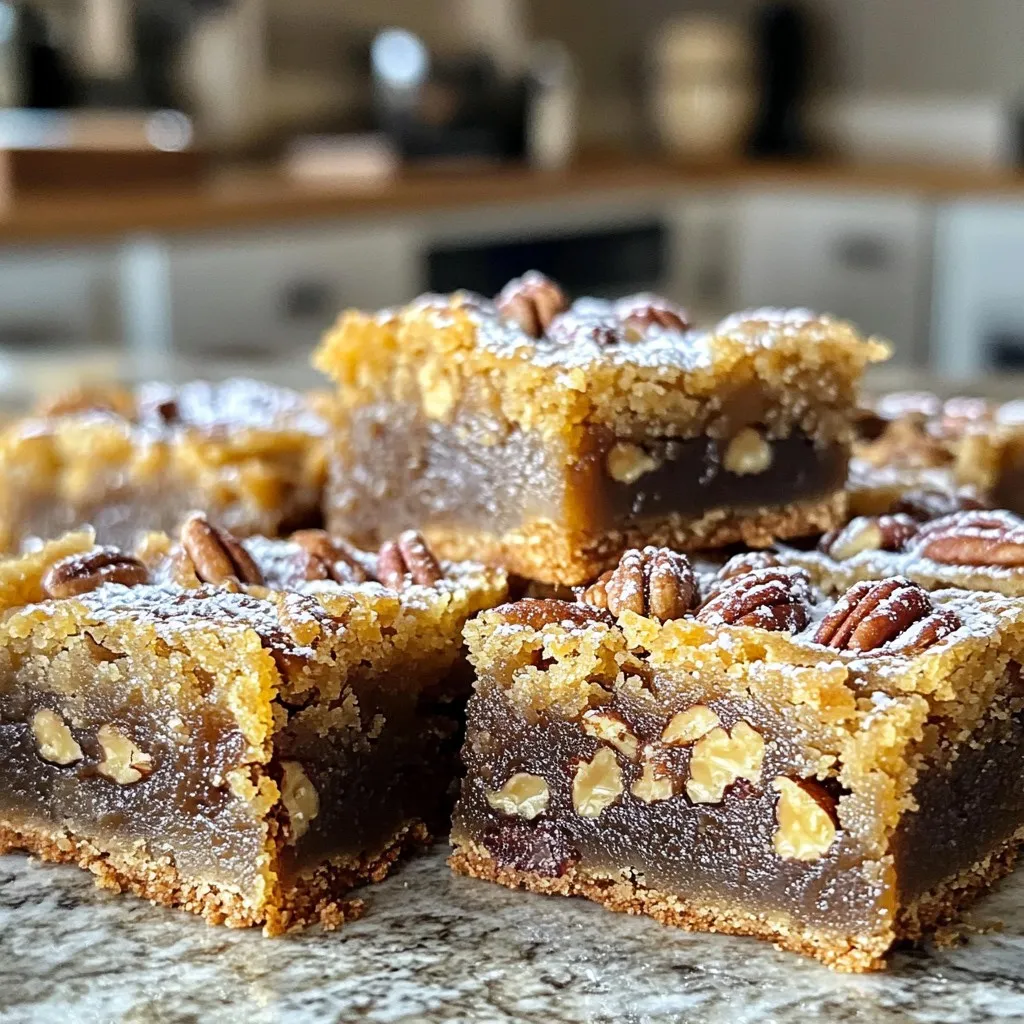
Brown Sugar Pecan Pie Blondies Irresistible Treat
Get ready for a sweet treat that combines classic flavors with a twist! My Brown Sugar Pecan Pie Blondies will steal the show at any
To make these delicious ingredient date caramels, you will need a few key items. I love how simple and wholesome they are. Here is the list of ingredients: - 1 cup medjool dates, pitted - 1/4 cup almond butter or your preferred nut butter - 1/4 cup coconut cream - 1/2 teaspoon vanilla extract - 1/4 teaspoon sea salt - 1/4 cup chopped nuts (like hazelnuts, walnuts, or pistachios) for topping - Optional: 1 tablespoon cocoa powder for a chocolate variation These ingredients work together to create a treat that is both sweet and satisfying. Medjool dates are naturally sweet and serve as the base. Almond butter adds creaminess and flavor. Coconut cream gives a rich texture. Vanilla extract enhances the taste, while sea salt balances the sweetness. If you want a chocolate twist, adding cocoa powder is a fun option! Feel free to mix and match the nut toppings based on your taste. Each ingredient plays a role in making these caramels a delightful snack or dessert. Enjoy the process, and don't hesitate to get creative! {{ingredient_image_2}} To start, place the pitted medjool dates in your food processor. Blend the dates until they become a sticky paste. If your dates feel too firm, soak them in warm water for about 10 minutes. This softens them and makes blending easier. Next, add the almond butter and coconut cream to the date paste. You can also include vanilla extract and sea salt for extra flavor. Blend all the ingredients until smooth. You want a thick, creamy caramel-like texture. Now, grab an 8x8 inch baking dish. Line it with parchment paper to help remove the caramels later. Pour the blended mixture into the dish and use a spatula to spread it evenly. Press it down firmly to ensure it sets well. It's time to chill the mixture. Place the dish in the refrigerator for 1 to 2 hours. This helps the date caramel to firm up nicely. Once chilled, carefully lift the mixture out using the parchment paper. Transfer it to a cutting board. Use a sharp knife to cut the caramels into small squares or rectangles. This makes them easy to serve. For a final touch, sprinkle the chopped nuts over the top. Press them gently into the surface to secure them. If you like, roll the pieces in shredded coconut for a tropical twist. Enjoy your sweet treats! To get a smooth texture for your date caramels, blend the dates well. If your dates feel a bit hard, soak them in warm water for 10 minutes. This will help them soften up. Once softened, place them in your food processor. Blend until they turn into a sticky paste. This is key for achieving that creamy caramel feel. You can make your date caramels even better with extra flavors. Try adding a pinch of cinnamon or nutmeg to warm things up. If you want a chocolate twist, add a tablespoon of cocoa powder. For a sweeter treat, you can mix in a little honey or maple syrup. Just remember to taste and adjust the sweetness to your liking. Date caramels pair well with many drinks. Try serving them with coffee or tea for a tasty match. You can also add a scoop of ice cream for a fun dessert. For presentation, cut the caramels into small squares and arrange them on a nice plate. Add a sprinkle of chopped nuts on top for a crunchy look. You can even roll them in shredded coconut for a tropical touch. Pro Tips Use Fresh Dates: For the best flavor and texture, opt for fresh medjool dates. They should be soft and plump for easy blending. Customize Nut Butter: Feel free to experiment with different nut butters like cashew or peanut butter to alter the flavor profile of your caramels. Chill for Best Results: Allow the caramels to chill adequately. The longer they set, the firmer they will become, making them easier to cut. Presentation Matters: Enhance the visual appeal by arranging the caramels in an aesthetically pleasing way on a serving platter, and consider adding a sprinkle of sea salt on top for a gourmet touch. {{image_4}} You can make these date caramels even better by adding cocoa powder. Just mix in 1 tablespoon of cocoa powder when blending. This gives your caramels a rich chocolate taste. It makes a great treat for chocolate lovers. You still keep that smooth, sweet date flavor, but with a nice twist. If you want to change things up, try different nut butters. You can use peanut butter or cashew butter instead of almond butter. Each nut butter brings its own flavor and texture. Peanut butter adds a classic taste, while cashew butter gives a creamier feel. Feel free to experiment and choose what you love best. You can easily adapt these caramels to fit your diet. To make them vegan, just check that all your ingredients are plant-based. Most nut butters and coconut cream are great choices here. If you're nut-free, you can skip the nut butter and use sunflower seed butter instead. This way, everyone can enjoy these sweets! To keep your date caramels fresh, store them in an airtight container. This helps prevent them from drying out. Choose a container that seals tightly. Glass or plastic containers both work well. These date caramels stay fresh for up to two weeks. The cool temperature in the fridge helps maintain their taste and texture. Always check for any signs of spoilage before eating. You can freeze these caramels for longer storage. To freeze, cut the caramels into pieces first. Place them in a single layer on a baking sheet. Freeze them for about two hours until firm. Then, transfer them to an airtight container. They can last up to three months in the freezer. Simply thaw in the fridge when you’re ready to enjoy them again. Dates are packed with nutrients. They provide energy due to their natural sugars. They also have fiber, which helps digestion. Eating dates can improve heart health, as they contain potassium. Plus, they are rich in antioxidants that fight free radicals. This makes dates a great choice for a healthy treat. Absolutely! You can swap out nuts based on your taste. Pecans or almonds work well too. If you want a twist, try using sunflower seeds or pumpkin seeds. They add a nice crunch and flavor. Feel free to mix and match your favorite nuts or seeds. To keep your caramels vegan, choose plant-based nut butter. Almond butter, cashew butter, or peanut butter all work great. Ensure the coconut cream is dairy-free, which it usually is. Vanilla extract is also plant-based. Just check your labels to confirm they are vegan-friendly. If the mixture is too sticky, try adding more nut butter. This will help it hold together better. You can also add a bit of coconut cream to adjust the texture. If it remains sticky, chill it longer. Chilling firms it up and makes it easier to cut. Yes! You can make these date caramels ahead of time. After cutting them, store them in an airtight container. Keep them in the fridge for freshness. They will stay good for up to two weeks. This makes them perfect for meal prep or parties. You can create delicious date caramels with simple ingredients and easy steps. We blended Medjool dates, nut butter, and coconut cream to get a smooth mix. Chill the mixture, cut, and add fun toppings to make them special. Remember, you can adjust flavors and toppings to fit your taste. These treats store well and can last up to two weeks. Enjoy experimenting with variations for everyone, including vegan options. Now you have the tools to impress friends and family with this tasty treat!
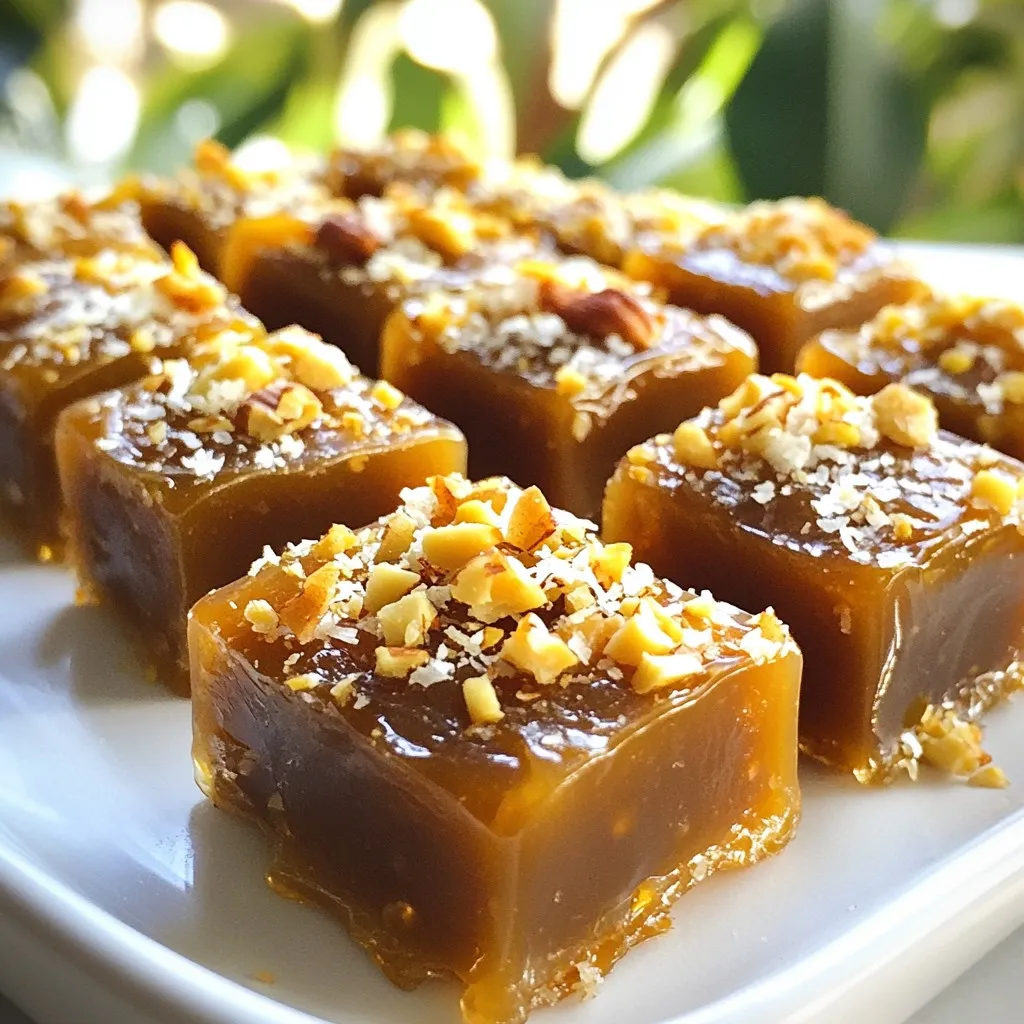
Ingredient Date Caramels Simple and Sweet Treat
If you’re looking for a sweet treat that packs a nutritious punch, try my Ingredient Date Caramels. These simple, homemade delights use just a few
- 2 cups rolled oats - 2 cups apple cider - 1/2 cup unsweetened applesauce - 1/4 cup maple syrup - 1 teaspoon vanilla extract - 1 teaspoon baking powder - 1 teaspoon ground cinnamon - 1/4 teaspoon ground nutmeg - 1/4 teaspoon salt - 1/2 cup diced Granny Smith apples - 1/4 cup chopped walnuts or pecans - For topping: melted butter or coconut oil, brown sugar, ground cinnamon Apple cider doughnut baked oatmeal brings flavors of fall right to your kitchen. You need basic ingredients like oats and apple cider to get started. Rolled oats form the heart of the dish. They soak up the apple cider and become soft and chewy. Apple cider adds a sweet, tangy taste. It makes the oatmeal moist and rich. Unsweetened applesauce adds more apple flavor, and maple syrup gives it sweetness. Vanilla extract rounds out the flavors with a warm touch. You can’t forget the spices. Ground cinnamon and nutmeg add a cozy vibe. Baking powder helps the oatmeal rise and become fluffy. A pinch of salt balances the sweetness perfectly. If you want to add more texture and flavor, consider adding diced Granny Smith apples. They are tart and crunchy, adding a nice contrast. Chopped walnuts or pecans bring a lovely crunch. For the topping, melt some butter or coconut oil. Mix it with brown sugar and cinnamon for a sweet, sticky layer. This step is key for that doughnut-like finish. This dish is not just about ingredients; it’s about joy and comfort. Each part comes together to create a mix that warms your heart. You will love how easy it is to make this delightful treat! - Preheat oven to 350°F (175°C) - Grease an 8x8-inch baking dish To start, preheat your oven to 350°F (175°C). This sets the stage for baking your oatmeal. While the oven warms, grab an 8x8-inch baking dish. Lightly grease it to help the oatmeal come out easily later. You can use butter or cooking spray for this. - Combine rolled oats, baking powder, cinnamon, nutmeg, and salt Next, take a large mixing bowl. Add in 2 cups of rolled oats. Then, sprinkle in 1 teaspoon of baking powder, 1 teaspoon of ground cinnamon, 1/4 teaspoon of ground nutmeg, and 1/4 teaspoon of salt. Stir these dry ingredients together well. This mix will give your oatmeal that classic doughnut flavor. - Whisk together apple cider, applesauce, maple syrup, and vanilla extract in a medium bowl Now, grab another bowl. In this medium bowl, whisk together 2 cups of apple cider, 1/2 cup of unsweetened applesauce, 1/4 cup of maple syrup, and 1 teaspoon of vanilla extract. This sweet, fruity mix will blend beautifully with your dry ingredients. - Pour wet mixture into dry ingredients; fold in apples and nuts; transfer to baking dish - Prepare topping and drizzle over oatmeal before baking Pour the wet mixture over the dry ingredients. Stir gently until just combined. Then, fold in 1/2 cup of diced Granny Smith apples and 1/4 cup of chopped nuts, if you want. Be careful not to break the apples. Once mixed, transfer everything into your greased baking dish. Spread it out evenly with a spatula. For a tasty topping, mix 2 tablespoons of melted butter or coconut oil with 1/4 cup of brown sugar and 1 teaspoon of ground cinnamon. Drizzle this over the oatmeal before it goes in the oven. - Bake for 30 to 35 minutes until firm and golden brown Place the dish in the preheated oven. Bake for 30 to 35 minutes. You want it firm and golden brown on top. When it’s done, take it out and let it cool for about 5-10 minutes. This makes it easier to slice. Enjoy your delicious Apple Cider Doughnut Baked Oatmeal warm! - Allow the baked oatmeal to cool for about 5-10 minutes. This makes slicing easier. If you slice it too soon, it may crumble. - Adjust the sweetness by using more or less maple syrup. Taste the mixture before baking to find your perfect balance. - Serve the oatmeal warm. Add extra maple syrup and a light dusting of powdered sugar on top. This mimics the sweet glaze of a doughnut. - Garnish with thin apple slices. A dollop of whipped cream or yogurt adds a creamy touch. This also brings extra flavor to each bite. - Do not overmix the wet and dry ingredients. This can make the oatmeal too dense. Stir gently until just combined. - Be sure to grease the baking dish well. If you don't, the oatmeal may stick. Use butter or a cooking spray for best results. {{image_4}} You can make this dish even more fun. Try adding dried fruits like cranberries or raisins. They add a nice sweetness and chew. You can also experiment with different nuts or seeds. Walnuts and pecans are great, but try sunflower seeds or slivered almonds too. Each change gives a new taste and texture. If you need a gluten-free option, use certified gluten-free oats. They work just as well in this recipe. For those who want vegan choices, swap butter for coconut oil and use a flax egg instead of regular eggs. This keeps the dish tasty and suitable for everyone. To celebrate the seasons, think about adding pumpkin or pears. They fit perfectly in baked oatmeal. You can also change the apple cider to spiced cider for extra warmth and flavor. This simple switch can make your dish feel special for fall or winter. You can keep leftovers in an airtight container. Store them in the refrigerator for up to 5 days. If you want to save them longer, you can freeze the baked oatmeal. Just make sure to wrap it well. When you're ready to enjoy more, reheat the baked oatmeal. You can use the microwave for a quick option. If you prefer, bake it in the oven for a warm treat. This dish tastes best when served fresh. It can still be enjoyed cold or reheated. The flavors stay nice, but the warm version is a cozy delight. No, steel-cut oats will change the texture. They take longer to cook and need more liquid. Stick to rolled oats for a soft, chewy bite. They soak up the apple cider well and bake perfectly. To make it nut-free, simply omit the walnuts or pecans. You can swap them for seeds, like pumpkin or sunflower seeds. This keeps the crunch while ensuring everyone can enjoy it. Yes, you can use apple juice as a substitute. However, apple cider offers a richer flavor. If you use juice, consider adding a splash of vinegar for extra tartness. Absolutely! You can prepare the oatmeal mixture a day ahead. Store it in the fridge and bake it when you’re ready. This is perfect for busy mornings or brunch gatherings. Serve it warm with a drizzle of maple syrup. You can add a light dusting of powdered sugar, too. Fresh apple slices and whipped cream make a great side for extra flavor. This recipe for Apple Cider Doughnut Baked Oatmeal combines yummy flavors and easy steps. You learn about key ingredients, baking methods, and helpful tips for the perfect texture. Remember to let the dish cool to slice easily. Feel free to add your own twist with fruits or nuts. It's great fresh, but you can store leftovers too. Enjoy cozy mornings with this delight!
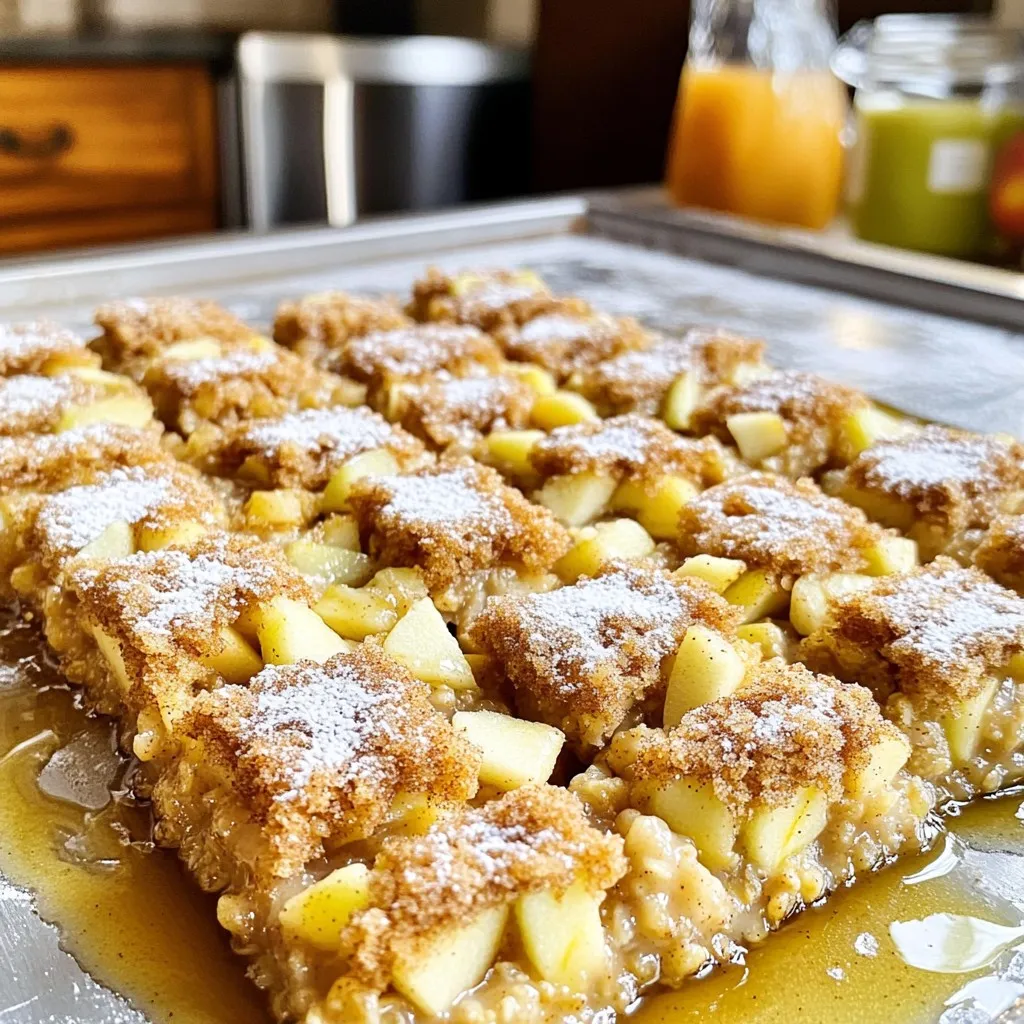
Apple Cider Doughnut Baked Oatmeal Flavorful Delight
Get ready for a warm, cozy treat with my Apple Cider Doughnut Baked Oatmeal! This recipe combines sweet apple cider, spices, and oats into a
- 1/2 cup unsalted butter - 1 cup semisweet chocolate chips - 2 large eggs - 2 large egg yolks - 1/2 cup granulated sugar - 1/4 teaspoon salt - 1 teaspoon vanilla extract - 1/2 teaspoon peppermint extract - 1/4 cup all-purpose flour - Powdered sugar - Crushed candy canes You can swap unsalted butter for coconut oil. This change adds a hint of coconut flavor. For a dairy-free option, use vegan chocolate chips instead of semisweet chocolate. You can replace granulated sugar with coconut sugar for a healthier choice. If you lack peppermint extract, use almond extract for a different taste. Use gluten-free flour if you want a gluten-free version. Start by preheating your oven to 425°F (220°C). Take four ramekins and grease them with unsalted butter. Dust the insides lightly with cocoa powder. This helps the cakes release easily after baking. In a microwave-safe bowl, combine 1/2 cup of unsalted butter and 1 cup of semisweet chocolate chips. Heat this mixture for 30 seconds at a time, stirring after each interval. Keep heating until it melts and becomes smooth. Let it cool a bit so it mixes well later. In another mixing bowl, crack two large eggs and add two egg yolks. Add 1/2 cup of granulated sugar and 1/4 teaspoon of salt. Whisk them together until the mixture is light and frothy. This step adds air, making your cakes fluffy. Once the chocolate mix has cooled, pour it into the egg mixture. Add 1 teaspoon of vanilla extract and 1/2 teaspoon of peppermint extract. Stir gently until well mixed. Next, fold in 1/4 cup of all-purpose flour using a spatula. Mix until just combined. Don’t overmix, or the cakes will be dense. Use a ladle to fill each ramekin with batter, about 3/4 full. This allows the cakes to rise. Place them in the oven and bake for 12 to 14 minutes. The edges should be firm, but the centers should be soft. After baking, let them sit for 1 minute. Carefully invert each ramekin onto a plate to release the cakes. Enjoy the warm chocolate peppermint goodness! To get that gooey lava center, timing is key. Bake the cakes for 12-14 minutes. The edges will look set, but the center should jiggle slightly. If you bake too long, the lava will turn into cake. Keep a close watch! One common mistake is overmixing the batter. This can lead to a dense cake instead of a light one. Another mistake is not greasing the ramekins properly. This can make it hard to release the cakes after baking. Always dust them with cocoa powder after greasing. You’ll need a few basic tools for these cakes. Use: - Four ramekins - A microwave-safe bowl for melting chocolate - A whisk for mixing the eggs - A spatula for folding in the flour - An oven mitt to handle hot ramekins These tools will help you create perfect lava cakes every time! {{image_4}} To make gluten-free lava cakes, simply swap the all-purpose flour for a gluten-free blend. Many store-bought blends work well. Look for one that contains xanthan gum, as it helps bind the ingredients. This change keeps the texture light and fluffy. The flavor stays rich and chocolatey, making it hard to tell it’s gluten-free. For a vegan twist, replace the eggs with a flaxseed mixture. Mix one tablespoon of ground flaxseed with three tablespoons of water. Let it sit for five minutes until it thickens. Use dairy-free butter and chocolate chips to keep it vegan. The lava cakes will still be warm, gooey, and delicious. You can easily mix up the flavor. For a mocha version, add one tablespoon of instant coffee to the chocolate mixture. This gives a rich coffee taste. For a raspberry twist, fold in a handful of fresh raspberries into the batter before baking. You can also drizzle raspberry sauce on top after baking for a fruity finish. Try different extracts too, like almond or orange, to create your own unique version. To keep your lava cakes fresh, place them in an airtight container. Store them in the fridge for up to three days. Make sure they cool to room temperature before sealing them. This step helps prevent moisture build-up, which can ruin the texture. You can freeze leftover lava cakes, too! Wrap each cake tightly in plastic wrap. Then, place them in a freezer-safe bag or container. They can last up to three months in the freezer. When you're ready to enjoy them, simply thaw them in the fridge overnight. To reheat, preheat your oven to 350°F (175°C). Place the lava cake on a baking sheet and warm it for about 10 minutes. This method helps restore that delicious gooey center. If you're in a hurry, you can also use the microwave. Heat for 15-20 seconds, but be careful not to overdo it. Enjoy your warm chocolate peppermint lava cake as if it just came out of the oven! Serve warm chocolate lava cakes right away. They taste best fresh from the oven. Place the cake on a plate. Dust it lightly with powdered sugar. Add crushed candy canes for a festive touch. A scoop of vanilla ice cream pairs well too. The cold ice cream melts into the warm cake, creating a great mix. Yes, you can make the batter ahead. Prepare it and store it in the fridge for up to 24 hours. Just remember to cover the bowl tightly. When you're ready to bake, bring the batter to room temperature. Then, pour it into the ramekins and bake as directed. Check the edges of the cakes for firmness. They should look set and not jiggle. The centers should remain soft and slightly wobbly. A good rule is to bake them for 12-14 minutes. Keep an eye on them to avoid overbaking, which can ruin the lava effect. Absolutely! You can try dark chocolate for a richer flavor. Milk chocolate will make the cakes sweeter. White chocolate is also an option, but it won't have the same lava effect. Just adjust the sugar levels if you switch to a sweeter chocolate. To adjust sweetness, change the sugar amount. Use less sugar if you prefer less sweetness. You could also add a pinch of salt to balance the flavors. If using sweeter chocolate, cut back on sugar too. Taste the batter before baking to find your perfect balance. You learned how to make warm chocolate lava cakes from start to finish. We covered ingredients, step-by-step instructions, and tips for success. You can create different flavors and even store leftovers. Remember to avoid common mistakes for a perfect lava center. Get ready to impress your friends and family with these treats. Enjoy baking and experimenting with this fun dessert!
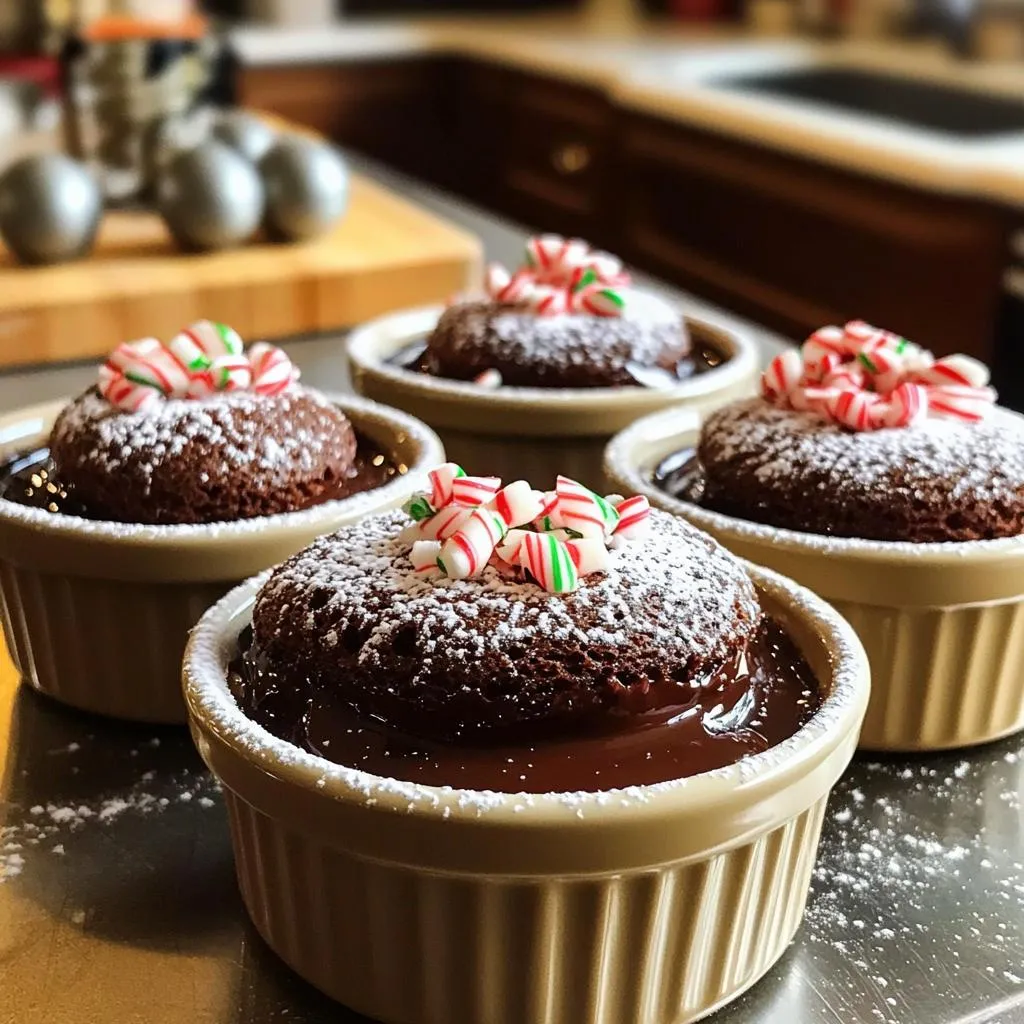
Warm Chocolate Peppermint Lava Cakes Irresistible Treat
Looking for a dessert that warms your heart and soul? Try these Warm Chocolate Peppermint Lava Cakes! With a gooey center bursting with chocolate goodness,
- 2 cups heavy whipping cream - 1 can (14 oz) sweetened condensed milk - 1 teaspoon vanilla extract - 1 cup crumbled birthday cake (store-bought or homemade) - 1/2 cup rainbow sprinkles - A pinch of salt In a mixing bowl, pour in the heavy whipping cream. I like to use a sturdy bowl to prevent spills. Whip on medium-high speed until stiff peaks form. This takes about 3 to 5 minutes. The cream should hold its shape firmly when you lift the mixer. Take a separate bowl and combine the sweetened condensed milk, vanilla extract, and a pinch of salt. Mix these ingredients until they blend smoothly and look creamy. This step adds a sweet base to our ice cream. Now, gently fold the whipped cream into the condensed milk mixture. Do this in three separate additions. This keeps the whipped cream airy. After that, add in the crumbled birthday cake and rainbow sprinkles. Use a spatula to fold them in evenly. Be careful not to overmix. Next, transfer the mixture into an 8x8 inch dish or a loaf pan. Spread the top evenly. Cover it tightly with plastic wrap. Place it in the freezer for at least 6 hours. This lets the ice cream set and become solid. When you’re ready to serve, scoop generous portions into bowls or cones. If you like, sprinkle some extra rainbow sprinkles on top for fun! To make this ice cream, start by whipping the cream. The key is to reach stiff peaks. This means the cream holds its shape well. You will whip it for about 3-5 minutes. Use an electric mixer for best results. When you fold the whipped cream into the condensed milk, do it gently. You want to keep the air in the cream. Use a spatula to fold in three parts. This method helps maintain that light and fluffy texture. Overmixing will make it too flat and dense. Presentation matters! Serve the ice cream in colorful bowls or cones. Bright colors make it fun and festive. You can also add extra rainbow sprinkles on top. A slice of birthday cake on the side adds a nice touch. This makes each scoop feel like a party! To store your no-churn birthday cake ice cream, use a tight container. I prefer using glass or plastic containers with lids. This helps keep ice crystals from forming, which can ruin the smooth texture. Make sure to press plastic wrap directly on the ice cream's surface before sealing the lid. For the best taste and texture, freeze the ice cream for at least six hours. But, if you can wait, letting it freeze overnight is even better. This waiting time helps all the flavors blend perfectly. If you have leftover ice cream, you can re-freeze it. Just make sure to scoop out only what you need. Avoid leaving the container open for too long. This can lead to texture changes and ice crystals forming. Look for signs of freezer burn or icy layers on the top. If you see these, it might affect the taste. Ideally, eat the ice cream within two weeks for the best flavor and texture. {{image_4}} No, you cannot use regular milk. Heavy cream has more fat. This fat gives the ice cream its rich and creamy texture. Using regular milk will make the ice cream thin and icy. If you want creamy ice cream, stick with heavy cream. To make this ice cream dairy-free, use coconut cream instead of heavy cream. You can also use dairy-free sweetened condensed milk. Both options will give you a creamy base. Vanilla extract remains the same, adding flavor. With these swaps, you’ll enjoy a tasty treat without dairy. Yes, you can make this ice cream ahead of time. It lasts about 2-3 weeks in the freezer. Store it in an airtight container. This helps keep the texture smooth. For the best taste, eat it within a week. The longer it sits, the harder it can become. Leftover birthday cake can become a fun topping. Crumble it and sprinkle it on ice cream. You can also layer it in a parfait. Just add whipped cream and fruit. Another idea is to make cake pops. Mix the cake with frosting, roll it into balls, and dip them in chocolate. Enjoy being creative with your leftover cake! This blog post covered a simple and fun homemade ice cream recipe. You learned about the key ingredients, step-by-step instructions, and helpful tips. Adding birthday cake and sprinkles makes this treat special. Remember, you can mix different flavors and customize toppings for your taste. Now, with proper storage, you can enjoy this ice cream for weeks. Try making it today; it's a sweet treat that everyone will love!
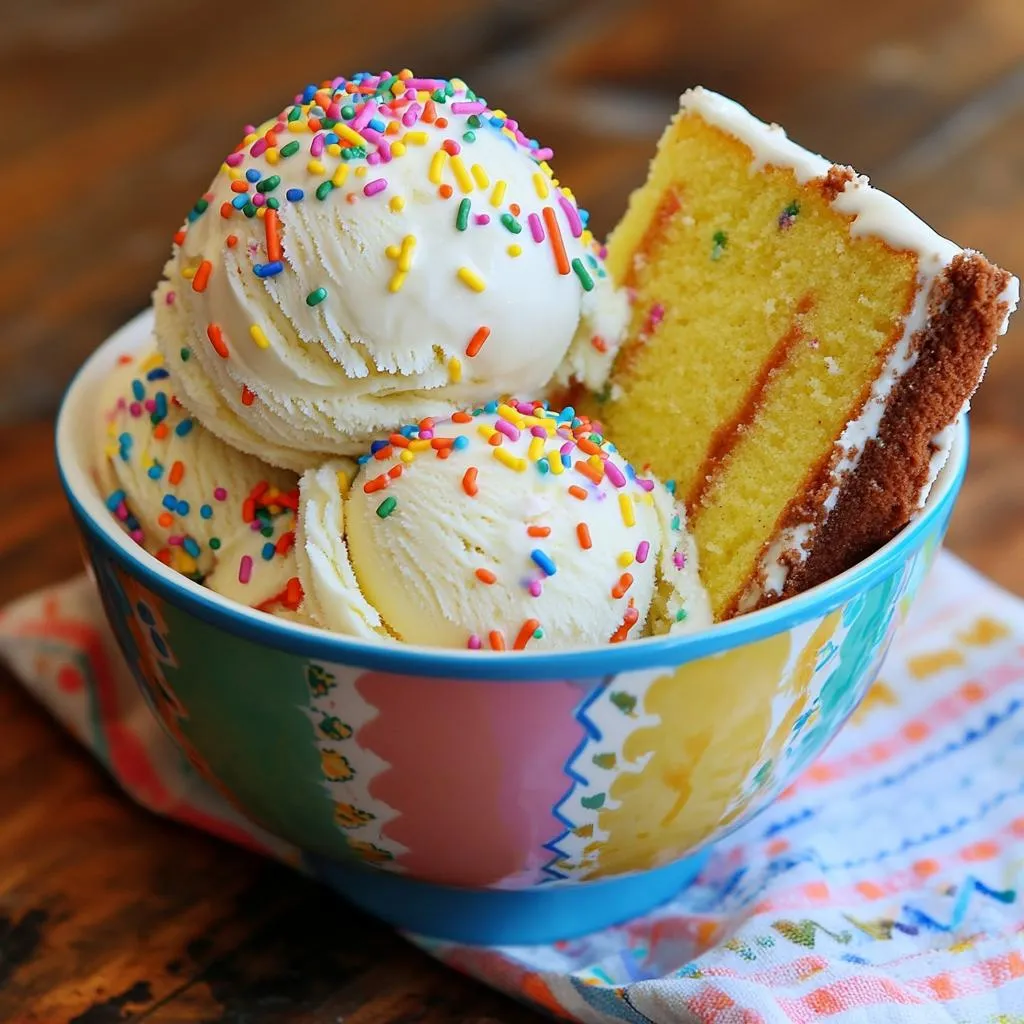
No-Churn Birthday Cake Ice Cream Easy and Fun Treat
Looking to celebrate with a sweet twist? My No-Churn Birthday Cake Ice Cream is an easy and fun treat for any party. You’ll whip up
To make Air Fryer Cinnamon Sugar Apple Rings, you need a few key items. Here’s a list of what you’ll need: - 2 large apples (such as Granny Smith or Honeycrisp) - 1/2 cup all-purpose flour - 1 teaspoon baking powder - 1 teaspoon ground cinnamon (plus extra for coating) - 1/4 teaspoon ground nutmeg - 1/4 teaspoon salt - 1/2 cup milk (can be dairy or plant-based) - 1 tablespoon pure maple syrup - 1/4 cup granulated sugar - 1/2 teaspoon vanilla extract - Cooking spray These ingredients come together to create a warm, sweet treat that’s perfect for any time. Choosing the right apples can really boost your flavor. I recommend using Granny Smith or Honeycrisp apples. Granny Smith apples add a lovely tartness. Honeycrisp apples are sweet and juicy. Both options work well in this recipe. Their natural sweetness pairs perfectly with cinnamon and sugar. You can use any milk you like for this recipe. Whole milk gives a rich flavor. You can also choose almond milk or oat milk for a plant-based option. Just make sure to use unsweetened versions for the best taste. The milk helps create a nice batter that coats the apple rings just right. Start with two large apples. I love using Granny Smith or Honeycrisp. They have great flavor and crunch. First, wash the apples well. Then, use a corer to remove the core. After that, slice each apple into rings that are about 1/4-inch thick. A mandoline slicer can help you get even slices. This step is key to making sure the apple rings cook evenly. In a medium mixing bowl, combine the dry ingredients. You need 1/2 cup of all-purpose flour, 1 teaspoon of baking powder, 1 teaspoon of ground cinnamon, 1/4 teaspoon of ground nutmeg, and 1/4 teaspoon of salt. Whisk them together until mixed well. In another bowl, whisk together the wet ingredients. You will need 1/2 cup of milk, 1 tablespoon of pure maple syrup, and 1/2 teaspoon of vanilla extract. Mix until smooth. Now, pour the wet mixture into the dry bowl. Stir gently until combined, but be careful not to overmix. The batter should be thick but smooth. Preheat your air fryer to 350°F (175°C) for about 5 minutes. This helps the apple rings cook evenly. Dip each apple ring into the batter. Make sure each ring is well coated. Let any extra batter drip back into the bowl. Lightly spray the air fryer basket with cooking spray. Arrange the battered apple rings in a single layer. Make sure they do not overlap. Depending on your air fryer size, you might need to fry them in batches. Cook the apple rings for 8-10 minutes. Flip them halfway through. They should turn golden brown and become tender. While the apple rings cook, mix the cinnamon-sugar coating. Combine 1/4 cup of granulated sugar and 1 teaspoon of ground cinnamon in a shallow bowl. Once the apple rings are done, move them to the cinnamon-sugar mix. Toss them gently while they are still warm. This ensures each ring gets a good coat. Allow them to cool slightly before serving. Enjoy your delicious treat! To cook your apple rings evenly, preheat your air fryer. Set it to 350°F (175°C) for about 5 minutes. This step warms the air inside, helping the apple rings cook evenly. When placing the rings in the basket, arrange them in a single layer. Avoid stacking or overlapping them. If your air fryer is small, cook the rings in batches. Flipping the rings halfway through cooking helps too. This method ensures that both sides become golden and crisp. For a great cinnamon sugar coating, mix 1/4 cup of granulated sugar with 1 teaspoon of ground cinnamon in a shallow bowl. Once your apple rings are cooked, take them out while they’re still warm. This helps the sugar stick better. Toss the warm rings in the cinnamon sugar mixture. Make sure each ring is coated well. You can adjust the cinnamon amount based on your taste. If you like it sweeter, add a bit more sugar. One common mistake is not cutting the apple rings evenly. Aim for about 1/4-inch thick slices. This helps them cook at the same rate. Another mistake is overmixing the batter. Mix just until combined to keep the batter thick and smooth. Also, avoid overcrowding the air fryer basket. This can lead to soggy rings. Lastly, don’t skip the cinnamon sugar coating. It adds a wonderful flavor that makes these apple rings a true treat! {{image_4}} You can mix up the flavors of your apple rings easily. Try adding a pinch of ginger or cardamom to the batter for a warm spice. You can also add a splash of orange juice or zest for a bright note. Consider using coconut sugar instead of granulated sugar for a deeper flavor. If you like a bit of heat, a dash of cayenne pepper can be a fun twist. If you need a gluten-free option, use a gluten-free flour blend instead of all-purpose flour. Many blends work well, like almond flour or oat flour. Just make sure to check the blend's texture and adjust the liquid if needed. This way, everyone can enjoy these tasty treats without worry. Serving your apple rings can be fun and creative. Drizzle some warm maple syrup on top for extra sweetness. Add a scoop of vanilla ice cream for a lovely contrast of hot and cold. You can also sprinkle chopped nuts on top for a nice crunch. For a light touch, serve them with a dollop of whipped cream or yogurt. These additions make the apple rings even more delightful! To keep your leftover apple rings fresh, place them in an airtight container. Make sure they cool to room temperature first. Store them in the fridge for up to three days. If you want to preserve them longer, freezing is a great option. When you're ready to enjoy those leftover apple rings, reheat them in the air fryer. Set the air fryer to 350°F (175°C) and cook for about 3-5 minutes. This method helps restore their crispiness. You can also use a toaster oven if you don’t have an air fryer. To freeze apple rings, first, let them cool completely. Place them in a single layer on a baking sheet. Freeze them for about an hour, then transfer them to a freezer bag. Remove as much air as possible to prevent freezer burn. They will last for up to three months. Yes, you can use other fruits! Pears work great and have a sweet flavor. You can also try peaches or bananas. Just remember to slice them thinly, like the apples. This helps them cook evenly in the air fryer. The apple rings stay fresh for about 2 to 3 days when stored properly. Keep them in an airtight container at room temperature. If you want them to last longer, you can refrigerate them. Just know that they may lose some crispness. Any air fryer will work for this recipe. I like using models with adjustable temperature settings. Brands like Philips, Ninja, or Cosori are popular. They cook evenly and can handle a good amount of food at once. Always check your air fryer’s manual for specific guidelines. In this article, we explored making delicious air fryer cinnamon sugar apple rings. We covered essential ingredients, from the best apples to milk choices. You learned step-by-step how to prepare, mix, and air fry your apple rings for great results. We shared tips to ensure even cooking and avoid common mistakes. You also found fun variations and ways to store your leftovers. Enjoy experimenting with this tasty snack. Trust me, these apple rings will become a new favorite treat! Happy cooking!
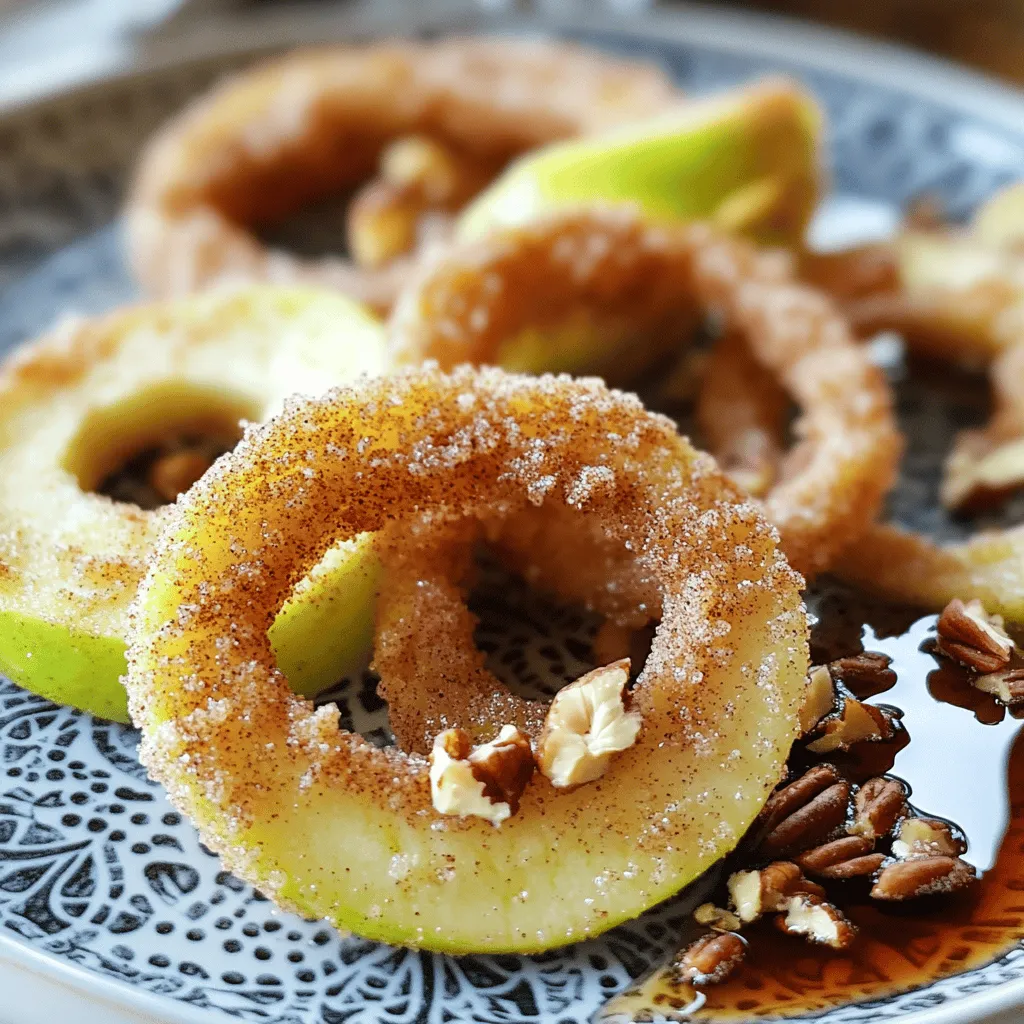
Air Fryer Cinnamon Sugar Apple Rings Delightful Treat
Looking for a tasty treat that’s easy to make? You’re in the right spot! I’ll show you how to whip up Air Fryer Cinnamon Sugar
To create these delightful Chocolate Peppermint Thumbprint Cookies, gather the following ingredients: - 1 cup unsalted butter, softened to room temperature - 1 cup granulated sugar - 1 teaspoon pure vanilla extract - 1 teaspoon pure peppermint extract - 2 cups all-purpose flour - 1/2 cup unsweetened cocoa powder - 1/2 teaspoon baking powder - 1/4 teaspoon salt - 1/2 cup chocolate chips (for filling) - Crushed peppermint candies (for garnish) These ingredients work together to create a rich, chocolatey base with a refreshing peppermint twist. The butter gives the cookies a soft texture, while the sugar adds sweetness. Both extracts enhance the flavor, making each bite a festive treat. The flour and cocoa provide the structure and chocolate depth. The baking powder helps them rise, and the salt balances the sweetness. Finally, the chocolate chips melt in the center, creating a lovely filling, and the crushed peppermint candies add a crunchy finish. First, preheat your oven to 350°F (175°C). This step is key for even baking. Next, line a baking sheet with parchment paper. This helps to prevent sticking and makes cleanup easy. In a large bowl, combine 1 cup of softened butter and 1 cup of granulated sugar. Beat them together until fluffy. This should take around 3-5 minutes. Next, add 1 teaspoon of vanilla extract and 1 teaspoon of peppermint extract. Mix until everything is smooth and well combined. In another bowl, whisk together 2 cups of all-purpose flour, 1/2 cup of unsweetened cocoa powder, 1/2 teaspoon of baking powder, and 1/4 teaspoon of salt. This helps to evenly distribute the dry ingredients. Slowly add this dry mixture into the wet ingredients. Mix on low speed until a soft dough forms. Cover the dough with plastic wrap and chill it in the fridge for 30 minutes. Chilling the dough makes it easier to handle and shape. After chilling, scoop out tablespoon-sized portions of the dough. Roll them into balls and place them on the baking sheet, spacing them about 2 inches apart. Use your thumb or the back of a small spoon to press down in the center of each ball, creating a small indentation. Bake the cookies in the oven for 10-12 minutes. Keep an eye on them; the edges should look set, while the centers may still be a bit soft. When you take them out, fill each indentation with a few chocolate chips. The warmth will melt the chips slightly. Let the cookies cool for about 5 minutes before moving them to a wire rack. Once cooled, sprinkle the tops with crushed peppermint candies for a festive touch. To make the best Chocolate Peppermint Thumbprint Cookies, start with room temperature butter. Soft butter mixes better with sugar. It helps create a light and fluffy dough. Next, chill the dough for about 30 minutes. Chilling makes the dough easier to handle. It also helps the cookies keep their shape while baking. Watch the baking time closely. You want chewy centers, not hard cookies. Bake them for 10 to 12 minutes. When the edges set and the centers look soft, it’s time to take them out. Also, be sure to rotate the baking sheet halfway through. This step ensures even baking for all the cookies. These cookies pair perfectly with hot chocolate or coffee. The rich chocolate and mint flavors complement warm drinks well. For a festive touch, serve them on a colorful platter. Add some holiday decorations for a special look. Your guests will love this delightful treat! {{image_4}} You can make these cookies even more fun. Try using different extracts. Almond or orange extracts work well. They add a nice twist to the flavor. You can also add cocoa nibs. These little bits give extra texture and a nice crunch. They pair perfectly with the smooth chocolate filling. If you need a gluten-free option, almond flour is a great choice. It gives the cookies a lovely nutty flavor. For those who follow a vegan diet, you can use substitutes. Replace butter with coconut oil and use flax eggs instead of regular eggs. This way, everyone can enjoy these tasty treats! To keep your Chocolate Peppermint Thumbprint Cookies fresh, store them in an airtight container at room temperature. This method maintains their soft texture and rich flavor. If you want to keep them longer, refrigerate them for extended freshness. Just remember to let them come back to room temperature before enjoying! You can freeze unbaked dough for later use. Just scoop the dough into balls and place them on a baking sheet. Freeze until solid, then transfer to a freezer bag. When you want cookies, bake them directly from the freezer. For baked cookies, store them in freezer bags. This keeps them fresh for up to three months. For the best quality, consume your cookies within one week. They taste best when fresh! To maintain their freshness, keep them sealed in an airtight container. Avoid humidity, as it can make them soft or stale. Enjoy every bite of these delightful treats! Yes, you can use milk chocolate. It will make the cookies sweeter. Just adjust the amount to match your taste preferences. If you like a richer flavor, dark chocolate is also a great choice. Absolutely, you can make these cookies in advance. Once baked, store them in an airtight container. This keeps them fresh for days. You can also freeze the dough if you want to bake later. Just thaw it in the fridge before baking. To prevent spreading, chill the dough well. This helps keep the shape while baking. If the dough is too warm, cookies may spread out too much. Always ensure your dough is properly chilled before baking. These peppermint chocolate cookies are simple and fun to make. You start with basic ingredients and follow easy steps. Chilling the dough helps shape perfect cookies. Remember to keep an eye on baking time for the best results. You can experiment with flavors and store them well for lasting freshness. Enjoy these treats with hot drinks for a cozy experience. I hope you try this recipe and delight in every bite. Happy baking!
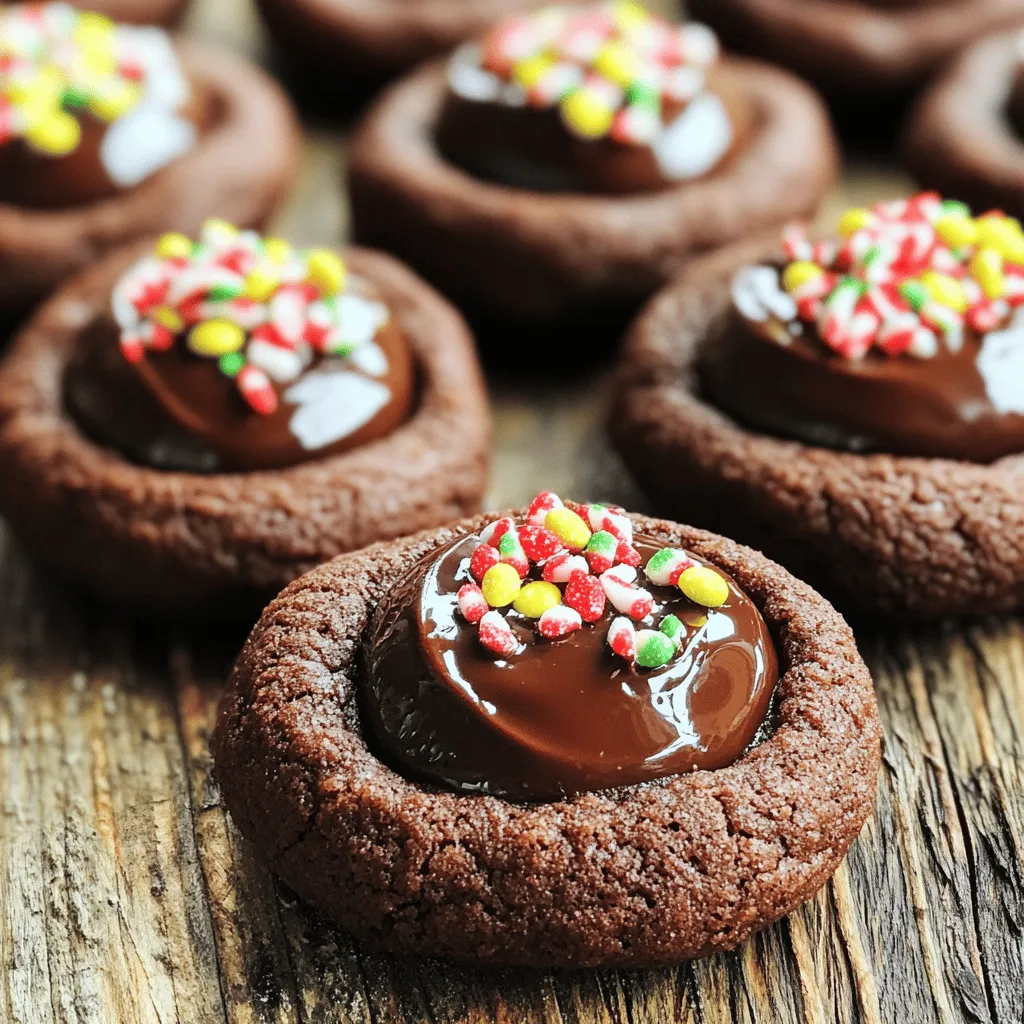
Chocolate Peppermint Thumbprint Cookies Delightful Treat
If you love chocolate and peppermint, you’re in for a treat! Our Chocolate Peppermint Thumbprint Cookies are a delightful blend of flavors that will make