Desserts

To make these Pumpkin S'mores Cookies, gather the following items: - 1 cup all-purpose flour - 1/2 cup rolled oats - 1/2 teaspoon baking soda - 1/2 teaspoon baking powder - 1 teaspoon ground cinnamon - 1/4 teaspoon ground nutmeg - 1/4 teaspoon salt - 1/2 cup unsalted butter, softened - 1/2 cup packed brown sugar - 1/4 cup granulated sugar - 1/2 cup pumpkin puree - 1 large egg, at room temperature - 1 teaspoon pure vanilla extract - 1/2 cup mini marshmallows - 1/2 cup semi-sweet chocolate chips - 1/2 cup graham cracker crumbs If you need to make some swaps, here are some great options: - Use almond flour instead of all-purpose flour for a gluten-free version. - Replace the butter with coconut oil for a dairy-free option. - Maple syrup can replace the brown sugar for a different sweetness. - Use any nut butter instead of butter for extra flavor. Using quality ingredients makes a big difference. Fresh pumpkin puree gives a rich taste. Good chocolate chips melt beautifully and add a creamy texture. Quality oats provide a hearty feel. When you use fresh spices, they enhance the cookie flavor. Always aim for the best you can find. This way, you create cookies that are full of taste and joy. {{ingredient_image_2}} First, you need to preheat your oven to 350°F (175°C). This ensures even baking. Next, grab a baking sheet and line it with parchment paper. This prevents your cookies from sticking. In a medium bowl, mix together the dry ingredients. Combine 1 cup of all-purpose flour, 1/2 cup of rolled oats, 1/2 teaspoon of baking soda, 1/2 teaspoon of baking powder, 1 teaspoon of ground cinnamon, 1/4 teaspoon of ground nutmeg, and 1/4 teaspoon of salt. Whisk them well, then set the bowl aside. In a large bowl, cream 1/2 cup of softened unsalted butter with 1/2 cup of packed brown sugar and 1/4 cup of granulated sugar. Use an electric mixer and mix on medium speed for about 2-3 minutes. Your mixture should look light and fluffy. Now, add 1/2 cup of pumpkin puree, 1 large egg, and 1 teaspoon of pure vanilla extract. Mix until everything is smooth and well blended. Gradually add the dry ingredient mixture into the wet mixture. Use a spatula to stir gently. Mix it until just combined; be careful not to over-mix. Then, fold in 1/2 cup of mini marshmallows, 1/2 cup of semi-sweet chocolate chips, and 1/2 cup of graham cracker crumbs. Make sure they are evenly mixed into the dough. Using a tablespoon or a cookie scoop, drop rounded balls of dough onto the prepared baking sheet. Leave about 2 inches between each ball to allow them to spread. Place the baking sheet in your preheated oven. Bake for 10-12 minutes. The cookies should look set at the top and have lightly golden edges. After baking, take the cookies out of the oven. Let them cool on the baking sheet for 5 minutes. This helps them firm up. Then, use a spatula to transfer them to a wire rack. Allow them to cool completely. For serving, stack the cookies on a pretty plate. For an extra touch, drizzle melted chocolate over the tops and sprinkle additional graham cracker crumbs. This makes your cookies look even more inviting and delicious! To make the best Pumpkin S'mores Cookies, avoid over-mixing the dough. When you combine the wet and dry ingredients, stir gently. Stop mixing as soon as you don’t see dry flour. Over-mixing can make cookies tough, and we want them soft. For great results, bake your cookies for 10 to 12 minutes at 350°F (175°C). Look for a set top and lightly brown edges. If you prefer softer cookies, check them at the 10-minute mark. Every oven is a little different, so keep an eye on them! If you have leftover dough, store it well. Wrap the dough in plastic wrap, then place it in an airtight container. You can keep it in the fridge for up to 3 days. For longer storage, freeze the dough for up to 3 months. Just thaw it overnight before baking. Pro Tips Use Fresh Pumpkin: If possible, use fresh pumpkin puree for a richer flavor and moisture. Roast and puree your own pumpkin for the best results. Chill the Dough: For thicker cookies, chill the dough for 30 minutes before baking. This helps prevent spreading and enhances the texture. Adjust Sweetness: Taste the dough before baking. If you prefer sweeter cookies, feel free to add an extra tablespoon of sugar. Store Properly: Keep your cookies in an airtight container at room temperature for up to a week, or freeze them for longer storage. {{image_4}} You can spice up your cookies in fun ways. Add a pinch of ground ginger for warmth. You could also use allspice or cardamom for a unique twist. If you love pumpkin pie spices, mix in an extra teaspoon of cinnamon. This will enhance the fall flavors and make your cookies even more special. Feel free to change the mix-ins. If you prefer nuts, chop up pecans or walnuts and add them in. For a fun twist, try using peanut butter chips instead of chocolate chips. If you want a fruity flavor, mix in dried cranberries or raisins. Each choice brings a new taste to your cookies. You can make these cookies gluten-free. Simply swap the all-purpose flour for a gluten-free blend. Ensure that the blend includes xanthan gum for proper texture. Check your oats to confirm they are gluten-free as well. This way, everyone can enjoy your pumpkin s'mores cookies without worry! To keep your pumpkin s'mores cookies fresh, store them in an airtight container. This helps keep moisture in and prevents them from going stale. You can also layer parchment paper between the cookies to avoid sticking. Store them at room temperature for the best taste. You can freeze these cookies for later enjoyment. First, let them cool completely. Then, place them in a single layer on a baking sheet and freeze for about an hour. Once frozen, transfer the cookies into a freezer-safe bag. Label the bag with the date. They will stay good for up to three months. These cookies taste best within a week of baking. After that, they may lose their soft texture. If you want them to last longer, freezing is a good option. Always check for any signs of spoilage before eating. Enjoying them fresh is the key to the best flavor! Yes, you can use fresh pumpkin puree. If you choose to make it, start with a small pumpkin. Roast or steam it until soft, then mash or blend it. Fresh pumpkin adds a nice texture and flavor. Just ensure it is smooth and not too watery. To get chewy cookies, you need to focus on a few key points. First, do not over-mix the dough. Over-mixing adds air and makes cookies cakey. Second, use brown sugar. This sugar keeps cookies moist and chewy. Finally, bake them just until the edges are golden. This keeps the center soft. If you want to replace chocolate chips, there are many tasty options. You could use butterscotch chips or white chocolate chips for a sweet twist. Nuts, like walnuts or pecans, add crunch and flavor too. Dried fruits, like cranberries or raisins, can also give a fun twist to these cookies. In this post, we explored key ingredients, step-by-step instructions, and helpful tips for baking cookies. You learned how to choose quality ingredients and substitute when needed. We covered cooling and serving tips, along with storage advice and cookie variations. It's all about finding the best flavors and keeping your cookies fresh. As you bake, remember that small changes can lead to big taste. Enjoy the process and have fun making those cookies that bring smiles!
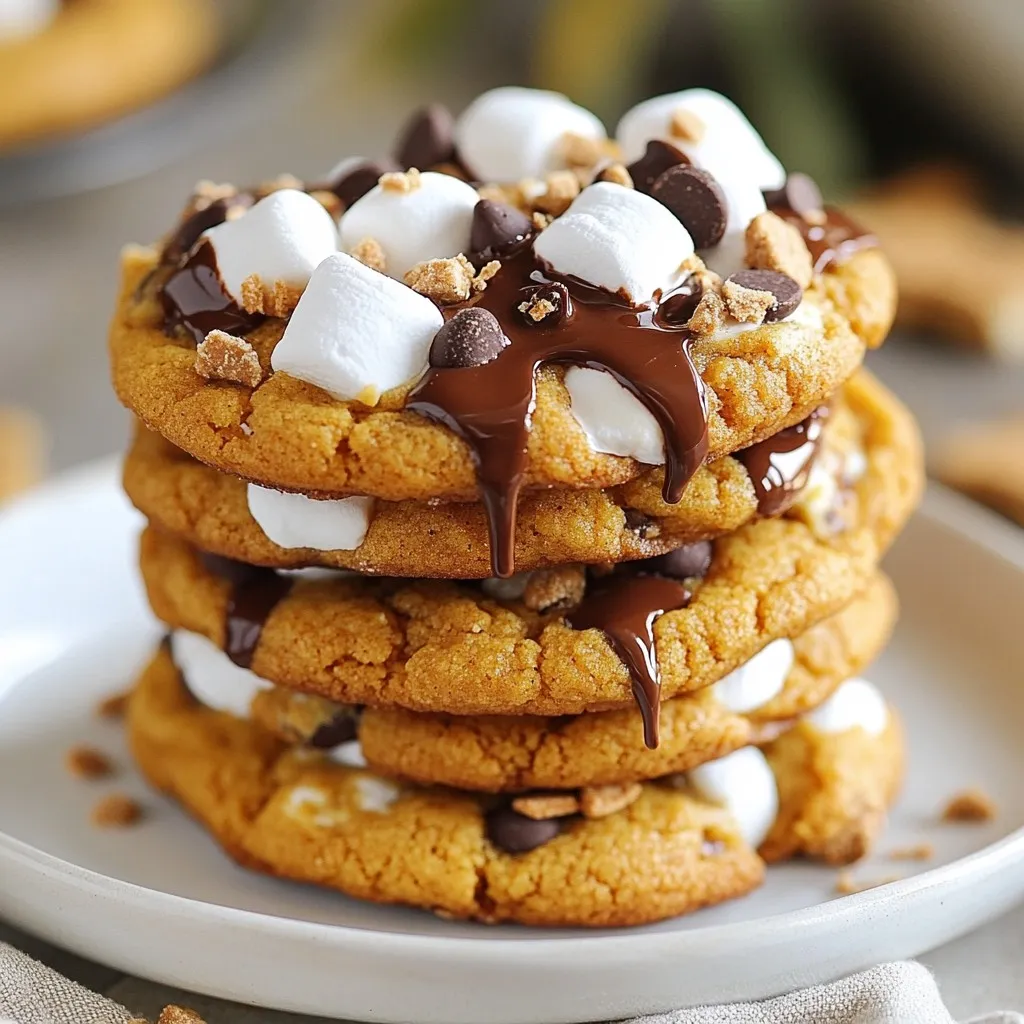
Pumpkin Smores Cookies Irresistible Fall Delight
Get ready for a tasty treat that screams fall! My Pumpkin S’mores Cookies blend warm pumpkin spice with gooey chocolate and soft marshmallows. This recipe
- 2 large apples (Fuji or Honeycrisp) - 1 cup all-purpose flour - 1 teaspoon ground cinnamon - ½ teaspoon ground nutmeg - 1 cup breadcrumbs (Panko recommended) - 2 large eggs - 2 tablespoons milk - 2 tablespoons brown sugar - Pinch of salt - Cooking spray Gather all your ingredients before you start. Choosing the right apples is key. Fuji and Honeycrisp are my favorites because they are sweet and firm. They hold up well when cooked. Next, you’ll need flour. This will help the breading stick to the apples. Ground cinnamon and nutmeg add warm spice notes that make these fries special. The sweetness from brown sugar enhances the flavor of the apples. For that perfect crunch, I recommend using Panko breadcrumbs. They give a unique texture that regular breadcrumbs cannot. The eggs and milk form a nice binding mix to help everything stick. A pinch of salt balances the sweetness and enhances the overall taste. Finally, cooking spray will keep the fries from sticking to the air fryer basket. With these ingredients ready, you are set to create a tasty snack that everyone will love! {{ingredient_image_2}} Start by washing the apples under cold water. This step removes any dirt. Next, cut each apple in half. Remove the core with a knife. Slice each half into fry-shaped pieces. Aim for uniform thickness. This helps them cook evenly. Set up your breading station. Use three shallow bowls. In the first bowl, mix the all-purpose flour, ground cinnamon, ground nutmeg, brown sugar, and a pinch of salt. In the second bowl, whisk together the eggs and milk until they are smooth. Place the breadcrumbs in the third bowl. This setup makes coating the apple fries easy. Take each apple fry and dip it into the flour mix. Make sure it gets good coverage. Shake off any extra flour. Next, dip the fry into the egg mixture. Let the excess liquid drip off. Finally, roll the fry in the breadcrumbs until fully coated. Repeat this for all apple fries to ensure they are all crispy. Preheat your air fryer to 350°F (175°C). This step is key for getting a crispy texture. Preheating ensures the apple fries cook evenly and brown nicely. Place the coated apple fries in the air fryer basket. Make sure they sit in a single layer. Do not overcrowd them; this helps airflow and crispiness. Lightly spray the fries with cooking spray. Air fry for about 10-12 minutes. Flip them halfway through to promote even cooking. They are done when they turn golden brown. Once cooked, carefully remove the apple fries. Let them cool slightly before serving. Present them on a nice plate. You can add a small bowl of caramel sauce or creamy vanilla yogurt for dipping. For a special touch, sprinkle a little cinnamon and sugar on top. Enjoy your delicious, crispy apple fries! To make sure your apple fries cook evenly, cut them into similar sizes. Aim for about ¼ inch thick. This uniformity helps all the pieces cook at the same rate. Also, avoid overcrowding the air fryer basket. Give each fry space to breathe. This ensures hot air circulates around them, leading to crispiness. For the best crispiness, use Panko breadcrumbs. They create a light and airy crust. Before cooking, spray the apple fries lightly with cooking spray. This extra moisture helps them brown and crisp up nicely. Remember to flip them halfway through cooking. This way, both sides get a chance to become golden brown. You can boost the flavor of your apple fries with spices. Try adding a pinch of allspice or ginger to your flour mix. A little vanilla extract in the egg wash will add a nice touch too. For extra sweetness, drizzle honey or maple syrup over the fries right after cooking. These small changes make a big difference in taste! Pro Tips Choose the Right Apples: For the best flavor and texture, opt for apples that are crisp and sweet, like Fuji or Honeycrisp. These varieties hold up well during cooking and provide a delicious sweetness. Double Dip for Extra Crunch: For an even crunchier coating, consider double-dipping your apple fries in the egg mixture and breadcrumbs. This extra layer will add to the crispiness once they are air-fried. Don't Overcrowd the Basket: Make sure to place the apple fries in a single layer in the air fryer basket. Overcrowding can lead to uneven cooking and less crispy results. Experiment with Dips: While caramel sauce is a classic pairing, don’t hesitate to try other dips like chocolate sauce, peanut butter, or even a tangy yogurt dip to elevate your apple fries experience. {{image_4}} You can use various apple types for this recipe. Fuji and Honeycrisp are sweet and crisp, making them perfect for apple fries. Other great choices include Granny Smith for a tart flavor or Gala apples for a mild sweetness. Each type adds a unique taste and texture. Experimenting with different apples keeps things fun and tasty. If you need a gluten-free version, simply swap all-purpose flour with gluten-free flour. There are many options available, such as almond flour or rice flour. Make sure the breadcrumbs are also gluten-free. Panko breadcrumbs often have gluten-free varieties. This way, everyone can enjoy the crispy apple fries. You can get creative with the coating. Try mixing crushed nuts, like almonds or pecans, into the breadcrumbs for added crunch. You could also use coconut flakes for a tropical twist. For a spicy kick, add cayenne pepper to the flour mix. Each option gives you a new flavor experience. Enjoy customizing your apple fries! To store leftover apple fries, let them cool down completely. Place them in an airtight container. You can keep them in the fridge for up to three days. If you want to enjoy them later, try to separate layers with parchment paper. This helps prevent sticking. When you want to eat leftover apple fries, the air fryer is your best friend. Preheat it to 350°F (175°C). Place the apple fries in the basket. Heat them for about 5 minutes. This will help them regain their crispiness. If you don’t have an air fryer, you can use an oven. Just set it to 350°F and bake for about 10 minutes. You can freeze apple fries if you want to save some for later. After breading, place them on a baking sheet. Make sure they don’t touch each other. Freeze them for a few hours until firm. Once frozen, transfer them to a zip-top bag. They can stay in the freezer for up to three months. When ready to cook, there's no need to thaw. Just air fry them straight from the freezer for 12-14 minutes. Enjoy your crispy snack anytime! Yes, you can use other fruits. Pears and bananas work great too. Just slice them like apples. For pears, choose firm ones. For bananas, use slightly unripe ones for best texture. To get crispy apple fries, follow these steps: - Use Panko breadcrumbs for extra crunch. - Make sure to coat each fry well. - Preheat the air fryer to 350°F. - Do not overcrowd the basket; this helps hot air circulate. - Flip the fries halfway through cooking for even browning. Apple fries taste great with many sauces. Here are some options: - Caramel sauce for a sweet touch. - Creamy vanilla yogurt for a smooth contrast. - Peanut butter or almond butter for a nutty flavor. These dips enhance the apple fries' taste and make them more fun to eat. Cleaning your air fryer is simple: - Unplug the air fryer and let it cool. - Remove the basket and pan. - Wash them with warm soapy water. - Use a soft sponge to avoid scratches. - Wipe the inside of the air fryer with a damp cloth. Keep it clean for the next delicious batch of apple fries! In this post, we covered how to make tasty air fryer apple fries. We listed key ingredients and provided easy steps to follow. We also shared tips to make your fries crisp and delicious. Plus, I included ideas for variations and storage methods. Now you can enjoy a fun twist on a classic snack. These apple fries are simple to make and great for sharing. Try them out and have fun in the kitchen!
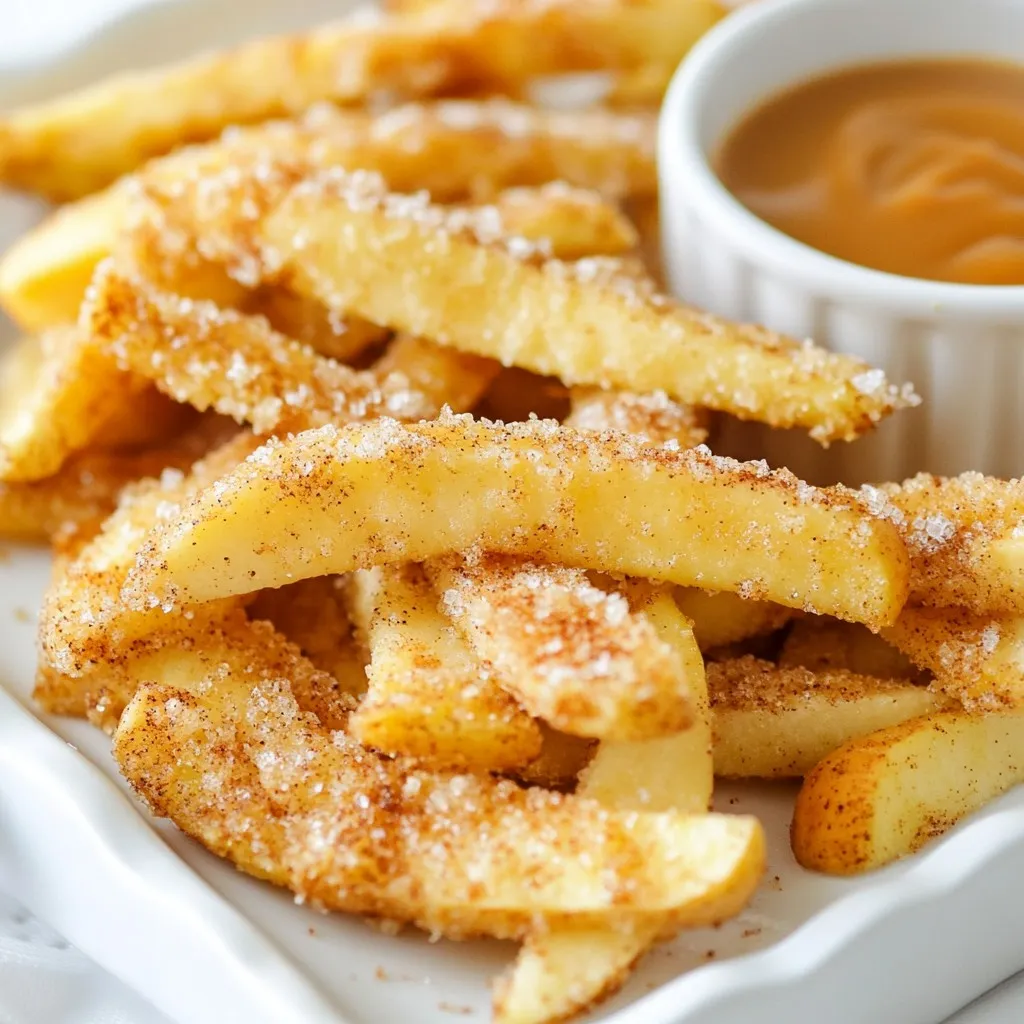
Air Fryer Apple Fries Crispy and Flavorful Snack
Are you ready to explore a tasty twist on a classic snack? Air Fryer Apple Fries are crispy, flavorful, and easy to make. With just