Desserts
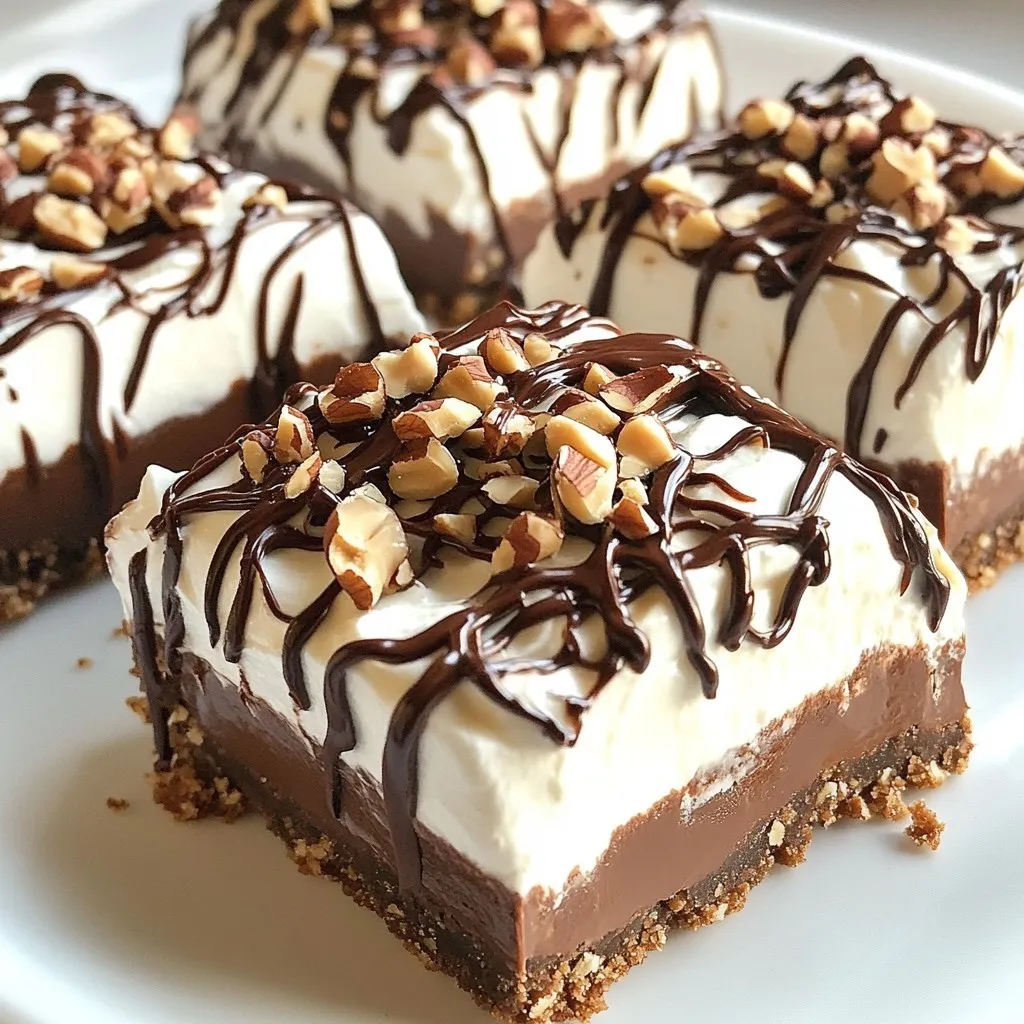
No-Bake Chocolate Hazelnut Cheesecake Bars Delight
Get ready for a sweet treat with my No-Bake Chocolate Hazelnut Cheesecake Bars! This easy recipe combines rich hazelnut cookies, creamy cheesecake filling, and swirls
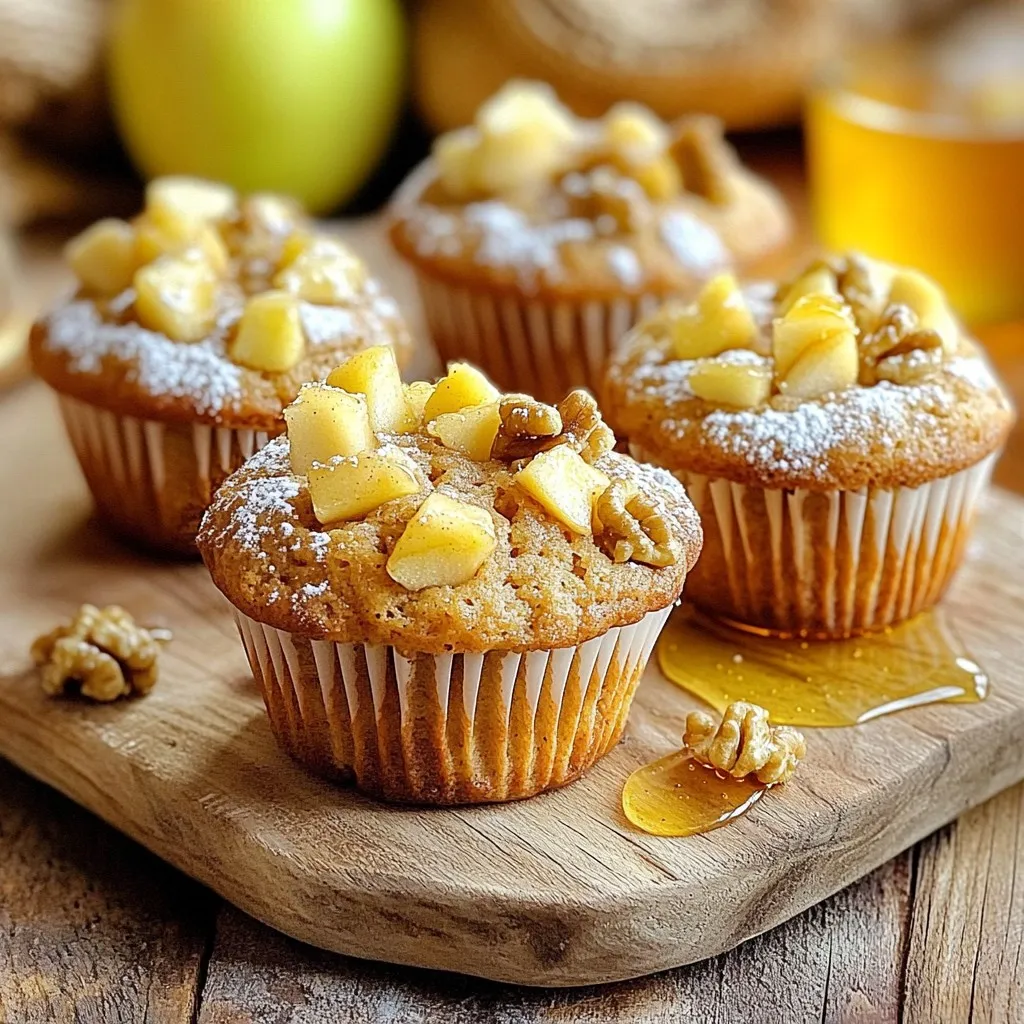
Brown Butter Apple Muffins Savory Fall Delight
Fall is the perfect time for warm, comforting treats, and these Brown Butter Apple Muffins deliver just that. With rich flavor from brown butter and
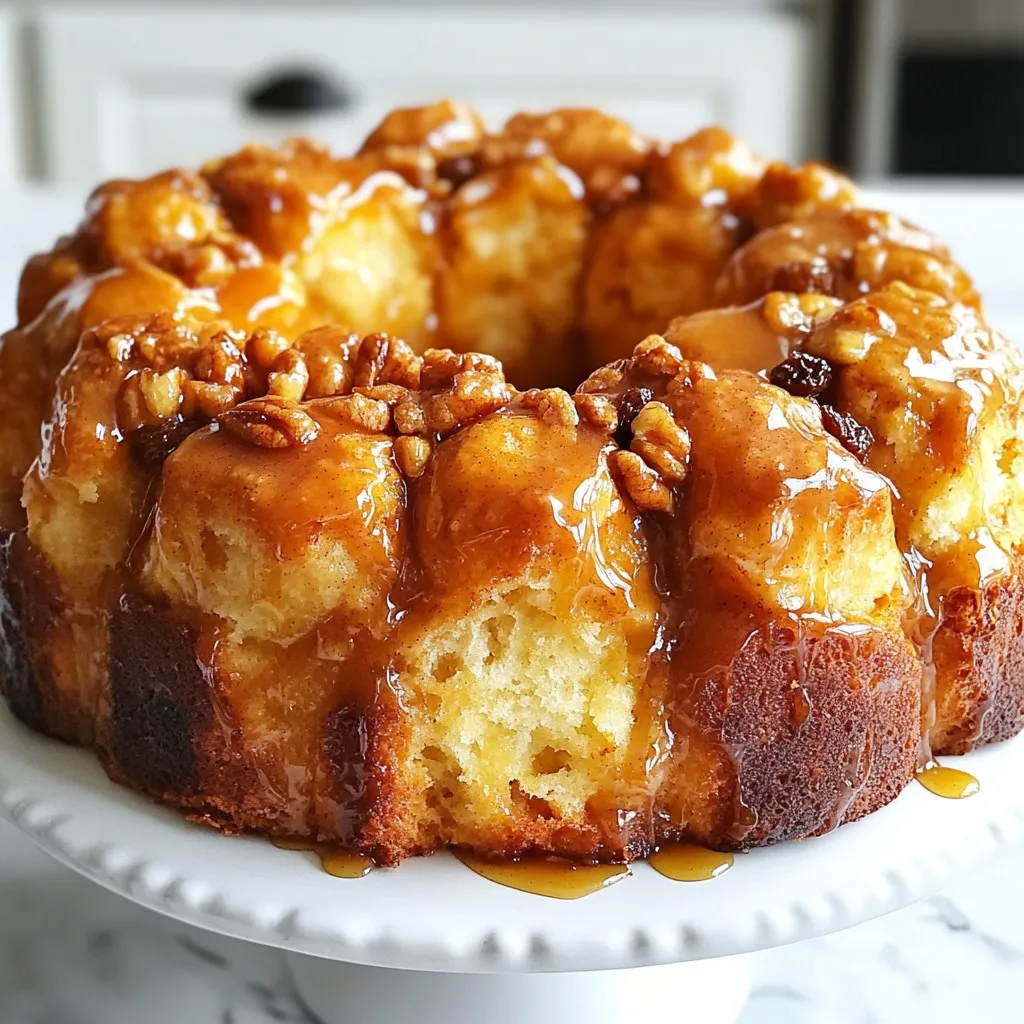
Classic Pull-Apart Monkey Bread Comforting and Easy Recipe
Are you ready to dive into the warm, gooey delight of Classic Pull-Apart Monkey Bread? This comforting treat needs just a few simple ingredients, making
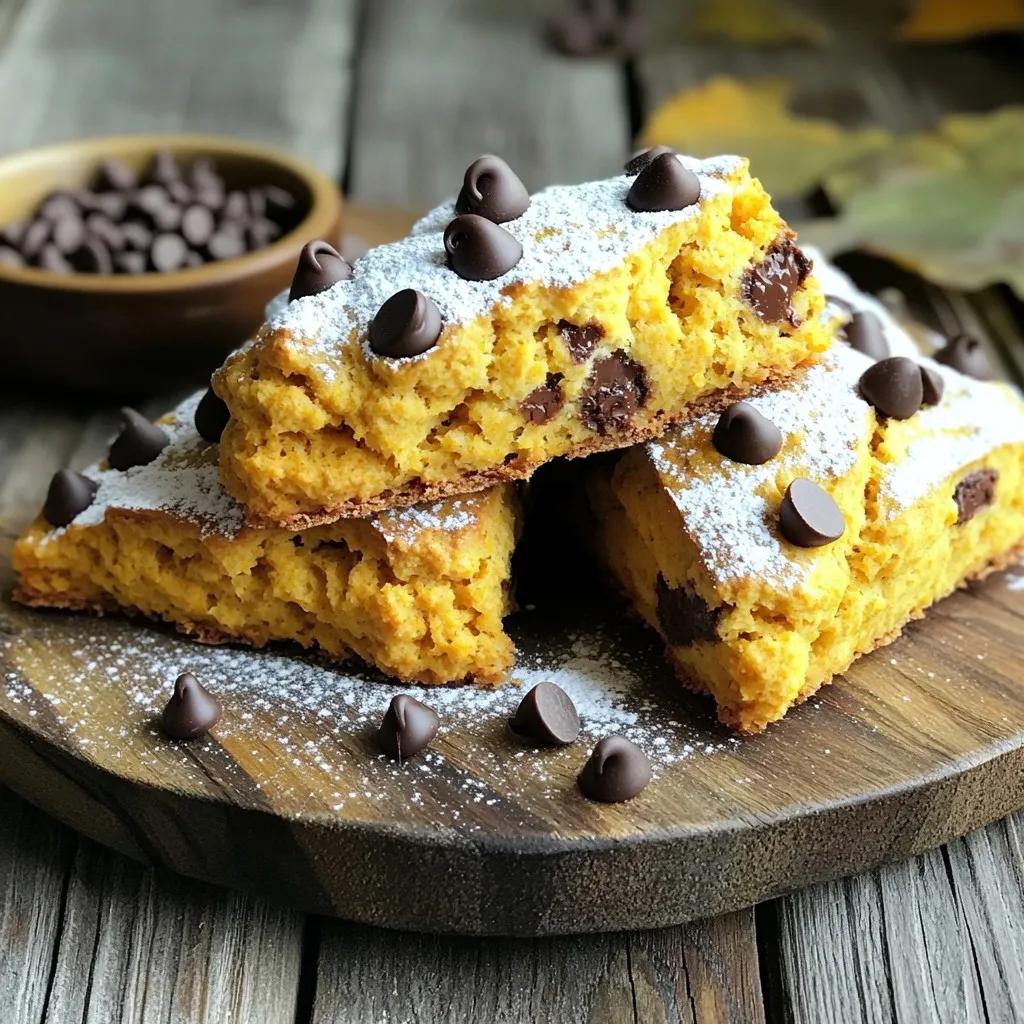
Chocolate Chip Pumpkin Scones Irresistible Fall Treat
Fall is here, and it’s time to indulge in warm, comforting treats! If you love pumpkin and chocolate, then my Chocolate Chip Pumpkin Scones are

Caramel Apple Oatmeal Bake Warm and Cozy Delight
Craving a warm and sweet treat? Let me introduce you to Caramel Apple Oatmeal Bake! This delightful dish blends chewy oats, fresh apples, and gooey
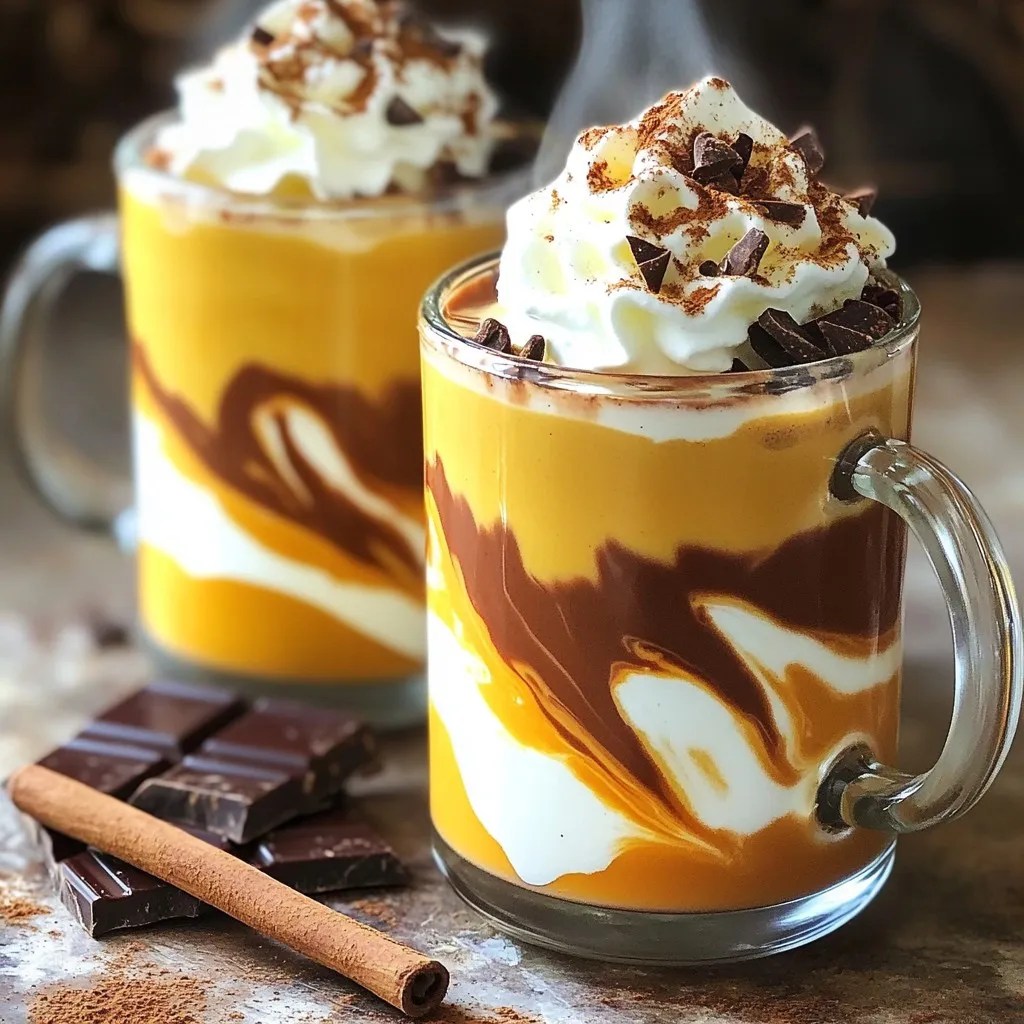
Pumpkin Hot Chocolate Cozy and Comforting Drink
As the cozy season rolls in, nothing warms you up quite like pumpkin hot chocolate. This drink combines the sweet taste of pumpkin with rich
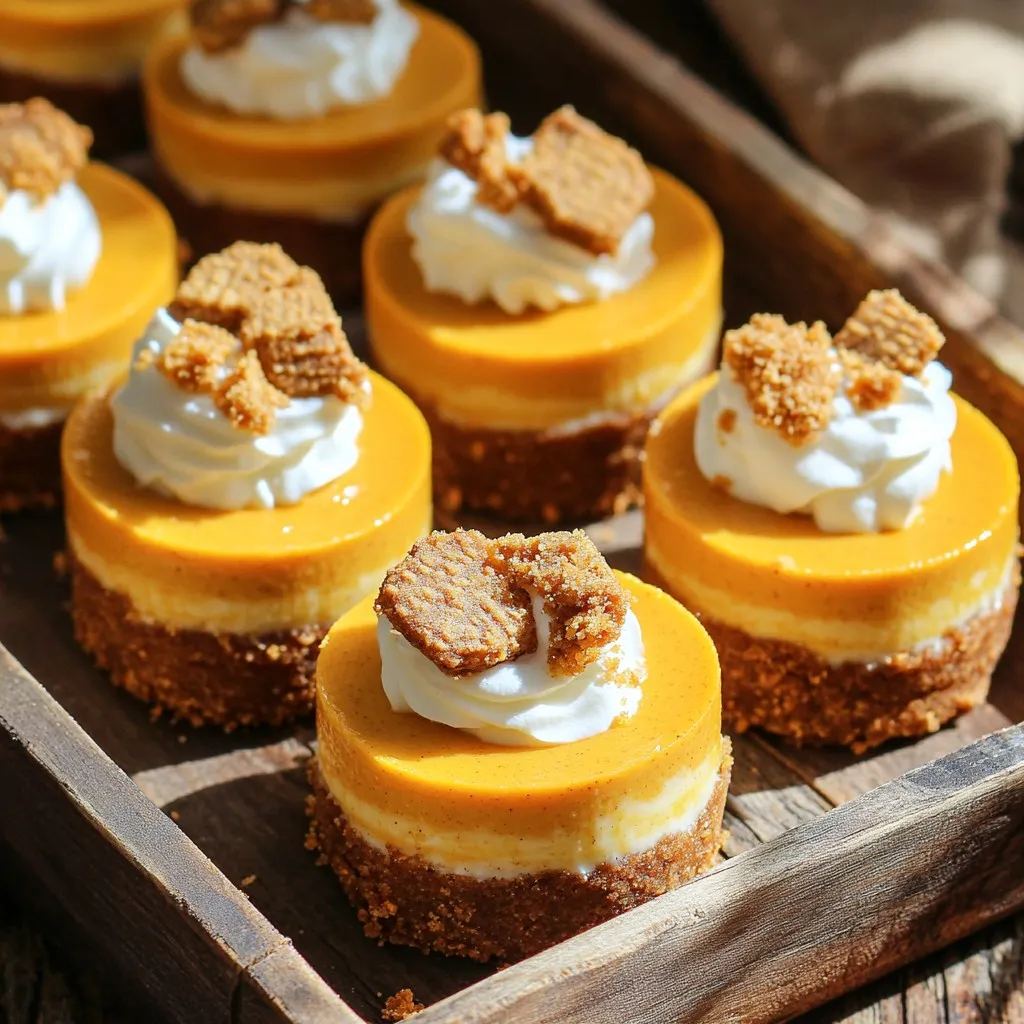
No-Bake Biscoff Pumpkin Cheesecake Bites Delightful Treat
Get ready to indulge in a sweet and easy treat! My No-Bake Biscoff Pumpkin Cheesecake Bites bring together the warmth of pumpkin and the spice
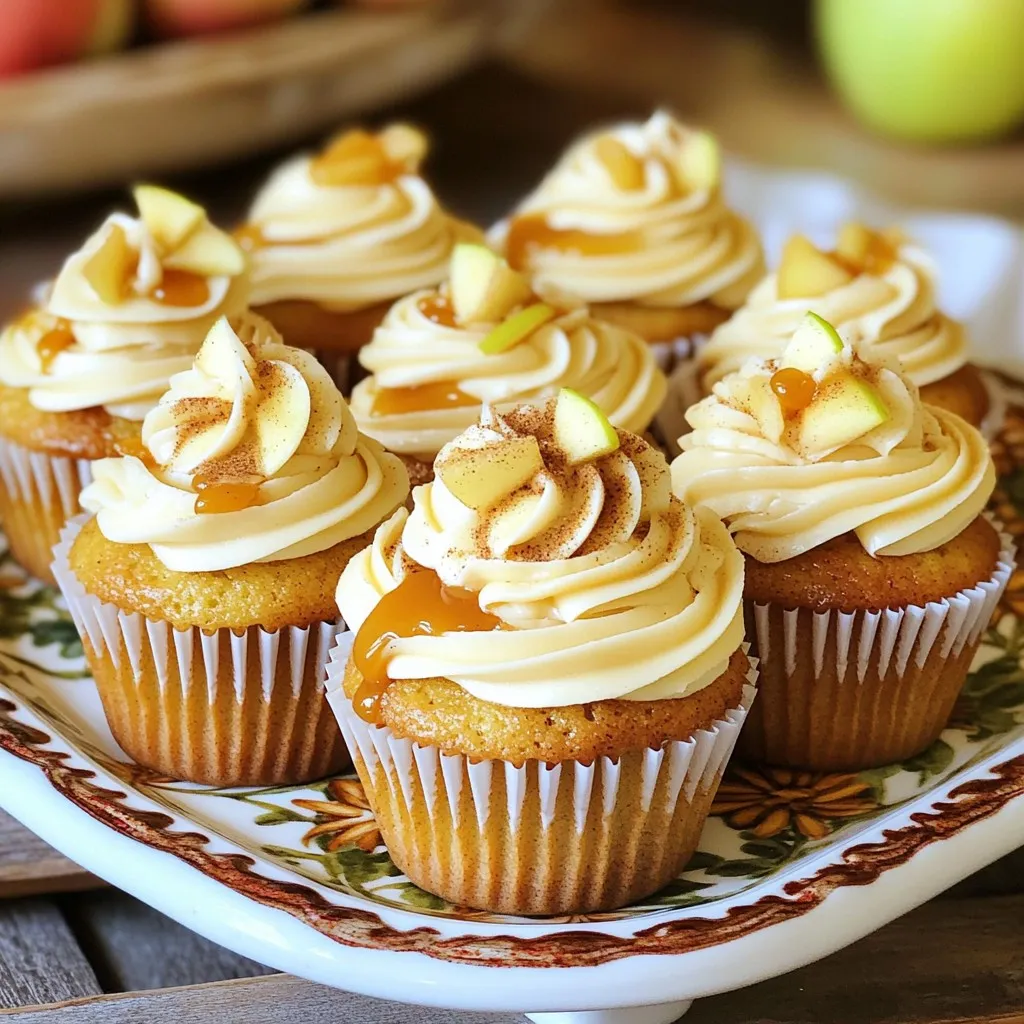
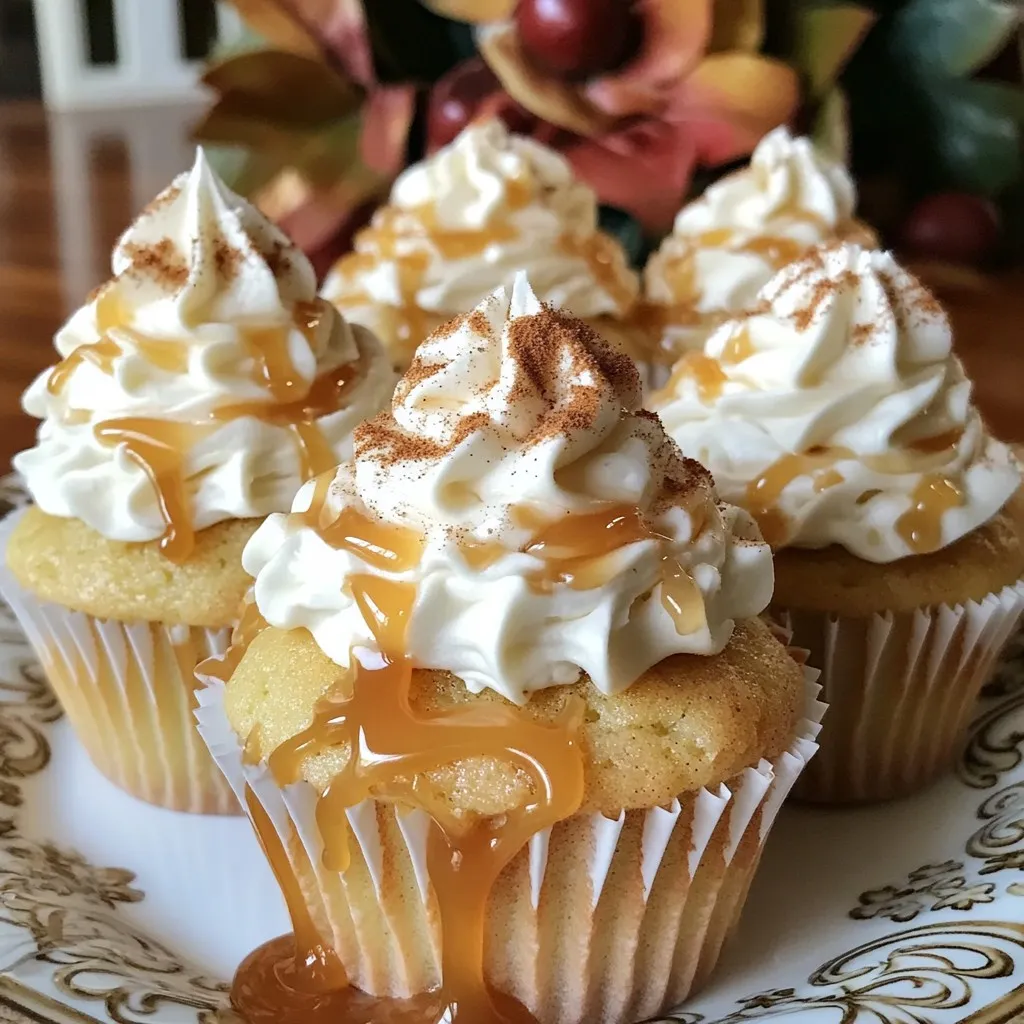
Spiced Caramel Apple Cupcakes with Buttercream Delight
Get ready for a treat that blends fall flavors into each bite: Spiced Caramel Apple Cupcakes with Buttercream Delight! These soft, moist cupcakes are packed

Chocolate Chip Pumpkin Bread Bakery Style Delight
Are you ready to bake a treat that warms hearts and fills homes with joy? My Chocolate Chip Pumpkin Bread Bakery Style Delight is perfect
Spiced Caramel Latte Cupcakes Delightful Dessert Treat
If you love the rich taste of coffee and warm spices, you’ll adore my Spiced Caramel Latte Cupcakes! These delightful treats combine the warmth of