Desserts

To make these soft and mouth-watering red velvet cinnamon rolls, you need: - 2 ½ cups all-purpose flour - ¼ cup granulated sugar - 1 package (2 ¼ tsp) instant yeast - ½ teaspoon salt - 1 teaspoon baking powder - 1 teaspoon baking soda - 1 tablespoon cocoa powder - ½ cup whole milk, warmed - 1 large egg - 2 tablespoons unsalted butter, melted - 2 tablespoons red food coloring - 1 cup packed brown sugar - 1 tablespoon ground cinnamon - ½ cup unsalted butter, softened (for filling) These ingredients work together to create that rich flavor and lovely red color. For the luscious cream cheese frosting, gather: - 1 cup cream cheese, softened - 2 cups powdered sugar - 1 teaspoon vanilla extract - 2 tablespoons milk This frosting adds a creamy and sweet finish to your rolls. For an extra special touch, consider these optional ingredients: - Additional cream cheese frosting for drizzling - Cocoa powder for dusting - Finely chopped nuts for added crunch These little extras can make your red velvet cinnamon rolls even more delightful! {{ingredient_image_2}} To make the dough, I start by mixing the dry ingredients. In a large bowl, I add 2 ½ cups of flour, ¼ cup of sugar, 2 ¼ teaspoons of yeast, ½ teaspoon of salt, 1 teaspoon of baking powder, 1 teaspoon of baking soda, and 1 tablespoon of cocoa powder. I whisk them well until they look fluffy. Next, I gather the wet ingredients in another bowl. I whisk together ½ cup of warmed milk, 1 large egg, 2 tablespoons of melted butter, and 2 tablespoons of red food coloring until it looks smooth. I then pour this mixture into the dry mix. I stir gently until a soft dough forms. Now, I lightly flour my surface and knead the dough for about 5-7 minutes. I want it to be smooth and elastic. After that, I put the dough in a greased bowl, cover it with a towel, and let it rise in a warm spot for about 1 hour. It should double in size. Once the dough has risen, I gently punch it down to let the air out. I roll it out on a floured surface into a rectangle, about 16x12 inches. Then, I spread ½ cup of softened butter evenly over the dough, but I leave a small border around the edges. In a separate bowl, I mix 1 cup of brown sugar with 1 tablespoon of cinnamon. I sprinkle this sweet mix evenly over the buttered surface of the dough. Starting from one long side, I tightly roll the dough into a log. Using a sharp knife or dental floss, I slice the log into 12 equal pieces. I place these rolls in a greased 9x13 inch baking dish, making sure to leave some space between them. I cover them again with a towel and let them rise for another 30 minutes. I preheat my oven to 350°F (175°C). Once it’s ready, I bake the rolls for 25-30 minutes. They should be lightly golden on top when done. While the rolls bake, I prepare the cream cheese frosting. I mix 1 cup of softened cream cheese, 2 cups of powdered sugar, 1 teaspoon of vanilla extract, and 2 tablespoons of milk in a bowl. I blend it until it’s smooth and creamy. After the rolls cool a bit, I generously frost them with the cream cheese icing. For a fun touch, I might drizzle more frosting on top and add a sprinkle of cocoa powder or nuts. Enjoy your soft and irresistible treat! To get your rolls soft and fluffy, follow these tips: - Use fresh yeast. Old yeast may not rise well. - Warm your milk. This helps the yeast activate and grow. - Knead the dough well. This builds gluten, making rolls airy. - Let it rise in a warm spot. A cozy place helps the dough grow. - Don't rush the rising time. Patience gives you the best texture. Here are some mistakes to skip: - Adding too much flour. This can make rolls dry. - Not allowing the dough to rise fully. This leads to dense rolls. - Overbaking rolls. Keep an eye on them; they should be golden. - Skipping the butter. It adds flavor and moisture to your rolls. For a creamy frosting, here are my secrets: - Use softened cream cheese. It blends better and is smoother. - Mix sugar slowly. This helps avoid lumps in your frosting. - Add milk gradually. Adjust for the perfect consistency. - Include vanilla extract. It adds a warm, sweet flavor. - Frost rolls while warm. This allows the frosting to melt slightly and soak in. Pro Tips Use Room Temperature Ingredients: Ensure that your milk, butter, and egg are at room temperature for better incorporation into the dough, resulting in a softer roll. Don’t Skip the Second Rise: Allowing the rolls to rise a second time enhances their fluffiness and ensures they are light and airy once baked. Check for Doneness: Cinnamon rolls should be lightly golden on top and spring back when gently pressed in the center. If they appear too brown, they may be overbaked. Customize Your Frosting: Feel free to add a pinch of cinnamon or a splash of almond extract to the frosting for an extra flavor twist that complements the rolls beautifully. {{image_4}} You can make these rolls gluten-free with a few changes. Use a good gluten-free flour blend. Make sure it has xanthan gum for structure. Follow the same steps in the recipe. Keep an eye on the baking time. Gluten-free dough can bake faster than regular dough. To go vegan, swap the egg with a flax egg. Mix one tablespoon of ground flaxseed with three tablespoons of water. Let it sit until it thickens. Use plant-based milk instead of whole milk. Replace the butter with vegan butter. The rest of the steps stay the same. Even without dairy, these rolls will taste amazing! You can add fun flavors to your rolls. Try mixing in nuts or chocolate chips. Chopped pecans or walnuts give a great crunch. Chocolate chips add sweetness and richness. Just sprinkle them on the filling before rolling. This makes each bite even more special. Feel free to get creative with flavors! To keep your leftover red velvet cinnamon rolls fresh, place them in an airtight container. This helps to lock in moisture and flavor. You can also wrap them tightly in plastic wrap and then in foil for extra protection. Store them at room temperature for up to three days. If you want to keep them longer, the fridge is not the best choice. It can dry them out. Freezing cinnamon rolls is a smart way to save them for later. Allow the rolls to cool completely after baking. Then, place them in a single layer on a baking sheet. Freeze them for about an hour. Once frozen, transfer the rolls into a freezer-safe bag or container. Make sure to remove as much air as possible. They can stay frozen for up to three months and still taste great! To reheat your cinnamon rolls, you have a couple of easy options. For the best taste, use the oven. Preheat it to 350°F (175°C). Place the rolls on a baking sheet and cover them with foil. Heat for about 10-15 minutes until warm. If you’re in a hurry, you can use the microwave. Just heat one roll at a time for 15-20 seconds. Add a little cream cheese frosting on top for that extra touch! Red velvet cinnamon rolls come from the classic red velvet cake. The cake gained fame in the 1920s. It has a rich red color and a slight cocoa taste. People loved the soft texture and the cream cheese frosting. Bakers wanted to combine the flavors in new ways. Thus, we have red velvet cinnamon rolls. They mix the best parts of both treats. The result is a soft, sweet roll with a hint of cocoa and a rich frosting. Yes, you can make these rolls ahead of time. Prepare the dough and fill it as usual. After cutting the rolls, place them in the baking dish. Cover them tightly with plastic wrap. You can store them in the fridge overnight. The next morning, let them rise for about 30 minutes. Then, bake them as usual. This makes breakfast or brunch easy and fun. To adjust the sweetness, simply change the amount of powdered sugar. For a sweeter frosting, add more sugar. If you want it less sweet, use less sugar. You can also add a pinch of salt to balance the flavors. This helps mellow the sweetness without losing the creamy texture. Additionally, try using cream cheese with less sugar for a tangier taste. Making red velvet cinnamon rolls is enjoyable and fun. We covered the main ingredients, step-by-step instructions, and helpful tips. You learned how to make fluffy rolls and avoid common mistakes. I also shared tasty variations like gluten-free and vegan options. Plus, I provided storage tips to keep your rolls fresh. Try these rolls for a special brunch or a sweet treat. With practice, you'll get better each time. Enjoy each bite and share these treats with friends. Happy baking!
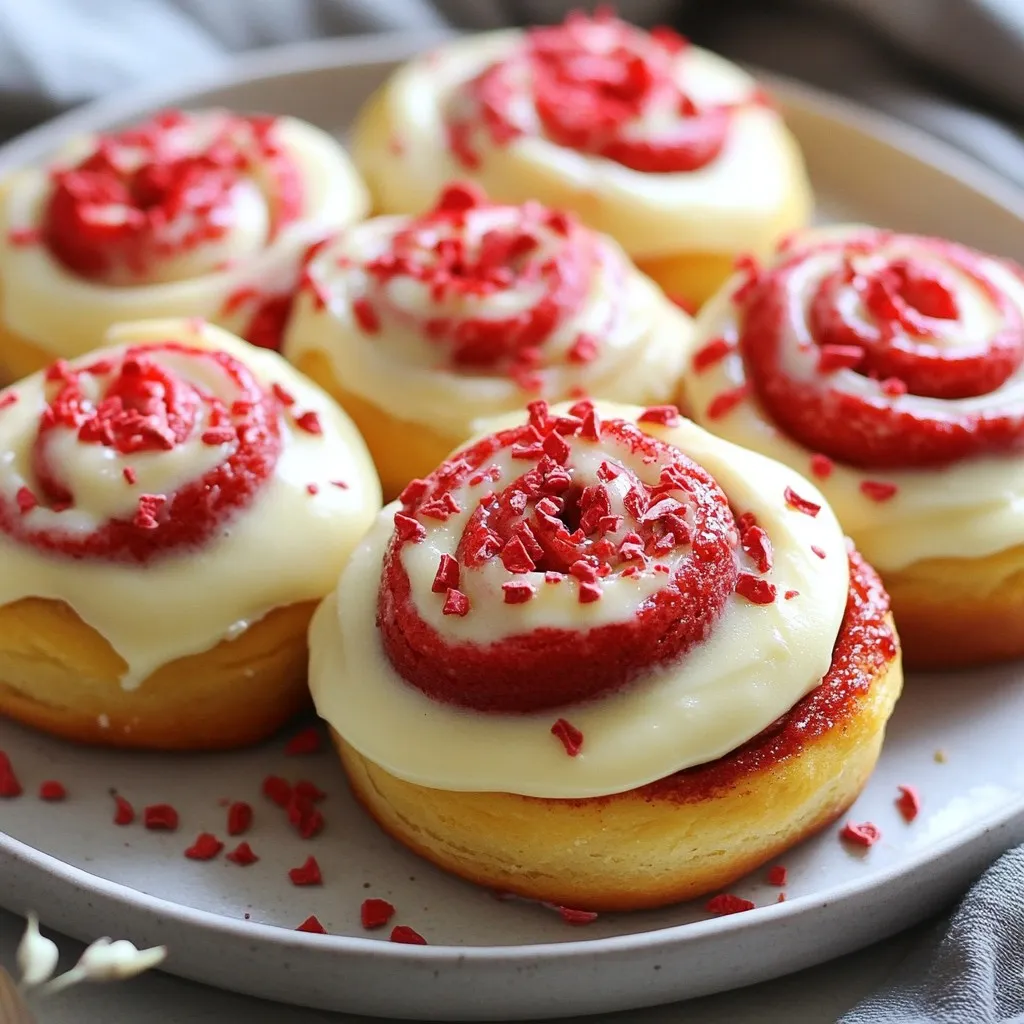
Red Velvet Cinnamon Rolls Soft and Irresistible Treat
Get ready to indulge in the ultimate dessert with my Red Velvet Cinnamon Rolls! These soft, fluffy treats combine the classic flavors of red velvet
To make these tasty pumpkin protein balls, you need the following items: - 1 cup canned pumpkin puree - 1 cup rolled oats - 1/2 cup protein powder (vanilla or unflavored) - 1/4 cup almond butter (or peanut butter) - 1/4 cup honey or maple syrup - 1 teaspoon vanilla extract - 1 teaspoon pumpkin pie spice (or ground cinnamon) - 1/4 cup dark chocolate chips (optional) - A pinch of salt You can easily swap some ingredients. Almond butter works great, but you can use peanut butter if you prefer. Both add healthy fats. For sweetness, honey and maple syrup are interchangeable. Choose the one you like best. You can also skip the dark chocolate chips if you want to keep it simple. These pumpkin protein balls are not just tasty; they are good for you too! - Canned pumpkin: It is packed with vitamins A and C. It also adds moisture. - Rolled oats: They offer fiber, which helps you feel full longer. - Protein powder: This boosts protein content, supporting muscle growth and recovery. - Almond butter: It provides healthy fats and protein, which keep energy levels steady. - Honey or maple syrup: Both add natural sweetness and antioxidants. Using these ingredients makes for a snack that is both nutritious and satisfying. {{ingredient_image_2}} First, grab a large mixing bowl. Add 1 cup of canned pumpkin puree. Then, include 1/4 cup of almond butter or peanut butter. I like almond butter for its rich taste. Next, pour in 1/4 cup of honey or maple syrup. This gives our balls a sweet touch. Finally, add 1 teaspoon of vanilla extract for flavor. Mix everything with a spatula or whisk until it's smooth. In another bowl, whisk together 1 cup of rolled oats and 1/2 cup of protein powder. You can use either vanilla or unflavored protein powder. Then, add 1 teaspoon of pumpkin pie spice or ground cinnamon. This spice adds warmth and depth. Don't forget a pinch of salt to balance the flavors. Make sure all the dry ingredients blend well. Now, slowly add the dry mix to the wet mix. Stir gently but thoroughly until everything is combined. If you like dark chocolate, fold in 1/4 cup of chocolate chips. After mixing, cover the bowl and place it in the fridge for 30 minutes. This helps the mixture firm up. Once chilled, wet your hands to avoid sticking. Scoop about 1 tablespoon of the mixture and roll it into a ball. Repeat until you shape all the mixture. Place the balls on a baking sheet lined with parchment paper. You can store them in an airtight container. Enjoy them fresh or freeze them for later! When you mix your ingredients, start with the wet ones. Use a large bowl for this. Combine the canned pumpkin puree, almond butter, honey, and vanilla extract. Use a spatula or whisk to blend until it's smooth. This step ensures your balls will be tasty and moist. In a separate bowl, mix the dry items. Combine rolled oats, protein powder, pumpkin pie spice, and salt. Whisk them well. Then, add the dry mix to the wet mix. Stir continuously to blend everything well. This helps the flavors mix evenly. After mixing, chill the mixture for about 30 minutes. Chilling makes it easier to shape into balls. It also helps with the texture. To prevent sticking, wet your hands before shaping. This small trick is key! It helps the mixture glide off your hands. You can also use a scoop to measure out the mixture. This keeps them uniform. If you find the mixture too sticky, add a bit more oats or protein powder. Just a little will help! Make sure to keep your hands moist throughout the process. Presentation matters! For a nice display, use a colorful plate or a mason jar. This makes your snack look inviting. You can add a drizzle of melted chocolate on top for a sweet touch. This not only looks good but also adds flavor. Lastly, consider adding some nuts or seeds around the balls on the plate. This adds color and texture. Enjoy your tasty pumpkin protein balls! Pro Tips Chill for Best Results: Refrigerating the mixture for 30 minutes not only helps in shaping the balls but also enhances the flavors, making them more enjoyable. Customize Your Sweetness: Adjust the amount of honey or maple syrup according to your taste preference. You can even experiment with other sweeteners like agave or stevia. Add Texture: For added crunch, consider mixing in nuts, seeds, or dried fruits into the mixture before rolling them into balls. Perfect for Meal Prep: These protein balls make an excellent snack for busy days. Prepare a batch and store them in individual containers for grab-and-go convenience! {{image_4}} To make vegan pumpkin protein balls, simply swap the honey for maple syrup. This keeps the sweet taste while making it plant-based. You can also use a vegan protein powder. This makes the snack suitable for everyone, even those who avoid animal products. If you need gluten-free protein balls, ensure your oats are certified gluten-free. Most rolled oats are fine, but it's good to check. You can also substitute the protein powder with a gluten-free option. This way, you can enjoy a tasty snack without any worries about gluten. You can add nuts, seeds, or different spices to the mix. Try adding chopped walnuts or sunflower seeds for extra crunch. You can also mix in spices like nutmeg or ginger for unique flavors. For a sweet twist, fold in dark chocolate chips. Each of these additions brings new flavors and textures. Experiment with what you like best! To keep your pumpkin protein balls fresh, store them in an airtight container. This helps them stay moist and tasty. You can place them in the fridge for easy access. Just remember to seal the container well. This will keep them from drying out. If you want to save some for later, freezing works great. First, roll the balls as you normally would. Then, place them on a baking sheet lined with parchment paper. Freeze them for about an hour until they are firm. After that, transfer the balls to a freezer bag or container. Make sure to label the bag with the date. This way, you know how long they have been in the freezer. In the fridge, pumpkin protein balls last about a week. They are still good but best eaten within this time. In the freezer, they can last up to three months. This makes freezing a smart choice if you want them to last longer. Just remember to thaw them in the fridge before eating. They will taste fresh and delicious after freezing! You can make these pumpkin protein balls healthier in a few ways. First, consider using a natural nut butter with no added sugar. This option boosts healthy fats while cutting down on sugar. You can also swap out the chocolate chips for nuts, seeds, or dried fruits. Adding chia seeds or flaxseeds can increase fiber and omega-3s. Lastly, try reducing the sweetener amount. Your taste buds may adjust, and you’ll still enjoy the flavor. Yes, you can use several sweeteners in place of honey or maple syrup. Agave syrup is a great choice. It has a mild taste and is easy to mix. If you want to cut sugar even more, try using mashed bananas or unsweetened applesauce. These options will add natural sweetness and moisture to your protein balls. Just remember, different sweeteners may change the taste slightly, so adjust based on your preferences. There are many fun ways to enjoy pumpkin protein balls! You can have them as a quick snack on the go. They are also perfect after a workout. Pair them with a piece of fruit for a balanced meal. For a special treat, serve them with a cup of tea or coffee. You can even create a fun snack board with different dips, like yogurt or nut butter, for a delightful experience. We covered how to make delicious pumpkin protein balls. You learned about the key ingredients, with useful substitutions and health benefits. I shared step-by-step instructions to mix, shape, and chill. You found tips to perfect your mixing and shaping. We explored variations for diets like vegan or gluten-free and how to store them for freshness. These tasty snacks are easy to make and fun to enjoy. Try them today!
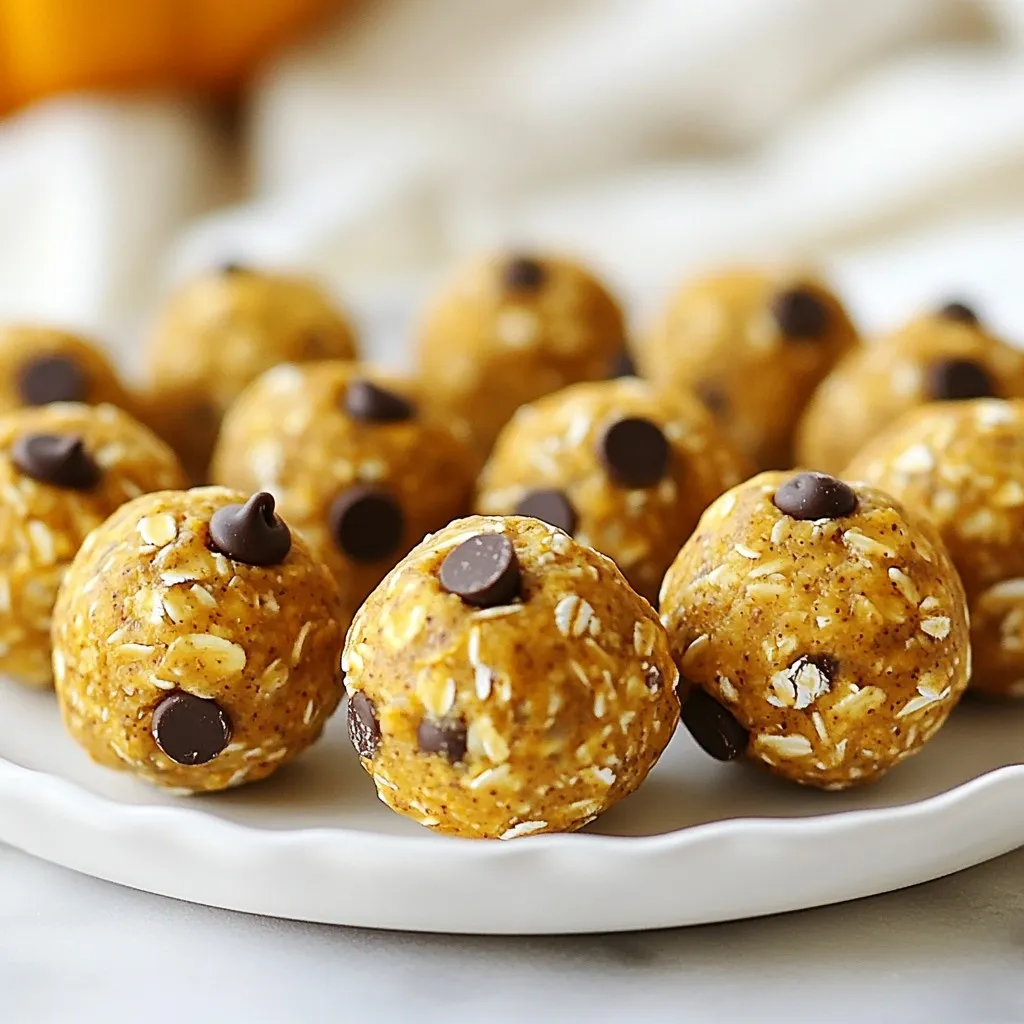
Pumpkin Protein Balls Nutritious and Easy Snack
Looking for a snack that’s both tasty and healthy? You’ve come to the right place! Pumpkin protein balls are nutritious and quick to make, perfect
To make these tasty bars, you need a few simple items: - 2 cups rolled oats - 1 cup creamy peanut butter - 1 cup honey or maple syrup - 1/2 cup chocolate chips (dark or semi-sweet) - 1/4 cup unsweetened cocoa powder - 1/2 teaspoon vanilla extract - A pinch of salt These ingredients come together to create a rich, sweet, and chewy treat. The oats give the bars a hearty texture. The peanut butter adds creaminess, while honey or maple syrup provides sweetness. Cocoa powder brings that deep chocolate flavor. You can add fun toppings to make your bars even better. Here are some tasty options: - Crushed nuts - Coconut flakes - Additional chocolate chips If you want to swap ingredients, feel free! Try almond butter instead of peanut butter. You can use agave syrup in place of honey. These swaps keep the bars delicious and interesting. Each bar is packed with nutrients. Here is a rough estimate of what you'll get per serving: - Calories: 180 - Protein: 5g - Carbohydrates: 25g - Fat: 8g - Fiber: 3g These numbers make your snack both filling and fun. You get energy from the oats and protein from the peanut butter. Enjoy these bars as a quick pick-me-up or a sweet dessert! {{ingredient_image_2}} Start with a microwave-safe bowl. Add 1 cup of creamy peanut butter and 1 cup of honey (or maple syrup) to the bowl. Heat this mix in the microwave for 30 seconds to 1 minute. You want it soft and easy to stir. Once heated, stir it until smooth. This blend is the heart of your bars. Next, take a large mixing bowl and add 2 cups of rolled oats. Pour the warm peanut butter mix over the oats. Use a spatula or wooden spoon to mix. Stir until every oat gets coated well. This step is key to making sure your bars hold together. Now, gently fold in 1/2 cup of chocolate chips. Make sure they are spread evenly. Prepare an 8x8 inch pan by lining it with parchment paper. Let the paper hang over the edges a bit. This will help you remove the bars later. Transfer the oat mixture into the lined pan. Press it down firmly and evenly. Make sure it is tightly packed for the best texture. If you want, sprinkle on optional toppings like crushed nuts or coconut flakes. Press these down gently too. Finally, refrigerate the pan for at least 2 hours. This allows the bars to set properly. After that, lift the bars out using the parchment paper. Slice them into squares or rectangles for serving. To get the best texture, pack the mixture tightly. Use a spatula or your hands to press it down firmly in the pan. This helps the bars hold their shape once set. If the mixture feels too dry, add a bit more peanut butter or honey. If it feels too wet, add a few more oats. Keep these tips in mind for a perfect bite every time. Store your bars in the fridge for freshness. Place them in an airtight container. They will stay fresh for about one week. You can also freeze them for longer storage. Wrap each bar in plastic wrap and place them in a freezer bag. They can last up to three months in the freezer. Just thaw them in the fridge before enjoying. Get creative with your bars! Try adding crushed nuts for crunch. You can also mix in coconut flakes for a tropical twist. If you love chocolate, sprinkle more chocolate chips on top. For a fun flavor boost, add cinnamon or nutmeg to the mix. You can even use maple syrup instead of honey for a different taste. Pro Tips Use Natural Sweeteners: Maple syrup adds a unique flavor profile, but honey can provide a richer sweetness. Choose based on your preference! Adjust the Texture: For a chewier bar, use whole oats instead of instant oats. This will add a heartier texture to your bars. Customize Your Mix-Ins: Feel free to experiment with various toppings such as dried fruits or seeds for added nutrition and flavor. Storage Tips: Keep the bars in an airtight container in the refrigerator for up to a week for the best freshness. {{image_4}} You can easily make these bars vegan. Instead of honey, use maple syrup or agave nectar. Both work well and keep the sweetness. Look for natural sweeteners that are organic. This keeps your bars healthy while still being tasty. To make these bars gluten-free, just choose certified gluten-free oats. Many brands offer oats that do not contain gluten. This way, you can enjoy these bars without worry. They will taste just as good while fitting your diet. Want to boost nutrition? Try adding protein powder to the mix. A scoop or two of your favorite protein powder works great. You can also add spices like cinnamon or nutmeg for extra flavor. These small changes can make your bars even better! To keep your No Bake Chocolate Peanut Butter Oat Bars fresh, refrigerate them in an airtight container. If you want to store them longer, you can freeze them. Wrap each bar tightly in plastic wrap. Then, place them in a resealable freezer bag. This helps avoid freezer burn. When you want to eat one, just take it out and let it thaw in the fridge. These bars last about one week in the fridge. If you freeze them, they can last up to three months. Just make sure to label your containers. This way, you won’t forget when you made them. Enjoying them fresh is best, but they still taste great even after some time. I recommend using glass or BPA-free plastic containers. These keep the bars fresh and prevent any odors from other foods. Choose a container that fits your bars snugly. This limits air exposure. If you cut the bars into smaller pieces, use parchment paper between layers. This way, they won't stick together. Yes, you can swap peanut butter for other nut butters. Almond butter or cashew butter work well. Just ensure the nut butter is creamy. This keeps the bars smooth and easy to mix. Each nut butter adds a unique flavor. Almond butter gives a nuttier taste, while cashew butter is milder. To reduce sweetness, cut back on the honey or maple syrup. You can also use unsweetened cocoa powder. Adding more oats helps balance the sweetness. Another option is to mix in a bit of nut butter without added sugar. Taste as you go to find the right balance for you. After chilling, lift the bars out using the parchment paper. Place the block on a cutting board. Use a sharp knife for clean cuts. Cut into squares or rectangles for serving. If the bars are too firm, let them sit at room temperature for a few minutes. This makes slicing easier. Serve these bars chilled with milk or yogurt for a tasty treat. This article detailed how to make No Bake Chocolate Peanut Butter Oat Bars. We explored ingredients, instructions, tips, and variations. These bars are easy to make and packed with flavor. Customization lets you match your dietary needs. Proper storage keeps them fresh for longer. Enjoy the fun of making these sweet snacks. They are great for sharing or quick energy boosts. By following the steps, you can create a tasty treat anytime.
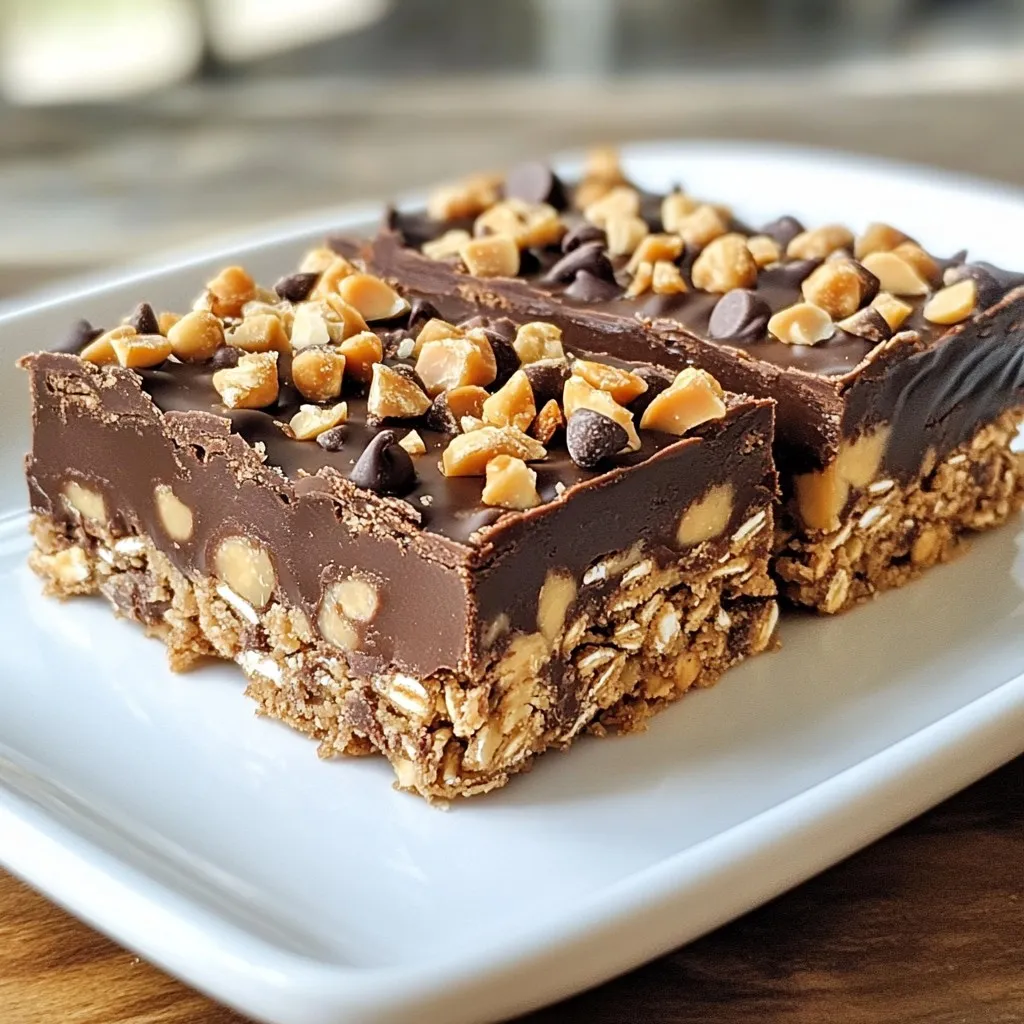
No Bake Chocolate Peanut Butter Oat Bars Delight
Are you craving a sweet treat that’s easy to make and guilt-free? Look no further! My No Bake Chocolate Peanut Butter Oat Bars are the
- 1 cup graham cracker crumbs - 16 oz cream cheese, softened to room temperature - 1 cup mixed fresh berries For mini cheesecakes, the main ingredients create a creamy and rich dessert. I love using graham cracker crumbs for the crust. They give a nice sweet crunch. The cream cheese is the star of the show. It makes the filling smooth and rich. I add mixed fresh berries for a pop of flavor and color. Strawberries, blueberries, and raspberries work best. They add freshness and a hint of tartness. - 1/2 cup unsalted butter, melted - 1 tablespoon fresh lemon juice - 1 tablespoon cornstarch The berry swirl adds a fun twist to your mini cheesecakes. I melt unsalted butter to mix with the graham cracker crumbs. This helps the crust hold together. The fresh lemon juice brightens up the berry flavor. It makes the taste more lively. Cornstarch thickens the berry mixture. This creates a lovely swirl that blends with the cream cheese. - Whipped cream - Additional fresh berries for garnish Toppings make your mini cheesecakes look even more inviting. I often serve mine with whipped cream. It adds a light and airy feel. Fresh berries on top not only look pretty, but they also add extra flavor. You can mix and match these toppings for fun and tasty results. {{ingredient_image_2}} 1. Preheat your oven to 325°F (160°C). Line a muffin tin with paper liners. This helps with easy removal later. 2. In a medium bowl, mix 1 cup of graham cracker crumbs and 1/4 cup of sugar. Pour in 1/2 cup of melted butter. Stir until the crumbs look like wet sand. 3. Take about one tablespoon of this mixture and press it down into each muffin cup. Use the back of a spoon to flatten it. Bake for 10 minutes. Let the crust cool completely. 1. In a new bowl, beat 16 oz of softened cream cheese with a mixer. Make it smooth and creamy. 2. Gradually add 1 cup of sugar and 1 teaspoon of pure vanilla extract. Mix until it’s all combined. 3. Add 2 large eggs one at a time. Mix on low speed just until each egg is mixed in. Be careful not to overmix; this helps avoid cracks in your cheesecakes. 1. In a small saucepan, combine 1 cup of mixed fresh berries and 1 tablespoon of fresh lemon juice. Cook over medium heat. Stir gently until the berries soften, about 5 minutes. 2. Once the berries bubble, add 1 tablespoon of cornstarch. Stir until the mixture thickens. Remove it from heat and let it cool slightly. 3. Carefully pour the cream cheese mixture over the cooled crusts in the muffin tin. Fill each cup about two-thirds full. 4. Drop spoonfuls of the berry mixture on top of the cream cheese. Use a toothpick to swirl the berry mixture into the cream cheese for a beautiful marbled look. 5. Bake for 18-20 minutes. The centers should be set but still a bit jiggly. Let the cheesecakes cool to room temperature in the tin. Then, move them to the fridge to chill for at least 4 hours or overnight. To keep your mini cheesecakes crack-free, mix at low speed once you add the eggs. Overmixing can bring in too much air. Air makes cracks appear as the cheesecake bakes. After baking, cool the cheesecakes slowly at room temperature. Rapid temperature changes can also cause cracks. For a smooth and creamy texture, use room temperature cream cheese. Cold cream cheese can lead to lumps. Beat it well until smooth before adding other ingredients. Chill your cheesecakes adequately before serving. A good chill helps the texture firm up nicely. Serve your mini cheesecakes with a generous dollop of whipped cream and fresh berries. This adds color and a fresh taste. Use a decorative platter for serving. A beautiful display makes these treats even more inviting for guests. Pro Tips Chill for Best Flavor: Allow the mini cheesecakes to chill overnight in the refrigerator. This not only enhances their flavor but also helps achieve the perfect creamy texture. Mix Berries Wisely: Use a variety of berries to create a colorful and flavorful swirl. Strawberries, blueberries, and raspberries complement each other beautifully. Avoid Overmixing: When combining the eggs with the cream cheese mixture, mix on low speed to prevent incorporating too much air, which can lead to cracks in your cheesecakes. Perfect Portioning: Use a cookie scoop to evenly distribute the cream cheese mixture and berry swirl for consistent sizes, ensuring even baking and presentation. {{image_4}} One great way to mix things up is by creating different flavors of mini cheesecakes. Here are two of my favorites: - Chocolate Mini Cheesecakes: Start with the same crust and cream cheese base. Melt dark chocolate and fold it into the cream cheese mix. This will give you a rich and creamy chocolate flavor that is hard to resist. - Pumpkin Spice Mini Cheesecakes: For a fall twist, add pumpkin puree and pumpkin spice to the cream cheese mixture. This gives you a warm, cozy flavor that is perfect for autumn gatherings. Toppings can make your mini cheesecakes even more delightful. Here are some tasty ideas: - Caramel sauce drizzled on top: A drizzle of warm caramel adds sweetness and a lovely look. It pairs well with both chocolate and plain cheesecakes. - Nut toppings for added crunch: Chopped nuts, like pecans or walnuts, give a nice crunch. They also add a nice contrast to the creamy texture of the cheesecake. You can make these mini cheesecakes gluten-free with some easy swaps: - Use gluten-free graham crackers: Many brands offer gluten-free options. They work just like regular graham crackers in the crust. - Alternative crust options such as almond flour or oats: If you want to get creative, use almond flour or oats for the crust. Both options taste great and ensure everyone can enjoy these treats! To keep your mini cheesecakes fresh, store them in the fridge. Place the cheesecakes in an airtight container. Cover them with a lid or plastic wrap to prevent them from drying out. This keeps their creamy texture and rich flavor intact. You can freeze mini cheesecakes for longer storage. To do this, first, let them cool completely. Then, wrap each cheesecake in plastic wrap tightly. Place the wrapped cheesecakes in a freezer-safe container. To serve, thaw them in the fridge overnight. This helps maintain their texture. Mini cheesecakes last about one week in the fridge. After that, they may start to spoil. Look for signs like a sour smell or a change in texture. If you see any mold, it’s best to toss them. Enjoy your cheesecakes while they are fresh for the best taste! Yes, you can make mini cheesecakes ahead of time. They taste even better after chilling. To prepare them in advance, bake and cool the cheesecakes. After cooling, cover them well with plastic wrap or store them in an airtight container. Refrigerate them for up to three days. If you want to store them longer, freeze them. Wrap each cheesecake in plastic wrap, then place them in a freezer-safe bag. They will stay fresh for up to two months. To keep your crust from getting soggy, bake it properly. Make sure to pre-bake the crust for about ten minutes. This helps it set. After baking, let it cool completely before adding the filling. Cooling allows the crust to harden. Also, avoid overfilling your cups with the cream cheese mixture. Leave a little space at the top. This helps the steam escape during baking, keeping the crust crisp. If you don't have muffin liners, you have options. You can use parchment paper cut into circles. Just place the circles in the muffin tin to help with removal. Another choice is to grease the muffin tin well with butter or cooking spray. This method works well too. You can also use silicone muffin cups. They are reusable and help the cheesecakes pop out easily. You learned how to make delicious mini cheesecakes with fresh berries. We covered the key ingredients for the crust and filling, plus tips for a creamy texture. I shared steps to create a perfect berry swirl and options for tasty variations. Storing your mini cheesecakes properly is easy with the right methods. With these techniques, you'll impress everyone at your next gathering. Baking should be fun and rewarding, so enjoy every bite of your tasty treat!
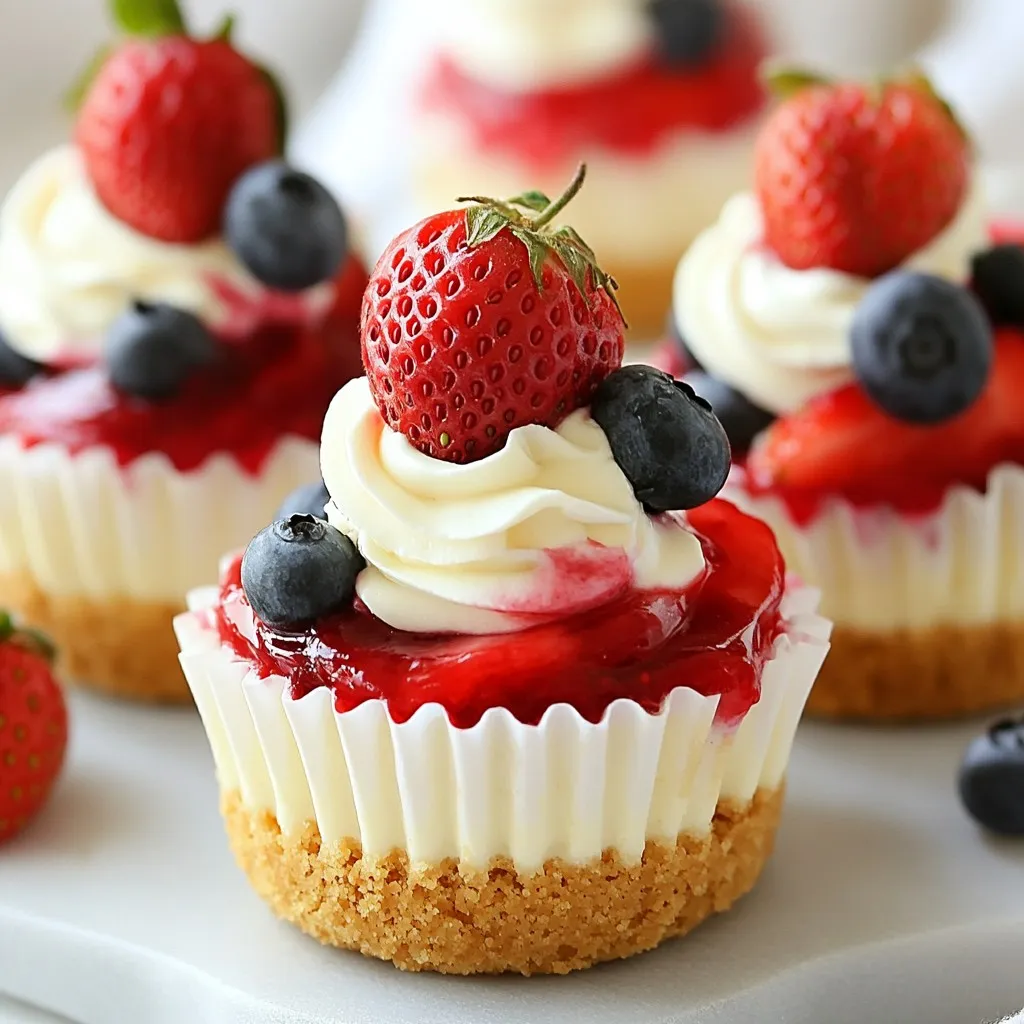
Mini Cheesecakes Delightful Treat for Any Occasion
Looking for a sweet treat that impresses without a lot of fuss? Mini cheesecakes are your answer! These delightful bites are perfect for any occasion,
- 1 cup unsalted butter, softened - 1 cup granulated sugar - 1 large egg, at room temperature - 2 tablespoons lemon zest (from about 1 large lemon) - 2 tablespoons fresh lemon juice - 2 ½ cups all-purpose flour - 1 teaspoon baking powder - ½ teaspoon baking soda - ½ teaspoon salt - 1 cup fresh blueberries (or thawed frozen blueberries) - Optional: powdered sugar for dusting You can add some vanilla extract for a warm note. About 1 teaspoon will do. A pinch of cinnamon can also enhance the flavor. Mix it in with the dry ingredients. If you want a richer taste, try adding ¼ cup of chopped nuts. Walnuts or pecans work best. These options can make your cookies even more special. If you need a butter substitute, use coconut oil or margarine. For a dairy-free version, try vegan butter. You can replace the egg with a flaxseed meal mix. Use 1 tablespoon of flaxseed mixed with 2.5 tablespoons of water. Let it sit for 5 minutes. For flour, you can use almond flour or a gluten-free blend. Just note that the texture may change slightly. {{ingredient_image_2}} Start by gathering all your ingredients. You need: - 1 cup unsalted butter, softened - 1 cup granulated sugar - 1 large egg - 2 tablespoons lemon zest - 2 tablespoons lemon juice - 2 ½ cups all-purpose flour - 1 teaspoon baking powder - ½ teaspoon baking soda - ½ teaspoon salt - 1 cup blueberries Make sure your butter and egg are at room temperature. This helps them blend well. Zest your lemon before squeezing it for juice. This way, you get the best flavor. Preheat your oven to 350°F (175°C). Line a baking sheet with parchment paper. This keeps cookies from sticking. In a large bowl, mix butter and sugar with an electric mixer. Beat until it looks light and fluffy, about 3-5 minutes. Add the egg, lemon zest, and lemon juice into the bowl. Mix until everything is well combined. In another bowl, whisk together the flour, baking powder, baking soda, and salt. Slowly add this dry mix into the wet ingredients. Stir gently with a spatula. Don’t over-mix; this keeps the cookies soft. Now, fold in the blueberries. Be gentle to keep them whole. This ensures they burst with flavor in your cookies. Use a cookie scoop to drop rounded dough balls on the baking sheet. Space them about 2 inches apart. This allows the cookies to spread while baking. Place the baking sheet in the oven and bake for 10-12 minutes. Look for light golden edges and set centers. After baking, let the cookies cool for 5 minutes on the sheet. Then, transfer them to a wire rack to cool fully. If desired, dust the cookies with powdered sugar before serving. Enjoy your delicious soft lemon blueberry cookies! To get soft cookies, use room temperature butter. This helps the butter blend well with sugar. Cream the butter and sugar until fluffy. This adds air, making cookies light. Avoid over-mixing the dough; this can make cookies tough. Fold in blueberries carefully to keep them whole. Bake until the edges are lightly golden, but the centers look soft. This ensures a chewy, soft bite. Store your cookies in an airtight container. This keeps them fresh and soft. If you stack them, place parchment paper between layers. This prevents sticking. For longer storage, freeze the cookies. Place them in a freezer bag. They can last up to three months. Just thaw them at room temperature before enjoying again. For a fun display, use a decorative platter. Arrange the cookies in a circle. Add lemon slices and fresh blueberries around them. This adds color and charm. For a sweet touch, dust the cookies with powdered sugar. This simple step makes them look fancy. These tricks make your cookies not just tasty but also lovely to serve. Pro Tips Use Fresh Ingredients: For the best flavor, opt for fresh blueberries and real lemon juice. This enhances the overall taste of the cookies. Don’t Overmix: When combining the dry and wet ingredients, mix just until combined. Overmixing can lead to tough cookies. Chill the Dough: If your dough feels too soft, chill it in the refrigerator for 30 minutes before baking. This helps the cookies maintain their shape. Store Properly: Keep cookies in an airtight container at room temperature for up to a week to maintain their softness. {{image_4}} You can easily switch up the flavors in these cookies. Try mixing in raspberries, strawberries, or blackberries. Each fruit brings a new taste and fun color. For a tropical twist, add shredded coconut or a splash of pineapple juice. If you want a spicy kick, try adding some grated ginger or cinnamon. These changes keep the recipe fresh and exciting! If you need a gluten-free option, swap the all-purpose flour for a gluten-free blend. Many blends work well in baking. Just make sure it contains xanthan gum, which helps bind the ingredients. The texture may vary, but the taste will remain delicious. You can still enjoy soft lemon blueberry cookies without gluten! You can adjust the sweetness to your liking. If you prefer less sugar, reduce the granulated sugar by ¼ cup. You can also use a sugar substitute, like stevia or monk fruit. If you want a sweeter cookie, add a bit of honey or maple syrup to the mix. Just remember to reduce the liquid in the recipe slightly to keep the dough right. To keep your soft lemon blueberry cookies fresh, place them in an airtight container. This prevents air from making them dry. You can layer the cookies with parchment paper to avoid sticking. Store them at room temperature for the best texture. If you want to save cookies for later, freezing is a great option. First, let the cookies cool completely. Then, place them on a baking sheet in a single layer. Freeze them for about an hour. After that, you can transfer the cookies to a freezer-safe bag. Remove as much air as you can before sealing. They can last for up to three months in the freezer. These cookies taste best within the first week. If stored properly, they can last about 5-7 days at room temperature. If you freeze them, they will stay fresh for up to three months. Just remember to thaw them before eating for the best flavor. Yes, you can use frozen blueberries. Just thaw and drain them first. This keeps the dough from getting too wet. You will still get great flavor and texture in your cookies. Plus, frozen blueberries are easy to find year-round. If you need a butter substitute, try using coconut oil or a plant-based margarine. These options will still give you a soft, moist cookie. Use the same amount as the butter in the recipe. Just make sure your substitute is softened for mixing. Check the edges of the cookies. They should be lightly golden, while the centers should look set. If the edges are brown, the cookies might be overbaked. Remember, they will continue to cook a bit after you take them out of the oven. Yes, you can make the dough ahead of time. Chill it in the fridge for up to 24 hours. This helps the flavors meld and makes it easier to scoop. Just be sure to let it sit at room temperature for a few minutes before baking. You learned the key ingredients and steps for soft lemon blueberry cookies. We also explored tips for the best texture and storage. Remember, you can customize these cookies with different fruits and flavors. Feel free to experiment with substitutions too. These cookies are not just tasty but also easy to share. Keep your leftovers fresh for later enjoyments. With these insights, you’re all set to bake delicious treats. Happy baking!
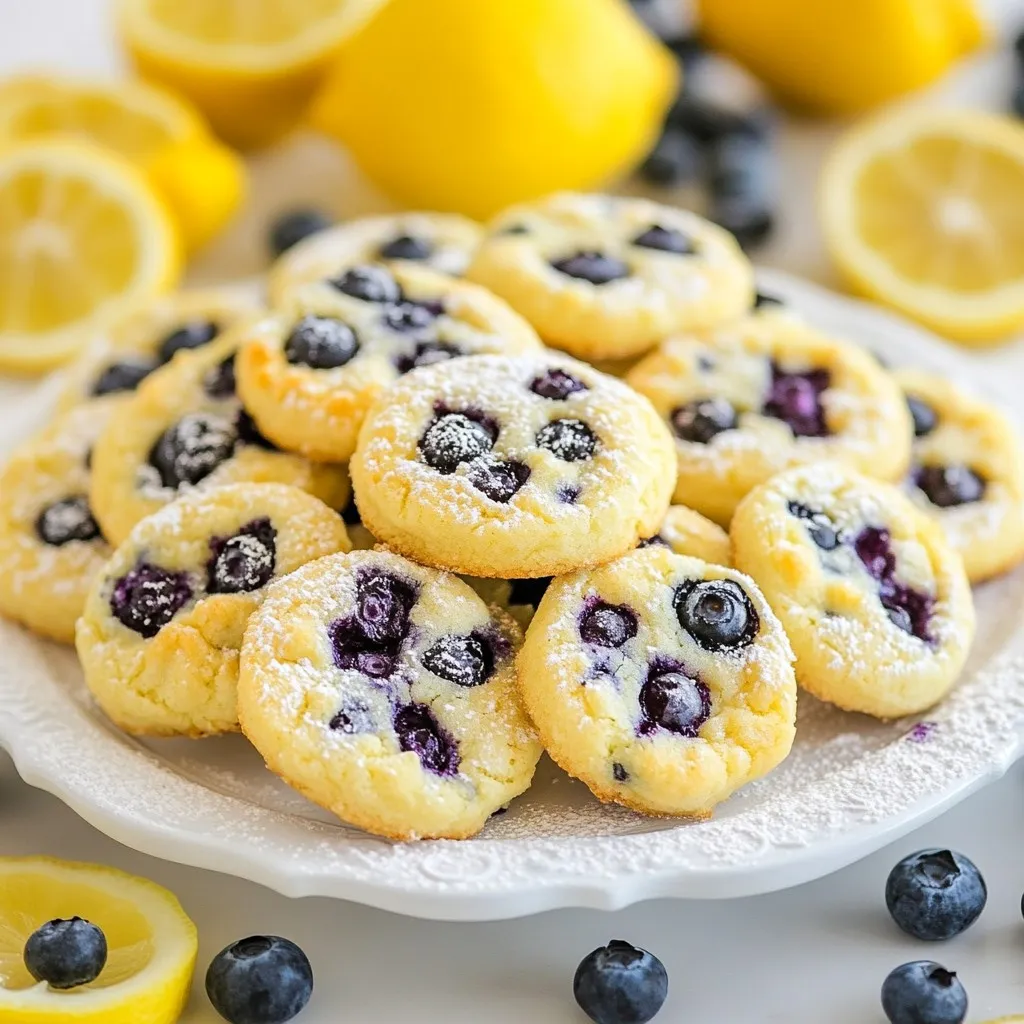
Soft Lemon Blueberry Cookies Delightful and Easy Recipe
Get ready to indulge with my Soft Lemon Blueberry Cookies! This easy recipe combines zesty lemon and sweet blueberries for a treat you’ll love. Whether
To make chewy brownie batter cookies, you need simple ingredients. Each one plays a key role. Here’s what you'll need: - 1 cup unsalted butter - 1 cup packed brown sugar - 1/2 cup granulated sugar - 2 large eggs - 1 teaspoon pure vanilla extract - 1 1/2 cups all-purpose flour - 1/2 cup unsweetened cocoa powder - 1 teaspoon baking soda - 1/2 teaspoon sea salt - 1 cup chocolate chips - 1/2 cup chopped walnuts (optional) Each ingredient adds flavor and texture. The unsalted butter gives richness. Brown sugar adds moisture and a hint of caramel. The granulated sugar helps with spread and sweetness. Eggs bind the dough and create softness. Vanilla extract enhances the overall flavor. Flour and cocoa powder form the base. Baking soda helps the cookies rise. Sea salt balances sweetness and brings out flavors. Chocolate chips provide gooey bites of chocolate. Walnuts add a nice crunch if you choose to include them. These ingredients come together to create a delightful cookie. They blend to form a soft and chewy treat. You will love how they taste and feel! {{ingredient_image_2}} First, set your oven to preheat at 350°F (175°C). This step is key for even baking. While the oven heats up, grab your baking sheets. Line them with parchment paper. This makes it easy to lift the cookies off later. Next, take a big mixing bowl. Add your softened butter, packed brown sugar, and granulated sugar. Use an electric mixer to blend these together. Mix for about 3 to 4 minutes. You want the mix to be light and fluffy. This helps create a nice texture in your cookies. Now, it’s time to add eggs. Make sure they are at room temperature. Add them one by one. Mix well after each egg. Pour in the vanilla extract and combine it all. This step adds flavor and moisture. In another bowl, gather the dry ingredients. Whisk together the all-purpose flour, cocoa powder, baking soda, and sea salt. Make sure to mix them well. This helps avoid lumps. A smooth batter leads to better cookies. Next, combine your dry mix with the wet mix. Do this slowly. Stir gently until everything is just combined. Be careful not to overmix. Overmixing can make your cookies tough instead of chewy. Using a tablespoon or a cookie scoop, drop the dough onto your lined sheets. Leave enough space between each scoop. The cookies will spread while baking. Bake them for 10 to 12 minutes. Look for set edges and slightly soft centers. This gives you that perfect chewy bite. Once done, let them cool on the sheets for about 5 minutes before moving them to a wire rack. To get that chewy texture, underbake the cookies just a little. The centers should look soft and slightly glossy when you take them out. This slight underbaking keeps the cookies moist and chewy. If you bake them too long, they will turn hard. Trust me, you want to keep that soft center for the best taste. Chocolate chips are a classic choice, but you can get creative! Try adding nuts, like walnuts, or even toffee bits for a twist. Each mix-in adds a new flavor. If you love dark chocolate, use dark chocolate chips. If you want a sweeter bite, go for semi-sweet. Mix-ins really let you personalize your cookies and make them special. Cooling on a wire rack is key. It helps the cookies cool evenly all around. If you leave them on the baking sheet, they can keep cooking and become too hard. A wire rack allows air to flow under the cookies. This keeps them soft and chewy, just like you want. Always transfer them after a few minutes on the baking sheet. Pro Tips Use Room Temperature Ingredients: Ensure your butter and eggs are at room temperature for a smoother batter and better incorporation of ingredients. Don't Overmix: Mix the dough just until combined to maintain the chewy texture of the cookies. Overmixing can lead to tough cookies. Chill the Dough: For even chewier cookies, consider chilling the dough for 30 minutes before baking. This helps the flavors meld and prevents excessive spreading. Experiment with Mix-ins: Feel free to personalize your cookies by adding different types of chocolate chips, nuts, or dried fruits for unique flavor combinations. {{image_4}} You can boost your chewy brownie batter cookies with different extracts or spices. Try adding almond extract for a sweet twist. A dash of cinnamon can give warmth to your cookies. You can also use peppermint extract for a fresh flavor. Experiment with what you like. Each choice can change the whole cookie! Mix-ins add extra fun to your cookies. Nuts like walnuts or pecans give a nice crunch. Dried fruits, like cherries or cranberries, add sweetness. You might even use flavored chocolate chips, like mint or caramel, for a special touch. These options let you be creative and make your cookies unique. If you're looking for dietary options, you can make gluten-free or vegan versions. For gluten-free, swap all-purpose flour with almond or oat flour. Use flaxseed meal mixed with water instead of eggs for a vegan choice. You can also find plant-based butter for a fully vegan cookie. These changes keep the joy of cookies alive for everyone. Store your chewy brownie batter cookies in an airtight container. This keeps them soft and fresh. Make sure the container is clean and dry. You can layer parchment paper between the cookies to avoid sticking. To freeze your cookies, first let them cool completely. Then, place them in a single layer on a baking sheet. Freeze for about an hour until firm. Once frozen, transfer them to a freezer bag. This way, they stay fresh for up to three months. To thaw, simply leave them at room temperature for a few hours or microwave for a few seconds. These cookies stay fresh for about one week at room temperature. If you store them in the fridge, they can last up to two weeks. Just remember, the colder they are, the more they may lose their chewy texture. Enjoy them while they're fresh for the best taste! Yes, you can use almond flour. However, it changes the texture and flavor. Almond flour makes cookies softer and denser. Your cookies may not spread as much. You might need to adjust the amount. Start with a 1:1 swap. Add a bit more liquid if needed. If your cookies spread too much, check your butter. If it's too soft, chill the dough before baking. You might also want to add a bit more flour. Make sure you measure it correctly. Too much sugar can cause spreading, too. Keep an eye on your oven temperature; too hot can also lead to issues. You can make your cookies more chocolatey! Add more cocoa powder to the dough. Try using dark chocolate chips instead of semi-sweet. You can also mix in chunks of chocolate for extra bites of flavor. If you're feeling adventurous, add a sprinkle of cocoa nibs on top before baking. Yes, these cookies freeze well! To freeze, wait for them to cool completely. Place them in an airtight container or freezer bag. Separate layers with parchment paper to avoid sticking. They can last up to three months. To reheat, bake them straight from the freezer for a few extra minutes. Enjoy fresh cookies anytime! This blog post covered all the steps to make perfect cookies. We looked at ingredients, how to mix them, and tips for great flavor and texture. Remember to underbake for chewiness and use a wire rack for cooling. Explore variations for fun twists, and store your cookies to keep them fresh. With these tips, you’ll impress everyone with your baking. Enjoy each bite and happy baking!
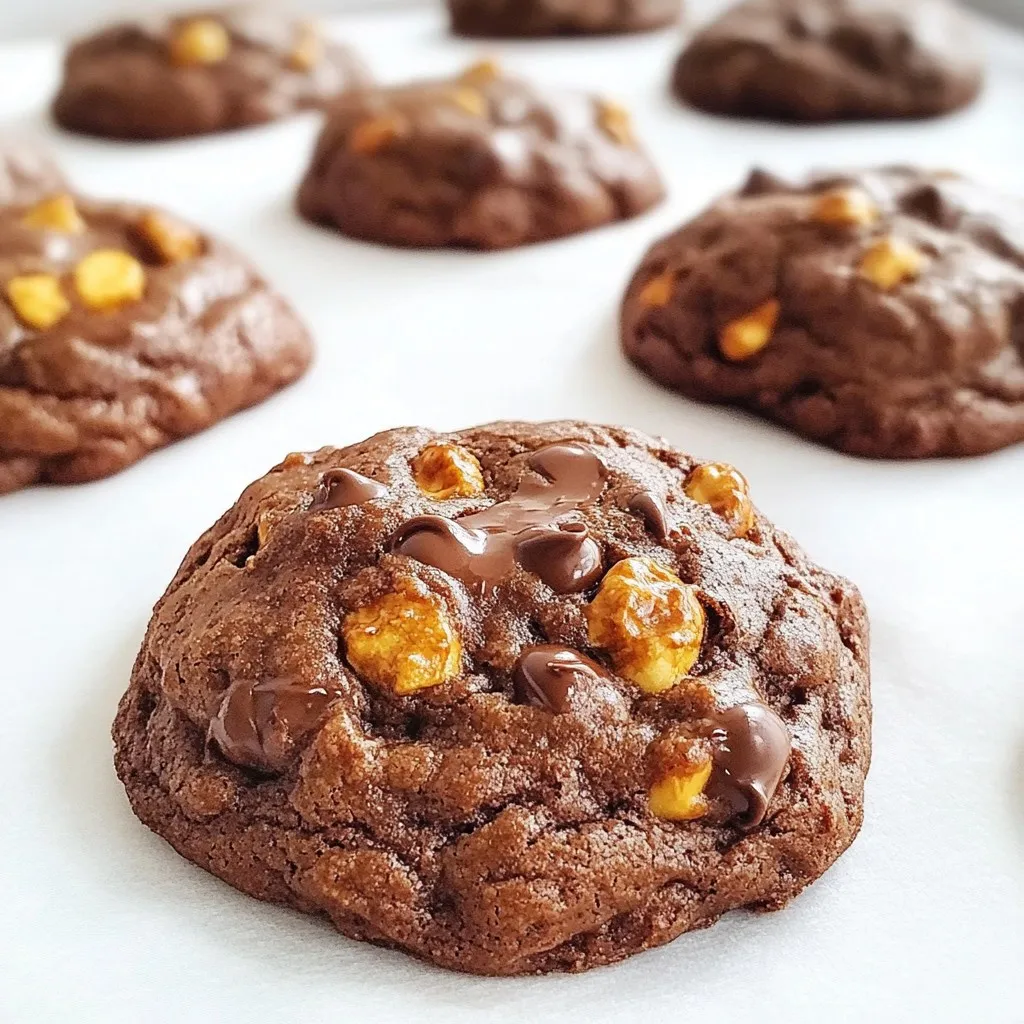
Chewy Brownie Batter Cookies Delightful and Soft Bites
Are you ready to indulge in a cookie that combines the best of brownies and cookies? My Chewy Brownie Batter Cookies are soft, chocolatey bites
To make salted brownie crinkle cookies, you need the following: - 1 cup semi-sweet chocolate chips - ½ cup unsalted butter, cut into cubes - 2 large eggs, at room temperature - 1 cup granulated sugar - 1 teaspoon pure vanilla extract - ½ cup all-purpose flour, sifted - ¼ cup unsweetened cocoa powder, sifted - ½ teaspoon baking powder - ½ teaspoon fine sea salt - Sea salt flakes for topping You can add fun flavors or textures to your cookies. Consider these options: - Chopped nuts for crunch - White chocolate chips for sweetness - Mint extract for a fresh twist If you don’t have some ingredients, you can make easy swaps: - Use coconut oil instead of butter for a dairy-free option. - Substitute brown sugar for granulated sugar for a richer taste. - Use gluten-free flour if you need a gluten-free option. These choices can help you customize your cookie-making experience. Enjoy experimenting! {{ingredient_image_2}} First, gather your ingredients. You will need chocolate chips, butter, eggs, sugar, vanilla, flour, cocoa powder, baking powder, and sea salt flakes. The prep time is just 15 minutes. You can make 24 cookies, perfect for sharing. 1. Preheat Oven: Start by preheating your oven to 350°F (175°C). This ensures even baking. 2. Melt Chocolate and Butter: In a microwave-safe bowl, combine the chocolate chips and butter. Heat in 20-second bursts, stirring well until smooth. Allow it to cool slightly. 3. Mix Wet Ingredients: In a large bowl, whisk together the eggs, sugar, and vanilla. Mix until frothy and well combined. 4. Combine Mixtures: Stir the cooled chocolate mixture into the egg mix. Ensure everything blends well. 5. Mix Dry Ingredients: In another bowl, whisk the flour, cocoa powder, baking powder, and sea salt. 6. Combine Wet and Dry Ingredients: Gently fold the dry mix into the chocolate-egg mix. Do not overmix; a few lumps are okay. 7. Chill the Dough: Cover the bowl with plastic wrap. Chill the dough for about 30 minutes. This step helps with shaping the cookies. 8. Form Cookies: Use a tablespoon to scoop the dough. Roll each scoop into a smooth ball. First, roll in granulated sugar, then in powdered sugar. 9. Position on Baking Sheet: Place the rolled dough balls on a parchment-lined baking sheet. Leave about 2 inches between each ball. 10. Add Sea Salt: Sprinkle a pinch of sea salt flakes on top of each dough ball. This adds a nice flavor boost. 11. Bake the Cookies: Bake for 10-12 minutes. The edges should be firm, and the centers should feel soft. They will set as they cool. 12. Cool Down: Remove the baking sheet from the oven. Let the cookies cool for about 5 minutes. Then, transfer them to a wire rack to cool completely. Once the cookies cool, serve them on a decorative plate. For a finishing touch, sprinkle a few extra sea salt flakes on top right before serving. This not only looks great but also enhances the flavor. Enjoy your delightful salted brownie crinkle cookies! To get the best texture, start with quality ingredients. Use fresh eggs and good chocolate. When mixing, combine the wet and dry ingredients gently. Overmixing makes cookies tough. Chill the dough for thirty minutes. This makes it easier to scoop and helps cookies hold their shape. Bake them just until the edges feel firm. The centers should still be soft for that chewy bite. Avoid using cold eggs. They can make your dough hard to mix. Don’t skip the chilling step. If you bake the dough right away, the cookies may spread too much. Also, be careful with the baking time. Overbaking can lead to dry cookies, while underbaking means they won’t set properly. Finally, let them cool for a bit before moving them. This helps them firm up. To boost flavor, consider adding a splash of espresso powder. This makes the chocolate taste richer. You can also mix in some chopped nuts for crunch. If you love mint, a few drops of mint extract works wonders. Always top with sea salt flakes before baking. This adds a nice touch of flavor and makes each bite special. Enjoy experimenting with these tips to create your perfect salted brownie crinkle cookies! Pro Tips Use Quality Chocolate: For the best flavor, opt for high-quality semi-sweet chocolate chips. The chocolate's richness will enhance the overall taste of your cookies. Room Temperature Eggs: Ensure your eggs are at room temperature before mixing. This helps the ingredients blend more smoothly, resulting in a better cookie texture. Don't Overmix: When combining the wet and dry ingredients, mix until just combined. Overmixing can lead to tough cookies, so be gentle! Let Them Cool: Allow the cookies to cool on the baking sheet for a few minutes before transferring to a wire rack. This helps them set properly and prevents breaking. {{image_4}} You can make these cookies even better by adding nuts or chocolate chunks. Chopped walnuts or pecans add a nice crunch. You can also use dark chocolate chunks for a richer flavor. Just fold in about ½ cup of your choice when mixing the dry ingredients. If you need a gluten-free option, swap the all-purpose flour with a gluten-free blend. Many blends work great in cookie recipes. Look for one that has xanthan gum in it for the best results. This keeps the cookies soft and chewy. You can easily change the flavor of your cookies. For a minty twist, add 1 teaspoon of mint extract. If you love coffee, add 1 tablespoon of instant espresso powder to the dry mix. These small changes can make a big difference in taste and keep things exciting! To keep your salted brownie crinkle cookies fresh, store them in an airtight container. This helps maintain their chewy texture and rich flavor. Place parchment paper between layers if stacking cookies. This prevents them from sticking together. Keep the container in a cool, dry place away from sunlight. They stay fresh for about five days. Freezing is a great way to save extra cookies. To freeze, let them cool completely first. Then, place the cookies in a single layer on a baking sheet. Freeze them for about one hour. Once frozen, transfer the cookies to a freezer-safe bag. Remove as much air as possible before sealing. They can last up to three months in the freezer. To enjoy your cookies again, reheating is easy. Preheat your oven to 350°F (175°C). Place the cookies on a baking sheet. Heat them for about five minutes. This warms them up and makes them soft again. For microwave heating, place a cookie on a microwave-safe plate. Heat it for about 10-15 seconds. This gives you a warm, gooey treat! Yes, you can make these cookies ahead of time! To do this, prepare the cookie dough and chill it. After chilling, scoop and roll the dough into balls. You can then freeze the dough balls on a baking sheet. Once frozen, transfer them to a zip-top bag. Store them in the freezer for up to three months. When you're ready to bake, just add a few extra minutes to the baking time. Cookies can spread too much for a few reasons. First, make sure your butter is not too warm when you mix it with the chocolate. If it is too warm, the dough will be too soft. Second, chilling the dough helps. If you skip the chilling step, the cookies will spread more. Lastly, check your flour measurement. Too little flour can also cause spreading. To know when your cookies are done, look at the edges. The edges should feel firm, while the center should still be slightly soft. This means they are perfectly baked. If they look shiny in the middle, give them another minute or two. Remember, they will set as they cool on the baking sheet. You learned about the key ingredients and steps to create amazing cookies. Using variations and tips can help you find your perfect recipe. Remember to store them properly and revive them if needed. Baking cookies can be simple and fun with a few tricks. Enjoy experimenting, and don’t be afraid to try new flavors. You can always make delicious cookies your way. Happy baking!
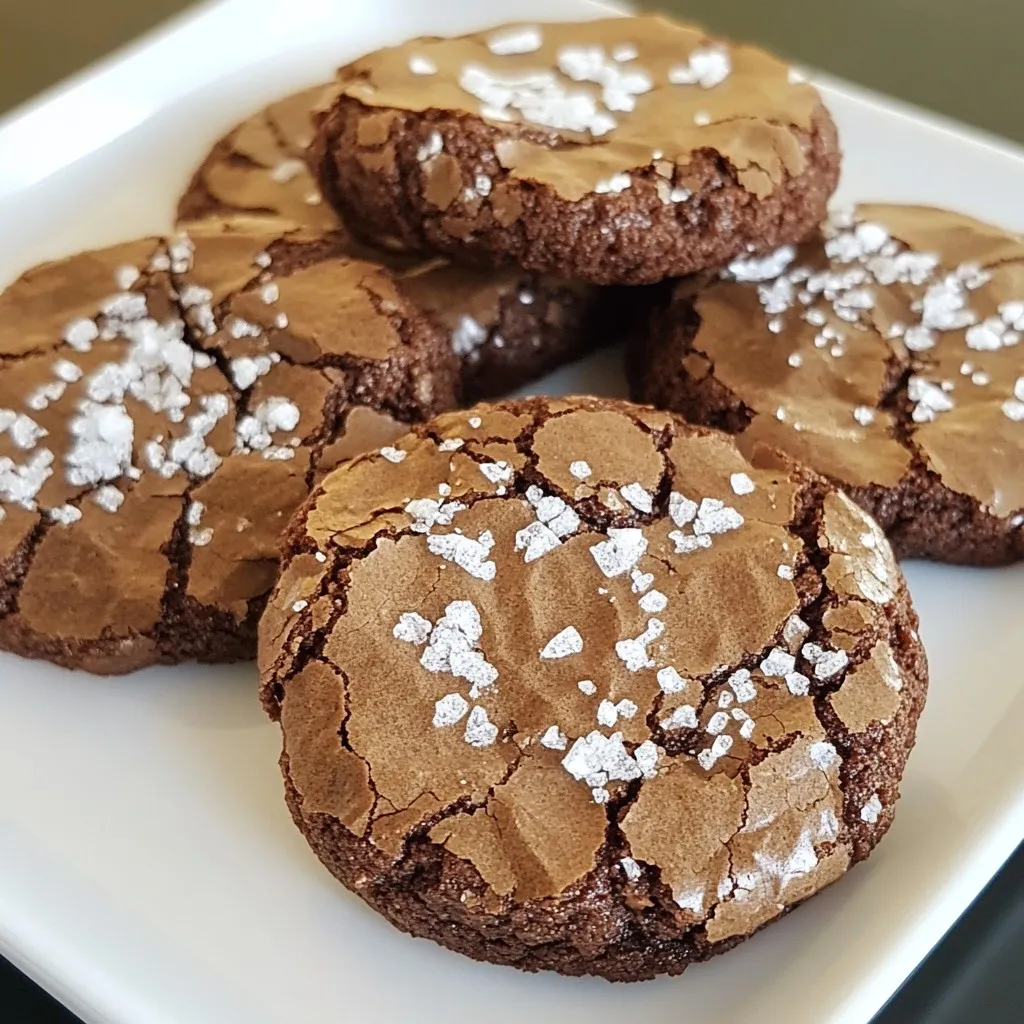
Salted Brownie Crinkle Cookies Delightful Sweet Treat
Get ready for a treat that blends brownie richness with cookie fun! My Salted Brownie Crinkle Cookies are a must-try, perfect for satisfying your sweet
- 2 large apples (like Granny Smith or Honeycrisp), peeled and diced - 1 cup all-purpose flour - 1/4 cup granulated sugar - 1 teaspoon baking powder - 1/2 teaspoon ground cinnamon, plus extra for tossing apples - 1/4 teaspoon freshly grated nutmeg - 1/2 teaspoon salt - 1/2 cup milk (whole or 2%) - 1 large egg - 1 teaspoon pure vanilla extract - Vegetable oil (for frying, about 1-2 inches deep) - Powdered sugar (for dusting, optional) You can swap apples based on your taste. Try Fuji or Braeburn for sweetness. If you need a gluten-free option, use a gluten-free flour blend. For a dairy-free version, almond milk or oat milk works well. You can also replace the egg with a flax egg for a vegan option. Just mix 1 tablespoon of ground flaxseed with 3 tablespoons of water, and let it sit for a few minutes. The best apples for fritters are firm and crisp. Granny Smith gives a nice tartness, while Honeycrisp adds sweetness. When picking apples, look for ones that are free of bruises and have a bright color. Smell the apple; a fresh apple should have a sweet aroma. Choose organic apples if possible for better flavor and fewer chemicals. {{ingredient_image_2}} Start with two large apples. I like using Granny Smith or Honeycrisp. Peel them and dice them into small cubes. Toss the diced apples in a medium bowl with a sprinkle of ground cinnamon. This adds flavor and makes them taste better. Set the apples aside for a bit. Letting them sit helps deepen their flavor. In a large bowl, mix together one cup of all-purpose flour, a quarter cup of granulated sugar, one teaspoon of baking powder, half a teaspoon of ground cinnamon, freshly grated nutmeg, and half a teaspoon of salt. Make sure to whisk it well. In another bowl, combine half a cup of milk, one large egg, and one teaspoon of pure vanilla extract. Whisk this mixture too. Slowly pour the wet mix into the dry mix. Stir gently until they just come together. Do not overmix. You want a soft batter. Next, fold in the diced apples. Make sure every piece is coated. Heat vegetable oil in a deep skillet or frying pan. Aim for about 350°F (175°C). You need enough oil so the fritters float a little. Using a spoon or small ice cream scoop, drop spoonfuls of the batter into the hot oil. Fry them in small batches. This keeps them from sticking together. Cook for about 2-3 minutes on each side. Look for a nice golden brown color. Once cooked, use a slotted spoon to take them out. Place them on a plate lined with paper towels to soak up extra oil. While they are warm, dust them with powdered sugar for a sweet finish. Enjoy! To fry the best fritters, follow these tips: - Oil Temperature: Heat oil to 350°F (175°C). Use a thermometer to check. Too hot, and they burn. Too cool, and they soak up oil. - Small Batches: Fry in small batches. This helps keep the oil's temperature steady. Overcrowding leads to soggy fritters. - Use a Scoop: Use a small ice cream scoop for even-sized fritters. This ensures they cook evenly and look great. If your fritters do not turn out right, here are some quick fixes: - Soggy Fritters: If they soak up too much oil, the oil might be too cool. Ensure the oil is hot enough before frying. - Dense Texture: Overmixing the batter can make them tough. Mix gently until the ingredients are just combined. - Fritters Falling Apart: If they fall apart while frying, the batter might be too thin. Add a little more flour to thicken it. To make your fritters even tastier, try these ideas: - Apple Varieties: Use different apples for unique flavors. Granny Smith adds tartness, while Honeycrisp offers sweetness. - Spices: Add a pinch of ginger or allspice for a warm kick. Experiment with flavors to find your favorite mix. - Toppings: Consider drizzling with caramel or chocolate sauce. You can also sprinkle with chopped nuts for added crunch. These tips can help you create perfect cinnamon apple fritters. Enjoy the process and have fun experimenting! Pro Tips Choose the Right Apples: Opt for firm apples like Granny Smith or Honeycrisp, as they hold their shape well during frying and provide a nice tartness to balance the sweetness. Don't Overmix the Batter: When combining wet and dry ingredients, mix just until incorporated. Overmixing can lead to tough fritters, so a few lumps are okay! Check Oil Temperature: Use a kitchen thermometer to ensure the oil is at 350°F (175°C) before frying. If the oil is too hot, the fritters will burn; if it's too cool, they will absorb excess oil. Serve Immediately: Fritters are best enjoyed fresh and warm. If needed, keep them warm in a low oven while frying in batches to maintain their crispy texture. {{image_4}} You can use many apple types for fritters. Granny Smith apples offer a tart flavor. Honeycrisp apples are sweet and juicy. You can also try Fuji or Gala apples. Each type brings its own taste and texture to the fritters. Experiment to find your favorite! If you want a gluten-free version, swap all-purpose flour for a gluten-free blend. Many brands make good mixes that work well in frying. You can also use almond flour for a nutty flavor. Just remember to adjust the liquid, as gluten-free flours can absorb more moisture. You can customize your fritters with more spices. Consider adding a pinch of cardamom or allspice for warmth. Chopped nuts, like walnuts or pecans, add crunch. You can even add raisins for extra sweetness. Mix and match to create your perfect fritter! To keep your fritters fresh, store them in an airtight container. Place a paper towel at the bottom to absorb extra moisture. This helps keep them crispy. You can store them at room temperature for up to one day. If you need longer storage, move them to the fridge. They will stay good for about three days in the fridge. To reheat your fritters, use an oven for the best results. Preheat your oven to 350°F (175°C). Arrange the fritters on a baking sheet. Heat them for about 5 to 7 minutes. This keeps them warm and crispy. You can also use a toaster oven. If you're short on time, you can reheat them in the microwave, but they may lose some crispness. If you want to enjoy fritters later, freezing is a great option. Allow the fritters to cool completely. Then, place them in a single layer on a baking sheet. Freeze them for about an hour. Once frozen, transfer them to a freezer bag. Seal tightly, and label with the date. They can stay in the freezer for up to three months. To enjoy, simply reheat them directly from the freezer in the oven. You can use almond milk or oat milk. These options work well in the batter. You can also use water if you need a dairy-free option. Just remember, the flavor may change a bit. Yes, you can bake them. Preheat your oven to 375°F (190°C). Place the fritters on a lined baking sheet. Bake for 15-20 minutes, flipping halfway. They won’t be as crispy, but they will still taste great! Cinnamon apple fritters stay fresh for about 1-2 days at room temperature. Store them in an airtight container. For longer storage, keep them in the fridge. They will last about a week there. This blog post covers all you need for delicious apple fritters. I shared the key ingredients and even how to choose the best apples. You learned how to prepare and fry them perfectly. Tips helped you avoid common issues. We explored tasty variations and proper storage methods. In the end, making apple fritters can be fun and rewarding. Try them at home for a sweet treat! Enjoy every bite.
Cinnamon Apple Fritters Irresistible Fried Delight
If you love warm, sweet treats, you’ve found the right recipe! Cinnamon Apple Fritters are a delicious delight that combines crispy goodness with soft, juicy
To make healthy cookie dough balls, you need simple and wholesome ingredients. Here’s what you will need: - 1 cup almond flour - 1/2 cup oat flour - 1/4 cup nut butter (choose almond or peanut) - 1/4 cup pure maple syrup - 1 teaspoon vanilla extract - 1/4 teaspoon salt - 1/4 cup dark chocolate chips (opt for dairy-free if preferred) - 2 tablespoons chia seeds - 2 tablespoons unsweetened cocoa powder (optional, for a chocolate twist) Each ingredient plays a key role. Almond flour gives a nutty base. Oat flour adds fiber and keeps the texture light. Nut butter binds everything together, making it creamy. Maple syrup brings sweetness without refined sugars. Vanilla extract enhances flavor, while salt brings balance. The dark chocolate chips add a delightful crunch. Chia seeds are packed with nutrients and help with texture. Cocoa powder gives a rich chocolate taste if you choose to use it. You can use different nut butters based on your preference. Almond butter offers a mild flavor, while peanut butter gives a stronger taste. Remember, each choice impacts the final flavor. So, feel free to mix and match to suit your taste! {{ingredient_image_2}} First, gather your almond flour and oat flour. In a large mixing bowl, combine these dry ingredients well. If you want a chocolate twist, add the unsweetened cocoa powder here. Next, pour in your nut butter, maple syrup, and vanilla extract. Sprinkle in the salt too. Mix all these ingredients until they form a nice dough. Now, it's time to add some fun! Gently fold in the chia seeds and dark chocolate chips. Make sure they are spread out evenly in the dough. If your dough feels too crumbly, don't worry! You can add a tablespoon of water or a little more maple syrup. Mix until it feels moist enough to shape. Take small amounts of dough and roll them into balls. Aim for about 1 inch in size. Place these balls on a lined baking sheet. Leave some space between them to allow for easy handling. Chilling the dough is key. It helps the balls hold their shape better. Place the baking sheet in the fridge for about 30 minutes. This step makes your cookie dough balls firmer and tastier. Enjoy them cold or let them warm up a bit before eating! To get the right moisture in your dough, start with the base. If it feels too dry, add a little water or maple syrup. Mix it well until the dough holds together. When mixing, make sure to blend all the dry ingredients first. This helps in evenly distributing flavors. Add the wet ingredients and mix until combined. You want a smooth dough with no lumps. Plating can make your cookie dough balls look fancy! Use a dessert stand to showcase them. A simple sprinkle of chia seeds on top adds a nice touch. You can also drizzle some extra nut butter over the balls. This adds flavor and looks great too. Use a squeeze bottle for neat lines. These cookie dough balls are packed with good stuff! Almond flour offers healthy fats and protein. Oat flour adds fiber, making these treats good for digestion. Chia seeds are also a superfood. They provide omega-3s and keep you full longer. Dark chocolate chips add antioxidants without too much sugar. These treats fit well in a balanced diet. Enjoy them as a snack or a sweet treat! Pro Tips Storage Tips: Keep your cookie dough balls in an airtight container in the refrigerator for up to one week for maximum freshness. Nut Butter Choice: Experiment with different nut butters like cashew or sunflower seed butter for unique flavors and textures. Chia Seed Benefits: Chia seeds not only add texture but also provide a boost of omega-3 fatty acids, making these cookie dough balls even healthier. Chocolate Variations: For a fun twist, try adding white chocolate chips or dried fruits along with the dark chocolate for additional flavors. {{image_4}} You can make these cookie dough balls in many flavors! Chocolate-flavored cookie dough balls are a great twist. Just add 2 tablespoons of unsweetened cocoa powder to the dry mix. This little change makes a big difference! If you want to keep it simple, stick with the plain version. You can also add nuts or seeds for extra crunch. Chopped walnuts or sunflower seeds work well. They add texture and nutrients. Want to make these cookie dough balls vegan? Just use maple syrup and any nut butter. Both are plant-based. If you need a gluten-free option, almond flour and oat flour are naturally gluten-free. Always check labels to ensure they meet your needs. You can also make these allergen-friendly. Use seeds instead of nuts if allergies are a concern. This way, everyone can enjoy these tasty treats! Pair these cookie dough balls with a refreshing drink. Nut milk or coffee tastes great together. They also make a lovely snack for parties or gatherings. Serve them on a dessert stand for a fun touch. You can add a sprinkle of chia seeds or a drizzle of nut butter for decoration. These little details elevate your presentation! To keep your healthy cookie dough balls fresh, store them in the fridge. Use an airtight container. This way, they stay moist and tasty. You can also layer them with parchment paper to prevent sticking. If you want to save them for longer, freezing is a great option. Place the dough balls in a freezer-safe bag. Label the bag and remove as much air as possible. They will keep their flavor for up to three months in the freezer. When stored properly in the fridge, these cookie dough balls last about one week. If you freeze them, they can stay fresh for up to three months. Just remember to thaw them in the fridge before enjoying. To enjoy leftovers, let the cookie dough balls sit at room temperature for a few minutes. This brings back their soft texture. You can also warm them slightly in the microwave. Heat them for about 10-15 seconds. This will make them even more delightful! Just be careful not to overheat them, or they may lose their charm. You can use oat flour or sunflower seed flour. Both are great options. They will change the taste a bit but keep the texture nice. If you need a nut-free choice, sunflower seed flour works well. Yes, you can make these cookie dough balls nut-free. Just use sunflower seed butter instead of nut butter. This swap keeps the flavor rich and creamy. Always check for allergies when using new ingredients. To make these cookie dough balls vegan, choose a nut butter that is dairy-free. Also, use maple syrup as your sweetener. These changes keep the recipe plant-based and delicious. Yes, you can use honey instead of maple syrup. Honey will add a nice sweetness. However, honey is not vegan, so keep that in mind. If you want a vegan option, stick with maple syrup. In this blog post, we explored how to make delicious cookie dough balls. We covered the key ingredients like almond flour and oat flour. You learned the step-by-step process from mixing dough to chilling it for texture. We shared important tips for consistency, health benefits, and creative variations. Lastly, we discussed storage tips to keep your cookies fresh. Enjoy making these treats, knowing they're tasty and good for you! You can impress family and friends at any occasion with these simple recipes.
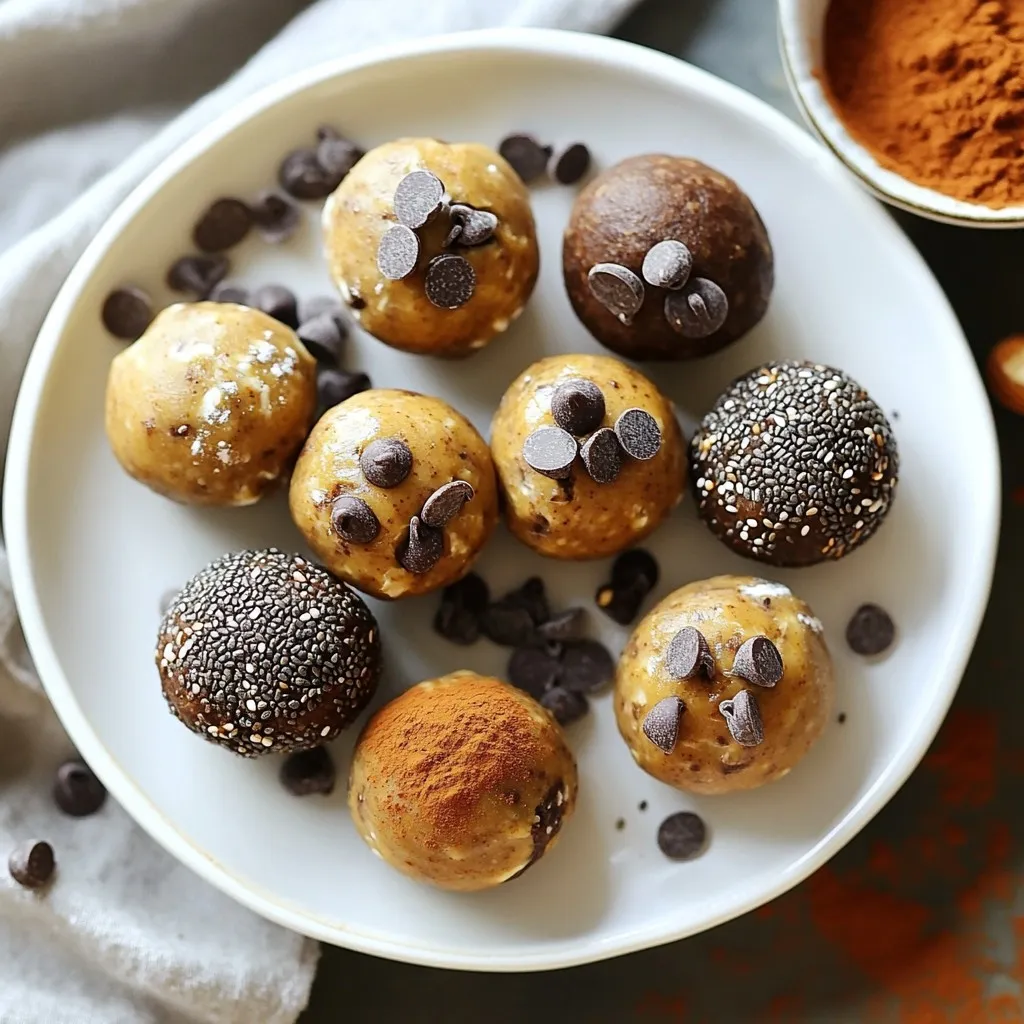
Healthy Cookie Dough Balls Simple and Tasty Treat
Craving a sweet treat that won’t derail your healthy eating? Look no further! In this article, I’ll guide you through making Healthy Cookie Dough Balls
To make high protein chocolate pudding, you will need: - 1 cup unsweetened almond milk (or any milk of your choice) - 1/4 cup unsweetened cocoa powder - 1/4 cup protein powder (chocolate or vanilla) - 1/4 cup maple syrup (or honey) - 2 tablespoons chia seeds - 1 teaspoon vanilla extract - A pinch of sea salt - Optional toppings: sliced bananas, crushed nuts, or coconut flakes You can easily swap ingredients for your needs: - Almond milk can be replaced with soy milk, oat milk, or regular milk. - If you don’t have cocoa powder, try carob powder for a different flavor. - Any protein powder works, or you can skip it for a lighter pudding. - Maple syrup can be replaced with honey, agave nectar, or stevia. - Instead of chia seeds, use flax seeds for a similar texture. - You can omit vanilla extract if you want a simpler flavor. Here’s why these ingredients are great for you: - Almond milk is low in calories and rich in vitamin E. - Cocoa powder is full of antioxidants and can boost mood. - Protein powder provides essential amino acids for muscle repair. - Maple syrup offers trace minerals and is a natural sweetener. - Chia seeds are high in fiber and omega-3 fatty acids, great for digestion. - Vanilla extract may help reduce inflammation and add flavor. - Sea salt enhances flavor and provides essential minerals. - Toppings like bananas or nuts add vitamins, fiber, and healthy fats. This pudding is not only tasty but also packed with nutrients. Enjoy making it! {{ingredient_image_2}} Start by pouring 1 cup of unsweetened almond milk into a medium bowl. Next, add 1/4 cup of unsweetened cocoa powder. Then, include 1/4 cup of your choice of protein powder, either chocolate or vanilla. Mix in 1/4 cup of maple syrup or honey for sweetness. Add 2 tablespoons of chia seeds, 1 teaspoon of vanilla extract, and a pinch of sea salt. This mix of ingredients creates a rich flavor. To achieve a smooth pudding, whisk all the ingredients together vigorously. This helps combine everything well. Then, transfer the mixture into a blender. Pulse it for about 15 seconds. This step is crucial because it breaks down the chia seeds. Blending gives the pudding a creamier texture. After blending, pour the pudding into individual containers or a large bowl. Cover each container with a lid or plastic wrap. Place them in the fridge for at least 2 hours, or overnight if you can wait. Chilling allows the chia seeds to absorb liquid, making the pudding creamier. When ready, stir well before serving to ensure a smooth consistency. To make your high protein chocolate pudding creamy, start with the right milk. I prefer unsweetened almond milk, but you can use any milk you like. Mix the cocoa powder and protein powder well with the milk. This step helps avoid clumps. For extra creaminess, blend the mixture for about 15 seconds. This will break down the chia seeds and create a smooth texture. Remember, the longer you chill it, the creamier it gets! I love a touch of sweetness in my pudding. The maple syrup adds a rich flavor, but you can adjust it. Taste the pudding after blending. If it needs more sweetness, add a bit more syrup or honey. You can also try using stevia or agave for a different flavor. Everyone has their own taste, so make it just right for you! Serving is just as fun as making the pudding. For a lovely display, use clear glass cups. Layer the pudding with toppings like sliced bananas or crushed nuts. This not only looks great but adds different textures, too. You can sprinkle coconut flakes on top for a tropical touch. Your pudding will be a feast for the eyes and the taste buds! Pro Tips Adjust Sweetness: Feel free to modify the amount of maple syrup or honey to suit your taste preference. Start with less and add more if needed after blending. Blend for Smoothness: Blending the mixture after whisking ensures a silky texture. It's worth the extra step to avoid any clumps! Maximize Chilling Time: For the best results, allow the pudding to chill overnight. This enhances the flavor and texture significantly as the chia seeds expand. Experiment with Toppings: Don't hesitate to mix and match toppings! Different fruits, nuts, or even a dollop of nut butter can elevate your pudding experience. {{image_4}} You can easily change the flavor of your high protein chocolate pudding. For a minty twist, add a few drops of peppermint extract. This gives a fresh taste. You can also mix in coffee for a rich flavor. Simply add one tablespoon of instant coffee granules. This will wake up your taste buds! Try adding spices like cinnamon or nutmeg for a warm flavor. The options are endless, and you can find what you love best. The protein powder you choose can change the taste and texture of your pudding. Chocolate protein powder adds a rich flavor. Vanilla protein powder keeps it sweet and light. If you want to avoid whey, try plant-based options. Pea protein or hemp protein are great choices. They add nutrition without dairy. You can even skip the protein powder if you prefer. Just add more cocoa powder for a deep chocolate flavor. Toppings can really make your pudding shine! Sliced bananas add sweetness and creaminess. Crushed nuts give a nice crunch. You can also sprinkle coconut flakes for a tropical twist. For more fun, add berries like raspberries or strawberries. They bring a tart flavor that balances the sweetness. You can also mix in a dollop of nut butter for a creamy texture. These toppings help you customize your pudding to fit your mood! Store your high protein chocolate pudding in airtight containers. This keeps it fresh and tasty. If you use plastic wrap, press it directly onto the surface of the pudding. This helps prevent a skin from forming. Place the containers in the refrigerator right after chilling. The pudding stays fresh in the fridge for up to 5 days. If you want to keep it longer, freezing is an option. To freeze, pour the pudding into freezer-safe containers. Leave some space at the top for expansion. It can last up to 2 months in the freezer. When ready to eat, thaw it overnight in the fridge. Stir well before serving. If you have leftover pudding, think of fun ways to use it! You can add it to smoothies for extra creaminess and protein. It works well as a topping on pancakes or waffles. You can even fold it into yogurt for a rich snack. Be creative with your leftovers! High protein chocolate pudding is a rich and creamy dessert packed with protein. It combines almond milk, cocoa powder, protein powder, and chia seeds. This pudding is perfect for a healthy treat or snack. It tastes great while boosting your protein intake. To make this pudding dairy-free, use unsweetened almond milk or any other plant-based milk. Almond milk works well, but oat milk or coconut milk can also be tasty. Just replace regular milk with your chosen dairy-free option. This keeps the pudding creamy without using dairy. Yes, you can use other sweeteners instead of maple syrup. Honey is a great alternative if you prefer a different taste. You can also try agave syrup or stevia for a low-calorie option. Adjust the amount based on your sweet preference. This pudding contains about 10-15 grams of protein per serving. The protein comes mainly from the protein powder and chia seeds. Using a high-quality protein powder can boost the protein even more. Enjoying this pudding helps meet your daily protein needs. You now have all the tools to make high-protein chocolate pudding. We explored key ingredients, helpful tips, and delicious variations. You learned how to prepare, blend, and chill for the best results. Plus, we shared easy ways to store leftovers and answered your top questions. Enjoy crafting this tasty treat that suits your needs. Remember, small changes can bring big flavor and health benefits. Get creative, and have fun with each bowl!
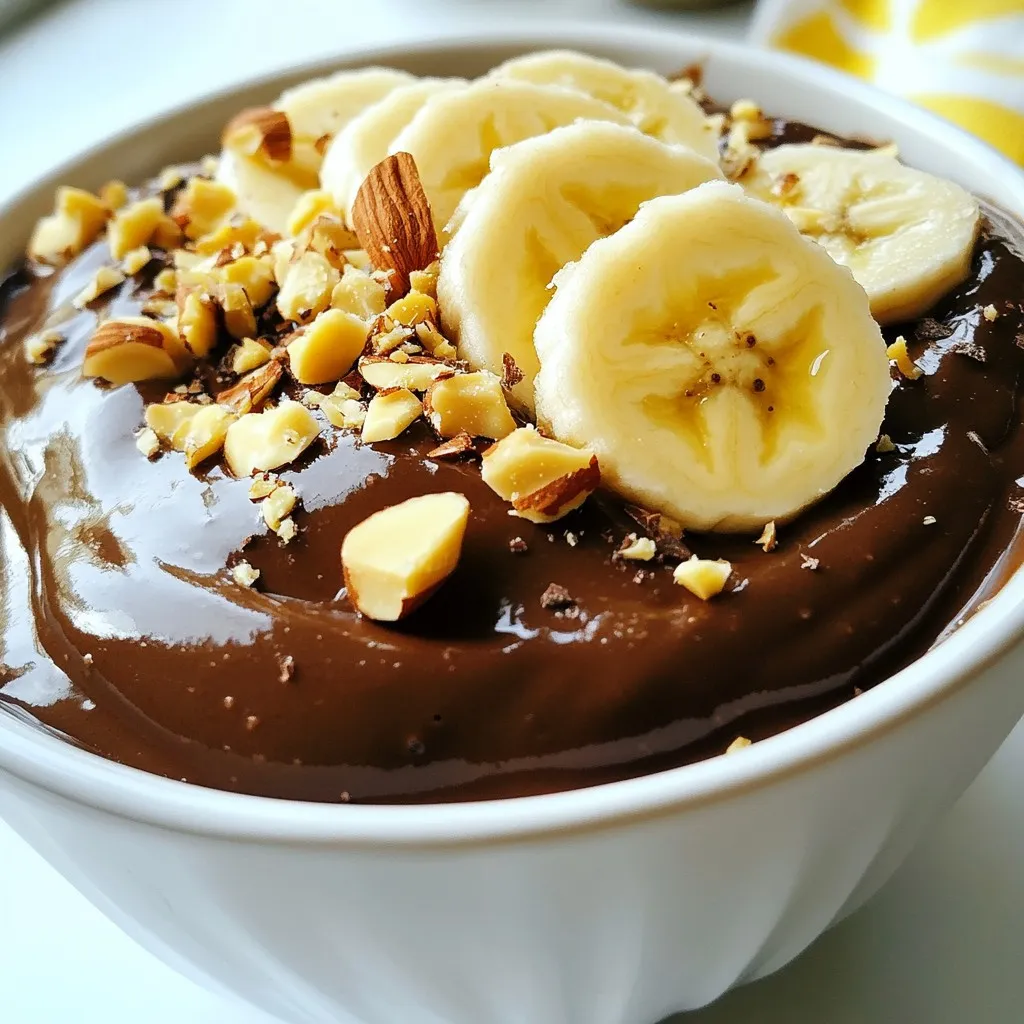
High Protein Chocolate Pudding Creamy and Delicious
Are you ready to treat yourself to a delicious high protein dessert? This creamy chocolate pudding is your answer! It combines rich taste with a